V-Moda Over-ear Headphone Custom Shield Kit review

REVIEW – In the world of headphones, design can be as important as: 1. Sound; 2. Quality; and 3. Comfort. Many times it seems like you can have any two of them—just not all three. V-Moda is one headphone maker that disagrees with that. Their headphones—beginning with the original Crossfade to the latest wireless Crossfades—are designed like no other headphones with outstanding comfort and great sound. Except that V-moda doesn’t stop there, because if you want, they offer customization to make your headphones your headphones. They call this customization the V-Moda Over-ear Custom Shield Kit.

What is it?

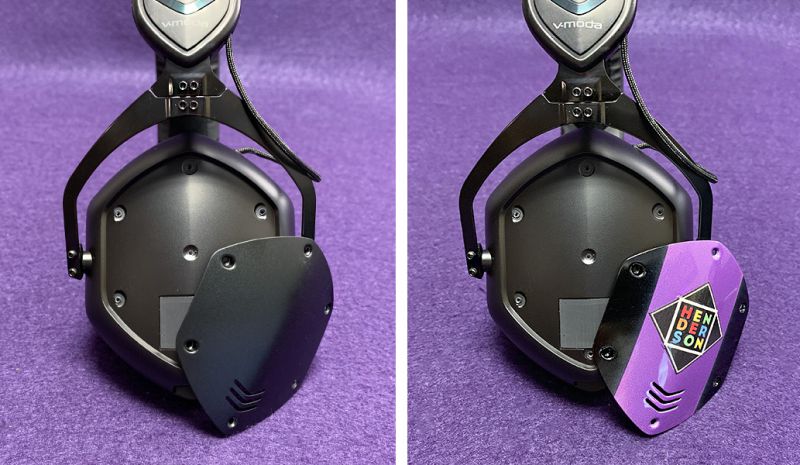
The custom shield kit is an extra-cost service V-Moda offers to buyers of their Crossfade headphones. V-Moda’s headphones come with a metal plate on the ear cup exterior. These plates are removable and can be replaced with other colors, metals or customizable designs (what I’m reviewing). These designs can be printed, laser engraved or embossed. Artwork/designs can be either chosen from ready-made selections, personally made and uploaded by you or developed in conjunction with one of V-Moda’s own designers through their concierge service. Each one of these choices has its own pricing structure. These choices are so numerous that I won’t list all the prices in this review. However, to give you an idea, prices for the shields run from a basic color with no printing for $35 all the way up to solid platinum for $28,000—I kid you not! Ordering is done through V-Moda’s web site. Delivery takes anywhere from 2-20 days, depending on design and metal chosen.

Design and features

It’s hard to talk about design for the custom shields because it’s totally up to the buyer. I can only relate my own experience based on what I ordered, but it should give you an idea of the possibilities. 

Note that the custom shields are purchased separately and do not include the headphones. Also custom shields can be purchased later for those who already own a V-Moda Crossfade headphone. 

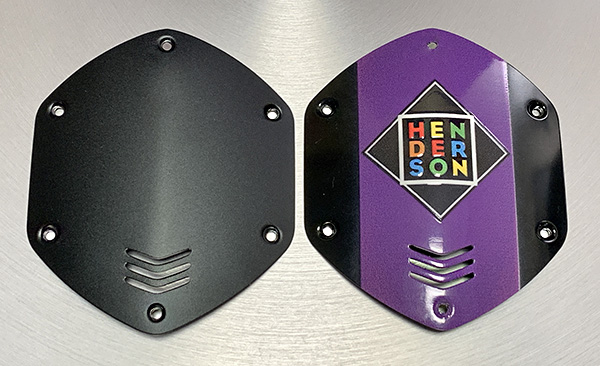
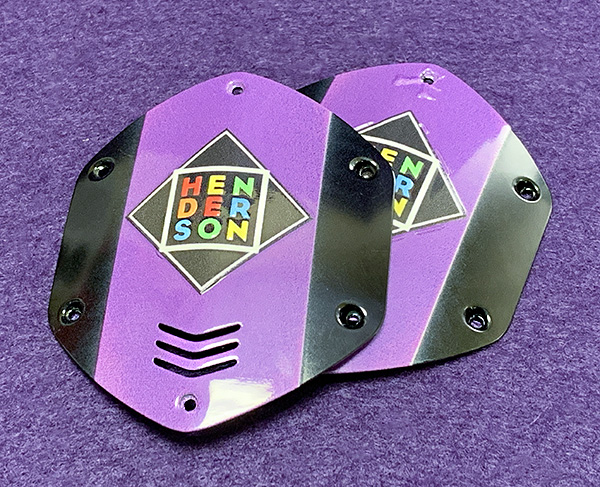
Since I am an art director by day, I decided to go with one of my own designs—my personal logo. V-Moda offered to print what I wanted, as long as it followed their basic guidelines and rules. Copyrighted art or design (Coca-Cola or Nike, for example) is not allowed. 

If you’re not an artist, V-Mode offers a good selection of designs to choose from. In fact, there are almost too many choices, which can be a bit overwhelming. Also, the multi-step process of making selections can be confusing because choices are dependent on whatever previous selection was made. 

The process is: After you choose your headphone (if you don’t already own one), you navigate to the Shield Kit page. From there you choose Type for the design you want and then choose: Color Printed, Laser Engraved or 3D Printed (embossed). After choosing Type, choose Design and then choose: Designs, Monograms or Upload Your Own (my choice). As I said, it can be confusing because the choices are almost limitless. It requires taking your time to get what you want—or close to it. Note that V-Moda’s FAQ section is a big help for answering any questions, especially if you’re uploading your own design. They even provide a useful downloadable template for sizing and placement of art.

For my design, I downloaded V-Moda’s template and used Adobe Illustrator. Accepted formats from most art apps are: JPG, .PNG, .GIF, .BMP, .TIFF, .PSD, .PDF, .AI, .EPS, .SVG, .DOC(X), .CDR.

My logo is usually black/white, but since this process allows multi-color designs, I decided to test that out. After preparing the art, it was then uploaded. I received an emailed confirmation and all I had to do then was wait. It didn’t take long.

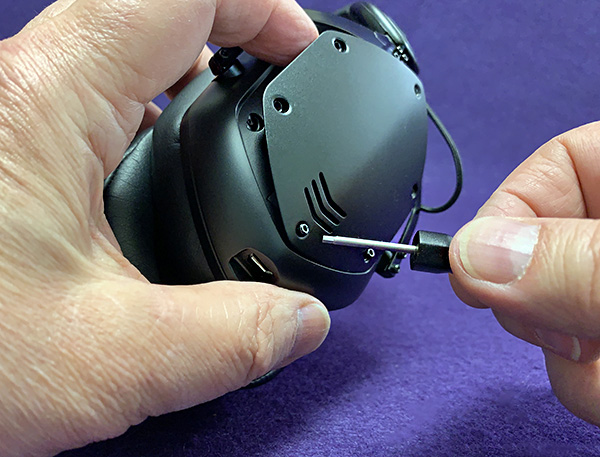
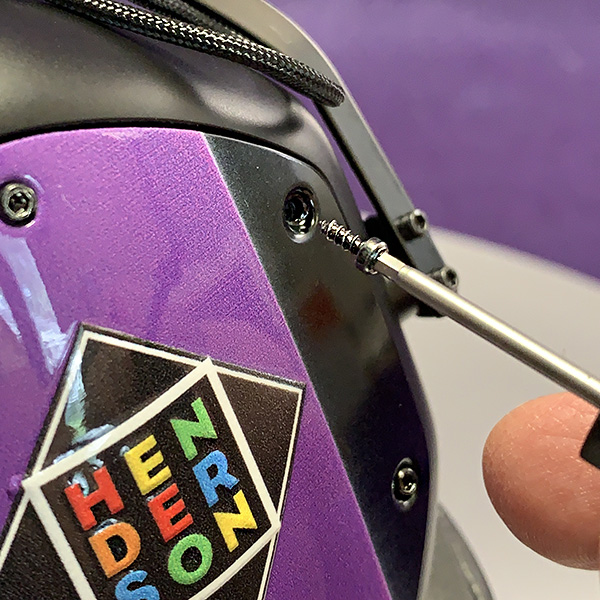
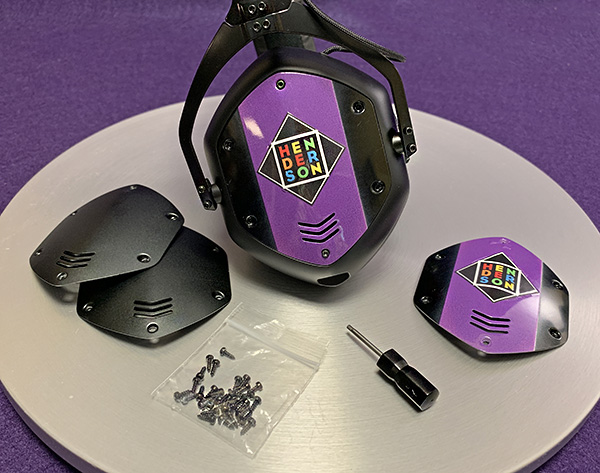
Just a few days later, the shields arrived in a bubble-wrapped envelope. Inside were the shields, a small allen (hex) screwdriver and a package of tiny screws. When ordered, you can also choose the color of screws. I went with plain black. All that needed to be done for each shield was removing the six screws that held the original shield and replace with the new design. This process is easy enough to do. Even though the screwdriver and screws are magnetic, the screws are tiny and can easily be dropped or misplaced, so paying attention is a good thing.

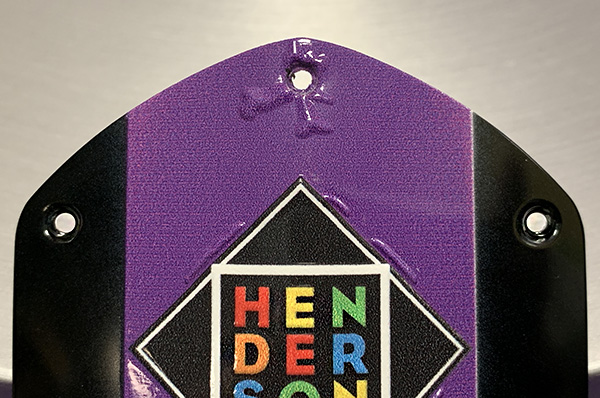
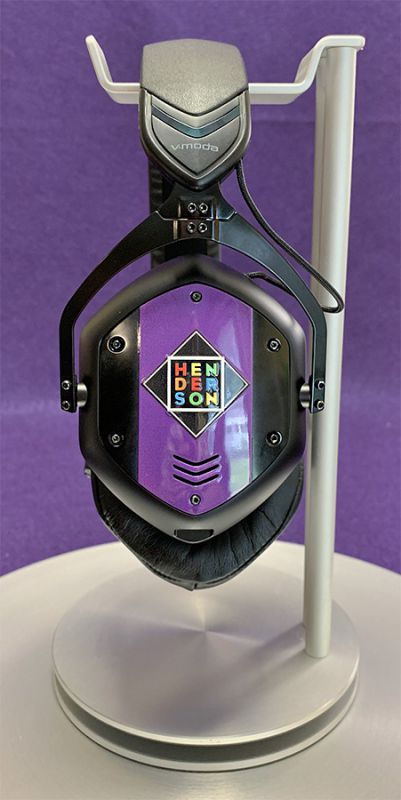
The printed shield is identical to the design I uploaded and color accuracy is spot-on. Interestingly, my design on the shield felt slightly embossed even though I did not request or pay for 3D printing. It gave the design a bit of welcomed depth. One caveat is that while one shield was printed perfectly, the other had small but noticeable bubbles in the paint. I’m okay with it, but I can see where some might want to return the defective shield for a re-print.

Once the new shields are screwed into place, that’s it! You now have your headphones.

What I like

V-Moda’s ready-made designs are almost limitless. Any custom design is only limited by your imagination—provided you’re budget allows. All tools are provided and moving and replacing the shields is easy.

What I’d change

There are so many choices and design directions, that unless you know what you want beforehand, the complete process from beginning to end can be daunting. 

Final Thoughts

Even though V-Moda’s headphones are unique looking out of the box, I like that they offer this service for those who aren’t satisfied with the stock design. Being able to upload custom designs, using a ready-made design or even using V-Moda’s help with designs are nice choices to have. Plus the price range can fit any budget—even for those with $28,000 to burn!

Price: $35 – $28,000 US
Where to buy: V-Moda
Source: The sample for this product was provided by V-Moda.

Filed in categories: Reviews

Tagged:

V-Moda Over-ear Headphone Custom Shield Kit review originally appeared on The Gadgeteer on August 9, 2019 at 1:46 pm.

Note: If you are subscribed to this feed through FeedBurner, please switch to our native feed URL http://the-gadgeteer.com/feed/ in order to ensure continuous delivery.

How to Choose the Right CPU Cooler

The processor is the centerpiece of any desktop computer build, but without a CPU cooler it wouldn’t run at all. Providing your CPU with a safe, controlled environment in which it can function goes beyond improving performance – doing so keeps it from self-combusting. An improperly cooled CPU can burn itself up in a matter of seconds. Most of the time your CPU will come with stock cooling equipment of some kind, but an aftermarket option can seriously help. The following are a few tips for acquiring the perfect CPU cooler as well as some excellent options that are currently available…. Read more

Stealtho office chair wheels review

REVIEW – Tired of your old, creaky office chair wheels rolling across that cracked plastic mat? Stealtho office chair caster wheels may be just the thing to rejuvenate your trusty office chair.

What is it?

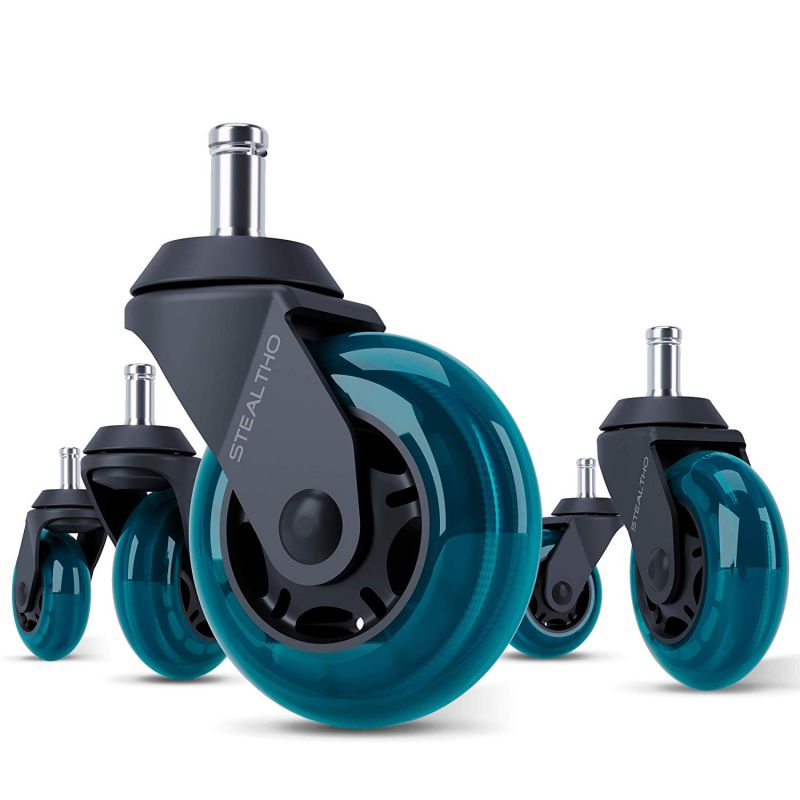
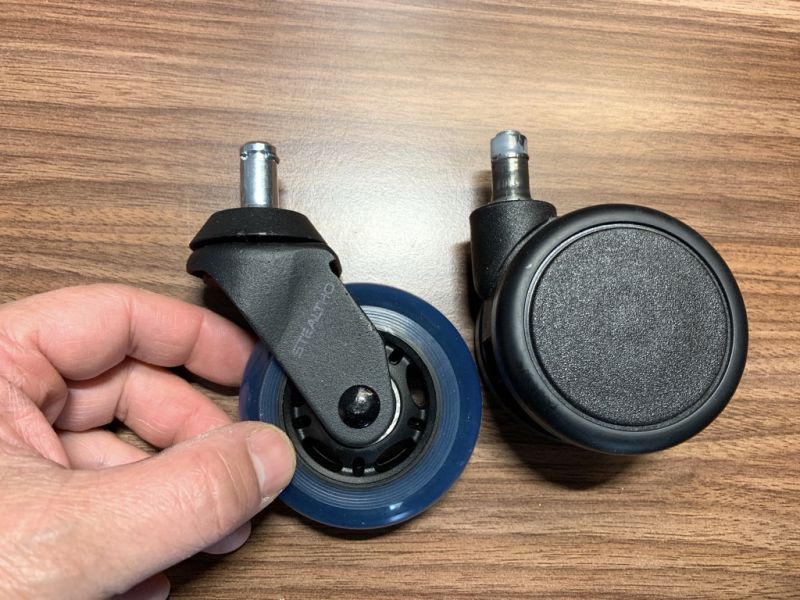
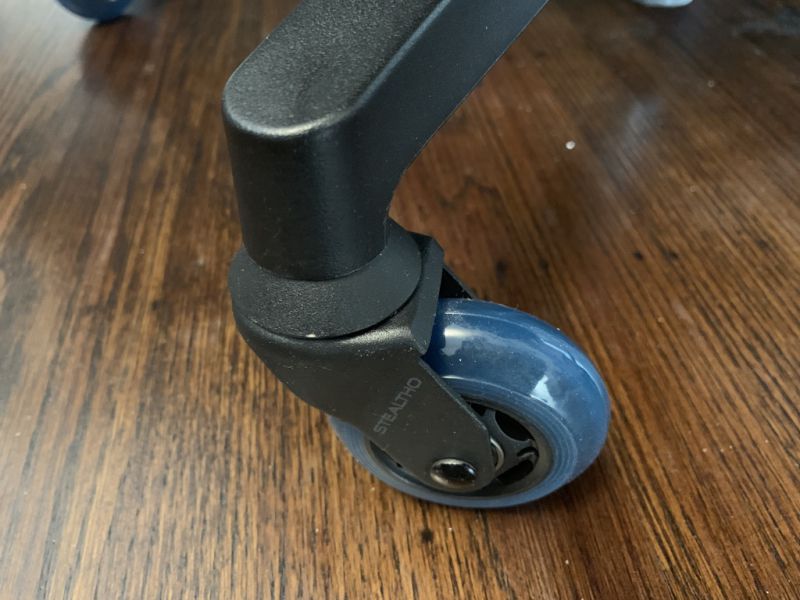
Stealtho wheels resemble inline skate wheels, made of an elastic polyurethane, for a smooth, scratch-free glide across your hardwood floors.

What’s in the box?

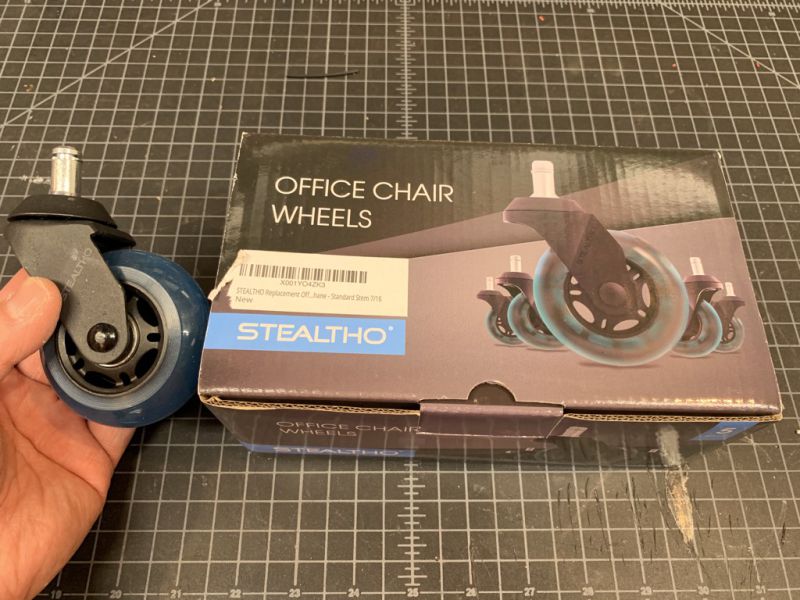
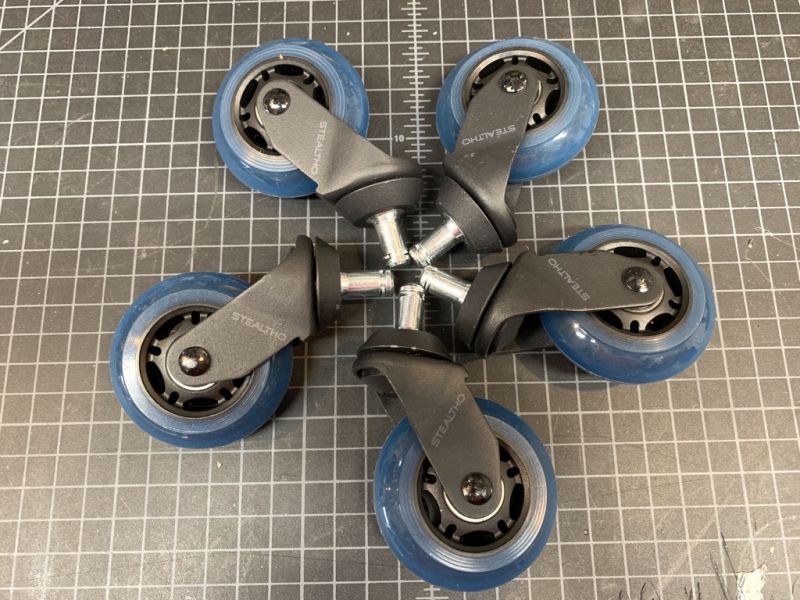
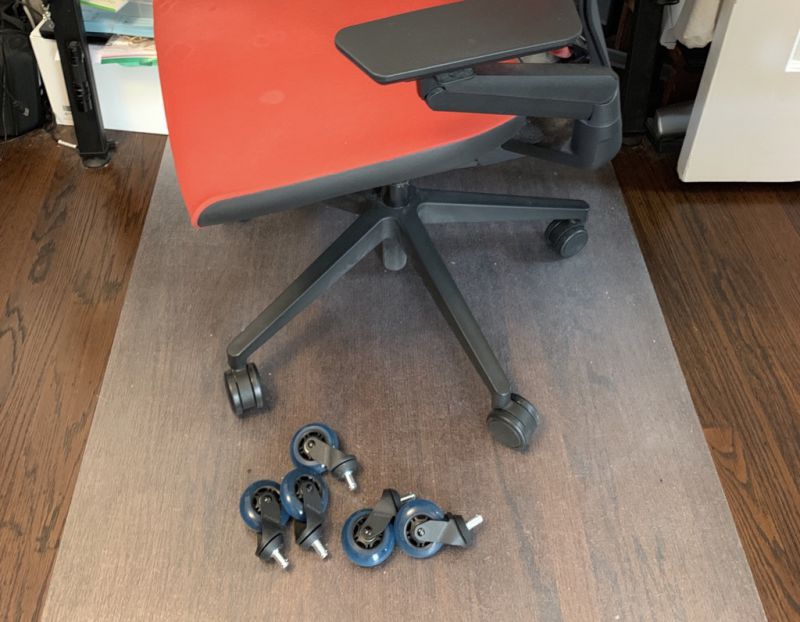
Pretty straightforward: I found exactly five replacement wheel assemblies.

Hardware specs

From the product description:

  • STEALTHO embedded support skirt, no wobble even with worn-out base housing holes.
    Wheel has two additional thrust ball bearings in the cage that prevents them from falling out.
  • STEALTHO combined the elastic polyurethane with luminophore on the base of strontium aluminate which can radiate light at a level 20 percent. It increases the wheels wear, as well as makes the wheel glow in the dark and roll over cables. This combination of durability and “no stumble” function gave STEALTHO the basis for its PATENT (currently pending).
  • The body of the wheel is made of heavy-duty tool steel and its shape is achieved by 3-times pressing at a temperature of 3000 ºC, that’s why the set of wheels can withstand up to 660 pounds.
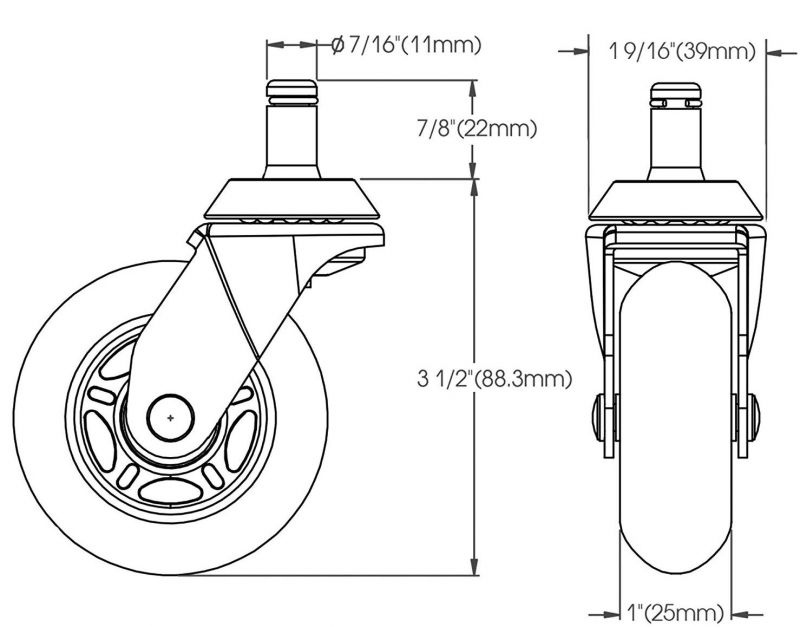
  • STEALTHO wheels fit standard office chairs from Herman Miller Aeron, Mirra 2, Steelcase, Dxracer, Humanscale Freedom, Lazyboy Serta, Hon Nucleus, Boss, Staples, Office depot which have the universal grip ring stem 11 mm x 22 mm (7/16″x7/8″), (don’t fit IKEA).

It’s important to note the last part. The casters will fit chairs that accept a 7/16″ diameter stem. Apparently IKEA, chairs are different.

Setup

Simply pull out your old casters and insert the Stealtho ones. Here’s my dirty office chair, resting atop a floor mat.

Notice how the Stealtho assembly is slightly taller than my original ones. You may have to readjust your seat height.

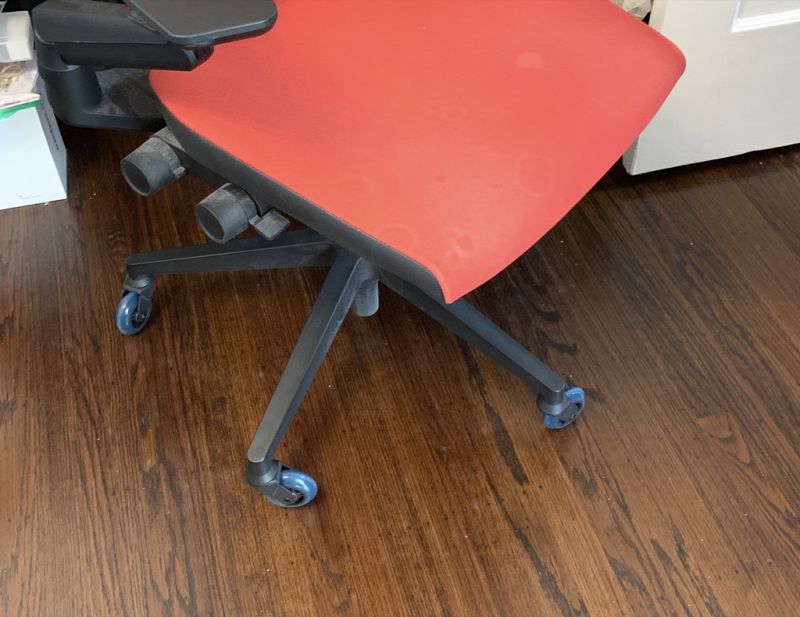
Wheels installed! Piece of cake. No more floor mat.

Performance

The first thing I noticed was how grippy these wheels are versus my original hard plastic ones. They glided smoothly but sometimes changing directions meant a brief moment of “sticky” grip, similar to wearing new sneakers on a smooth basketball court. However, after a week of use, I noticed the wheels were getting a little dirty and the grippy “squeak” sensation has gone down a bit.

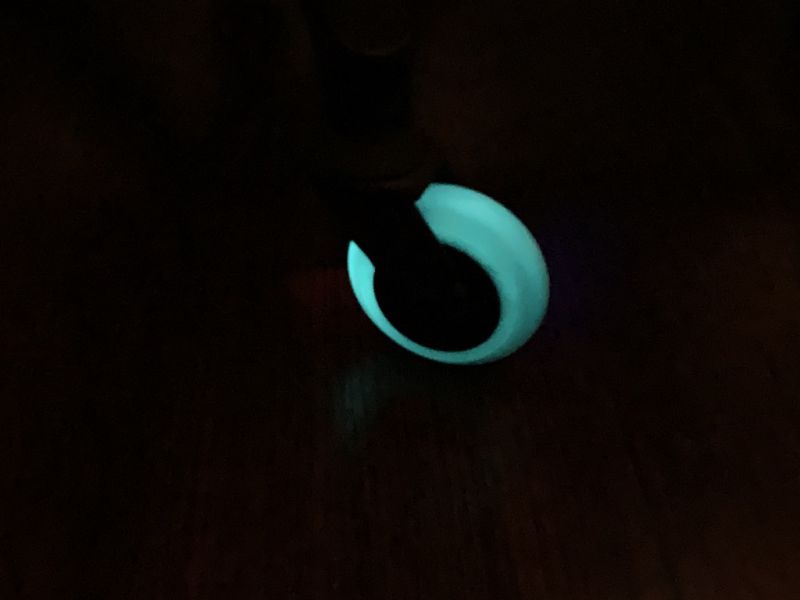
The wheels are advertised as glow-in-the-dark, and it’s true. However, my desk area isn’t very bright so the wheels never got enough ambient light to be visible in the dark. I took a flashlight and “charged up” one wheel to see the effect. You can’t see the wheels in the background, but they’re there… not glowing!

What I like

  • Easy to install
  • Rolls smoothly without the need for a floor mat

What I’d change

  • The glow feature isn’t very powerful
  • I wish the wheels weren’t quite so grippy

Final thoughts

Despite the grippy squeak of the Stealtho office chair wheels, I kind of like not having a plastic floor mat that keeps shifting around my floor. That’s a tradeoff I can live with.

Price: $39.99
Where to buy: Amazon
Source: The sample of this product was provided by Stealtho.

Filed in categories: Reviews

Tagged:

Stealtho office chair wheels review originally appeared on The Gadgeteer on August 9, 2019 at 10:00 am.

Note: If you are subscribed to this feed through FeedBurner, please switch to our native feed URL http://the-gadgeteer.com/feed/ in order to ensure continuous delivery.
Thinkware Q800 PRO dash cam review

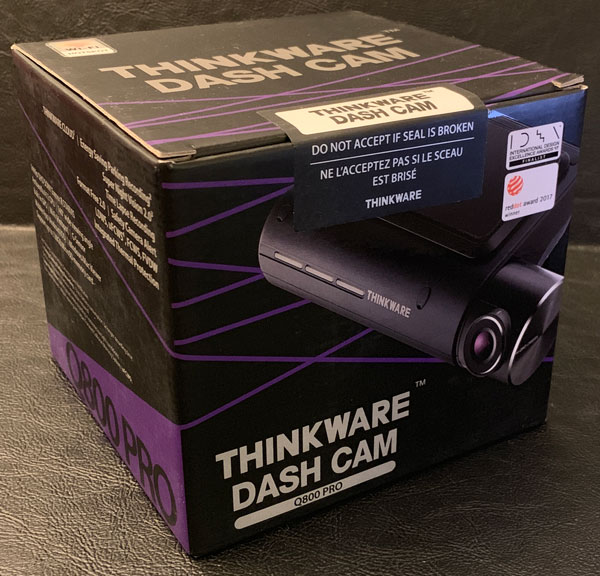
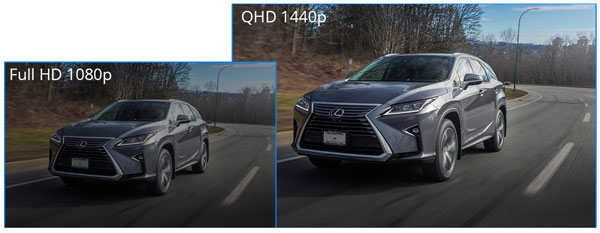
REVIEW – The past few years I’ve had the opportunity to review both of Thinkware’s flagship dash cams: the F800 and F800 PRO. With many other brands to choose from, the 800 series continues to be my dash cam of choice. I’ve even had the Thinkware 12v power cable hardwired into my vehicles enabling all of their features to be fully functional. That said, the only negative/criticism I had in those reviews was the F800’s HD resolution. In today’s high-res world, 1920 x 1080 is a bit meager IMO. Well, Thinkware has finally addressed this shortcoming in the new Q variant of the series, bumping the resolution to 2K QHD (2560 x 1440)…a welcome upgrade. Let’s see if it lives up to the anticipation 😉 .

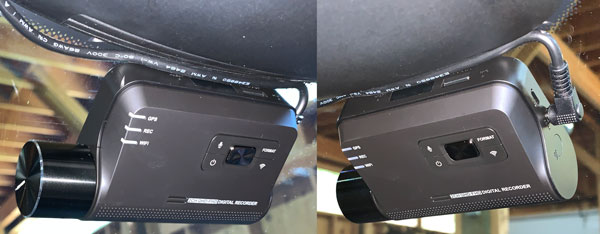
Since the F800, F800 PRO and Q800 PRO are nearly identical in form and function, I will be plagiarizing myself while describing the Q800’s shape, ports, and shared features but dive into what differences there are. Here you can see, that other than lens/camera assembly the F800 PRO and Q800 PRO are identical.

What is it?

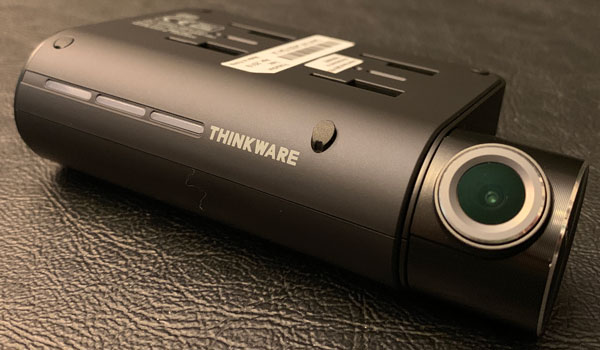
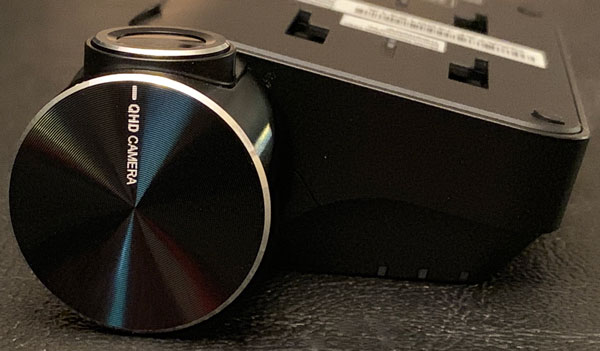
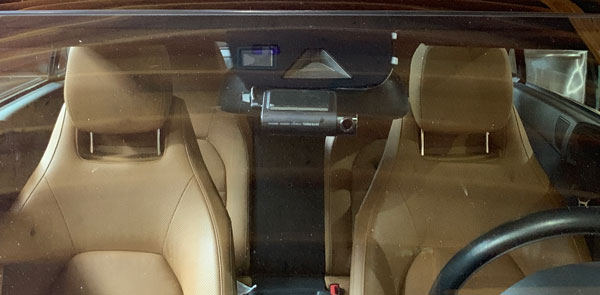
The Q800 PRO is a screen-less dash cam, shaped more or less like a thick deck of cards with a growth on its side to house the lens assembly. Like it’s predecessors, I love the minimalistic, non-distracting form factor of the Q800 PRO. Other than verbal/audio notifications, you can hardly tell it’s installed in your vehicle being tucked behind my rearview mirror. The Q800 PRO is even more stealthy than the original F800, housed in all-black (vs gray) plastic and packed full of the latest tech, features, and Sony’s 2K/high resolution 5.14MP Sony STARVIS camera sensor.

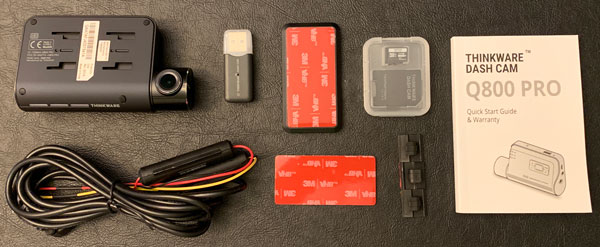
What’s in the box?

  • Main dash cam unit
  • Mount with 3M tape (1ea)
  • 12v power cable
  • Adhesive cable holders
  • 16gb microSD memory card with adapter (consumable)
  • Quick start guide/warranty card

Hardware specs

• Resolution: Front – 2K QHD (2560 x 1440) / Rear – Full HD (1920 x 1080) [Optional]
• Camera: Front – 5.14MP Sony STARVIS  / Rear – 2.13MP Sony STARVIS [Optional]
• Frame Rate: 30 fps
• Viewing Angle: 140° (Diagonal)
• Dimensions (WxDxH): 4.2 x 1.3 X 2.4 inch
• Weight: 107.5g (0.237 lb)
• Storage Temperature:   -4°~ 158°F / -20°~ 70°C
• Operating Temperature:   14°~ 140°F / -10°~ 60°C
• Capacity:  MicroSD card 32/64/128GB (UHS-I)
• Input Power:  DC 12/24V, Built-in Super Capacitor
• GPS:  Built-in GPS Antenna

Design and features

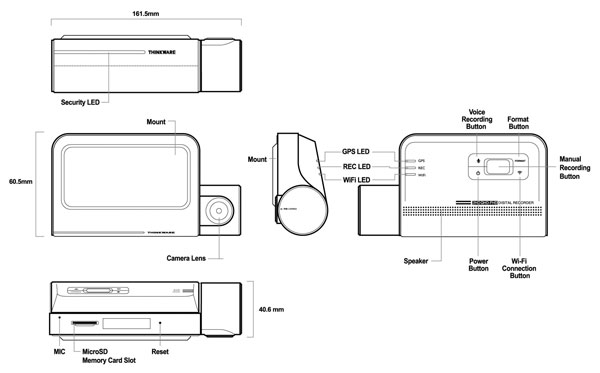
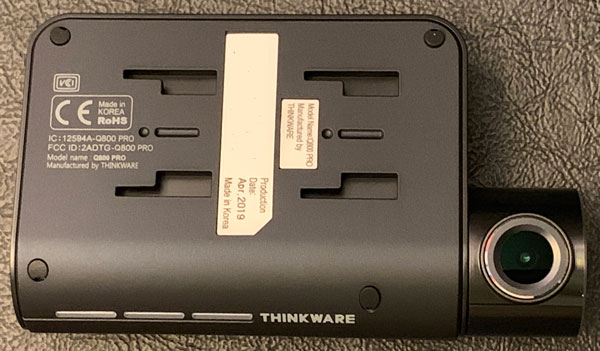
The top of the Q800 PRO has four slots that slide onto the mounting plate which allows for easy installation and removal of the device. The mounting plate is securely held to the windshield by a 3M adhesive strip (vs suction cup mount). The dash cam locks onto the mounting plate with a secure, wiggle-free connection.

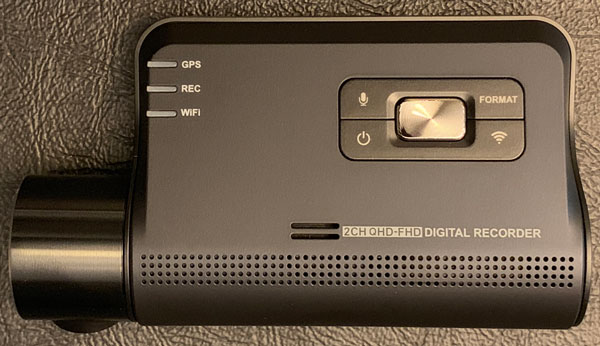
The main face of the Q800 PRO has the mic mute, SD card format, WiFi, and power buttons in addition to the GPS, recording, and WiFi status LEDs located on the left. The Q800 PRO’s speaker is also located on the front of the device. Like the F800 and F800PRO, the Q800 PRO’s speaker impressed me just like its brethren, definitely the clearest and loudest dash cam I have experienced to date.

The Q800 PRO’s camera is on the left side of the device, engineered to sit very close to the windshield to reduce distortion and glare. The camera housing is able to rotate vertically approximately 90 degrees to accommodate nearly any windshield angle and vehicle design.

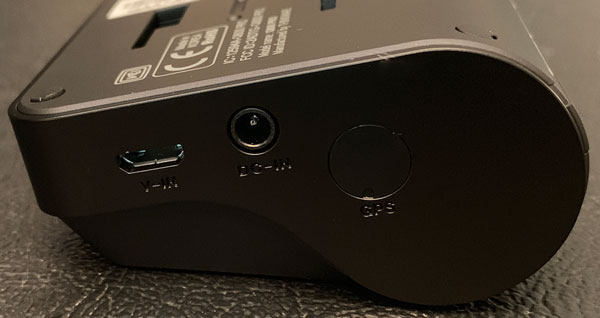
The right side of the Q800 PRO has its video-in, power, and external GPS ports. The video-in port is for the rear, second channel camera. The Thinkware Rear View Camera is an optional accessory that connects to the Q800 PRO via microUSB cable providing HD quality video with a 2.13MP Sony STARVIS sensor and 140 degree viewing angle. The rear video feed can be viewed concurrently with the main, front-facing video on the PC Viewer.

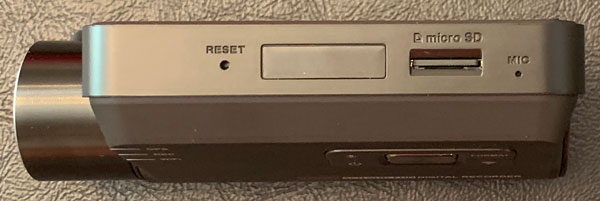
The top of the Q800 PRO has a recessed reset button, microSD card slot, and microphone. Thinkware includes a 16gb microSD card. The Q800 PRO can accommodate up to a 128gb card. Considering the Q800 PRO records in 2K with video taking up twice the space/capacity of standard HD, seems like Thinkware could have included a 32 or better yet 64gb microSD card with their premium device.

Installation

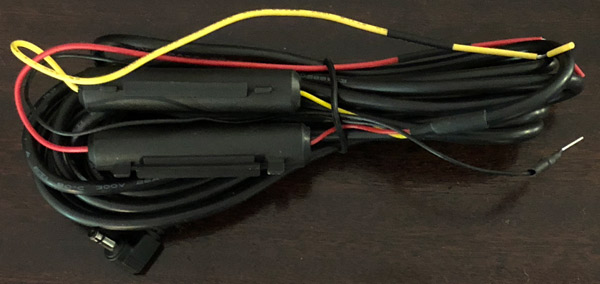
Instead of sending a standard 12v power cable that plugs into your cigarette lighter, Thinkware includes their TWA-SH hardwiring cable with the Q800 PRO. I had the hardwiring cable professionally installed during the F800 PRO review and it has performed perfectly. In addition to looking cleaner and more polished, the hardware kit enables you to use all of the Q800 PRO’s Parking Mode features/capabilities.

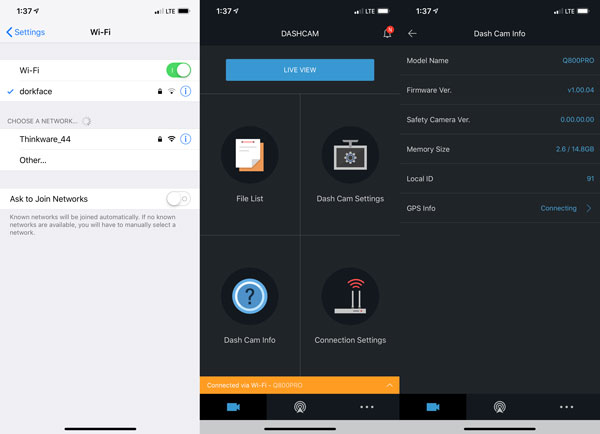
Once installed a majority of the configuring, managing and viewing/downloading video is all done via the Thinkware app available for iOS and Android devices.

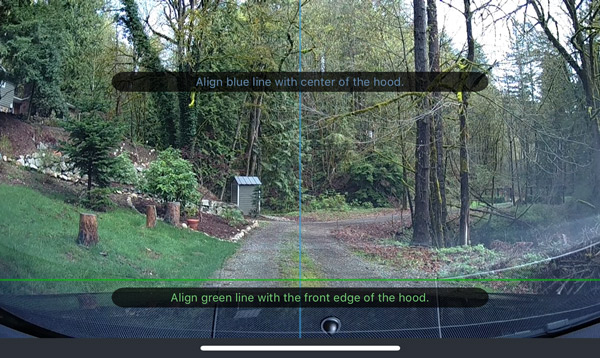
The Thinkware app even helps you align the dash cam when first setting the 3M mounting plate as you can see here with the blue & green lines.

Setup and management

Setting up the Q800 PRO’s involves connecting your smartphone to the dash cam via WiFi and using the mobile app to tweak things as you like. The process requires you to press the WiFi button on the front of the dash cam, directly connect to its WiFi (for me it is Thinkware_44), then start up the app.

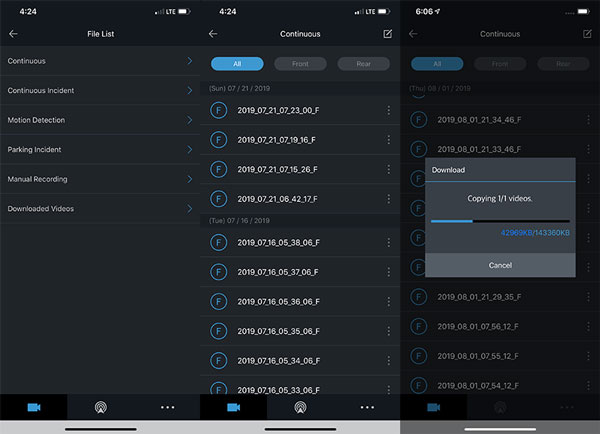
In addition to accessing the Q800 PRO’s camera (memory card/camera/recording/road safety/system) settings, the app also provides a listing of recordings and enables you to download these files from the microSD card to your smartphone wirelessly. Each 146mb file takes several minutes to download. Viewing videos are definitely easier by removing the microSD card and watching them on the Thinkware viewer on your computer.

Noteworthy Features

  • Built-in GPS sensor  – the 800 PRO series has the FASTEST built-in GPS I have ever tested.
  • Driver assistance – Includes lane departure, forward collision avoidance, and forward vehicle departure warning.
  • Speed camera alerts – the Q800 PRO has an internal database that warns you when you’re coming up to an intersection or location with a known speed camera standing watch.
  • High-temperature protection system – a built-in thermal sensor protects the Q800 PRO hardware and data against intense heat by automatically turning it off to prevent overheating.
  • Dual channel capable (aka second camera) – Thinkware also offers a rear camera that captures HD video @30fps.
  • Geo-Fencing – allows drivers or parents to stay alert of the vehicle location.
  • Locate Vehicle – enables drivers to find the vehicle’s current location.
  • Driving Impact Notification – will notify owners when their vehicle has sustained a significant impact.
  • Energy Saving Parking Mode – reduces power consumption by 1/3 less and gives 3x longer video recording than typical parking mode.

Performance

Thinkware’s new optical lens and improved 5.14MP Sony STARVIS image sensor combine to deliver impressively crisp and clear video quality in 2K QHD. The Q800 PRO just works…once installed, it blends into your car only needing to be accessed when something bad happens or an alien spaceship zips across the horizon.

Video Quality

As I mentioned above, the Q800 PRO uses a Sony 5.14MP STARVIS QHD (2560 x 1440) sensor that captures 2K video at 30fps. The clarity and detail in all lighting condition is excellent. Like the rest of the Thinkware’s 800 series dash-cams, the Q800 PRO gives you a relatively wide viewing angle with a 140-degree view of the road.

With its better lens and greater resolution, the Q800 PRO’s daytime video is excellent. The detail, color, and clarity make for a much improved image quality over its predecessors.

Thinkware’s Super Night Vision 2.0 and Sony improved Exmor CMOS image sensor are very good at capturing light, producing low-light and nighttime video.

Here is an example of the Park Mode video. Even though my parking garage is dimly lit with shadows and bright lighting, the lights are not overexposed and the detail is very clear and detailed.

Thinkware Viewer

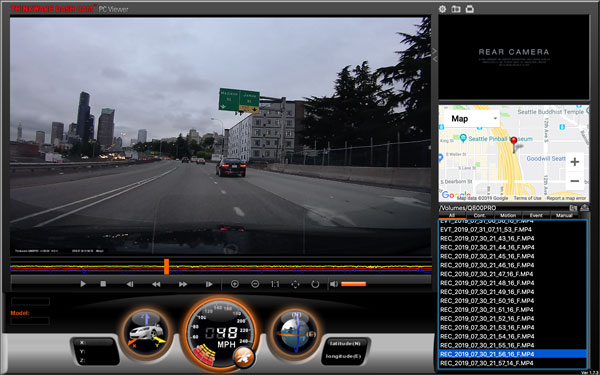
The Thinkware PC viewer is one of the best features of using their dash cams, very well polished and intuitive. Other dash cam manufactures either create a half-baked viewer or do not offer one at all.  The Thinkware viewer is an excellent integrated tool for viewing not only your driving video but speed, lat/long, Google map location, and three-dimensional G-forces the car is experiencing at any particular moment. These G-forces are illustrated in the bar graph under the video and the dial with a car in it with X- Y- and Z- axis in the lower left corner of the window. Like the F800 and F800 PRO, the Q800 PRO records in 1:00 minute blocks but its 2K resolution bumps the file size from approximately 85 to 146mb in size. So, I swapped out the 16gb microSD card Thinkware provides with a 64gb one I had laying around, to (obviously) hold more video at one time before the dash cam overwrites itself.

F800 PRO vs Q800 PRO:

As I mentioned above…other than the lens assembly, there is no outward/physical difference between the F800 PRO and the Q800 PRO. The Q800 PRO’s improved resolution and video are the only things that truly set it apart from the F800 PRO, the features are the same.

What I like

  • Great build quality
  • 2K QHD (2560 x 1440) resolution
  • Additional features and functions
  • Stealthy/minimalistic form factor
  • Very good video quality (especially Night Vision)
  • TWA-SH hardwiring cable included
  • Dual channel/camera capable
  • Quick GPS lock
  • Excellent PC viewer
  • Solid companion smartphone app
  • Easy to install/use

What I’d change

  • Included microSD needs to be higher capacity

Final thoughts

I really like Thinkware’s 800 series of dash cams…so much so, I have had them hardwired into several of my vehicles. I have always prefer their screen-less, minimalistic form factor. The Q800 PRO raises the bar by bumping up the camera’s resolution from 1080p to 2K. As I have said in past reviews, I prefer a higher resolution sensor and Thinkware has delivered with their latest & greatest. The Q800 PRO is jam-packed with features you would expect from a high-end dash cam (tho I can see many not using some of its more advanced capabilities). I love the all-black PRO’s stealthy look and vibe. Bottomline: I recommend the Q800 PRO for its video quality, design, features, and polished ecosystem. If you’re thinking of buying or upgrading your dash cam, I definitely recommend the Q800 PRO be on the top of your list.

Price: $299.99
Where to buy: Amazon or Thinkware.
Source: The sample of this product was provided by Thinkware.com.

Filed in categories: Reviews

Tagged: ,

Thinkware Q800 PRO dash cam review originally appeared on The Gadgeteer on August 9, 2019 at 9:00 am.

Note: If you are subscribed to this feed through FeedBurner, please switch to our native feed URL http://the-gadgeteer.com/feed/ in order to ensure continuous delivery.
The Saddleback Leather Messenger Backpack brings back a classic design in a new format!

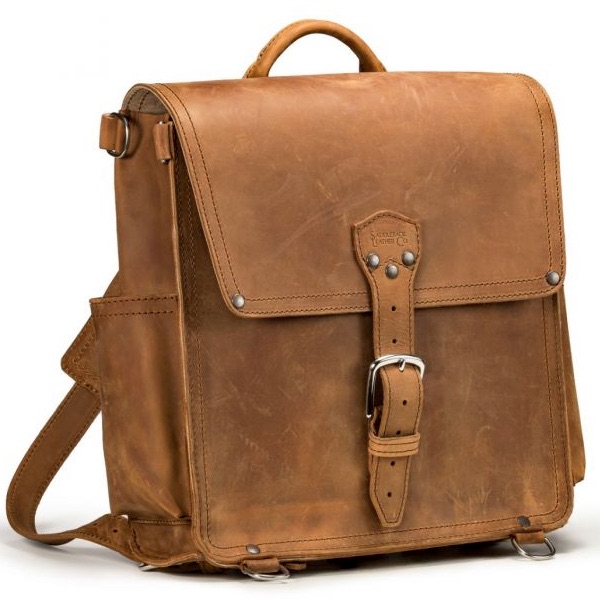
NEWS – When Saddleback Leather first started out, one of their original products was a simple messenger-style bag. It was a great design that also converted to a backpack in a pinch. I know many owners who modified theirs for full-time use this way, arguing that the big square form factor worked better that way. While the original messenger bag has been retired, Saddleback Leather just retooled the design and released it as a dedicated backpack!

The new Messenger Backpack follows the dimensions of the old design at 14″ by 13″ by 4-1/4″, and weighs in at a comfy 4.3 pounds. Two side-mounted pockets hold water bottles or cell phones, while the interior includes a dedicated pocket for a 15″ laptop, a couple of small pockets for extra bits, a secret bottom to hide important stuff, and a built-in key leash. Dedicated backpack straps are attached on the rear of the bag, which also has multiple D-ring attachment points to lash all kinds of things.

I know some long-time Saddleback fans (like me) will be excited about this one. It looks like a perfect marriage of form and function. It retails for $379 and is available in 4 different colors. Check it out on the Saddleback Leather Messenger Backpack page!

Filed in categories: News

Tagged: ,

The Saddleback Leather Messenger Backpack brings back a classic design in a new format! originally appeared on The Gadgeteer on August 9, 2019 at 8:00 am.

Note: If you are subscribed to this feed through FeedBurner, please switch to our native feed URL http://the-gadgeteer.com/feed/ in order to ensure continuous delivery.