Botanium Hydroponic and Automatic Indoor Gardening Pot review

REVIEW – Farm fresh herbs and veggies can make all the difference between a good dish or a blah dish. But not everyone has the time, space, or interest to put in their own garden. Gardening is Jeanne’s hobby and we have a 50′ x 50′ fenced in garden plot on our property. Traditional gardening is a ton of work and is reliant on mother nature blessing or wrath when it comes to yield. Today I want to show you a very small gardening option that you can do indoors with little to no effort. It’s the Botanium Hydroponic and Automatic Indoor Gardening Pot. Let’s check it out.

What is it?

The Botanium is a self-contained tabletop automatic self-watering hydroponic indoor gardening pot.

What’s in the box?

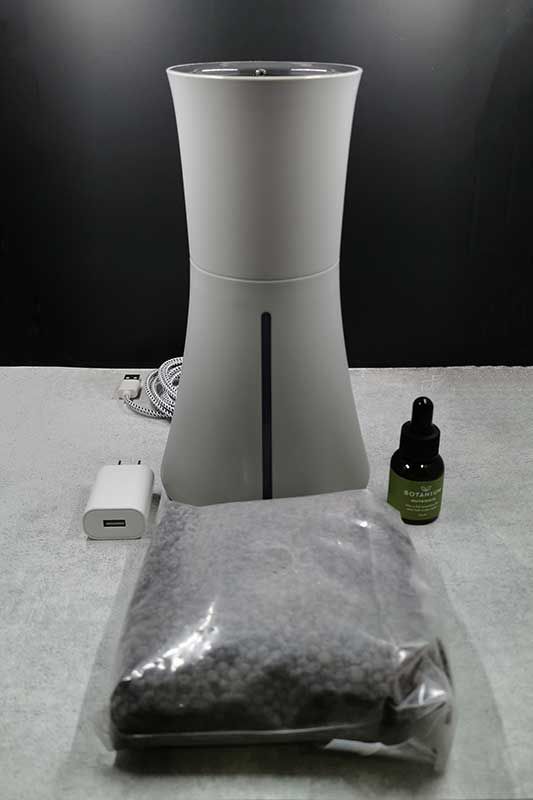
  • Botanium gardening pot
  • Gardening medium
  • Pipette bottle with liquid nutrients
  • AC adapter
  • User guide

Design and features

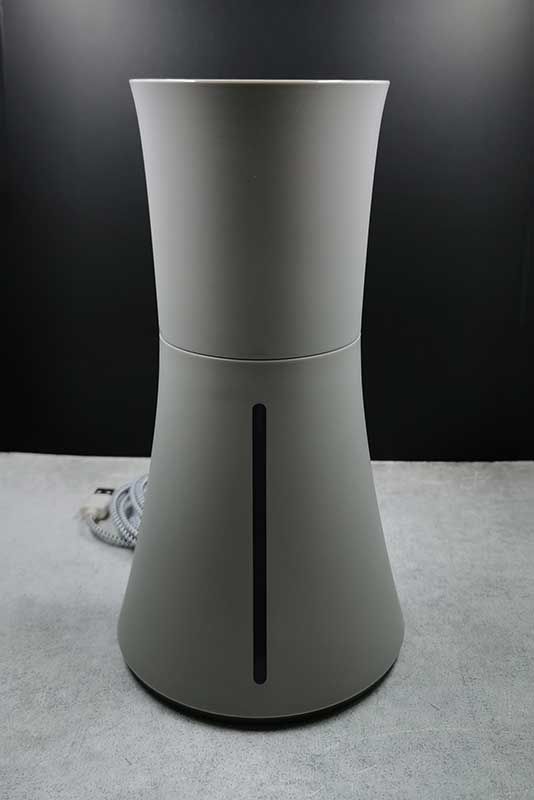
The Botanium hydroponic gardening pot is available in three colors including the grey version that was sent to me. It is made of plastic in a contemporary shape that resembles a flower vase and the pot is made up of two pieces.

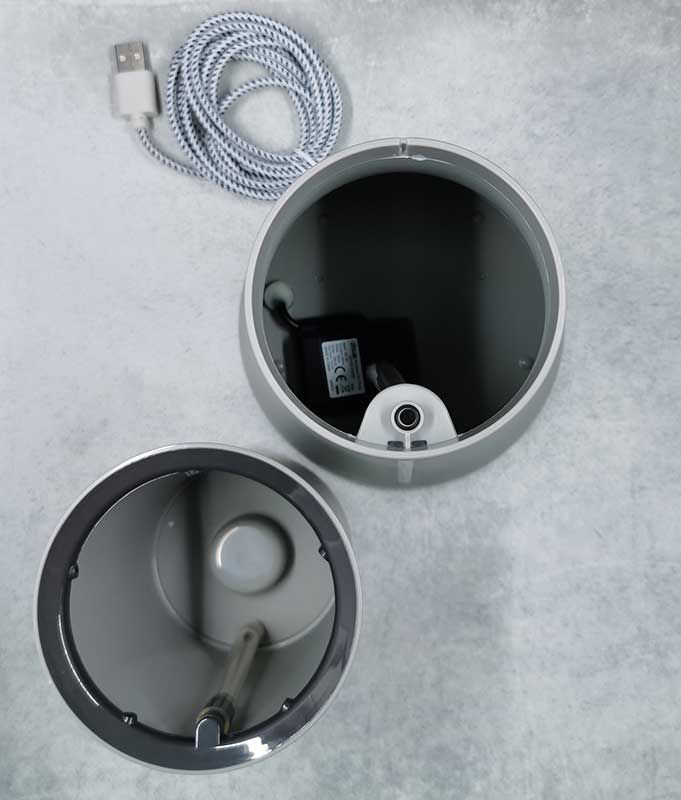
There’s the bottom section which is the water reservoir and holds the pump mechanism, and the upper section where the growing medium is placed and where the plants grow.

It’s green thumb time!

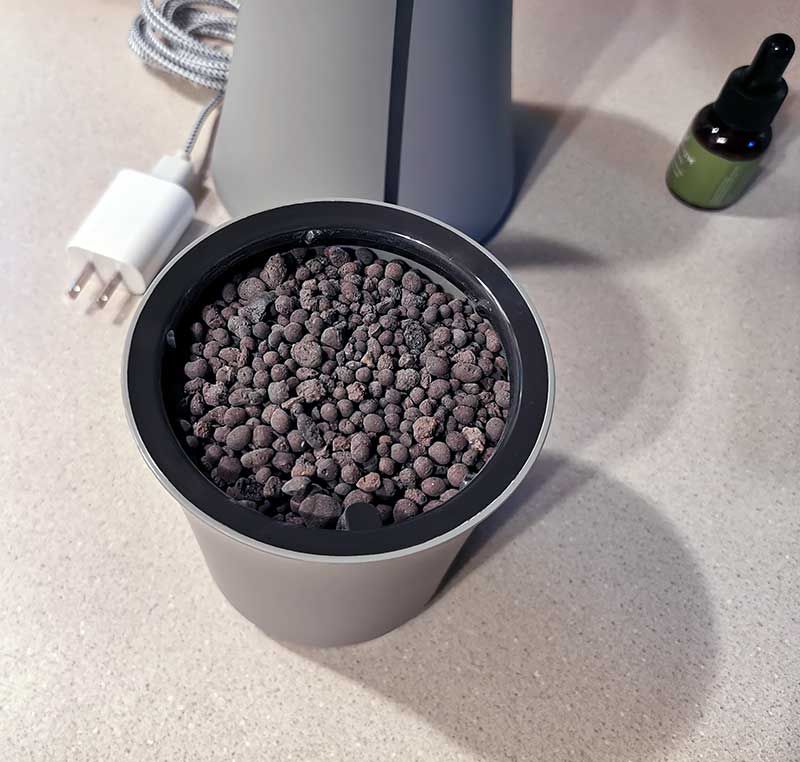
Setting up the Botanium is quick and fun. All you have to do is fill the upper section with the growing medium which looks and feels like porous brown pebbles.

Then you fill the bottom section with water, add 4 droppers of the liquid nutrients, and set the upper section on top.

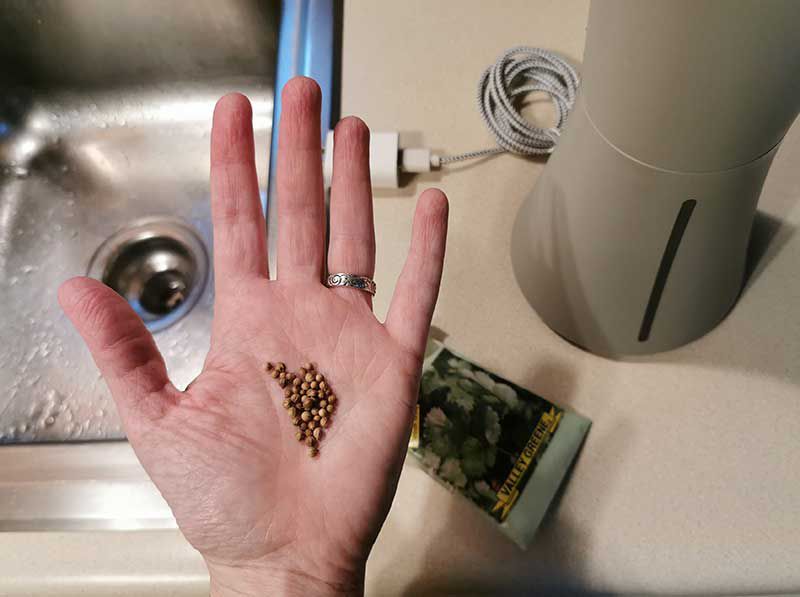
Next, you have to get some seeds. I had some coriander/cilantro seeds on hand and used those. All you have to do is poke them in the growing medium.

Then you plug in the pot and within a few seconds, the automatic watering pump will kick on to water the seeds. This happens every 6 hours. Here’s what it looks like when it’s all set up.

VIDEO

It’s up to you to keep an eye on the water level in the lower section of the pot by looking at the level window on the front. Every few weeks you’ll have to full it up with water and add more of the fertilizer drops.

Depending on the variety of seeds that you planted, they will sprout in a few days. Note that you will need to place the Botanium pot in a well-lit area since plants need sunlight just like regular ones. I really wish that some sort of light attachment was available for this pot as you can see from my pictures, the seedlings are very lanky even though I placed the pot in a window.

What I like

  • Easy to setup
  • Automatic watering
  • You can use any type of seeds that you have
  • Reusable

What I would change

  • Make a larger capacity pot
  • Include a light attachment

Final thoughts

Growing plants with the Botanium is pretty much foolproof because it takes care of the watering for you. All you need to do is make sure to put the pot in a bright area and keep the water reservoir filled.

If you’ve always wanted to grow herbs or flowers but don’t have room for a traditional garden, the Botanium is a fun and easy way to get started indoors. Just remember that this is a really small pot, so you can’t expect a huge harvest 😉

Price: $79.00
Where to buy: Amazon
Source: The sample for this review was provided by Botanium.

Filed in categories: Reviews

Tagged:

Botanium Hydroponic and Automatic Indoor Gardening Pot review originally appeared on The Gadgeteer on June 25, 2019 at 10:27 am.

Note: If you are subscribed to this feed through FeedBurner, please switch to our native feed URL http://the-gadgeteer.com/feed/ in order to ensure continuous delivery.

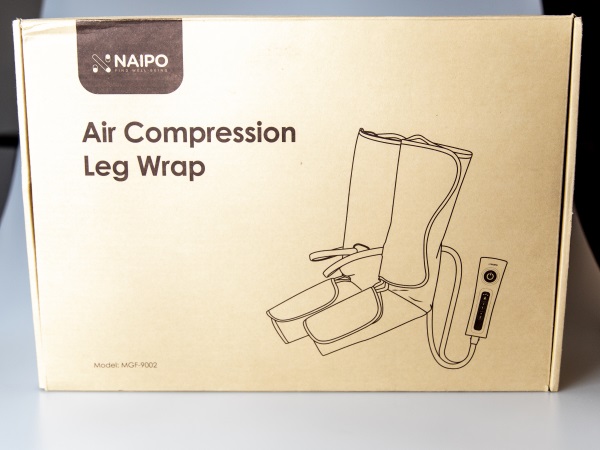
Naipo Air Compression Leg Wraps review


REVIEW – Approximately 8 years ago, my father who is now 87 years old, was diagnosed with Neuropathy as a result of aging. Diabetic Neuropathy seems to be the most common type, but the symptoms are the same with the latter being more extreme. As a result of helping him with his condition, I have learned a lot about various types of issues that contribute to the level of discomfort associated with this chronic disease. One of those issues can be poor circulation. I am very interested in testing the Naipo Air Compression Leg Wraps to see how they perform and then maybe I will have my dad try them.

What is it?

The Naipo Air Compression Leg Wraps are a pair of air compression devices that you wrap around your legs and feet and then they work via air compression to aid in the circulation in those body parts. They are made of durable material and designed to be therapeutic.

What’s in the box


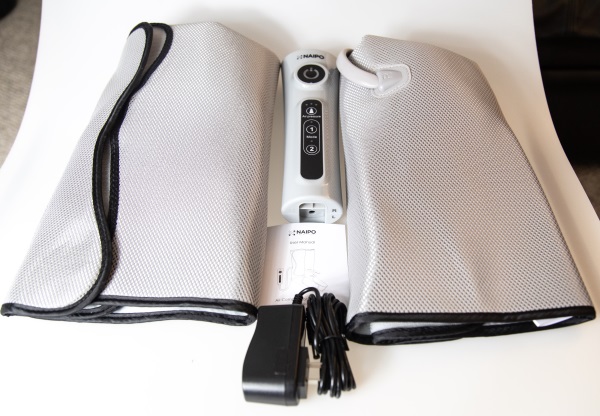
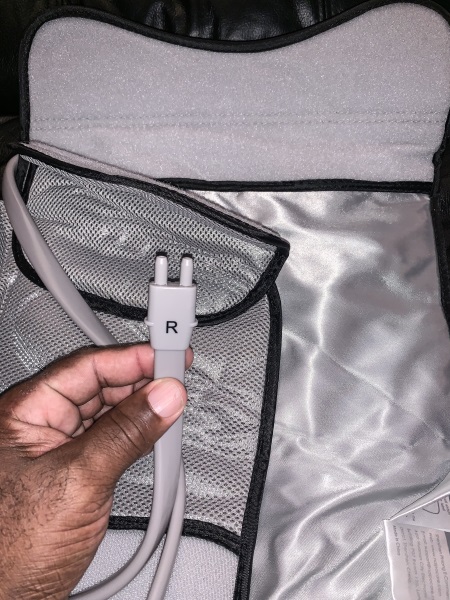
2 x Compression Leg wraps (“R” for right leg / “L” for left leg)
1 x AC Adapter
1 x User manual
1 x Handheld controller

Design and features

Specifications

Features

Stress-Relieving Massage: This air massager provides cyclical air compression for your calves and feet, allowing you to enjoy an unforgettable massage experience
Adjustable Modes and Compression Intensity: Choose a setting that works best on you for an optimal relaxation experience that helps to alleviate fatigue and pain
Ergonomic Design: The leg air massager is made from a durable and dirt-proof fabric. The design of the air compression wraps fits naturally and comfortably around your legs
Built-in Safety Features: The device shuts off automatically after 15 minutes for safer user experience. The corded design allows for consistent power all the time

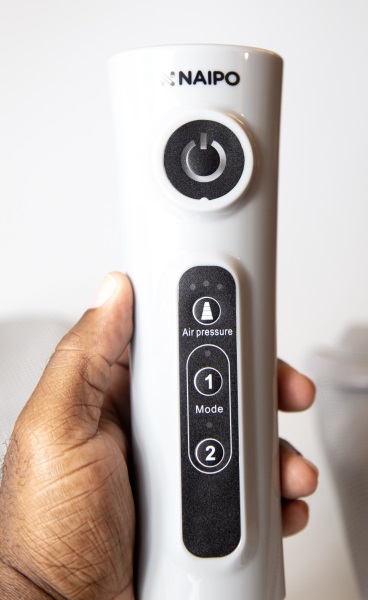
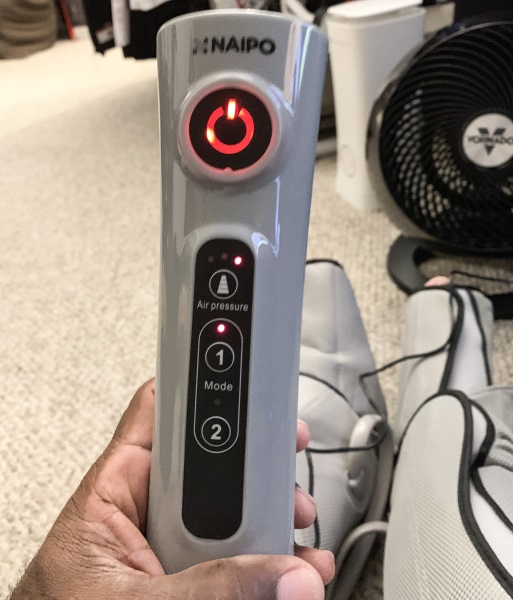
There is one main controller that has everything that you need on the surface to use the massager. The controls are the power button, an air pressure button, and the 2 mode buttons.

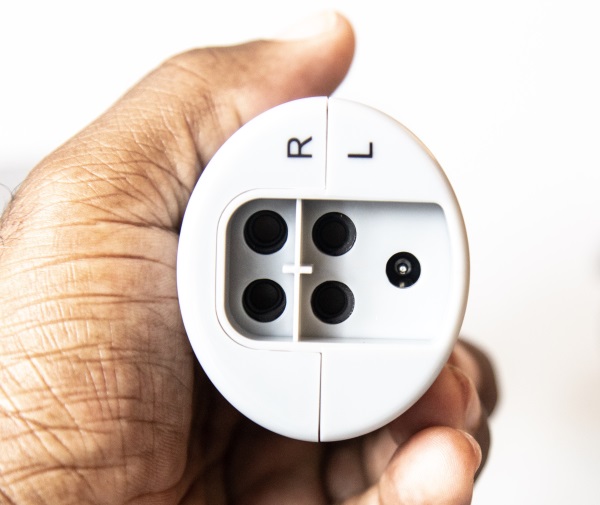
At the bottom of the controller, there are four jacks for the pair of connecting cables for each side of the massager, and the power jack for the AC adapter.


Performance

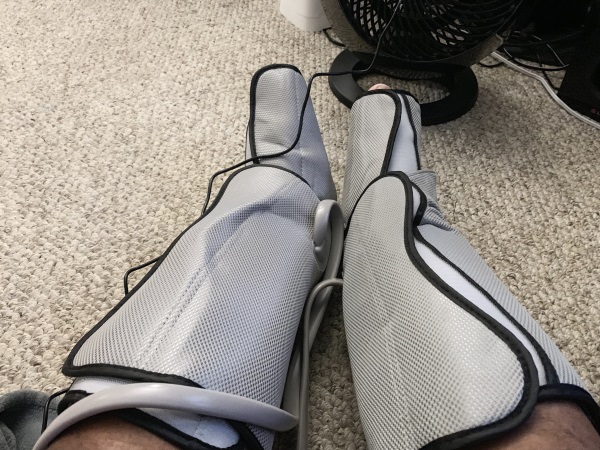
The first thing that you have to do to use these leg massagers, is to wrap them around your legs and feet. They are secured via the attached velcro and have a bending section that allows you to connect the lower part around your feet and the upper around your legs.

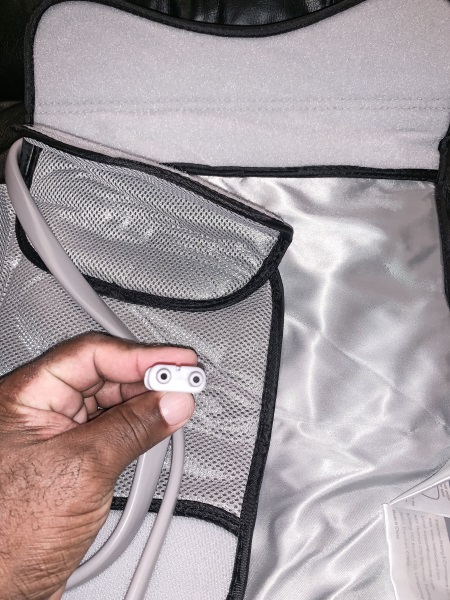
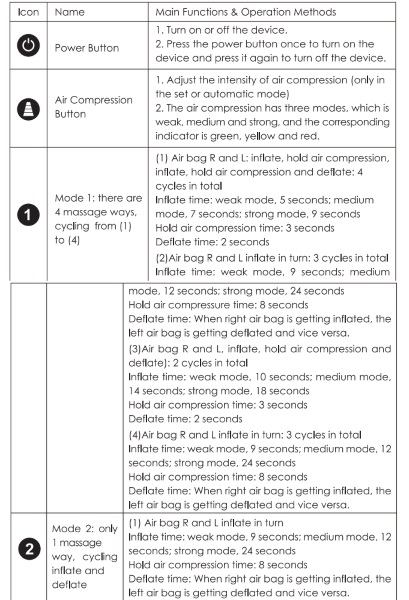
Once you plug in the cables to the controller and turn on the power, the power button LED lights red. As soon as you push the power button, air compression begins in both leg massagers. You have the option to increase or decrease the air compression level/intensity and to change modes which changes the way the compression moves around your legs/the rhythm.


The following chart explains the control functions:

What I like

  • The quality of the device
  • The simple controller
  • The therapeutic massaging effect

What I’d change

  • The length of the AC adapter cable

Final thoughts

The Naipo leg massager is the first of its type that I have tried. It is an interesting feeling in terms of having your feet and legs wrapped in one device that can feel a bit restrictive. However, it does massage both of your legs and feet and while I hate being immobile like that, I think that this would work great for people with circulation problems. As I previously mentioned, my father suffers from Neuropathy and it specifically affects his feet. I am hoping to convince him to try them sometime soon. In terms of the compression and the massaging effect, they seem to work well, and overall, they are well constructed and should withstand daily use.

Price: $89.99
Where to buy: Naipo Website and Amazon
Sample: The sample for this review was provided by Naipo

Filed in categories: Reviews

Tagged:

Naipo Air Compression Leg Wraps review originally appeared on The Gadgeteer on June 25, 2019 at 9:00 am.

Note: If you are subscribed to this feed through FeedBurner, please switch to our native feed URL http://the-gadgeteer.com/feed/ in order to ensure continuous delivery.

Plugable USB-C Cube docking station review

REVIEW – How many times have you been somewhere with only your phone and wished you had a way to enter emails, browse the internet or work with various Microsoft applications like Word or Excel?  Better yet, how many times did you wish you did not have to lug a laptop or even your large tablet with you every time you traveled and could just use your phone as a computer?   Well if any of these have applied to you, your wishes may have been answered with the new Plugable Docking Station.   Read on to see if this device can make your life easier.

What is it?

The Plugable USB-C docking station  (UD-CUBE-15W) will take your Samsung DeX capable device and turn it into a full-fledged desktop PC.  It has multiple ports to connect an HDMI monitor, several USB devices and an ethernet port.

What’s in the box?
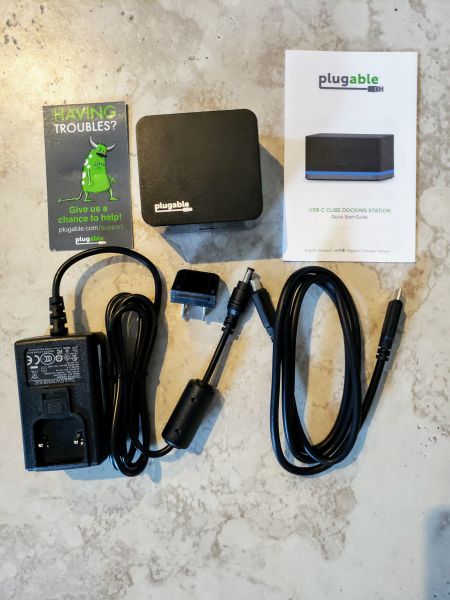
The box contents are surprisingly simple.  Inside the box you will find:

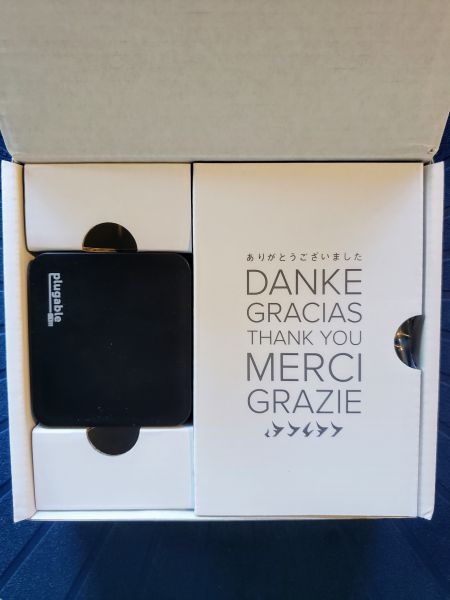
  • The cube itself.  The cube is very small.  Note the ‘Having troubles’ business card next to it.
  • A small business card with contact info if you run into any questions or problems.
  • A user manual.
  • Power adapter (20W 5V/4A)
  • Standard U.S.A. power plug which snaps into the power adapter
  • USB-C to USB-C cable to connect your phone to the cube. 36 inches long

Hardware specs
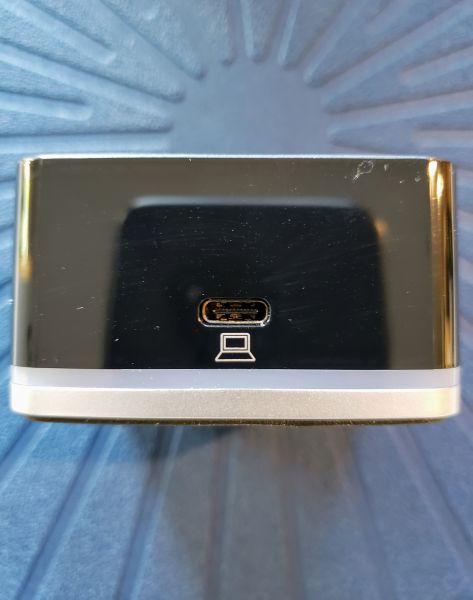
The front of the cube has a single USB-C port.  This is the port where you take the included USB-C cable and connect it to your compatible Samsung DeX device.   Your phone must have a USB-C connector.  Adapters that convert a micro USB or lighting connector to USB-C will not work with the Plugable.  Also, to work as a DeX device your phone must be running the Android 9 ‘Pie’ OS.
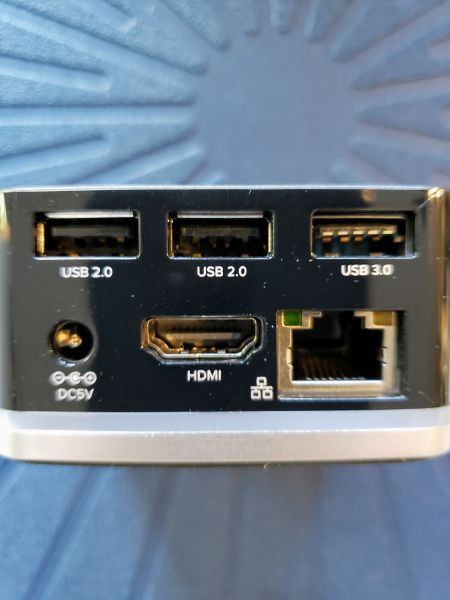
The back of the device has two USB 2.0 ports and one USB 3.0 port.  It also as the power connector, Ethernet, and HDMI port.  It should be noted that the display you use must have an actual HDMI port as DisplayPort monitors are not supported.  I also want to note that the cube supports rapid charging of your phone while it is connected to the cube.

Setup

My setup was pretty simple.   I connected the power supply and then connected my Samsung Galaxy S9 (Running Android 9) using the available cables.   I then used a standard HDMI cable and connected it to my desktop monitor.  I used the USB 2.0 port to connect my trackball mouse and then connected my wireless keyboard directly to the phone via Bluetooth.  It was all pretty painless and simple.

Performance

I first want to state that this is not a review of the DeX operating system, but rather of the cube itself and how well it performed displaying the DeX system.   The cube actually has two different options.   It defaults to the DeX display.  The screenshot below shows the initial screen I am presented.
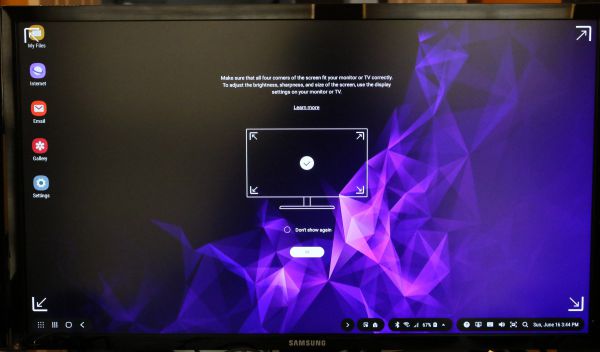
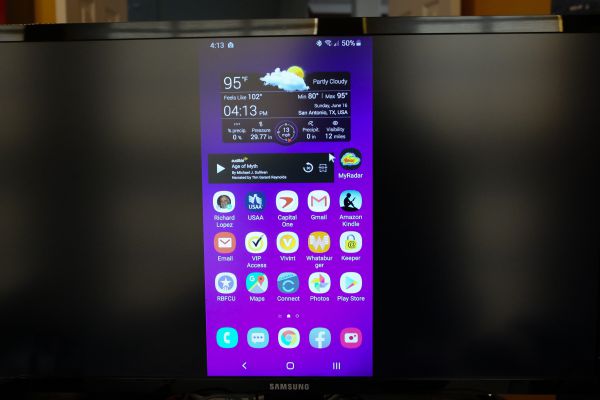
As you can see it looks like a regular desktop.   It is not displaying what is actually on the home screen of my phone.  The center display of the monitor was telling me to check the display and to make sure I could see all of the corners properly.  It went away after a few minutes.    The second option the cube has is that it can just screen mirror the phone to your monitor.  The manufacturer’s web page states that this will work with non-Samsung phones, but you have to check and see if your phone’s USB-C port allows for video output.  The screenshot below shows what the screen mirroring looks like.
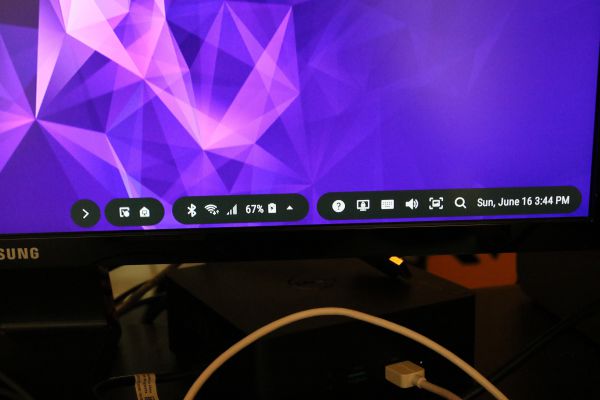
The screenshots below show the detail on the bottom of the DeX screen.  It has quick access buttons to your Bluetooth, Wifi and standard displays for cell signal and battery usage.  You also have quick and easy access to your standard setting buttons like you would have if you swipe down on your phone.
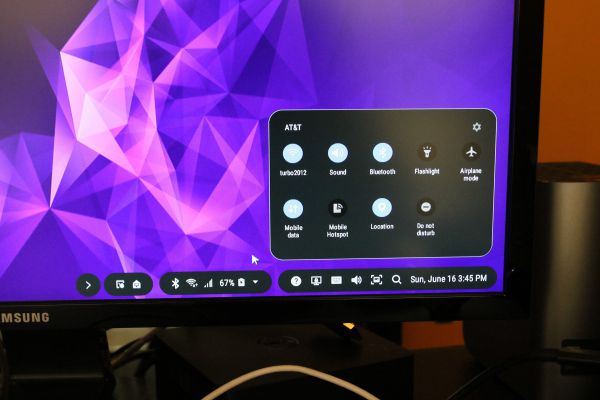
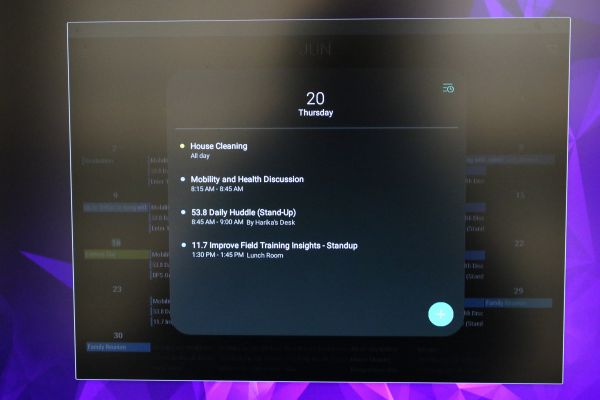
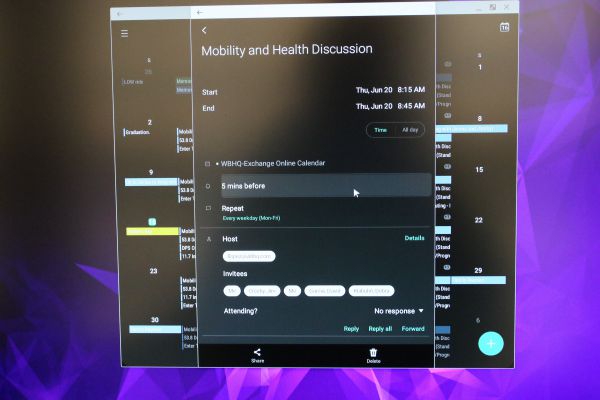
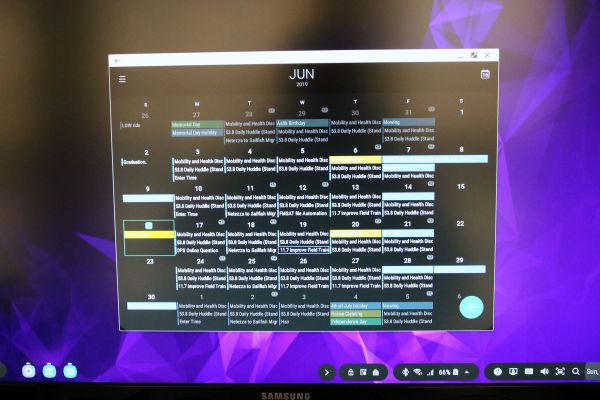
The screenshots below show the initial popup I get when clicking on the date on the far right of the taskbar.  It very nicely throws up my default calendar view.  I can then double click on a day and get the second screen.  Finally, I can click on an actual event and get the details for that event.
I can get full access to all of my installed app icons by clicking on the apps icon in the lower left corner of the screen.  I want to note that not all apps are DeX compatible.  For example, neither the Amazon Kindle or Audible apps will work on DeX.  You get a message saying they are not compatible.  You can switch to screen sharing and the Kindle app will then display at that time.
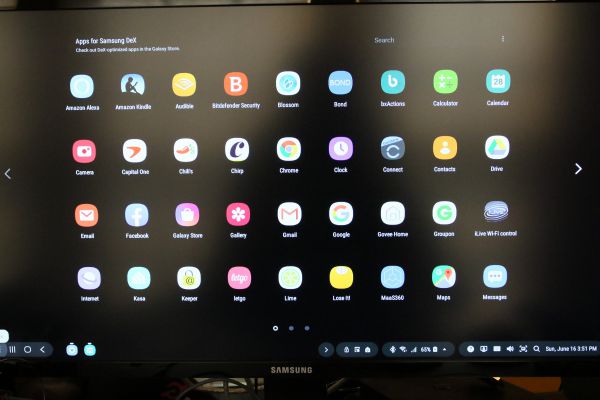
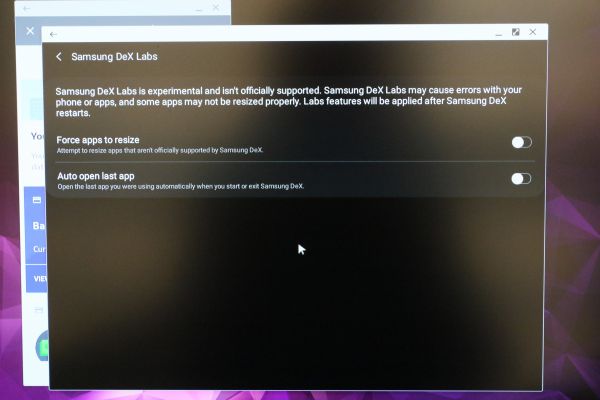
DeX does offer an option it calls Samsung DeX labs where it will let you turn the feature on and try to force noncompatible apps to display full screen.  I turned that feature on as you can see below.
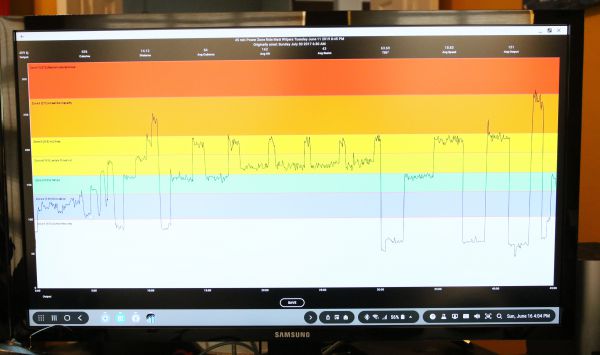
Once the feature was on I selected my PowerZone app which was originally only displaying vertically.  It said it would restart the app and try to display again and I got the following screen below.  You can see I received a nice full-screen display.
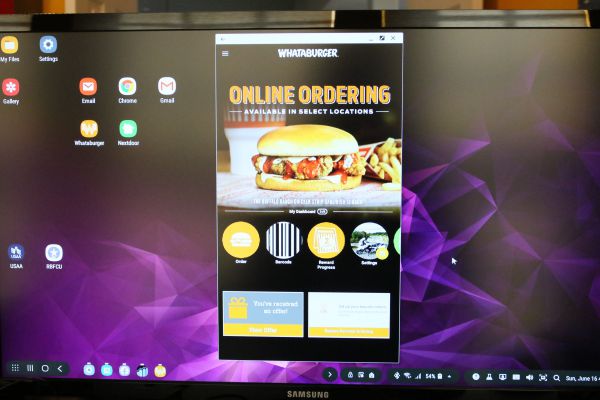
I tried the same with my Whataburger app and it still just continued to display vertically.  To be fair, this app looks pretty optimized for what it is trying to show.
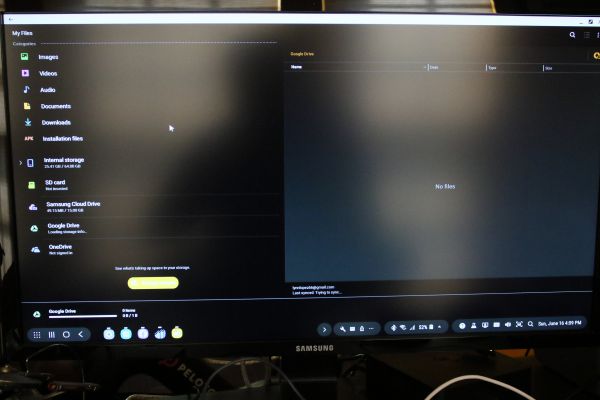
One of the last things I checked out was the My Files icon that displayed by default on the top of the screen.  I like that it tends to display like a standard Windows file explorer.  It gives you options to several cloud accounts like the Samsung, Google, and OneDrive accounts.
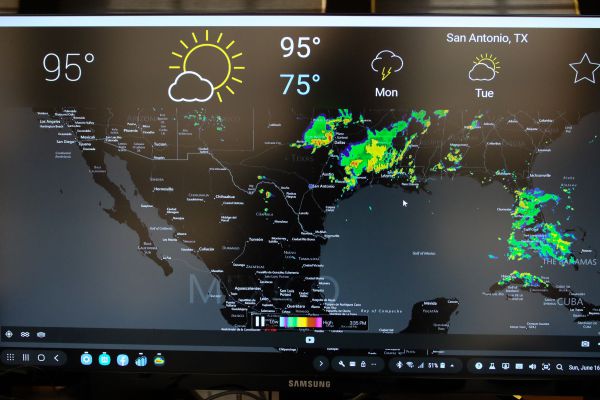
Finally, I wanted to show the full-screen shot of my MyRadar app which I think displays very nicely.
What I like

This was my first time using the DeX feature of a Samsung phone and I have to say I was pleasantly surprised.  I was expecting simple screen mirroring and what I received instead was almost a full PC like experience.   I was easily able to connect both Bluetooth and USB devices.  Because the cube connects using a cable, it does not matter what kind of protective case I have on my phone as long as the USB-C port is accessible.  The cube is really small.  It is certainly smaller than my phone and less tall than a business card.  It offers more USB ports than the standard Samsung DeX stations and you can keep the case on.

What I’d change

I honestly do not see much that needs to be improved.  If I had to complain about anything I think they could have included an HDMI cable with the setup.

Final thoughts

If you are looking for a DeX station for your latest model Samsung phone I really think this is the way to go.  You get more ports and can keep the case on your phone while using it.  It is very small and easy to pack.  Assuming that all you need to do on a computer is available through apps on your phone, I don’t see any reason why you would need to bring along a full-blown laptop on your travels.  The biggest thing you would have to pack would be the keyboard and hopefully, if you are going to work somewhere, they would have a keyboard, mouse, and monitor you could use while you were there.

Price: $99
Where to buy: Amazon
Source: The sample of this product was provided by Plugable

Filed in categories: Reviews

Tagged:

Plugable USB-C Cube docking station review originally appeared on The Gadgeteer on June 25, 2019 at 8:00 am.

Note: If you are subscribed to this feed through FeedBurner, please switch to our native feed URL http://the-gadgeteer.com/feed/ in order to ensure continuous delivery.

New Vulnerabilities in VLC Allow Hackers to Access Your Computer

If you have VLC media player on your computer, you must immediately upgrade to its latest version, 3.0.7 and above. There are two new exploits that are allowing hackers to use the vulnerable older versions of VLC to crash your system and remotely execute their codes. The modus operandi is very typical. After you unsuspectingly download an AVI or MKV attack file, it will give the hackers full control of your computer whenever you play a video on VLC. These attack files can originate from video torrents as well as Facebook, Twitter or Instagram. Sound dangerous? Well, it… Read more

Instapage, Unbounce or LeadPages – Which Is The Best Landing Page Builder?

Remember when you had to work with a developer every time you wanted to test a new landing page? Landing page builder tools like Instapage, Unbounce, and Leadpages have, thankfully, made that a thing of the past. Now, using simple visual drag-and-drop, you can quickly design, deploy, and optimize as many landing pages as you… View Article

The post Instapage, Unbounce or LeadPages – Which Is The Best Landing Page Builder? appeared first on WinningWP.