4 of the Best Web Browsers for Linux

There are plenty of web browsers for Linux these days, but not all of them support all distros. This makes it a little bit difficult to choose, but there are some viable options that still work with the ecosystem. The choice isn’t just dependent on your Linux distribution, but also on your preferred use cases. While Linux desktops offer most of the web browsers you’d use on Windows and Mac, there are some lesser-known browsers that aren’t available for the latter two operating systems. Our top four picks for the best browsers you can use on Linux support the majority of most top distros, but… Read more

Zagg Slim Book Go iPad Pro 12.9in keyboard case review


REVIEW – I have owned the previous 3 or 4 versions of the iPad and the last 2 versions of the iPad Pro 12.9″. I now use it so often that it is a daily part of my workflow. The ability to have a good case with a sturdy kickstand and an integrated keyboard is a must for me. I have a tried a few combinations of a case and a separate Bluetooth keyboard, but that solution is clumsy. I now get the opportunity to try the Zagg Slim Book Go iPad Pro 12.9″ case/keyboard combination. I am excited about it, so let’s get going!!

What is it?

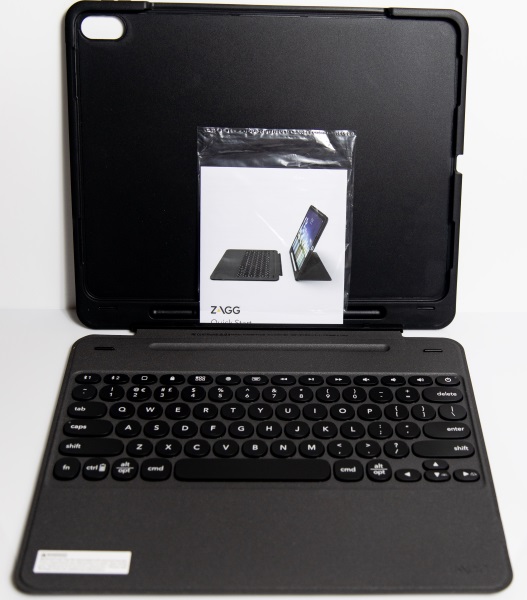
The Zagg Slim Book Go iPad Pro 12.9″ keyboard case is slim, sleek and lightweight and connects to your iPad via Bluetooth. It can also simultaneously connect your smartphone. (2 devices at once)

What’s in the box


1 x Zagg Slim Book Go iPad Pro 12.9″ Keyboard Case
1 x Instruction Manual

Design and features

Specifications:

Device Compatibility: 12.9-inch iPad Pro (2018)
InvisibleShield® Friendly: Yes
Battery Life: 1 year
Backlighting: Yes (7 colors)
Dimensions: 11.5” x 9.6” x .8”
Tablet Function Keys: Yes
Multi Pairing: Yes
Language Options Available: Yes
Multi-Angle Viewing: Yes
Laptop-Style Keys: Yes
Detachable Case: Yes

Features:

Lightweight, Portable Design:
The sleek, streamlined design fits easily in your bag so you can take the lightweight Slim Book Go keyboard and case with you wherever you go.

Holder for Apple Pencil:
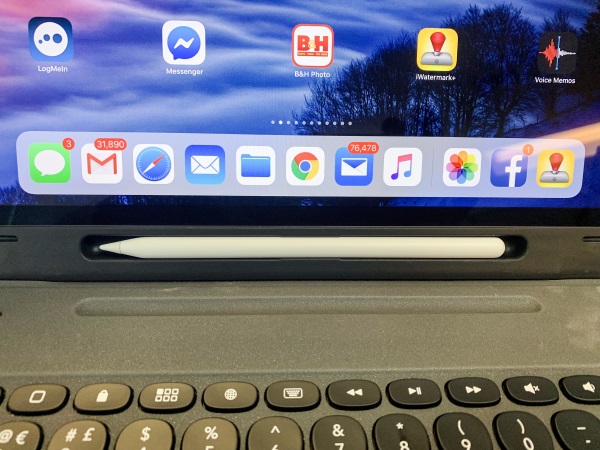
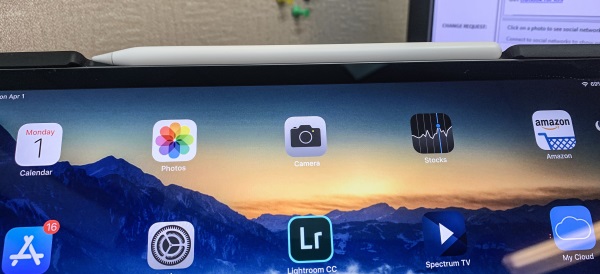
Built-in holders for the Apple Pencil are located at the top of the keyboard and at the base of the cover. So your Apple Pencil is stored safely when it’s not in use and is right where you need it.

Laptop-style Keys:
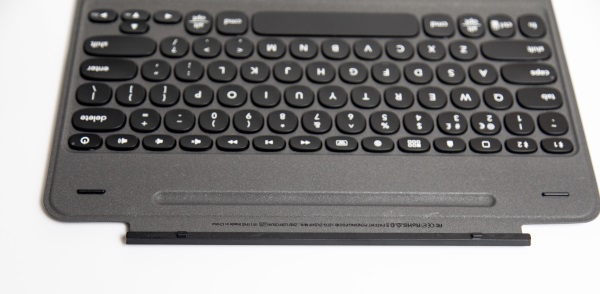
The laptop-style keys have optimal key travel so that you get clean, precise, even pressure with each keystroke which facilitates fast and accurate touch typing. Backlighting is available in seven different colors, so it’s easy to type in lowlight conditions.

Detachable Keyboard for Multiple Uses:
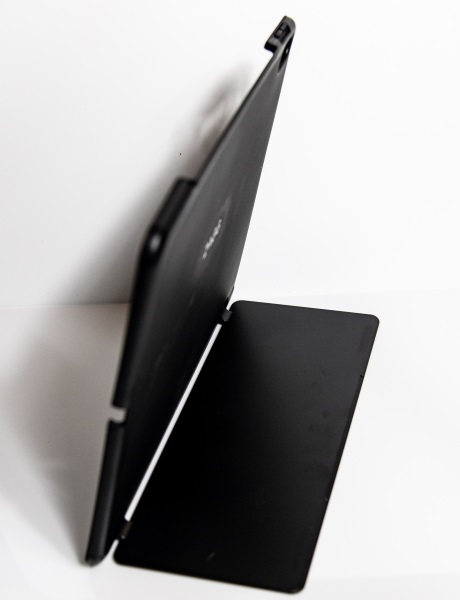
The Slim Book Go keyboard and case can be easily detached to accommodate different uses and work environments. The cover of the Slim Book Go, with its reverse kickstand, can support your tablet on one surface while you type with the keyboard on another.

Multi-device Pairing:
The Slim Book Go keyboard and case can pair with two devices at once, so you can sync with both your iPad and your smartphone and toggle between them.

Long-lasting Battery:
The Slim Book Go keyboard’s long-lasting battery lets you type up to one year between charges, so you don’t have to drag along extra cords for charging.*
*based on regular use of one hour per day without backlight.

The keyboard has a built-in magnetic pencil holder and a rubber hinge that connects magnetically to the tablet case.

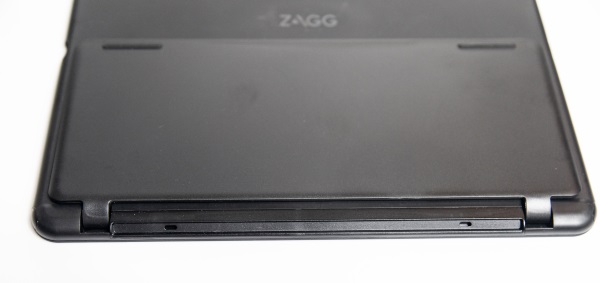
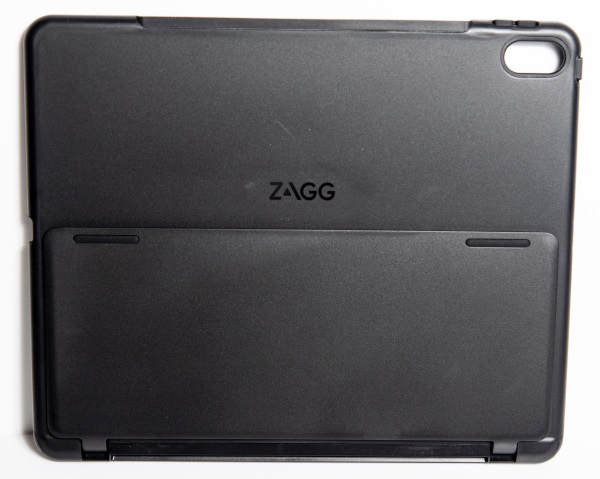
At the bottom of the tablet part of the case, is the second half of the magnetic rubber hinge that connects with the keyboard portion of the case. There are 2 small rectangle notches that match up with the other half of the hinge.

When not in use, the kickstand folds flat against the case.

The built-in hinged kickstand allows you to place the tablet in a standing position and can be adjusted as needed at increments of your choice.

Performance

This Zagg case is just easy to use right out of the box. The iPad fits snugly in the case and the keyboard half of the case attaches magnetically to the tablet half of the case via a rubber hinge that folds easily to allow the two halves to fold and close together into one flat case.

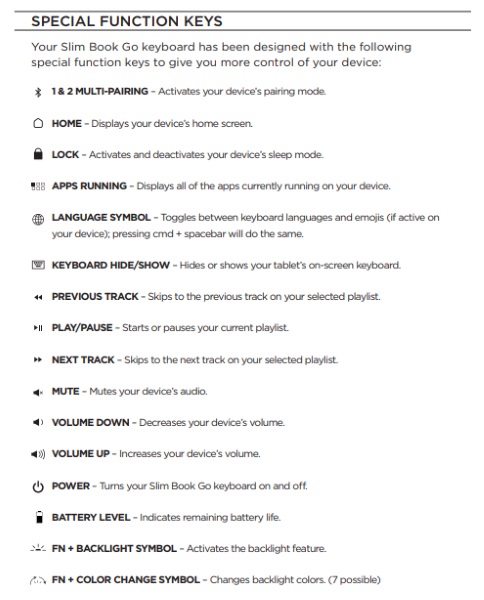
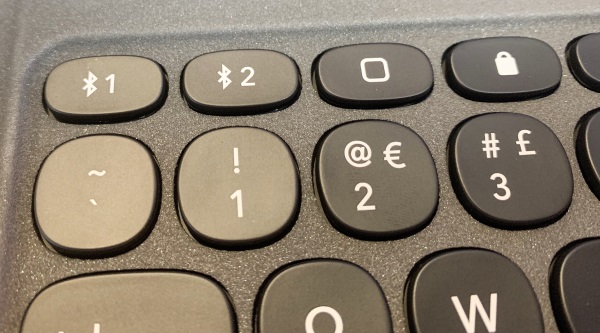
The keyboard charges via its USB-C port and once charged, you are ready to go. Press the #1 Bluetooth key and the case immediately shows up in the Bluetooth device list on the tablet.

The keys offer just enough resistance to provide a very nice typing experience and other than a small delay if the keyboard has not been used for a while, it is very responsive.

The keyboard is backlit and offers the choice of 7 different colors of lighting. There is also the ability to use the function and backlight key to change the level of brightness of the LEDs.


On the bottom front of the tablet half of the case, there is a magnetic cutout for the pencil which matches a similar cutout in the keyboard portion of the case to provide a perfect enclosure when the case and keyboard are folded together in the closed position.


The case has the perfectly placed cutout for the Apple Pencil which allows you to connect and charge the pencil.

What I like

  • Build quality
  • Keyboard functionality
  • Apple Pencil accommodation

What can be improved

    • There does not seem to be an auto shutoff for the keyboard. I forget to press the power key so it stays on and the battery drains in a few days
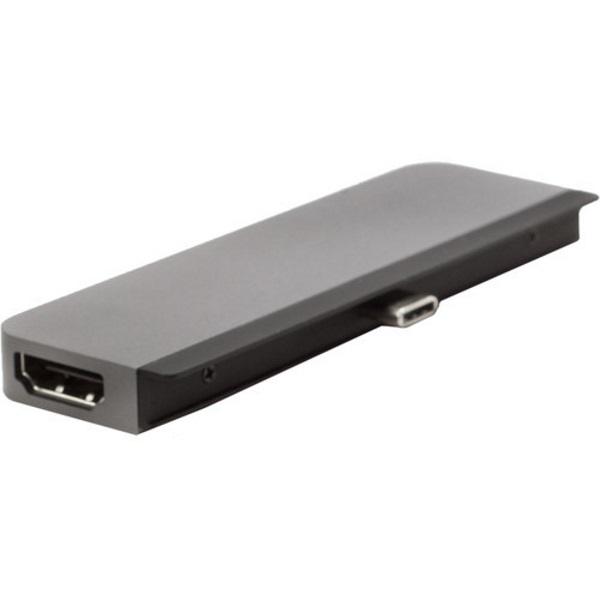
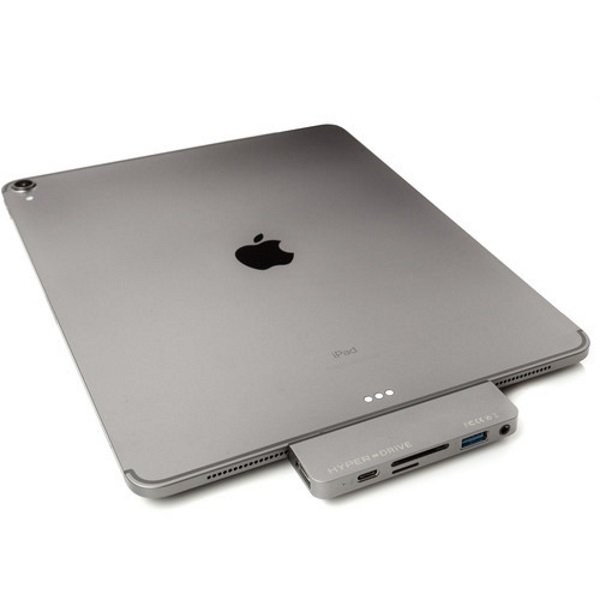
    • The depth of the cutout in the case around the iPad’s USB-C port will not likely accommodate some of the currently available USB-C hubs that have a built-in USB-C jack. (See pics below)


Final thoughts

After trying a few cases for my 2018 12.9″ iPad Pro, I can easily say that I think that I have found the winning case for me. I like the feel and build quality of this case, and the stiff hinged kickstand that allows me to place the iPad on my desktop at any angle. The tablet is always secure and even with the keyboard attached the package is slim enough to easily fit in my backpack along with my laptop. The keyboard functionality is great and the dual Bluetooth connectivity comes in handy. I also love the fact that the keyboard is backlit. As long as the hinged kickstand does not become loose from constant movement, this case is good to go. I give Zagg two thumbs up and well done!!

Price: $129.99
Where to buy: The Zagg website and Amazon
Source: The sample for this review was provided by Zagg

Filed in categories: Reviews

Tagged:

Zagg Slim Book Go iPad Pro 12.9in keyboard case review originally appeared on The Gadgeteer on April 19, 2019 at 11:00 am.

Note: If you are subscribed to this feed through FeedBurner, please switch to our native feed URL http://the-gadgeteer.com/feed/ in order to ensure continuous delivery.

Black Eye Pro Kit G4 smartphone lens kit review

REVIEW – Cell phone cameras have come a long way since the days of the first smartphone. We went from needing a brightly lit area years ago to optical zoom in today’s phones. The technology of having interchangeable lenses built into the phone hasn’t quite arrived yet, but in the meantime, there are portable options out there. One of them is the Black Eye Pro Kit G4 which has a fish-eye, wide-angle, and 2.5x telephoto zoom lenses.

What is it?

The Black Eye Pro Kit G4 is a set of lenses that allows a smartphone to have more photographic versatility than the standard on-board camera.
What’s in the box?

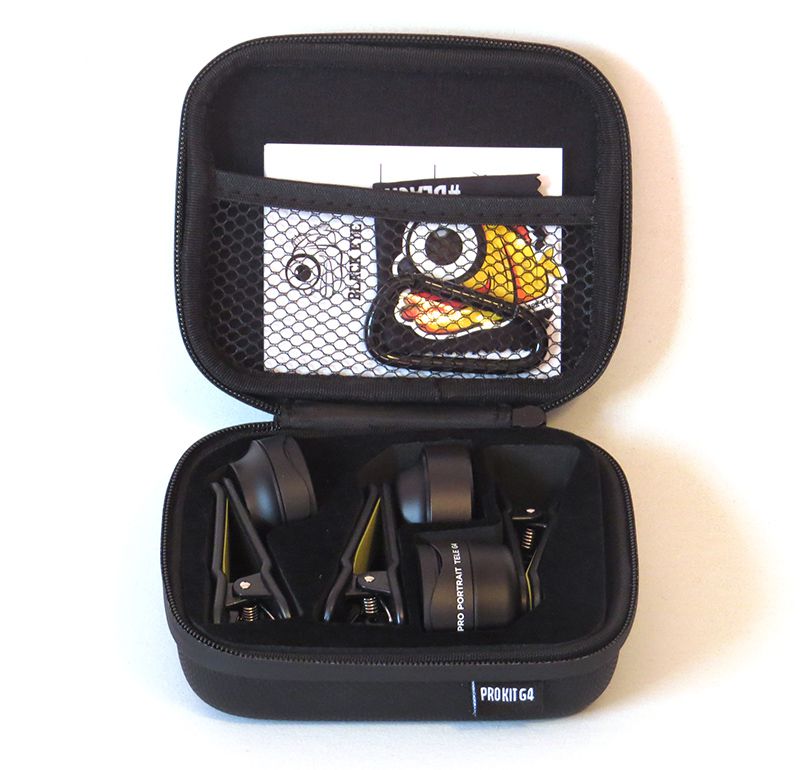
In the box you’ll find the three lenses with lens caps, a D ring, sticker, lens cleaning cloth, and a nice, sturdy case.

Design and features

I own a Canon Powershot SX50 HS camera, and the last time I used it for photography outside of review items was to take pictures of the moon. Before that, it was at Yellowstone, two years ago. Nowadays, I simply use my phone for my photographs since the quality is so good.
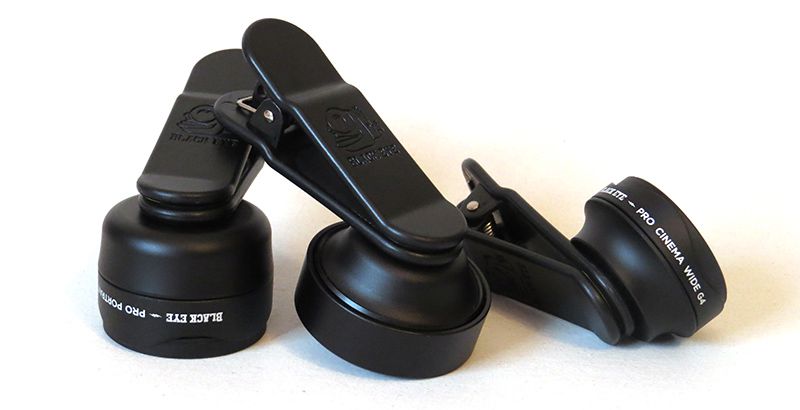
The Pro Kit G4 design allows for easy access and quick transitions between lenses. What impressed me was that it worked with both the regular and 2x zoom on the iPhone X.
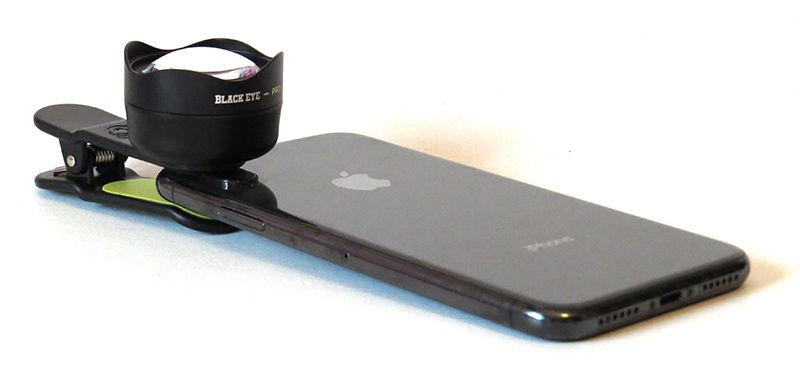
I do admit, getting the lenses positioned perfectly on my phone was a challenge, and it took many trials to get them on perfectly. They worked with the case on my phone, but it was much easier to position the lenses correctly if I removed the case. That can be a bother if you are trying to be quick about it and choose to use a case on your phone.

First up on the list of three lenses, we have the Pro Fish-eye G4. I usually don’t bother with fish-eye lenses unless I want to take an amusing picture, but I had to admit the picture of the cherry tree blossoms in my front yard turned out very well. This one was probably the easiest to fit on the phone, simply because the outer section of the picture is slightly distorted due to the fish-eye effect anyway.

As you can see, the fish-eye effect isn’t too jarring. I actually prefer it this way. It made it so those blossoms and the daffodil growing alone in my yard look stylish in picture form. Of course, it also works well for the silly cat pictures that I associate fish-eye lenses with. The fish-eye was overall, my second favorite lens.

Secondly, we have the Pro Portrait Tele G4, which provides 2.5x zoom. I was worried that this would not work with the iPhone X’s dual cameras, but it worked just fine for my zoom, effectively doubling the zoom on it.

I tested it out in my backyard, with all three pictures taken on the same spot. The top picture is 1x zoom (standard) on my phone, bottom left picture is standard zoom on the phone with the tele lens, and the bottom right is the phone’s 2x zoom with the tele lens. This was an accurate representation of the differences you get with each zoom level.

Of course, I also tested it on my cat to see the up close zoom, and it was about on par with my regular iPhone camera when up close. I definitely see it used more for outdoorsy type pictures, or if you want to get fancy, outdoor portraits.

Lastly, we have the Pro Cinema Wide G4. Out of the three lenses, this one was by far my favorite. When I first tested it out in my backyard, it was a little underwhelming. I just couldn’t get a good picture for some reason.

However, when I went to go to the pedestrian bridge nearby, I was able to really see the difference between the wide angle and regular camera lens. The ivy covered tree on the right side was my guiding point when looking at the difference between the two pictures. Both pictures were taken from the exact same spot on the bridge.

I also took a picture of a little display in the front yard of a neighbors house. This is very close to the sidewalk, and I used the wide angle lens to get it all within view.

What I like

  • Easy to use once you get the hang of it
  • Wide angle lens allows for a good picture without sacrificing quality
  • Carrying case is protective

What needs to be improved

  • Expensive

Final thoughts

Overall, I thought the Black Eye Pro Kit G4 was an interesting combination, but I feel the only lens I would use on a regular basis is the wide angle lens. That being said, if someone is wanting all three types of lenses, it is a solid set to choose from.

Price: $249.90
Where to buy: Black Eye website
Source: The sample of this product was provided by Black Eye.

Filed in categories: Reviews

Tagged:

Black Eye Pro Kit G4 smartphone lens kit review originally appeared on The Gadgeteer on April 19, 2019 at 10:00 am.

Note: If you are subscribed to this feed through FeedBurner, please switch to our native feed URL http://the-gadgeteer.com/feed/ in order to ensure continuous delivery.

Bionik TV LYNX Nintendo Switch portable connect and charge kit review

REVIEW – One of the most frustrating things about the Nintendo Switch is the need to carry a dock around if you want to both charge the switch and use an external display. The Bionik Lynx for the Nintendo Switch is a compact solution to this problem.

What is it?

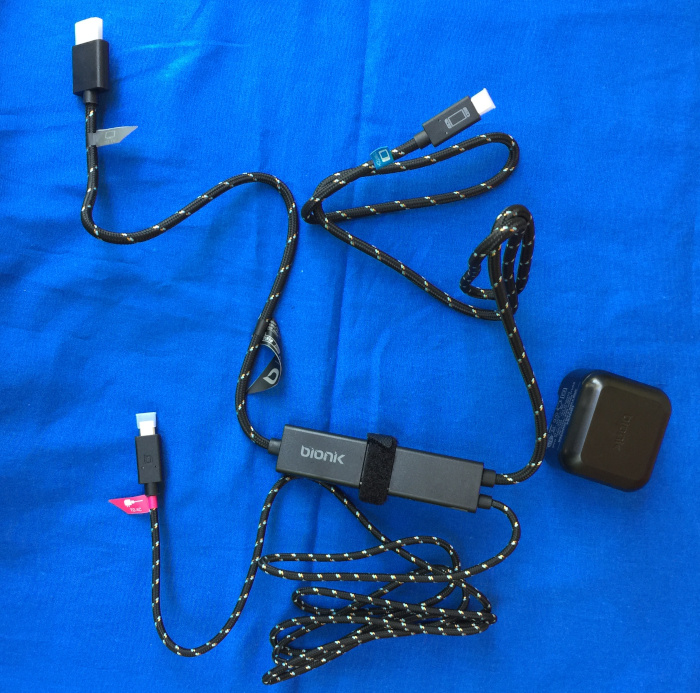
The Bionik Lynx for the Nintendo Switch (hereafter referred to as simply Lynx), is a compact solution for providing power to a Nintendo Switch and simultaneously allowing the Switch to be connected to an external display using an HDMI port.

What’s in the box?

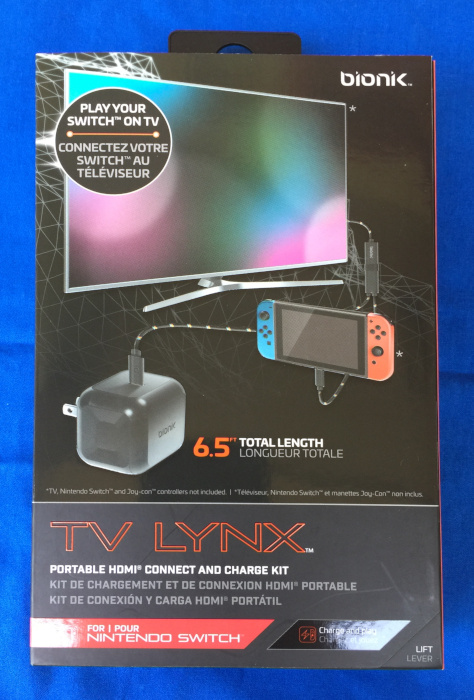
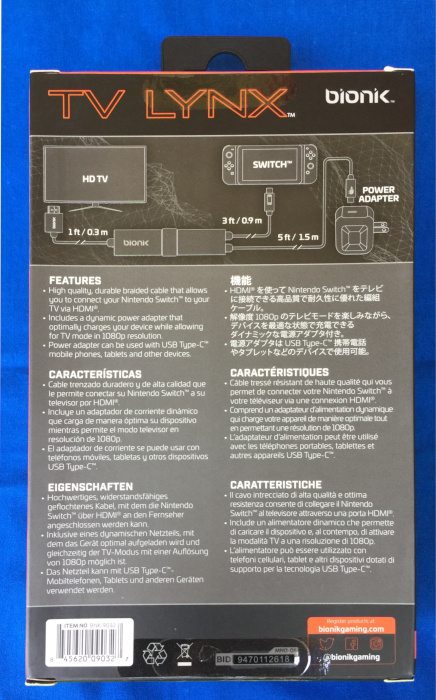
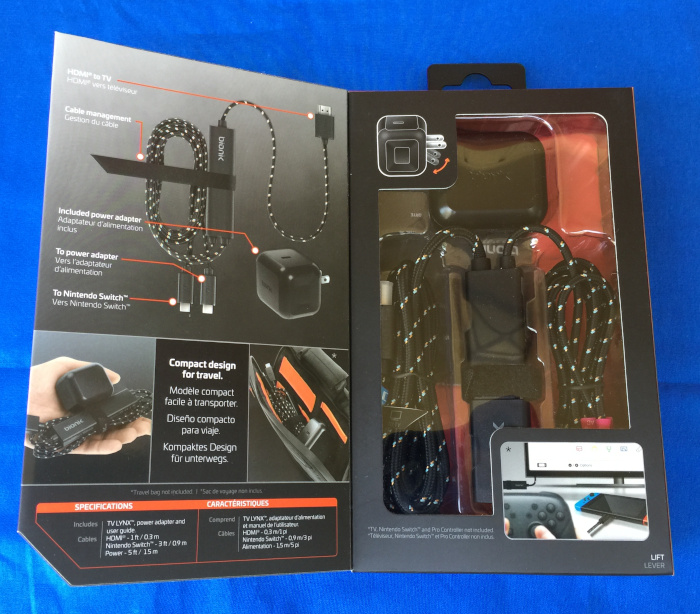
The Lynx is packaged in a nice full-color box with a front flap which allows you to see the kit in all its glory before you purchase or open the package.

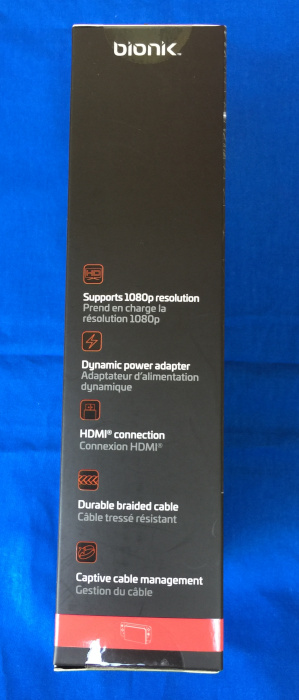
The package describes the basic features of the Lynx in 6 languages with English and French being the featured languages.

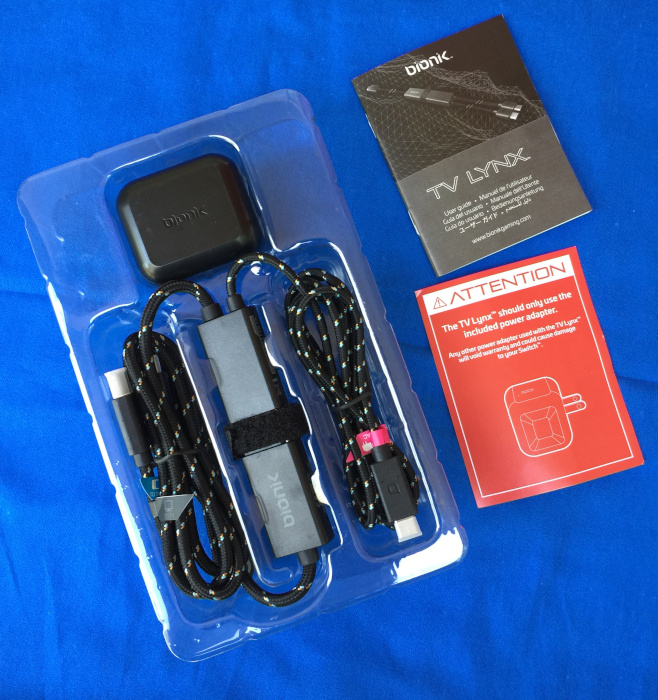
Inside the package are

  • Lynx unit with an attached branded hook-and-loop wire wrap
  • Power brick with USB-C port
  • Quick-start instruction manual (multi-language)
  • Flyer with adamant warning to only use the enclosed power adapter with the unit

Hardware specs

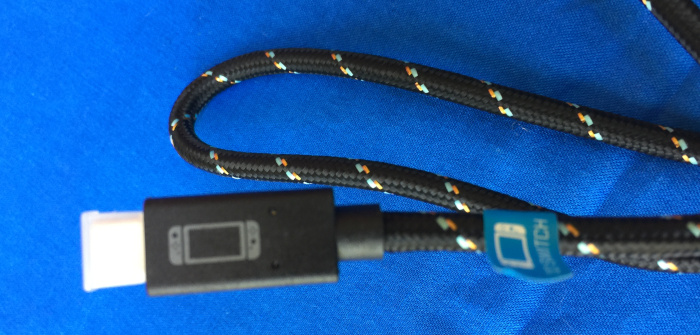
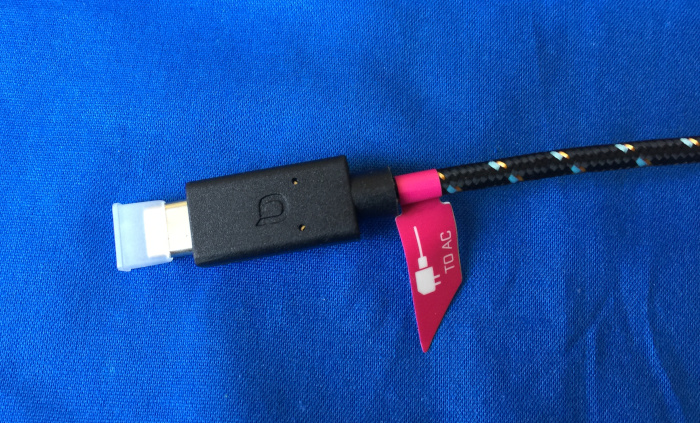
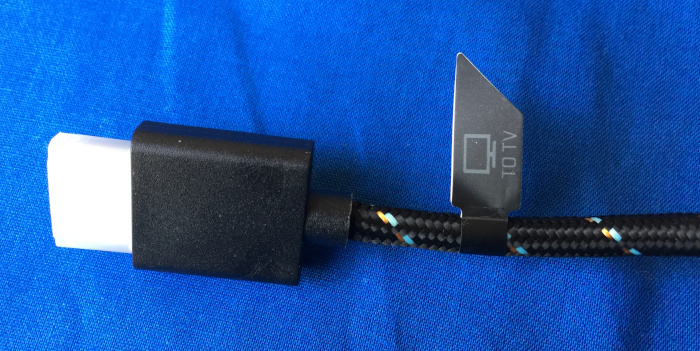
The Lynx unit itself is 9.9 cm long, 2.4 cm wide, and 1.2 cm thick. The Lynx has three attached cables that run to the power adapter (150 cm with a USB-C plug), a Switch (90 cm with a USB-C plug), and an HDMI display (30 cm with a full-sized HDMI plug). When bundled up the Lynx unit and cables is approximately 13 cm long and 5 cm in diameter and weighs 110.5 grams. The power brick measures 5.2 cm by 4.3 cm by 4.5 cm and weighs in at 70 grams.

Design and features

The Lynx is an elegant and functional device which only performs one set of functions, and it performs them very well.

Setup

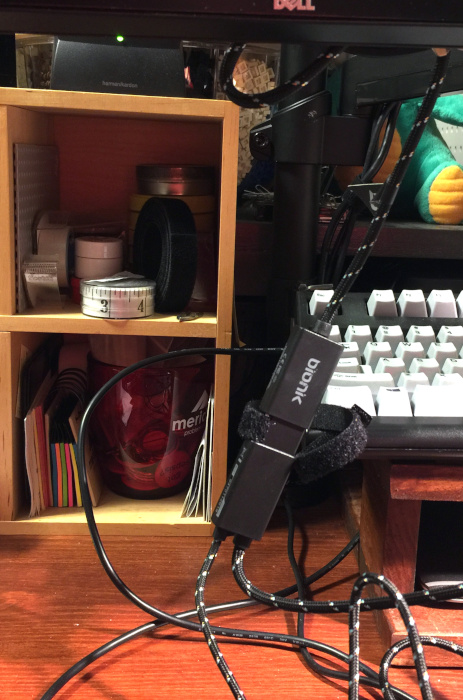
Setting up the Lynx involved simply removing the protective shipping caps from the various connectors, plugging the correct connectors into the correct places following the labeled flags / legends printed on the plugs, plugging the power adapter into an outlet, and turning on the attached display and Switch. I would have liked to see the plugs either embossed with the function or have the plug moldings color coded as I worry about the wire labels coming loose and the printed legends being worn away. I will be addressing this issue on my unit with two different colors of paint to fill in the embossed Bionik logo on the plugs and matching colored wire ties on the cables.

Performance

I initially tested my Lynx by hooking it up to the HDMI port on my monitor and hoping that the scaling algorithms in my monitor would render a decent picture. The Lynx outputs a 1080p signal over the HDMI port, but my monitor’s native resolution is WQHD/QHD/2K (2560 x 1440). When I booted everything up, the output looked as good as any other 1080p signal displayed on my monitor. A minor gripe is that the Lynx was hanging down from the bottom of my monitor rather than resting on my desk (yes, I do have my monitor set a bit higher than many others). This is due to the short video cable on the Lynx.

I panicked a bit when I couldn’t get the controls to respond. My younger son helpfully told me that I needed to undock the controllers from the Switch, because they won’t work with an external display when they are still attached. You can see how often I play video games on a Switch. I was able to load and run Super Smash Brothers Ultimate and play with no more trouble than the last time I tried. My younger son “helpfully” offered suggestions on my game play, but I was mostly able to ignore him. The only performance issue that we noted was that the HDMI signal coming out the Lynx runs audio at full volume and there is no way to adjust the volume. I have an inexpensive set of speakers that do not have an onboard volume control attached to my monitor, so game play was very loud.

We next moved to my younger son’s room and performed a second test. Since we were hooking the Lynx up to a regular TV, we could adjust the volume, but we had to rig a mounting solution because his television is mounted five feet up from the floor and the location of the nearest power outlet was just outside the maximum length of the cables. A piece of 3M Command Adhesive solved that problem. He played for over an hour, and would have played longer, but his older brother came in and demanded that his Switch be returned.

My older son has used the Lynx on several outings to friends’ houses for the Switch equivalent of LAN parties, and the Lynx has been a big hit. Again the short HDMI cable proved to be problematic, but the addition of a spare male-to-female HDMI extension cable that his friend’s father happened to have come to the rescue. I will be adding an extension cable to our kit as well.

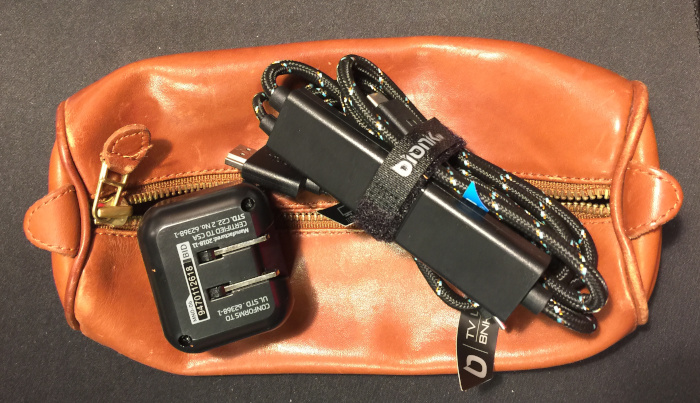
With the addition of an HDMI extension cable, the parts count reaches three, which is where things start to get lost. I think Bionik has made an error in not including a small bag for carrying the Lynx and power adapter. Yes, they could be put into the case with the switch, but the thin cases are already tight on space and the larger carrying cases that are designed to also carry the dock have room for the dock and spare cables and power adapters, so the Lynx is a bit redundant and rattles around in that big space if you choose to use the larger case anyway.

My solution was to pull an old Levenger leather pencil/pen/cable case out of mothballs and put everything in there. Without the HDMI extension cable, it is a bit large for the Lynx and power adapter, but I imagine that the extension cable will take up much of the left over space.

What I like

  • Neat and simple tool
  • Easy to setup and use
  • It just works

What needs to be improved

  • HDMI cable could be lengthened to 50-75 cm
  • Plugs could be better labeled to ensure that the wrong USB-C plug doesn’t end up in the wrong port
  • Needs a carry bag

Final thoughts

The Bionik TV Lynx for the Nintendo Switch is an excellent addition to any Nintendo Switch kit. It solves the problem of powering and simultaneous external display while playing on a Nintendo Switch without having to bring along a dock and its power supply. With a few tweaks, the TV Lynx would be perfect, but don’t let the cable and storage bag issues scare you away. The TV Lynx has become a permanent part of our Nintendo Switch kit.

Price: $59.99
Where to buy: Bionik’s e-commerce site or Amazon
Source: The sample of this product was provided by Bionik.

Filed in categories: Reviews

Tagged:

Bionik TV LYNX Nintendo Switch portable connect and charge kit review originally appeared on The Gadgeteer on April 19, 2019 at 9:04 am.

Note: If you are subscribed to this feed through FeedBurner, please switch to our native feed URL http://the-gadgeteer.com/feed/ in order to ensure continuous delivery.
“USB Killer” Used by Student to Destroy More than $58K of Computers at College

The reasons for nefarious tech behavior is never clear, but to steal information for gain is one thing, but destroy computers and devices for no reason often catches people off guard. A former student used a “USB Killer” to destroy nearly seventy computers in various computer labs at a New York college. Even more inexplicably, he filmed his entire process of destruction. USB Killer Used to Destroy College Computers The name “USB Killer” itself sounds nefarious. It’s obvious what it does, and what its sole purpose is. It’s a cheap USB drive that when plugged into a computer will fry it by rapidly drawing power… Read more

Posted by / April 19, 2019 / Posted in News