Give your dog a little more room while riding in the backseat of your car

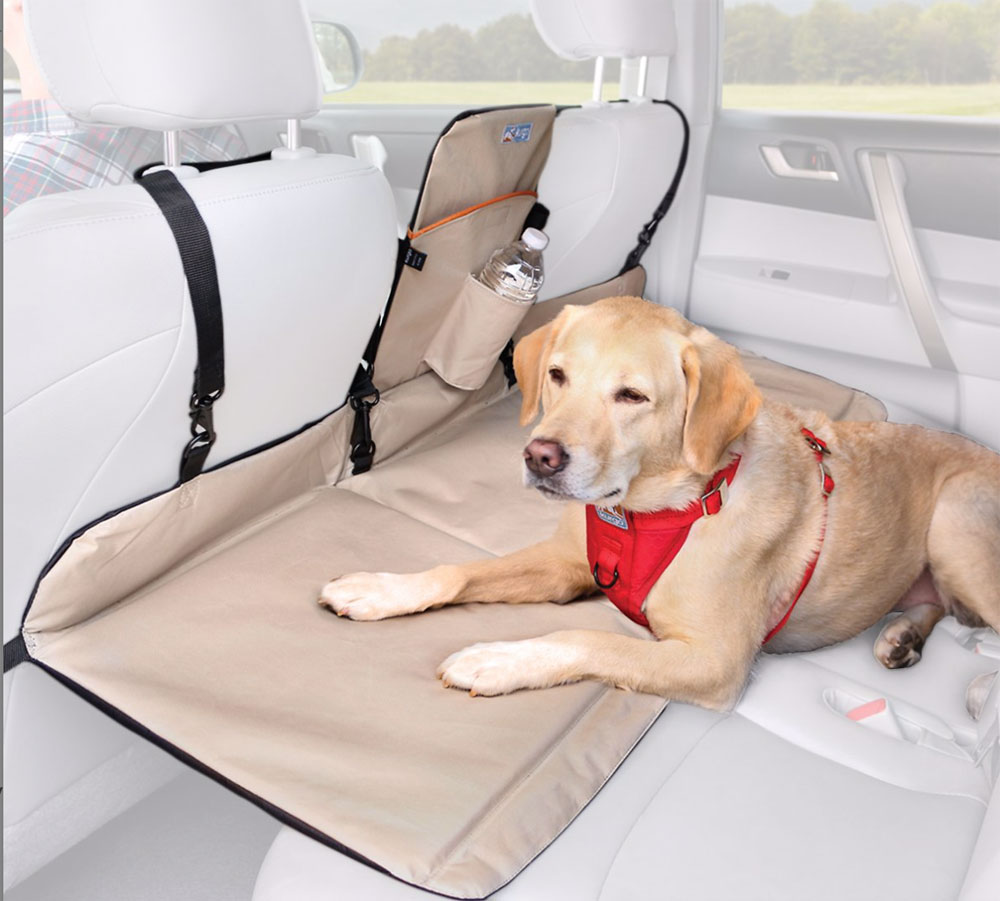
NEWS – Little dogs always have plenty of room to spread out in the car, but big dogs may need a little more space to be comfortable.  The Kurgo Backseat Bridge covers the gap between the front seats and the backseat, extending the space for your dog to sit or lay.  Covering the gap also prevents your dog – big or small – from falling to the floor or just getting down there and getting up to no good.

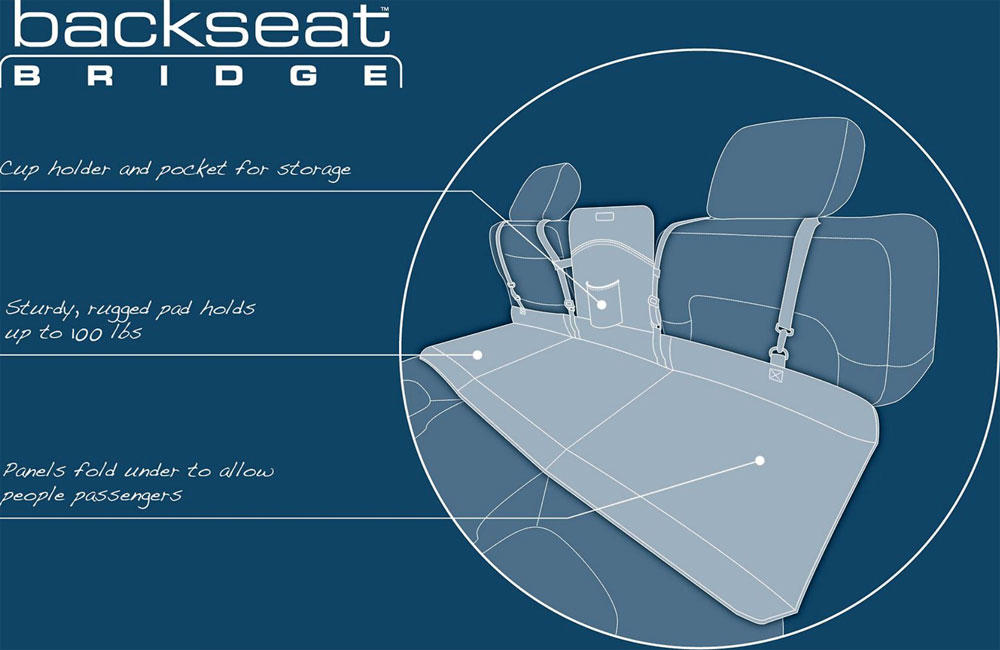
The Kurgo bridge is sturdy enough to support 100 pounds.  It’s recommended for spaces not greater than 13″ from back of seat to seat edge.  There’s a partition to keep Fido from climbing onto the center console and getting into the front seats.  It’s made of 600d polyester with TPE backing and is completely waterproof.  Black on one side and sand on the other, the bridge can be flipped to match your car’s interior.  The Kurgo Backseat Bridge is $58.49 from the Chewy website.

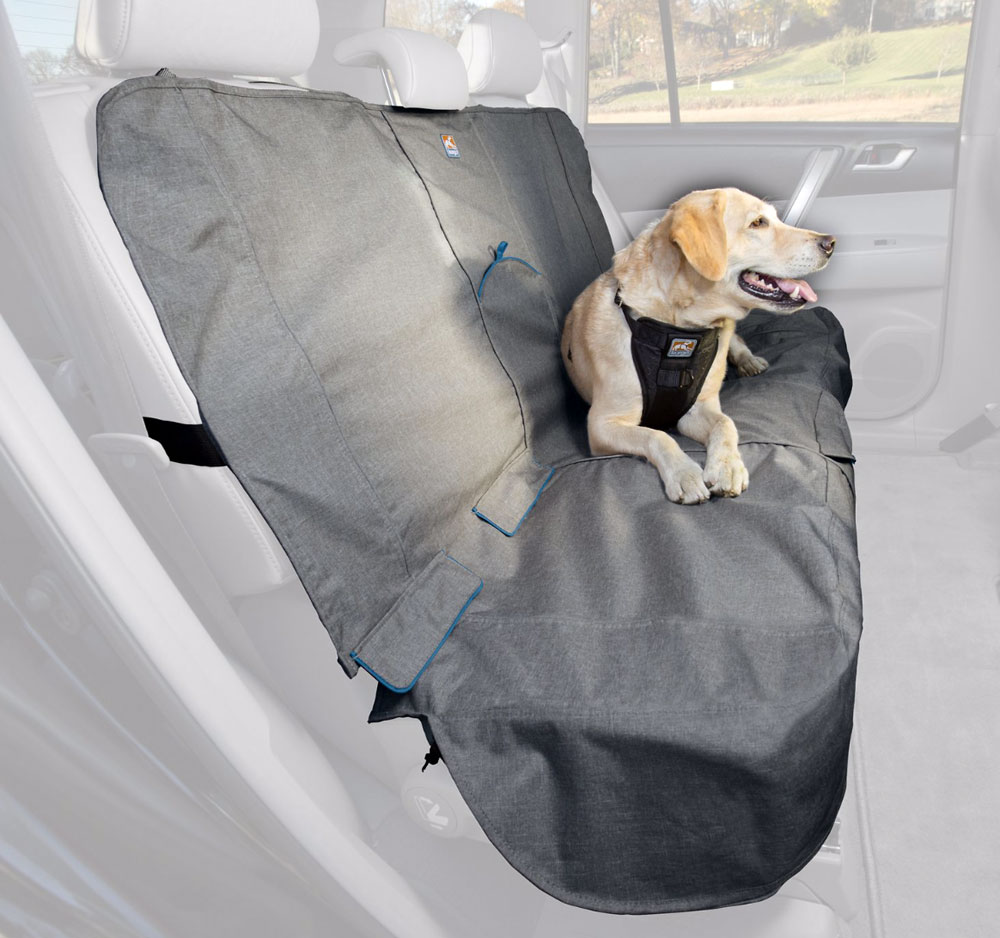
To fully protect the backseat of your car, you could add a Kurgo Bench Seat Cover.  This waterproof and stain-resistant cover protects upholstery from getting muddy, wet, scratched, or torn.  The Kurgo Bench Seat Cover is $49.49, also from Chewy.

Filed in categories: News

Tagged:

Give your dog a little more room while riding in the backseat of your car originally appeared on The Gadgeteer on October 21, 2018 at 11:24 am.

Note: If you are subscribed to this feed through FeedBurner, please switch to our native feed URL http://the-gadgeteer.com/feed/ in order to ensure continuous delivery.

Saddleback Leather Simple iPad case review

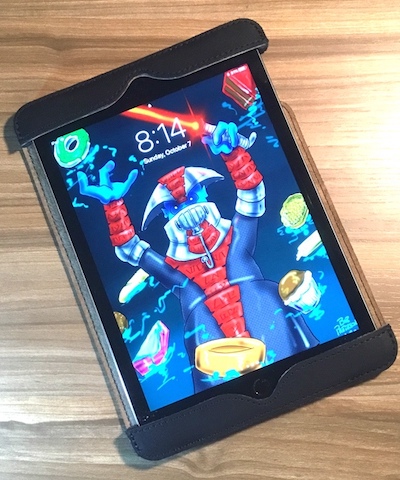
REVIEW – Many moons ago I owned an original Saddleback Leather iPad case. It was a beautiful, beefy piece of leather. The new Simple iPad Case is a completely different animal. Simple and streamlined, it’s made for portability and optimal day-to-day usability. Fear not, however: you still get that gorgeous full-grain leather. To the review!

What is it?

It’s a leather iPad case for your iPad, iPad Air, or iPad Air 2.

Hardware specs

  • 10″ by 7″ by 0.5″
  • 0.55 pounds
  • Full-grain leather with pigskin suede lining

Design and features

The Saddleback Leather “Simple” designs offer lighter products with simplified designs as an alternative to their beefier, full-featured gear. The new Simple iPad Case is great example of this. You get all the benefits and style associated with quality leather, in a streamlined and extremely functional package.

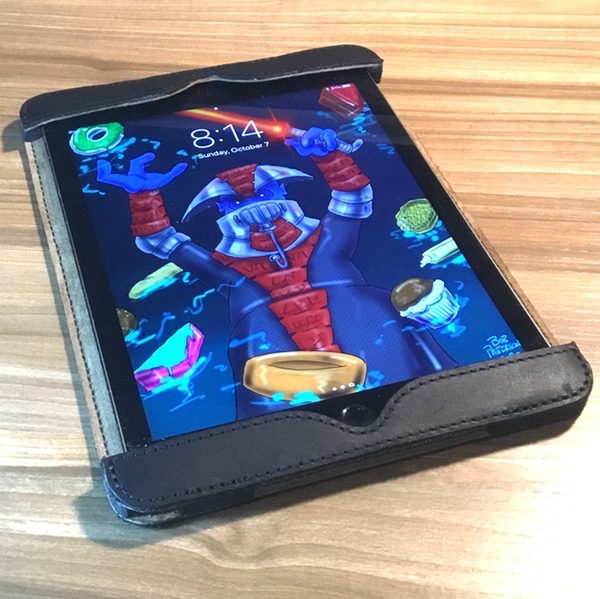
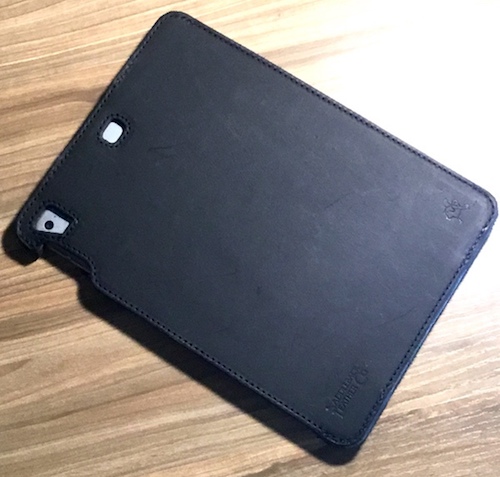
While it is a simple shell-style design, Saddleback fans have no need to fret about the quality and construction on this item. a 7″ by 10″ piece of full-grain leather forms the back panel, while two 1” by 7” strips of leather on the front face form a pocket into which you slip your iPad.

My tester is the newer black leather, backed by pigskin suede to protect the iPad. It’s a beautiful, thick leather that measures roughly 1/8″ including the suede backing. It is thinner than some of the older leather pieces I’ve had from Saddleback, but I think it’s just as tough. It’s also got a great pliant feel. I like it quite a bit.

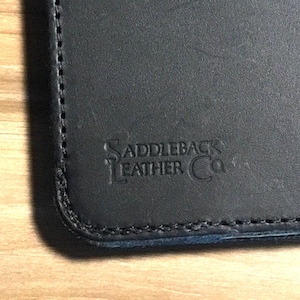
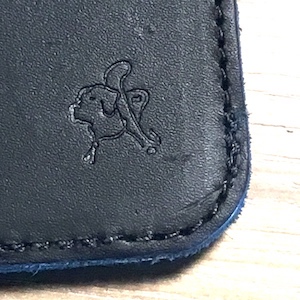
You’ll also see some subtle embossed logo work on the back face in the Saddleback logo and the tribute to Blue, founder Dave Munson’s dog. They’re nice touches that are tastefully handled, adding some character to the piece.

Black has always been my favorite color in Saddleback products, and they do a quality job with the dye work here. The leather is dyed through the whole piece, so scratches don’t pull up an underlying color. I haven’t seen any dye rub-off on clothes or other gear. It’s marvelous and speaks to my artistic side.

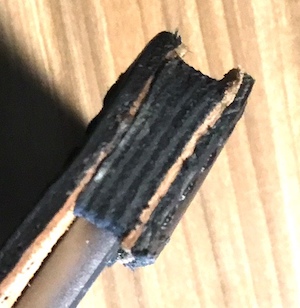
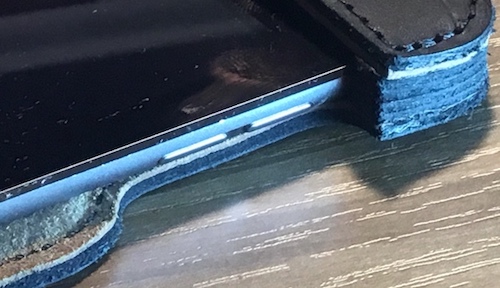
Saddleback Leather deserves a lot of credit here for their commitment to leather as a medium. There are three materials used in the build of this case: leather, pigskin suede, and marine-grade thread to keep it all together. That’s it. Even the spacers/bumpers between the layers are made wholly from leather dyed to match the case:

It would be easier (and probably cheaper) to solve design problems in a case like this with additions like plastic tabs, foam padding, or elastic webbing. Not that those solutions are inherently bad, but I appreciate that Saddleback doesn’t go that route. It’s a truly unique leather-focused design solution that’s *just* a bit more special as a result.

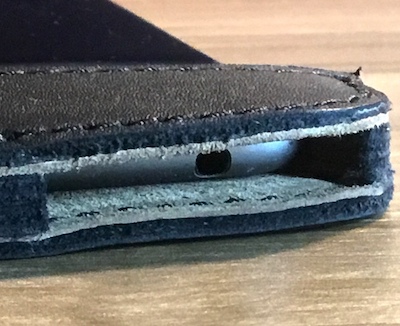
This case is designed for the 9.7″ iPads, specifically the 2017 iPad and multiple 2018 models (the iPad 9.7, Air, Air 2, and 9.7 Pro). You’ll find an assortment of cuts to accommodate the whole range of speakers, ports, and buttons on these models. As we walk through the slots, note that mine is an iPad Air 2. Here’s the audio-in port and sleep/wake button port. It looks tight, but the leather is flexible enough to get your fingers in there for obstruction-free operation:

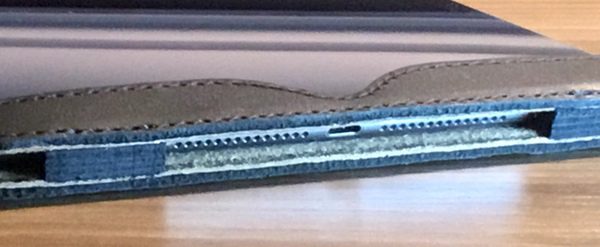
The same goes for the bottom ports for the lightning cable and speakers:

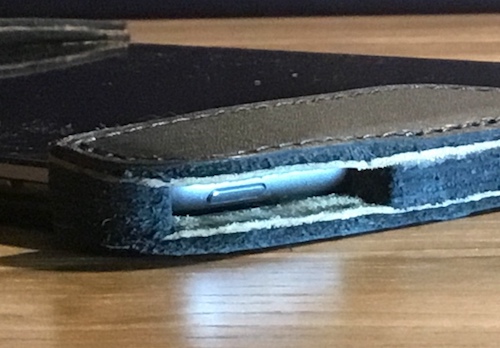
The right-panel rocker buttons  have an additional slot cutout for easy access:

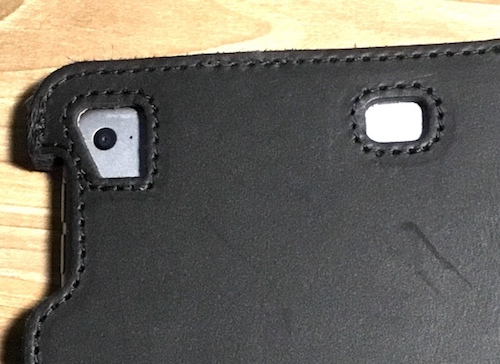
You’ll also find two cutouts for the rear camera to accommodate multiple model iterations:

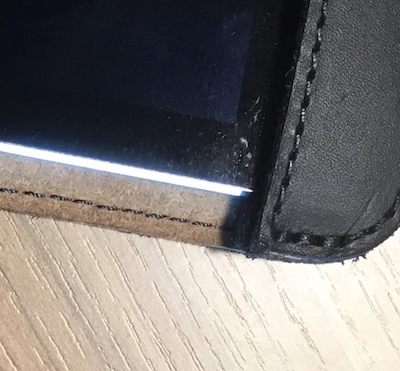
When I first received the Simple iPad Case I was concerned by the fact that the front face and sides are completely exposed. After kicking it around a bit, however, I’m becoming more and more impressed with the design. There’s 1/4” of extra leather around all edges, so that thick leather absorbs side impacts to protect your tablet. It absolutely brings more protection than silicone shells like the Apple iPad cover, and only adds 8 ounces of weight to your kit if you’re including this in your daily carry.

Overall usability is excellent. There’s front flap or cover to mess with here. The entire screen edge-to-edge is accessible, with generous slots cut for the home button and front camera. Everything is easy to get to, and you don’t find yourself fumbling to get to the ports. It’s also wonderfully easy to handle, working perfectly with the iPad’s form factor. Nothing interferes with regular operation, and it feels solid in your hands. It slips easily in and out of your bag, with no protrusions or extra bits that could get caught on zippers. If you like your iPad covers lean & mean, this cover gets you there with the added protection and style of excellent leather.

The simple design does lack some capabilities found in more feature-rich cases. There’s no front cover for additional protection. It’s not compatible with the Apple keyboard. There’s also no integrated stand. If these are capabilities you are looking for, you’ll need to look elsewhere. If you’re looking for a great leather case that works well with the iPad’s natural form factor, however, the Simple iPad Case is worth putting on your shopping list.

What I like

  • Excellent leather quality and construction
  • Streamlined form that is easy to handle without adding significant bulk
  • Well-designed access to all the ports, controls, and speakers

What needs to be improved

  • No inherent flaws that I see

Final thoughts

If you’re looking for a well-built, straightforward iPad case with great looks, the Saddleback Leather Simple iPad Case is a great choice. The leather is fantastic, usability is excellent, and the simple form factor makes for easy handling and day-to-day use. You’ll also get Saddleback Leather’s famous 100-year warranty. This one is now in my EDC lineup, and I expect it to stay there for quite some time. Maybe not 100 years. We’ll see.

Price: $59.00
Where to buy: Saddleback
Source: The sample of this product was provided by Saddleback Leather.

Filed in categories: Reviews

Tagged: ,

Saddleback Leather Simple iPad case review originally appeared on The Gadgeteer on October 21, 2018 at 9:42 am.

Note: If you are subscribed to this feed through FeedBurner, please switch to our native feed URL http://the-gadgeteer.com/feed/ in order to ensure continuous delivery.

Oxo’s pour-over cover brewer with tank brews a better cup of coffee

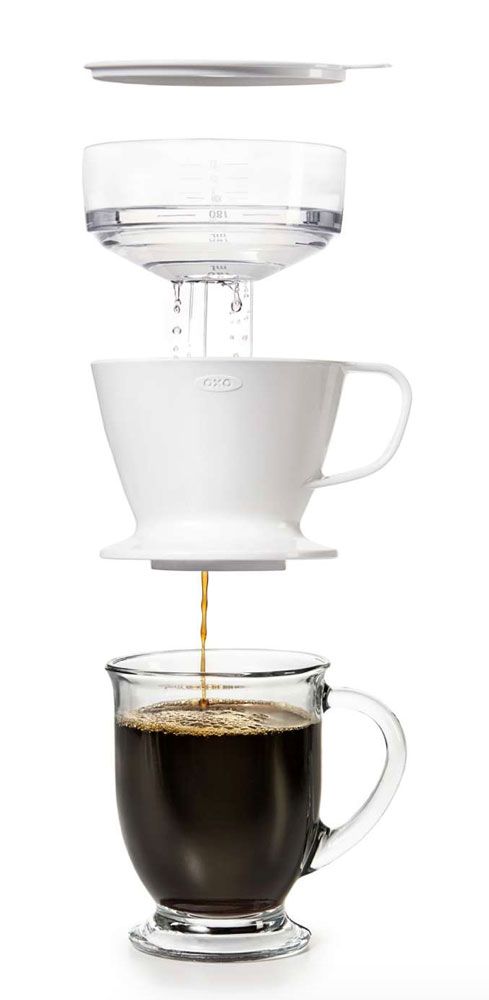
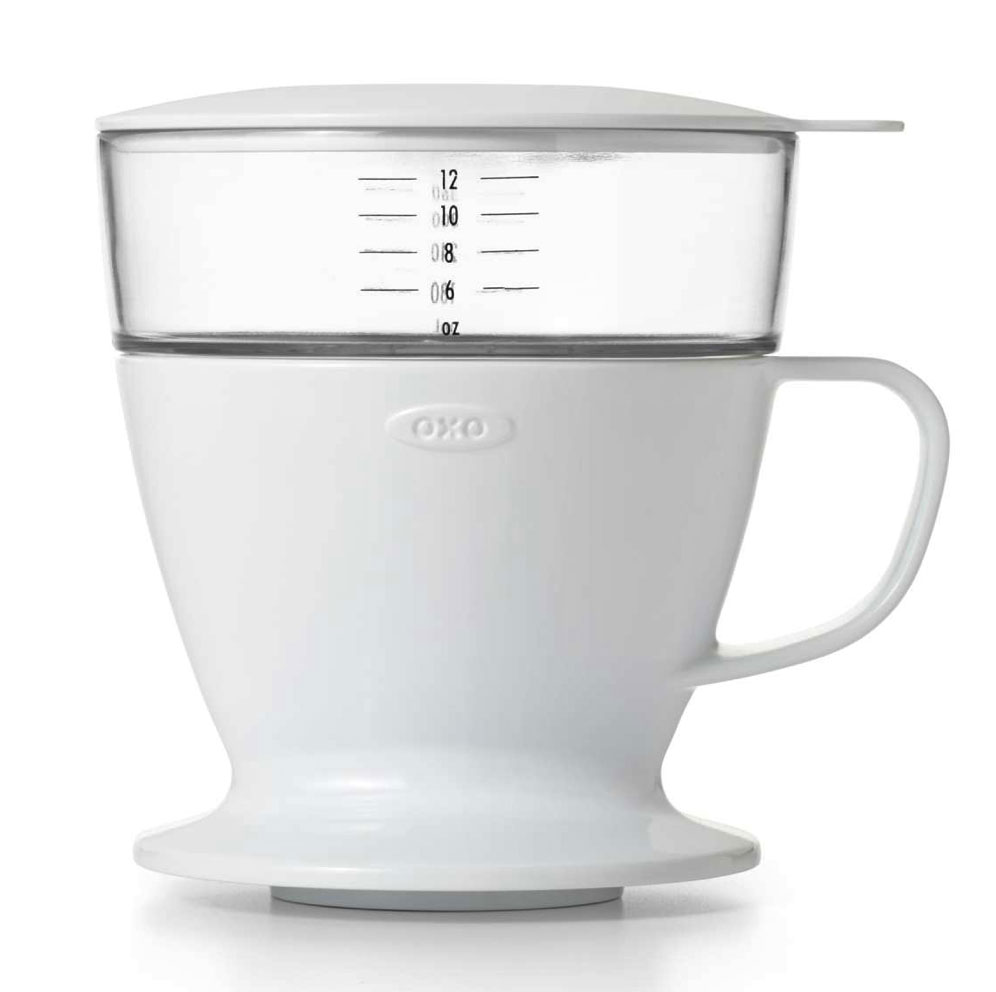
NEWS – I’ve seen these little pour-over brewers before.  They’re basically just a funnel with a filter inside; you dump all the water in and coffee quickly collects in your cup.  Oxo’s Pour-Over Coffee Maker with Water Tank claims to make a better cup of coffee because of the way it distributes water over the coffee grounds.

Oxo says the water tank features a precise hole pattern that automatically distributes hot water evenly over coffee grounds at just the right rate to maximize flavor, and the dripper’s ribbed walls help encourage coffee flow to promote ideal brew time.

The tank is graduated for precise measurement of up to 12 ounces of water, so you won’t have to stand there waiting to pour in more water as it drips through.  The tank’s lid helps retain heat as the coffee brews, then it can be used as a drip tray to hold the dripper after brewing is complete.

The Oxo Pour-Over Coffee Maker with Water Tank is $15.99 on Oxo’s website.

Filed in categories: News

Tagged:

Oxo’s pour-over cover brewer with tank brews a better cup of coffee originally appeared on The Gadgeteer on October 21, 2018 at 8:41 am.

Note: If you are subscribed to this feed through FeedBurner, please switch to our native feed URL http://the-gadgeteer.com/feed/ in order to ensure continuous delivery.

Team EDC updates, Zanco Tiny T1 phone, and more – Weekly roundup

NEWS – It’s time to take a break from your weekend activities and check in with The Gadgeteer. Here’s a list of the articles, reviews, and news from the past week. I’m sure there’s something that you missed, so take a look and enjoy!

Articles

Reviews

News

Filed in categories: News

Tagged:

Team EDC updates, Zanco Tiny T1 phone, and more – Weekly roundup originally appeared on The Gadgeteer on October 20, 2018 at 10:17 pm.

Note: If you are subscribed to this feed through FeedBurner, please switch to our native feed URL http://the-gadgeteer.com/feed/ in order to ensure continuous delivery.

Nitecore NU25 Headlamp review

REVIEW – Sometimes a product is so universal that it’s hard to imagine it needs a manual. Headlamps fall into that category for me. They have batteries, LEDs and buttons to turn them on and off. What more is there to know? In the case of Nitecore and their NU25 headlamp… Quite a bit, and I’m impressed. Join me after the jump to find out more.

What is it?

Nitecore’s NU25 is a best-of-breed headlamp designed specifically for outdoor use. It’s slim, fits well and does what it’s designed to do very well. Read on.

Hardware specs

– Size: ~2.2″ x 1.4″ x 0.9″ including holder
– Weight: ~1 oz
– Lamp: CREE XP-G2 S3 LED
– Max Output: 360 lumens
– White Light: CRI ≥90
– Color Temp: 4500K
– Max Beam Intensity: 1650cd
– Max Beam Distance: 81m
– Battery: 610mAh Li-ion polymer battery
– Charging: Via micro-USB port

What’s in the box?
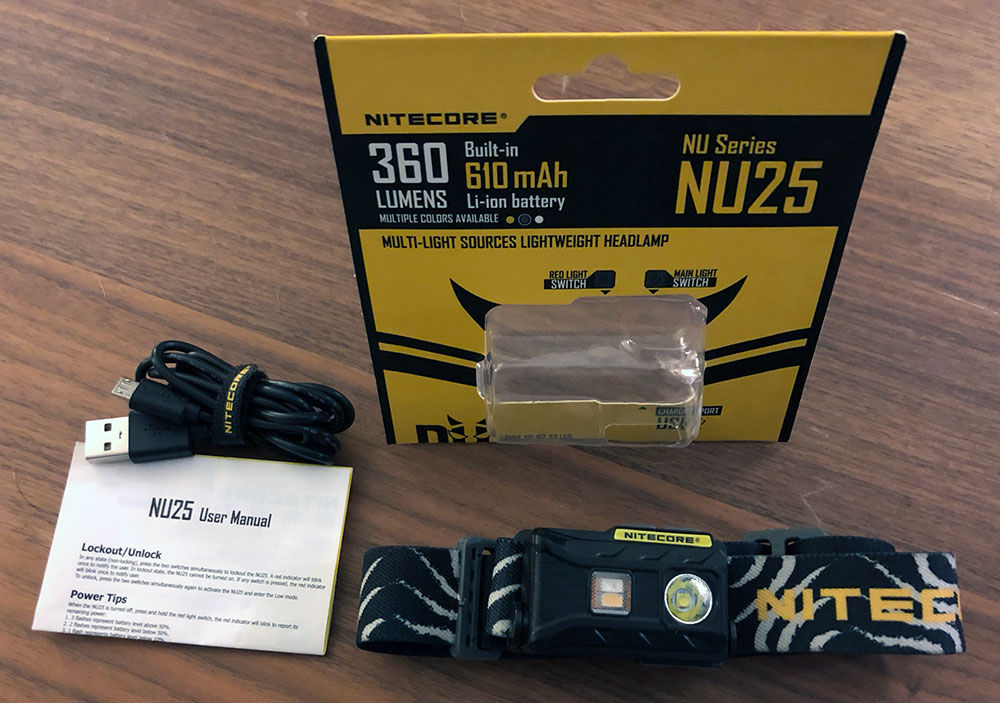
  • Inside the refreshingly simple packaging are the following items.
  • NU25 headlamp
  • Elastic headband
  • Micro-USB charging cable
  • Instruction manual

Design and features

The NU25 is a very slim, rectangular headlamp. The low profile is a welcome feature as is the lightweight.
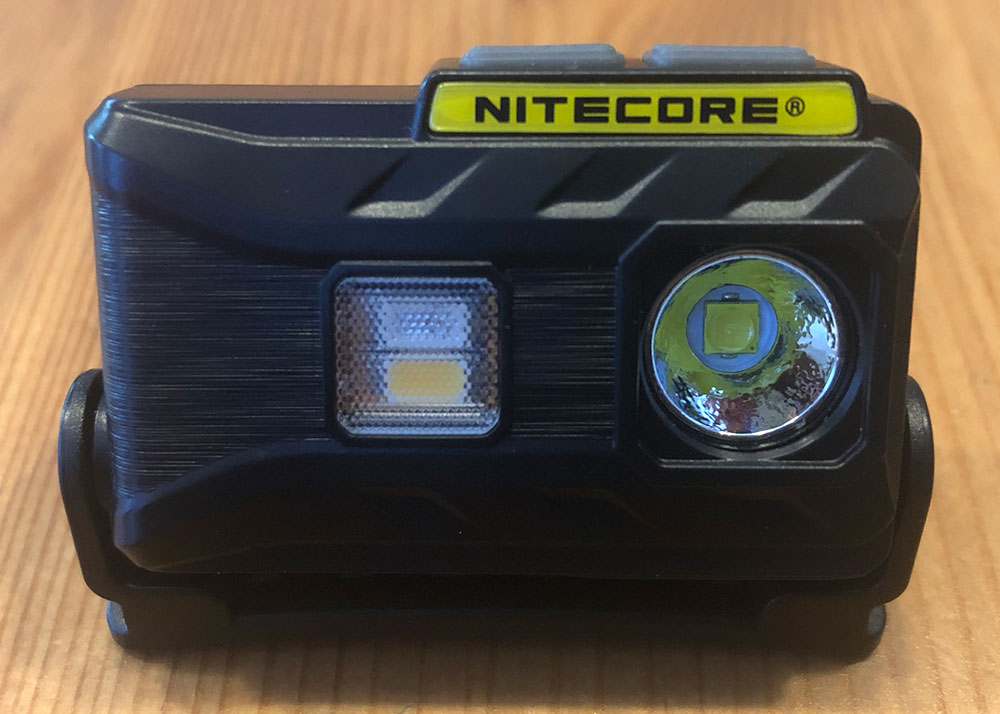
On the front, you can see the main light on the right and the auxiliary light on the left which provides both red and white lights independently.
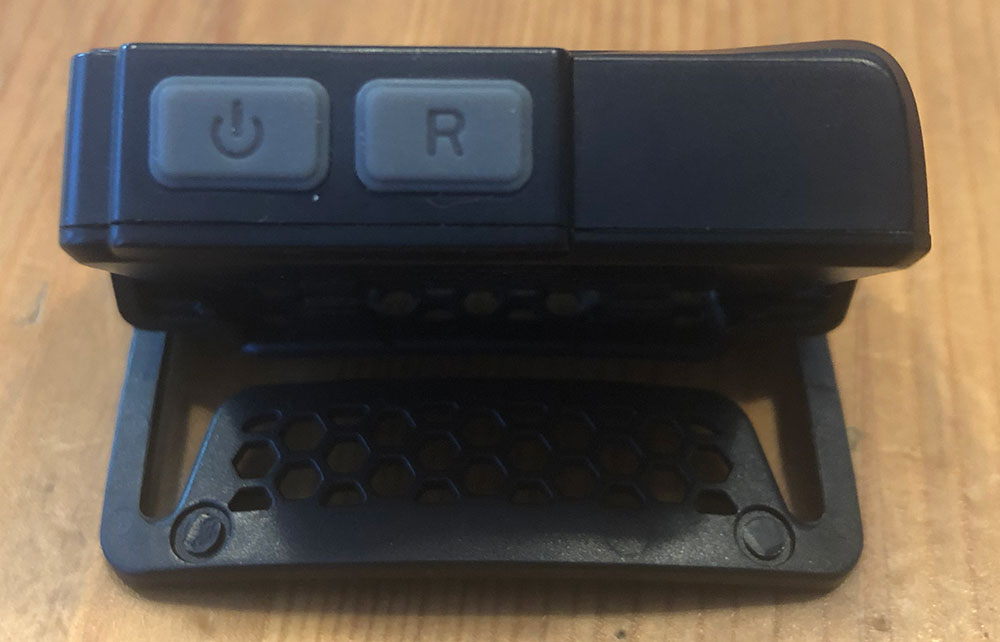
Two buttons. White on the left and red on the right.
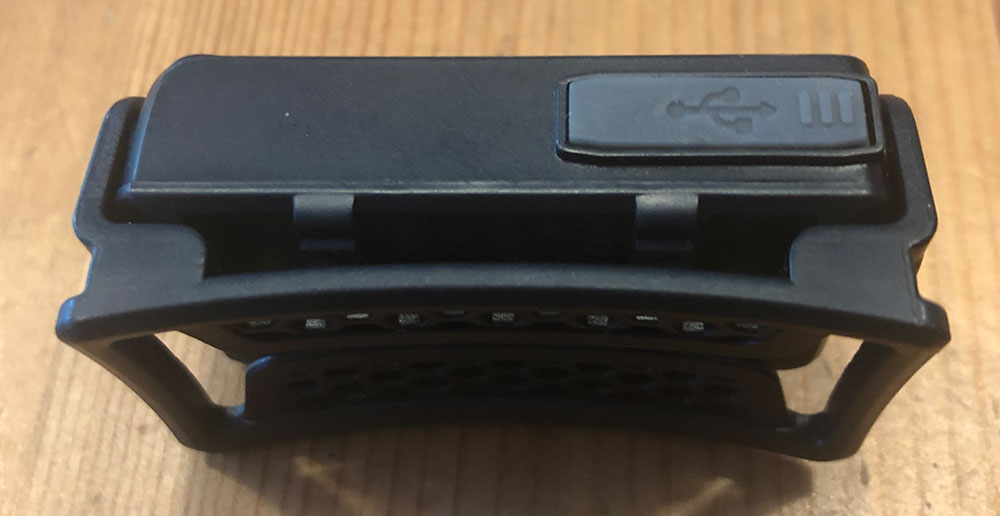
On the bottom is the Micro-USB port underneath the silicon tab
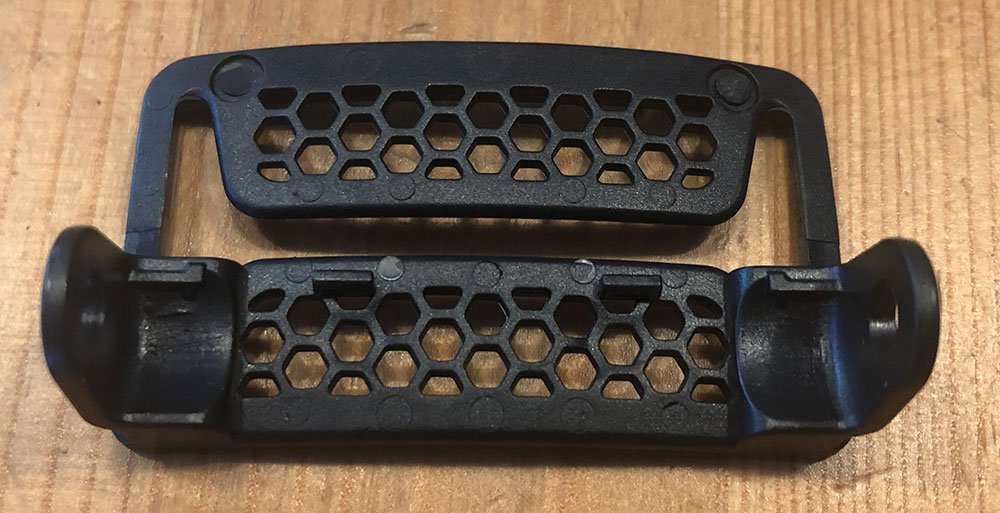
The holder pops off easily (but not too easily) for you to attach the headband.
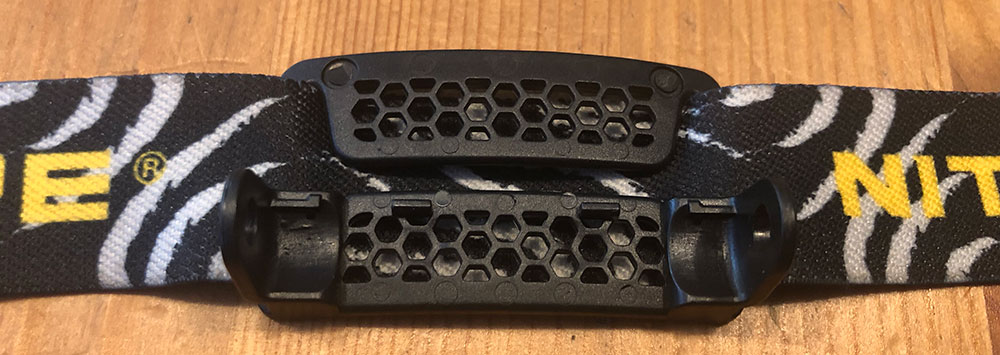
Tuck it behind the lower section and then again under the top like so.

Here’s a look at the different angle indexes within the 60º range of motion that the interface between the holder and the module provides.

Feature list:
– Lightweight design specific to outdoor activities
– Built-in rechargeable battery
– White (4 levels) and Red (2 levels) light options
– 1 SOS flashing mode
– Button lock mode
– IP66 rating against water and dust ingress
– 60º of angle adjustment

Setup

Out of the box, setup is as simple two-step operation.
1. Connect the USB cable to the micro USB charging port to make sure the battery is topped off
2. Slide the headband into the guides of the pivoting holder and adjust to fit

Performance

This review has taken me longer to get to than any other one that I’ve worked on for a simple reason. It works so well that I pretty much forgot that I was testing it. Let me explain a bit more.

Our family includes two dogs. A big sweetheart great pyrenees/shepherd and a very loud beagle. They get wound up pretty quickly on walks and are very vocal with other dogs to the extent that we now do the extended walks at 6am and after 9pm. For the last couple months that means that it’s been really dark when we’re out for our stroll, and headlamps are the solution for us to see and be seen. We’ve got 3 or 4 headlamps that are pretty typical examples of what you might expect. They have a bright LED and take 3 AAA batteries each. The odd number of batteries makes for interesting charging as we like to use rechargeable batteries and a lot of chargers require charging in pairs. But I digress.

The NU25 is… easy to size adjust, plenty bright, very comfortable, lightweight and its battery lasts. As a result, it’s been going on my head every morning and every night and has become such a reliable part of our daily outings that it really slipped my mind that I needed to write a review. The second part of that is that it works so well that there aren’t any negatives that were gnawing at my brain to talk about. And lastly, I finally got around to reading the manual (something I didn’t think I needed to do) and learned about three new features that I didn’t even know it had.

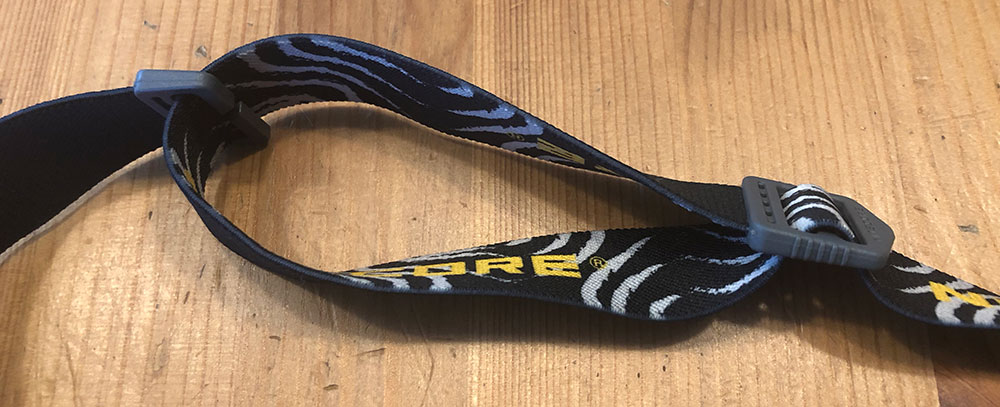
When I first put the NU25 on I noticed that the band was threaded differently than most headbands I’ve used. It’s deceptively simple in that the adjustment slides effortlessly and then stays in place when on your head. This means that when not on your head the setting is likely to change. At first I was a little annoyed, but then I quickly realized how frequently I adjust the tension and it became one of my favorite features. The headband also has a thin strip of silicon printed on the inside of the band which helps to keep it right where you place it without being too tacky.
Next is the buttons. Really easy to press, and know you’ve pressed them. There are two buttons. One for the white light and one for the red. Each cycle through the different levels of each light. For white (off, level 1, level 2, level 3), for red (off, level 1, level 2). A cool intuitive feature you discover while using is that if you are idle on a setting for a bit (I generally use level 2), the next press will now turn it off. It’s a quick learning curve that you adapt to pretty much right away.

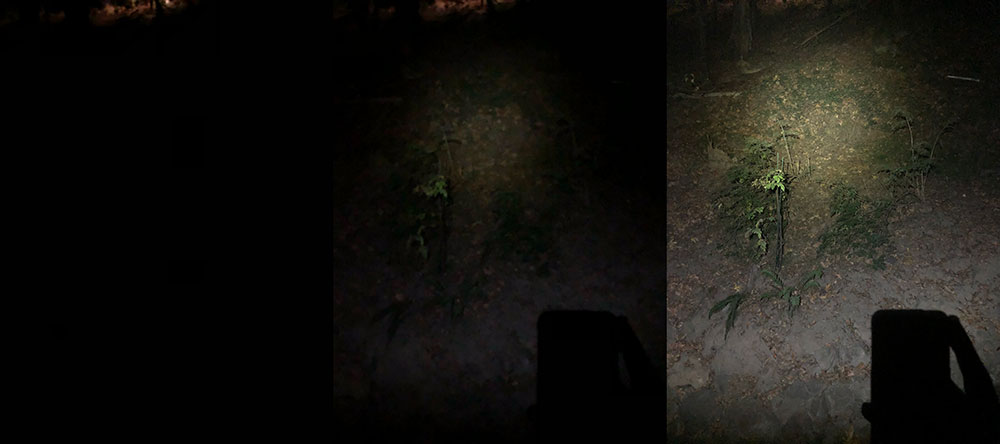
You may have noticed that the features bullets listed 4 levels for the white light. Here’s the first extra I learned reading the manual. A 1 second hold on the white light engages Turbo mode. This is full 360 lumens and will only run for 30 seconds to avoid overheating. The handy chart in the manual then explains the lumens for each level.  1 = 3 lumens, 2 = 38 lumens, 3 = 190 lumens. Here are photos to show what each of those looks like. I’ll update this post with a Turbo photo just as soon as I’m back from traveling, as again as I wasn’t even aware that it had a Turbo mode. I had just assumed the level 3 was 380 lumens.
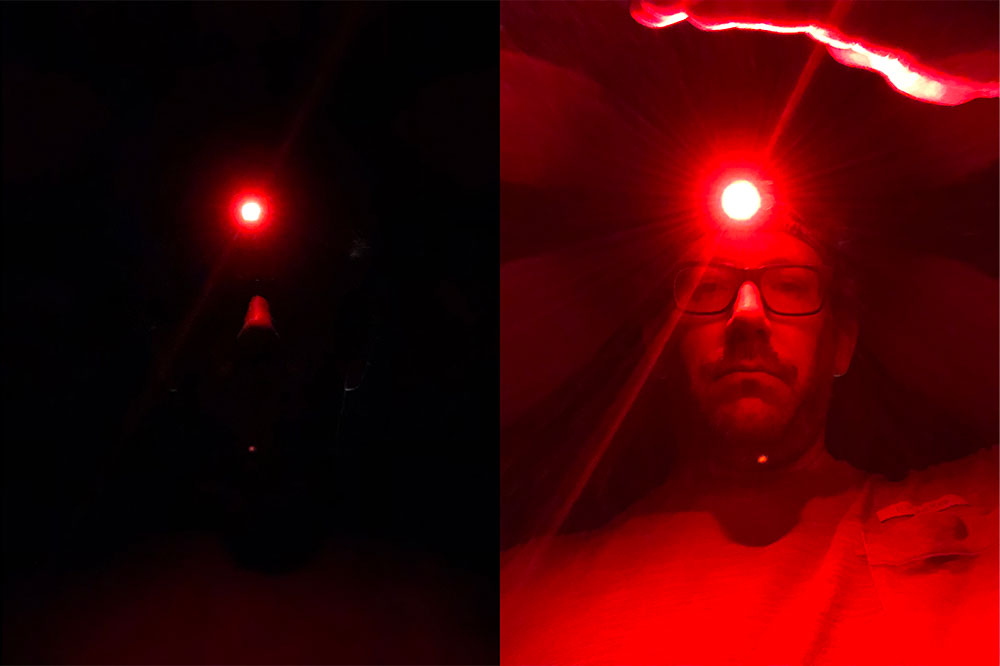
The red light is a really useful feature for visibility without the harshness of a white light. Best use example is probably camping and needing to find something in your gear without waking up your tent mates. It’s also just very cool looking. Here are those two levels.
The next thing I learned from the manual (aside from remembering that I should always read manuals), is that there’s a button lock. To engage this, just press both buttons simultaneously. This is a great way to keep the headlamp from turning on while in your bag. Instead of turning on, it’ll just flash its status light once. Repeat the process to unlock the buttons again.

My last manual discovery was the SOS feature. A three second press of the white light sets off the well known ••• – – – ••• Morse code sequence. A very cool and potentially life-saving feature to have access to.

As for the battery, it just works. I was pretty used to charging batteries once a week and frequently finding a dead headlight when I needed it. With the NU25, it seemed very hard to kill the battery, and when it was running low, it would restrict access to the highest output white light first and then dim the 2nd level. It was pretty easy to tell that it was time to charge again which is a quick 2 hours to get back to full. Let’s wrap this review up.

What I like

  • The ease of size adjustment
  • The many lighting options
  • Lightweight and comfort
  • Great battery life

What needs to be improved

  • Nothing that I could find

Final thoughts

It’s really uncommon to find products that work this well and this thoroughly thought through. As I mentioned earlier, this is now in the daily kit as a product I can 100% rely on without surprises. I’ll be picking up a second one for our daily dog rounds and probably a third to keep in my bike commuter bag.

Price: $36.95
Where to buy: Amazon
Source: The sample of this product was provided by Nitecore.

Filed in categories: Reviews

Tagged:

Nitecore NU25 Headlamp review originally appeared on The Gadgeteer on October 20, 2018 at 11:30 am.

Note: If you are subscribed to this feed through FeedBurner, please switch to our native feed URL http://the-gadgeteer.com/feed/ in order to ensure continuous delivery.