TiBag review

The Gadgeteer will turn 21 years old this summer and that means that we’ve reviewed a LOT of products over the last 2 decades. One of our favorite products to review are bags, and we’ve sure reviewed a lot of them. A few weeks ago I was asked if I might like to review the TiBag. The brand sounded familiar to me so I used the site’s search feature to search on the name and sure enough, we had reviewed the original TiBag back in 2002, over 15 years ago. I look a little different than I did back then, but how has the TiBag changed? Let’s find out.

What is it?

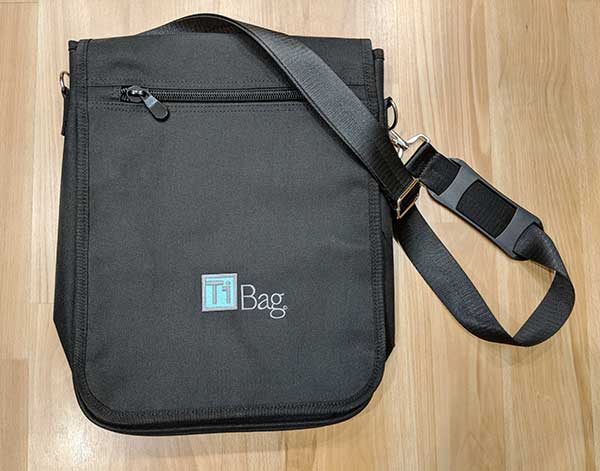
The TiBag is a shoulder bag made of Polyester canvas material that has been designed to hold your laptop or tablet.

Design and features

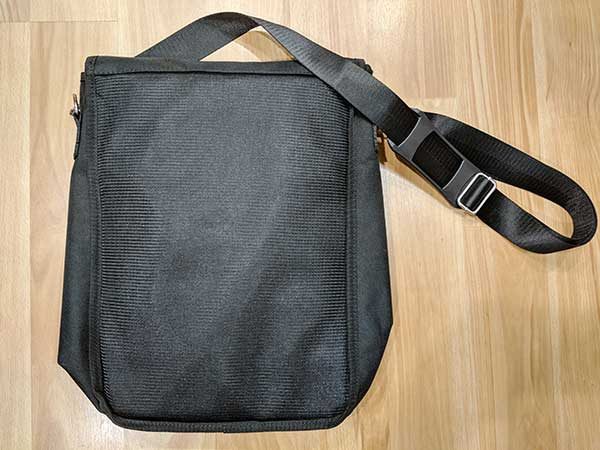
The TiBag is a vertical oriented shoulder bag that is available in a color that goes with anything – Black.

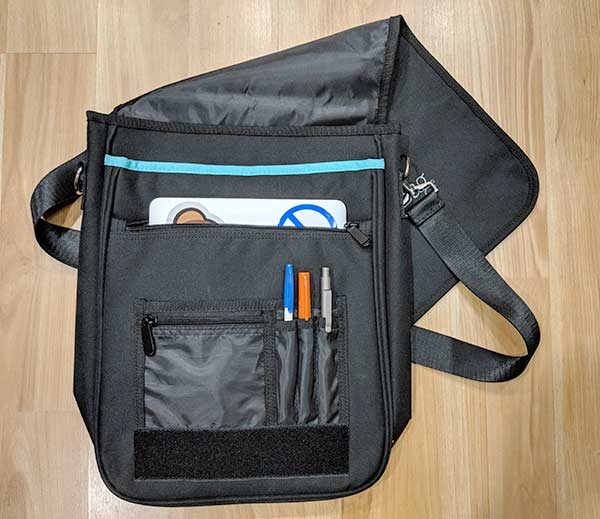
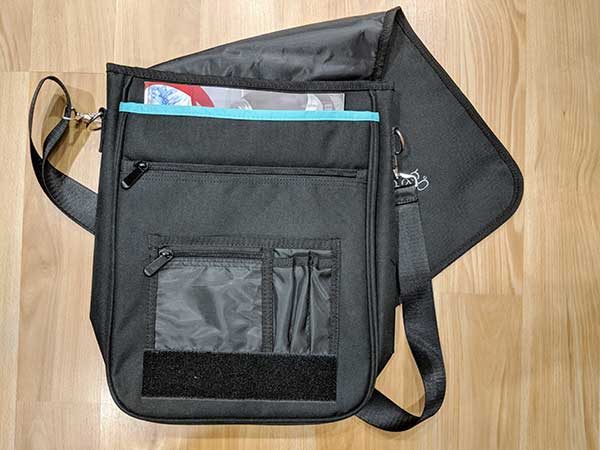
The bag has a flap with a built in zippered pocket on the exterior that is large enough to hold magazines and other flat items. The only branding on the bag is the TiBag logo on the flap. The logo is not bad looking, but it is kind of large. I’d rather see the logo under the flap instead of on the outside.

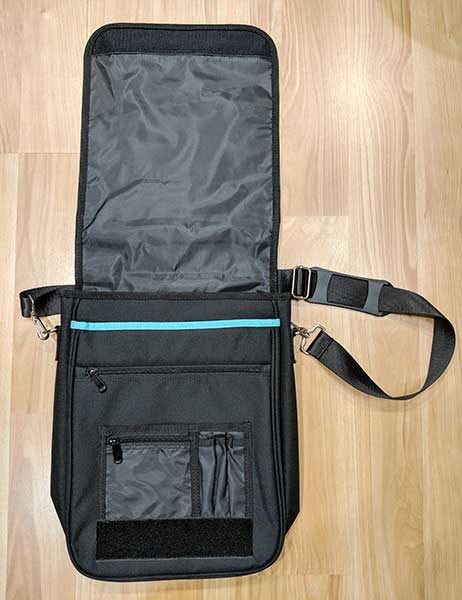
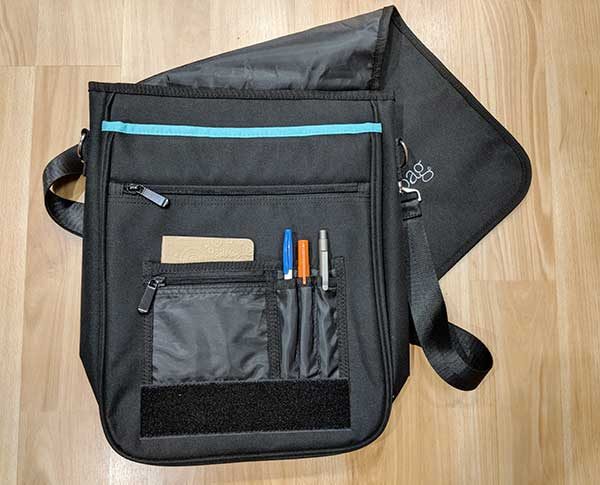
The flap is held closed with a large strip of Velcro. When opened, you will see a small zippered pocket with 3 pen slots next to it, an open-topped pocket behind them, another large zippered pocket behind them, an open-topped pocket behind that one and finally the main compartment. This bag has quite a few pockets, which means it can hold a lot of gear.

To give you some idea of the size of the pockets, you can see that a typical 3.5 x 5-inch notebook fits in the open pocket behind the pen/pencil slot organization panel.

Speaking of the pen slots, I noticed that they are pretty short, which means that some pen clips barely clip to the edge. This might be an issue if you carry your favorite pens with you and don’t want to chance losing one.

Here you see my 12″ MacBook in the large zippered pocket. Although this pocket isn’t meant to hold your laptop, it can easily hold other gear. The front of this pocket is padded, but the back of the pocket is not.

The open-topped pocket behind the zippered pocket is also very large and easily swallows magazines (the magazine in the image above is pulled out just to show it, but the pocket is much deeper) and is meant to be used as a sleeve for laptops and tablets.

The main open compartment is padded on the back, sides, and bottom, and is very roomy. It can hold even large 15-inch and maybe even 17-inch laptops, but if you use this compartment for your laptop instead of the TiBag’s built-in sleeve, you will probably want to put the laptop in another protective case since the main compartment is large and your other gear might rub against the laptop when you’re mobile.

Here I am carrying the bag. For reference, I am 5’6″ and weigh about 129 lbs.

Positives

  • Inexpensive
  • Plenty of room for gear
  • Removable shoulder strap

Negatives

  • No grab handle
  • Pen slots too shallow

Final thoughts

There isn’t much to fault with the TiBag. It’s made well, has a simple design and enough pockets to carry all your gear. I do wish it had a grab handle to make it easier to move into and out of a vehicle, but for less than $40, it’s a bargain for someone looking for a good deal on a basic shoulder bag to carry their laptop and everyday gear.

Price: $34.95
Where to buy: tibag.co
Source: The sample for this review was provided by TiBag.

Chargetech PLUG Pro portable power supply review

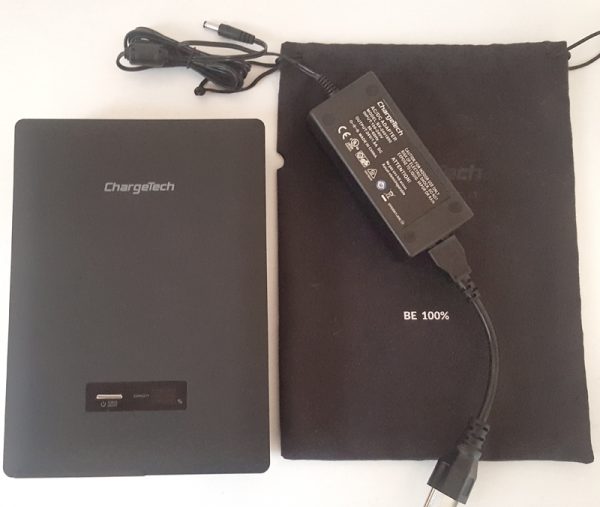
I have become quite the collector of portable power supplys. I have reviewed probably a dozen of them here on the Gadgeteer and I have them everywhere… my house, my office, and my car.  I give them as gifts, and I use just about all of them at some time during the day/week.  I used to have a portable power supply about 4 years ago that had enough juice to charge my laptop almost all the way full, but it died.  So ever since I have looked for one to replace it.  And I believe I have found the solution with the $399 Chargetech PLUG Pro.

What is it?

The Chargetech PLUG Pro (hereinafter referred to as the PLUG) is a portable power supply that can power just about any small gadget or appliance.  It is meant for electronics, so using it with power tools or things with motors probably will not work.  But have no fear, if you do plug something up that the PLUG can’t handle, then it will shut down before short-circuiting or overheating.

Hardware specs

Weight: 2 lbs 3 oz
Dimensions: 5.6 in (w) x 8.6 in (h) x 1.6 in (d)
Compatibility: International Power Adapter Available

Input:
– 1x Charging Port
Output:
– 2x International AC Outlets
– 2x Fast Charge USB Ports
– 1x USB Type-C Port

AC Adapter comes in both 110V and 220V options for worldwide usage.
When finished charging, the LCD screen will display ‘FF’ to indicate a full battery.
Input: 100-240V ~ , 50/60Hz, 1.0A
Output: 24.0V ⎓ 1.8A   L.P.S

Certifications:  CE, FCC Listed

Capacity: 54,000 mAh

What’s in the box?

The PLUG comes with a cloth carrying bag with a drawstring and a power adapter to charge it.

Design and features

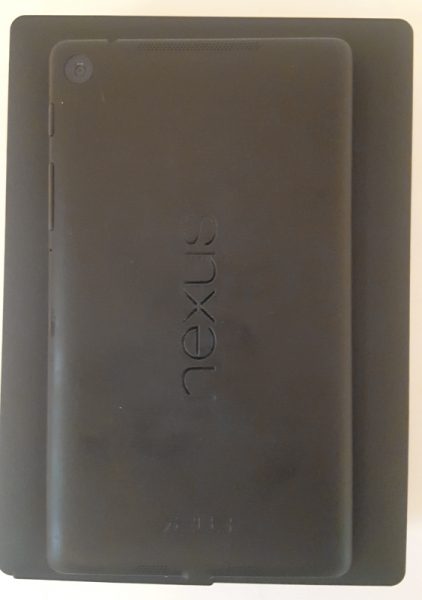
The title of this review says the PLUG is ‘portable’, but it should be noted that it is quite heavy for a portable power supply.  I would say it is about the same weight as one of your kids history textbooks from school, should it won’t be a device that you carry around every day.  It will easily fit inside your backpack or large purse, but again, it is heavy coming in at over 2 lbs.  Here is a picture of my Nexus 7 table sitting on top of the PLUG.  It is a little over 1.5 inches in thickness, so it is pretty thick as well.

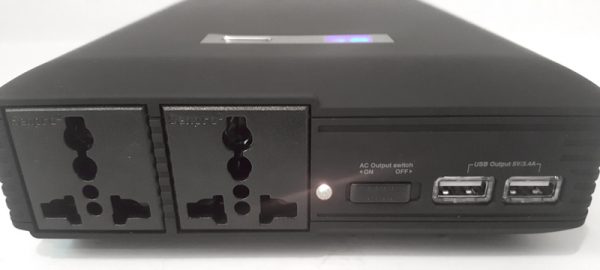
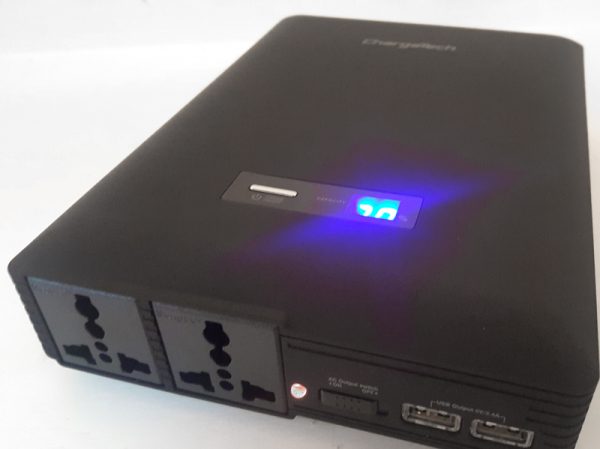
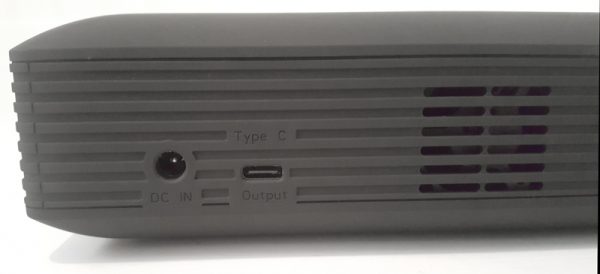
With a USB-C port on the side, 2 fast-charging USB ports and 2 regular power outlets, the PLUG can charge multiple devices at the same time.  I have a bunch of portable batteries around my house, office, and car.  And none of them have these many ways to charge.  I have the 54,000 mAh model and that means I can recharge my Galaxy S6 Plug about 15+ times.  My laptop requires a 19V/3.42V charger, so the PLUG can charge my laptop from completely dead to fully charged in 1.5 hours, and the PLUG can do that 2 times before it needs to be recharged.  Not bad.

And speaking of recharging, it is going to take you quite some time to charge the PLUG because, after all, the capacity is 54,000 mAh.  It will take at least 7-8 hours to fully charge, so I charge it overnight when I need to charge it and by morning it is ready to go.

So what situations is it best to use the PLUG?  Well, because of the size and weight you won’t be carrying it around in your pocket unless you are MC Hammer (a little throwback to you 80’s music fans). When I travel there are of course wall outlets in the hotel room, and for my cellphone, it is much more convenient to carry one of my small portable charges that really does fit in my pocket.  So I would say that the PLUG is perfect for when you are literally going to a place that has no power outlets.  Like camping, or the park, or working a booth at a convention where your boss won’t spring for a power connection at the booth!  You convention workers know what I am talking about.

It has an LED reading on the top that shows you how much juice is left.  And it has all the bells and whistles you would expect like protection from overheating and short-circuiting.  The model I have also has the international plugs.  Which is another great use for the PLUG.  International travelers will find this gadget invaluable for their US-designed gadgets but will also be able to plug in international devices as well.

Positives

  • Portable (sort of)
  • Huge capacity
  • 5 plugs for devices
  • True power outlet on-the-go

Negatives

  • It is heavy for a portable battery supply
  • It is very expensive
  • Fast-charging USB slows down when you also use the power outlets

Final thoughts

For $399, the PLUG isn’t for everyone.  But for someone who regularly finds themselves without access to a power outlet, it is worth every penny.  With the number of ports it has, and humongous capacity, and the portability it affords, the PLUG is a great gadget.  Plus, unlike most other portable power supplies, you can actually use it with large gadgets like TVs, laptops, gaming consoles, small household appliances, even CPAP machines.  I highly recommend this gadget.

Price: $399.00
Where to buy: Amazon
Source: The sample of this product was provided by Chargetech.

Evapolar evaSMART EV-3000 Personal Air Cooler review

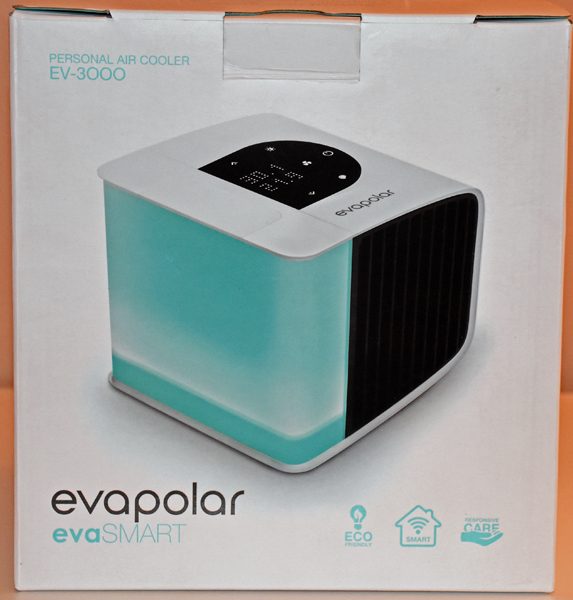
Evapolar makes small evaporative air coolers designed to cool your personal space, be it in your office, bedroom, or a nursery.  The evaSMART EV-3000 adds WiFi connectivity so you can control the functions through a mobile app or through home automation interfaces.

What is it?

The Evapolar devices use evaporative cooling to drop the temperature in your personal space to keep you cool in environments where you can’t control the ambient temperature.  It also adds humidity into the local environment, which is good for your skin and hair.  And it filters out dust particles for cleaner air.

Hardware specs

  • 7.24″ × 8.54″ × 8.14″; 4 pounds
  • Water tank holds 44 ounces
  • Cooling power: 340-1360 BTU/hr
  • Cooling area: Up to 43 ft
  • Noise level: 25-40 dB
  • Power consumption: 12W
  • USB Type C (5V, 2.5А)
  • Works with USB power bank

What’s in the box?

  • Evapolar Evaporative Cartridge (installed)
  • USB power cord
  • USB power adapter
  • Quick Start Guide and user manual
  • Stickers

Design and features

The top of the unit has a display panel that incorporates some manual controls, too.  You can see the lid of the water tank is open in the above image.
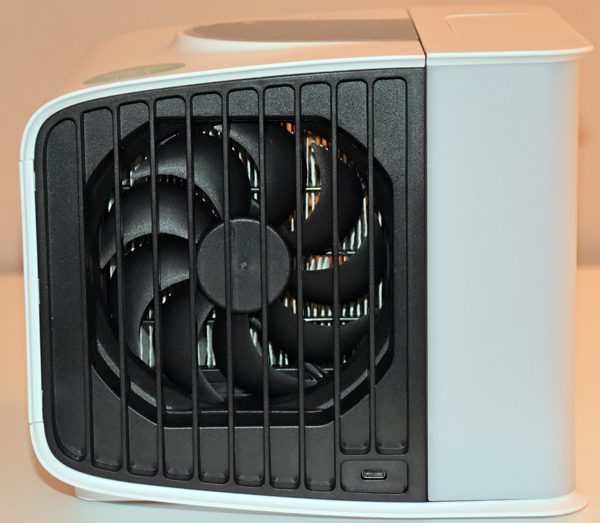
The back of the evaSMART has a fan that blows air through the evaporative cartridge.  The cartridge is visible behind the fan; it’s the white folded paper just visible through the fan blades.
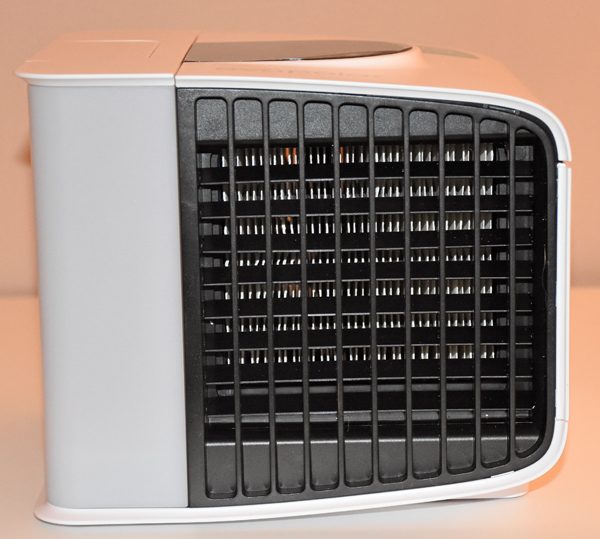
The front of the cooler has movable vanes that can adjust the direction of the air exiting the evaporative cartridge.

This slider, opposite the water tank, adjusts the movable vanes on the exit side of the cooler.
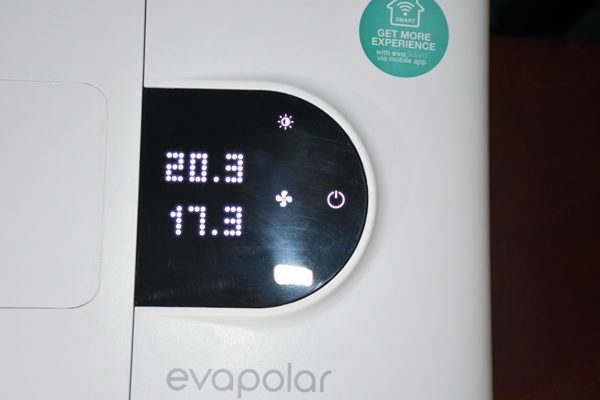
The evaSMART cooler defaults to displaying temperatures in Celsius.  You can select Fahrenheit only in the mobile app.  The touch panel lets you control fan speed, brightness of the water tank light, and the color of the light.  The top number is the temperature of the air entering the unit, and the bottom number is the temperature of the exiting air.

The water tank light can function as a nightlight, if wanted.  You can choose a static color, or you can set a color playlist.  You can turn it off, if a nightlight isn’t needed.

Setup

Since the Evapolar evaporative cartridge was already installed, setting up the device itself was simple.  Simply remove the water tank, fill it with water, and re-seat it in the evaSMART device.  Connect the USB cable to the power supply and plug it in.  Press the power button to turn it on.  You can use the top panel on the device to adjust the brightness and color of the water reservoir light, or to turn the light off, or to adjust the fan speed.

You need to download the Evapolar app to your mobile device to be able to connect the evaSMART to your home network.  You can use the evaSMART cooler without first installing the app, but there are some functions, such as changing the temperature display from Celsius to Fahrenheit, that can only be done via the mobile app.  Naturally, you can’t control the evaSMART using your home automation setup without the WiFi connection.

Performance

Once the evaSMART has water in the reservoir and is plugged in to power, you can begin cooling your personal area.  I was interested in this little personal air cooler because my husband and I often disagree on a comfortable room temperature for sleeping.  It seems that Butch always has hot feet, and he wants a cold room to keep his feet cool while he huddles the rest of his body under blankets.  I like a cool room, but I don’t like it cold.  Since I sleep next to the window that he wants opened, we both are often unhappy.

To test the cooler, I closed the window and set the evaSMART on a little table near his feet.  He was happy to report that his side of the bed was cooler that first night, and I was happy to report that I wasn’t freezing on my side of the king-sized bed.  He continued to use the evaSMART (with manual controls) for a few nights, and he even had to turn it off one night because his feet actually got cold.  The evaSMART personal cooler worked well to cool down the area where Butch slept to keep him more comfortable without requiring us to open a window and cool down the entire room.

You can see in the image showing the nightlight, the incoming air is about 6 degrees warmer than the exiting air (displayed in Celsius).  I used an external thermometer and found that the average temperature difference was about 6 degree F cooler in our room.  The cooling ability of the personal cooler depends on the ambient temperature and humidity.  The higher the ambient humidity, the less cooling can occur.  Our room humidity was only about 30% and ambient temperature was about 70 degrees F.  Evapolar claims it should be able to cool to as low as 63F under certain temperature/humidity conditions.  It might have worked more efficiently in an enclosed space, but it did work well to cool Butch’s micro space in our large bedroom.

We got about 4-5 hours of cooling from a tankful of water.  Evapolar says you should expect 4-8 hours, again depending on your ambient conditions.

Mobile app and WiFi connectivity

Attempting to use the mobile app is where my troubles began.  The app requires you to first set up an account.  My first attempt resulted in an error, so I tried several times to enter a password that would be accepted.  I got error codes of “2” or “4” or “Json not a dictionary”.  I finally found information on the Evapolar website that said one of those codes meant that the password didn’t fit the criteria and another meant that an account already existed for that email address.  Since one of my attempts had been successful – but I didn’t know which one, I tried the “forgot my password” route of storing a new password a few times.  I’d request a reset, I’d get the email enabling the reset, enter a password that was supposedly accepted, but I could still never log in because my password was incorrect.  After a couple of emails with online help, I was told that one of my passwords had been accepted and an account was set up, and that was the only password that could be used to log in, and it apparently couldn’t be changed.  I had no idea which one was the right one, so I ended up having to use a different email address to set up a new account.  BTW, there was plenty of room to display a message that my password wasn’t an acceptable format on the error line.  Having a code more useful than a “4” would have let me know what the problem was and would have saved all that trouble getting an account set up.

My troubles continued when I tried to connect the evaSMART to my home network.  I could easily connect my iPhone to the temporary local network with the evaSMART, but it always failed when I tried the next step to connect the cooler to my home network.  After more digging around on the Evapolar website, I found that the device was only compatible with 2.4GHz networks.  It wouldn’t connect to 5GHz networks, and it wouldn’t connect to dual-band networks.

Without being able to connect to the internet, and being unwilling to replace my dual-band router, I was unable to test out controlling the evaSMART with Alexa, and I was unable to change the temperature display to Fahrenheit.

Positives

The evaSMART EV-3000 does cool the air in a small area, so it’s great for your desk in your office or for a bedside table for those people who want a cooler sleeping environment than their partner does.

Negatives

The mobile app and WiFi connectivity, which is the function that separates this product from the cheaper evaLIGHT model, has confusing error messages when you’re trying to create an account and doesn’t let you know when you successfully entered an acceptable password and created that account.  Worst of all, you can’t use the app to connect the evaSMART to the internet at all if you have a router that isn’t 2.4GHz only – it doesn’t work with dual-band routers.

Final thoughts

The evaSMART device itself does work to cool a small area, and I like how it looks and performs.  If I were purchasing an Evapolar personal air cooler today, I would stick to the less expensive evaLIGHT model.  The evaSMART’s premium price doesn’t seem worth it until the app problems are worked out.

Price: $256.00
Where to buy: Evapolar and Amazon
Source: The sample of this product was provided by Evapolar.