Catsby food dish for cats, SHOTBOX photo studio, PITAKA Pixel 2 XL case, and more – Review updates

Here we go with the first set of review updates for the new year. What are review updates? They are quick blurbs added to the end of our past reviews where we comment about how the product has performed since the review was posted or since the previous update. You can click the links below and then scroll to the end to read the latest update (except for the first one… I’ve made numerous updates to the favorite gear page).

Julie’s favorite gear page

Dr. Catsby’s bowl for whisker fatigue review by Julie Strietelmeier

SHOTBOX portable photography light box review by Julie Strietelmeier

OROS Discovery jackets review by Julie Strietelmeier

PITAKA Aramid Pixel 2 XL case review by Julie Strietelmeier

PhotoLemur v2.2 Spectre photo software review

Back in May, I reviewed the first version of PhotoLemur, a Mac app that lets you computationally enhance photos for better colors, light, skies, and faces.  Well, here in this holiday time of year, the elves have been busily applying their digital hammers and saws to the code and have offered a significant upgrade. I was given an opportunity to test the new program and want to share my findings with you. I started this review working with version 2, but it’s been recently upgraded to 2.2 Spectre, and it’s quite a bit improved!

Note: Photos may be tapped or clicked for a larger image. Images may take some time to load.

What is it?

The first version of PhotoLemur was a one-trick, one-shot, stand-alone deal: Here’s your photo, or here’s your photo with our program applied. Take it or leave it. In version 2.2, they have the same singleness of purpose and application (you can’t select a single area and change just it – it’s still all-or-nothing on the photo itself), but the level of change and enhancement can now be modulated. Also, in addition to stand-alone, there are plug-ins for the two largest photo-editing programs: Adobe LightRoom and Apple Photos.

Design and features

The interface is almost identical: open an image, and you’ll see a partition with your original photo on the left, and the enhanced version on the right. But in the right corner beside the “Export” button, there is a new button with a paintbrush. When you click on this, you are able to view the entire altered photo. There is a slider at the bottom where you can basically choose the amount of processing you want to use. Rather than the 100%, all the way to the right (which was the original version’s only setting), there is now an infinite slider where you can say “For this photo, I only need 40% Lemur, but for this other one, it needs maybe 70% Lemur.” (And, yes, I am officially verbifying a noun, and you can’t stop me! It’s the 21st century, and making up new words is a cottage industry these days.)

I ran a couple dozen photos through PhotoLemur during the first review, mainly from my back-catalog of early digital photos, and there were some really nice changes that were made to these images. For this next version, I decided to up the challenge. I have been using quite nice computational cameras for the last few years: an iPhone 6s Plus and recently an iPhone 8 Plus. In spite of this, there are some photos that need to be “fixed” – the sky is wrong, or the grass is wrong or the skin tones are wrong or whatever. No matter the finesse of the algorithm, the final judgment is always the viewer’s eyeballs. Here are a few representing varying levels of Lemur. Above, a night scene, just as it’s begun to snow. Note the details in the building to the right under the software’s effects, as well as the patterns in the sidewalk where the snow was drifting.

The finish of the process has changed as well. The initial version was pretty cut-and-dried – hit export, choose a filename and location, and your freshly Lemured photo is ready to go, and the program is ready to start on another. Now, there are sharing options for email, online storage, social media, other programs to move the photo to… It’s a whole new world!
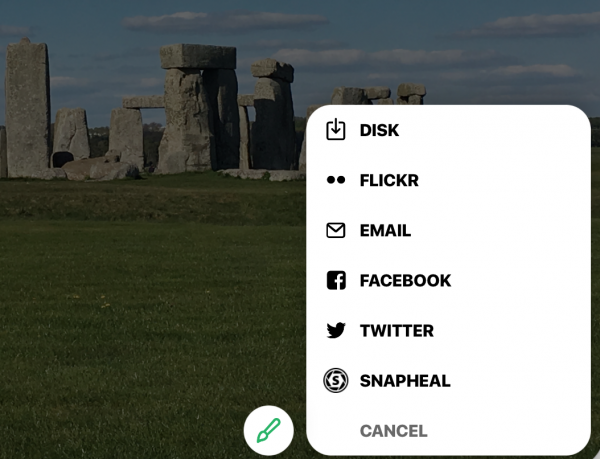
If you’re in the plug-in version, it will save to your camera roll. In standalone, you can also add a group of photos and work through them, rather than having to hunt down each one individually.
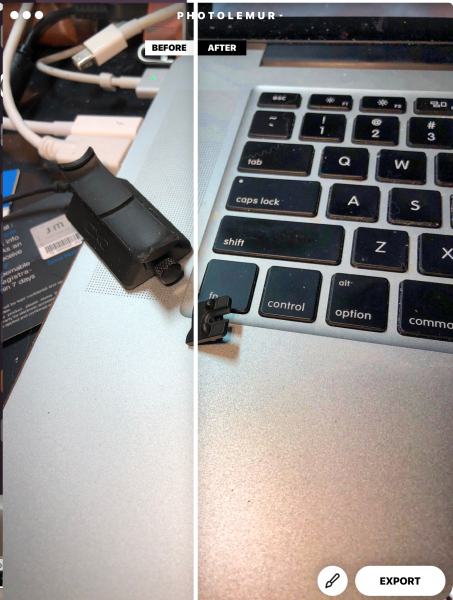
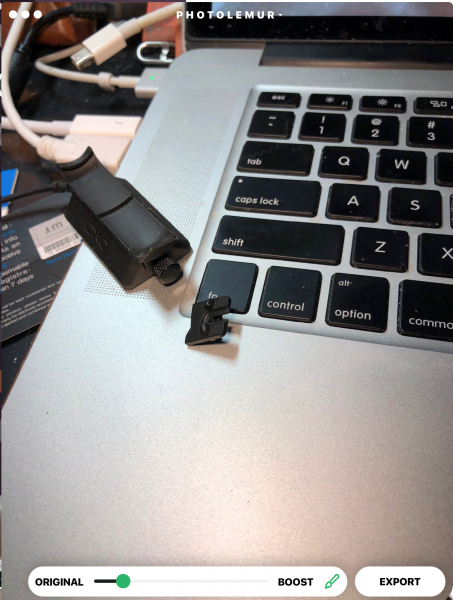
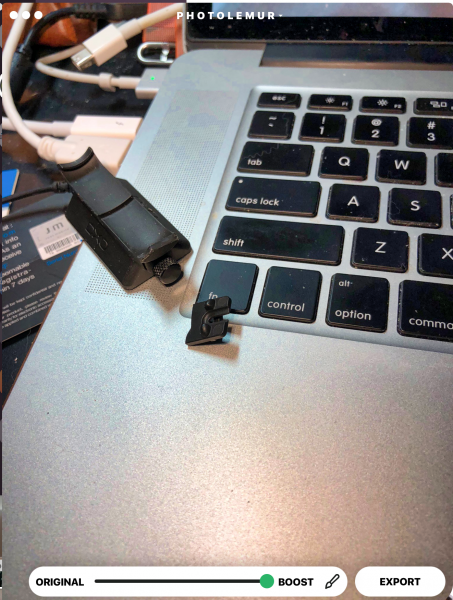
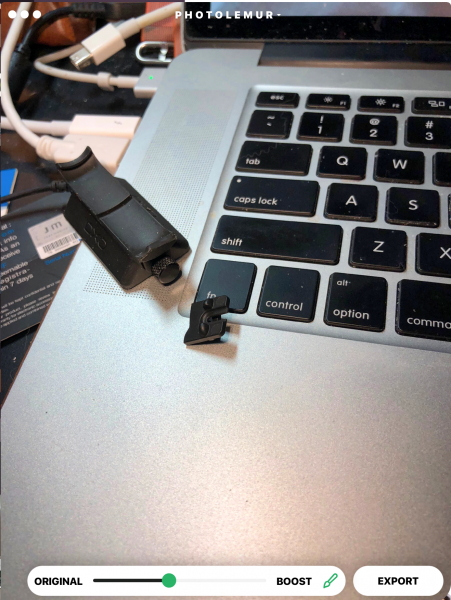
The second photo was taken with normal room lighting (all digital) of a broken part I had to return. Note the noise created by the bead-blasted finish on the MacBook Pro’s palm rest in the 100% correction.
 Tech Requirements

  • Windows

    • Intel® Core i3 or AMD Athlon® 64 processor; 2 GHz or faster processor
    • 4 GB of RAM (8 GB recommended)
    • 1024 x 768 display (1280×800 recommended)
    • 4 GB of available hard-disk space
    • DirectX 10-capable video adapter
    • Microsoft Windows 7, 8,10 (64-bit)
    • Internet connection and registration are necessary for required software activation, validation of subscriptions, and access to online services.
  • MacOS

    • Multicore Intel processor with 64-bit support*
    • 10.11 (El Capitan), 10.12 (Sierra)
    • 2 GB of RAM (8 GB recommended) 1024 x 768 display
    • 1 GB of Video RAM (VRAM).
    • 4 GB of available hard-disk space
    • Internet connection and registration are necessary for required software activation, validation of subscriptions, and access to online services.

Performance

The photos load fast, and once it is loaded, the changes are all updated instantly. You only have to swipe the dividing line to see before and after or the paintbrush to decide how much effect you’d like.

What I Like

  • Easy interface – two sliders
  • Solid upgrade with great user-oriented enhancements.
  • Much better pricing strategy
  • no confusing tools or masks
  • Integration into existing photo software is amazing!

What could be Improved

  • Limited – full frame editing only
  • No way to know what will be changed or enhanced – it’s a black box

Final thoughts

The bottom line is this: How much do you want to post-process your photos? When I first started in digital photography 20 years ago, I had to run every photo through some sort of software, originally because I knew little about the mechanics of how the process worked and was just shooting things and expecting that to fix my lack of knowledge and preparation, as well as the shortcomings of my beginner-level equipment. Over time, as I started to learn how to adjust settings to prevent some of the things I had to correct post-capture, I was able to edit less, but also to move into less intrusive tools.

Now, with hardware tools at a level where you really don’t have to worry about all those mechanics, the software options have come down to tiny tweaks that you may or may not care about. Many look at a photo and say to themselves, “Yeah, that’s how I remember it.” A few will want to change how those memories are stored. If you’re one that wants to fix certain things in photos “just so,” you may want to consider PhotoLemur. At $30, for me, I’d probably have bought it after trying the free version. Let me show you a photo that sold me, which I took just last spring. Just another day on the Salisbury Plains, right?

At 40% Lemur, the difference in the grass, the sky, the colors of the stones all were amazingly more real.

But at 100% Lemur, it pops your eyes out!

If you’re not one who wants to tweak, it may help with your back-catalog, but then, your current photo software may do more than you will ever use. Know it’s out here, and, if the need presents itself, grab it. You may find you are a tweaker more than you realized. You are, after all, reading a gadget website. ;-).

Price: $29 for one device/$49 for 5 devices
Where to buy: The software is available through the company website.
Source: The sample of this product was provided by PhotoLemur.

Other Gadgeteer posts that you might like…

Charge your Apple Watch with an iMac G3

Okay, it’s not an actual iMac G3, but this cute charging stand from Elago is styled to look like one of those 1998 iMac G3s in the juicy colors.  As you can see, the Elago W4 stand holds the Watch horizontally, so it supports Nightstand Mode.

The stand is made of silicone, so you don’t have to worry about it scratching your watch.  And the silicone will prevent the stand from sliding around or scratching your night table.  You feed your own charging puck into the stand for power.  Get the Elago W4 stand in blue ($12.99) or in pink ($14.99) at Amazon.

Other Gadgeteer posts that you might like…

Just like all books, this book will illuminate your life

You won’t be clipping this Book Light to the top of your hardcover book, but it will delight the book lover or the painfully-obvious pun-lover!  When turned off, it folds down to look like a black journal.  When you open the book, the “pages” fan open and the lights come on to provide accent lighting.  You can even open the book all the way to form an accordion-folded cylinder.  Strong magnets hold it open in the cylinder position, or they can be used to attach the lamp to a metal surface.

The book measures 7″ x 7.75″ x 1″ when closed.  You can choose one of five light colors (white, red, blue, green, or purple) by simply opening and closing the book to select to the next color.  Power is supplied with 3 AA batteries, so you won’t have to worry about dangling wires ruining the book illusion.  The Book Light is $24.99 at ThinkGeek.

Other Gadgeteer posts that you might like…

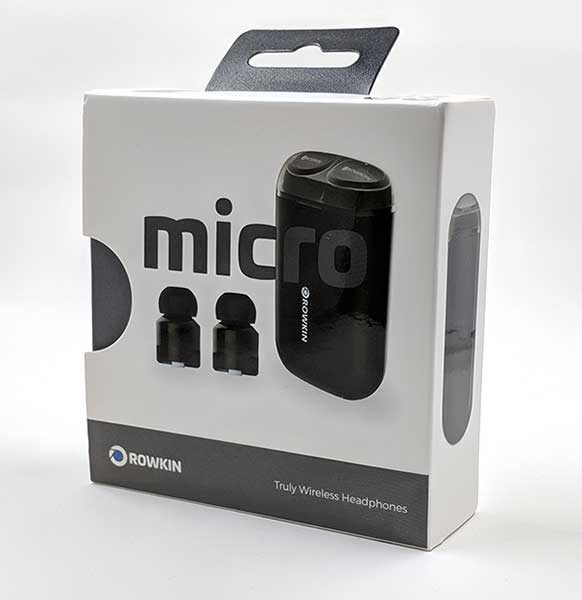
Rowkin Micro wireless headphones review

Never satisfied with what I have, I’m always on the lookout for my next favorite pair of Bluetooth earbuds. Comfort and long battery life are two of the most important features that I look for, other than audio quality, of course. The latest pair of wireless earbuds that I’ve had the opportunity to review are the Rowkin Micro Truly Wireless Headphones. Let’s see if this updated version of Rowkin’s Bit Charge earbuds which I reviewed over a year ago fixes any of the issues I had.

What is it

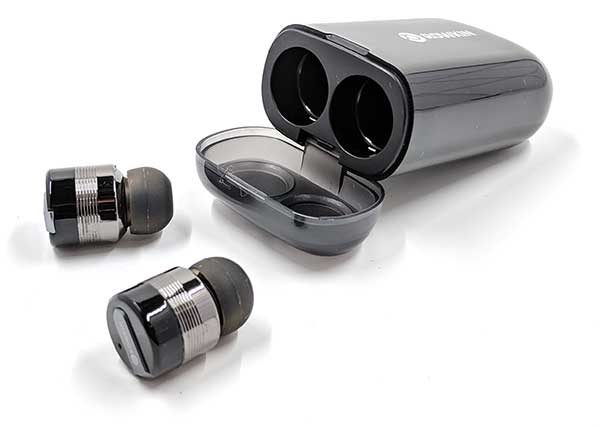
The Rowkin Micro wireless headphones are tiny Bluetooth earbuds that store in a small case that has a built-in battery that recharges the earbuds when they aren’t being used.

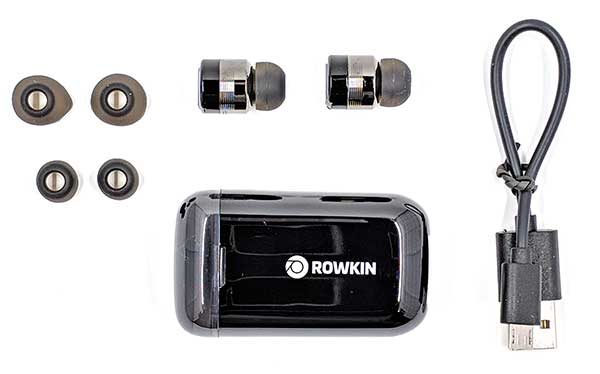
What’s in the box?

Rowkin Micro Bluetooth Earbuds
Charging Case
USB Charging Cable
3 Sets of Ear Tips

Hardware specs

Frequency Response: 20Hz-20kHz
Bluetooth Version: 4.1
Bluetooth Profiles: HFP, HSP, AVRCP, A2DP
Standby Time (Power On): about 27 hours
Standby Time (Power Off): about 120 days
Music Time: up to 3 hours
Talk Time: up to 3 hours

Design and features

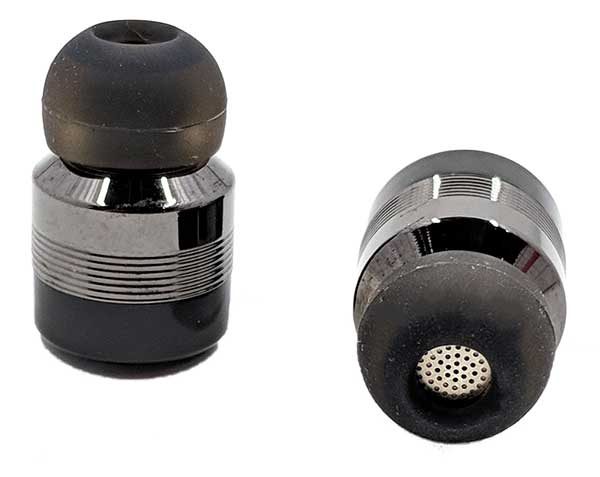
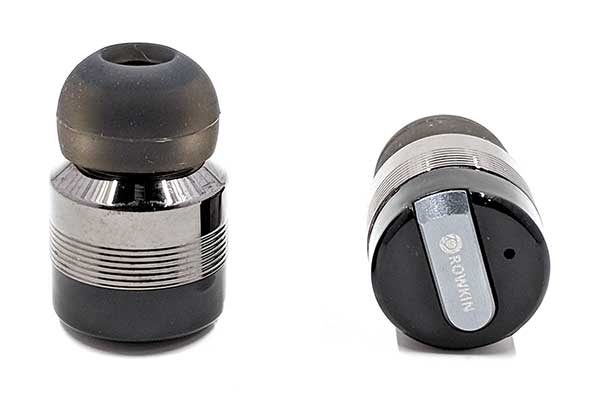
Physically, the Rowkin Micro earbuds look identical to the Rowkin Bit Charge earbuds that I reviewed over a year ago. They are the same size, same color, and have the same bullet design with ridged sides. There is no designation for the left earbud vs. the right earbud. But, when you power the earbuds on, a voice will tell you which channel is the left channel and which channel is the right channel, so you will know which ear to put them in.

Each sweat and water resistant earbud has a button on the end that toggles power, is used to go into pairing mode, and to toggle play/pause. The left earbud button must be used to answer and end calls, but you can press either earbud to pause music and then either earbud to resume.

Each earbud also has a tiny LED on the end that blinks white when the earbuds are powered on and being used. The LED glows red while charging and blinks red/white when in Bluetooth pairing mode.

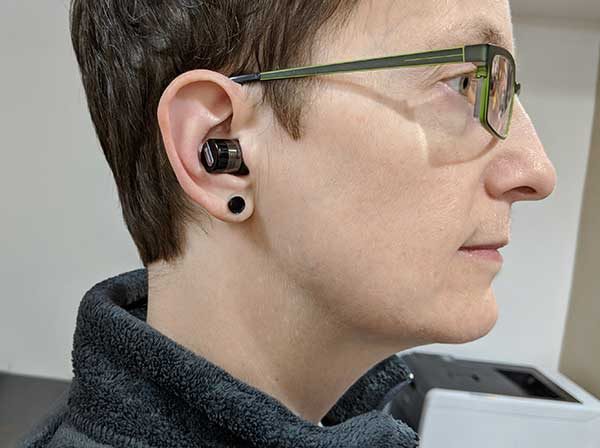
The Micro earbuds are lightweight and comfortable to wear for hours at a time. Their shape might be problematic for some people, but they stayed in my ears without any issues even during low impact workouts. I wouldn’t recommend them for running though.

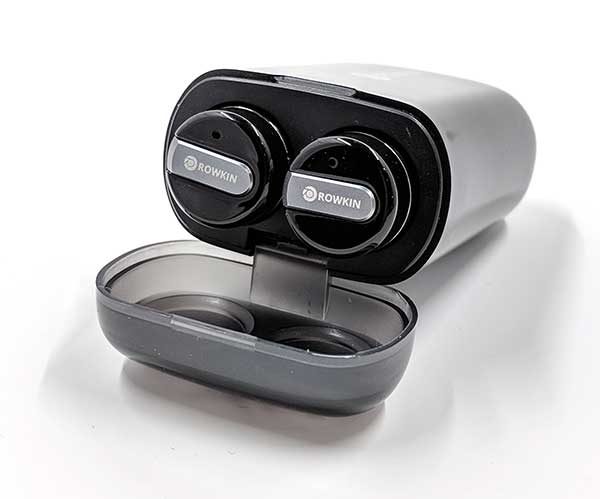
The main difference I noticed between the Bit Charge and Micro earbuds is the new case design. The Bit Charge earbuds had a larger metal case, while the Micro’s case is smaller and made of plastic.

This case doubles as the charger for the Micro earbuds.

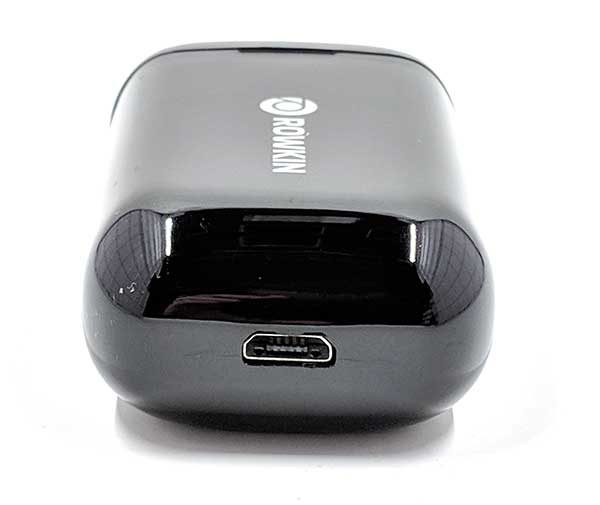
The Micro case has a built-in battery that charges the Micro earbuds when they aren’t being used. The micro USB connector on the back is used to charge the case.

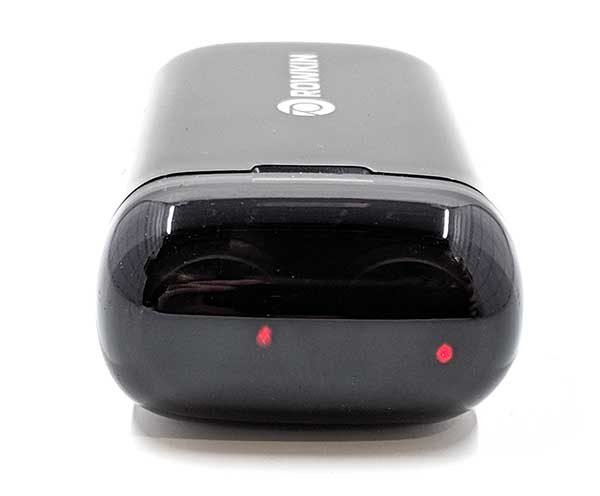
The LEDs on each earbud glows red while the earbuds are being charged. The battery has the capacity to recharge the Micro earbuds up to 4 times, for a total of up to 12 hours of playback time. Yes, that means that the earbuds only have 3 hours of play time per charge. The good news is that 15 minutes charging in the case will give you an hour of listening time and 1 hour in the case fully recharges the earbuds.

A blue LED next to the Rowkin logo on top of the charging case will blink 1-4 times when you pick up the case to give you a status of the built-in battery.

Pairing with your mobile device

When I first unboxed these earbuds and tried to pair them with my Pixel 2 XL smartphone, they would not pair. My phone showed the Rowkin Bit S-B device in the new device list, but would not connect no matter how many times I tried. On a whim, I deleted all my other paired Bluetooth audio devices and tried pairing the Micros again and it worked and has been working fine ever since. I don’t know if this is/was a problem with my Pixel 2 XL or the Micro earbuds.

Note that you can use the earbuds individually by pairing them one at a time. This will add two entries in the Bluetooth device list but gives you the ability to double the use time by just using one earbud while the other is charging.

Sound quality for music, movies, and calls

I no longer have the Rowkin Bit Charge earbuds, so I can’t compare the sound quality of the two versions. That said, the Micros sound good. They won’t blow your mind and do lack a little bit of rubble in the low end. But they sound pretty good and listening to my favorite tunes through Spotify or Amazon Prime Music has been enjoyable.

When I checked my past review of the Bit Charge earbuds, I saw that I had problems with audio cutting out between the two earbuds every hour or so. I’m happy to report that I have not had that same issue with the Micro earbuds after listening to music for many hours.

However, I do have one issue with listening to music with the Micro earbuds. The volume level resets each time you use them which means you will need to adjust the volume on your mobile device since the earbuds don’t have their own volume buttons.

I also tested the earbuds with Netflix, Amazon Prime Video, and YouTube. I haven’t noticed any problems audio syncing with the video.

Next up, phone call quality. For the most part, these Bluetooth earbuds are not much different than other earbuds I’ve tested. People will say that I sound OK but they can sometimes tell I’m talking through a headset. The audio on my end of call sounds fine although the audio only comes out of the left earbud.

What I like

  • Case charges earbuds when they aren’t be used
  • Tiny and comfortable to wear
  • You can use one earbud while the other one is in the charging case.

What needs to be improved

  • Only 3 hours of play time per charge
  • Volume level resets when earbuds pair to device after charging in case

Final thoughts

The Rowkin Micro truly wireless earbuds are my new favorite Bluetooth earbuds because I like that they are always charged and ready to go when I pull them out of the case. I also like that there’s no cable in between each earbud, so I can wear the main earbud in my left ear and leave my right ear open when I’m at work to hear my co-workers or talk to people when they walk up to my desk. It helps that they sound good and are comfortable to wear too.

Price: $129.99
Where to buy: Amazon
Source: The sample for this review was provided by Rowkin.

Other Gadgeteer posts that you might like…