Ember Ceramic Mug review

Hot beverages like coffee, cocoa, and tea are obviously meant to be enjoyed when the beverage is hot. But if you don’t chug your mug of joe minutes after pouring the cuppa, your hot beverage quickly becomes lukewarm. I usually get up at least twice to reheat my mug of tea in the microwave before I’ve consumed it. There has to be a better way to keep your drink at the perfect temperature from the first sip to the last drop right? Ember thinks they have solved this problem, so I ordered one of their Ember Mugs and am here to share my experience with it.

What is it?

The Ember Mug is an 8-ounce mug that has a built-in heating element that will keep the contents of the mug at the right temperature for your beverage.

What’s in the box?
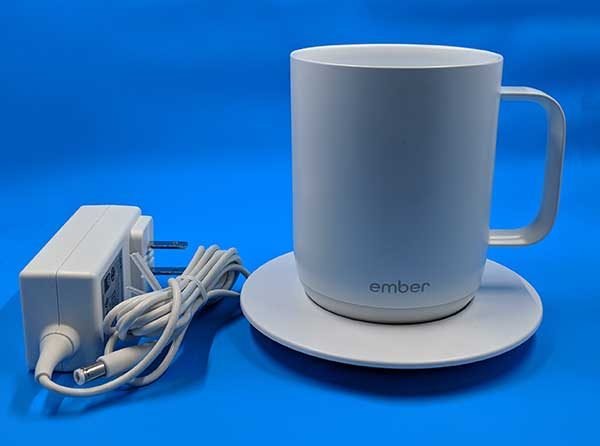
Ember Mug
Recharging saucer
AC adapter

Specs

Capacity: 10oz.
Weight: 0.75lb
Size: 4.2 x 3.25 x 4.3 inches
Temperature range: 120° F – 145° F
IPX7 rated (fully submersible under water)
Cleaning: hand wash only

Design and features
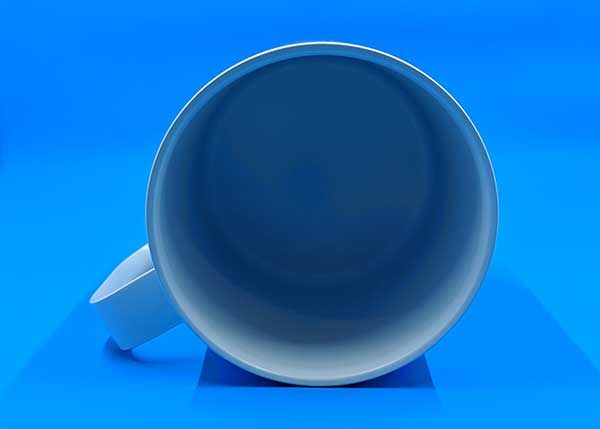
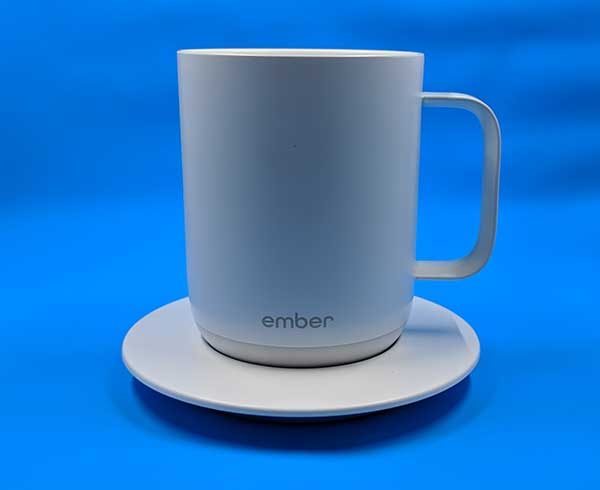
At first glance, most people would mistake the Ember Mug for an ordinary white ceramic coffee cup. But the Ember Mug is actually made of stainless steel with a FDA food grade ceramic-reinforced coating.
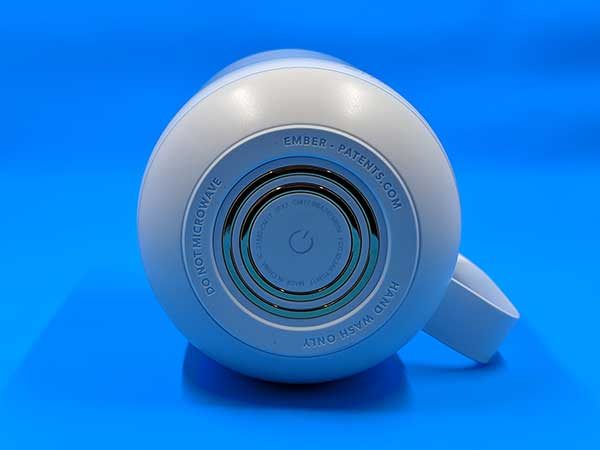
The bottom of the mug reveals a non-slip base, a power button, and gold rings.
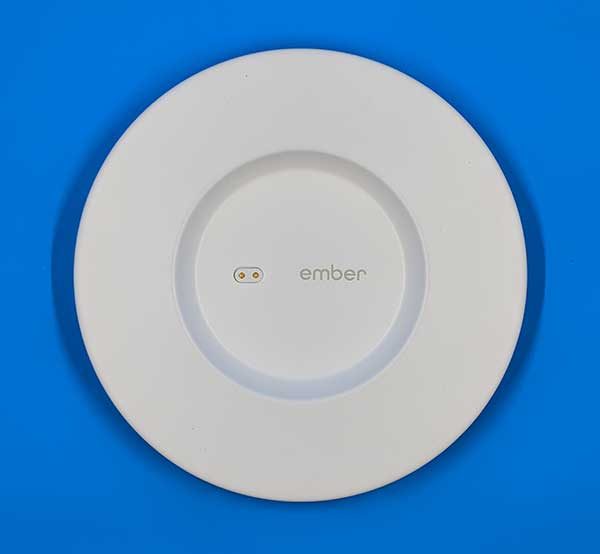
The rings are electrical contacts that connect to the saucer which is used to recharge the Mug’s built-in rechargeable battery.
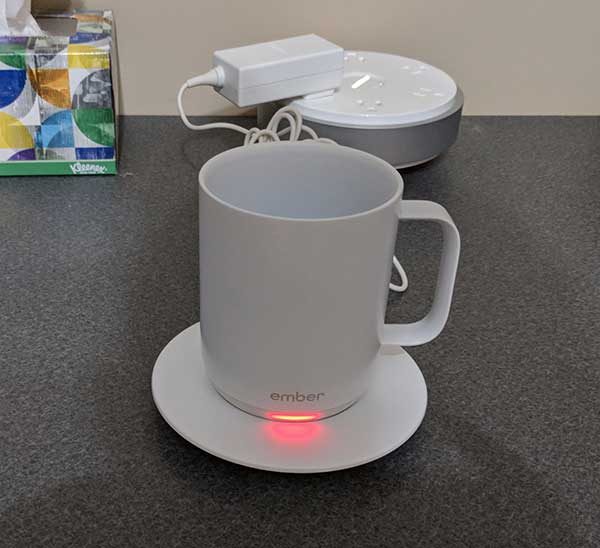
Connecting the included AC adapter to the saucer and then setting the Ember Mug on top will cause the status LED on the base of the mug to glow red to indicate that the Mug’s batteries are recharging.
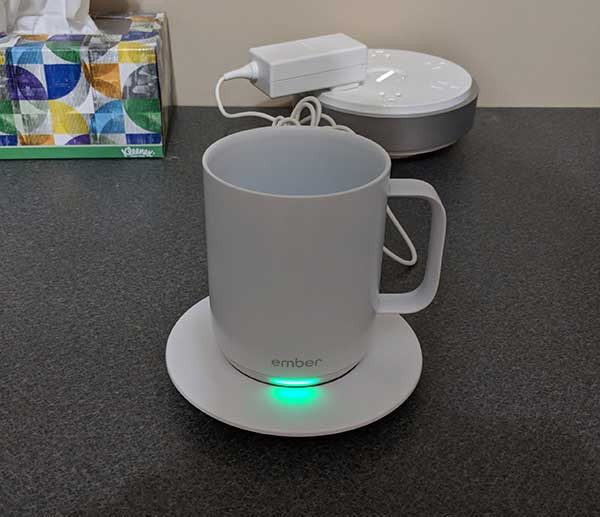
After about an hour and a half, the mug’s battery is completely charged and the status LED glows green.

Once fully charged, you’re ready to start using the Ember Mug. However, you might want to wash it first! But only wash it by hand because it’s not dishwasher safe due to the electrical components inside. The saucer should only be wiped clean and not submerged in water.

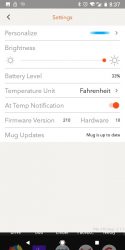
To use the Ember Mug, all you have to do is pour in your hot beverage and enjoy. By default, the mug will keep the beverage at a temp of 130° F degrees from full to the last sip. If you want to customize the temperature, you will need to install the iOS or Android Ember app and pair the mug with your mobile device.


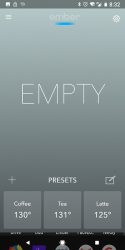
The app has temperature presets that you can choose for different beverages, or you can choose any temperature from a minimum of 120° F to a maximum of 145 °F.
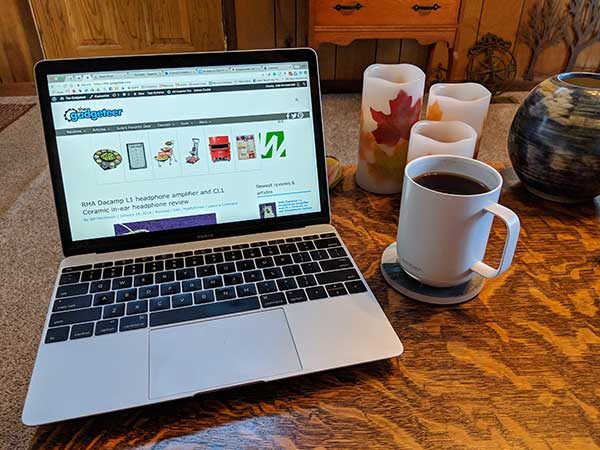
Using the Ember Mug

The first time I used the Ember Mug was at home before installing the app. I boiled water on the stovetop like I always do and poured the water into the Mug over a tea bag. I waited a few minutes, removed the tea bag and moved to the couch where I sipped the tea for 90 minutes or so. Every time I wanted a sip, the tea was still hot which was great. I didn’t have to get up and reheat the tea in the microwave which helped me improve my couch potato skills. The only troubling thing that I noticed was that the LED on the mug started glowing red after an hour to let me know that the battery was getting low. I was surprised that the mug’s battery only lasted for 60 minutes because the tea in the mug was hotter than the set temp, meaning the mug was not having to use any juice to keep the tea at the right temp.

The next day I took the Mug to work with me and that’s when more problems with this product started becoming apparent to me.

First of all, at work, I don’t have access to boiling water like I do at home. I do have access to a hot water machine, but the water is only 160° F at its hottest, which isn’t the right temp for brewing the black tea that I prefer. Since you can’t put the Ember Mug in the microwave to heat the water to boiling, which is what I have been doing several times a day with a traditional mug when I’m at work. I filled my glass mug with water and put it in the microwave to boil the water.

Once the water was boiling, I put the teabag in the Ember Mug and dumped the water from my 10-ounce mug into the Ember Mug. Problem #1: The Mug’s true useable capacity is only about 8-ounces instead of 10-ounces and Problem #2: I made a mess pouring water from the glass mug into the Ember Mug.

Here’s a history of the temps using the Ember Mug and an IR thermometer which I pointed straight down into the center of the mug.

  • 160° F degrees out of water machine in a glass mug
  • Microwave glass mug of water 1.5mins to a temp 185° F degrees. Transferred water to Ember Mug with a teabag.
  • 167° F degrees after 3 mins steeping. The status LED starts pulsing white to show that the temp is either over or under the desired temp.
  • 152° F degrees 5 mins later
  • 142° F degrees 5 mins later
  • 130.5° F degrees 10 mins later – The status LED glows solid white to show that the desired temp is achieved.
  • 129.5° F degrees 3 mins later
  • 123.5° F degrees 3 mins later – The status LED is pulsing to show that the contents are below the desired temp.
  • 127.5° F degrees 15 mins later
  • 125.5° F degrees 15 mins later
  • 126° F degrees 5 mins later and the cup is empty.

I then set the mug on the saucer to charge it. For my next test, I went with green tea which can steep at the temp out of the hot water machine. I also installed the Ember app so I could compare what it thinks the beverage temps are vs. what my IR thermometer reports.

  • 142° F degrees 8:46am
  • 132° F degrees 8:54am – app shows 136
  • 125° F degrees 9:04am – app shows 132

The app reports a higher temperature than my IR thermometer. Not a big deal though. What is a big deal is that the app loses connection with the Mug and it has to be paired again when you want to use it to check the temp or customise it. Almost every time that I would launch the app, it would not reconnect to the mug. I finally got frustrated and stopped using the app altogether since I am fine with the default temperature setting of 130° F degrees.

What I like

  • Perfect hot beverage temps from the first drink, to the last drop.
  • No cables to plug in for charging. Just set the mug on the saucer to charge.

What needs to be improved

  • Capacity
  • Battery life
  • App loses connection to the mug

Final thoughts

I had high hopes for the Ember Mug at work and thought it would be the perfect solution to my lukewarm tea woes. Unfortunately, the fact that the mug doesn’t hold that much liquid and the battery life is too short makes the Ember Mug an expensive novelty item. Sure, I could just place the Mug on the charging saucer and not worry at all about battery life. But then I can also buy a cup warmer like this one from Amazon for less than $10. Disclaimer: I’ve never used a cup warmer plate, so I don’t know how well they really work. But, the cup warmer can be used with any mug including my favorite glass mug which I can use in the microwave to boil water to brew my tea. I plan to order one and try it.

When it’s all said and done, the Ember Mug is a nicely made product but needs to have a larger capacity and at least double the battery life before I would recommend it.

Price: $79.95
Where to buy: Ember
Source: The sample for this review was purchased with my own money.

Always have a stable place for your coffee cup and phone with this wooden arm rest table

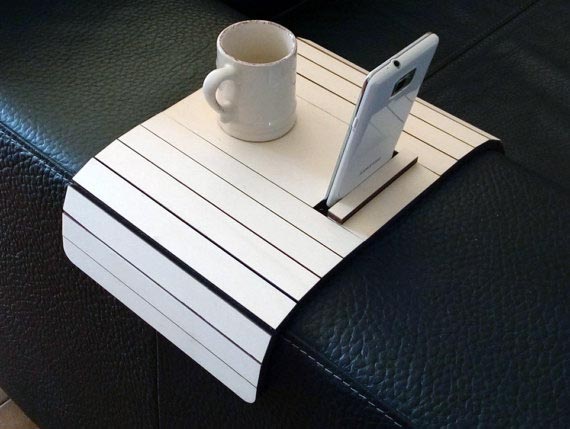
The LOHNtech store at Etsy has another idea for adding a stable place to set your drink without needing to add a table to your room.  Just lay the laser-cut arm rest table over the arm of your sofa or chair (or flat out on the sofa cushion beside you), and you can rest your beverage without risking damage to the sofa.  The arm rest table also has a built-in stand to hold your cell phone.

The table measures 15.1″ x 7.8″ x 0.28″.  It’s made of multiple strips of poplar wood with a felt backing, so it can conform to the shape and thickness of the arm of the sofa.  The built-in mobile device stand is available in two sizes to fit devices with a thickness 9mm or less or devices between 9 and 12mm.

It’s available in a couple of wood stains or in a selection of colors to match your decor.  The LOHNtech laser-cut arm rest table is hand-made in Italy and is ready to ship in 3-5 business days for $45.57 from the LOHNtech Etsy shop.

Oberon Design’s Sonoma Tote carries your gear and does some good, too

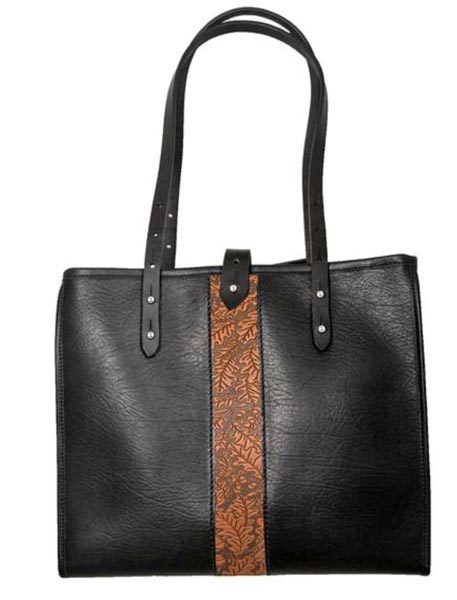
The new Sonoma Tote from Oberon Design is beautifully designed and US bench-crafted, as we expect from Oberon Design.  The bag is made of black leather with tooled leather panels on the front and back of the bag.  The image seen here is the Oak Leaf design in the middle; other choices for the tooled panel include Acanthus in navy, Cloud Dragon in wine, Paisley in orchid, and Wild Rose in black.

Each bag measures 12″ X 14″ X 5″, has straps with a maximum of 12″ under-arm space, and weighs 1.8 pounds.  Construction details include triple-stitched, taped, and bound seams and solid brass Sam Browne studs to attach the straps and close the bag.  The interior has a 9″ x 7″ zippered pocket, 2 additional pockets, and a pen pocket; these are made from spill-resistant, top-grade ballistic nylon.  You’ll also find a key loop at the mouth of the bag, so you’ll never need to scrounge for your keys.

The Sonoma Tote is $295.00, priced according to their new Oberon Direct program, which means no wholesaling of this bag results in a very reasonable price direct to the customer.  And now for the “do good” part:  In support of the vital ongoing efforts controlling the Sonoma, California fires, with this introductory offer,  $20 of every purchase will go directly to the Sonoma County Fire Relief Fund.  The Sonoma Tote can be purchased at Oberon Design.

Conbrov T17 Car Dash Cam review

While cars have gotten much safer over the years in terms of protection, there is still little to protect you from other drivers. In the event of an accident, even a little fender bender, it’s easy to miss important details that could prove vital in an insurance claim. We could all use a little more peace of mind in that regard, and that’s exactly what Conbrov hopes to bring you with their T17 Car Dash Cam.

What is it?

The Conbrov Car Dash Cam is a tiny HD video recorder that can be easily secured to the windshield of your car for recording events and details while driving. It automatically records while your car is running and could provide vital proof in the event of an insurance claim or if you like to record yourself on off-road adventures.

It’s like a little spy camera.

Hardware specs

  • Camera size is 2” x 1.4” x 0.3”
  • Captures 1080P HD resolution footage
  • Loop Recording
  • Night vision mode
  • “World’s Smallest Dash Cam”
  • 1.5” LCD screen
  • Auto accident detection feature triggered by G-sensor automatically locks videos in event of an accident
  • Supports up to 32GB microSD cards (not included)
  • 12-month warranty
Everything you need … except an SD card!

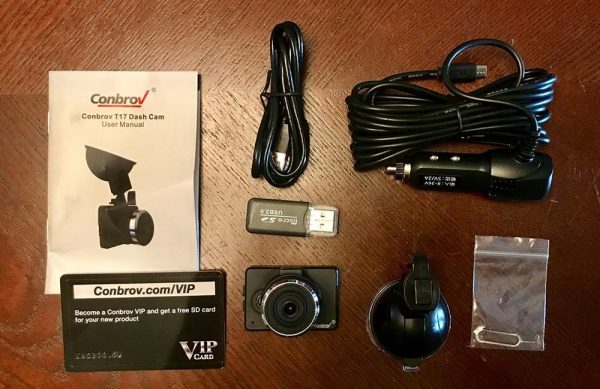
What’s in the box?

  • T17 Car Dash Cam
  • Car charger
  • USB cable
  • Car bracket with suction cup
  • Card reader
  • Pin for reset button
  • User-manual
  • VIP registration card

Design and Features

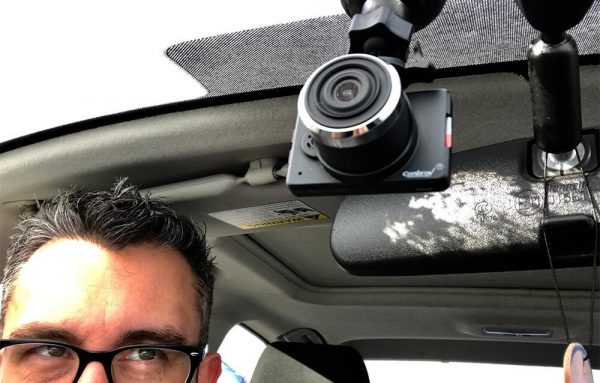
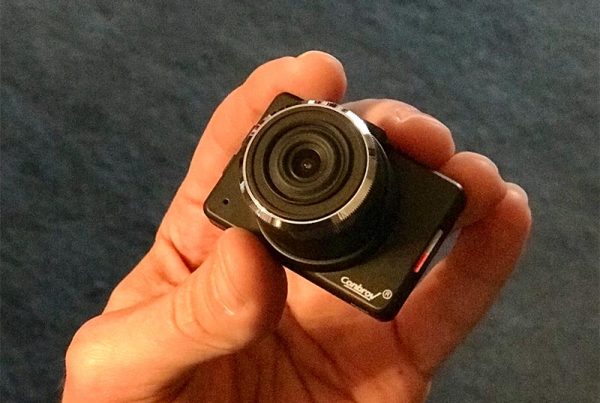
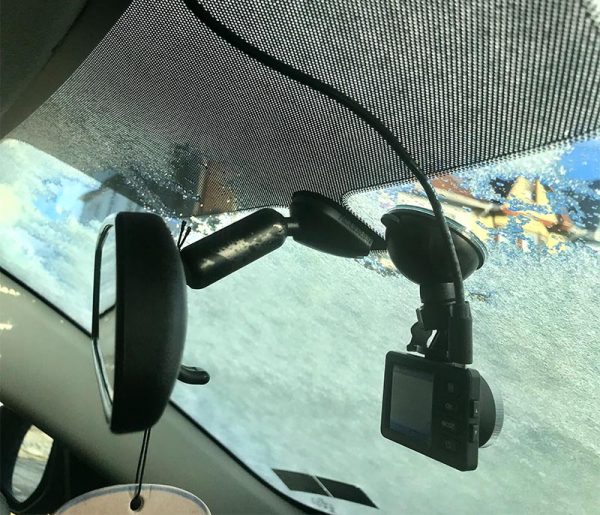
Let me start by saying this camera is tiny. Conbrov claims it’s the smallest dash cam in the world, which always seems to be a haughty claim, but they might be right in this instance. This allows the camera to be positioned in an area that’s out of direct sight from the driver, namely obscured by the rear view mirror, and that’s great for reducing distractions from a tiny, floating rectangle while driving at night.

Installation and usage are straightforward, as seen below.

Setup

The Conbrov Dash Cam was very simple to set up.

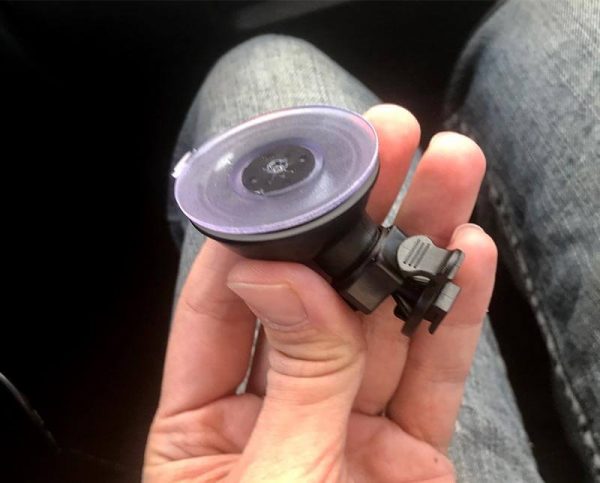
Handy little suction cup stayed on tight.

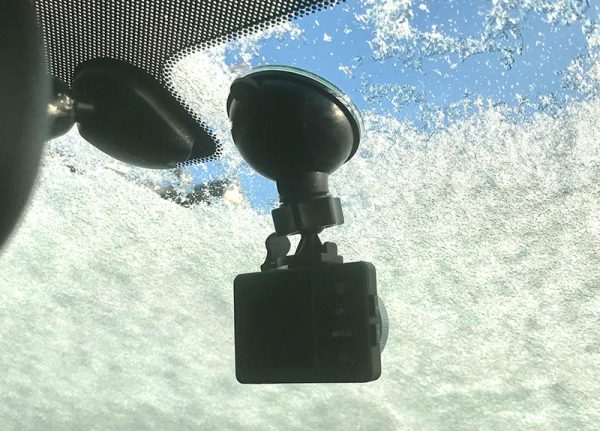
Once I found a spot on my windshield that was just out of my field of vision (I placed it so that it was mostly obscured by my rear view mirror).

Hang in there, baby.

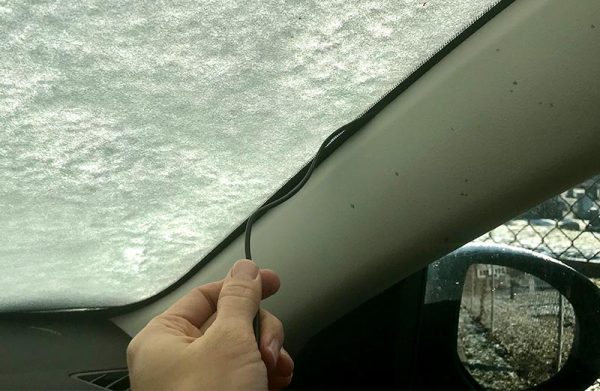
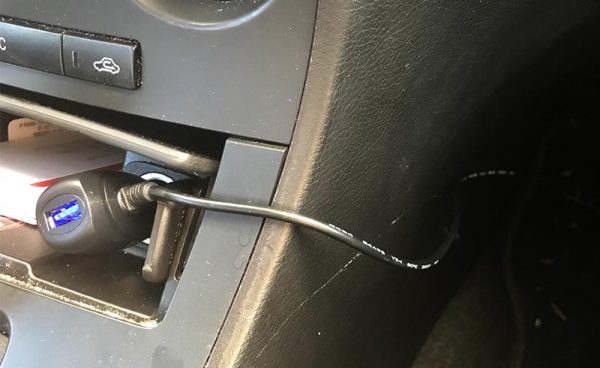
I secured the suction cup bracket, attached the camera, plugged in the charger and ran the lengthy cable from the passenger side floor, up the side of the door, and around the edge of the windshield to obscure it from sight.

The wire wedged nicely into the plastic around the windshield, but your milage may vary.

Once the cable was plugged in, I turned on the car and the camera turned on as well and instantly started recording.

The supplied adapter includes a nice USB throughput so you can continue to use it with other devices.

Usage

The thing about a dash cam is that, like most safety features on your car, you don’t really actively use it unless you have to, and you hope that you never have to. Once I had the camera in place, I didn’t touch it, save for checking out the footage that I had recorded. It was easy enough to forget about completely while in use.

Set it and forget it.

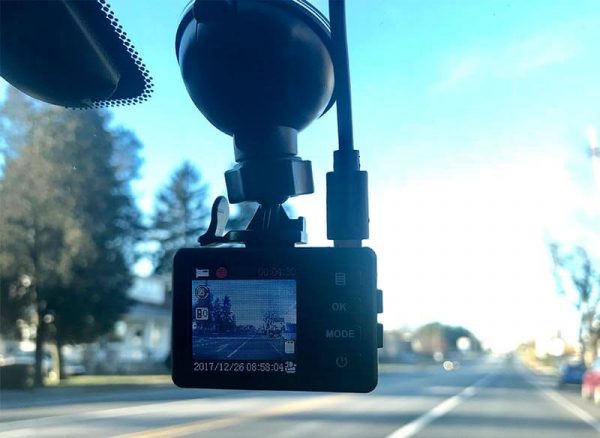
More on that point, it’s entirely hands-off. Once you start your car, the camera recognizes the power source and begins to record immediately. When you turn your car off, the camera continues to record for a set time (1 minute default, adjustable in the settings) and turns off.

While it does have a still camera setting, and you could use it like a pocket-sized video camera, the size and interface aren’t very practical for that purpose. It’s perfect for what it was meant for, a constant recording device that sees what you’re seeing behind the wheel, providing proof in the event of something eventful.

It never takes its eye off the road.

The camera features an adjustable loop recording feature. You can select the length of the recordings in the settings, in 1, 2, 5 and 10-minute increments. The loop recording basically means that it creates video files until the SD card is filled and then starts overwriting the oldest file. The size of the SD card determines how long the videos are archived.

For instance, the video files at full resolution took up about 800MB on average for a 5-minute clip. Given that, the oldest record on my 16GB SD card was about an hour and a half of drive time.

Fortunately, the camera features a G-lock setting which detects sudden stops, such as in an accident, and automatically “locks” the currently recording video. This prevents accidental deletion or overwriting of that important video file. One note: I found that a lot of the videos were locking themselves, which means the were not being overwritten and my card was filling up. I can’t figure out if it was because of the G-lock system being a little too finicky, so I ended up turning that setting off.

Video quality

Below are two examples of day and night recordings. The camera was set to 1080p resolution and highest quality.

Daytime

Nighttime

While reviewing the videos, I found the quality slightly lacking. It’ll do just fine for recording the cause of an accident in front of the car, but if you’re looking to capture something like the license plate of a hit-and-run vehicle, or any car that’s further than 20 feet away, that might prove difficult. Overall, it gets the job done. The night mode was pretty decent.

Positives

  • Very small and visually unobtrusive
  • Auto-start and stop
  • Relatively inexpensive

Negatives

  • Doesn’t come with a required SD card (which is common among dash cams I’ve found)
  • Power cable could be visible on dash
  • Mediocre video quality
  • Smaller SD cards fill up really quickly

Final thoughts

I was impressed with the Conbrov Dash Cam’s simple set-and-forget functionality. Thought it might not be the sharpest camera, its size and cost are very well suited for those looking for a little extra protection on the road.

Price: $42.99
Where to buy: Amazon
Source: The sample of this product was provided by Conbrov.

Wine bottle not empty? Put a planet-sized cork in it!

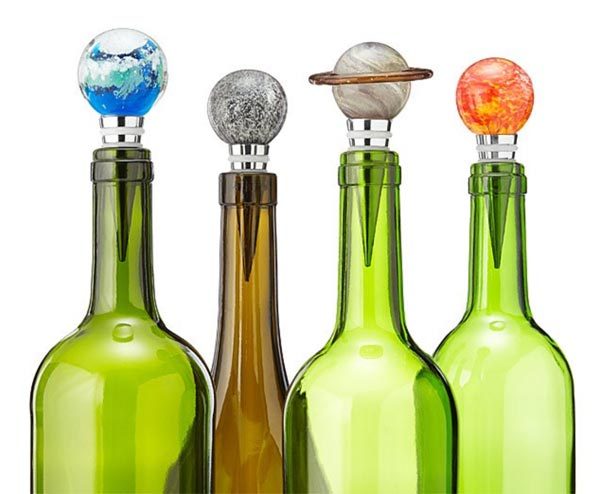
Well, these wine-bottle stoppers aren’t planet sized, but they are planet shaped.  The Solar System Glow-in-the-Dark Bottle Stoppers are made by Chinese artisans using lamp-working techniques to turn colored glass rods into beautiful spheres representing the Sun and some of the planets.  As they are being made, a luminescent powder is mixed into the molten glass to make the spheres glow in the dark.

The stoppers are made of chrome, glass, and silicone.  The stoppers are 3.75″ tall, and the glass spheres are 1.5″ in diameter, except for Saturn, which is 2.25″.  In addition to the Sun, you can also select from the Earth, Moon, Mercury, Saturn, or Neptune.  Saturn is $26.00; all other designs are $24.00 each.  Choose your glow-in-the-dark cosmic bottle stopper at UncommonGoods.