Canvas Press canvas print review

Last year for vacation, my husband and I joined another couple for a trip to Santa Fe, New Mexico.  The very first day we were there, we were walking around the main square as the ‘Golden Hour’ hit.  For the photography nuts reading this, you will know the Golden Hour is the hour after sunrise and the hour before sunset where you can get some really optimal lighting.  Just down the street was the Cathedral Basilica of St. Francis of Assisi.  It was the perfect ‘Kodak’ moment!  I ran like a fool down the street stopping traffic so I could stand in the middle of the street and get the shot.  When we got home I had the image printed on metal and have it hanging proudly in our living room.  Our friends who went on the trip with us have said that they really want a copy of the image for themselves.  Lucky me, Julie posted up an offer to review the canvas prints from Canvas Press.  I jumped at it and now I have the perfect gift for our friends who are getting married in September.

What is it?

Canvas Press is a web-based photo printing company.  They have been in business since 2006. They offer canvas, metal and paper prints.  They even offer murals using a set of stock photos.  I was given the opportunity to try out a 16 x 20 1.5 inch canvas print.
How is it done?

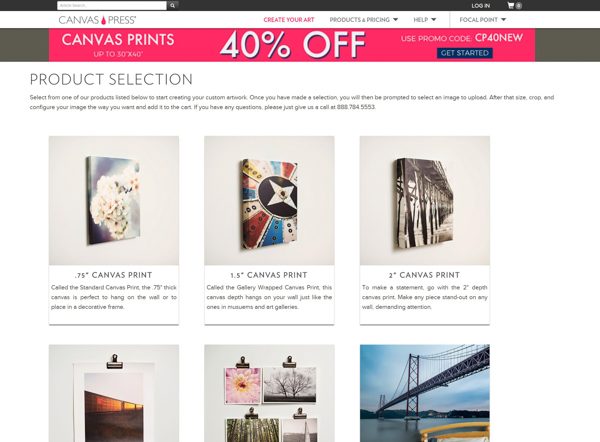
You start by going to their website at www.canvaspress.com and click on the ‘Get Started’ button at the top of the screen.  The picture above shows you the various products they have available.  They offer .75 inch, 1.5 inch, 2 inch and non stretched canvas prints.  I clicked on the 1.5-inch Canvas Print option.
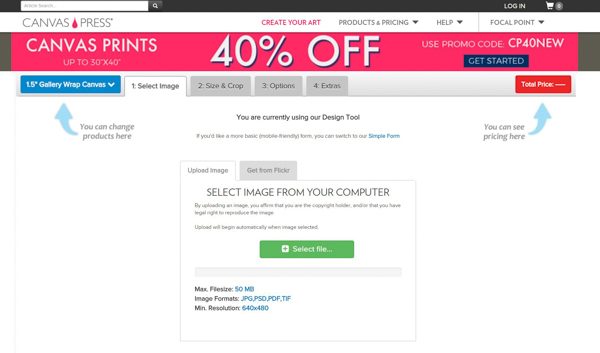
I was then presented with the screen above.  You have the choice of picking a picture off your computer or you can also download an image from Flickr.  They do give the following limits when downloading your photo:

  • Max file size of 50 MB
  • Image formats limited to JPG, PSD, PDF, TIF
  • Minimum resolution is 640 x 480

I choose the photo from my computer and proceeded to upload the photo to their website.
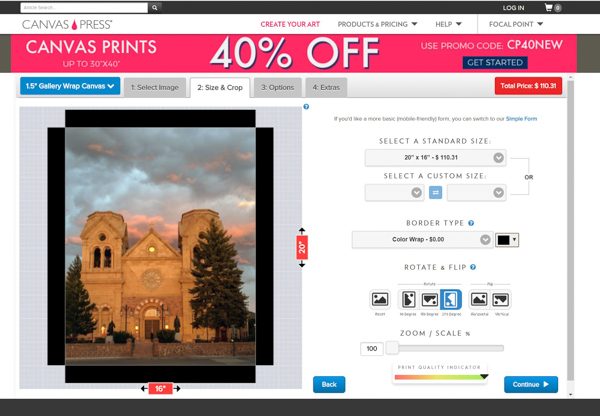
On the next page, I was presented with my photo.  I could easily rotate the photo to the proper perspective. I could also place my mouse on the picture and move the picture around as necessary. The first thing the site asked was what size I wanted for my print.  I chose 16 X 20 but they do offer the following sizes:

  • 8 x 8
  • 10 x 8
  • 14 x 11
  • 20 x 16
  • 24 x 18
  • 30 x 20
  • 30 x 24
  • 36 x 24
  • 40 x 30
  • 40 x 36
  • Custom size of your choosing

They also offer multiple options when it comes to the border type on the canvas print.  The standard is a mirror wrap option.  Depending on what is in your picture different options might make more sense.  On the canvas print I made a few years back I chose the ‘image wrap’ option where the image was carried around to the sides of the photo.  This option works great if you have a lot of extra image to wrap around.  They also offer a mirror image option where they replicate pieces of your picture on the sides. This would not work for the image I was using.  In my case, I chose ‘color wrap’ and then picked the color black.  This will give me black on the canvas edges as you can see above.  One thing to note is that at the bottom of the screen they are showing you a print quality indicator.  Depending on how many pixels your image is, the print quality can get really poor if you try to print large images or zoom in too much.
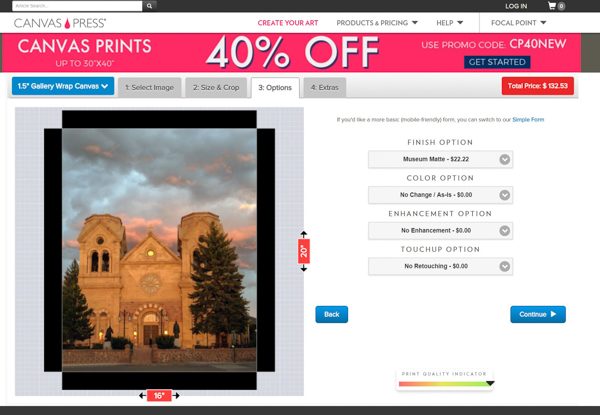
The next page presented me with several options.  The first was the ‘Finish Option’.    The ‘Standard Canvas’ is the default no charge option.  The next option is ‘Museum Glossy’.  The website states this will give you a smooth surface and deep rich blacks.  Since this print would be going into a room with lots of light I chose the next option of ‘Museum Matte’ which would give me the matte finish and not have so much shine to it.

The next option is ‘Color Options’.  I defaulted to the ‘No Change/As Is’ option which is how I had the previous version of this picture printed.  I wanted to try to compare the two using the same options I could.  There are several other choices such as black and white, sepia and blue suede shoes.

The third option is called ‘Enhancements’.  I left mine with no enhancements.  They offer such options like ‘Oilworks’ where they can make your picture look like a painting, pop comic and various other options that are a lot like some of the filters you see in apps like Snap Chat.

The final option is retouching.  Here I left the setting at the default of ‘No Retouching’.  I did not have my first print of this picture retouched so I wanted to be sure they just printed what I gave them.  You can pay extra for things like minor or major retouching.  The major retouching will do advanced things like background replacement and large object removals from the picture.
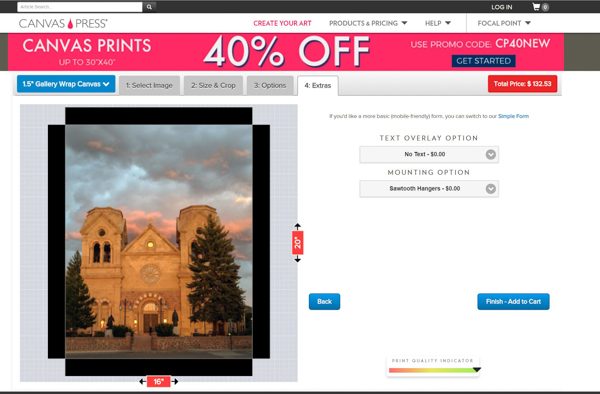
The last and final page only includes two options.  The first is a text overlay option. This option will add a text label to your picture.  I chose none, but if you do choose to add text, it lets you pick the font, size, and color of the text.  The website then lets you position the text wherever you want it on the image.  It is actually a pretty cool idea.  The last and final option is your mounting choice.  I left it at the default ‘Sawtooth hanger’, but you also have the choice of wire, security (in case you think someone will still your print!) or no hanger at all.  The last thing you do is click add to cart and you pay for the print.

I did all of this on a Sunday.  I chose the standard ground shipping which cost me $12.58.  I found the picture waiting on my doorstep the very next Wednesday.  I found out the company is located in Houston, Texas and I am located in San Antonio, Texas.  This explains the really fast turnaround I experienced.  It does speak well that my picture was printed and shipped the very next business day.

What it looks like
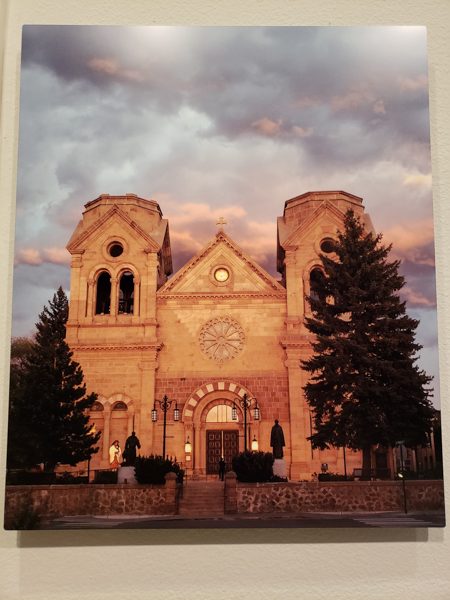
The above picture was the print on metal from another printing company.

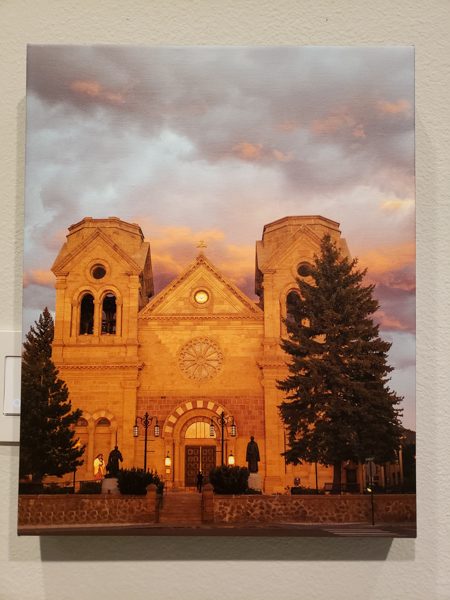
The picture above is the same picture in a smaller format on canvas from Canvas Press.  Notice I did not choose any type of touch-ups or enhancements, but they did lighten the image.  The trees are more distinct, but the church itself is now, in my opinion, a bit too yellow/orange looking.  Because the entire picture has been brightened we also lost some detail in the clouds.  I still think it is a good print and I know my friends will love it, but I do wish they had printed it exactly as I sent it to them.  I believe the top print was more true to the original scene.  The sun was setting but the church itself and the clouds behind were bathed in a nice glow.  The trees are just a part of the frame for the church in my mind.
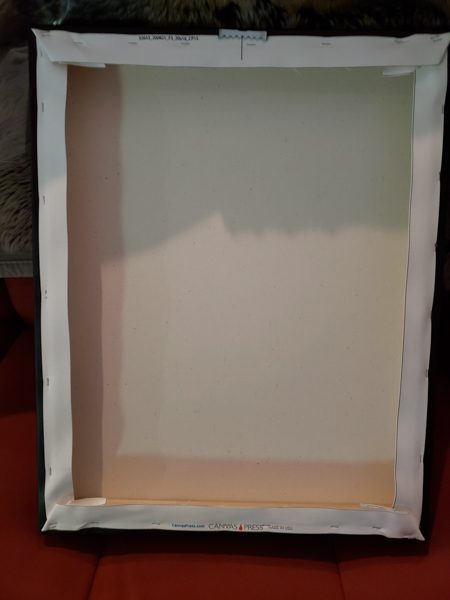
I took a picture of the back of the print to show you how they mounted the canvas to the frame.  This is pretty standard with another canvas print I have at home.  The sawtooth hanger is also pretty standard and works well.

What I like

  • Super fast printing
  • Lots of options when deciding what and how you want it printed.
  • Prices are comparable to other canvas print sites
  • Canvas quality is great and the picture is stretched tight over the frame.

What needs to be improved

  • Don’t touch up the picture if I ask you not to. NOTE – this may not be an issue with other folks and they may appreciate this and call it a feature.

Final Thoughts

Overall I think they delivered a very nice product.  I have seen some canvas prints from other companies not be stretched tight enough across the frame, but Canvas Press did a great job with this.  They also had next day printing and shipping when I ordered on a Sunday.  I also loved the plethora (I love using that word!) of choices when designing your print.  I think if you are looking for a place to try printing on canvas I would certainly give them a try.

Price: $132.53 for a 20 x 16 1.5in canvas print.  I paid extra for the matte finish.
Where to buy: Canvas Press website
Source: The sample for this review was provided by Canvas Press.

The post Canvas Press canvas print review appeared first on The Gadgeteer.

Filed in categories: Reviews

Tagged: ,

Canvas Press canvas print review originally appeared on The Gadgeteer on March 29, 2018 at 11:00 am.

Note: If you are subscribed to this feed through FeedBurner, please switch to our native feed URL http://the-gadgeteer.com/feed/ in order to ensure continuous delivery.

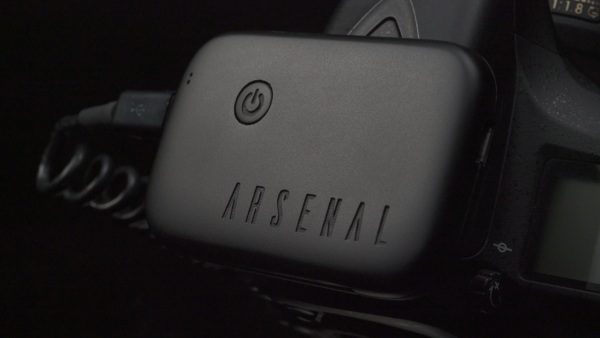
The Arsenal Intelligent Camera Assistant seems to be an amazing product that can guarantee the perfect photo


As a lover of outdoor photography, I really enjoy capturing unique photos whether I am in a nature park or my favorite place, the beach. What I do find each time I head out to these locations, is that I often get the opportunity to take an amazing photo, but capturing that moment with the all of the right camera settings does not always work out well. I usually take as many photos as I can of my chosen scene, sometimes adjusting settings as quickly as possible before the moment is gone. While I do take several test shots prior to starting, there are many variables to outdoor photography that can change moment by moment. When I head back to the studio, I know that I can edit the photos to enhance the originals, but getting the best original is a fundamental prerequisite for an amazing photograph.

A few days ago as I was browsing the internet, I came across a gadget that may just be a great solution for my needs. Arsenal is an intelligent camera assistant that utilizes Artificial Intelligence, and according to the website, it is the first of its kind. Arsenal uses a set of algorithms to suggest the best settings for the picture you are attempting to take, to ensure the perfect shot. It can intelligently consider all the visual environmental characteristics and arrive at the perfect settings for your camera. Its automatic adjustment of your camera settings also includes consideration of the type of lens that you are using, and its capabilities. In addition, it allows you to remotely control your camera, and to adjust settings manually if so desired. Arsenal can also automate photo stacking and save the result back to your camera’s memory card as a RAW or JPG file.

The Arsenal Intelligent Camera Assistant seems to be an amazing product that I will review if I ever get my hands on one. You can pre-order one today on the Arsenal website for $175.

The post The Arsenal Intelligent Camera Assistant seems to be an amazing product that can guarantee the perfect photo appeared first on The Gadgeteer.

Filed in categories: News

Tagged: ,

The Arsenal Intelligent Camera Assistant seems to be an amazing product that can guarantee the perfect photo originally appeared on The Gadgeteer on March 29, 2018 at 10:00 am.

Note: If you are subscribed to this feed through FeedBurner, please switch to our native feed URL http://the-gadgeteer.com/feed/ in order to ensure continuous delivery.
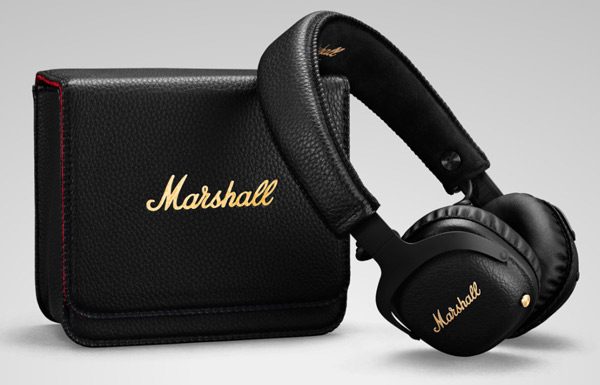
Marshall’s new MID A.N.C. Bluetooth headphones go up to 11

Marshall has recently announced a new set of wireless headphones, the MID A.N.C….their first foray into the world of active noise canceling. The MID A.N.C. headphones use Bluetooth aptX technology and are a follow-on to their original wireless MID Bluetooth headphones. The A.N.C.’s have an on-ear design featuring custom 40 mm dynamic drivers, soft microfiber wrapped headband, 3D hinges for transportability and ergonomic fit, and black anodized metal frame and brass logo that give a unique look & old-world style to the headphones. Marshall promises the headphones can last up to 20 hours of wireless playtime when active noise canceling is on or 30+ hours of wireless playtime without active noise cancelling activated. They are available from Marshall for $269.

The post Marshall’s new MID A.N.C. Bluetooth headphones go up to 11 appeared first on The Gadgeteer.

Filed in categories: News

Tagged:

Marshall’s new MID A.N.C. Bluetooth headphones go up to 11 originally appeared on The Gadgeteer on March 29, 2018 at 9:00 am.

Note: If you are subscribed to this feed through FeedBurner, please switch to our native feed URL http://the-gadgeteer.com/feed/ in order to ensure continuous delivery.
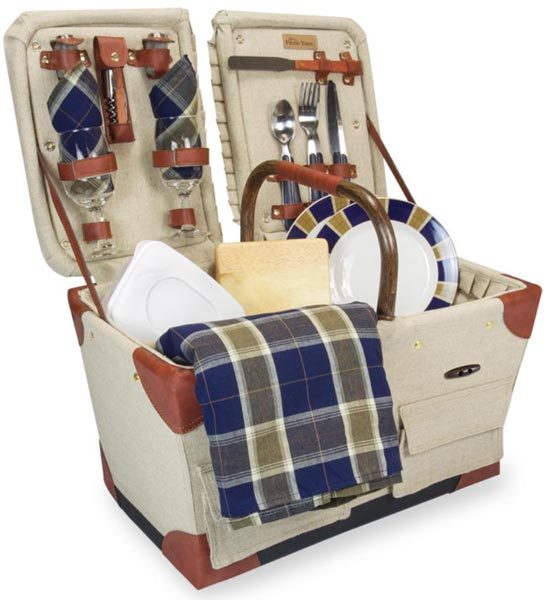
Everything you need for a picnic for two except the food

Levenger says this picnic basket is inspired by pioneer wagons, hence the name.  It has a durable canvas exterior, a water-resistant polyester lining, and faux leather trim.  The Pioneer Canvas Picnic Basket measures 20″ x 12.75″  x 11.5″ and weighs 11 pounds.  It has a double lid, two storage pockets on the front, and a water-resistant base.

Inside, you’ll find everything you need for a picnic for two:

  • 2 porcelain plates (8”; navy/khaki plaid design)
  • 2 hand-blown wine glasses (7 ounces)
  • 2 stainless-steel forks, knives and spoons
  • 1 set of stainless-steel salt and pepper shakers
  • 2 cotton napkins (14” x 14”; navy/khaki plaid)
  • 1 stainless-steel cheese knife with wooden handle
  • 1 blanket (50” x 60”; quilted navy/khaki cotton topside and navy polyester underside)
  • 1 plastic food storage container

The Pioneer Canvas Picnic Basket is $120.00 at Levenger.

The post Everything you need for a picnic for two except the food appeared first on The Gadgeteer.

Filed in categories: News

Tagged: ,

Everything you need for a picnic for two except the food originally appeared on The Gadgeteer on March 29, 2018 at 8:00 am.

Note: If you are subscribed to this feed through FeedBurner, please switch to our native feed URL http://the-gadgeteer.com/feed/ in order to ensure continuous delivery.
PortraitPro 17 Studio Max photo editing software review

What is it?

PortraitPro 17 Studio Max is a very intuitive and easy to use photo editing software that allows even the most novice of users to quickly learn and edit photos for a truly professional look. It provides a set of tools that is able to fix just about every defect in a photo, and it also works as a plugin for Adobe Lightroom and Adobe Photoshop to ensure that it fits into a complete professional workflow.

Design and features

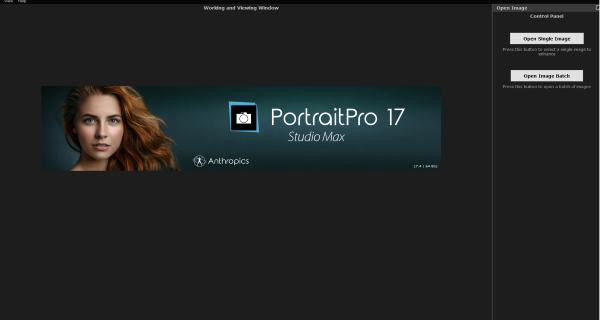
When you first run the PortraitPro Studio Max application, the first screen is a splash screen with 2 choices that allow you to open a single image to edit or to open a batch of images for editing.

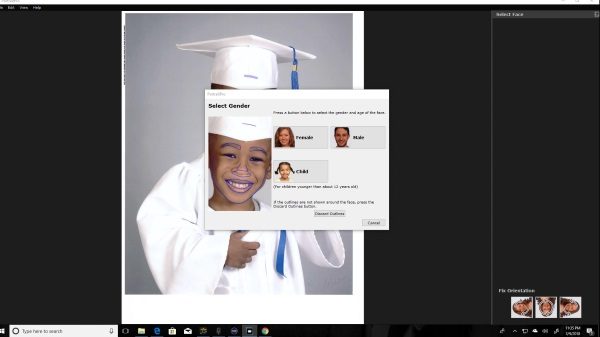
If you select to open a single image, the file manager will open and allow you to navigate and select a photo. Once the photo is selected, it will appear in the background with a selection dialogue box over it asking you to select if the picture is male, female or child. I do believe that the software uses this information for the face detection algorithm. This screen also has the option to rotate the picture to the correct or desired orientation.

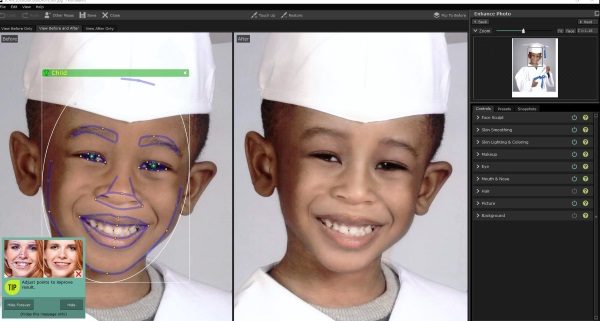
Once the selection is made, and in this case, I chose child since I used my son’s picture for this review, a split screen appears with a left and right pane. It is important for me to explain that I bought this photo of my son’s graduation to support his school. However, it was painfully obvious that it was overexposed and taken in such harsh light that it just about ruined the photo. This made it the perfect photo to test PortraitPro.

On the left pane, there is the picture with the face detection mask outline with nodes, that allow you to change the shape to define the facial area as you would like. On the right pane is the same picture without any masking. The picture on the right pane reflects the changes that you make on the left throughout the process. The toolbar on the right shows the original picture on the top and the available editing categories and tools below. There is also a floating “tips” box that can be hidden as desired.


There are 3 main tabs for the editing tools which are Controls, Presets, and Snapshots. The Controls tabs contain all of the tools that you use for original editing. The Presets tab contains presets for the controls, and the Snapshots tab is for saved snapshots. Under the “Controls” tab there are 9 editing categories:

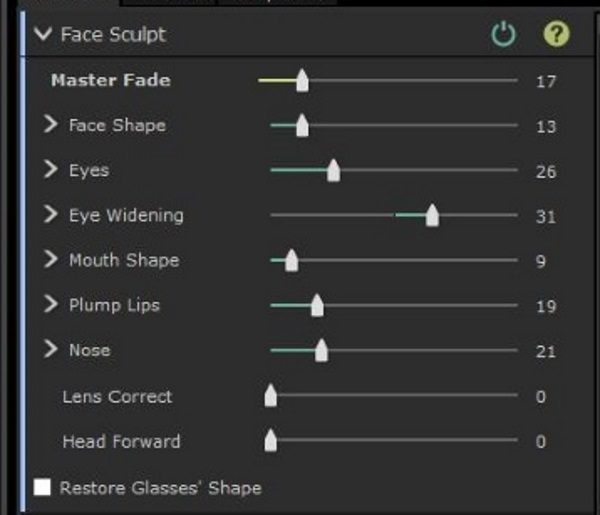
Face Sculpt


As depicted by the tool selection, the face Sculpt toolset allows you to reshape all the aspects of the face to either correct them to be true or to enhance them for the required look.

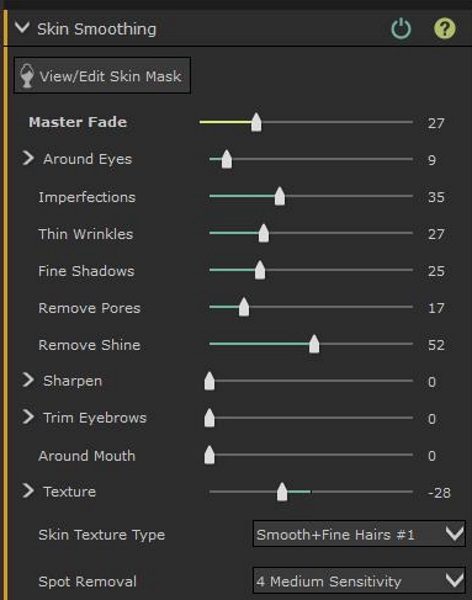
Skin Smoothing

Skin smoothing allows you to smooth out the normal skin imperfections like bags under the eyes, wrinkles, bushy eyebrows, skin texture, spot removal, etc. It really does a great job in this category as well.

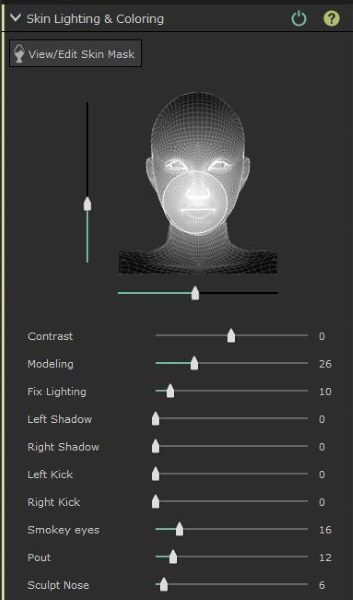
Skin Lighting and coloring

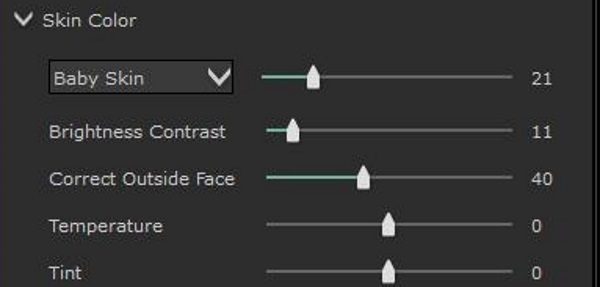
Skin lighting and coloring is made up of two sections. There is the main section that allows you to edit all of the lighting properties of the portrait. There is also a second section that includes two categories that are Skin Color and Tan. Skin color allows you to edit contrast, temperature, and tint along with brightness and color correction of the skin immediately outside of the mask area.

The Tan section allows you to saturate and darken the skin color, and tweak the level of “gold” in the skin color to get the desired skin shade.

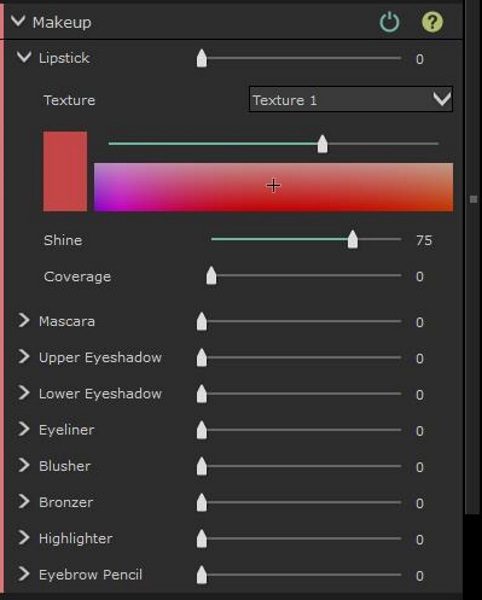
Makeup

The Makeup category is another section that really shines in this software. The ability to not only fix makeup imperfections highlighted by the lighting when the picture was taken is an amazing tool. You are also able to add makeup effects to enhance the photo.

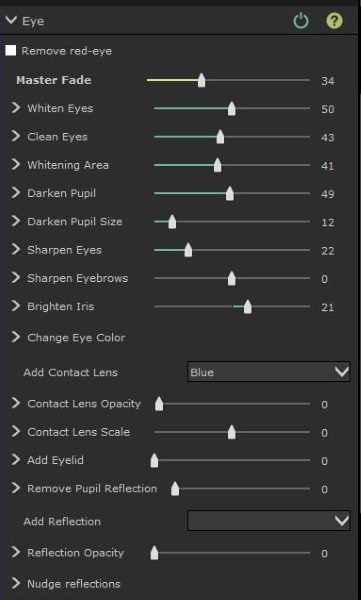
Eye

The “eye” tool is another amazing capability of this software. As I played around with the tools I was really impressed by the effects that can be added and how much you can actually alter the mood and/or facial expression by altering the appearance of the eyes.

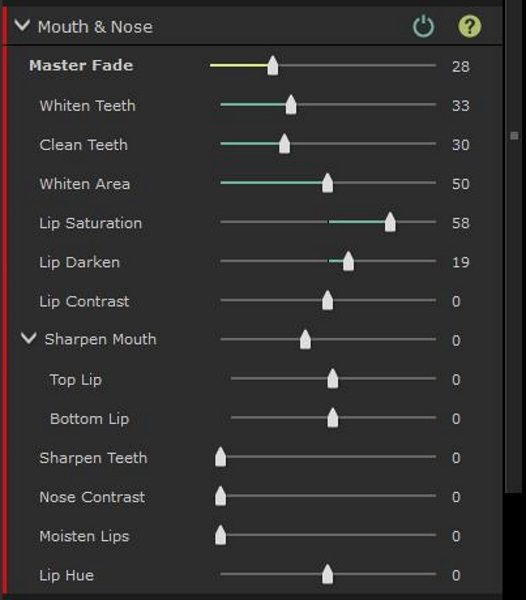
Mouth and Nose

This is simple but effective set of tools that allows you to enhance the appearance of the mouth and lips and remove some of those unwanted digital artifacts that can be the result of bad lighting or an unprepared subject.

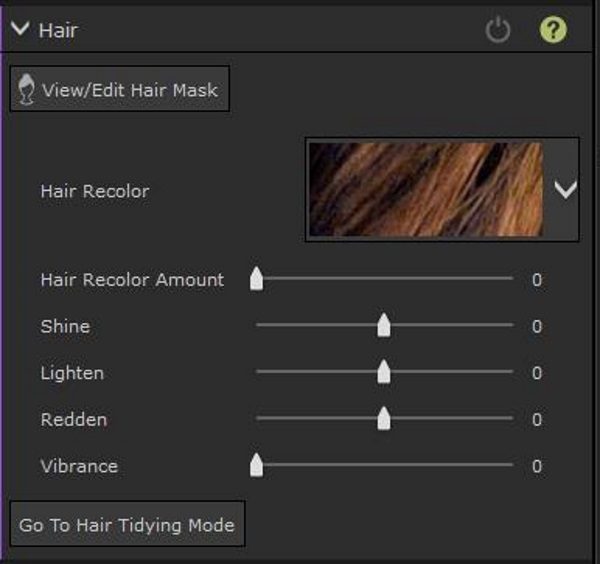
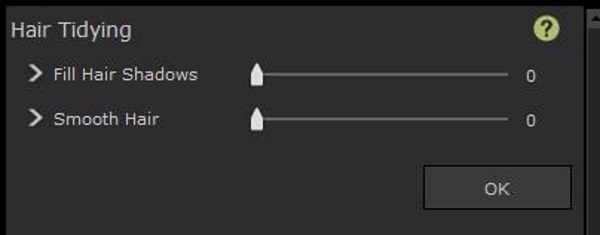
Hair

The hair tools are a simple set of tools that allow you to get the correct look and smooth appearance of hair which is key to a good portrait. Smoothing and tidying hair that may have been a bit ruffled from movement or from wind is a great ability. Being able to alter the color of the hair is also nice.

Picture

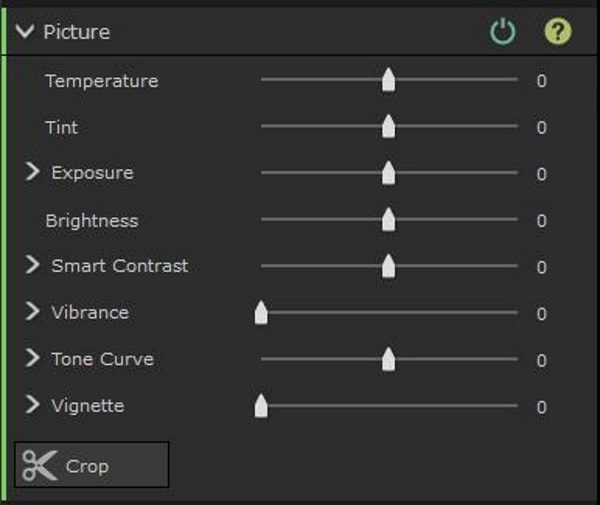
The picture tools allow you to change the overall lighting and other attributes of the picture including vibrance, exposure, temperature, tint, etc.

Background

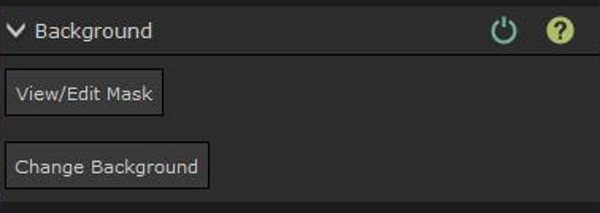
I had a really enjoyable time playing around with the background tools. This category offers two sub-categories.
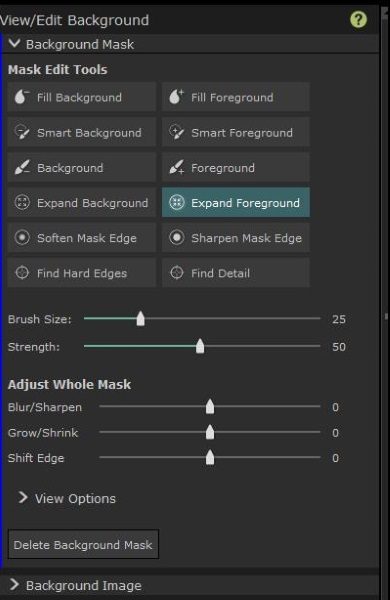
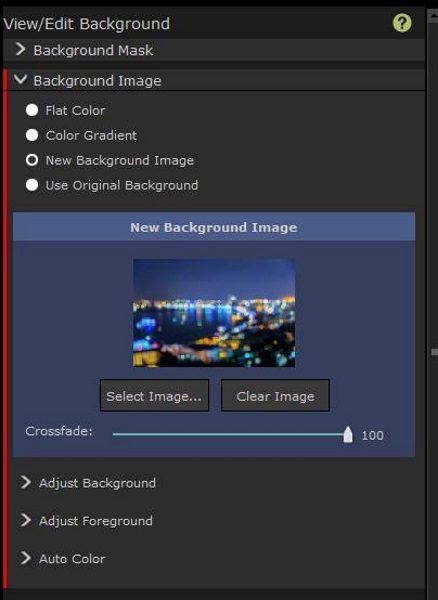

The Background Mask tools allow you to fill the foreground and the background along with several other adjustments. I am sure that once these tools become familiar, that replacing backgrounds is easy and very well done.

The Background Image category allows you to add background images or colors, and to adjust the background and foreground to blend as desired. The color gradient can also be tweaked to satisfaction. There is also an Auto Color category that allows you to blend the colors.

 What I like

There are so many really great things to like about this software. It includes a really great set of tools that are in my opinion, a great asset to any level of photographer or editor. I was very impressed with what I was able to do to fix and enhance the photo. I really like the numerous specific tools and tweaks that are included that allow you to get a picture just right. I was able to edit what I considered to be a horribly taken photo of my son, albeit that it was taken by a supposed professional photographer, and I was able to fix almost everything that was very wrong. Whatever I was unable to fix was due to my lack of knowledge of how to manipulate all of the great tools, and I am very sure that the more I work with this software, that perfection will be obtainable.

I also like that compared to the many other available software packages, PortraitPro is a great bang for the buck. Its ability to be added as a plugin to Adobe Lightroom and Photoshop makes it a permanent part of my workflow.

What needs to be improved?

While the PortraitPro software is a simply excellent photo editing set of tools, there are a few improvements that can be made to make it the obvious “go to” application. I feel that the face masking could be slightly more accurate in its initial detection, and could include more nodes on the lines of the masked areas, for more precise adjustments to the facial contours. I also think that the background detection can be more accurate by possibly doing a better job at detecting the edges of the subject so that a basic mouse can do the job as opposed to the Wacom Tablet that I had to use to get more precise edges of the photo. While the brush size can be adjusted, using the mouse for this did not feel as comfortable.

I also think that this software can be the perfect tool if a hardware controller is designed to precisely adjust the sliders, much like the Loupedeck does for Lightroom.

Final thoughts

Before

After

I am very impressed by what PortraitPro offers and what I was able to accomplish with my first try with the software. As you can see from the photo above, my initial attempt while not perfect has yielded very nice results. I have no doubt that as I continue to work with the software that I will not only get better at using all of its editing tools, but I am sure that it will continue to be an integral part of my workflow, especially if PortraitPro continues its current trend and releases updates and new versions to add to its already great set of tools.

PortraitPro is available in three editions: Standard, Studio and Studio Max which is the version used for this review.

Price: Starts at $39.95 for the standard edition.
Where to buyPortraitPro
Source: The free software license for this review was provided by PortraitPro

The post PortraitPro 17 Studio Max photo editing software review appeared first on The Gadgeteer.

Filed in categories: Reviews

Tagged: ,

PortraitPro 17 Studio Max photo editing software review originally appeared on The Gadgeteer on March 28, 2018 at 4:52 pm.

Note: If you are subscribed to this feed through FeedBurner, please switch to our native feed URL http://the-gadgeteer.com/feed/ in order to ensure continuous delivery.