AirTV review


REVIEW – There seems to be a big movement across the United States by many folks that want to cut the cord and get the programming they need for an affordable cost. I am one of those folks, especially since in recent times, my cable bill has ballooned to a cost that I can only define as ridiculous. Whenever I get a chance to try a new alternative to cable TV, I “jump” at the opportunity. This device is just such a chance, so here we go.

What’s in the box
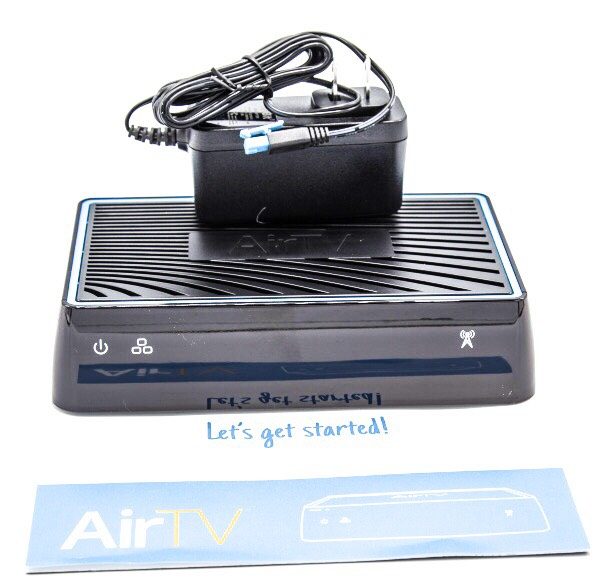

1 x AirTV Streaming Box
1 x AC Adapter
1 x Instruction Booklet

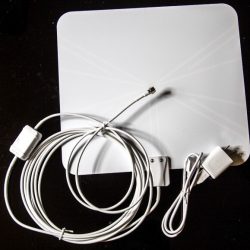
The company was kind enough to also provide the FlatWire OTA antenna for me to be able to test and review all of the functions for the AirTV box.


Design and features

The AirTV streaming box is designed to work with the Sling TV service with an option to add an Over-The-Air antenna to have access to local TV channels as well. The concept here is to offer a good option for you to be able to cut the cable TV cord. Viewing is controlled via the Sling TV app that works on both IOS and Android mobile devices as well as several available streaming boxes such as Roku, Amazon FireTV, XBOX ONE, Chromecast, Apple TV, etc. The Sling TV streaming service (Sling.com) offers 3 streaming packages: Sling Orange – $25 monthly, Sling Blue – $25 monthly, and Sling Orange + Blue – $40 monthly. These options represent different channel options or a combination of channels. They also offer various add-on packages at $5 each per month that include the following:

Categories:

Comedy
Kids
Sports
News
Lifestyle
Premium
Hollywood
Heartland
International
Espanol
In addition, you can get 50 Hours of cloud DVR storage for $5 monthly.

Design

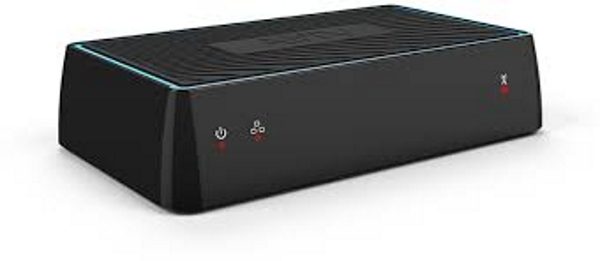
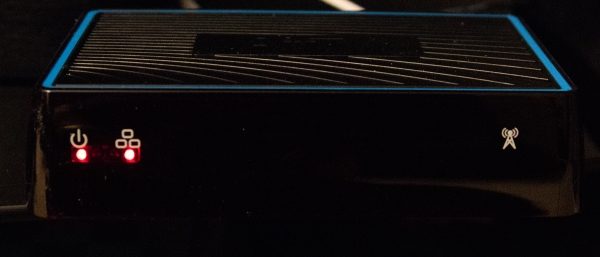
On the front of the box, there are a couple of red LEDs that show the power and connection status. There is also a logo to the extreme right.
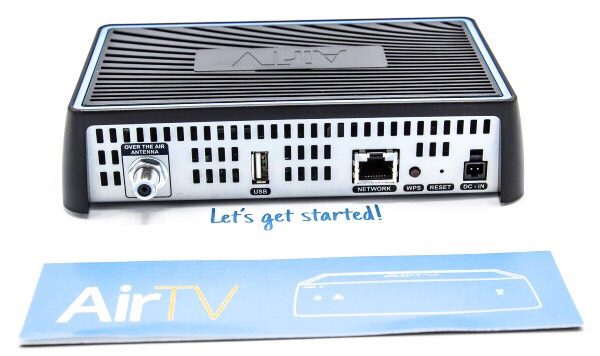
On the back of the AirTv box, there is a coaxial connection for connecting the Over-The-Air antenna a USB port for adding an external drive for additional content of your own, an Ethernet jack for a wired connection, albeit that it can also be connected wirelessly, a “WPS” button for wireless connection, a reset button and the DC in power port.
App

The AirTV works with the Sling Tv app, that allows you to stream both free and paid content to your tablet/mobile device or on to your TV using streaming devices like Roku, Apple TV, etc.

For the pictures below, I used my iPad Pro 12.9 to show the screen examples.
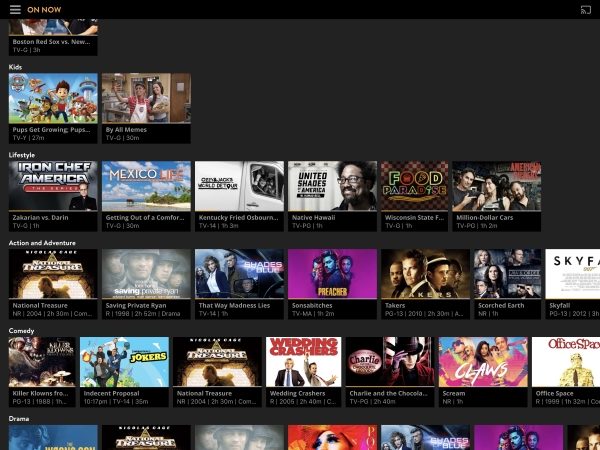
When you first select the app, this is the screen you see. If you have added any favorite channels/content they will show here, or you have the option to add them here if you have not. This is the “My TV” screen.

In the upper left-hand corner, there is a menu icon for selecting the options. Once you select the icon, you get the menu and the options for each screen:
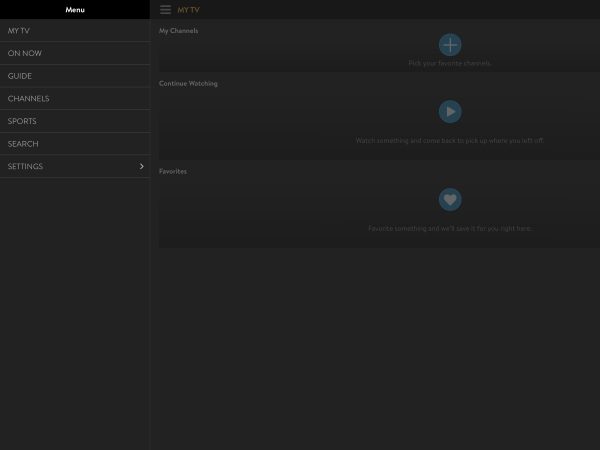
The first option is the My TV option that displays what shows are “On Now”. You can scroll up/down and sideways through this screen to see thumbnails for what is currently showing on each channel.
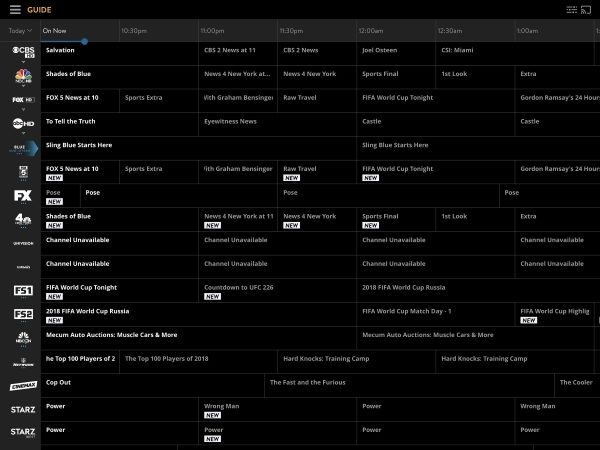
The next option is the TV guide and it looks much like a normal cable TV guide, or at least it looks just like my Spectrum Cable TV guide. You can also scroll up/down and side to side on this screen.
The Channels option shows the channels that you have access to across the top of the screen, and you can scroll across to see the specific channel guide for each channel with a thumbnail view of the shows below. The channel selection is made up of the Over-The-Air channels that you receive and the channels from the Sling TV package that you have subscribed to.

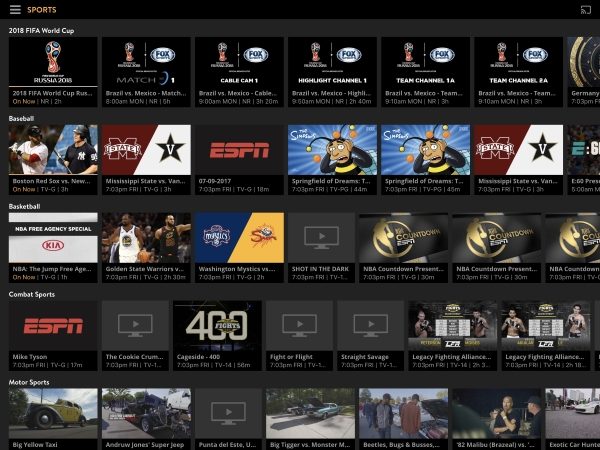
The Sports option shows all of the sports events available according to your subscription channels and OTA channels.
The last two options are the Search option and the Settings option.


The layout for the Sling TV app on the Roku streaming box is very similar and I suspect this would be the same for other devices.

What I like

I really like how well this box works and the layout of the options. The fact that it combines both the Sling TV streaming and the Over-The-Air channels is fantastic and eliminates the need for a separate OTA set up. I have a 300Mbps downstream connection, and this box performs as well as the cable TV box. I also like that it offers several options for the devices that can be used to stream. While the OTA antenna is not a part of this review, it performs very well and brings in over 40 channels in HD quality. I have tried other OTA antennas, and for “MY” scenario, and I must stress the “MY”, it brings in the most channels thus far, albeit that a couple of my local channels do not show up.

What can be improved

Packages that offer a better deal of more channels for the existing costs to better compete with most cable TV services. I would also like the ability to choose the channels for my package (minus premium channels of course).

Final thoughts

I really like the AirTV streaming box and its design. The combination of an OTA antenna along with the streaming package is a great option to cable TV if you are ok with the channels that are included with the packages being offered. On several occasions when my cable TV service went down, I was able to use the AirTV with the Sling TV app to continue to watch TV. However, in order to compete with my cable TV service and get me to cut the cord, the total cost has to be cheaper. Since I still have to rely on my cable TV provider for internet access, cutting the cord would only make sense if Sling offers more channels as a part of the flat rate packages. In order to compete with my current cable Tv subscription and my favorite channels, I would have to subscribe to several Sling TV add-ons as well as the Orange and Blue combination package. The cost of that Sling subscription, along with the cost of internet service, would be more than I currently pay. However, it is important to note that I have quite an upgraded internet package. If I was willing to live with a 60Mbps download speed, which is enough to stream, then I would be able to save some money using Sling TV.

Price: $119
Where to buy: AirTV and Amazon
Source: The sample for this review was provided by AirTV.

The post AirTV review appeared first on The Gadgeteer.

Filed in categories: Reviews

Tagged: ,

AirTV review originally appeared on The Gadgeteer on July 10, 2018 at 9:00 am.

Note: If you are subscribed to this feed through FeedBurner, please switch to our native feed URL http://the-gadgeteer.com/feed/ in order to ensure continuous delivery.

Protect yourself and your animals against tick-borne illness with the TickEase tick remover

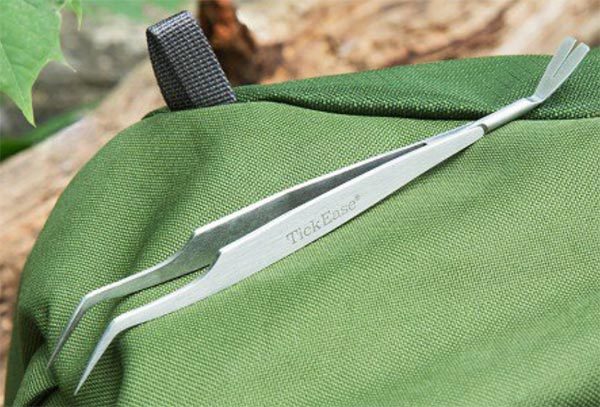
NEWS – Well, that title just said it all, didn’t it?  The TickEase Tick Removal Tool was created by Dan Wolff, also known as Tick Man Dan.  He’s a tick-prevention specialist who has been bitten over 200 times and who has been educating people about tick removal and prevention for more than 20 years.  He’s now applied his expertise to designing a tick-removal tool that complies with the Center for Disease Control and Prevention’s tick-removal guidelines, which advocate using a fine-tipped tool.

The TickEase tool is made of stainless steel.  One end has a thin, sharp-tipped set of tweezers for removing small ticks.

The other end is a slotted scoop for removing larger, engorged ticks.  You’ll also receive a magnifier and tick-testing instructions with the tool.

The TickEase Tick Removal Tool is $9.99 from The Grommet.

The post Protect yourself and your animals against tick-borne illness with the TickEase tick remover appeared first on The Gadgeteer.

Filed in categories: News

Tagged: ,

Protect yourself and your animals against tick-borne illness with the TickEase tick remover originally appeared on The Gadgeteer on July 10, 2018 at 8:00 am.

Note: If you are subscribed to this feed through FeedBurner, please switch to our native feed URL http://the-gadgeteer.com/feed/ in order to ensure continuous delivery.
Royole RoWrite Smart Writing Pad review

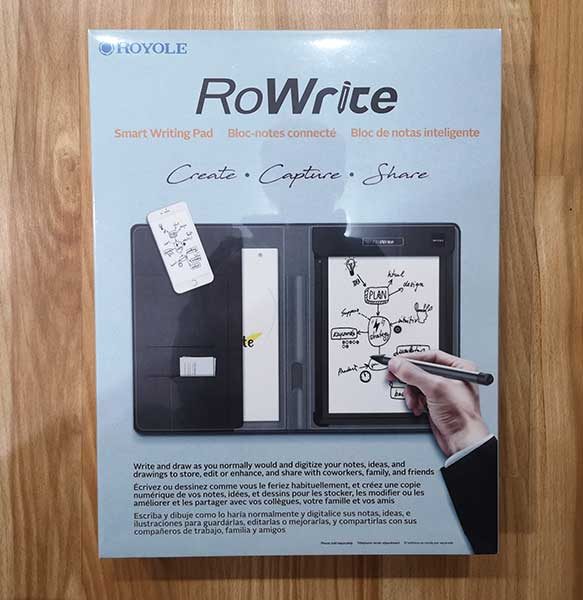
REVIEW – It can be argued that digital notetaking is infinitely better than writing notes on regular paper because digital notes are always backed up, easily searchable, and can be edited. But what can you do if you want to switch to digital notetaking or journaling, but you also don’t want to give up the feel of writing on paper with a traditional pen? One solution might be the RoWrite Smart Writing Pad from Royole. Let’s take a look.

What is it?

The RoWrite is a specially designed writing surface that when paired with the RoWrite pen, digitizes your text and drawings written on regular paper. The pen includes pressure sensor circuitry that captures 2048 pressure points and the iOS and Android app allows you to edit and enhance your captured images and text after the fact.

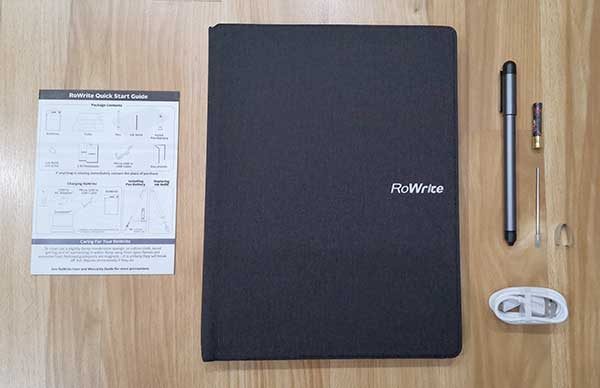
What’s in the box?

RoWrite folio
2 RoWrite A5 sized writing pads
RoWrite digital pen
AAAA Battery
Extra ink cartridge
Cartridge extraction tool
micro USB charging cable
Quick start guide

Design and features

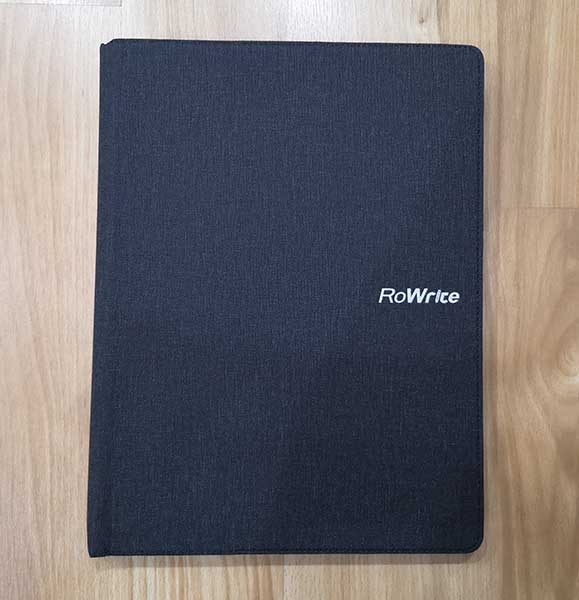
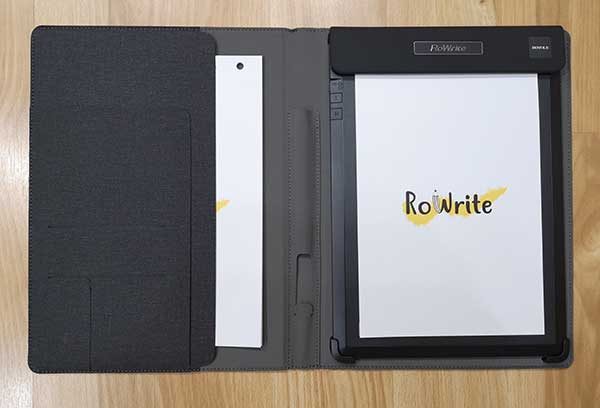
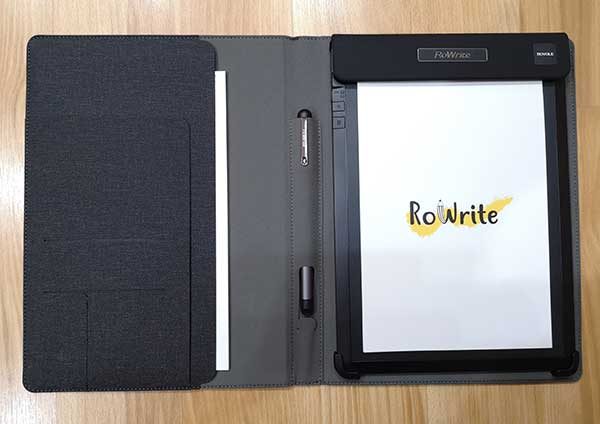
The RoWrite folio is designed like a notepad folio and dimensions of  8.5 x 11-inches. The cover has a soft texture that looks like canvas but I think it’s really a soft flexible nylon material.

Inside the cover of the RoWrite folio are several slots for papers, cards, and an extra notepad.

And in the center of the folio is a built-in holder for the digital pen.

Included with the RoWrite are 2 A5 sized smart writing pads which each have 18 blank unlined pages.

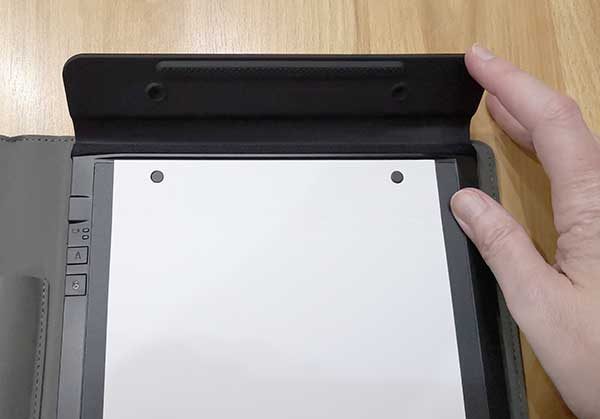
The pads of paper are held in the right side of the RoWrite folio by a magnetic clasp at the top of the notepad.

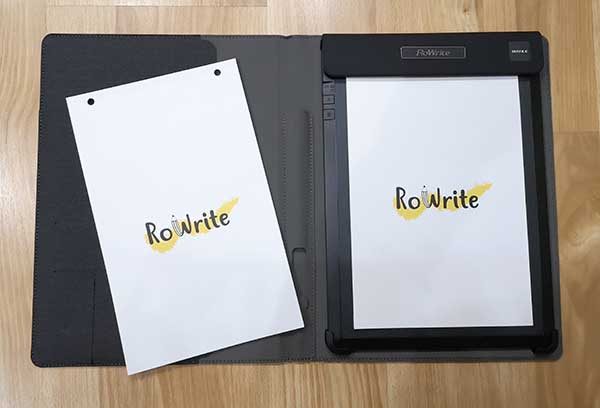
This clasp easily folds open so that you can replace the pad when needed. Note that I am not sure how much the replacement pads of paper cost because they aren’t listed on the Royole site or any other sites that sell the RoWrite like Amazon.

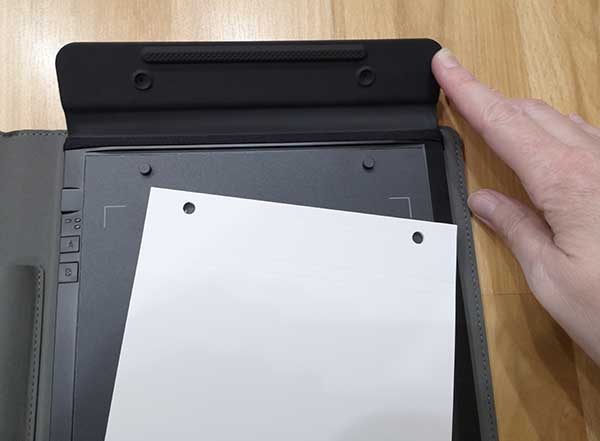
The pads have two holes at the top that make it easy to keep the pads securely in place and the thickness of the pads are designed to make the digital text capturing function of the RoWrite as optimal as possible.

That said, there is nothing special about the pads of paper and you can use your own paper if you make sure that you only write within the area of the A5 size outline. You can see the page outline corners on the digitizing pad in the image above.

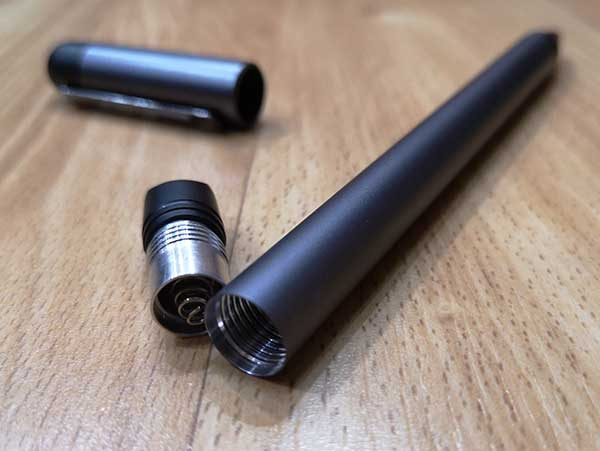
The RoWrite pen looks like a traditional ink pen with an aluminum barrel and cap that has plastic accents on the ends. It uses a standard Type D1 pen refill that you can find on Amazon.

The pen doesn’t have to be charged as it is powered by a replaceable AAAA battery.

The battery compartment is accessed by unscrewing the cap on the end of the barrel. There are advantages and disadvantages to a digital pen that uses physical batteries. An advantage is that it probably runs longer on a physical battery than it might on one charge of a built-in lithium-ion battery. But the disadvantage is that you will have to keep buying new batteries to have on hand and the RoWrite pen uses a AAAA battery, so you might not find replacements at your local Walmart or drug store. But you can buy a package of 8 AAAA batteries on Amazon for less than $5.

I’ve been using the pen on and off for brief writing sessions for a couple of weeks and the battery is at 80% capacity.

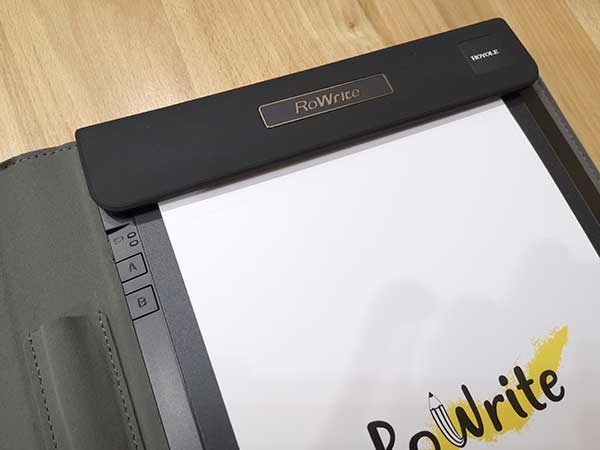
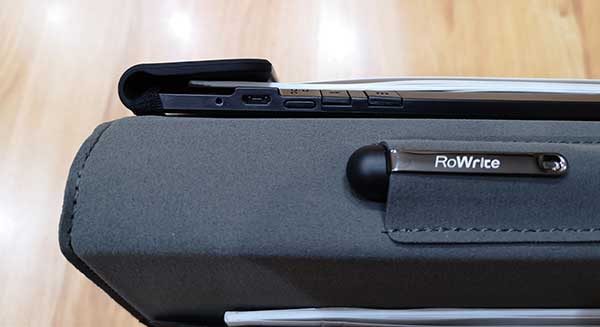
The RoWrite pad has its own built-in battery that requires charging before you can start using it. To charge it, you can connect a micro USB cable to the port on the upper left corner of the pad. You can see the port in the image above along with the power switch to the right of the USB port and two buttons that are labeled A and B. When you press the A button, it will immediately send any digitized text in the RoWrite’s internal memory to the RoWrite app and the cloud and if you press the B button it prompts the RoWrite to create a new page in the app for the next pen strokes even though you might still be writing on the same physical piece of paper.

Testing the RoWrite

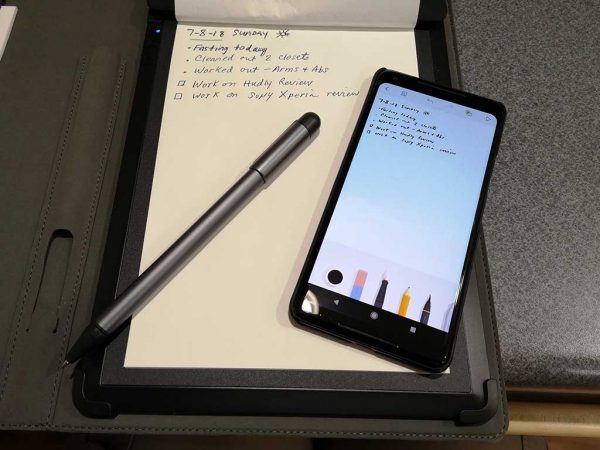
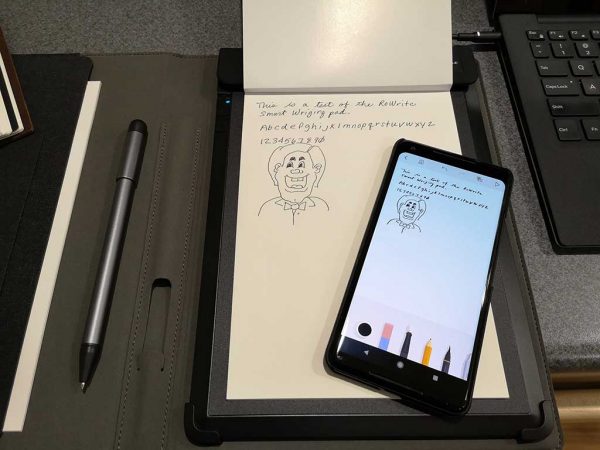
With the RoWrite smart writing pad charged, the battery inserted in the pen, and the RoWrite app installed on your iOS or Android device, it’s ready to start digitizing your written text and drawings. I tested the RoWrite with the Android version of the app on my Pixel 2 XL.

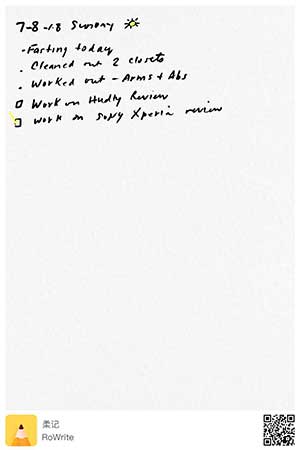
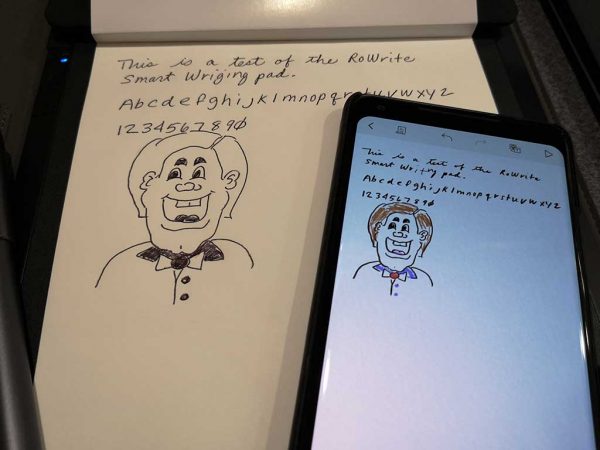
As you write on the paper pad, the marks are immediately recreated on the RoWrite app. You can even press the play button in the app to watch a replay of your writing/drawing session.

The RoWrite app


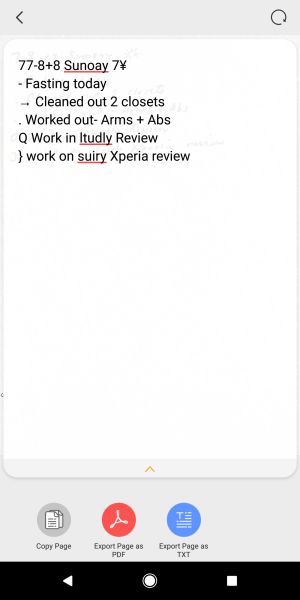
The RoWrite app has a set of basic features that allow you to create digital copies of the physical notes and drawings done on the paper in the folio. As you write, a copy of the same writings appears in the app. From there, you can convert the written words to text. It does an average job of converting the physical writings to text as long as you write clearly and don’t expect doodles or other little drawings to convert correctly. For example, checkmarks, X’s in boxes for tasks and other drawn symbols probably won’t be recognized.


The RoWrite app will also allow you to edit your digital drawings using rudimentary tools to change the color of the pen’s “ink”. You can even erase sections and write on the screen to add to the notes or drawings digitally.


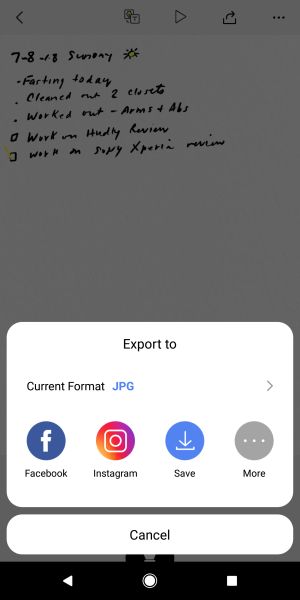
Digital drawings and notes can be saved as a PDF file, a JPG, and shared with a variety of apps like Facebook, Evernote, Instagram, and more.

What I like

  • You can use any paper with the pad as long as you only write within the A5 footprint
  • Instantly captures what you write in the RoWrite app as you’re writing it

What needs to be improved

  • You have to keep the RoWrite pad charged and have a supply of physical batteries on hand for the pen
  • Not sure where you can buy the RoWrite replacement pads of paper

Final thoughts

The Royole RoWrite does what it’s been designed to do and I had no problems with any the functions or features. This product reminds me a lot of the Neo smartpen M1 which I recently reviewed. But with the Neo pen and other digital pens like it, they can only be used with special notepads and notebooks.

The RoWrite can be used with any paper, BUT you have to keep both the pen and the folio charged. Therein lies the choice. Do you go with a digital pen that can be recharged, but uses special paper or do you go with the RoWrite which lets you use any paper you like, but it requires you to buy special batteries for the pen? For me, I  would go with the RoWrite just for the fact that I can use my own paper instead of buying expensive notebooks. While there is a bit of inconvenience with the pen’s batteries, they aren’t very expensive and there’s also the option to get rechargeable AAAA batteries.

Price: $129.99
Where to buy: Amazon
Source: The sample for this review was provided by Royole.

The post Royole RoWrite Smart Writing Pad review appeared first on The Gadgeteer.

Filed in categories: Reviews

Tagged: ,

Royole RoWrite Smart Writing Pad review originally appeared on The Gadgeteer on July 9, 2018 at 5:38 pm.

Note: If you are subscribed to this feed through FeedBurner, please switch to our native feed URL http://the-gadgeteer.com/feed/ in order to ensure continuous delivery.

Lululook Canvas Backpack for men review

Convertible bags are great, but they also present a tricky design challenge to make sure the bag works in both vertical (backpack) and horizontal (messenger) mode. Today we’re looking at Lululook’s take on the convertible backpack/messenger bag. There are ‘s a lot of interesting  design happening here. How does the whole package come together? Let’s have a look!

What is it?

It’s a canvas backpack that converts to a messenger bag.

Hardware specs

  • Cotton canvas with leather accents
  • Molded plastic hardware
  • 12” by 18” by 7”

Design and features

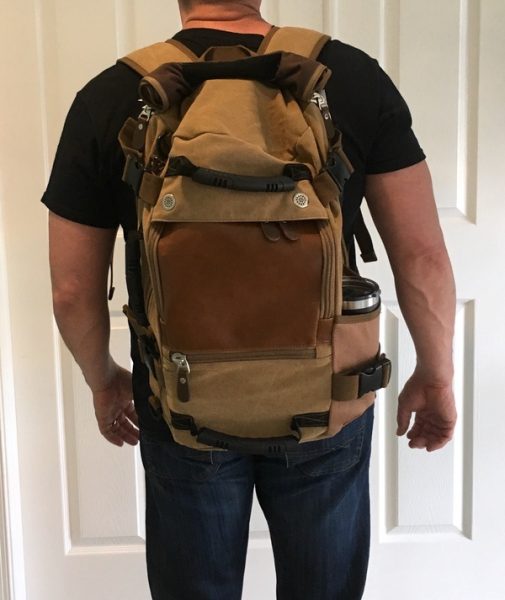
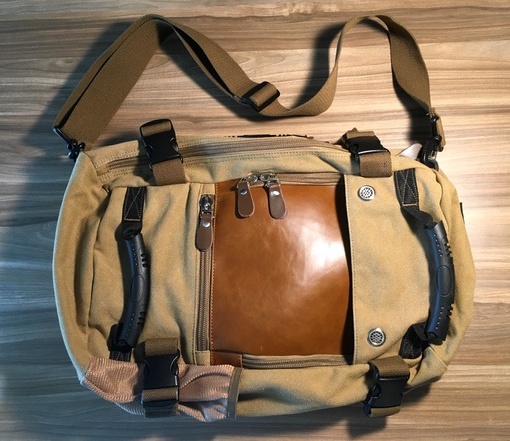
The Lululook Canvas Backpack is a convertible backpack/messenger that’s all about urban style. Tan is the primary color in my tester, but there’s some well-balanced use of earth tones in the trim & hardware (plus some leather hits) that provide visual interest. It’s a good looking piece of carry.

The exterior seems pretty well put together for a bag at this price point. Soft cotton canvas is the primary material, with cotton webbing used for straps throughout. Rugged plastic hardware and chunky zippers (not YKK, unfortunately) add to a build that feels fairly substantial. The interior fabrics are an issue, however, as we’ll see below.

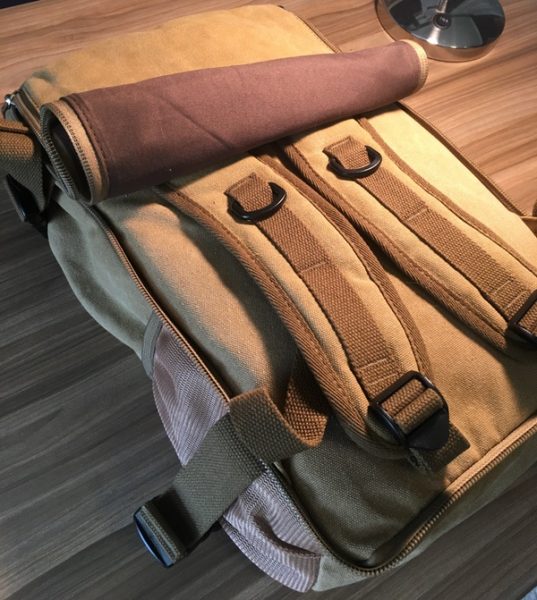
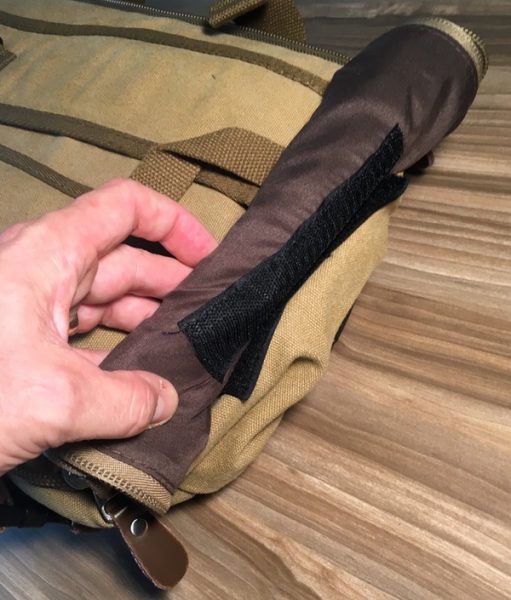
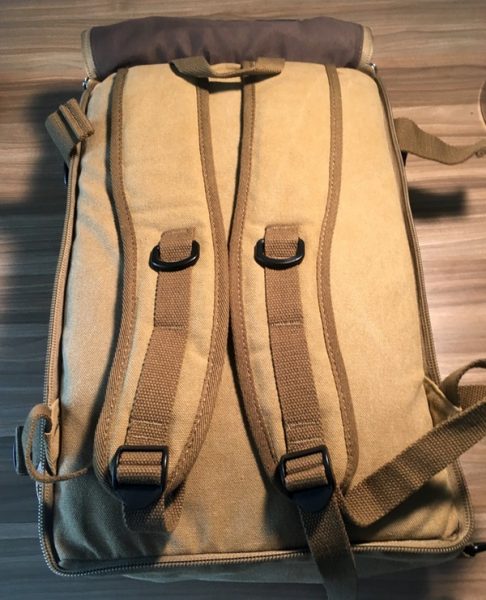
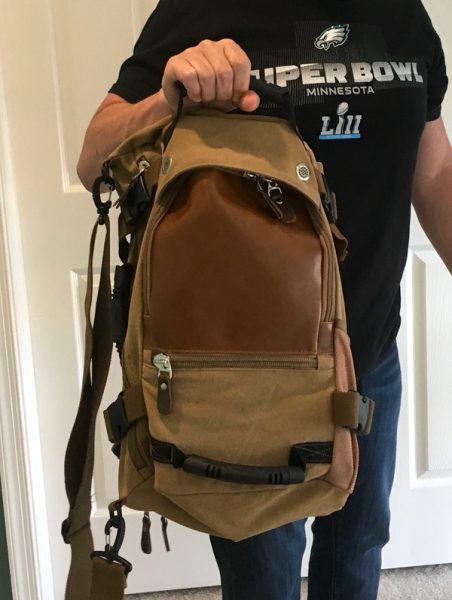
The design is built around a simple 12” by 18” by 7” box shape. The backpack straps are hidden behind a zippered panel on the rear of the bag that rolls up and velcros to the top of the bag when in use. See below for the walk through:

It’s a clever solution that, when combined with the low-profile backpack straps, gives you a nice option for stashing those straps without adding a lot of extra bulk. Those straps are also comfortable despite the light padding.

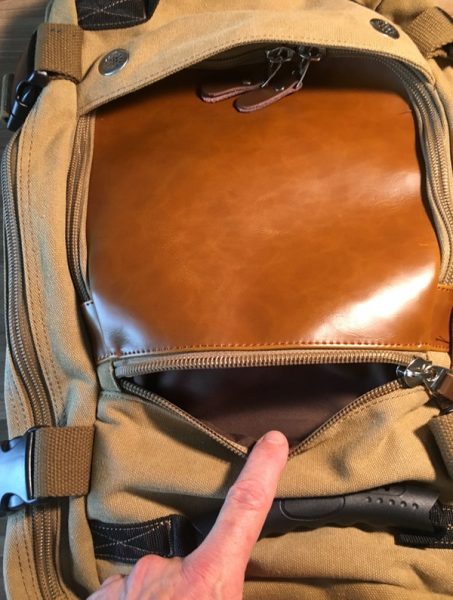
You’ll find two pockets on the front face to organize your goods. That leather flap unzips on three sides to reveal a monstrous pocket that runs almost the full height and width of the bag. There’s also a horzontal pocket below it that’s plenty big enough for power bricks and such.

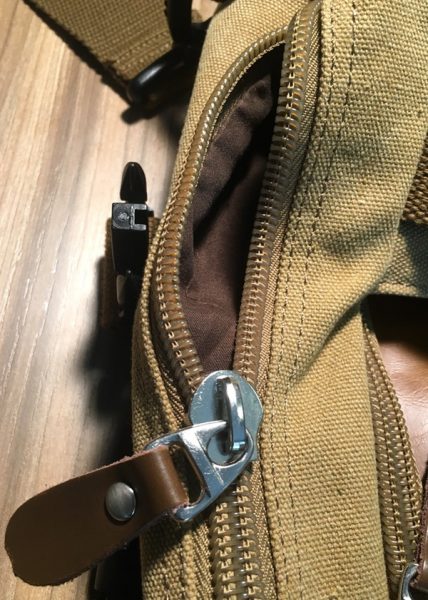
This presents one of the challenges I have with this bag design. See how those zips have to get under that rain hood at the top of the bag? It’s really tough to make that zipper turn those corners under the grommets without a fight. Maybe the zips will loosen up over time, but I found it really hard to get into this compartment.

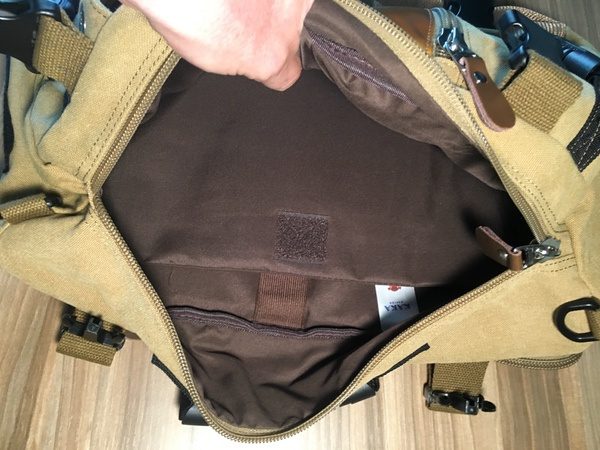
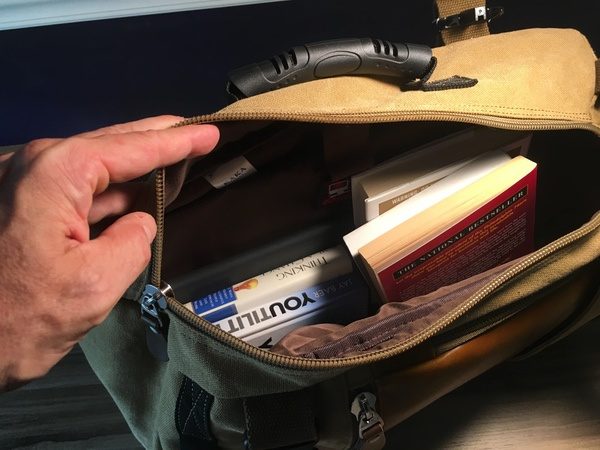
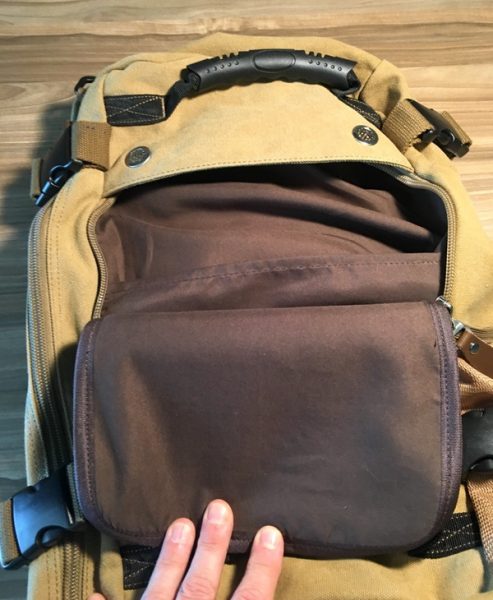
This leads to the second issue I have with the front pocket: not only is it huge and tough to get into, but the pocket is backed by nothing but a thin piece of fabric. There’s a thin fabric divider in this space, but it just gets in the way. I dropped a 9″ by 11″ textbook in there… you can’t see it, can you?

With no internal support, that space just turns into a big floppy black hole. Big items get lost, and small items vanish into the void. Between this and the trouble working that zipper, I found myself not using that pocket much on a day-to-day basis. I also see that thin fabric as an area with a high potential for tearing over time.

On the plus side… the main compartment is enormous. Some soft padding on the rear panel and the divider will protect a laptop up to 15″, and the rest is just open space for whatever you like. We’re talking roughly 30 liters of space if you’re not putting too much in the front compartments.

I stuffed 6 books, my laptop, and an ipad in there in addition to the textbook in the front compartment with plenty of room to spare. If you like big spaces to bung all your gear, you’ll like this.

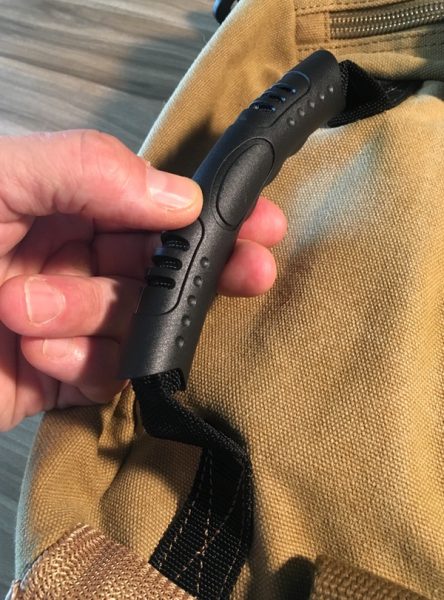
There are some thoughtful additions to design that I like quite a bit. Three rubberized grab handles are placed at the top, bottom, and side of the bag for tossing it around. They’re nice & grippy, and work well when getting in and out of vehicles:

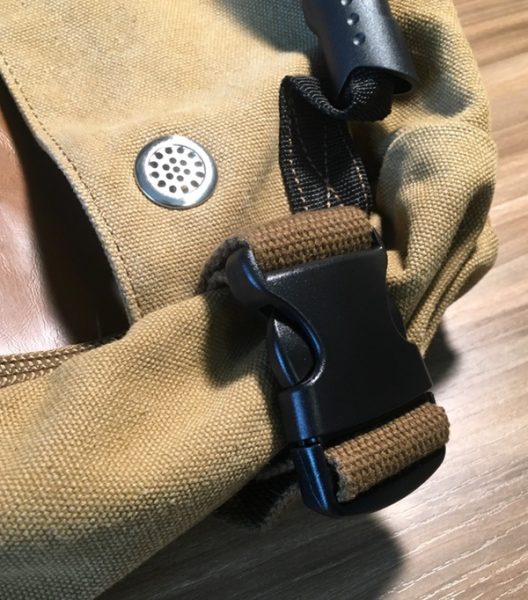
Compression clips at the four corners of the bag are very much appreciated for cinching things down if you’re lightly packed:

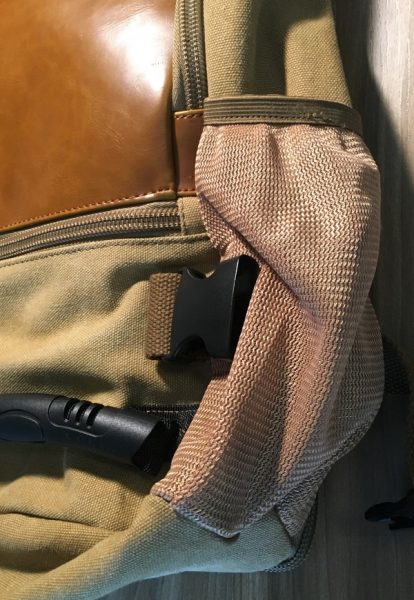
The elastic mesh water bottle pocket is also a nice touch… while I have that compression strap unlocked here, it actually expands with the pocket to handle the Yeti 24 ounce mug you’ll see in some of the other pics:

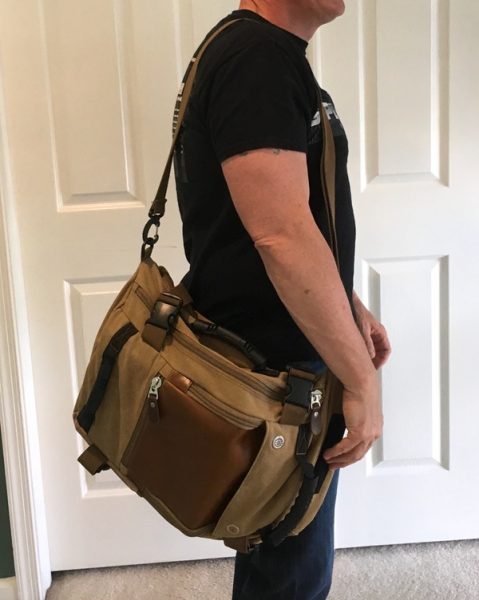
When you want to go to one-shoulder mode, the included cotton web strap clips on the same side as the main compartment opening and side grab handle (which now becomes a briefcase-style handle). There’s no shoulder pad, but the strap is sturdy and comfortable. The hardware and attachment points are all solid.

Sadly, that front panel pocket is even less usable in this mode. It’s just impossible to access when the bag is turned on its side. The messenger-style carry works great for the main compartment, however, which turns into one big ol’ stuffable space. Note that the compression straps need to be unlocked to unzip to the main compartment in this mode. 

With all those soft fabrics and no framing, it’s important to note that the bag tends to sag and flop based on whatever you put in it. You can see that everything I loaded into the bag sinks to the bottom as shown below:

There’s a lot to like in this bag, but I found myself dealing with tradeoffs in both backpack and messenger mode that took away from the overall usability. If you’re an organizer with a lot of tech, you probably won’t be happy with this bag. If you like a floppy, unstructured bag that will accommodate all kinds of stuff, this may be a good fit for you. I’d prefer to see that front pocket redesigned (or removed entirely) to make this bag really usable.

What I like

  • Good looking, modern style
  • Some nice additional features in the compression clips, multiple grab handles, and water bottle pocket
  • Roomy

What needs to be improved

  • The main front pocket is not very usable
  • The bag could use some more structure to keep your stuff from sinking to the bottom
  • Interior fabrics are flimsy
  • Very little organization for tech and small bits

Final thoughts

The Lululook Backpack for Men is a mixed bag (pardon the pun) for me. It looks great, and there are some nice design elements that I quite like. There are some challenges in the overall layout, however, that you may want to consider if you’re thinking about this one.

Price: $45.99
Where to buy: Visit the Lululook web site for purchasing information.
Source: The sample of this product was provided by Lululook.

The post Lululook Canvas Backpack for men review appeared first on The Gadgeteer.

Filed in categories: Reviews

Tagged:

Lululook Canvas Backpack for men review originally appeared on The Gadgeteer on July 9, 2018 at 2:00 pm.

Note: If you are subscribed to this feed through FeedBurner, please switch to our native feed URL http://the-gadgeteer.com/feed/ in order to ensure continuous delivery.

PlanetBox is the eco-friendly lunchbox for kids or adults

NEWS – Just like with most reusable lunch kits, taking your lunch from home will be more eco-friendly.  You will reduce waste because you won’t need plastic bags, waxed paper, or aluminum foil to package up your lunch.  You don’t have to worry if the PlanetBox lunchbox is food-safe and BPA-free.  PlanetBox says they take “non-toxic, non-leaching, safe from BPA, phthalates, and lead” very seriously.  Their lunch kit isn’t made of plastic – it’s made of high-quality stainless steel that’s warranted for 5 years.
PlanetBox lunchboxes have been thoughtfully designed after years of studying how people use lunchboxes.  They have compartments of various sizes to hold sandwiches or an entree, veggies, chips, fruit, and even some tiny compartments for dressings or even a small dessert.  The size of the compartments can guide you to pack sensible portions.  The lunch kits are dishwasher safe, and unlike plastic containers, the stainless steel doesn’t stain or hold on to odors.

The boxes are available in three sizes, so just like Goldilocks, you’ll be able to find a PlanetBox that’s just right for the way you pack lunch for your kids or yourself.  The Shuttle (small, center) holds 3.5 cups of food and is $39.95; the medium-sized Rover (left) holds 5 cups of food and is $55.95; and the large Rover (right) holds 7 cups of food and is $59.95.  You can purchase magnet kits to personalize the kits with designs from dinosaurs to galaxies, or you can have custom-printed magnets made for a truly unique kit.

PlanetBoxes are available alone or as part of kit with magnets, a carrying bag, and a drink bottle.  Other accessories, like cutlery sets, napkins, and snack containers, are also available.  Shop PlanetBox for your own eco-friendly lunchbox and accessories.  Also check out the meal planning ideas while you’re at the PlanetBox website.

The post PlanetBox is the eco-friendly lunchbox for kids or adults appeared first on The Gadgeteer.

Filed in categories: News

Tagged:

PlanetBox is the eco-friendly lunchbox for kids or adults originally appeared on The Gadgeteer on July 9, 2018 at 11:05 am.

Note: If you are subscribed to this feed through FeedBurner, please switch to our native feed URL http://the-gadgeteer.com/feed/ in order to ensure continuous delivery.