FinalStraw reusable folding straw review


REVIEW – I just returned from a week’s vacation on Sanibel Island Florida and I immediately noticed that all but one of the restaurants that we visited provided paper straws instead of plastic straws. Why does this matter? Because Americans throw away 500 million plastic straws every day. Think about that a minute. Can you imagine that much plastic that goes unrecycled? Millions of these straws end up in the ocean where they hurt sea turtles, fish, and other animals. Is there a solution? Maybe. One possible solution is the FinalStraw reusable folding straw. Let’s see if it sucks, but in a good way.

What is it?

The FinalStraw is a reusable BPA free and dishwasher safe straw that folds down into a pocket-sized bundle.

What’s in the box?
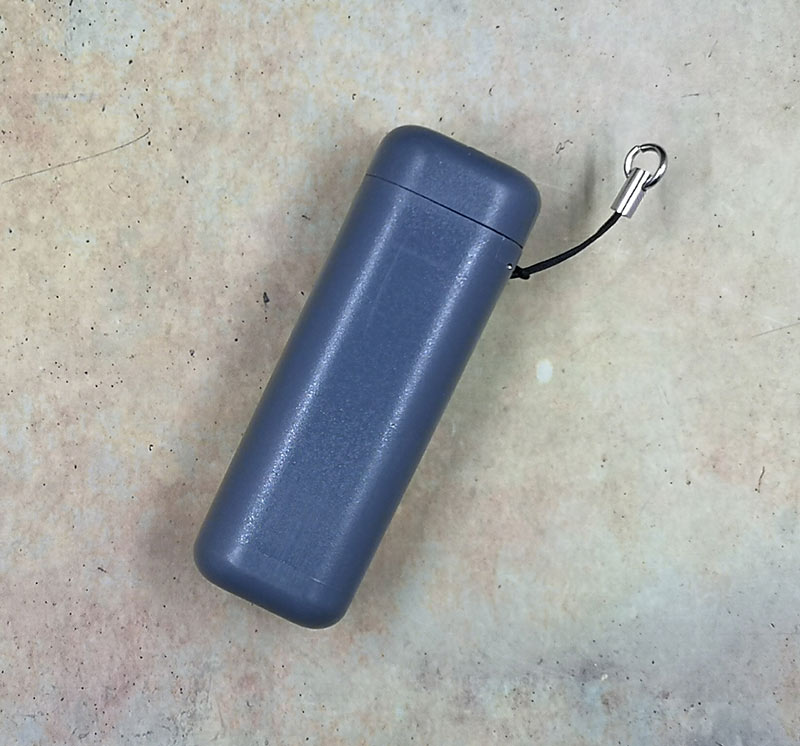
FinalStraw
Storage container
Drying rack
Squeegee cleaner

Design and features
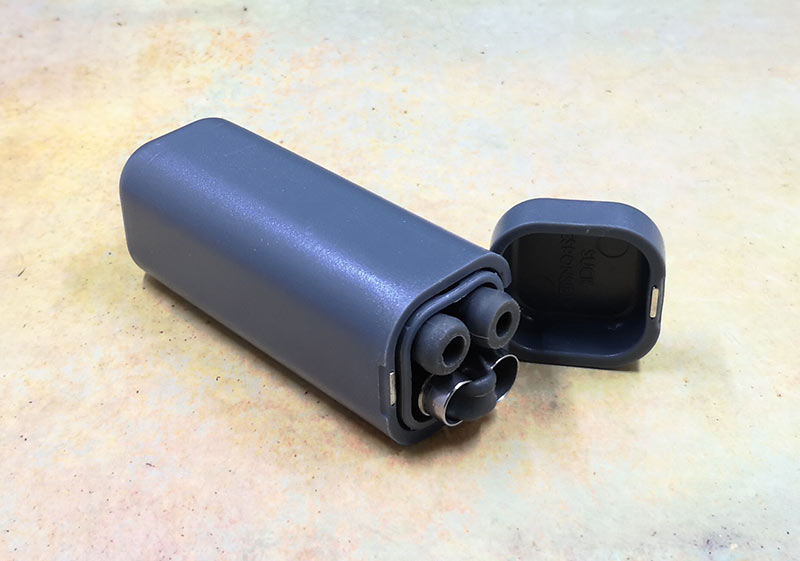
 

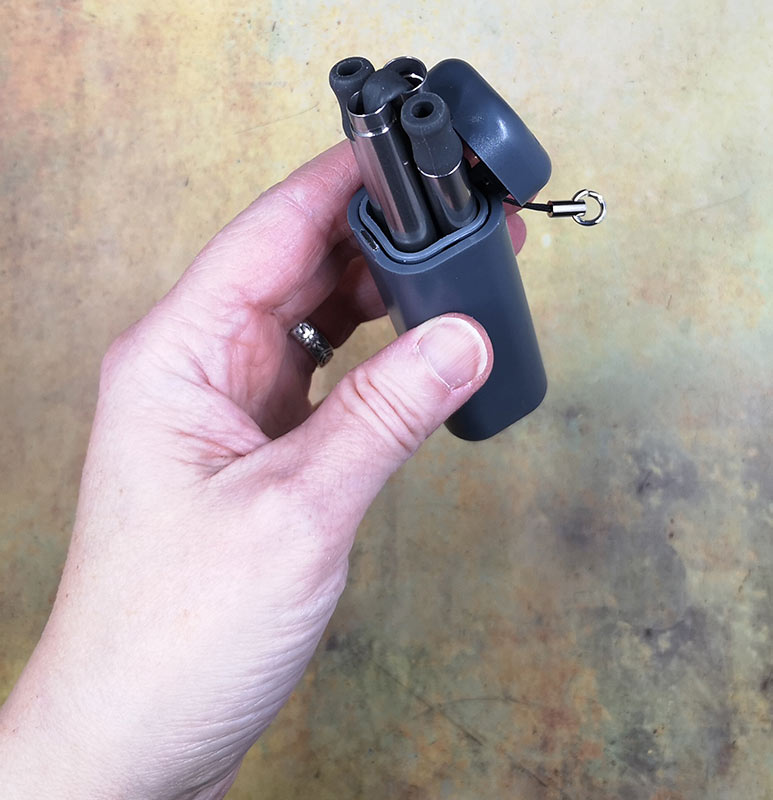
The FinalStraw case is available in several colors, but I was sent the “goes with everything” Shark Butt grey version. The case has a flip top that opens to reveal a funky looking folded straw.
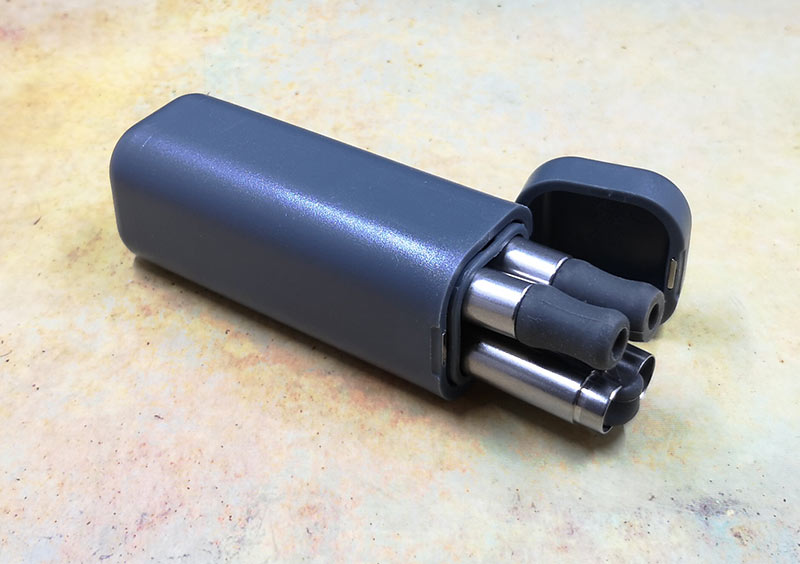
Grabbing one of the silicone ends allows you to pull the FinalStraw from the case.
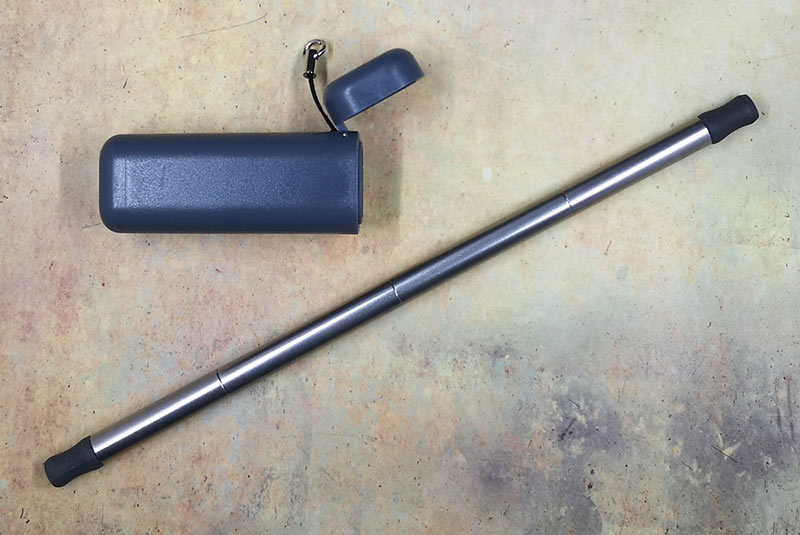
Doing so causes the 9-inch straw to automagically unfold for immediate use. The unfolding action makes me feel like I’m a magician every time I do it.
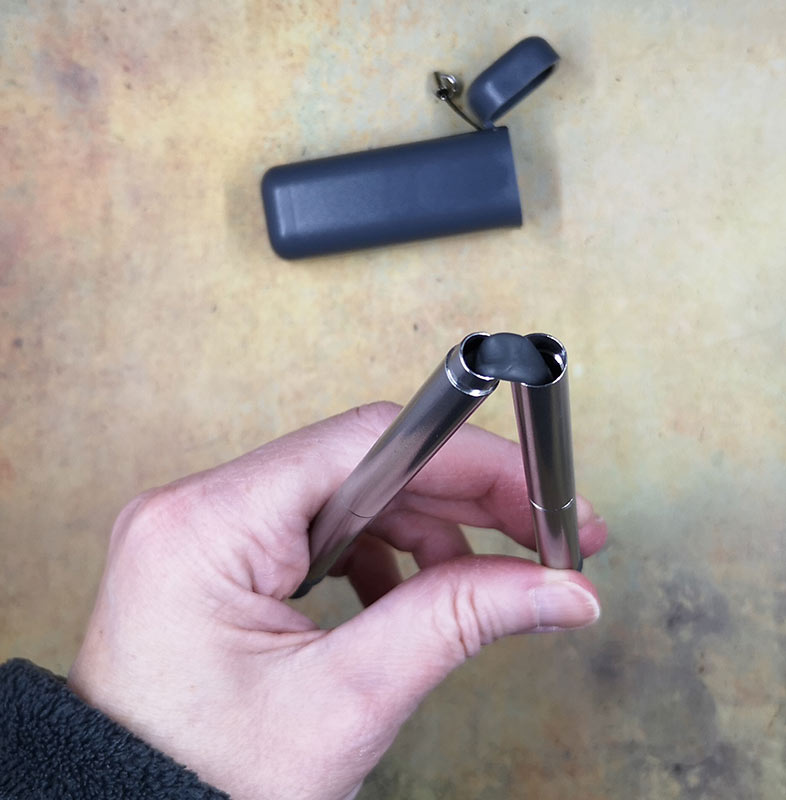
A closer look reveals that the straw is really a medical & food grade TPE tube which is inserted into four sections of 304 stainless steel which fit into each other to create a sturdy and reusable drink-sipping accessory.

Sipping performance
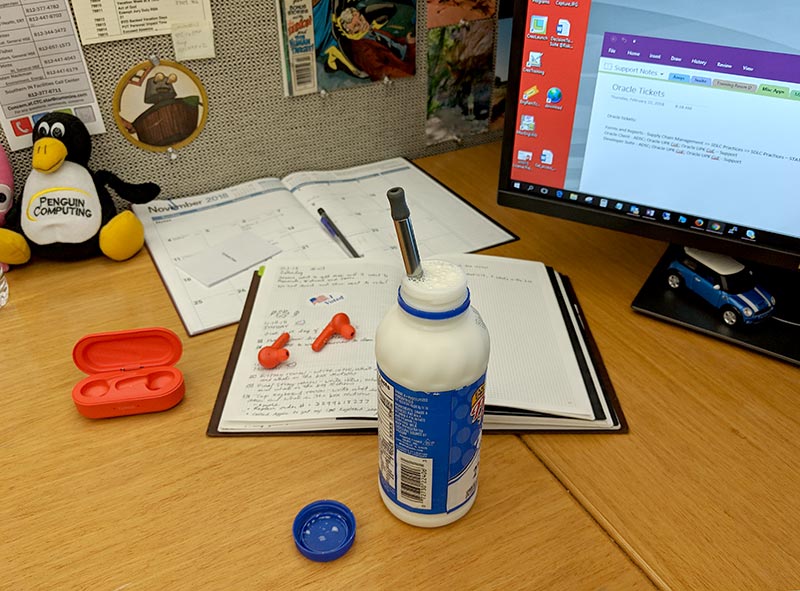
Does the FinalStraw perform like other straws? Yes and no. As you can see from the image above, the FinalStraw fits in a bottle of milk like other straws, and I can drink from it like I can with an evil plastic straw. But… yes, there’s always a but. And in this case, there are several buts to consider before using the FinalStraw as your final straw.
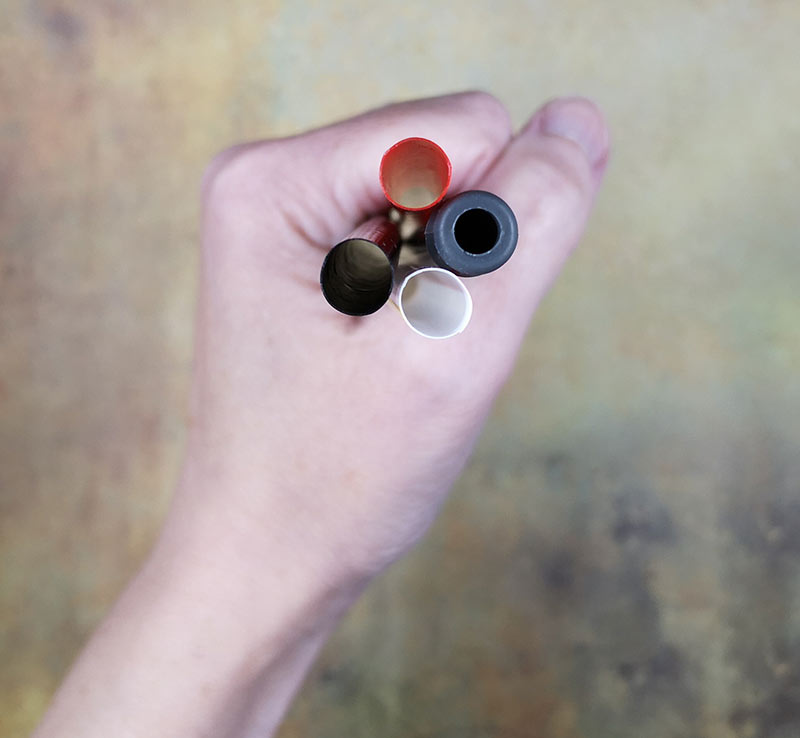
The first difference that I noticed is that the 7mm diameter of the FinalStraw is much smaller than plastic straws that I had laying around in my silverware drawer.  Why does this matter? Because the smaller diameter means you have to suck harder to drink using this straw. This is especially true if the drink is thicker like a smoothie or workout shake.

The FinalStraw is also heavier and feels kind of sloppy and wiggly when you use it to stir your drink. That shouldn’t be a surprise since it’s made of steel and is made of four separate pieces.

The ends of the FinalStraw are made of silicone which is great for mouthfeel and for people who like to chew or bite the ends of their straws (weirdos). But I noticed that the end in the bottle or cup would sometimes stick to the bottom of the cup so that sipping would stop abruptly. If you’ve ever been stopped in mid-sip, you can understand how this is can be pretty tragic.

You’ve finished your drink, now what?
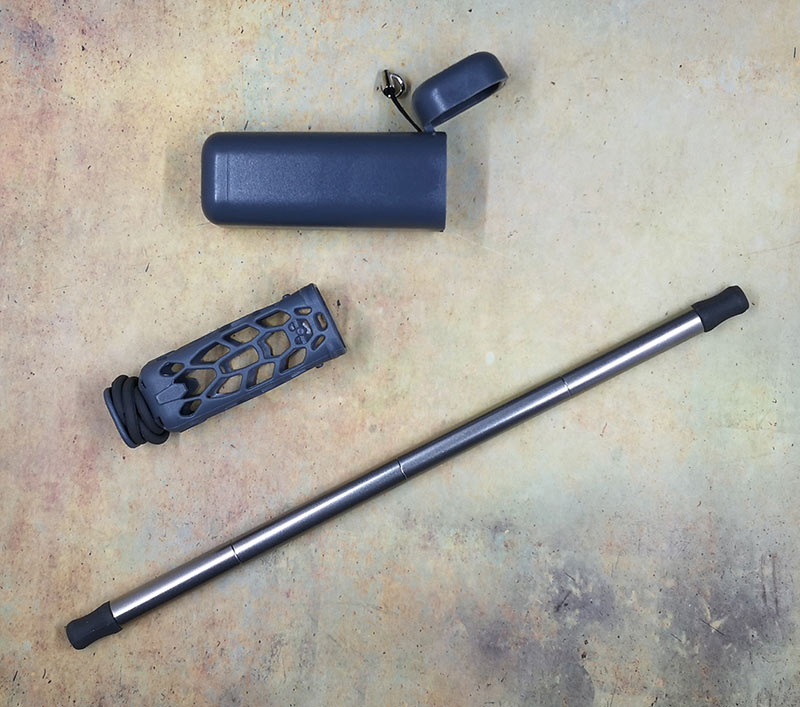
After you’ve sucked up the last drop of your soda or workout shake, what do you do with the FinalStraw? If you’ve used it to drink anything but water, you’ll need to rinse the inside and outside, and clean it. To do that, you pull the drying rack out of the storage container. Wrapped around the bottom of the drying rack is a squeegee cleaner.
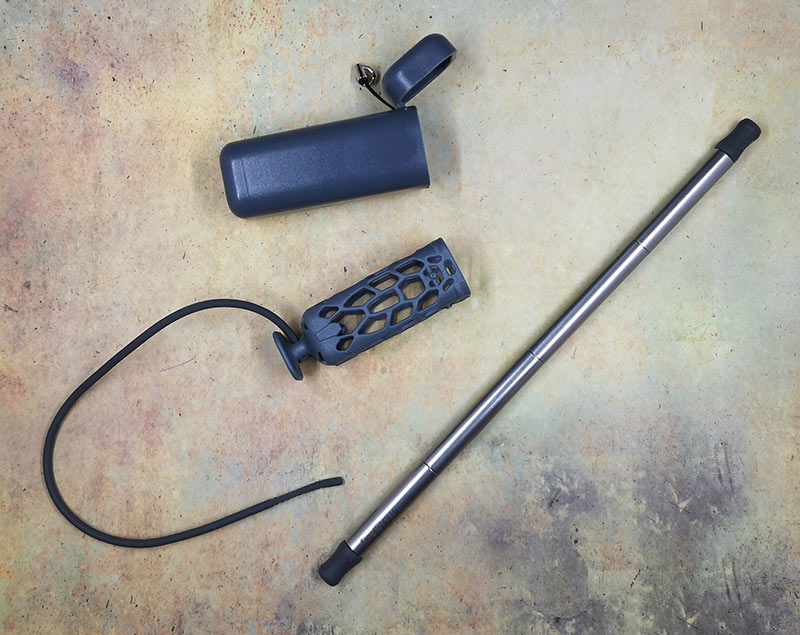
The squeegee cleaner is a silicone cord with one end that is a little larger than the opposite end.
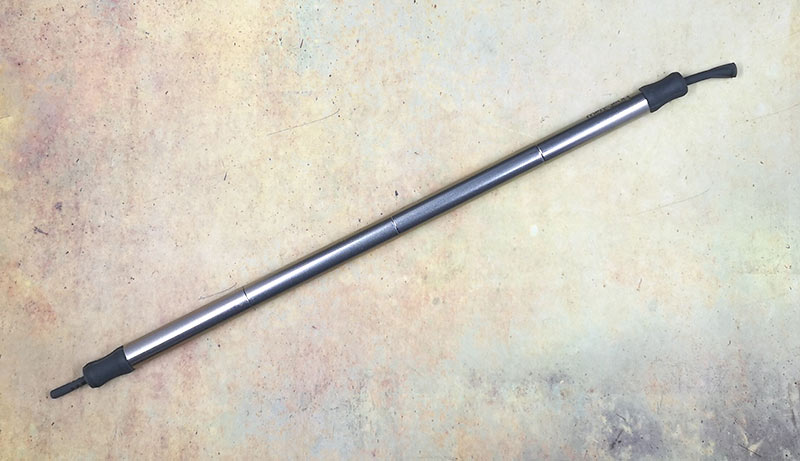
To clean the FinalStraw, you remove the squeegee cleaner from the drying rack and slide one end through the straw.
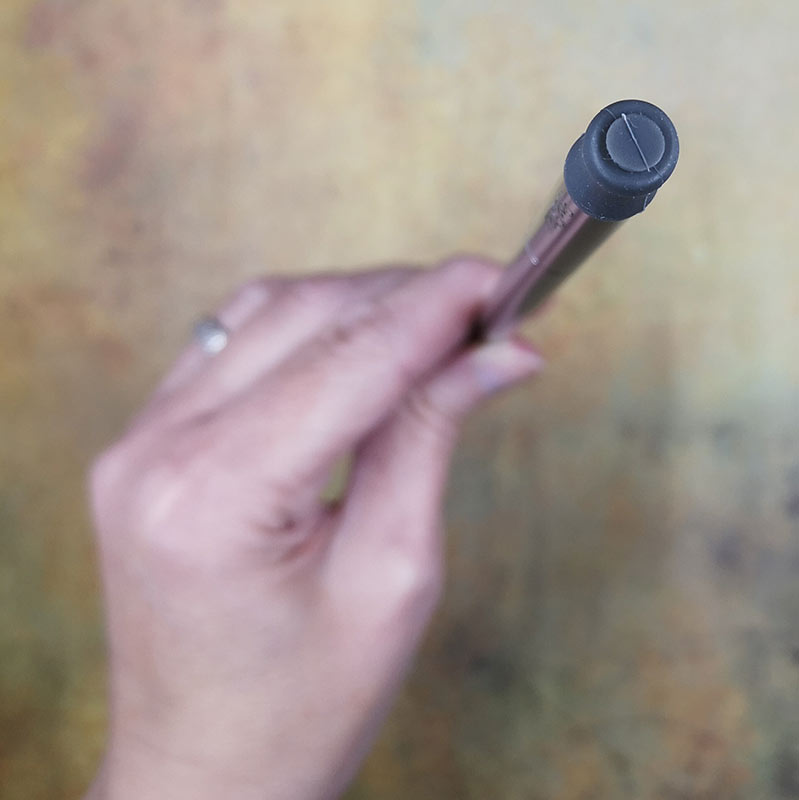
Then you pull the larger end through the length of the FinalStraw which squeegees out any remaining liquid or gunk (ick).
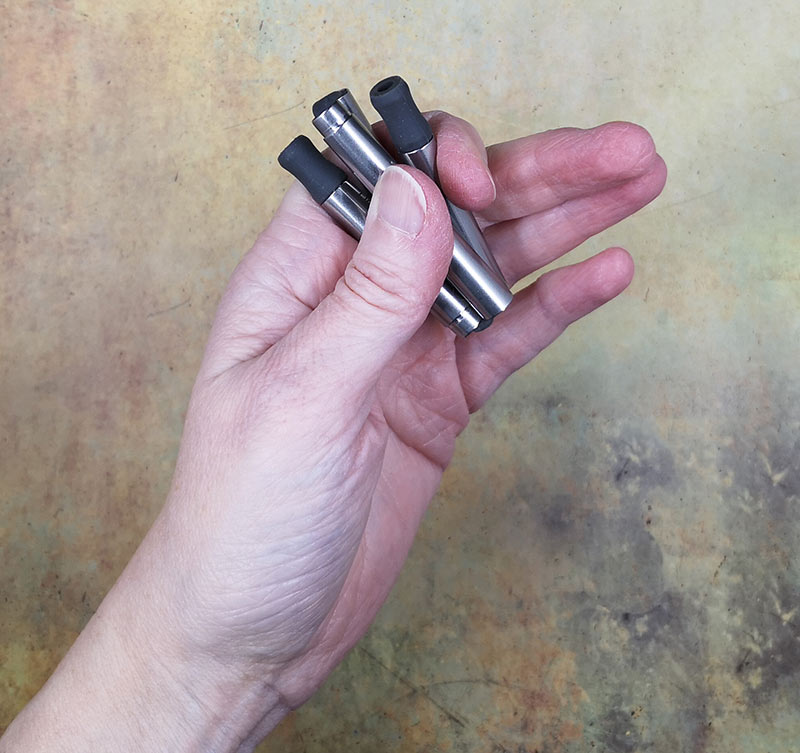
The final step is to fold up the straw and insert it back into the storage container once you’ve wrapped the squeegee cleaner around the drying rack and replaced the rack in the container. Wow, that seems like a lot more work than using a plastic straw, doesn’t it? Yes, it is… Folding the straw back up so you can put in the storage case makes you feel kind of dorky when you’re out in public because it’s a little awkward.

What I like

  • It’s fun to pull the FinalStraw out of the case so it unfolds like magic
  • Makes me feel like I’m saving the world from evil plastic straws
  • Made to last

What needs to be improved

  • The price
  • Diameter

Final thoughts

I recycle everything I can, and I even reuse plastic straws. You should see my silverware drawer, it’s full of them. I was hoping that the FinalStraw would be an excellent alternative to plastic straws, but the biggest issue comes down to price. I don’t know many people who are willing to spend $25 for a straw. Granted, this straw is made to last a lifetime, but $25 is hard to swallow (sorry, I couldn’t resist). Then there is the fact that the diameter is narrow which requires more sucking power sip drinks. And then last but not least, there’s the fact that you have to clean this straw after each use. That’s a lot of effort. While I agree that reducing the number of plastic straws is obviously a good idea, I think there has to be a better way to do that. Paper straws are one alternative since they will break down over time. The FinalStraw is a move in the right direction, but I don’t think it’s the final solution. What do you think? Share you thoughts in the comments below.

Price: $25.00
Where to buy: FinalStraw
Source: The sample for this review was provided by FinalStraw.

Filed in categories: Reviews

Tagged:

FinalStraw reusable folding straw review originally appeared on The Gadgeteer on November 7, 2018 at 9:00 am.

Note: If you are subscribed to this feed through FeedBurner, please switch to our native feed URL http://the-gadgeteer.com/feed/ in order to ensure continuous delivery.

Give the gift of a diamond – decanter, that is

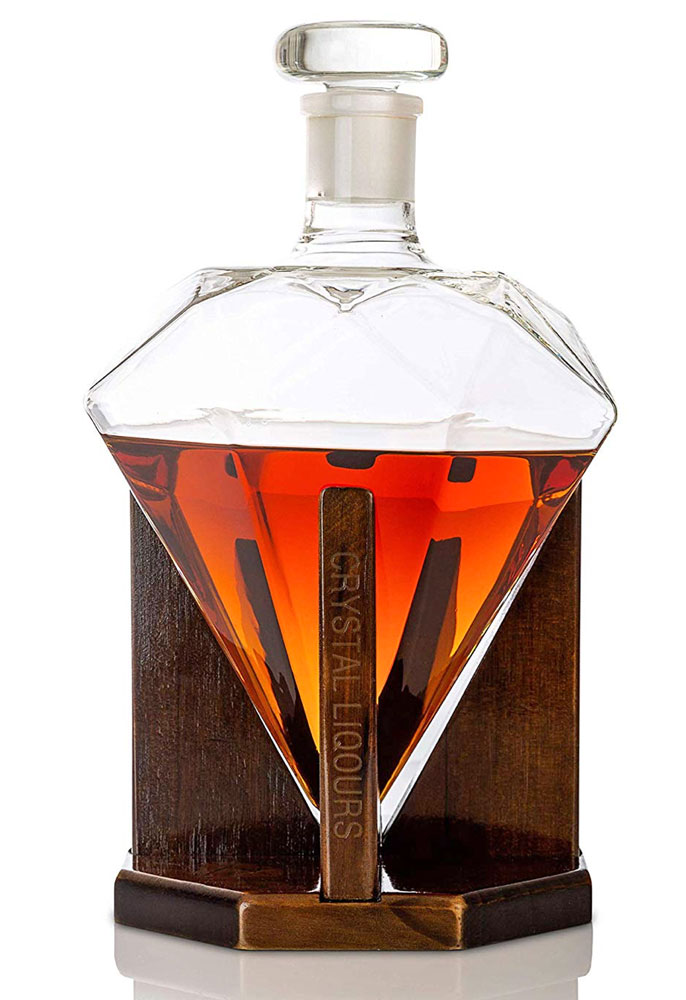
NEWS – Back in 2012, John Walker & Sons produced 60 bottles of a limited-edition whisky to honor the 60th anniversary of Queen Elizabeth II’s ascension to the throne.  That whisky was bottled in a beautiful lead crystal decanter with a sterling silver collar set with a half-carat diamond.  The decanter was diamond shaped, similar to this decanter shown here, but the Walker decanter was all crystal, with the base part of the decanter itself.  Those bottles sold for £100,000.  There’s no way I’ll ever even see one of those Diamond Jubilee bottles, much less own one.  But I could get a beautiful diamond-shaped decanter with a wooden base for a much more budget-friendly price.

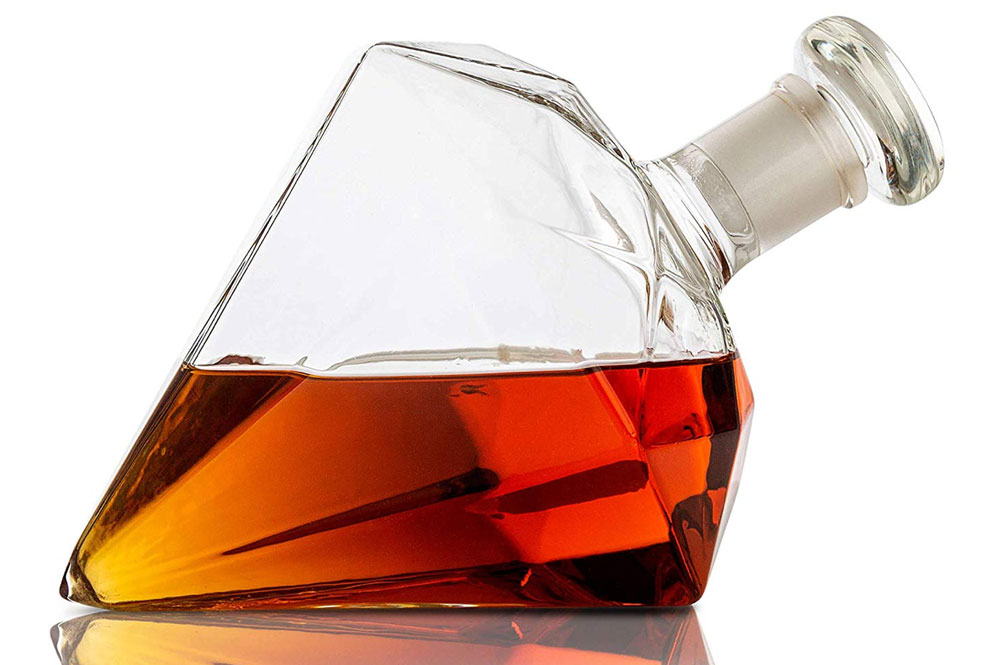
Amazon is offering the Crystal Liquors 1000ml Diamond Liquor Decanter with a hand-crafted wood stand.  The decanter is hand-blown, lead-free glass with a hermetic, round glass stopper that prevents evaporation and leaks.  The Diamond Liquor Decanter is $34.97 at Amazon.

Filed in categories: News

Tagged:

Give the gift of a diamond – decanter, that is originally appeared on The Gadgeteer on November 7, 2018 at 8:00 am.

Note: If you are subscribed to this feed through FeedBurner, please switch to our native feed URL http://the-gadgeteer.com/feed/ in order to ensure continuous delivery.
The Bagsmart Xpedition Backpack works for all occasions – Notable crowdfunding campaign

What is it?

The Bagsmart Xpedition Backpack is an ergonomic backpack that utilizes a modular design to adapt to various daily needs with the use of swappable modules.

Why is it cool?

I like the Bagsmart backpack because it is well made and perfectly balanced to ensure that no matter what you are carrying, there is no fatigue or discomfort on your back. This backpack uses modular bags that clip on the inside of the backpack so that you can create multiple configurations that are interchangeable based on your needs for that time or day.

I received a pre-production sample of this bag, and I am quite impressed, The sample that I received included the following 7 modules for traveling, business and photography: 1 Sling Bag 0.4L, 1 Garment Bag 11L, 1 Wash Bag 3L, 1 Power Bag 1L, 1 Document Case 2L, 1 Camera Bag L 9L and 1 Camera Bag S 3L.

The modules fit perfectly, and can easily be pre-packed and then just swapped based on your needs. As a photographer, I find this to be a great bag for many types of shoots and the fact that it feels so comfortable really will help on those long photo shoot days. The backpack is also great for work and for excursions with my family and especially so when out with my kids and when I need to ensure that they have the necessary supplies.

Where can I find more info?

The Bagsmart Xpedition Backpack campaign ends on 12/21/18 and they are working towards their funding goal of $6,000. You can pre-order a Bagsmart Xpedition Backpack starting at $149. After the Bagsmart Xpedition Backpack campaign ends, rewards are estimated to start shipping in January 2019. Visit their Kickstarter page for all the details.

Filed in categories: News

Tagged: ,

The Bagsmart Xpedition Backpack works for all occasions – Notable crowdfunding campaign originally appeared on The Gadgeteer on November 6, 2018 at 1:41 pm.

Note: If you are subscribed to this feed through FeedBurner, please switch to our native feed URL http://the-gadgeteer.com/feed/ in order to ensure continuous delivery.
PRO-SYS VarioSonic Electric Toothbrush review

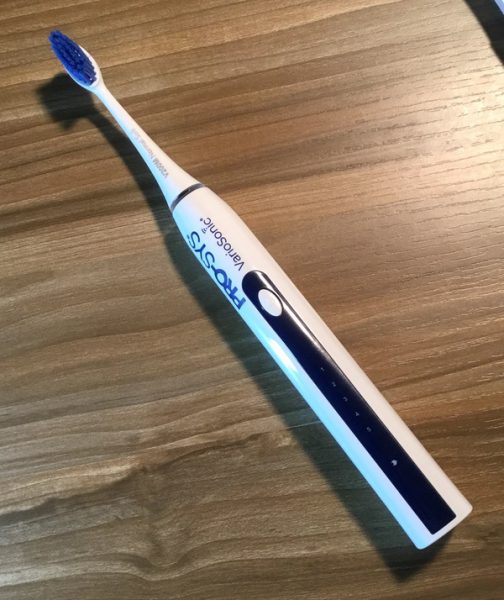
REVIEW – Yeah, I know… electric toothbrushes aren’t the sexiest gadgets. But they are an important tool in your daily cleaning routine. If you’re shopping for some power-assisted dental hygiene the PRO-SYS VarioSonic is a simple, cost-effective solution worth our consideration. And if you’ve been avoiding an electric toothbrush because you have sensitivity issues (like I do), this particular gadget is even better. To the review!

What is it?

It’s a rechargeable electric toothbrush with 5 different speeds and 5 different brushes for a total of 25 possible brushing intensities.

  • Hardware specs
  • Rechargeable battery runs for over 1 month on a full charge
  • DuPont Tynex Bristles for all brush heads
  • 5 levels of intensity
  • 2 minute timer

What’s in the box?

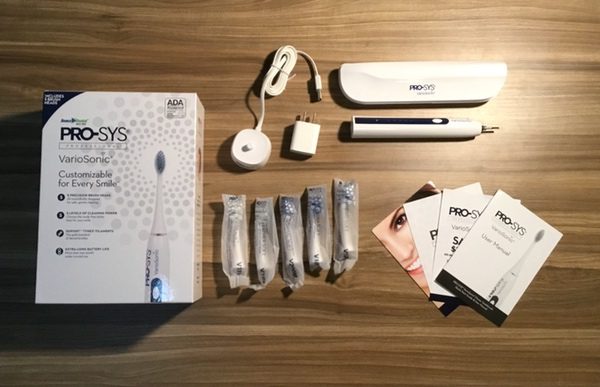
The package includes the toothbrush, 5 brush heads, a charging dock, a USB wall adaptor, and a travel case. An instruction manual is also included.

Design and features

There are lots of electric toothbrushes out there with a wide range of features and options. The PRO-SYS VarioSonic keeps things simple: excellent design, simple functionality, and great ergonomics. You pretty much get everything you need in a great toothbrush out of the box, without paying for a bunch of features you’ll probably never use.

The VarioSonic is lightweight and maneuverable in your hand. It doesn’t have features like a rubberized grip, but I didn’t miss this in normal use.

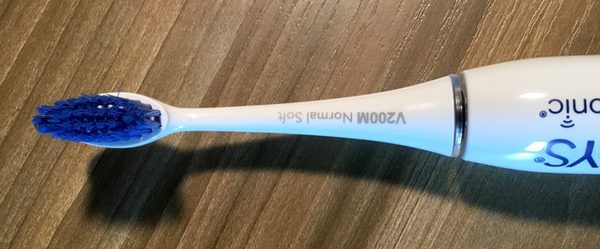
One of the great things about the VarioSonic is that it caters specifically to those with sensitivity issues. You get 5 different toothbrush heads, each with different degrees of brush stiffness and contouring based on your needs. “Normal Soft” is the standard brush for folks without sensitivity issues and healthy gums:

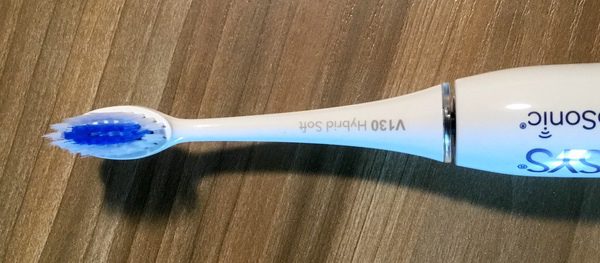
For comparison, here’s a close up of the “Hybrid Soft” that represents the midrange of the set. It uses a combination of the “Normal Soft” bristles with an outer ring of longer, softer bristles for deep cleaning. High-quality DuPont Tynex bristles are used in all the brushes:

The brush heads run down to a “Super Soft” level for really sensitive teeth and gums. If you have sensitivity issues, this package gives you everything you need for comfortable brushing without having to buy any extras. That’s great if you’ve been afraid to check out an electric toothbrush. Options abound here.

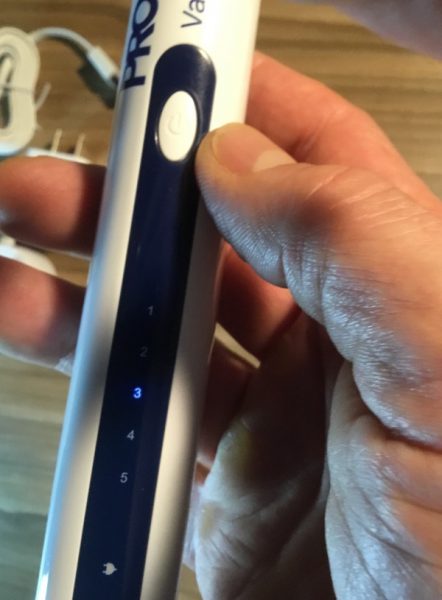
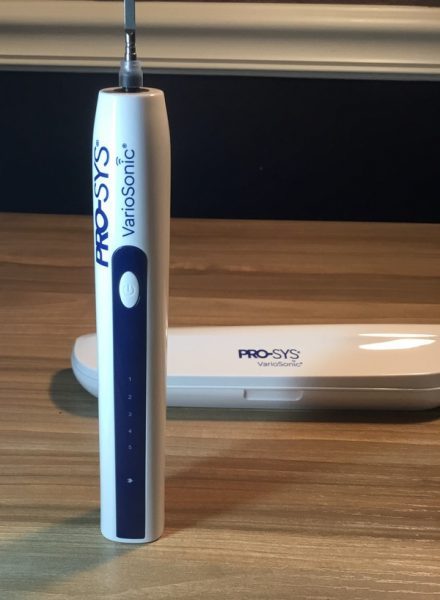
Once you’ve chosen a brush head, you’ll find that there is a single button on the handle for operation. Pushing the button cycles through 5 level of intensity, each of which is accompanied by an audio tone that drops with each level for additional feedback. The pic below shows the middle level selected. When combined with the 5 brush heads, this makes for 25 different levels of softness and intensity to choose from to match your specific needs. You can even start on really gentle settings with the softest brush and work your way up as you get more comfortable!

Regardless of the level you choose, the brush runs through a two minute brush cycle. The brushing pauses every 30 seconds to indicate that you should move to the next quadrant in your mouth (upper right, lower right, upper left, lower left) for a proper cleaning. If you’re wondering about the quality of the brushing, you should know that the ADA Council on Scientific Affairs has provided their seal of approval on the VarioSonic as safe & effective when used as directed.

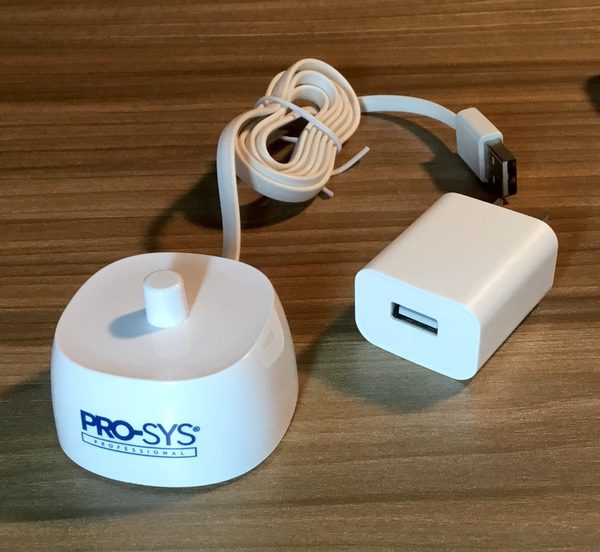
The charging setup is also very well executed, using a USB cable to connect the charging dock. A USB power block is provided in the kit, but you could plug directly into a USB wall socket or even a portable charger in a pinch. Note that you cannot get the USB port wet, so you’ll want to be careful handling it!

PRO-SYS has also provided a nice traveling case with the package. It’s a nicely contoured and slim design that makes it easy to travel with, and includes a pair of light magnets to ensure a tight seal. The build feels like much more than an afterthought. Combined with a battery life that is rated for more than a month of regular use between charges, and you’ll find that the VarioSonic is really easy to travel with.

Daily use with the PRO-SYS VarioSonic is great. It handles well, feels good, and provides everything you need for your daily dental maintenance. It does not have features like the ultraviolet cleaning or gum massage modes, but I don’t know that you need those for this device to be effective. It does the job simply and well.

I should note that the selection of soft brushes is a great bonus. I’m a dentist’s worst nightmare with some pretty bad sensitivity issues. While my Sonicare does a great job, it does put a pounding on my sensitive teeth. The VarioSonic provides a gentler brushing (even at max intensity) that is much more comfortable for me.

There’s also the issue of price. You can pick up the VarioSonic on Amazon right now for $69.99 on Amazon Prime. That’s a pretty good value for an ADA-approved electric toothbrush when compared to Sonicare or Oral-B pricing. You also get 5 different brush heads to boot. I think it’s a pretty good deal.

What I like

  • Quiet operation
  • Lightweight and easy to handle
  • USB charging options
  • Multiple brush heads and intensity levels out of the box
  • Ideal for those with sensitivity issues

What needs to be improved

  • Keep the USB connectors away from water

Final thoughts

In a market filled with electric toothbrushes, the PRO-SYS VarioSonic provides a simple & effective design at a reasonable price point. If you have particularly sensitive teeth, this is a great option over some other brands that provide more power but aren’t as kind to those with dental issues.

Price: $69.99
Where to buy: Get it on Amazon or visit the Variosonic product page on the PRO-SYS web site to buy direct.
Source: The sample of this product was provided by PRO-SYS

Filed in categories: Reviews

Tagged:

PRO-SYS VarioSonic Electric Toothbrush review originally appeared on The Gadgeteer on November 6, 2018 at 11:00 am.

Note: If you are subscribed to this feed through FeedBurner, please switch to our native feed URL http://the-gadgeteer.com/feed/ in order to ensure continuous delivery.
Step-By-Step Guide for Website Building with NING #sponsored

ARTICLE – Gone are the days when creating a website was something only professional programmers could do. Thanks to modern website building solutions, a good-looking site can be crafted by anyone having a clear purpose and desire to get visible online.

One of these solutions is NING. It is a platform allowing you to make your own website from scratch and build up your online presence. What sets NING apart from the competition is its focus on social networking and content monetization. While other website builders provide tools for making regular, static sites, NING offers an opportunity to create an interactive online community where every member can contribute to the topic and share content on equal terms.

As for monetization, the platform enables users to make money from their websites through selling content, charging a membership fee or accepting donations. Thus, NING is an excellent solution for both internet enthusiasts who want to bring people together around a specific idea and content creators striving to promote their stuff and get paid.

In this brief guide, we will lead you through the basic steps for creating a social website on NING.

Step 1. Create a NING account

Before you can dive headlong into the creative process, you will need to sign up on Ning.com. Just go to their website and click “Get started” (the green button in the top right corner of the page). You will have to provide your full name and email, as well as specify the topic of your future website. This will determine the default design template which will be applied to your site. It can be changed later anytime.

Also, NING gives you a custom domain name, so you will have to specify the desired URL during the registration. Mind that all native domain names provided by NING end with .ning.com. However, if you want to change it, you can do it later by purchasing a new domain name elsewhere and mapping it to your NING website.

NING offers a free 14-day trial which should be enough for you to figure out whether the platform meets your expectations. Beyond that, there are three subscription plans ranging from $25 to $99 depending on the amount of storage, member capacity, and support privileges you want to get.

Step 2. Customize your website design

No doubt, you want your website to look unique and convey the idea behind it through dazzling visuals. Your website design can help you get recognized and stand out from the rest. This is why NING offers a broad array of customization tools to let you configure every aspect of your website:

Design theme: select one of the available visual templates that determine the overall appearance of your website.
Background: choose or upload an image that would appear at the backdrop of each website page.

Header: configure a website header by changing its layout and size, adding your website name and logo, customizing a navigation menu, picking a custom background image, and modifying an account bar.
Page: personalize the overall look of pages by customizing fonts, content blocks, and buttons.
Custom CSS: insert custom CSS code to achieve advanced customization effects.

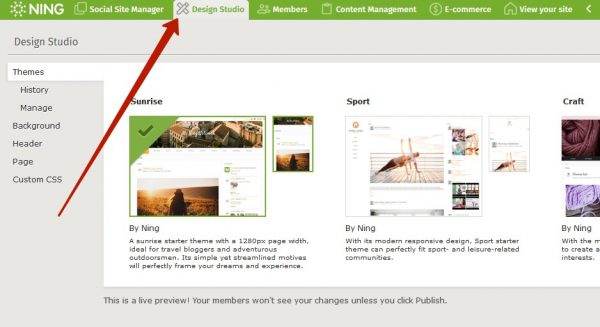
Start with selecting a design theme that serves your purpose and matches your industry. NING offers templates for various niches including blogging, business, education, sports, politics, gaming, charity, religion, etc. Then customize the template using the tools mentioned above. All of them can be accessed by clicking a Design Studio tab in the admin panel.

Step 3. Create the pages you need

When you’re through with designing your website, it’s time to think what kind of content you are going to fill it with. Everybody knows that websites consist of individual pages. Therefore, your next task is to create as many web pages as you need to achieve your goals.

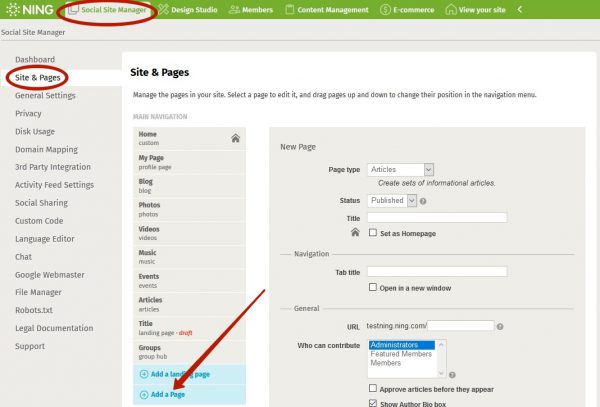
By default, your newly created NING website will have several basic pages for different types of content, e.g., Home, Blog, Photos, Videos, etc. However, you can add the new ones or delete pages you don’t need anytime. To create a new page, follow these simple steps:

1. Go to Social Site Manager in the admin panel;
2. Select Site & Pages in the sidebar;
3. Click Add a Page;
4. Select a page type (e.g., Blog, Photos, Event, Forum, etc.);
5. Select a page status (published or draft);
6. Enter the page title and tab title;
7. Specify who can add content to the page (administrators, featured members,
all members) and who can view it;
8. Configure comments;
9. Choose the page layout.

Depending on your niche, you can add pages of different types. If your goal is to create a blogging website, focus on text-oriented page types like Blog and Articles.

Making a craft website? Add Photos and Videos pages which are tailored specifically for visual content. To generate more engagement and encourage communication on the network, create a Forum, Poll or Chat page. There are options for any topic or industry. And of course, you are free to add new pages whenever you want.

Step 4. Add content

Now, when you have all the pages you need, you can start imbuing them with your unique content. To do it, simply go to the corresponding website page (while logged in as an administrator) and click +Add. Depending on the page type and content added, you will be offered different editing options. Below is an example of a Blog editing page.

If you allow your network members to contribute their own content, you can easily moderate (approve or disapprove) their publications by going to the Content Management tab in the admin panel.

Step 5. Create a landing page

Now your website is almost ready. But you still have to promote it and make it attractive to visitors. Start with creating a professional landing page aimed at converting visitors into your network members. NING has a dedicated design tool for that too:

1. Create a landing page by going to Social Site Manager > Site & Pages and click Add a landing page.
2. Give your landing page a title and configure the basic privacy settings.
3. Click Save.
4. Click Edit layout and content.

Wait for the editing tool to load and start designing the landing page using the available Drag-&-Drop instruments.

Step 6. Grow your community

To grow your audience and stimulate the development of the community, use the extensive social networking features offered by NING, including personal and group messaging, live chat, comments, forums, polls, events, social sharing, and liking, etc.

Step 7. Monetize your website

When your community expands and your audience becomes loyal enough, nothing will prevent you from monetizing your website. Select the E-commerce tab in the NING admin panel and explore three different monetization options. Paid Access is perfect for content creators, Paid Membership is an optimal choice for closed communities, influencers, and celebrities, while Donations will help charities and start-ups to raise funds more effectively.

These were just basic steps for creating a website on NING. Explore more features of the platform by taking a free trial!

Filed in categories: Articles

Tagged: ,

Step-By-Step Guide for Website Building with NING #sponsored originally appeared on The Gadgeteer on November 6, 2018 at 10:00 am.

Note: If you are subscribed to this feed through FeedBurner, please switch to our native feed URL http://the-gadgeteer.com/feed/ in order to ensure continuous delivery.