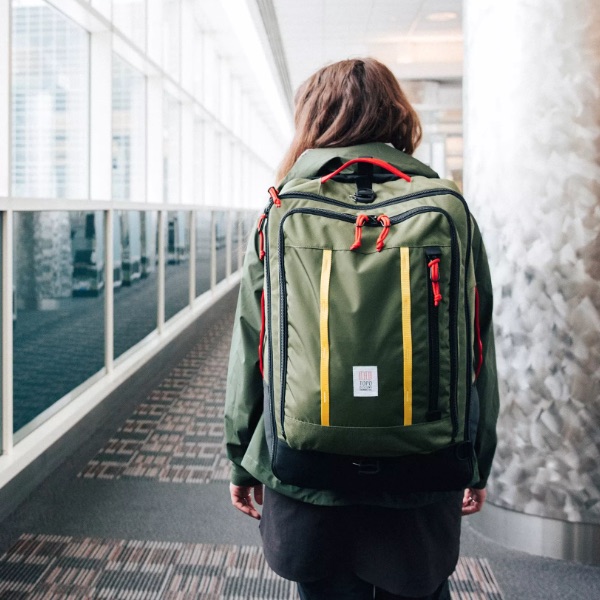
NEWS – If one-bag travel is your thing, Topo Designs has some new stuff to show you!
Topo Designs has upgraded their travel bag, with new 30-liter and 40-liter designs. Both bags feature separate compartments for your laptop, quick access travel essentials, tech gear, and small stuff, and a main compartment that opens flat with a U-shaped zip for easy packing. Both bags have stowable backpack straps and a removable shoulder strap in addition to sternum straps and a waist belt to help balance bigger loads. The 30L retails for $189 and the 40L retails for $229. Both are available in three colors: an olive or blue with red/yellow accents, or an all-black version for the more conservative-minded traveler.
As with all of Topo Design’s gear, the travel bags feature everything we love about their products: simple & functional usability, bomber construction, and a design aesthetic that reflects their outdoor style. I own the Rover Pack and Commuter Briefcase, and I’d highly recommend you give them a look based on my experience.
Note: If you are subscribed to this feed through FeedBurner, please switch to our native feed URL http://the-gadgeteer.com/feed/ in order to ensure continuous delivery.
REVIEW – For near 30 years, I traveled the world for work. I’ve had cause to stay in some less desirable places, sometimes losing sleep worrying if someone might gain access to my lodging while I slept. On one occasion, one of my coworkers woke to find a hotel employee in his room in the middle of the night. I took to carrying a door wedge with me, but the Masterbolt Travel Door Lock is a far better option
What is it?
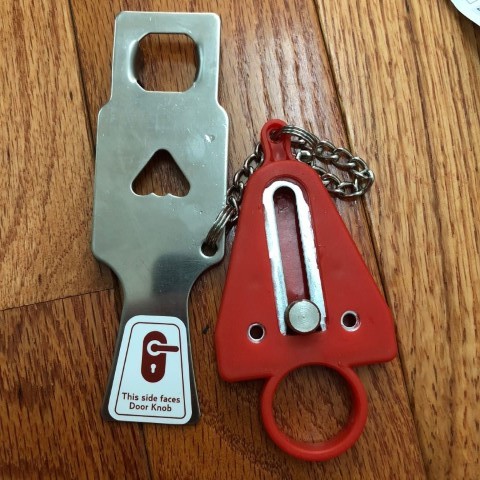
Masterbolt Travel Door Lock is a simple two-piece mechanism that when properly deployed, renders it extremely difficult to open a door from the outside, even when in possession of the keys.
Hardware Specs:
7 x 3 x 1.1 inches
4 ounces
Portable – Masterbolt is easily packable and comes with its own pouch to place in your suitcase or backpack to provide additional security when you travel
Installs in seconds – No tools required. Protects you from unwanted intruders
Travel security – Use at home, hotels, Airbnb, hostels, rentals, and anywhere you travel and need added security
Perfect for students – Use in your dorm, while travel, or for internship apartment stays during the summer
Protect tour children – Prevent toddlers and small children from leaving the house unsupervised
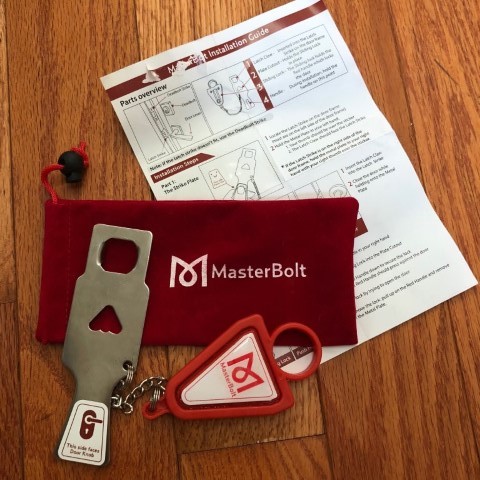
What’s in the Box?
Two-piece lock chained together
Storage pouch
Instruction sheet
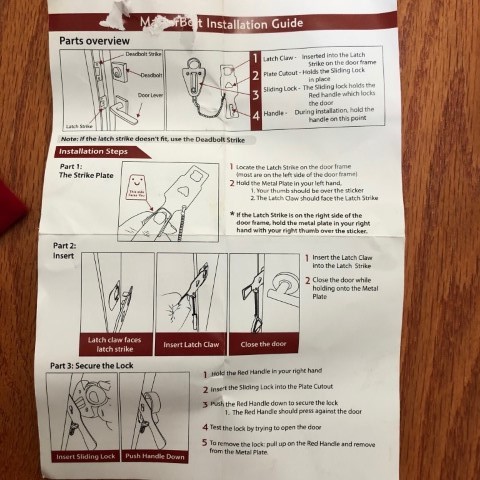
Design and features:
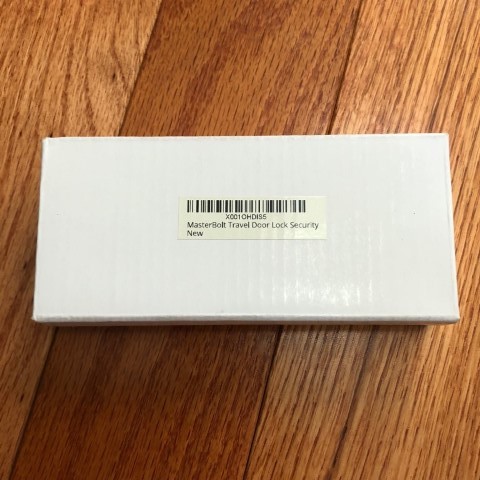
The Masterbolt lock arrived in a simple white cardboard box. It’s refreshing to receive something that is not over packaged.
The design is elegant, simple and fiercely effective – two pieces, chained together is all that’s needed. After practicing a few times, it literally takes seconds to deploy and remove.
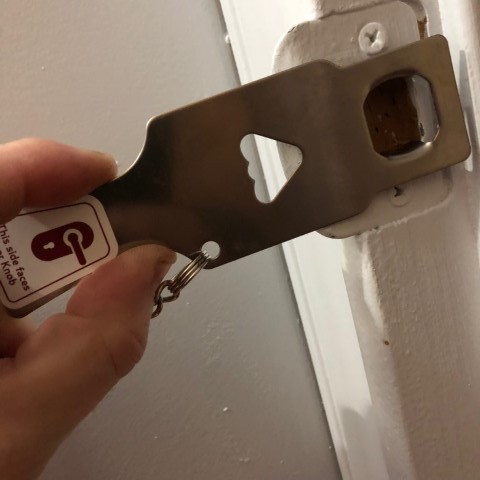
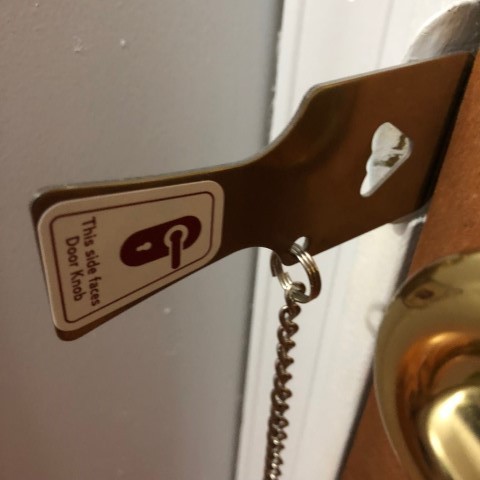
First, the long metal part’s tabs are placed into the strike plate on the door frame.
The door is closed and the latch bolt protrudes through the hole in the Masterbolt plate.
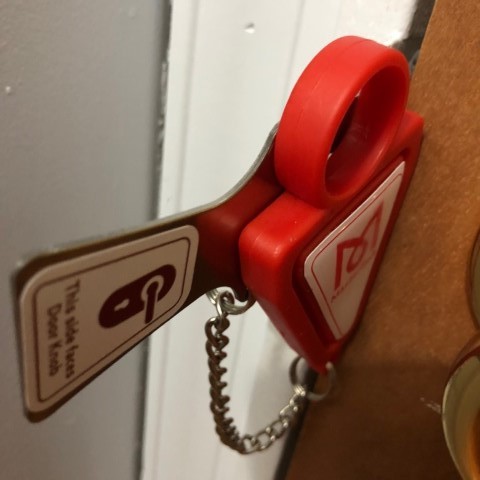
On the knob side of the plate, the sliding bolt on the red part is placed into the triangular hole in the metal plate. The edge of the red part rests against the door. That’s it – secure.
Once the Masterbolt is installed, the door is VERY securely locked, whether the door is locked using the knob or not. I tried, hard, to dislodge the Masterbolt. If the strike plate is properly anchored, only an extreme amount of force is going to breach that door.
Pulling on the doorknob in an attempt to open the door resulted in flexing and distortion of the entire door frame. The stronger the door and frame, the better the Masterbolt is going to work. I’m confident that nothing short of a sledgehammer, SWAT breaching tool, reciprocating saw, or vicious kick by a mule is going to get that door open.
What I like:
Small size
Simple, effective design
Easy to use
Inexpensive
What needs to be improved?
Nothing
Final thoughts
Masterbolt’s Travel door lock is one of those “I wish I had thought of that” products. It’s tough and, in my opinion, works better than described. I was genuinely shocked at the stability and security this lock provides. Gone are my days of frequent travel, but I’ll be using the Masterbolt Lock every time I will be sleeping in an unfamiliar location.
Price: $19.95 Where to buy:Amazon Source: The sample for this review was provided by Masterbolt.
Note: If you are subscribed to this feed through FeedBurner, please switch to our native feed URL http://the-gadgeteer.com/feed/ in order to ensure continuous delivery.
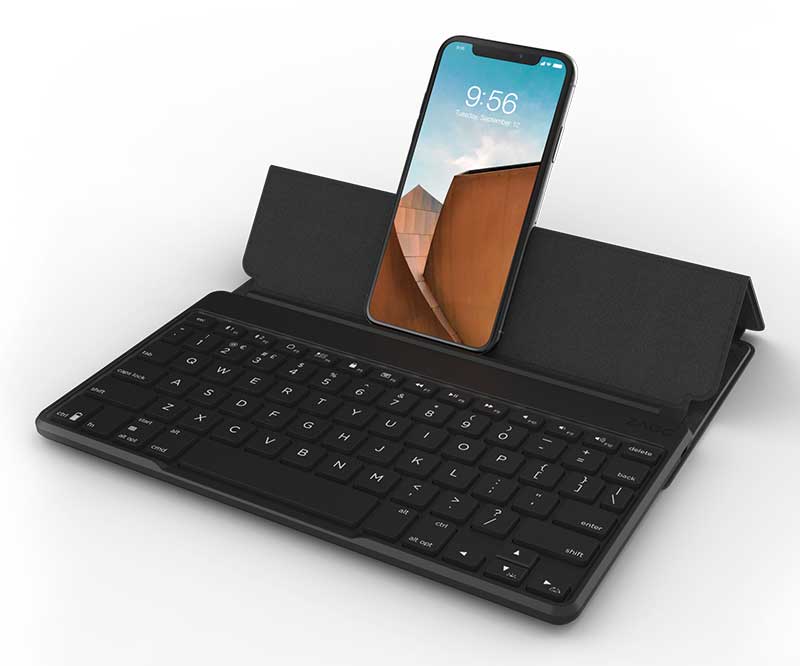
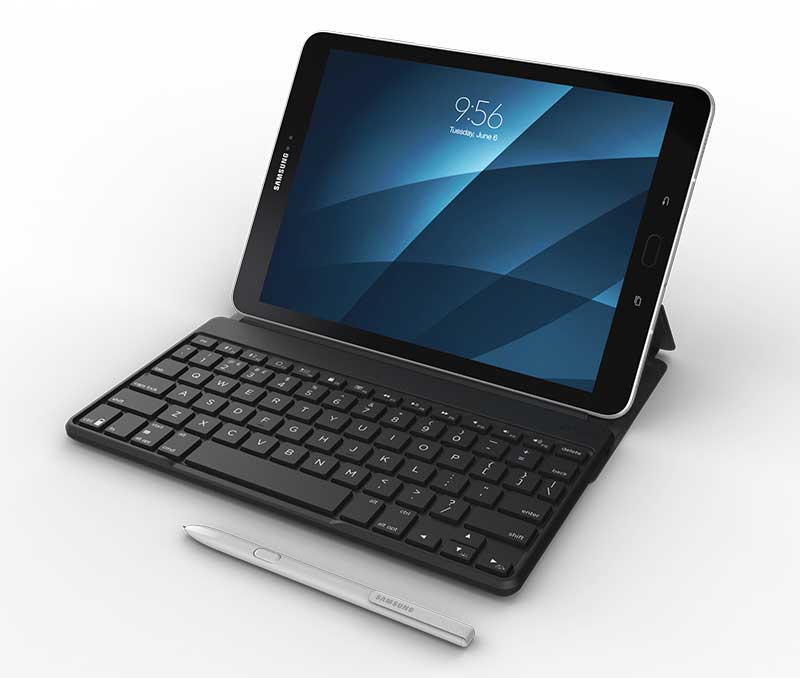
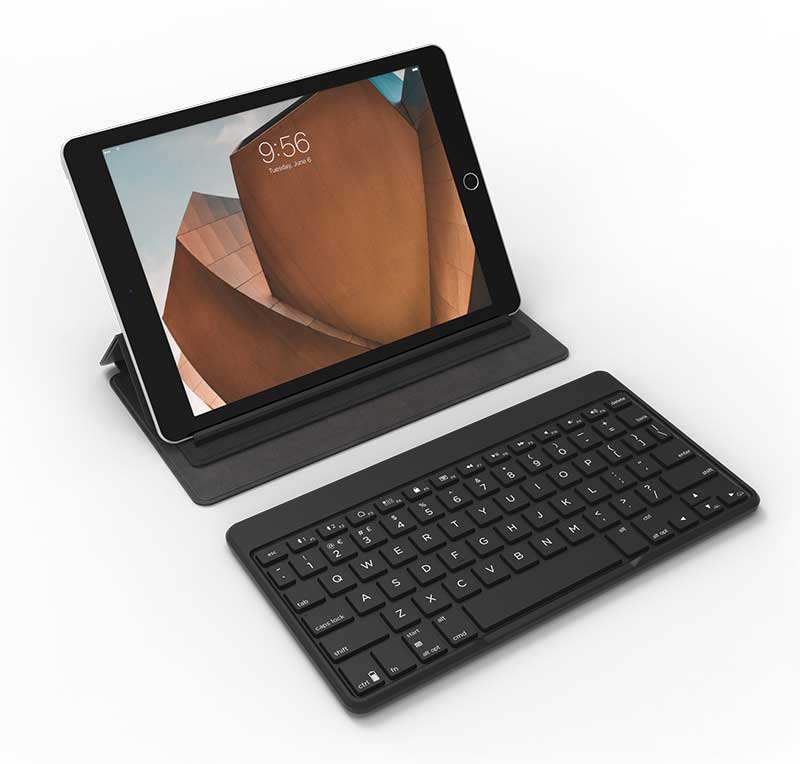
NEWS – Darnit, I was all excited when I first saw the pictures of ZAGG’s new Flex universal Bluetooth keyboard for iOS and Android devices. Can you guess from the picture above and the one below why I was excited about a Bluetooth keyboard that can be used with smartphones, tablets, and some smart TVs? No, it’s not the built-in stand, and no it’s not the backlit keys, which is actually a pretty nice feature.
The reason why I was excited is because the images of the Flex make the keyboard look like there’s a solid platform on the bottom of the keyboard and the stand. Why is that so exciting to me? Because a solid platform would mean that you could use the keyboard and your favorite device on your lap like a laptop which feeds into my long time unrealized dream of forcing an iOS or Android tablet to work as a pseudo-laptop – on my lap.
But then my dreams were shattered when I saw another image and realized that the ZAGG Flex keyboard is actually comprised of two separate parts. The keyboard and the stand. It even comes with an ultra-slim protective cover so you can store it in your bag or purse. Sniff… It still looks like a nice little keyboard. The ZAGG Flex universal keyboard is available now at ZAGG.com and select Verizon stores nationwide for a suggested retail price of $79.99. For more information, visit ZAGG.com.
Note: If you are subscribed to this feed through FeedBurner, please switch to our native feed URL http://the-gadgeteer.com/feed/ in order to ensure continuous delivery.
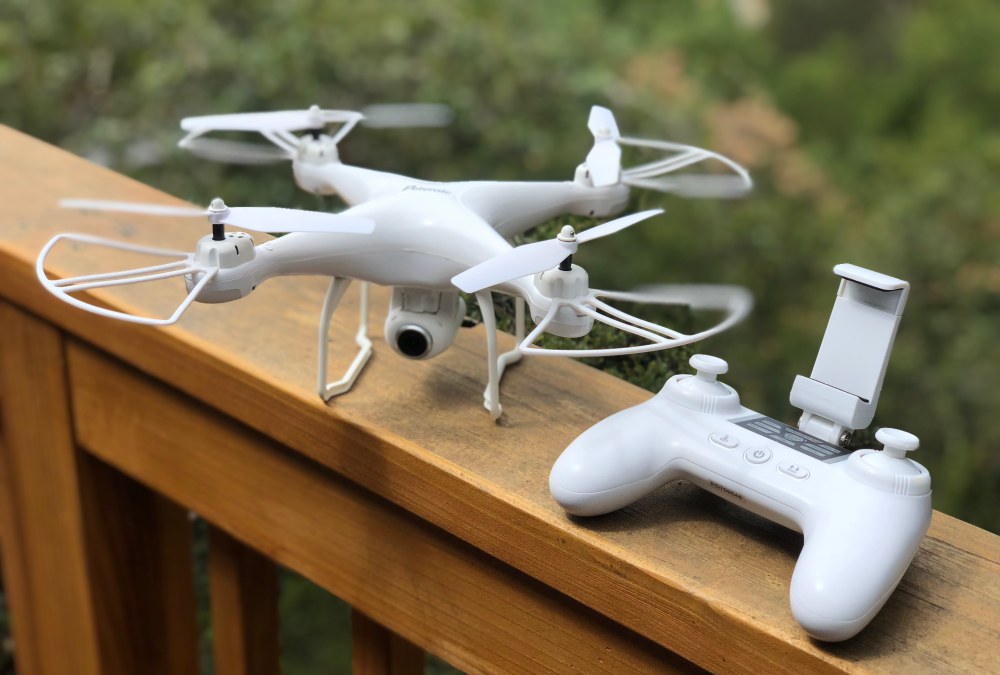
REVIEWS – Potensic’s new T25 drone has a lot of features, almost too many to grasp. Want to know more? Read on.
What is it?
The T25 is a small to mid-size drone with a full suite of capabilities including takeoff and landing assist, return to home, full 1080P recording and much more. Are you looking for your first drone or an upgrade from a low-cost mini-drone? Let’s take a look at the T25 and see if their feature set and performance are right for you.
Hardware specs
Drone GPS and specs
– Follow Me, GPS return home, GPS positioning and hold, Geo-Fencing, and Low Battery Return Drone inflight features
– Headless mode, Auto Takeoff / Landing / Hover, 9-Axis gyroscope, Color-coded dual LED lights, 2.4G technology
– Range: Up to 300m (Image range up to 100-150m)
– Max Height: Up to 120m, Max Speed: Up to 25km/h Camera
– HD Wifi Camera with 75º articulating 120º wide-angle lens
– Optional SD card (sold separately) Battery
– 3.7v 1000mAh lithium ion
– Micro-USB port allows for charging in or outside drone
– LED lights for battery level indication Controller – Internal lithium polymer battery
– Micro-USB port for charging
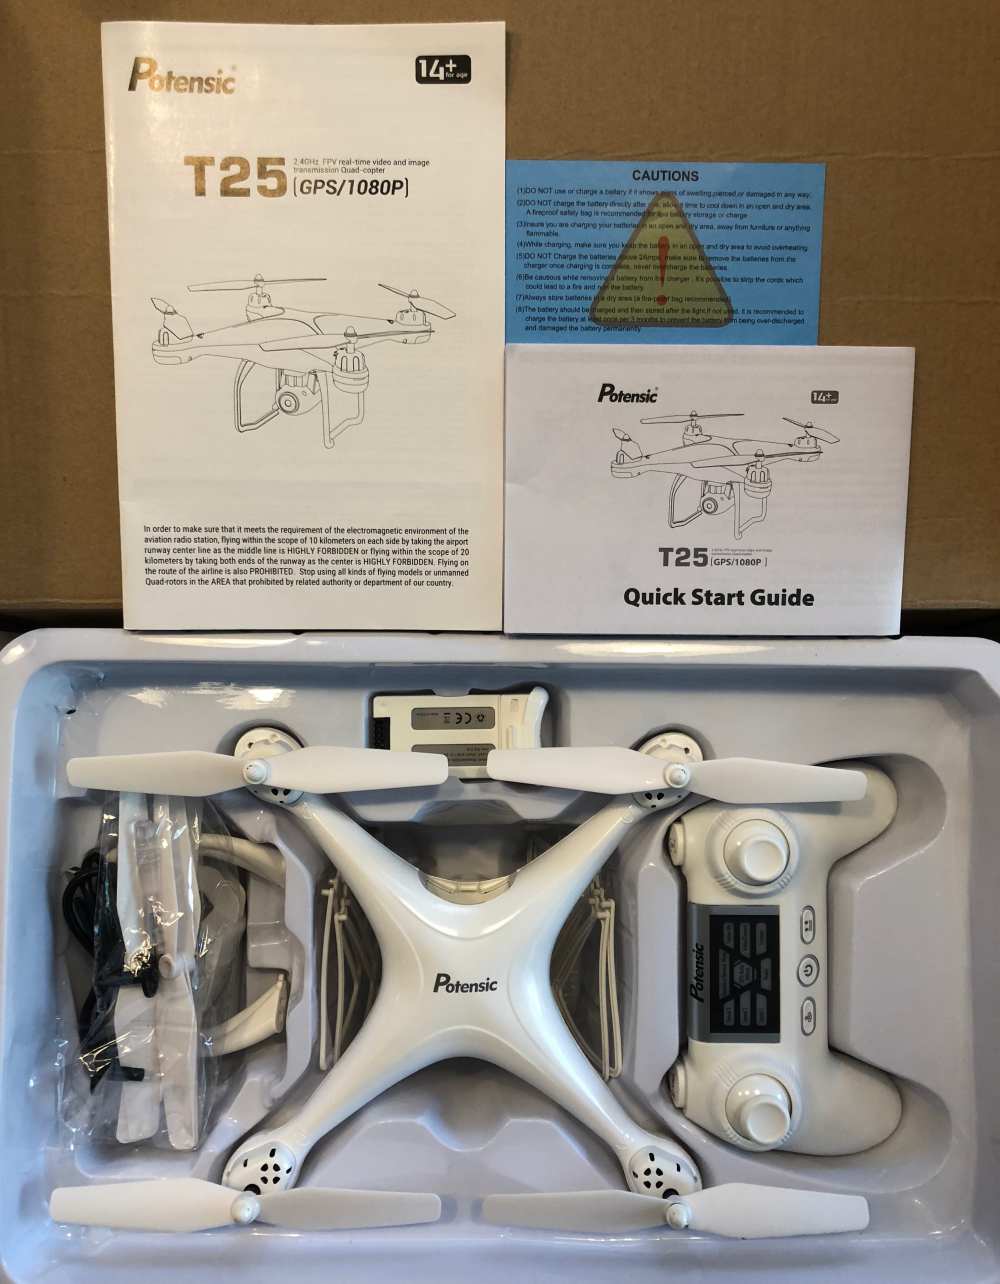
What’s in the box?
(1) T25 Drone
(1) 1080P HD camera module
(1) Transmitter w/ mobile phone cradle
(1) 3.7V 1000mAH Battery
(1) User Manual & Quickstart Guides
(1) USB Battery Charger
(1) Screwdriver, (1) Wrench
(4) Propeller Protection Guards
Spare Parts
(2) Landing Leg pairs
(4) Propeller Blades (2 each rotational direction)
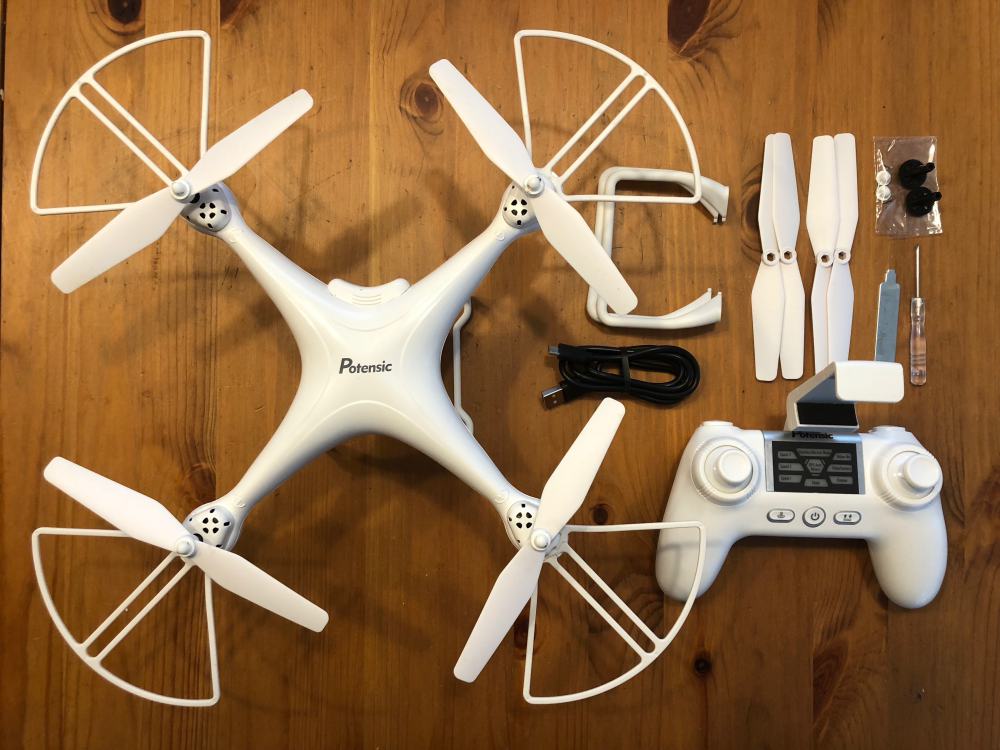
Here’s a better look at those parts removed from the packaging.
Design and features
Functionally, the design of the T25 is well done. The landing legs are replaceable as are the propellers and the propeller guards. The will hold most (if not all) smartphones and the app works well during use. From an aesthetic standpoint, there is little here that stands out as being unique to this drone so I would forgive almost anyone for mistaking it for a drone from the market leader. Maybe that’s the point, but in the end, while you are watching the drone as you fly, you quickly start to go heads down and watch your phone where the camera feeds a live view. As bland as the exterior may be, you’ll want to avoid putting stickers on or painting it as even adding the 4 propeller guards changes flight characteristics and a medium gust of wind definitely does. Let’s move on to set up and performance.
Setup
If you’ve had a drone before, none of the following is likely to surprise you. If not, let’s just say that setup isn’t hard, it’s just not fast nor straightforward if you’re expecting something similar to an RC car. The T25 is relatively assembled in the box, but as you saw in the photos above, there are so many additional small parts, both required and spares that it still feels like a kit instead of a finished product. That’s actually part of the charm in some respects.
If we boil it down, the setup process is as follows…
Charge the batteries
Install a microSD card (not included) into the camera
Press the propeller guards into place
Install batteries in the controller
Install the phone cradle into the controller
Download and launch the Potensic-G App
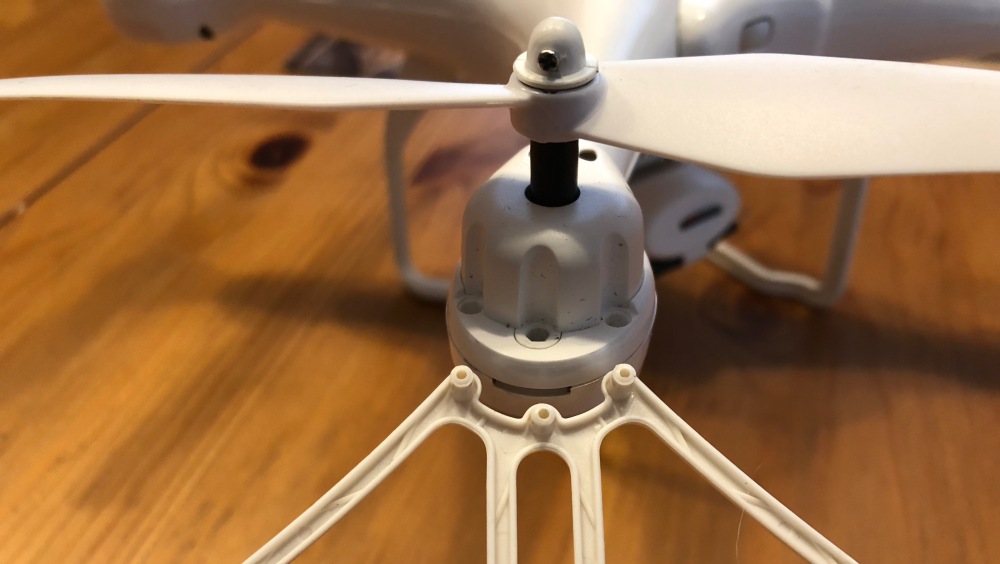
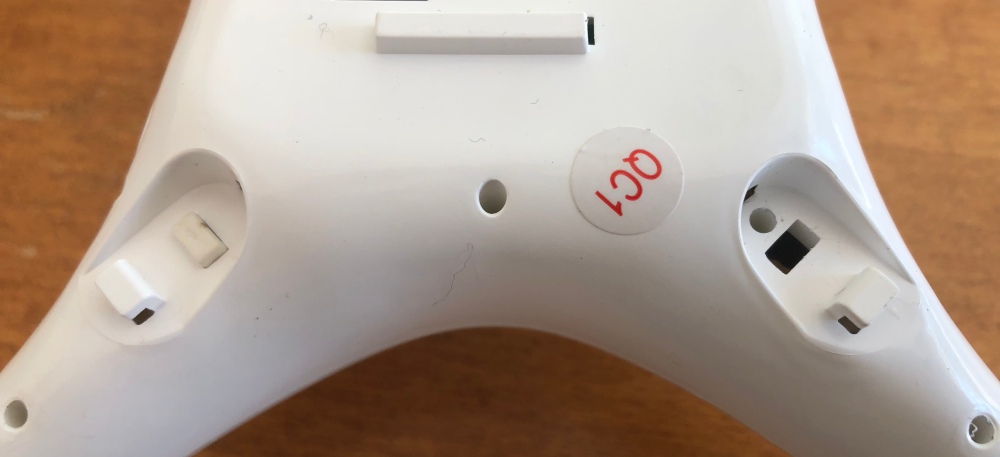
Here’s a shot of the propeller guard posts and the press-in receivers on the drone. It literally is a press-fit.
Right about here is where you think you’re ready to fly, and you kind of are. As a drone novice, I underestimated the amount of time the next steps would take including getting comfortable piloting the drone. While awaiting the review sample to arrive I did happen to notice that the battery provides about 8 minutes of flight time, so I ordered a spare battery from Amazon so that I’d have double the flight time between charging sessions. All that out of the way, here’s the next set of setup instructions. (Feel free to skip this if you’re familiar with drone calibrations)…
Turn on the drone and set it down on a level surface, and all lights should be blinking red (This is an important step as the drone will use this as its perception of flat – You should also be in a wide open space, and the lights can be hard to see in strong sunlight)
Turn on the controller (Here’s where it gets all secret game code-like)
Press UP then DOWN on the left joystick
Front lights will flash WHITE, rear BLUE
On your phone hop into settings and connect to WiFi broadcast by the drone (Potensic-xxx) then jump back to the app
Calibrate the gyro by pressing each joystick to the forward and outward corners (left @ 11, right @ 1) – lights should blink rapidly
Calibrate the compass by pressing each joystick to the forward and inward corners (left @ 1, right @ 11) – lights should now add a red between the flashes (white/red in front, blue/red in rear)
Pick up the drone and in one smooth motion turn your body in a circle keeping the drone level in front of you – rear lights should go solid blue
Now tip the drone face down (propellers forward) and do the same thing keeping the drone in this position – front lights should go solid white
The app should confirm calibration okay and you will set the drone back on the level surface where the lights will return to respective white/blue flashing while the drone is ‘Waiting for GPS signal’. [NOTE: If you happen to be somewhere where you cannot get a GPS lock (large indoor area?), you can press and hold the right joystick for 2 seconds to disable GPS. Keep in mind that will also disable any of the features reliant on GPS like return home and follow me.]
When the lights return to all solid you’re ready to fly and the app should say so.
Last thing that was not mentioned anywhere that I could find is that in the app, you need to click on ‘CONTROLS’ to get to the flying screen.
Performance
There are a lot of controls on the controller (which makes sense), but it makes for a learning curve that’s as steep as your familiarity with this kind of setup. If you play any kind of modern gaming system you’ll already be more likely to jump in. Let’s take a look at all those controls quickly…
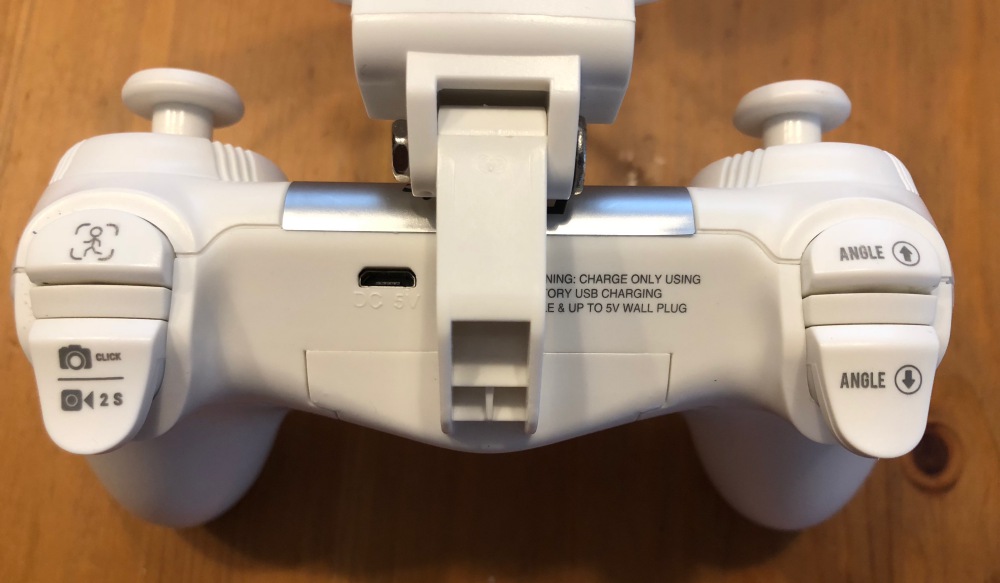
Above you see the trigger controls for [follow me], [camera/video] and on the left hand [angle up] and [angle down] adjustments
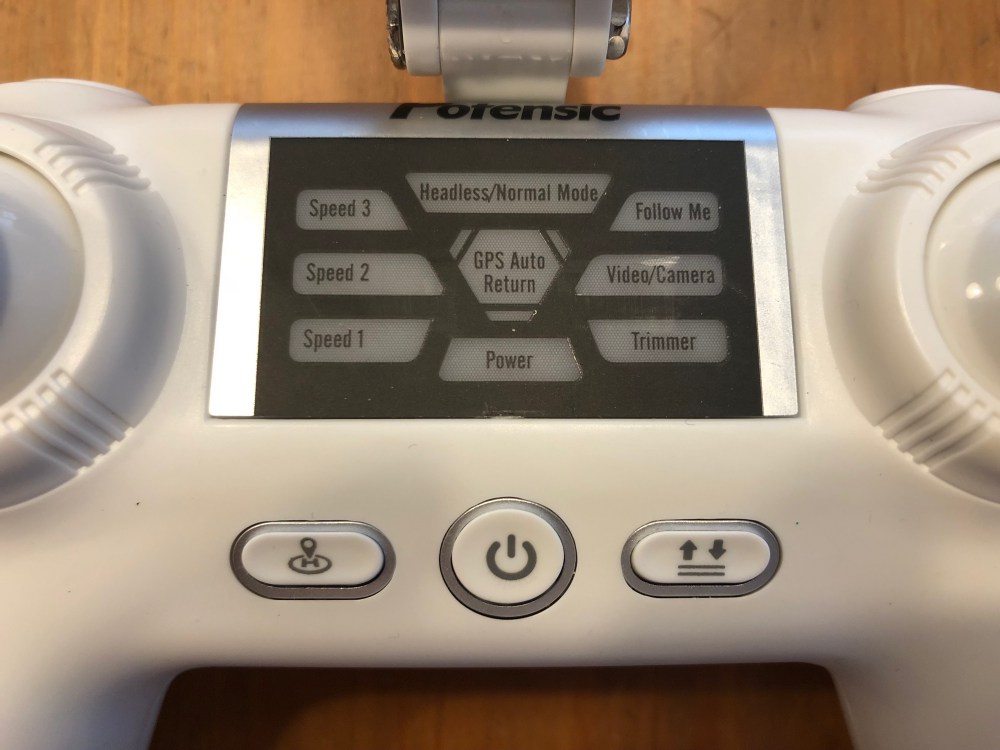
Here are the [return to home] , [power] and [takeoff/landing] buttons along with a whole lot of indicators above which help to communicate which settings the drone has active. These are lit well during use and hard to confuse.
When it comes to actually flying the drone, Potensic has done a few things that aid a new pilot significantly. The first is a one button take off which literally works as advertised. Press that button and the propellers whirr to life lifting the drone to about 5 feet off the ground at which point it just unnaturally maintains its position. Auto land is another that just takes a huge headache away by just landing for you.
A unique feature is “headless” mode which basically translates to the controls never switching orientation. This means that forward is always forward based on the starting position of your controller and left is always left of that forward motion. This is super useful if you’re thinking grid style, but if you turn around because you flew the drone behind you, you’ll need to mentally remap the controls to have the drone do what you want it to do.
Follow me is a feature that got me really excited and in my first attempts also concerned me the most. I don’t trust the GPS on my phone to be accurate to within 10 feet. When experimenting, the drone does what it’s supposed to do and if you back up, it advances. The problem is that with some GPS drift, sometimes it would get a little closer than I expected which resulted in me stepping back and it continuing to advance. Comical right? Also scary.
So as a new pilot, the reality is that it learning to fly is a bit stressful and just when you think you’ve got it, something changes and your gut reaction ends up causing a problem. It’s also a bit frustrating to see all these beautiful drone-shot videos on youtube and other media outlets, only to realize that it’s not quite that easy to get that beautiful shot without a lot of practice. So here are a couple of reference comments for you to consider.
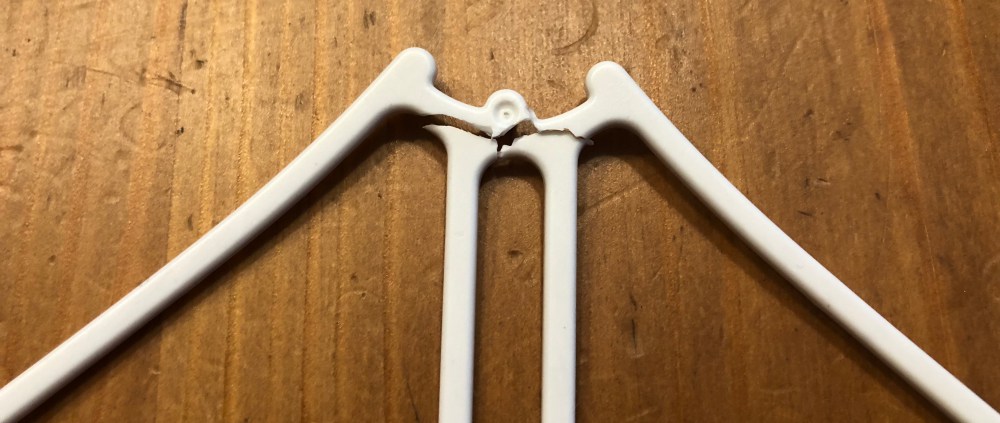
I only had one real ‘crash’. It was before I discovered headless mode and I ended up sending the drone into the side of our car. The propeller guards did what they were supposed to do and kept both the car and the drone uninjured, but one propeller guard snapped. It would be nice to have some spares in the box as it seems like these are more likely to be needed than spare landing gear, but then again who’s really to say.
The on-board video camera is why I think drones intrigue most of us, and the T25 boasts 1080P. Note that both the below videos are posted here at 720. On a recent family vacation, we were filming a sequel to an ongoing saga of movies with our kids as action heroes. There was a scene with my older kids running towards the beach and it seemed like the perfect opportunity for a drone shot. In the video below you’ll see that while it worked, I didn’t account for the amount of wind and controlling the drone was quite difficult. I will say that it was impressive to see the T25 tilted at almost a 25º angle and just holding its position which was right at the beginning of this video.
Here’s another video of one of the earlier flights just getting the hang of the controls and even just comfort level of having it head back towards me. The camera does a pretty good job, but it can be a bit jumpy and the clarity isn’t quite as good as I was hoping.
A couple of things to note about the way the camera works. You see exactly what you’re shooting on your controller display (iPhone in my case). Any photos or videos are recorded directly to your phone as well as an SD card if you have it installed. Videos record in .avi format on the SD card while .mov on the iPhone. That’s helpful as macs don’t read .avi natively so you’ll need to grab VLC or some other player/editor. I did not see resolution differences between the SD card recordings or the iPhone recordings.
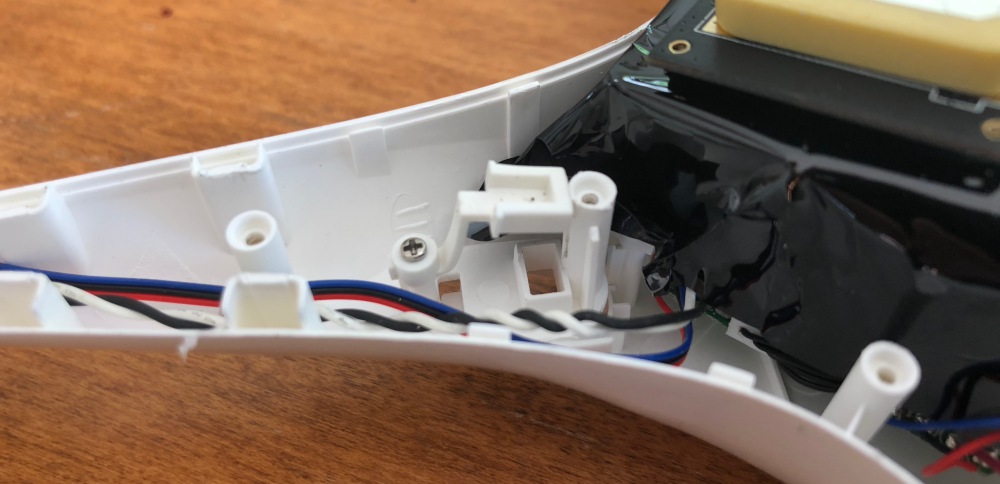
When initially setting the drone up and looking over all the parts I took off the legs and inadvertently pushed one of the release buttons too far where it pushed inside the drone and the spring was rattling around. In retrospect, this is why their wrench has a small extended section with physical stops. Regardless, it resulted in taking the drone apart to rescue the button and I got to look at some of the inner workings. You can see in the second shot where the button arm is keeping it trapped against the assembly post. Overall an easy fix, albeit with a lot of screws.
What I like
Small and compact without being diminutive
Learning aids are great for new pilots
Spare parts included for some key items
What needs to be improved
Battery life/flying time – and/or – 2nd battery in the box would help
Propeller guards are more fragile than they should be
Add a learning mode where certain features can only be unlocked if you’ve passed ‘flight school’ levels
Battery swap requires redoing all the calibration steps
Final thoughts
I’ve flown a couple of drones before, but it was quick flights with the drone’s owner right there. When it’s your own and you’re doing all the setup, the “am I doing this right?” weighs on you quite a bit and I can only imagine that ratcheting up a lot if you’ve dropped your own dollars to purchase it. The more time you can spend flying, the more efficient you’ll be and the better results you’ll get out of video and photos. The main complaint from any user will be flight time. I’d recommend a minimum of one extra battery and likely two as if you’re headed out to fly, you’ll want a good 30 minutes and 3 won’t quite get you there. Also once the controller battery is depleted you’re done as it takes an hour to charge even if you brought a power bank. Overall the T25 is a good value, not too light, not too heavy and sits in a pretty good spot as far as not being too expensive while having an impressive feature set.
Price: $189.99 Where to buy: Amazon Source: The sample of this product was provided by Potensic.
Note: If you are subscribed to this feed through FeedBurner, please switch to our native feed URL http://the-gadgeteer.com/feed/ in order to ensure continuous delivery.
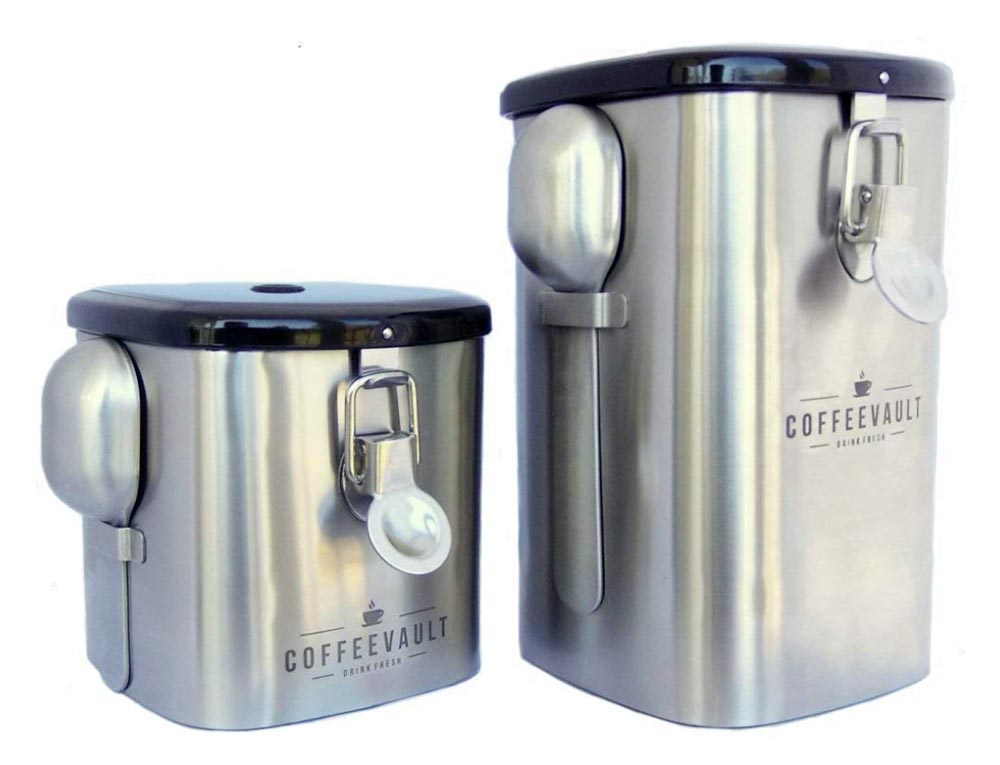
NEWS – Coffee is expensive, so you want to make sure you get the most of the beans you buy. There’s a lot of information about how you should store coffee until you brew it – keep it in the freezer, keep it in jars of various kinds, seal it in plastic bags, etc, etc. The Coffee Vault folks offer a storage solution that is designed to protect coffee from flavor loss until you’re ready to use it.
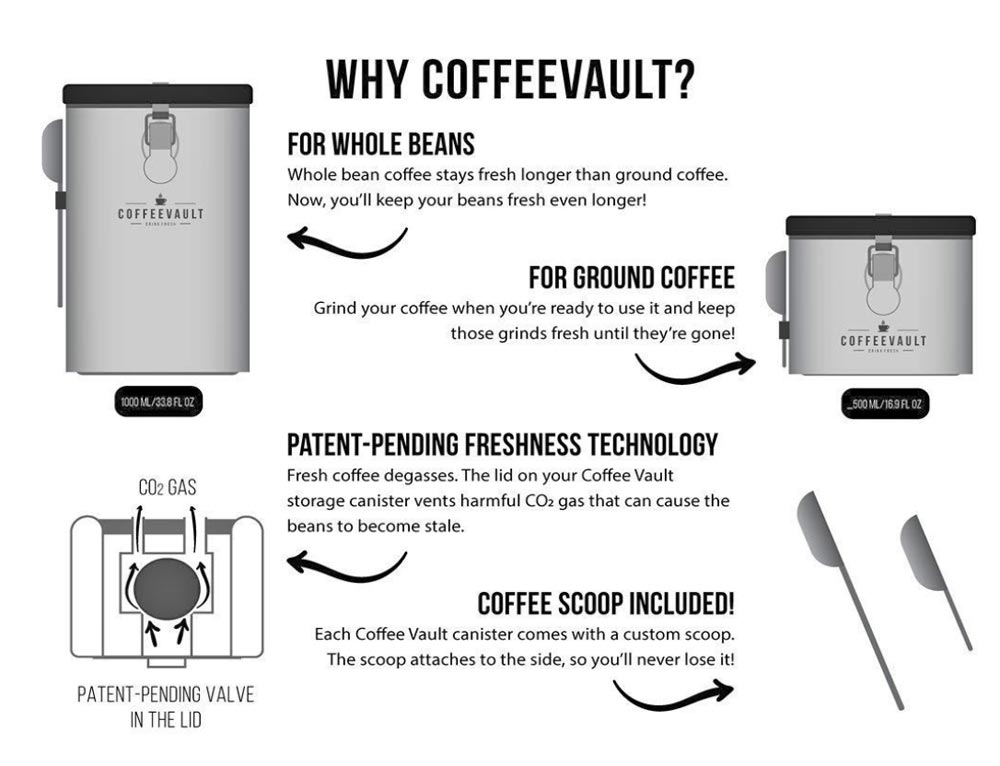
There are two containers in this kit. The bigger container can store 16 ounces of beans. When you grind some of the coffee, store the grounds in the smaller container until you need it. Each metal canister has a custom-sized scoop that stores right on the side of the canister. The canisters are square, so they’ll fit together to save space on your counters.
Once coffee is roasted to release those flavorful sugars and essential oils in the beans, the environment starts robbing coffee of its flavor. There are four factors that are the enemies of roasted coffee.
Light – Glass jars let light in, harming the flavor of your beans.
Air – Bags or non-airtight canisters let in flavor-diminishing air.
Moisture – Outside air lets moisture build up, weakening the flavor.
CO2 – Fresh beans release CO2, which must be vented.
Coffee Vault canisters block out light, air, and moisture. Plus, the lids have patent-pending vents to release the carbon dioxide.
The Coffee Vault Compact Coffee Canister Set is available at Amazon for $23.77. Visit the Coffee Vault website and you can get a 60%-off coupon to use to purchase the canister set from Amazon.
Note: If you are subscribed to this feed through FeedBurner, please switch to our native feed URL http://the-gadgeteer.com/feed/ in order to ensure continuous delivery.