IQAir AirVisual Pro Air Quality Monitor review

I live in Florida, the land of perpetual pollen, in an older home in the woods. And I have asthma. Those three strikes mean it can be difficult to enjoy the outdoors. But what about the indoors?

My husband, Bill “Mr. Headphones” Henderson, recommended I try the AirVisual Pro by IQAir to help me monitor our indoor and outdoor air quality index (AQI) in hopes we could identify necessary improvements to our indoor AQI and I would know when to avoid the outdoors.

What is it?

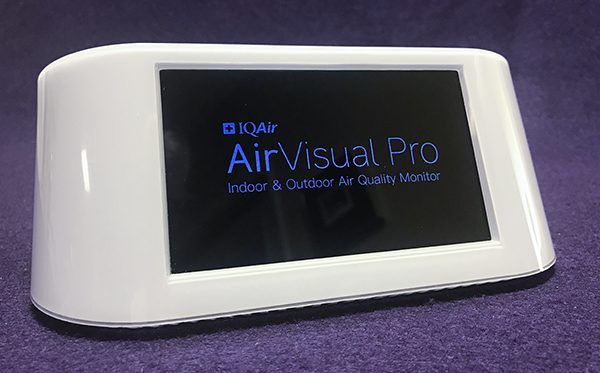
The AirVisual Pro by IQAir is a visual monitor of indoor and outdoor air quality. Plus, it displays the air quality from anywhere in the world that has monitoring stations. You can also register your monitor as a designated public station.

Design and features

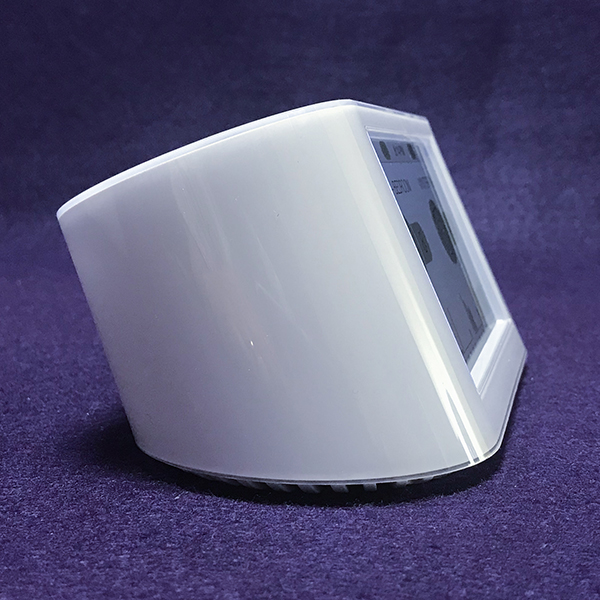
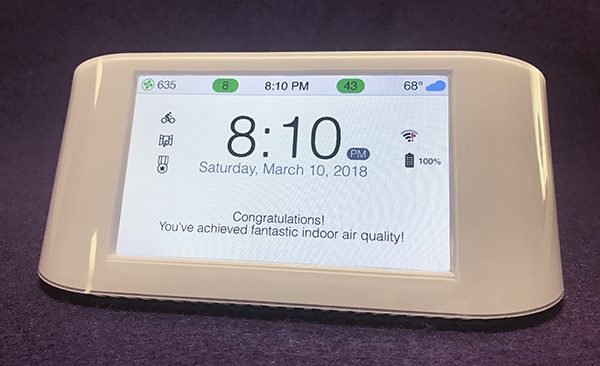
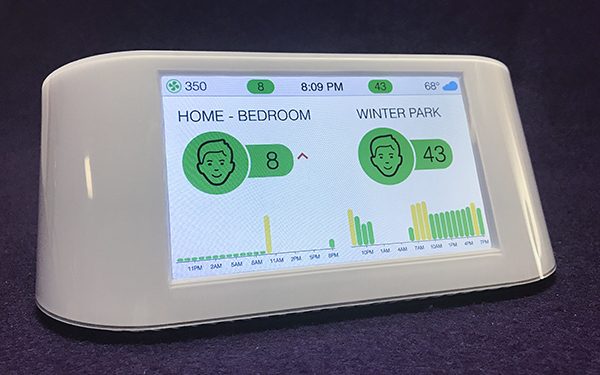
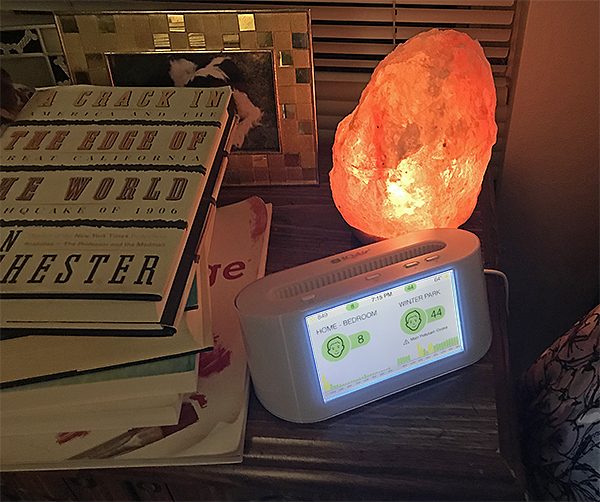
My unit, which retails for $269 plus shipping, arrived in late January and was easy enough to set up. Able to run on electricity or battery power, the small unit has a distinct Jetsons vibe to it. It immediately detected my location and linked me to an outdoor testing site. The home screen would display my indoor AQI – which was well within the green, or good, zone but with a higher-than-desirable CO2 level – next to our outdoor AQI.


AQI is broken into several categories: good, from 0 to 50; moderate, from 51 to 100; unhealthy for sensitive groups (people with respiratory or heart disease, children and the elderly), 101-150; unhealthy, 151-200; very unhealthy, 201-300; and hazardous, 301 and higher.

The AirVisual Pro also measures PM2.5, which the manual describes as “particulate matter in the air with a diameter of 2.5 micrometers of less. Due to its size, PM2.5 is considered the most hazardous pollutant to human health as it can be absorbed into the bloodstream via the lungs.” We had an initial PM2.5 that was quickly resolved, though I’m not sure how.

I also downloaded the app and linked it to my device using its serial number. The app allows me to see both my indoor and outdoor AQI, my indoor CO2 level and PM2.5, if applicable. It also shows me the air quality of some major U.S. cities.

Now to digress a bit. I also had recently received an Airfree Air Purifier to review. I placed that unit in our bedroom a few feet away from our bed. As a way to test the effectiveness of the Airfree unit, I placed my new AirVisual Pro on the other side of the room. The indoor AQI was 0, meaning the air in our bedroom was completely clean.

However, my AirVisual Pro warned me that outdoor air quality was poor and I should stay inside. So I decided to do an elliptical workout in lieu of going outside. The elliptical is also in the bedroom. With all my huffing and puffing, my workout bumped the CO2 level up about 300 points to 1471, causing the unit to suggest I open windows and doors to alleviate stuffiness. However, the outdoor air quality precluded that possibility. Using a ceiling fan didn’t nudge the CO2 reading a bit.

The next day, the indoor AQI was 35, which is still in the green, or good, range. Within a couple of days, I began to see a correlation between a higher indoor AQI and cooking fumes, but I hadn’t yet made that connection. So I decided to plug in my IQAir HealthPro Plus air purifier, which had been sitting idle in our family room. Also, within 45 minutes of plugging it in, the AQI in the master bedroom improved from 35 to 17.

It was a few days later that I actually connected the dots between cooking fumes and air quality. As my husband cooked bacon in the kitchen, two rooms away, our indoor AQI snuck up to 57, higher than the outside AQI. Obviously the machine doesn’t understand breathing bacon fumes cannot possibly be bad for you.

Two days later, the display inexplicably stopped showing the outside AQI when showing the inside AQI. In place of outside AQI, it displays the inside CO2 level. The manual indicated it was likely a wi-fi issue. However, the device itself and the app showed the AirVisual Pro was connected to the internet.

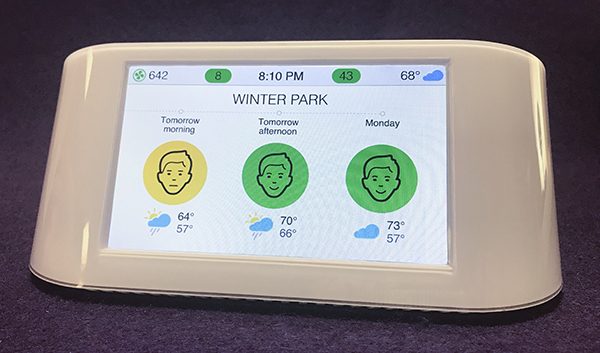
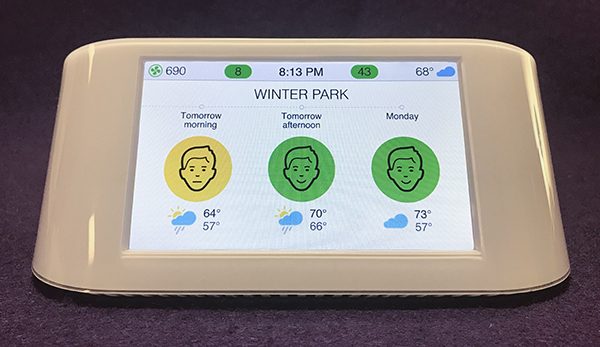
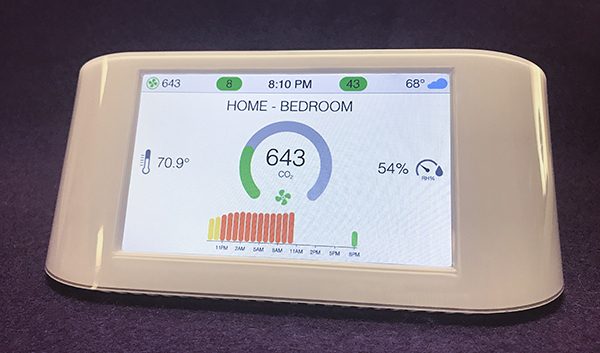
A couple of weeks later, when the display remained unchanged, I contacted the customer support team via email just to test the company’s responsiveness. The rep responded after a few days, suggesting something I had already tried. In the meantime, Mr. H was able to navigate the device’s menu, which has a bit of a learning curve, and he was able to restore and even improve the original display. Now one screen gives me the indoor and outdoor AQI, another gives me a three-day weather report, and a third gives me the CO2 level, which remains in the stuffy zone.

As Central Florida went immediately from winter to summer, it was time to turn on the air conditioning. The CO2 level was finally less than 1000, possibly from a whole day of AC. However, kitchen fumes from my dinner of oven-fried chicken, roasted asparagus, maple-glazed carrots and sautéed summer squash sent the indoor AQI soaring to 166. Again, the machine can’t distinguish between delicious and deadly. Once fumes dissipate, the AQI typically drops to 0.

I moved the unit to the family room – right next to the IQAir purifier and closer to the kitchen – for comparison’s sake. The indoor AQI remained at 0, and the CO2 count dropped to 570 – possibly from proximity to an exterior door that is often opened.

Because the outdoor AQI is still not displaying on the device, I refer to the app, which tells me the outdoor AQI is a low 41. However, this is the same day my state of Florida is called out for having the highest pollen count in the nation. This information is enough to inform this asthmatic to avoid being outside, though the app would have me believe otherwise.

A couple of days later, the app is telling me our local AQI is 30 – in other words, excellent for outdoor activities or opening doors and windows. However, the pollen count is still the highest in the nation, and I have to cover my nose and mouth when I’m outside because of smoke from a nearby wildfire. Obviously the reading station wasn’t getting accurate measures. So I ignored the recommendation on my unit to open doors and windows to alleviate stuffiness in our indoor air.

I even moved the device to a screened porch, which would result in outdoor AQI readings, so I could compare those readings with those of the local station. The readings from my back porch, which faces a couple of hundred trees, was a mere 13, compared with the local station reading of 30. Both are well within the green zone, though pollen levels remain high. I’m still confused by how outdoor AQI doesn’t reflect the high pollen counts.

What I like

The IQAir AirVisual Pro gives an accurate—and quick—reading of any changes in indoor air quality. It provides reassuring feeling knowing how good or bad our air quality is.

What needs to be improved

Outdoor readings are subject to monitoring stations which may not always be reliable.

Final Thoughts

Overall, I found the IQAir AirVisual Pro helpful in that it shows the Airfree and IQAir air purifiers are doing what they’re supposed to do. It also alerted me to the problem with our home’s high CO2 levels, a problem I still need to address. I suspect the outdoor AQI information will become more accurate as more testing stations become available and the technology evolves – especially if testing begins to take pollens into account.

Price: $269 US
Where to buy: Amazon
Source: The sample of this product was provided by IQAir.

The post IQAir AirVisual Pro Air Quality Monitor review appeared first on The Gadgeteer.

Filed in categories: Reviews

Tagged: ,

IQAir AirVisual Pro Air Quality Monitor review originally appeared on The Gadgeteer on March 12, 2018 at 11:00 am.

Note: If you are subscribed to this feed through FeedBurner, please switch to our native feed URL http://the-gadgeteer.com/feed/ in order to ensure continuous delivery.

Take pics with your DSLR without touching the shutter button

There are several types of photography that I find very enjoyable. I love close-up macro photography and also outdoor photography when I can place my camera on a tripod somewhere in nature and capture amazing photographic moments.

When I first started this type of photography, I would either have my camera handheld or next to me on a tripod, and I would depress the shutter release button to take the picture. When taking macro shots, I quickly understood that no matter how steady I tried to be, depressing the shutter release would cause some vibration on the camera and distort the full clarity of the image, because of the impact the movement had on the focus. When shooting in nature, I would try to capture insects or other natural inhabitants, but my presence next to the camera would almost always scare away the subject.

I realized that I needed a remote shutter release so that I could be away from the camera or in the case of macro photography, I could avoid the vibration of the camera.

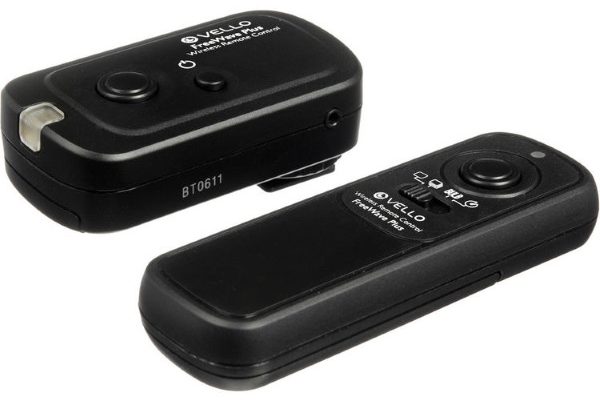
I purchased the Vello FreeWave Plus Wireless Remote Shutter release after researching the many available remote shutter devices. My decision was based on both cost and features.

The Vello Remote Shutter Release consists of 2 components, a transmitter, and a receiver. The Receiver connects to the camera via the Canon 3-pin connector and the Transmitter is the hand-held trigger that can send a signal to the Receiver from up to 100 meters away. I have never tried it from that far, but it works very well from all the distances I have tried. The Receiver and Transmitter each work on 2 AAA batteries and communicate via the 2.4Ghz frequency. In the event of any interference, they offer a selection of 16 channels to find the best signal.

If you would like to purchase the Vello FreeWave Plus Wireless Remote Shutter Release, it is available at B&H Photo Video and Amazon for select Canon, Sony, and Nikon cameras for $59.95.

The post Take pics with your DSLR without touching the shutter button appeared first on The Gadgeteer.

Filed in categories: News

Tagged:

Take pics with your DSLR without touching the shutter button originally appeared on The Gadgeteer on March 12, 2018 at 10:00 am.

Note: If you are subscribed to this feed through FeedBurner, please switch to our native feed URL http://the-gadgeteer.com/feed/ in order to ensure continuous delivery.
Add the unique beauty of natural wood to your Apple Watch with Ottm’s Hardwood bands


In a world full of watch bands Ottm’s hardwood Apple Watch straps really stand out. Made from two eye-catching hardwoods: Gabonese Zebrawood from West Africa best known for its striking finish and Indonesian Sandalwood which is prized for its fragrance and widely used across Asia in incense and oils. These distinctive and handsome straps have subtly rounded edges that are hand sanded to a smooth finish so that it feels comfortable on your wrist. Each band has a unique grain pattern and is hand-finished and treated with tung oil. Making them waterproof and weatherproof as well.

Ottm uses high-quality stainless steel for both the easy open butterfly clasp and the carefully fitted Apple Watch adaptors ensuring both durability and elegance.

The length of each band can easily be adjusted for a perfect fit using the included resizing tool. Extras include a pin removal tool, extra links and resizing instructions.

The Ottm hardwood Apple Watch band is available in both 38mm and 42mm sizes. Wood choices include Zebrawood, Sandalwood, or my favorite, a combination of the two.

The straps can be purchased at Amazon from $34.99-$49.99 depending on the size and wood finish you choose.

The post Add the unique beauty of natural wood to your Apple Watch with Ottm’s Hardwood bands appeared first on The Gadgeteer.

Filed in categories: News

Tagged:

Add the unique beauty of natural wood to your Apple Watch with Ottm’s Hardwood bands originally appeared on The Gadgeteer on March 12, 2018 at 9:00 am.

Note: If you are subscribed to this feed through FeedBurner, please switch to our native feed URL http://the-gadgeteer.com/feed/ in order to ensure continuous delivery.
Brew coffee at room temperature with the Asobu portable coffee brewer

You can make fresh, cold coffee without a fancy machine with the Asobu Cold Brew Coffee Maker.  You just add some coffee grounds and 24 ounces of water into the plastic brewer and let it sit at room temperature for 12-24 hours.  When the steeping is complete, press a button to transfer the coffee into the stainless carafe, add ice cubes, and you can take iced coffee with you in the carafe.  I suppose, if you prefer hot coffee, you could omit the ice cubes and just nuke a cup of coffee as you drink it.

The carafe is a double-walled stainless bottle with copper insulation to keep the coffee fresh and cold for up to 24 hours.  It holds 32 ounces, to allow room for the addition of ice.  The brewer is made of BPA-free Tritan plastic, and it has a reusable stainless steel mesh filter.

The Asobu Portable Cold Brew Coffee Maker is available with a stainless, copper, or black carafe for $49.95 from The Grommet.

The post Brew coffee at room temperature with the Asobu portable coffee brewer appeared first on The Gadgeteer.

Filed in categories: News

Tagged:

Brew coffee at room temperature with the Asobu portable coffee brewer originally appeared on The Gadgeteer on March 12, 2018 at 8:00 am.

Note: If you are subscribed to this feed through FeedBurner, please switch to our native feed URL http://the-gadgeteer.com/feed/ in order to ensure continuous delivery.
Speak Music Muse Alexa voice assistant review

Is Alexa your BFF? Do you have the Amazon Echo or Echo Dot devices in your home? Digital voice assistants like Alexa are very handy when you want to control your smart home gadgets or when you want to ask questions and play your favorite music without using your phone, or your computer. Being able to use your voice to say “Alexa, turn up the heat” or “Alexa, play songs by U2” makes you feel like you’re living in the future. But how can we take Alexa with us on road trips in our vehicles? The Speak Music Muse Alexa voice assistant is like a miniature Amazon Echo for your car. Let’s check it out.

What is it?

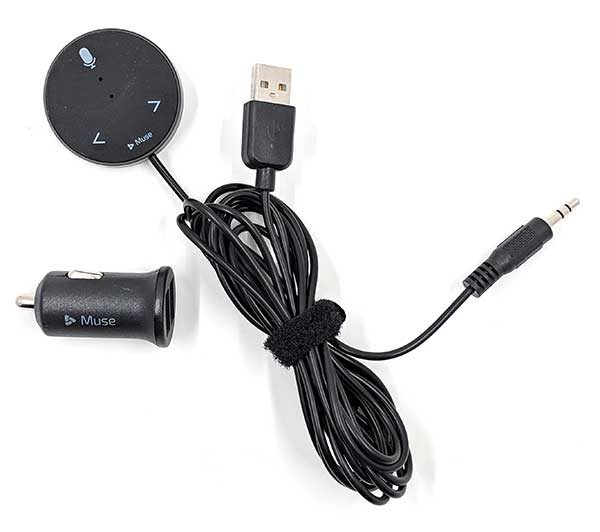
The Speak Music Muse Auto is an Alexa voice assistant with a microphone and forward and back buttons that plugs into a power socket in your car.

What’s in the box?

  • Muse Bluetooth device
  • 12V dual USB car adapter
  • Magnetic mounting plate
  • Quick start guide

Design and features

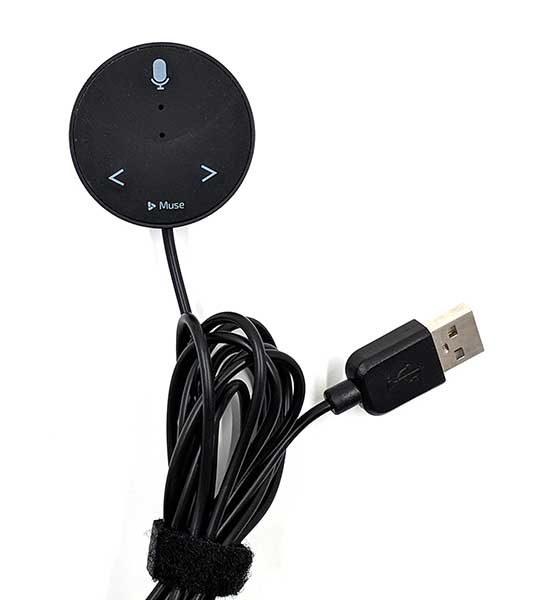
The Muse has a black plastic puck-shaped device with a microphone, a status LED, and two buttons. Attached to it is a cable connected to it that has a 3.5mm input cable and a USB connector.

On the back of the device is a magnetic mount that can be used to affix the Muse to a flat surface on your car.

The Muse voice assistant is powered through a USB cable. If you don’t have a USB port in your car, you can use the included dual port 12V power adapter.

Setup and usage

Installing and setting up the Muse is pretty easy. First, you need to find a place in your car to attach it. I didn’t have a good place to stick the adhesive mounting disk in my MINI Cooper, so I just stuck it to the iOMount that I already had installed in my car.

The next step is to install the Muse app on your phone. This is needed because your phone will be doing all the heavy lifting as far getting the info when you ask Alexa questions or command it to control other devices in your home when you’re on the road.


For the most part, you won’t even look at the app once it’s installed and you’ve set up Muse in your car. It will ask you to either connect the Muse via Bluetooth to your car, or you can use the 3.5mm cable to connect it to the Aux In jack in your car if you have one. From there, all you need to do is start talking to Alexa which you do exactly like you do with an Amazon Echo or Echo Dot, by saying “Alexa” and then your command or question. You will need to wait for a tone before saying your command or tone.

It should also be obvious that you’ll need to have a good signal on your phone in order to have a connection to the internet when you’re driving.

During my week or so of testing the Muse, I did all the usual things I would do with Alexa at home, I would ask her to read me the news, tell me what time it was, ask her where the nearest gas station was, play my favorite tunes, turn up the heat in my house, etc. All that worked as I had expected it to work.

I did run into a few small issues though. If I had my favorite music cranked up, and wanted to play another song or give Alexa another command, she sometimes would not be able to hear me unless I yelled her name a couple of times. However, the physical buttons on the Muse device are handy for skipping tracks when you don’t feel like shouting.

I also was disappointed that there was no way to get turn by turn directions to a destination. You can ask where the nearest store is and Alexa will give you the address, but she won’t tell you how to get there. She also won’t let you call people in your contacts. But, she will pause music or other playback if calls come in and then resume after the call ends.

One other issue that I noticed is that the Muse app is always running in the background which can be a drain on your battery.

I did all my testing with my Pixel 2 XL and noticed a drop in my battery life after starting to use Muse which you can see above in the Android battery details.

What I like

  • Can play and control music with your voice instead of your hands
  • Works just like the Amazon Echo in your home

What needs to be improved

  • No turn by turn navigation
  • Can’t use it to call your contacts
  • Have to yell ALEXA! To get “her” attention if music is playing

Final thoughts

I like a totally hands-free way of interacting with music when I’m driving and being able to hear news briefs instead of waiting to hear them on my normal radio stations. Muse is a fun and easy way to have an invisible assistant do your bidding and I’m looking forward to when it can do even more than it can do now.

Price: $69.99
Where to buy: Amazon
Source: The sample for this review was provided by Muse.

The post Speak Music Muse Alexa voice assistant review appeared first on The Gadgeteer.

Filed in categories: Reviews

Tagged: ,

Speak Music Muse Alexa voice assistant review originally appeared on The Gadgeteer on March 11, 2018 at 3:10 pm.

Note: If you are subscribed to this feed through FeedBurner, please switch to our native feed URL http://the-gadgeteer.com/feed/ in order to ensure continuous delivery.