I’ve been a Star Wars fan since being mind-blown by Episode IV: A New Hope at a drive-in with my parents back in the summer of ’77. It was only my first of hundreds of viewings of the classic original film, but since I was only about 5 years old at the time, my memories of that initial viewing are a bit foggy. However, of the many fantastic creations brought to life in the film, I clearly remember the spacecraft, particularly the Rebel X-Wing fighters and Imperial TIE fighters. Propel has brought these iconic ships to life with their Star Wars drones, and I had the opportunity to try out their TIE Advanced X1 Collector’s Edition Drone. Let’s check it out! Gadget on!
What is it?


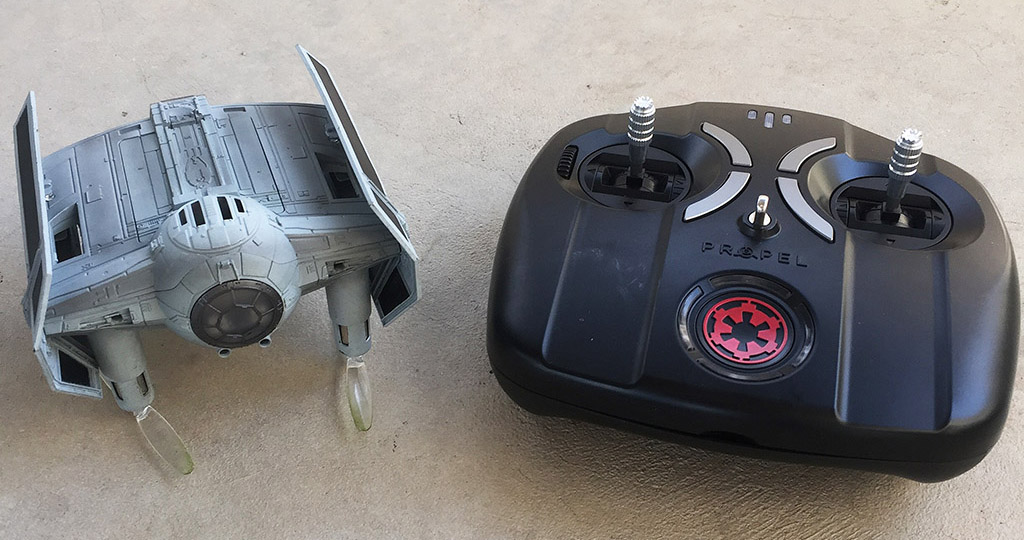
Darth Vader. The most icon movie villain in the history of cinema. Did you know he flew his own, custom TIE Fighter in Star Wars: Episode IV – A New Hope (see images above)? The Propel Star Wars TIE Advanced X1 Collector’s Edition Drone is a faithful representation of Vader’s personal ship: a highly detailed, film-accurate, high-performance quadcopter style remotely-controlled drone which includes features that allow it to be enjoyed by a single user or flown against other Propel Star Wars drones in multi-player aerial battles.
Hardware specs
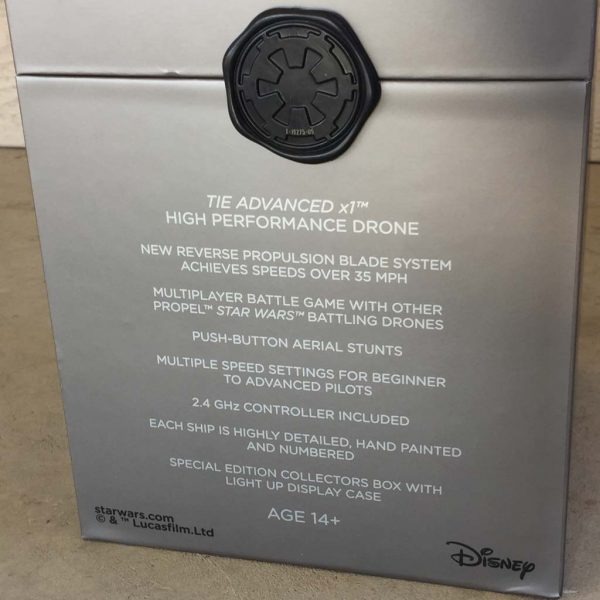
Per the Propel site:
- Highly detailed, hand-painted and numbered
- New Reverse Propulsion technology blade system achieves speeds over 35 MPH
- Three Speed Settings for beginner to advanced pilots
- T-Mode assists beginner pilots in learning how to fly
- Push-button aerial stunts
- Special edition collectors box
- Light up hand-made display case plays soundtracks from the Star Wars Original Trilogy
- Comes with two rechargeable Li-poly batteries and rapid charger for drone
- Average charge time: 30-40 minutes
- Average run time: 6-8 minutes
- 2.4 GHz wireless remote controller requires 4 AA 1.5v alkaline batteries (batteries not included)
- Multiplayer battle game with other Propel Star Wars battling drones
- Free iOS and Android Companion App available
- 1 Year Warranty
What’s in the box?
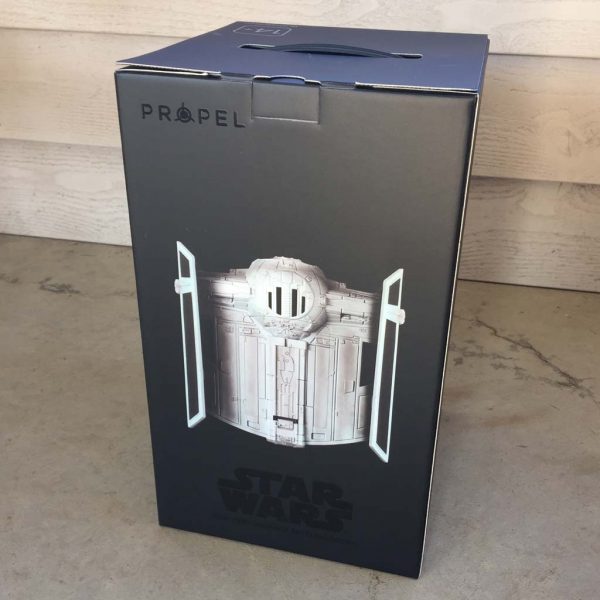
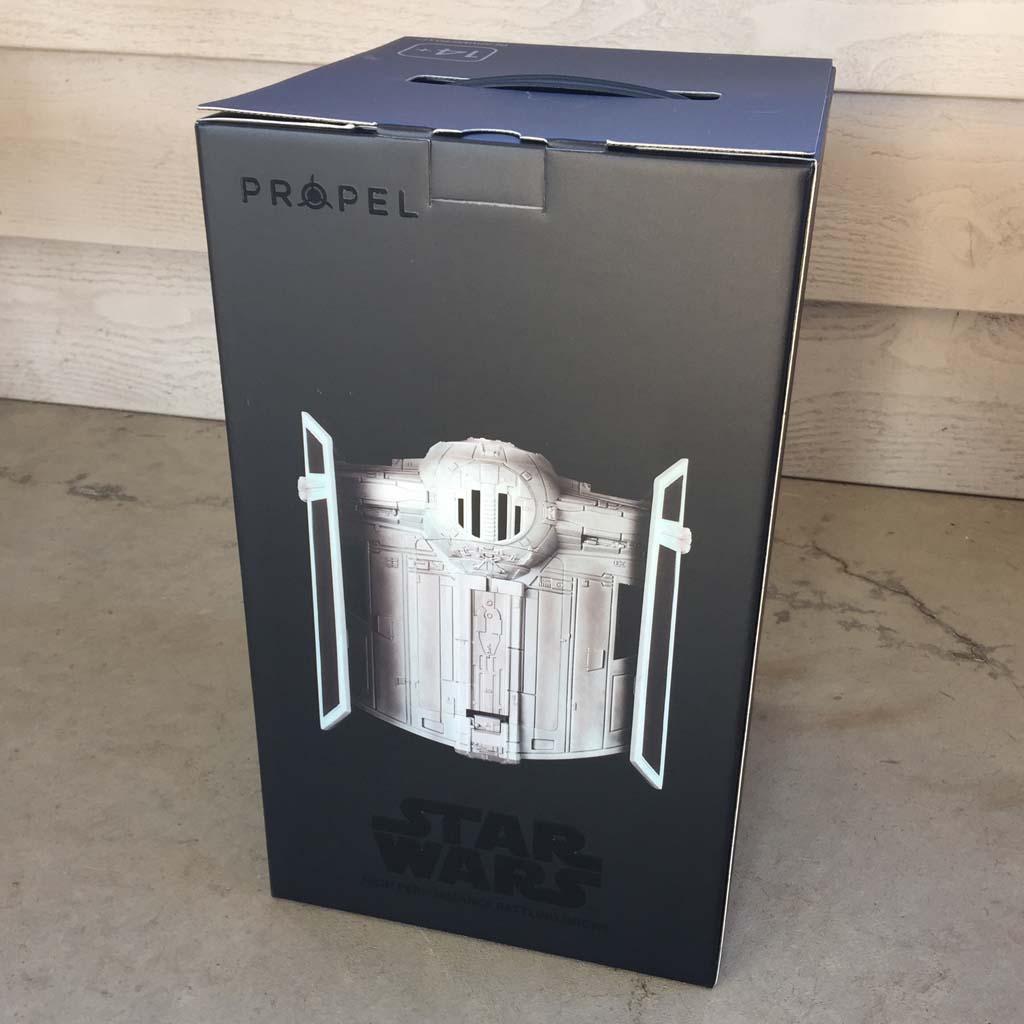
Let’s start with the outermost packaging and work our way inwards. The Tie Advanced X1 drone’s packaging was impressive right out of the box (pun very much intended). The external shipping box, shown in the images above and below, had a very professional look and feel, and a collapsible carry handle at the top, which was quite handy (again, shameless pun intended) considering that the box is fairly large and a bit heavy.
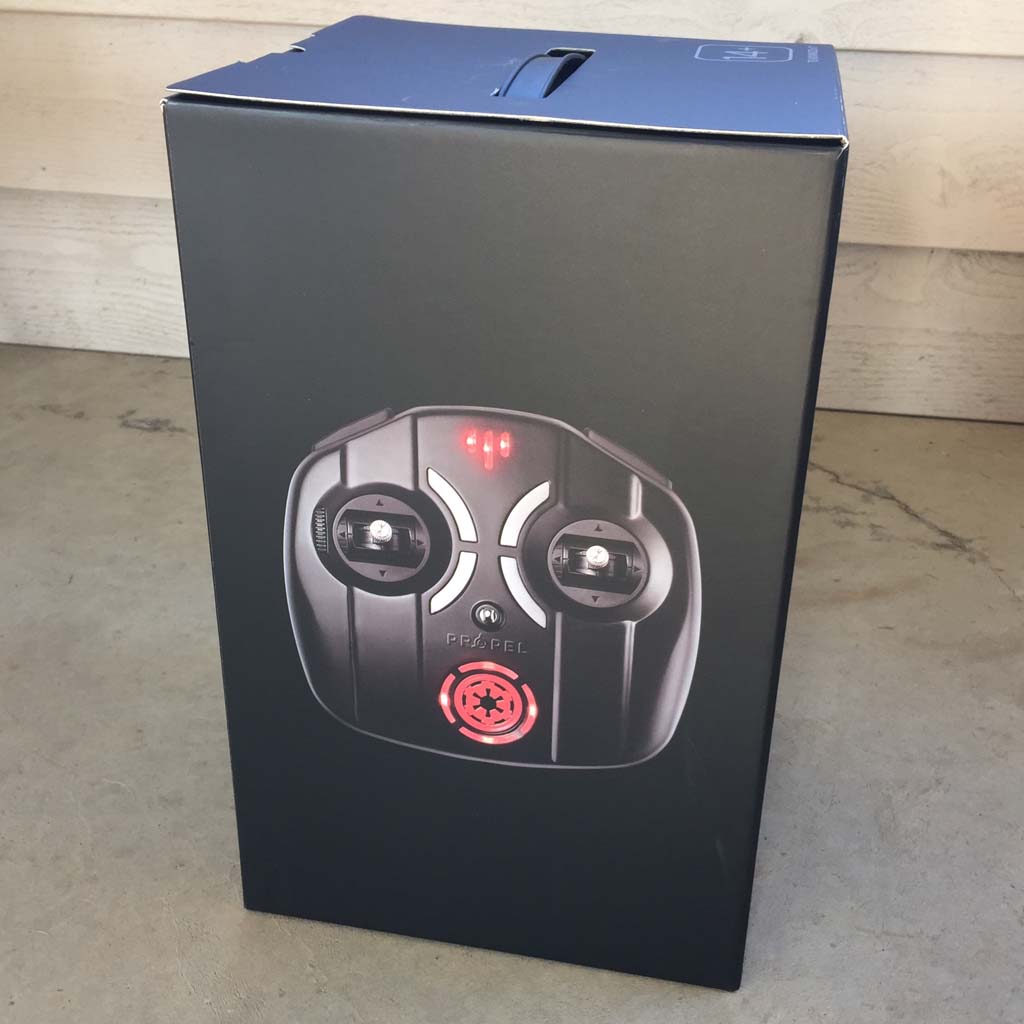
 Images of the drone itself and its controller adorn the outside of the external shipping box.
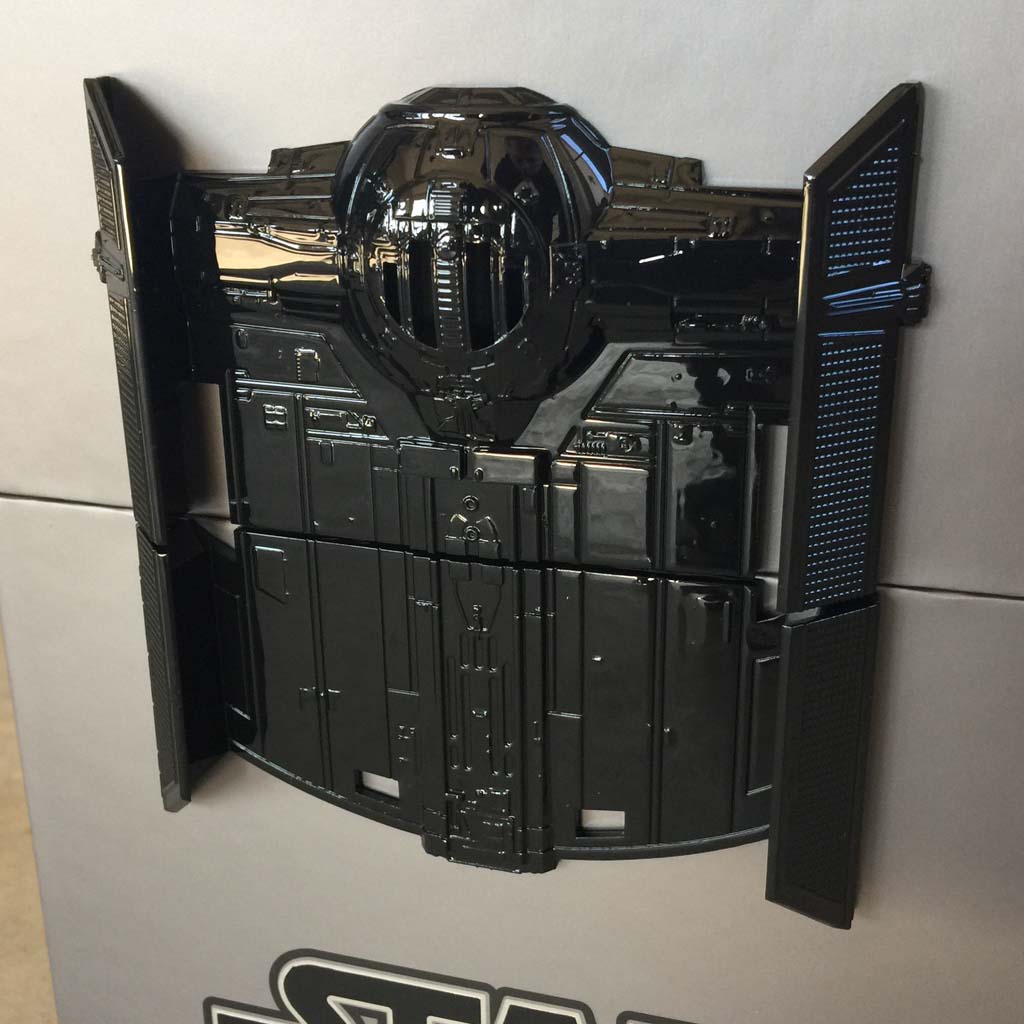
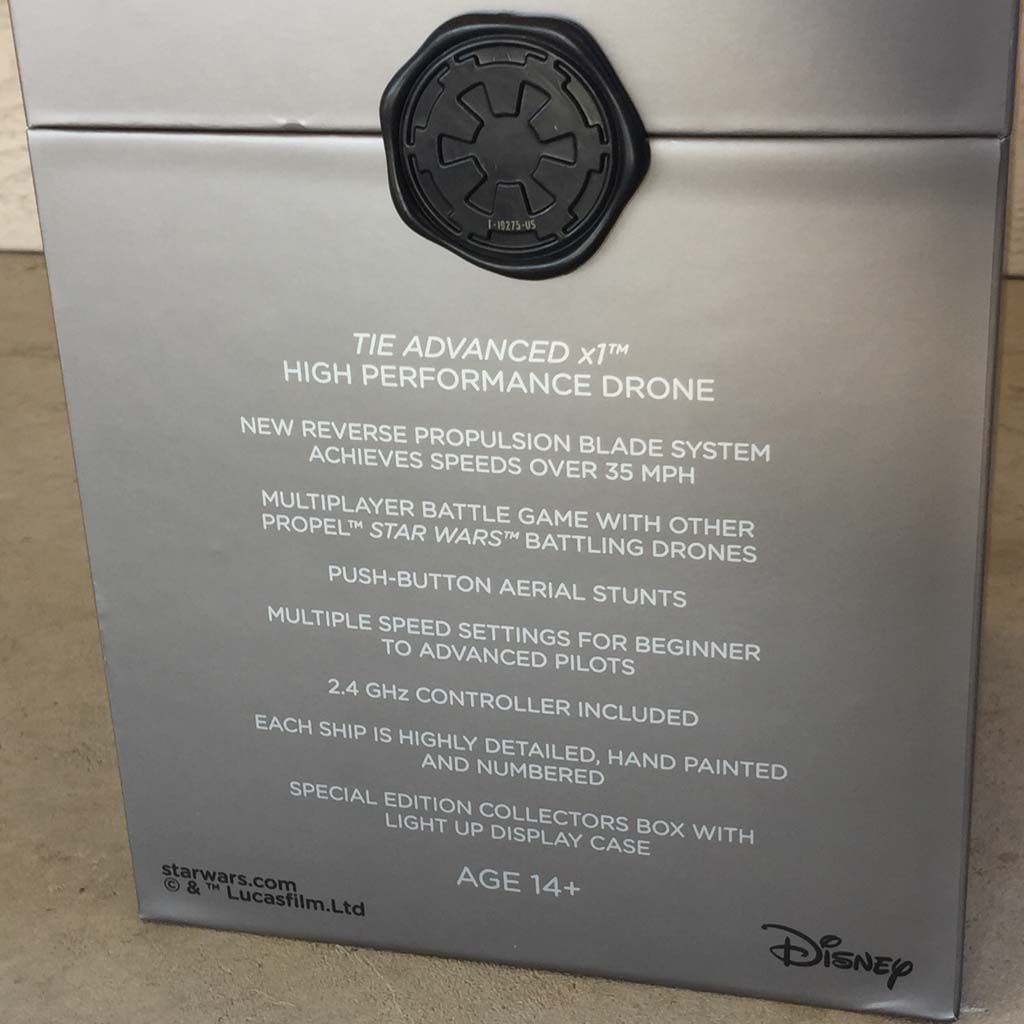
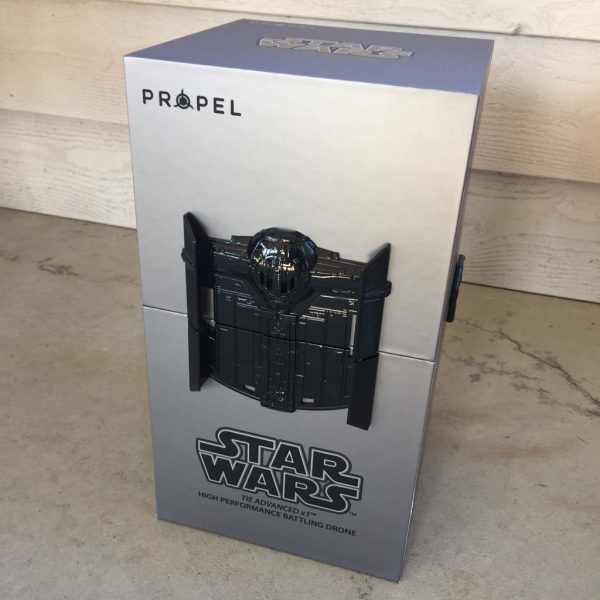 The next layer of packaging, inside the external shipping box, is where things already started to become impressive. One side of the internal package included a 3-dimensional likeness of the TIE Advanced X1 itself, split across its middle to facilitate separation of the box’s lid from its main body.
 Even this plastic likeness of the TIE Advanced X1 was highly detailed and hinted at the detail level of the drone itself inside, which raised my excitement level a few notches.
 In addition, sitting atop the internal box was a card stating that this was a “Special Collector’s Edition Box” (see above). The card went on to explain that this internal box included a wax seal with serial number. How cool is that!
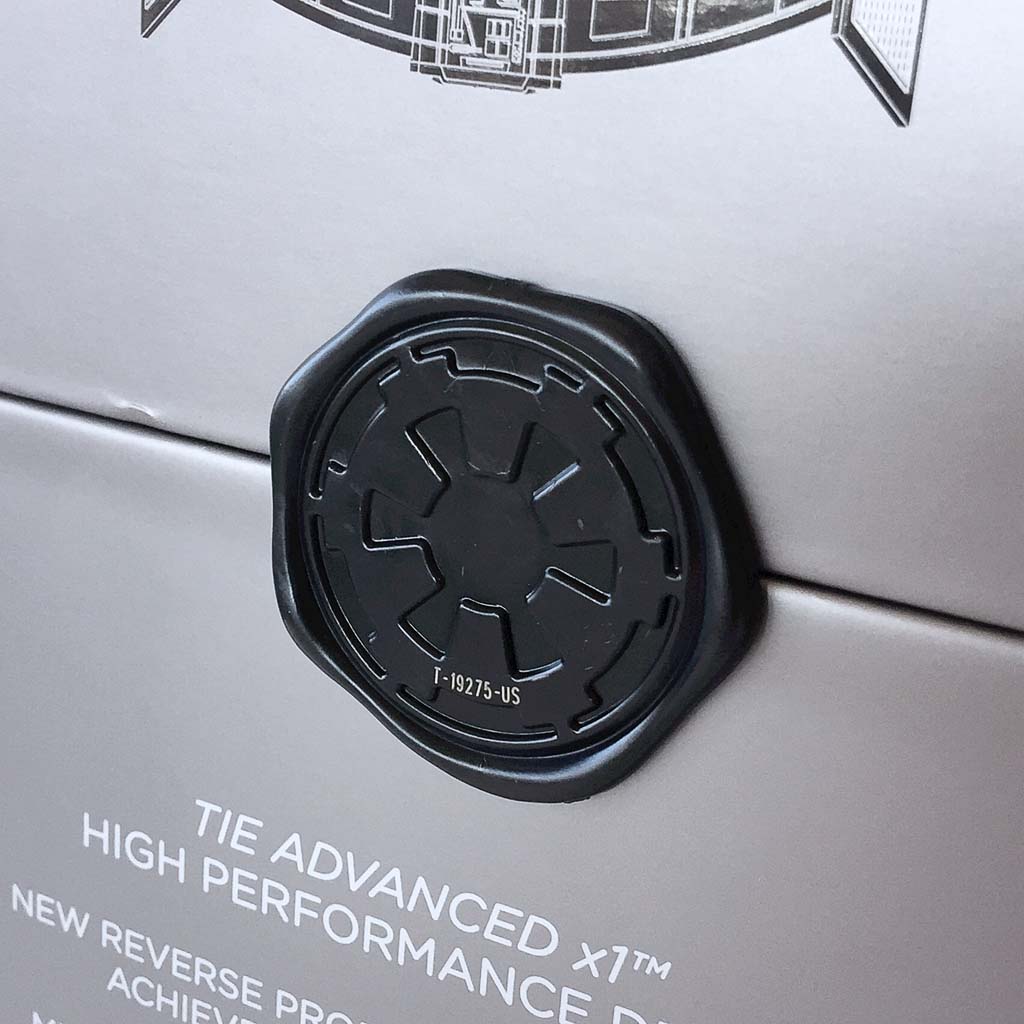
 The wax seals (there were two on opposite sides from each other) were embossed with the “Imperial crest,” insignia of the Galactic Empire, as seen in the images above and below.

Above you can see that one of the two wax seals also included a laser-engraved serial number unique to this specific item.
To open the internal box’s lid, I actually had to use a knife to carefully cut through the two wax seals (see above). Excitement level rising…

The silver sleeve shown above left encased the black “Imperial Flight Manual” book shown above right.
Design and features
As impressive as I found the TIE Advanced X1’s packaging, the contents of that packaging were even more impressive.
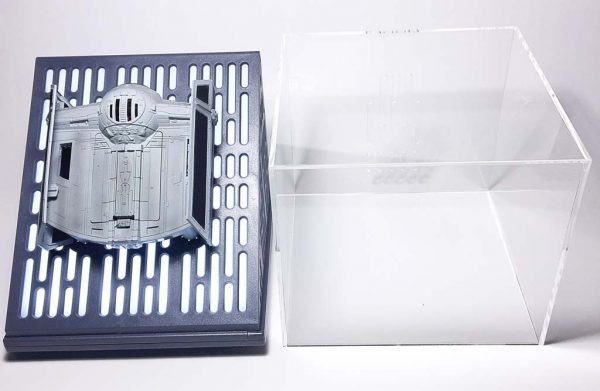
Display case and base
 When I finally removed the internal package’s lid, I was utterly blown away by a multi-media Star Wars experience.
For starters, before I had even fully lifted the lid off, the “Imperial March” (AKA “Darth Vader’s Theme”) from the Star Wars soundtrack began playing from inside the package! I literally gasped with glee.
 In addition to the universally-recognized martial anthem of the “Imperial March,” the next layer of packaging was even more impressive, as can be seen from the images above and below. It turned out to be almost like a multi-level tower of packaging items housing the drone and all of its many accessories.
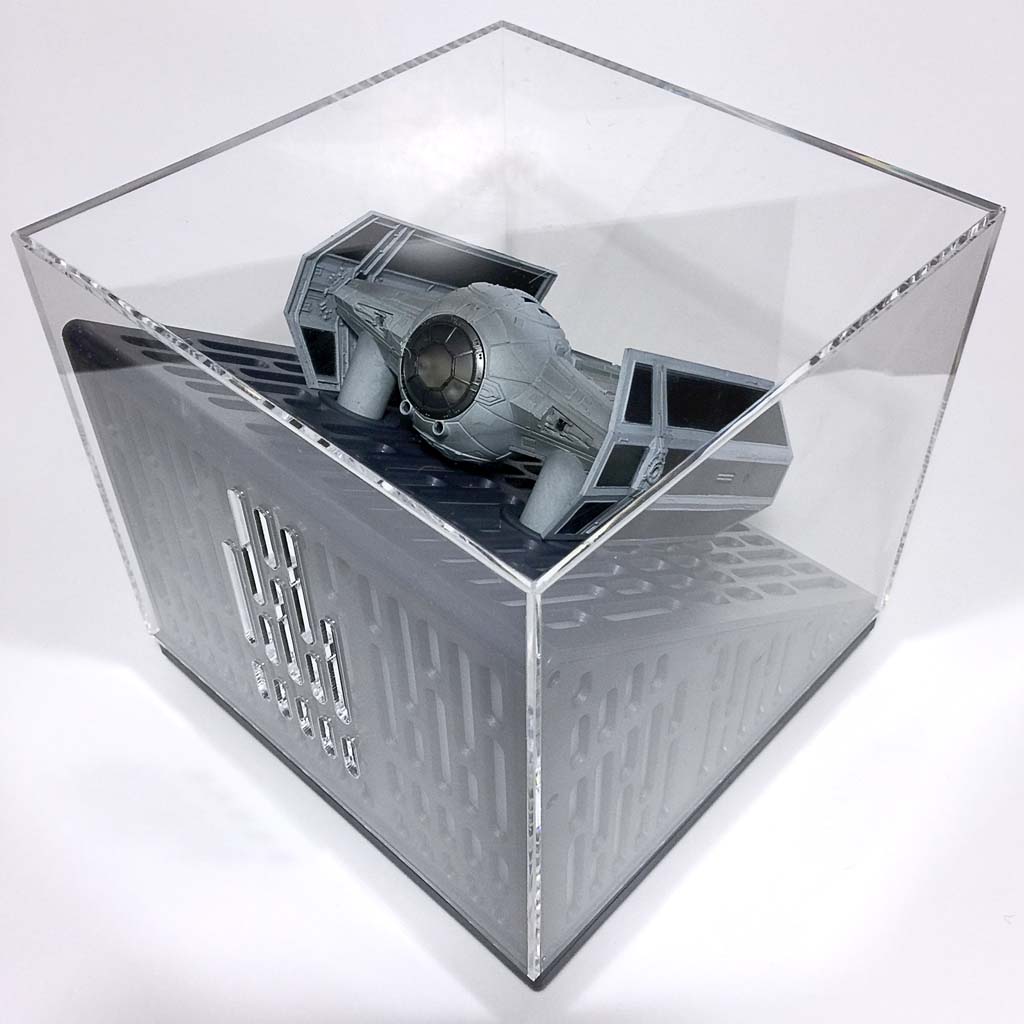
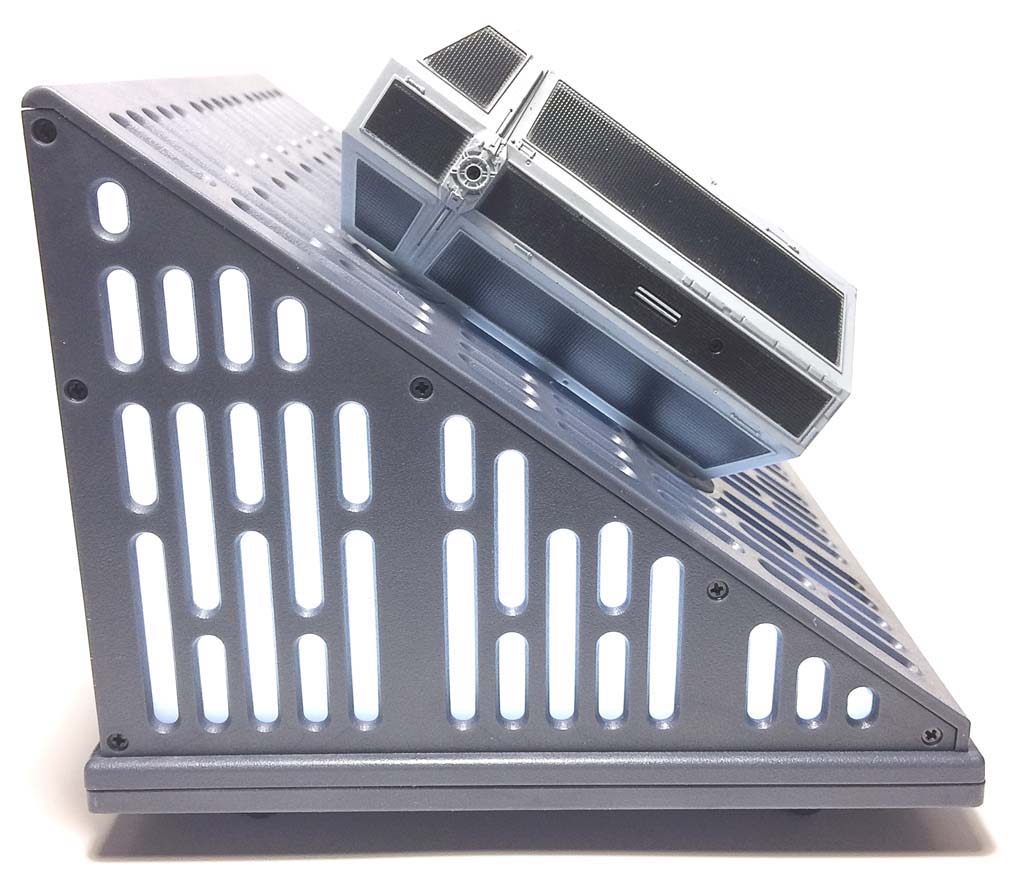
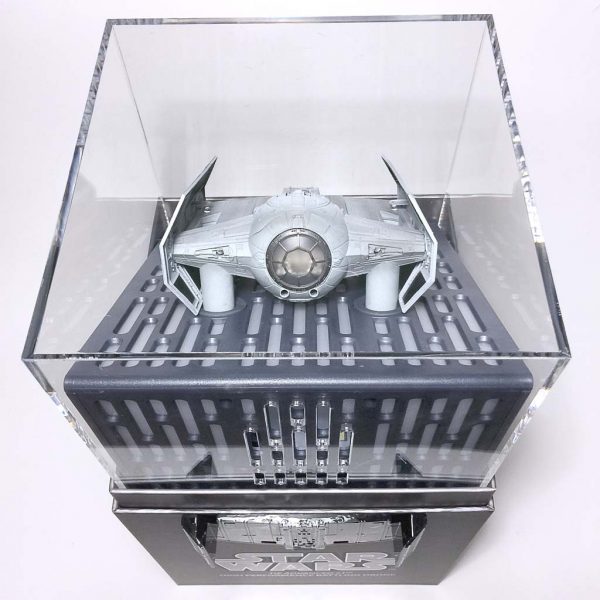
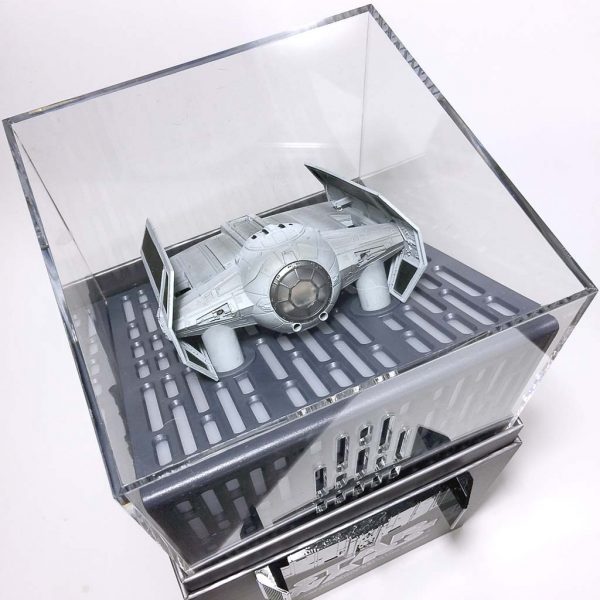
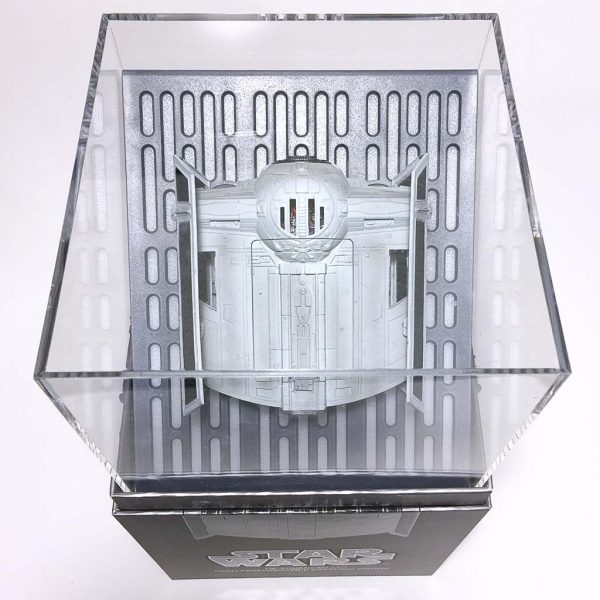
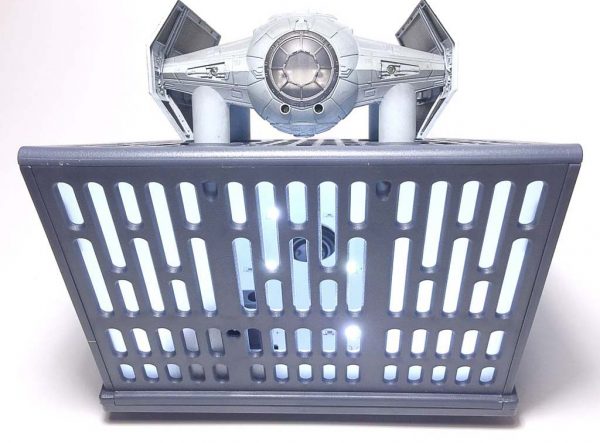
 The top-level essentially consisted of a display cube for the TIE Advanced X1 drone itself. This display cube was comprised of a transparent plastic lid which covered wedge-shaped display base upon which the drone itself sat in all its glory. The gray plastic base included slots that will be immediately recognizable to Star Wars fans as the hallway panels in Imperial Star Destroyers and the dreaded planet-destroying Death Star battle station.
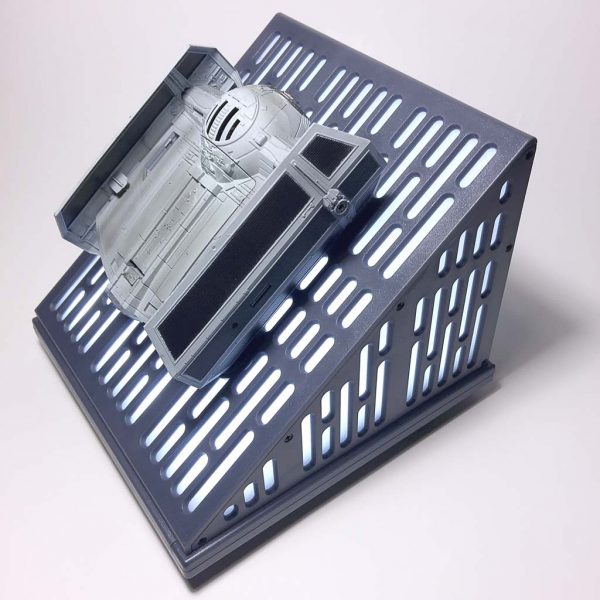
 As mentioned above the TIE Advanced X1 drone sits upon the base so that it can be displayed, and with the transparent lid protecting it, the whole thing is quite impressive.
The transparent lid fits well over the base but is easy to remove and replace and allows viewing of the drone from nearly all sides.
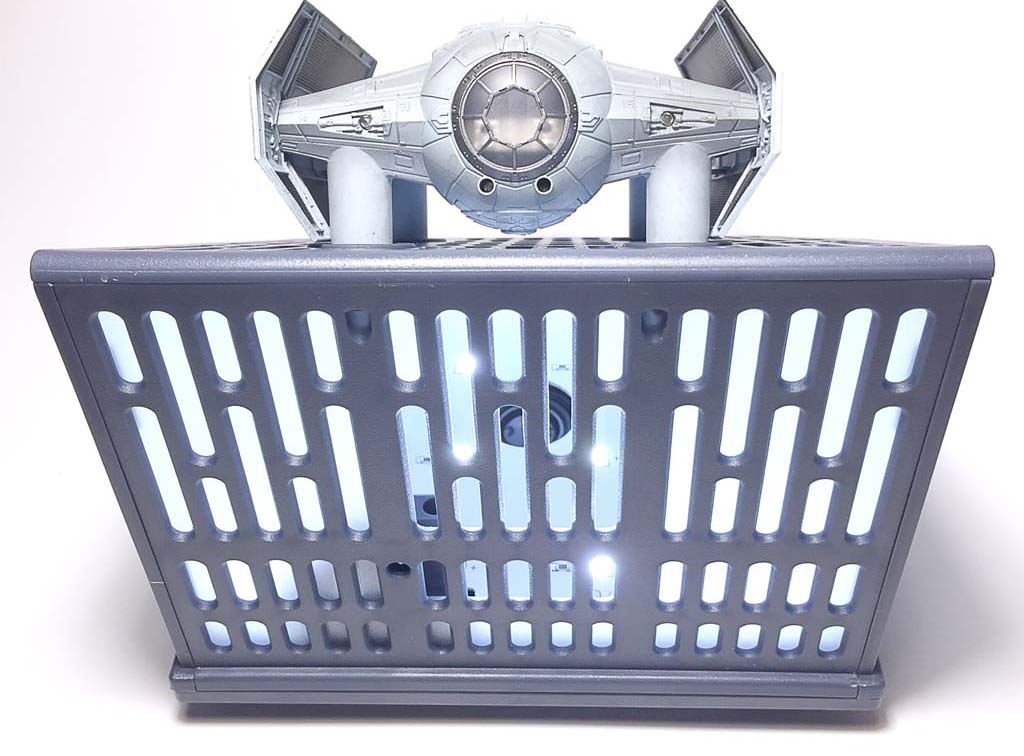
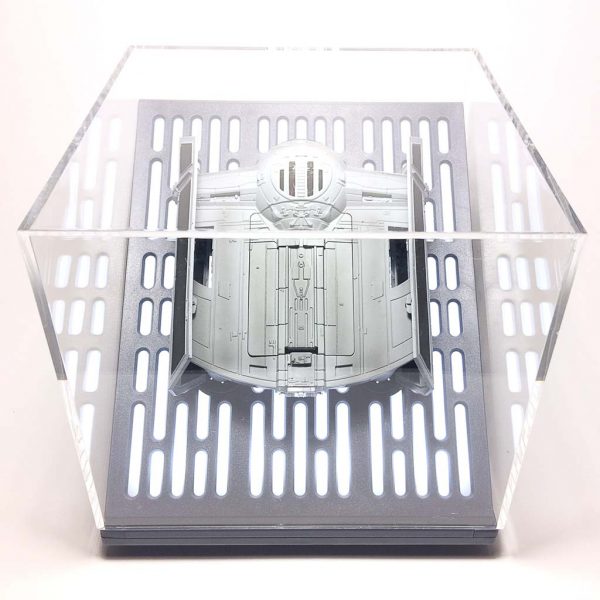
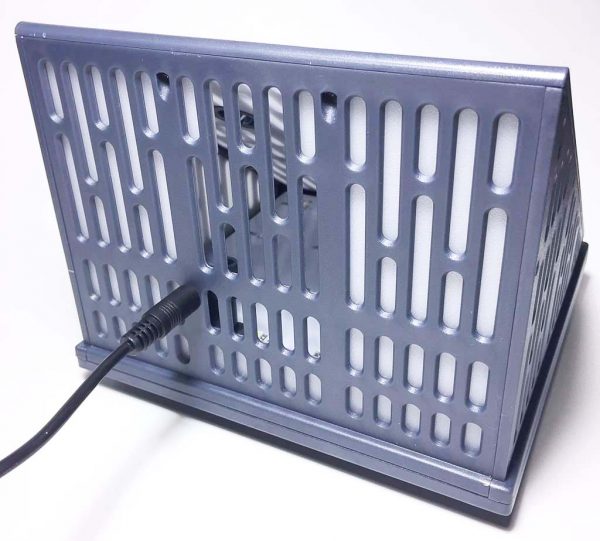
 One other feature of the Imperial-wall-likeness display base: it is illuminated from the inside, with white glowing panels visible behind the slots, just like in the Star Wars films. Great touch.
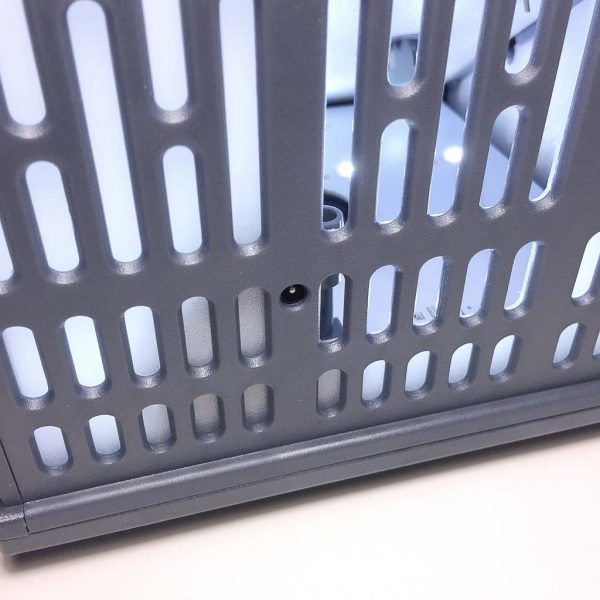
The rear of the display base has several open slots that allow you to see inside, where the LED lights are located.

 The display base is a worthy part of the kit, and the TIE Advanced X1 drone looks very impressive sitting atop it.
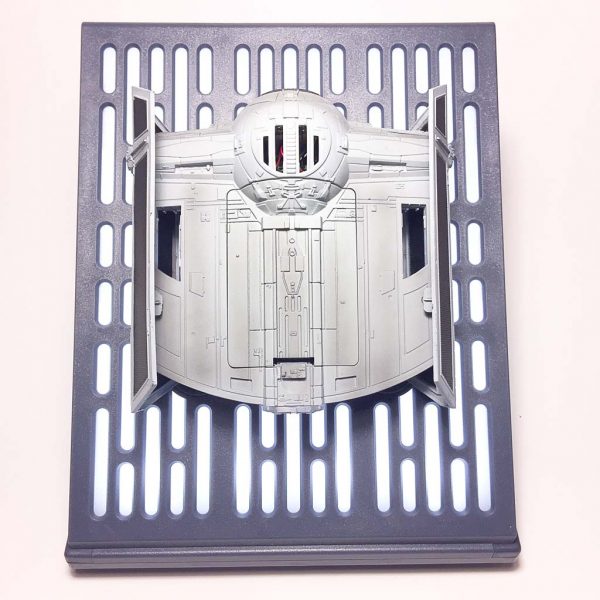
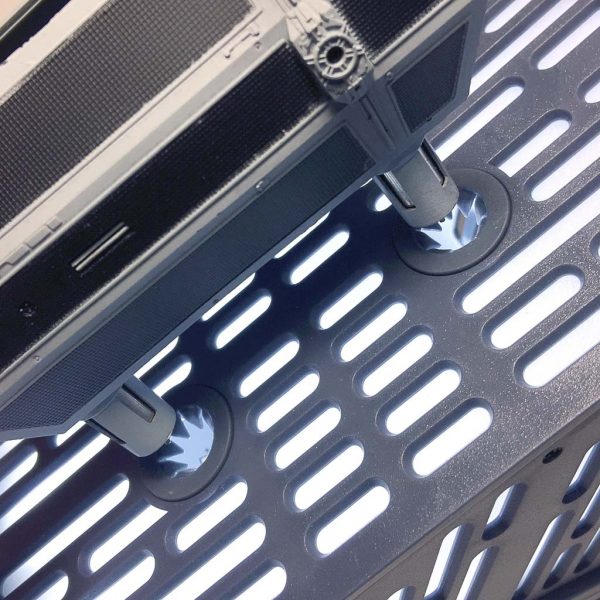 The Tie Advanced X1 drone’s four legs fit snugly into four holes in the base. Each of these holes has a series of flexible rubber “teeth” that grip the drone’s legs once they are inserted. This allows the drone to sit in an angled orientation along the base securely, but it is easy to remove.
 The AC wall adapter cable that plugs into the drone’s Li-polymer battery charger (described in more detail later), is also used to charge the battery in the display base. Once the battery powering the base’s LED lights and the soundtrack-playing speaker run down, just plug in the charging cable and it does its thing.
TIE Advanced X1 drone
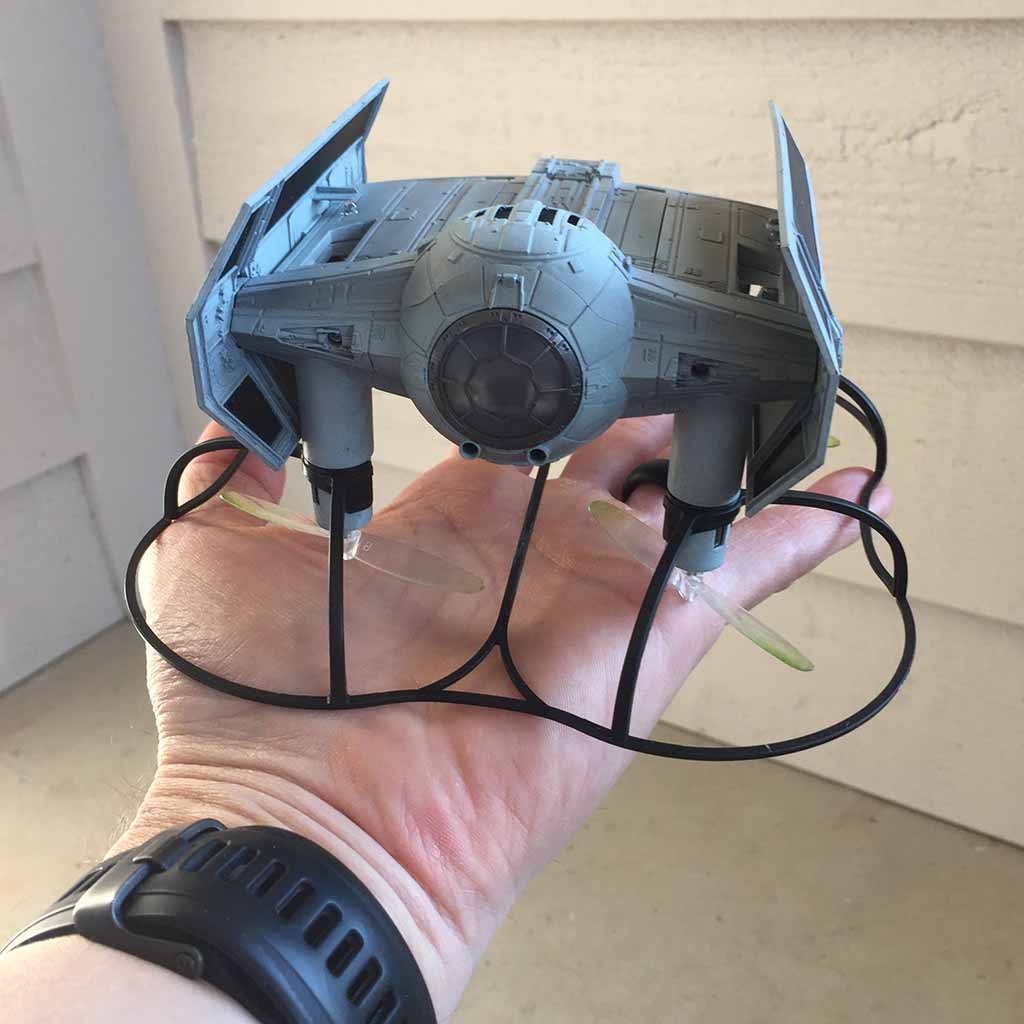
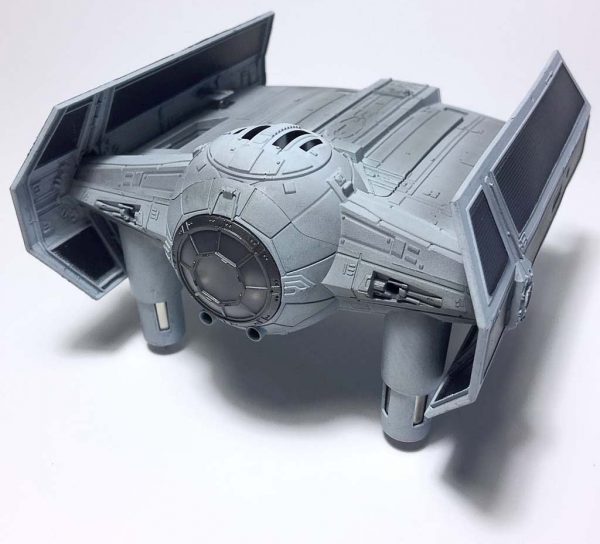 I alluded to this above, but the attention to detail on the drone is otherworldly (pun very much intended). This TIE Advanced X1 looks like Darth Vader flew it right off the movie screen. It is essentially like a model kit that was assembled and painted by a professional model builder. In fact, these collector’s edition versions have hand-painted details and weathering and no two drones are exactly alike.
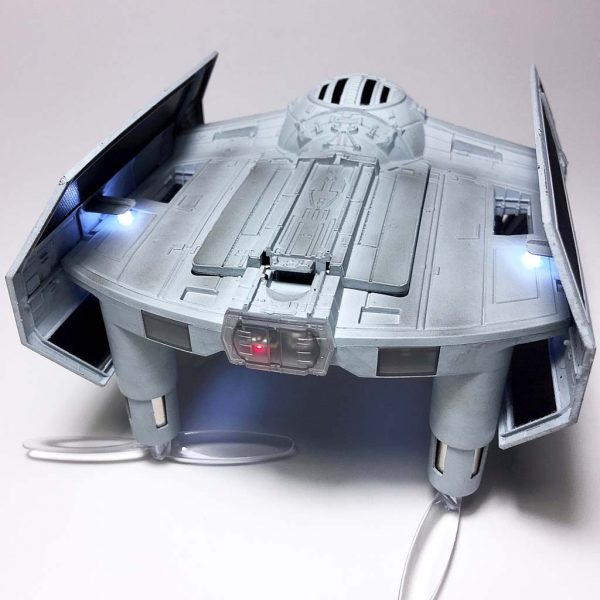
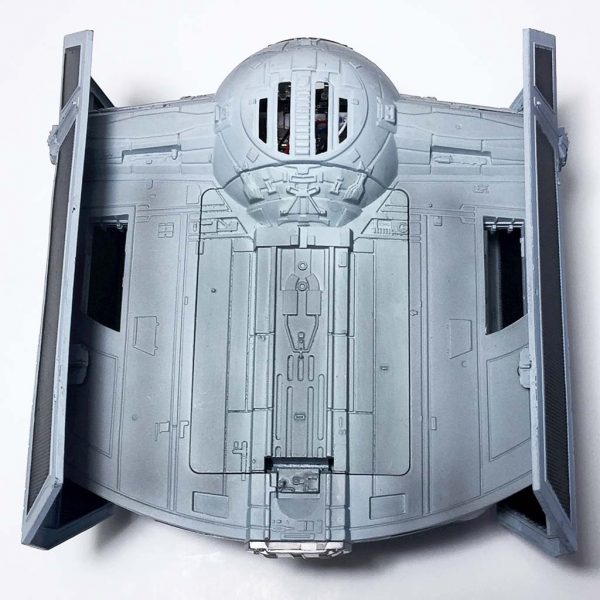 Above is a pic of the top of the drone, where you can see the Li-polymer battery compartment.
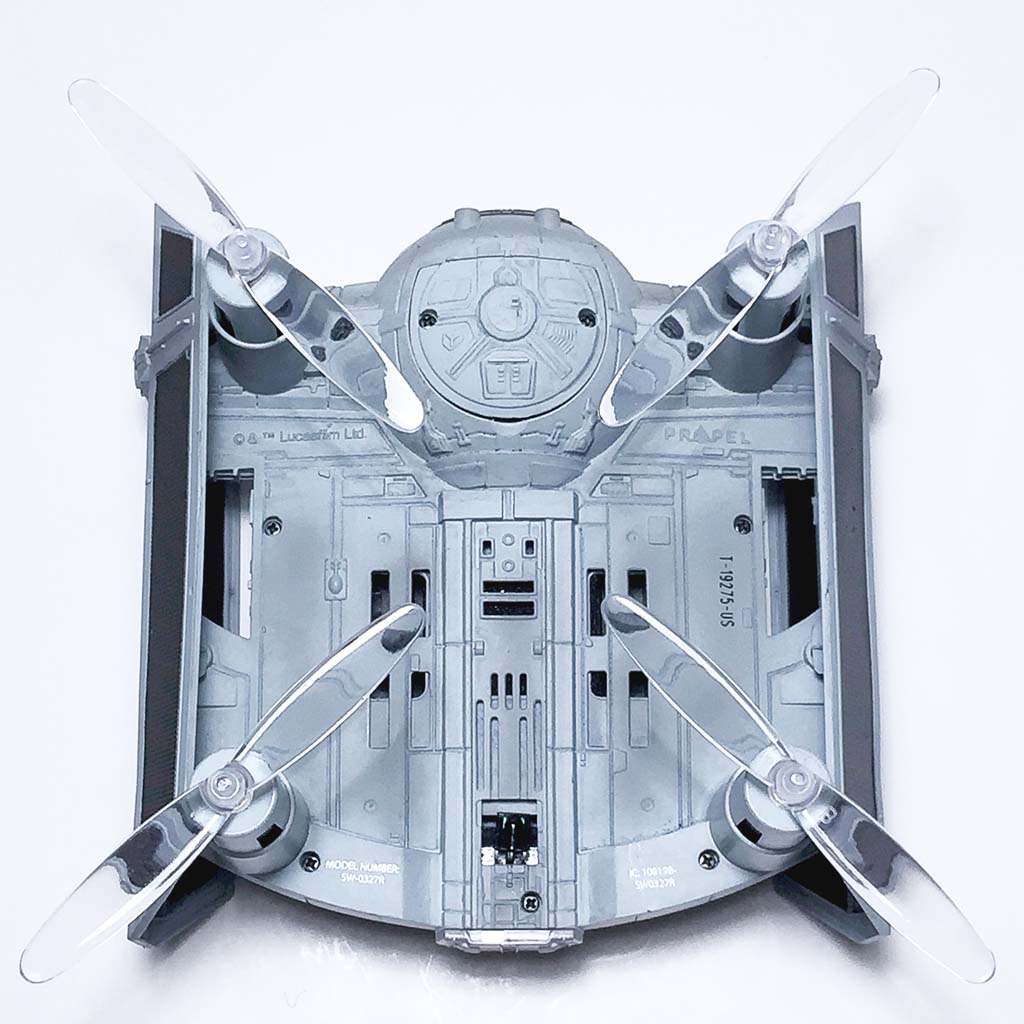
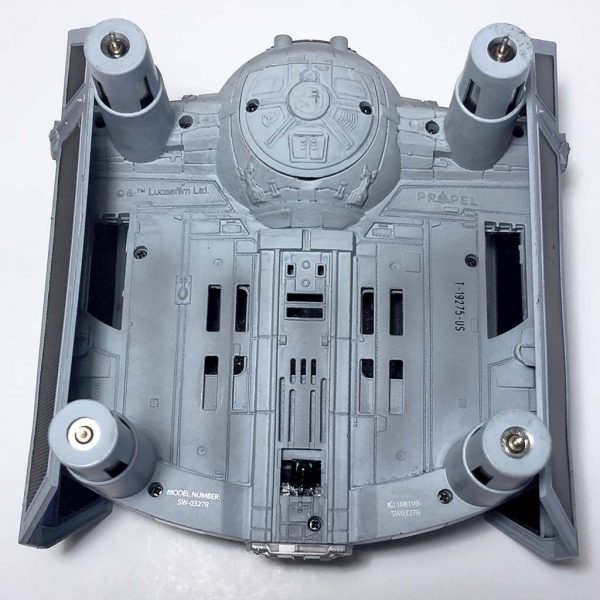 The bottom of the drone has the four propeller posts or legs hanging beneath it. Further down I’ll show how I installed the propellers.
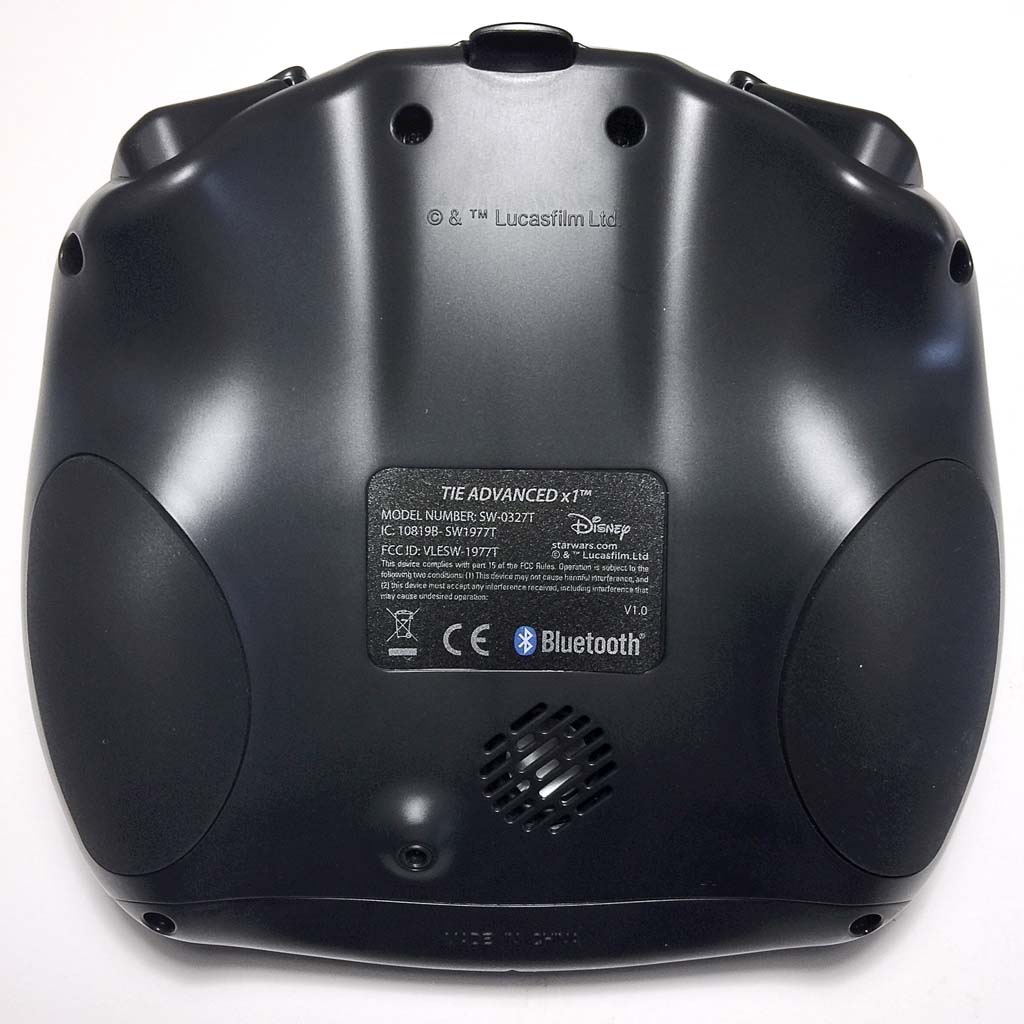
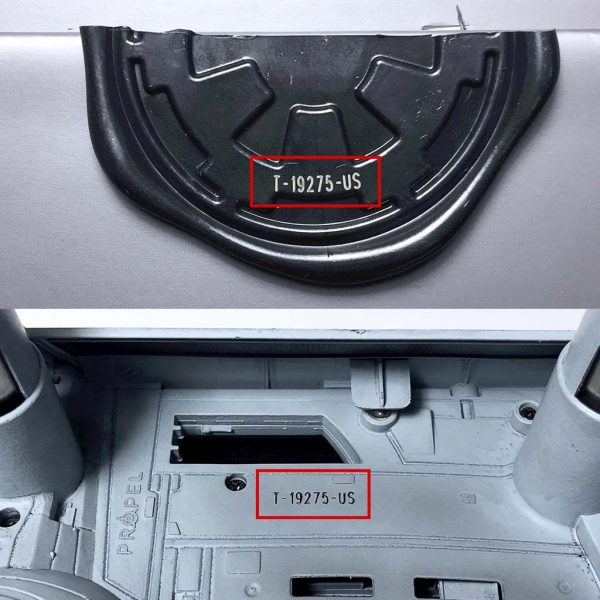 Above, something I noticed when inspecting the drone. The same unique serial number that was laser etched onto the package’s wax seal that I had to cut was also stamped to the underside of the drone.
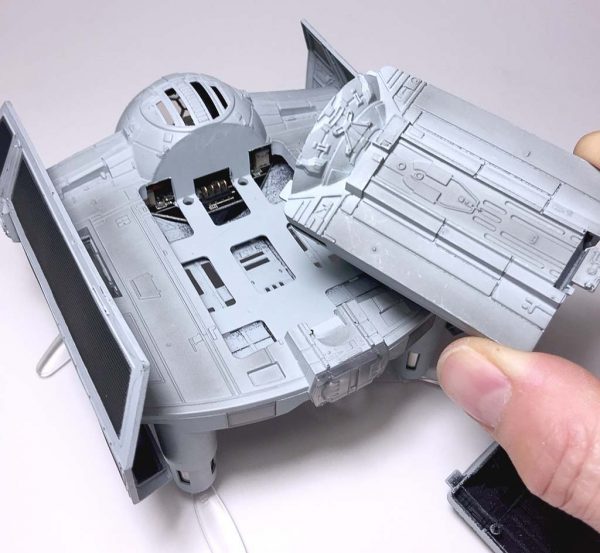
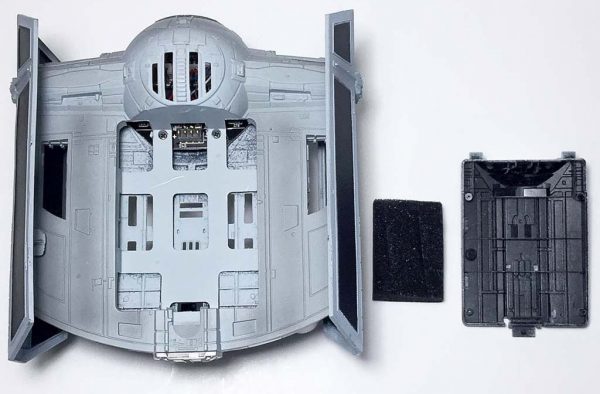 The drone comes from the factory with a “faux” battery panel installed over the compartment, along with a piece of spacer foam, both of which are shown above. I removed the faux cover by carefully squeezing the battery latch near the back of the drone, then tilting it up and removing the dummy cover. Below I describe the actual Li-polymer batteries and how to install them.
Accessories
 The above photo illustrate all of the TIE Advanced X1’s accessories that are related to powering the drone. It includes three (3) Li-polymer batteries, a charging base, a charging cable and an AC wall adapter. Note that the charging cable and AC wall adapter can be used to charge either a Li-polymer battery using the charging base or it can be used to charge the drone’s display base, as shown earlier.
 The drone’s AC adapter utilizes a USB cable.
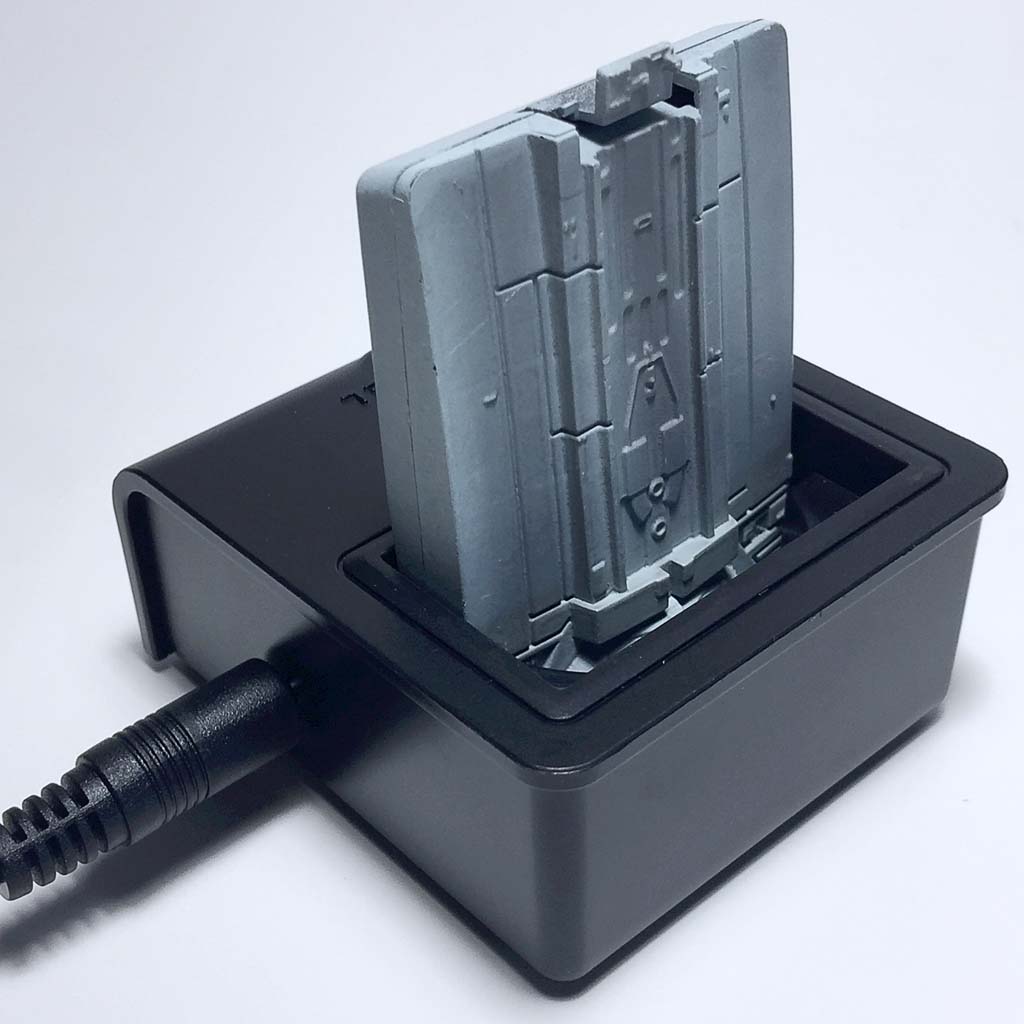
  The Li-polymer batteries for the drone fit down into the charging station. The battery’s contacts must be aligned with the opposing contacts in the dock. The charging base has a small LED that changes color to indicate the charging status. When plugged in, but with no battery, the LED is solid red.

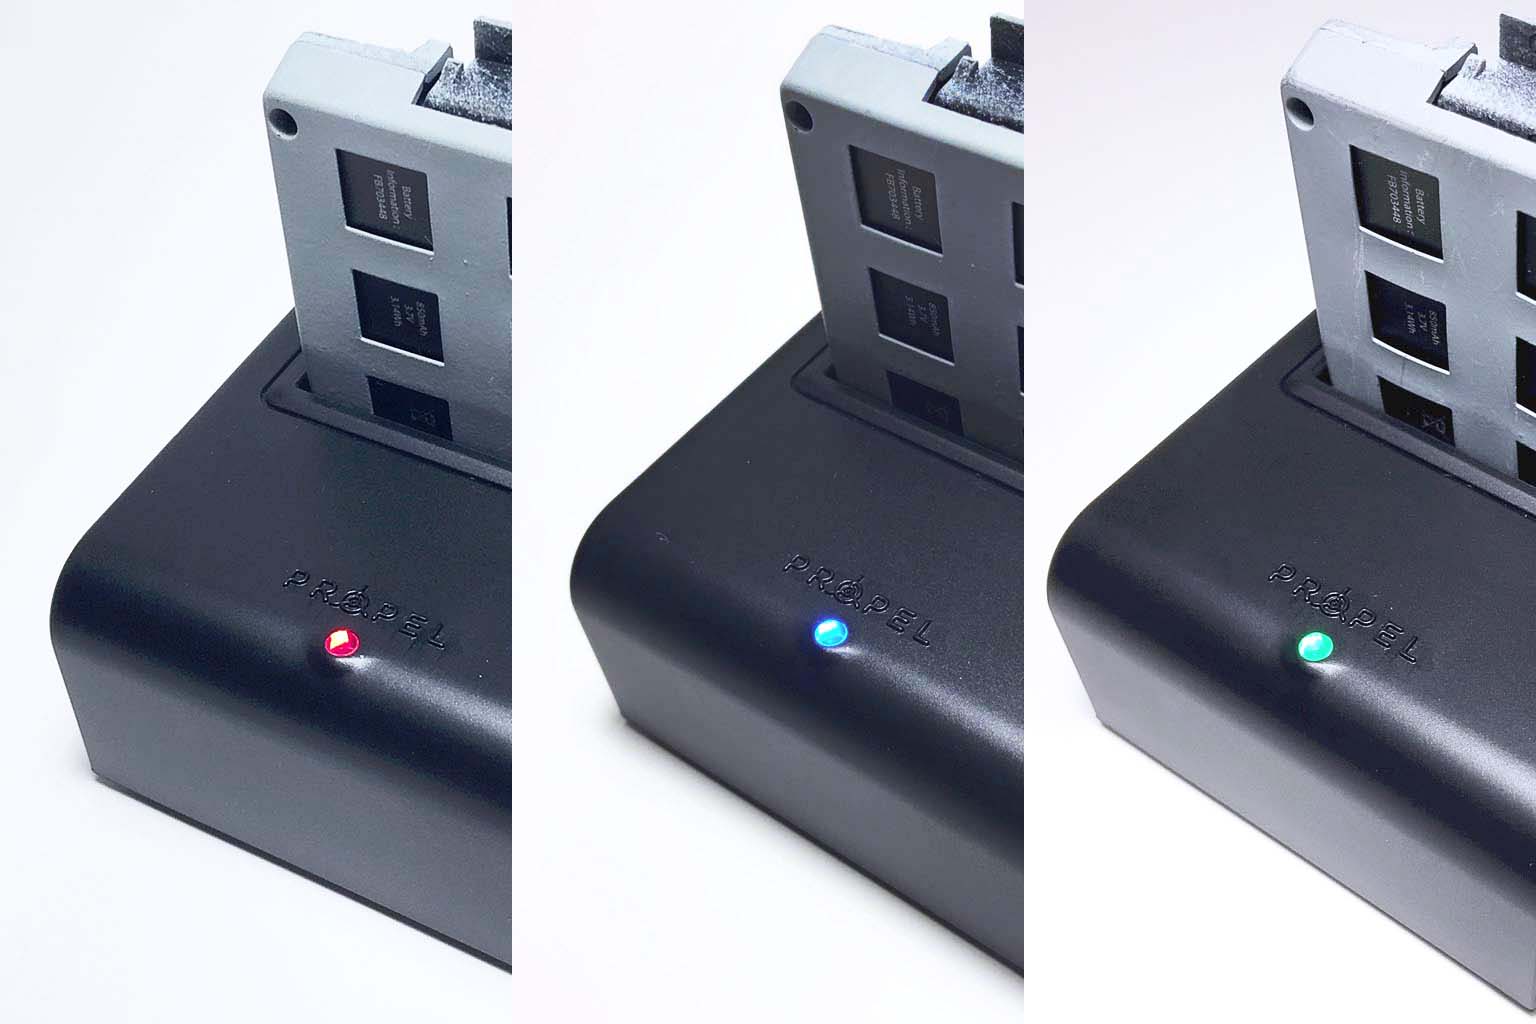
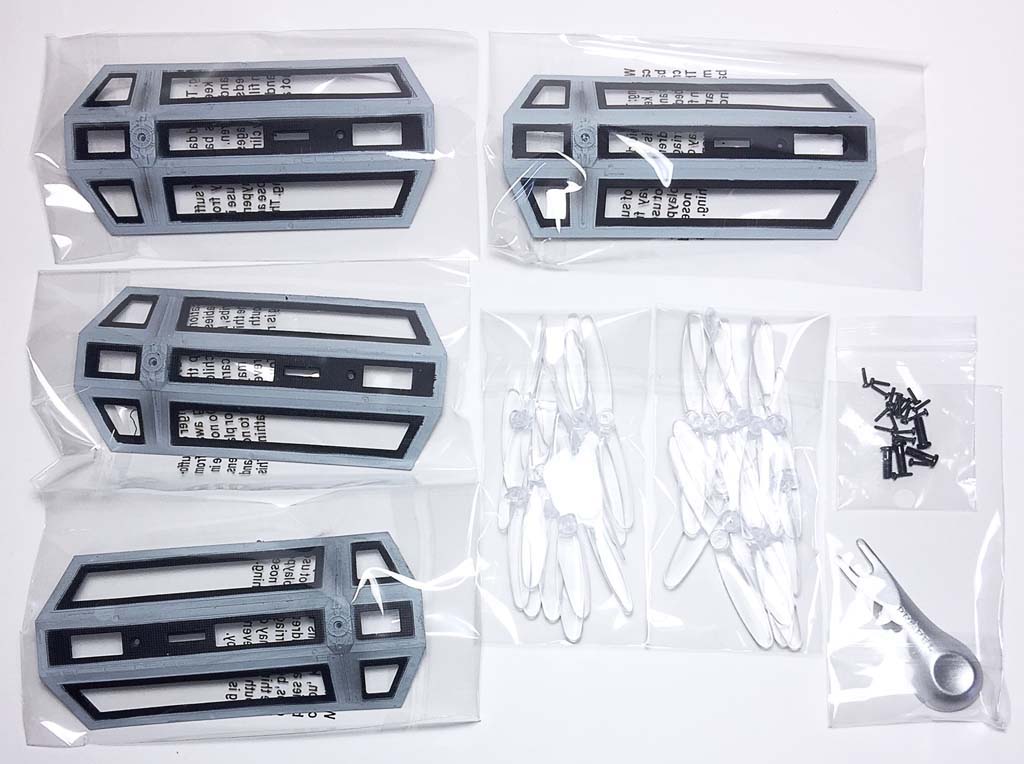
As shown above, blinking red indicates charging up to 90% of full life, blue indicates a 90% charge, while green indicates 100% full charge. Propel claims that, for a completely drained battery, it takes 30 minutes for a 90% charge, with an additional 10 minutes to get to full charge. Interestingly, the manual recommends that the drone be flown on 90% charge (which will allows 6-minutes of flight time), but I’m not quite sure why they recommend this as opposed to flying on a fully charged battery.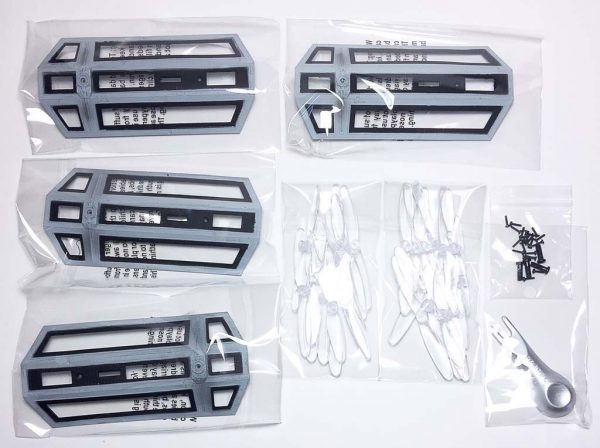 The Propel folks had the foresight to include some spare parts as well, which are shown above. The TIE Advanced X1 includes two sets of wing panels (ones with sections cut out of them), as well as several propeller pieces and tiny wing panel screws. Also included was a small propeller multi-tool used to help install the propeller onto the drone—more on this below.
Prop, battery and trainer cage installation
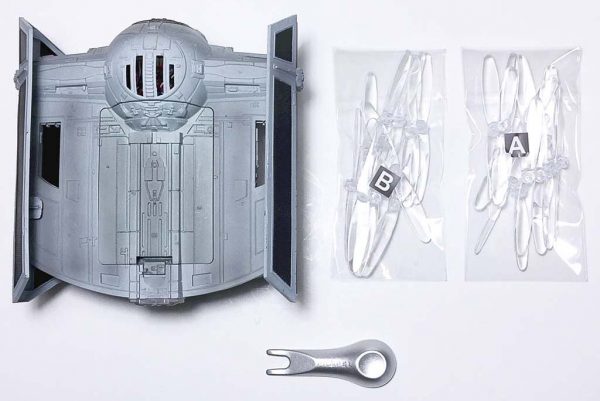
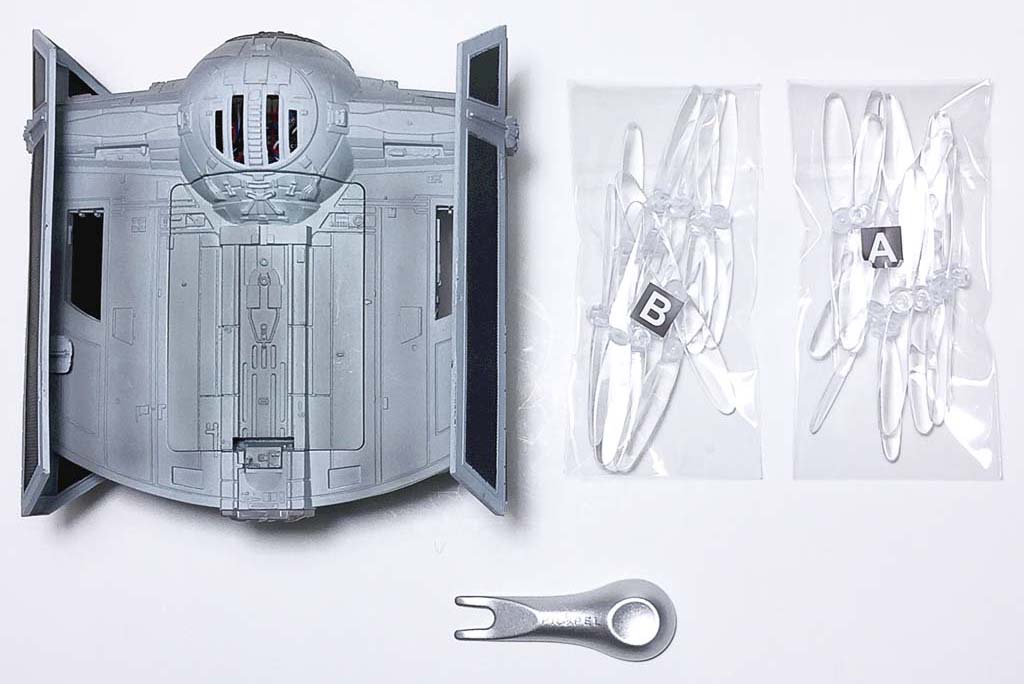
The parts above are needed for installation of the propellers onto the drone.
 The propellers themselves were very small and completely transparent, and two different types of propellers were included, “A” and “B” propellers, designated with their respective letters as shown above.
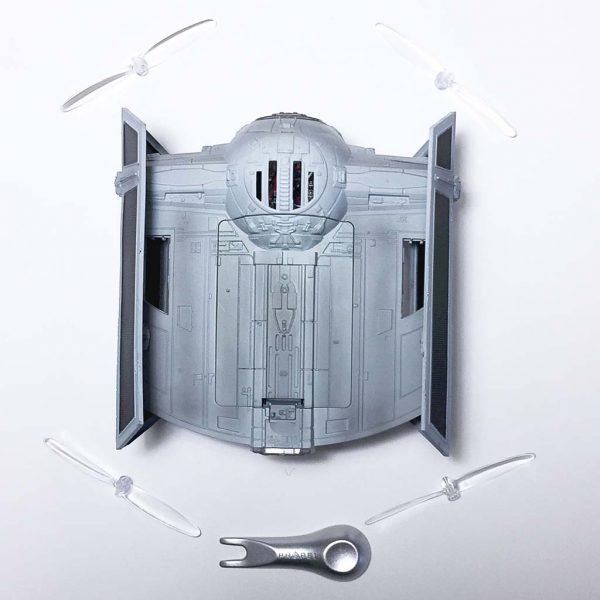 I had to lay out two sets of “A” and “B” propellers which were to be installed on opposed corners of the drone using the included multi-tool.
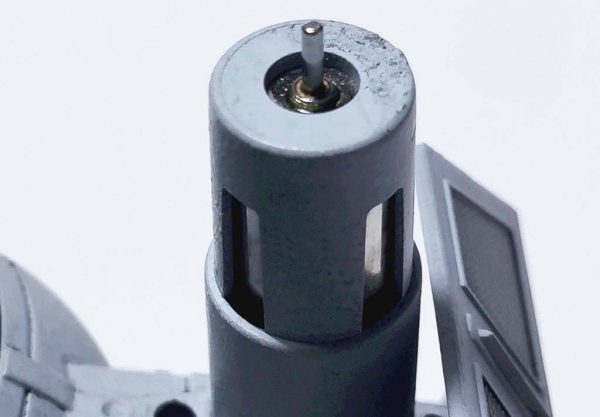
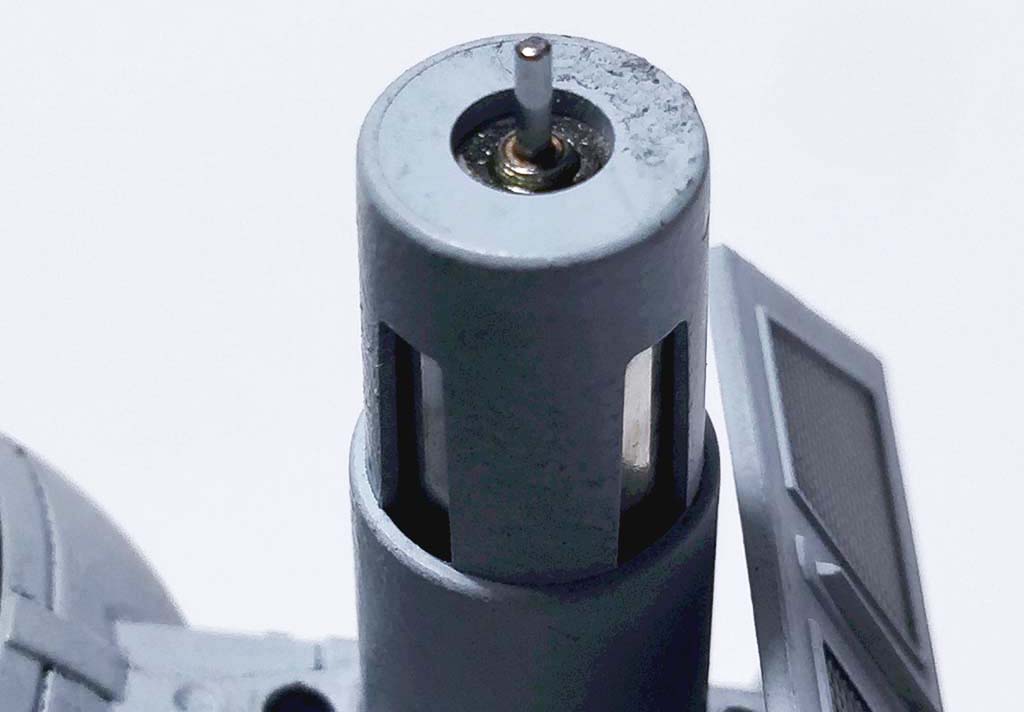
As mentioned above, the drone had four motor mount posts or legs on its underside. Each motor mount had a tiny metal shaft protruding from it, which were the drive shafts from the tiny motors inside the drone’s wings.
The included multi-tool, which resembled a tiny wrench, had one end with a small cup-like indentation in it, meant to fit over the cone-shaped tip of the propellers.

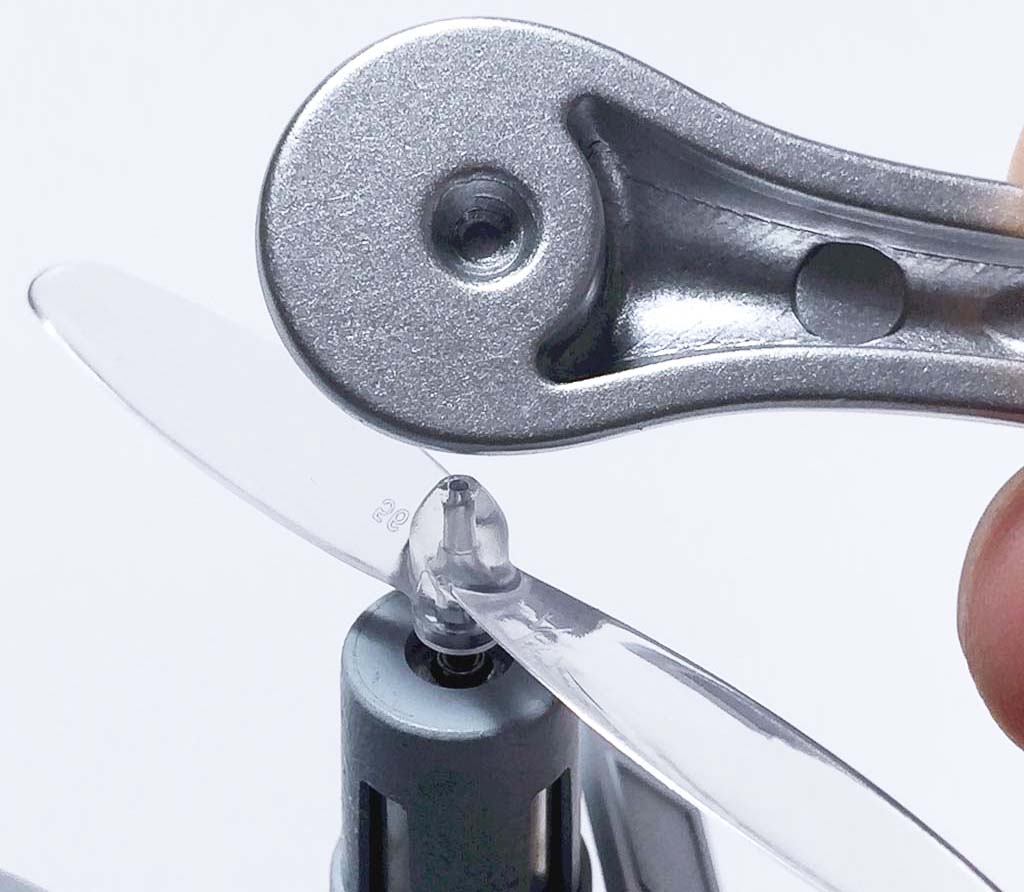
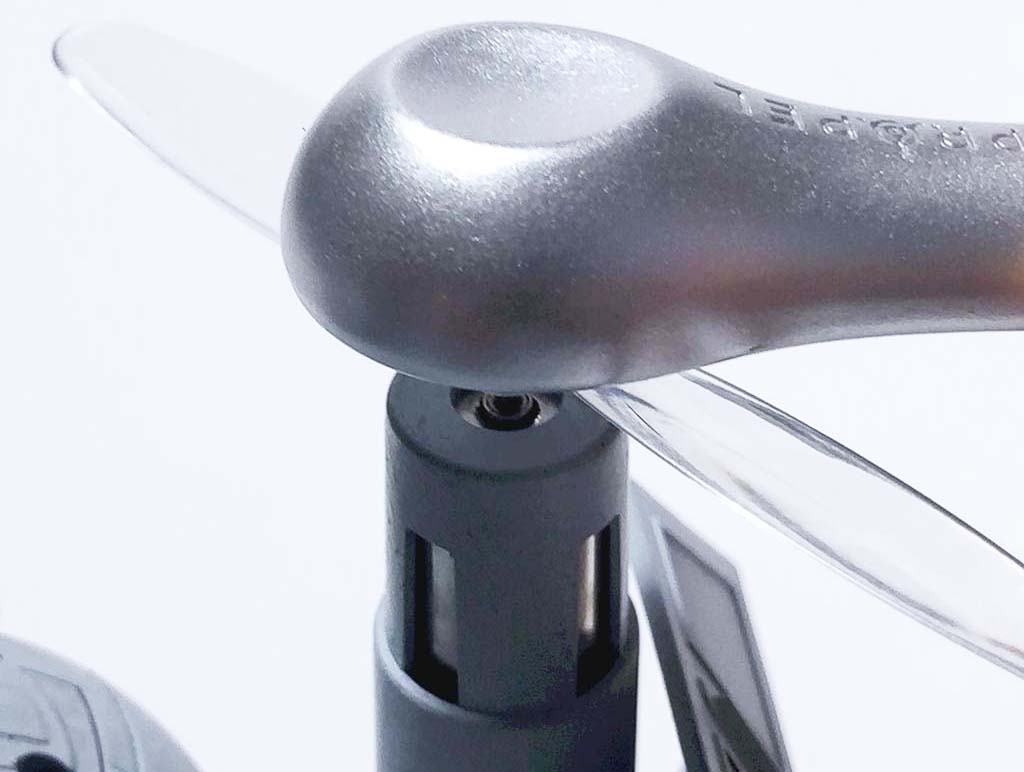
I simply positioned the center hole of each propeller over each of the metal shafts and used the cup-shaped end of the multi-tool to gently press the propeller straight downward. I suppose I could have simply used my fingers to press the propellers down onto the shafts, but the multi-tool made it a bit easier to align the propeller, apply more consistent pressure, and get it into the correct position without breaking the delicate parts. Conversely, the opposite, forked end of the multi-tool is intended to aid in removing the propellers should the need arise to replace them, or if you are planning to place the drone onto the display base for storage.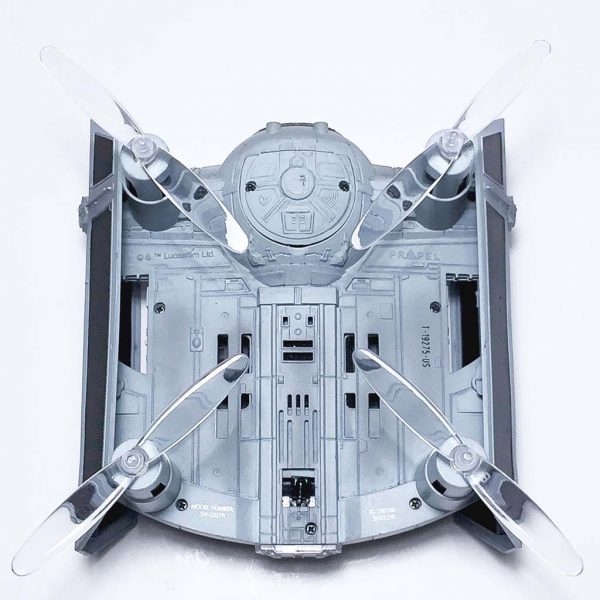
In just a few minutes, I had installed all four propellers onto the drone’s motor mounts, as seen above.
Next, I installed the Li-polymer battery into the TIE Advanced X1 drone . First I carefully removed the dummy battery cover, then carefully placed the Li-polymer battery in its place on the top of the drone.
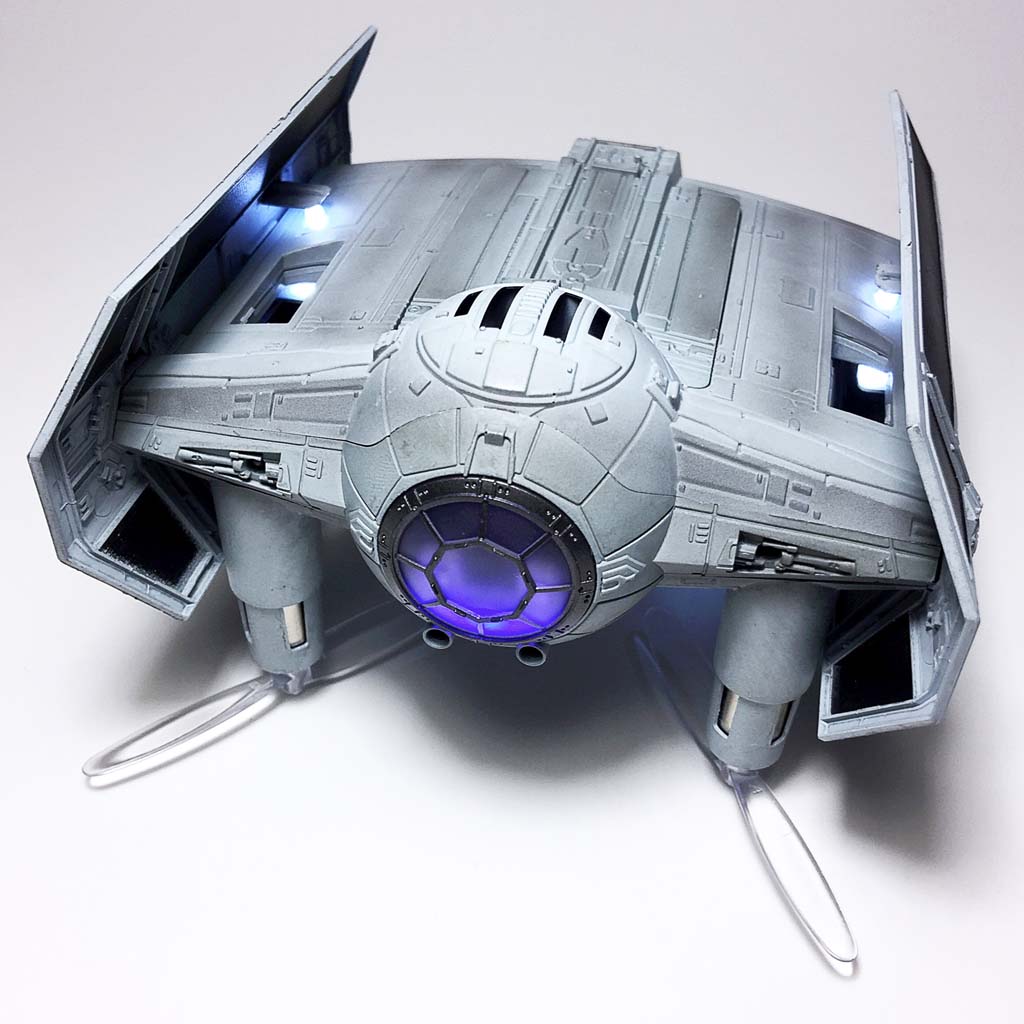
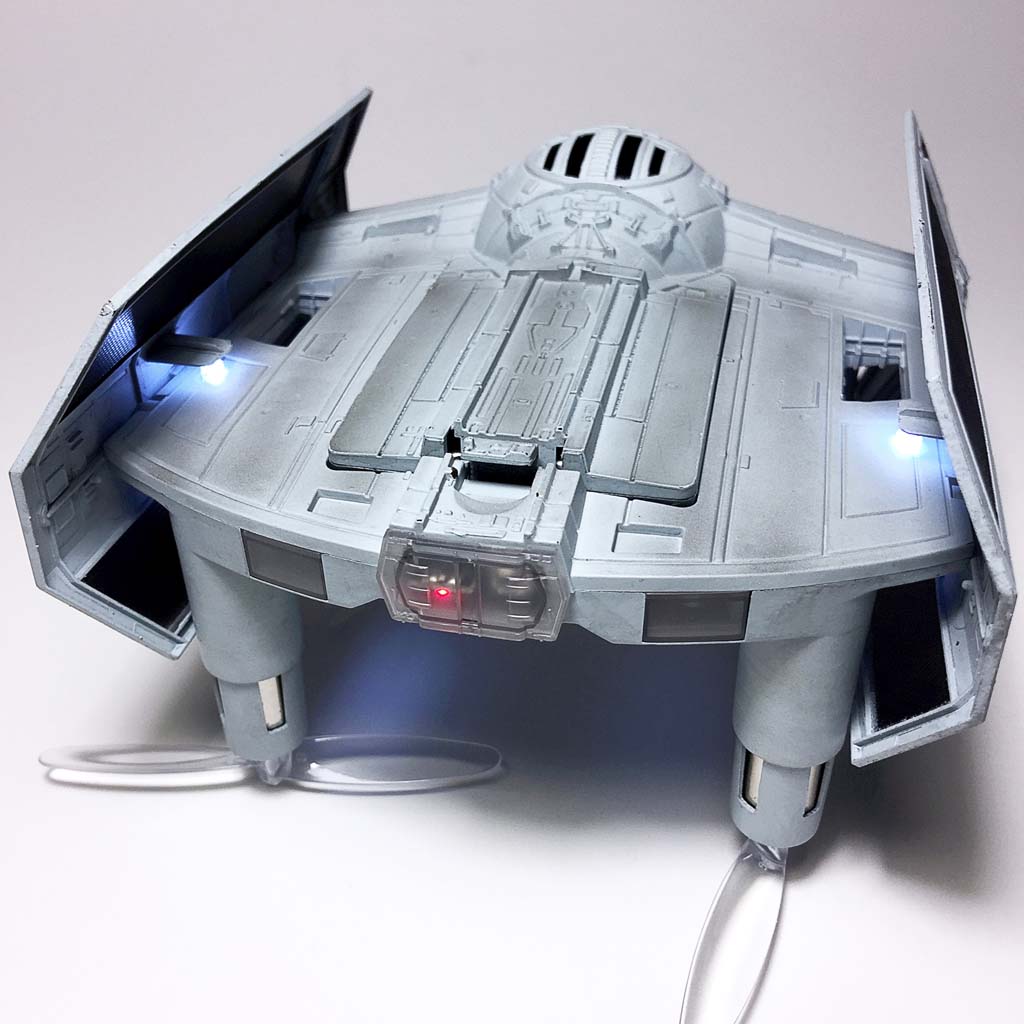
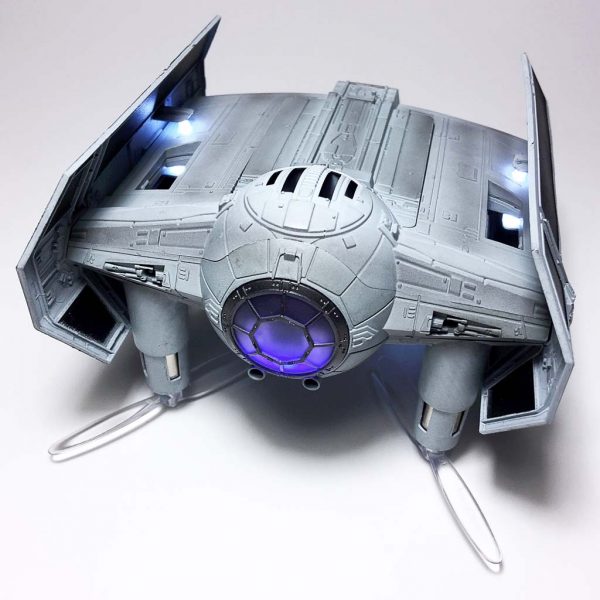 Immediately upon placing the fully-charged battery into the TIE Advanced X1, multiple lights illuminated on the drone, including a blue glow from the cockpit at the ship’s front, white LEDs on the top and bottom, and a red LED on the ship’s rear (a bit like a tail light on a car). The cockpit remained lit, while the LEDs began flashing.
 The drone itself has no on/off switch. To power it down, you must remove the Li-polymer battery. (Curiously, page 31 of the manual refers to the “ship’s power switch.” Some editing needed, perhaps.)
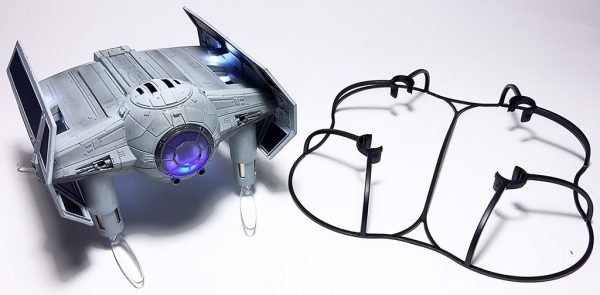 Before embarking on my first flight of the TIE Advanced X1, I wanted to protect it as best I could while I acclimated myself to its controls. To that end, installing the protective cage onto the drone seemed a prudent precaution.
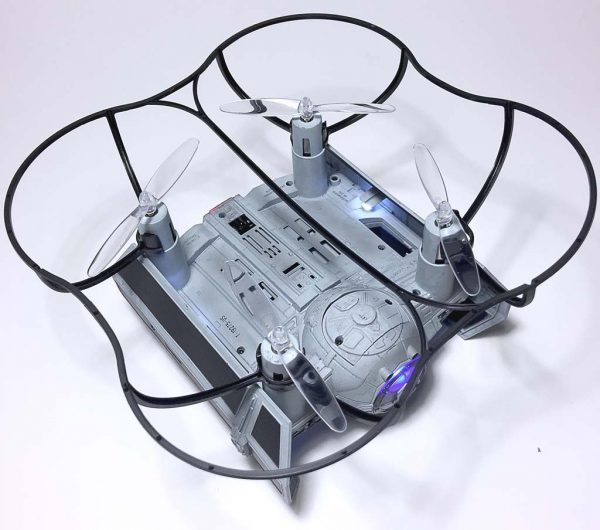
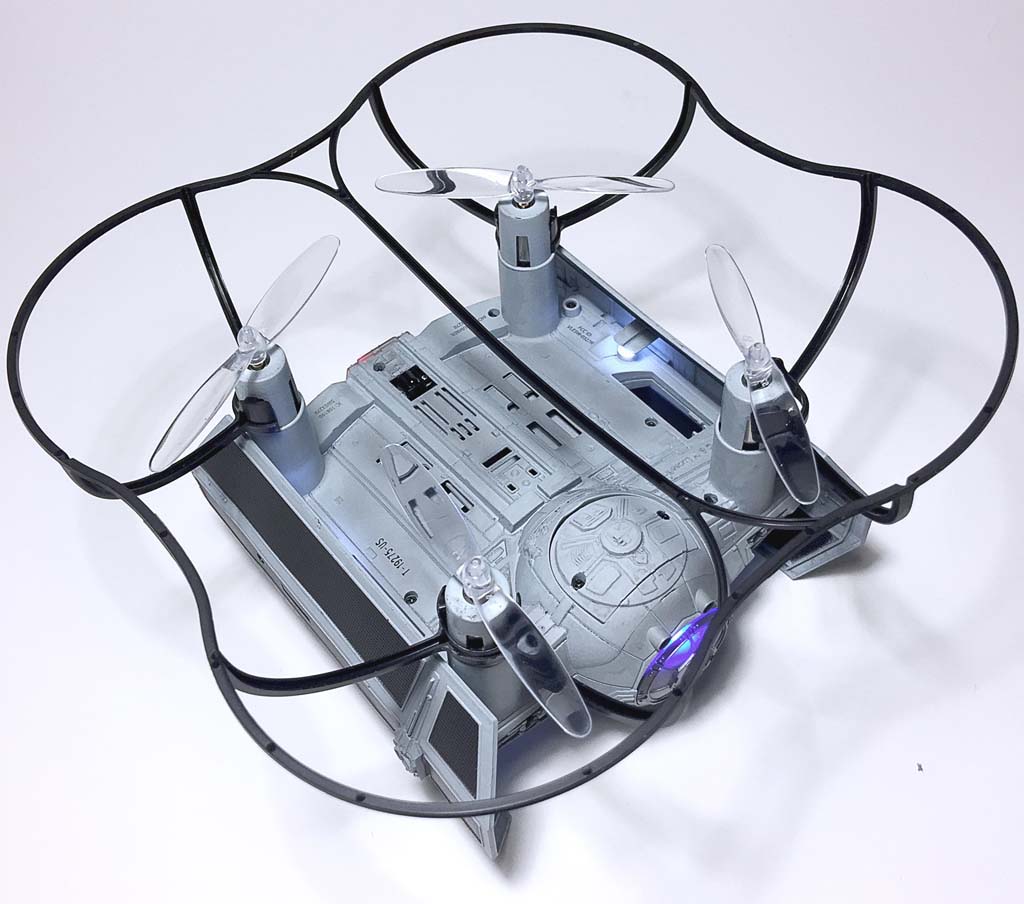
The cage had four clips that attached to the four motor mounts on the drone’s underside. The cage is designed in such a way that it can be installed right over the propellers and clipped directly to the motor mounts without having to remove the propellers first.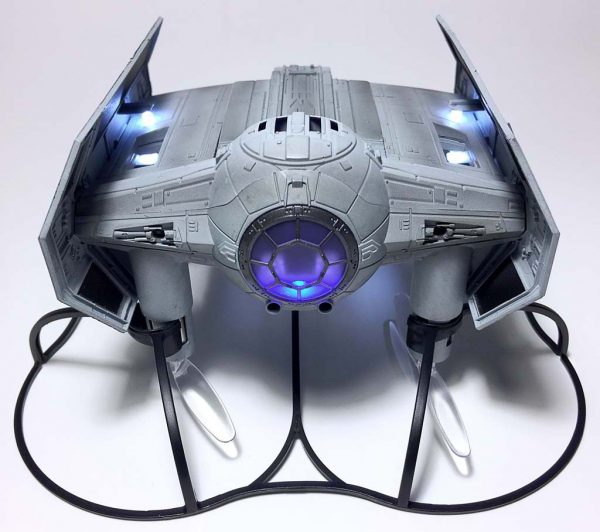 Once installed the drone can sit atop the cage, which prevents the propellers from touching the ground. The cage is made from a semi-rigid, somewhat springy plastic that can help absorb unintended hard impacts, such as crash landings or crashes into other objects. (Note: In the image above, I hadn’t fully attached the front left training cage clip onto its leg of the drone, but I did catch this and fix it before my initial flight.)
Controller
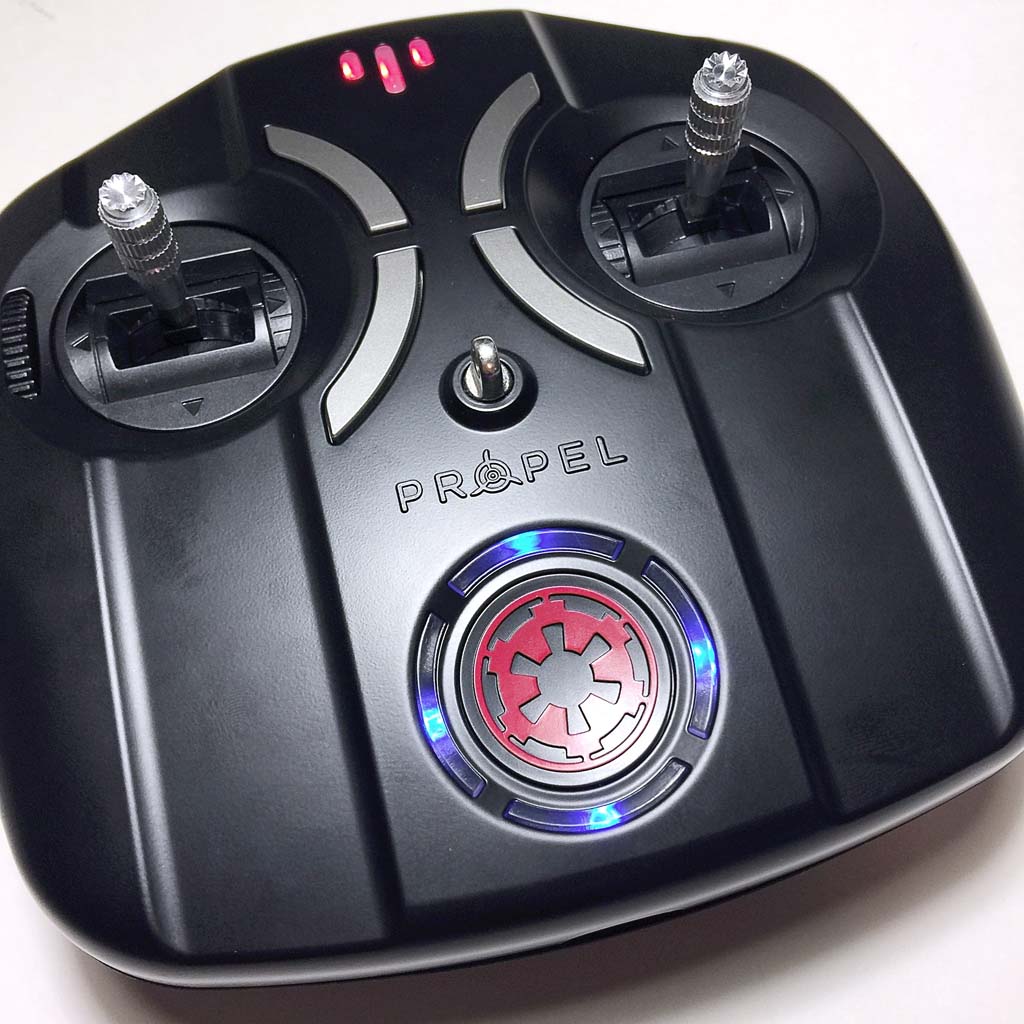
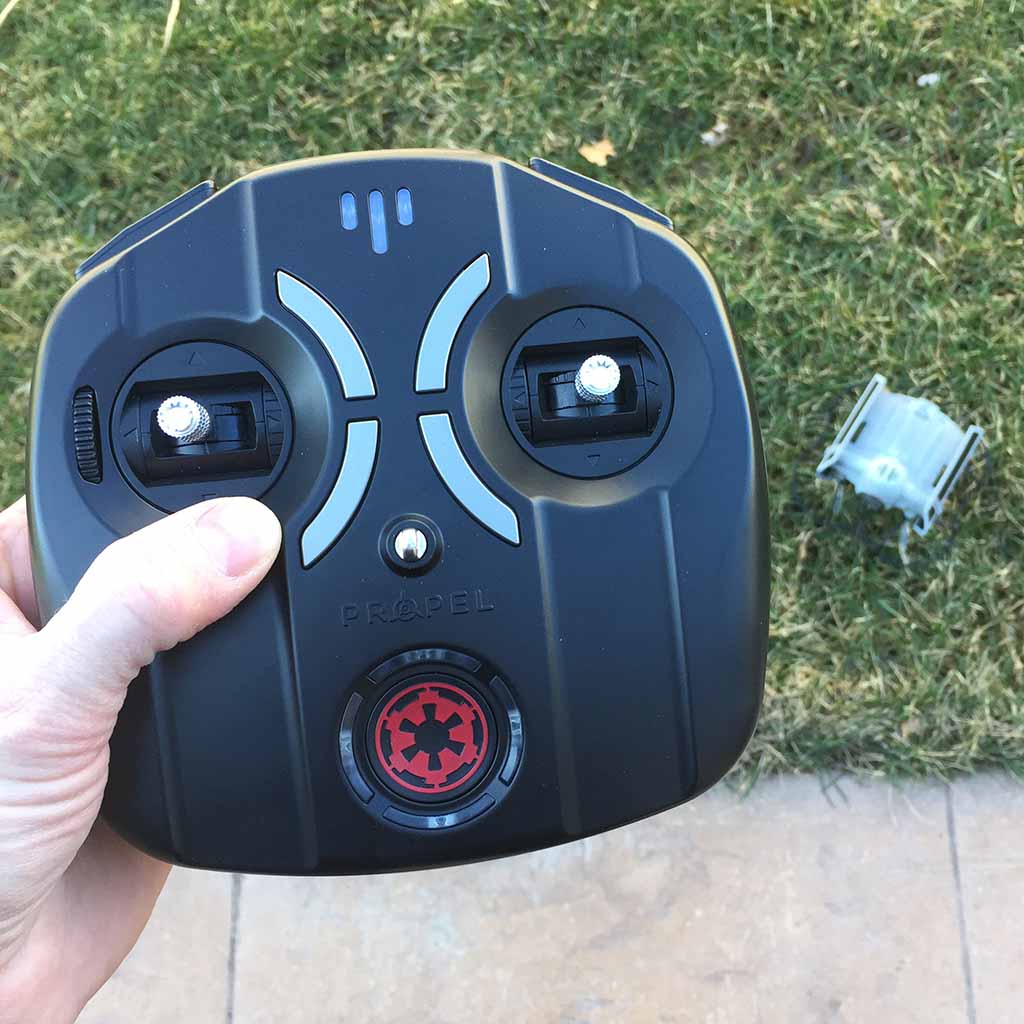
 The TIE Advanced X1’s controller is styled to look like something Darth Vader himself would use, with its matte black case, silver accents and a prominent Imperial crest symbol in blood red color.
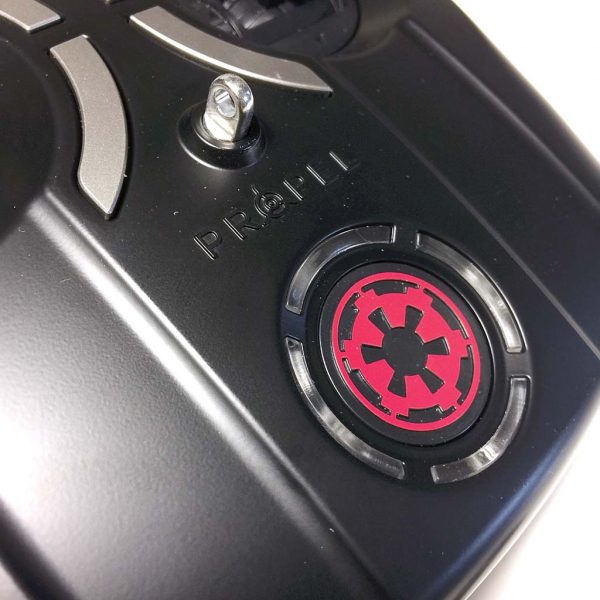 The red Imperial crest symbol is actually the controller’s on/off button. Also, note that there is a metal neck strap attachment for a lanyard (not included).
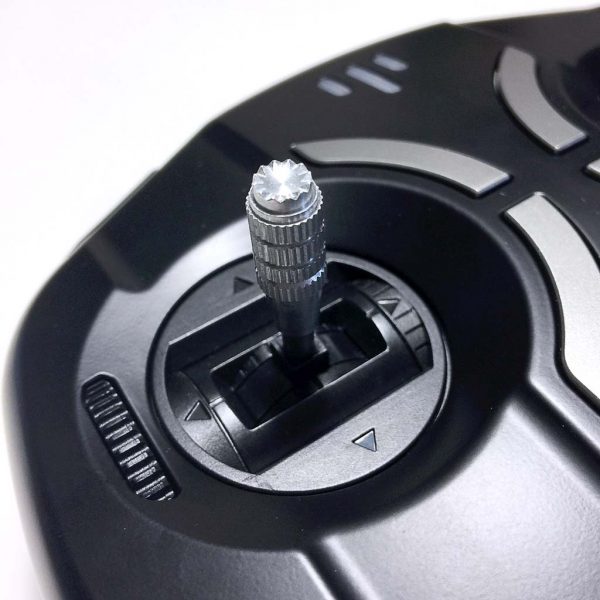 The controller’s Left and Right Gimbals (control sticks) are worthy of a Sith Lord with their metallic, jagged tips.
 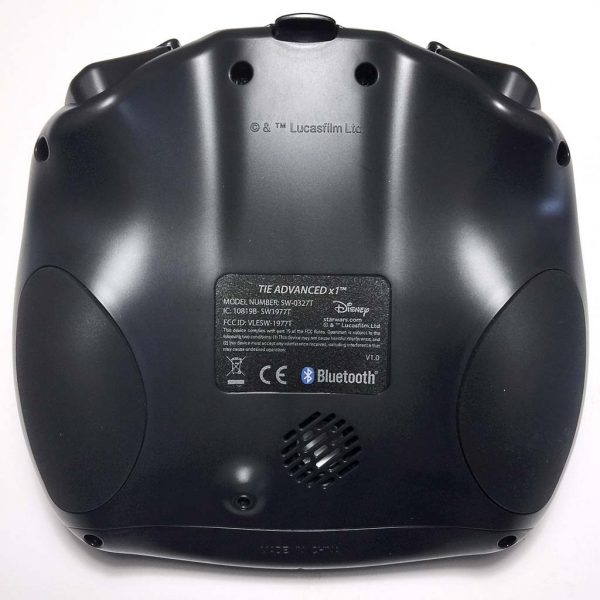 The underside of the controller has several features. A somewhat oval-shaped, rubberized handgrip is mounted on each side. Also, there is a speaker grille from which the sound emanates (Star Wars sound effects, audio clips from the Star Wars films, etc). Finally, there is a microphone jack that allows you to use headphones to hear the sounds rather than broadcasting them.
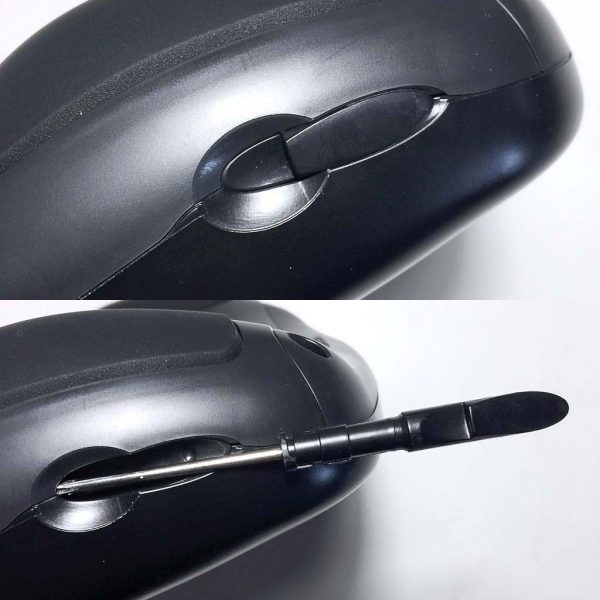
Along the side of the controller, a tiny Phillips head screwdriver has been cleverly hidden. The handle is shaped such that it blends into the contour of the side of the controller.
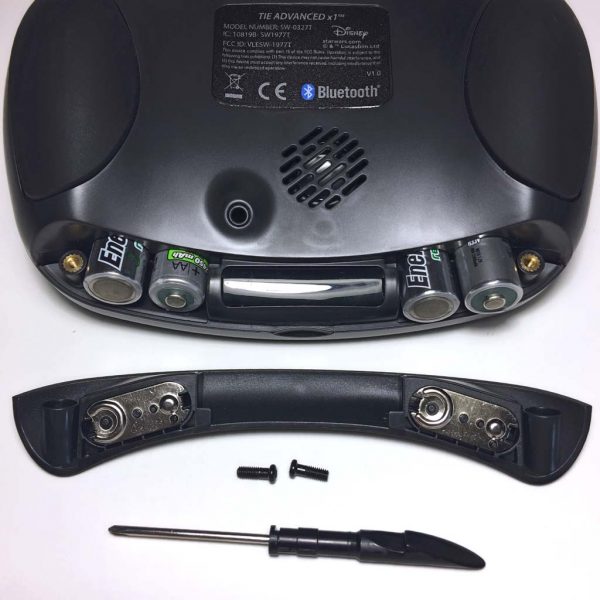 The controller is powered by four (4) standard AA batteries. Accessing the battery compartment requires using the hidden mini-screwdriver to remove the cover, which is held in place by two tiny screws, as shown above.
 Once the batteries have been inserted, a 2-second press on the red Imperial cog button powers up the controller. As soon as the controller is powered on, sound clips from the movie begin playing. Wicked cool. Also, as shown above, power on is indicated when the array of three red illuminated “Life LED” lights near the top of the controller and four red lights around the Imperial cog button near the bottom of the controller all begin blinking.
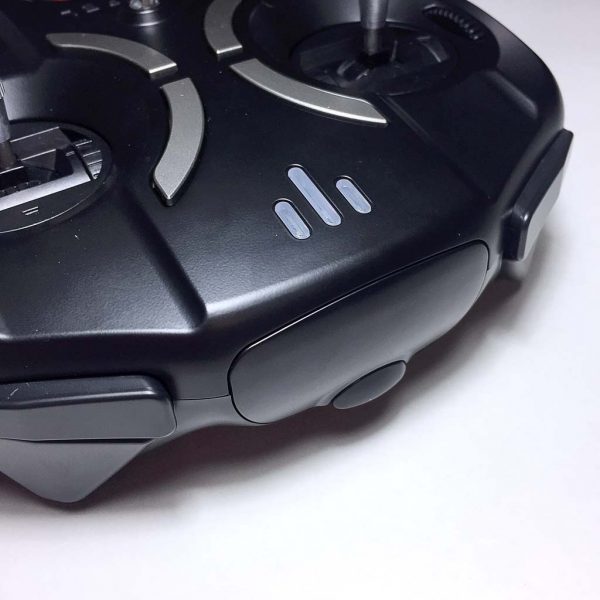 There is one additional hidden feature of the controller, a phone holder, which extends from the top of the controller, as seen above.
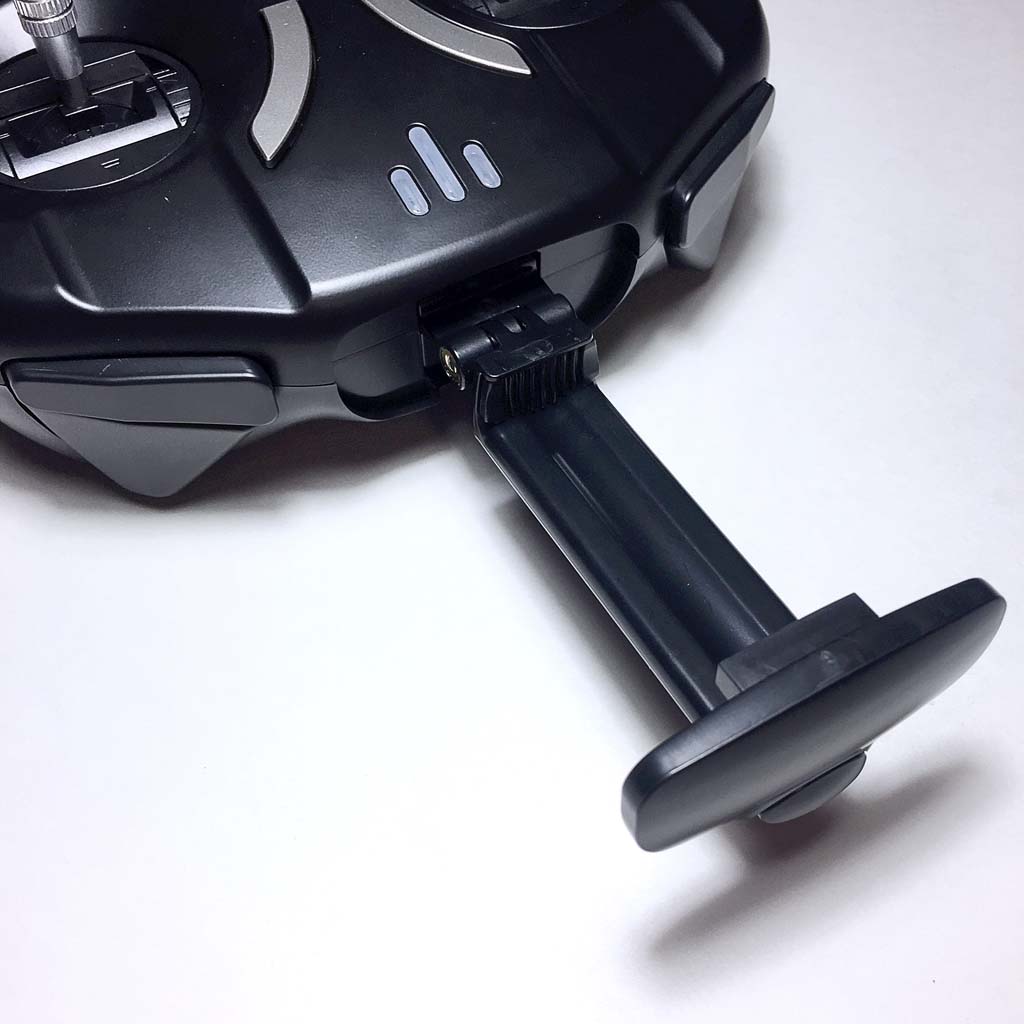
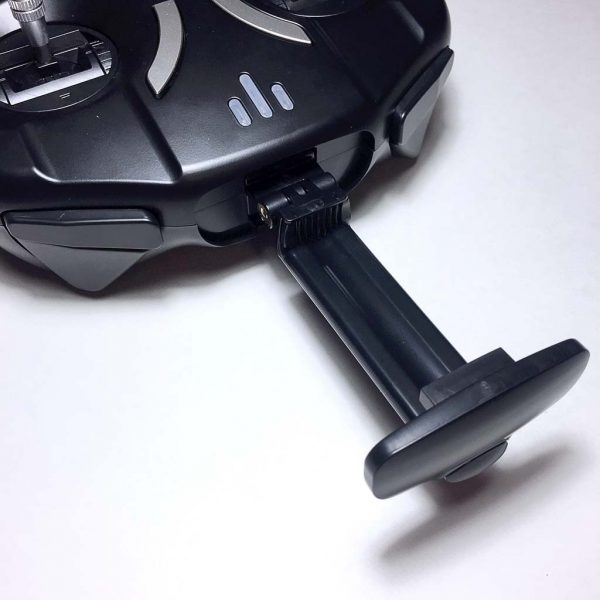 The phone holder is accessed by pulling firmly on a small pull tab, the pulling the holder straight outward.
 The phone holder is spring-loaded so that it can stretch to accommodate the width of various phones. My iPhone 6 Plus was a snug fit. The holder can also be pivoted on its hinge to give the user the best viewing angle and can also be locked in place by using the mini-screwdriver to tighten down a small screw in the holder’s hinge.
 Above, a closeup of my iPhone 6 Plus sitting in the holder, and I’ve launched the drone’s companion app.
 One of the first things I did in preparation for my initial flight of the TIE Advanced X1 drone was to put it into “T-Mode.” This is a training mode intended for new pilots to help acclimate themselves to the drone but moving in a slow, controlled rate with added stability. It also includes a 6-foot “invisible ceiling” as well as an “invisible floor,” both intended to help keep a new pilot within a controlled altitude and keep from crashing the drone. The four illuminated blue light surrounding the Imperial crest in the photo above indicates that T-Mode has been activated.
Flying the Drone
After checking out all of the above features, there was only one thing left to do: actually fly the TIE Advanced X1 drone. I consulted the instruction manual, but it was surprisingly not so obvious how to launch the drone. Eventually I was able to figure out the steps required, which included using an “Auto-Start” function. My first attempt to launch the drone was indoors, thinking that it would be more difficult for it to get away from me and I’d have a reduced crash risk. That didn’t work out so well. Upon activating the drone for flight, it didn’t gently lift off or even hover, but immediate took off at a fairly high rate of speed in an odd direction and crashed into a wall. Considering that I had placed the drone in T-Mode (see above), I was surprised at this outcome. Thankfully I had installed the training cage as see above, which I suspect helped prevent damage. I thought that I had likely done something incorrectly, so I re-consulted the instruction manual and determined that it might be useful to calibrate the drone and the controller, and I went through the steps to do this. My next launch resulting in the same abrupt, odd-direction lift-off and subsequent crash into yet a different wall. Disappointing.
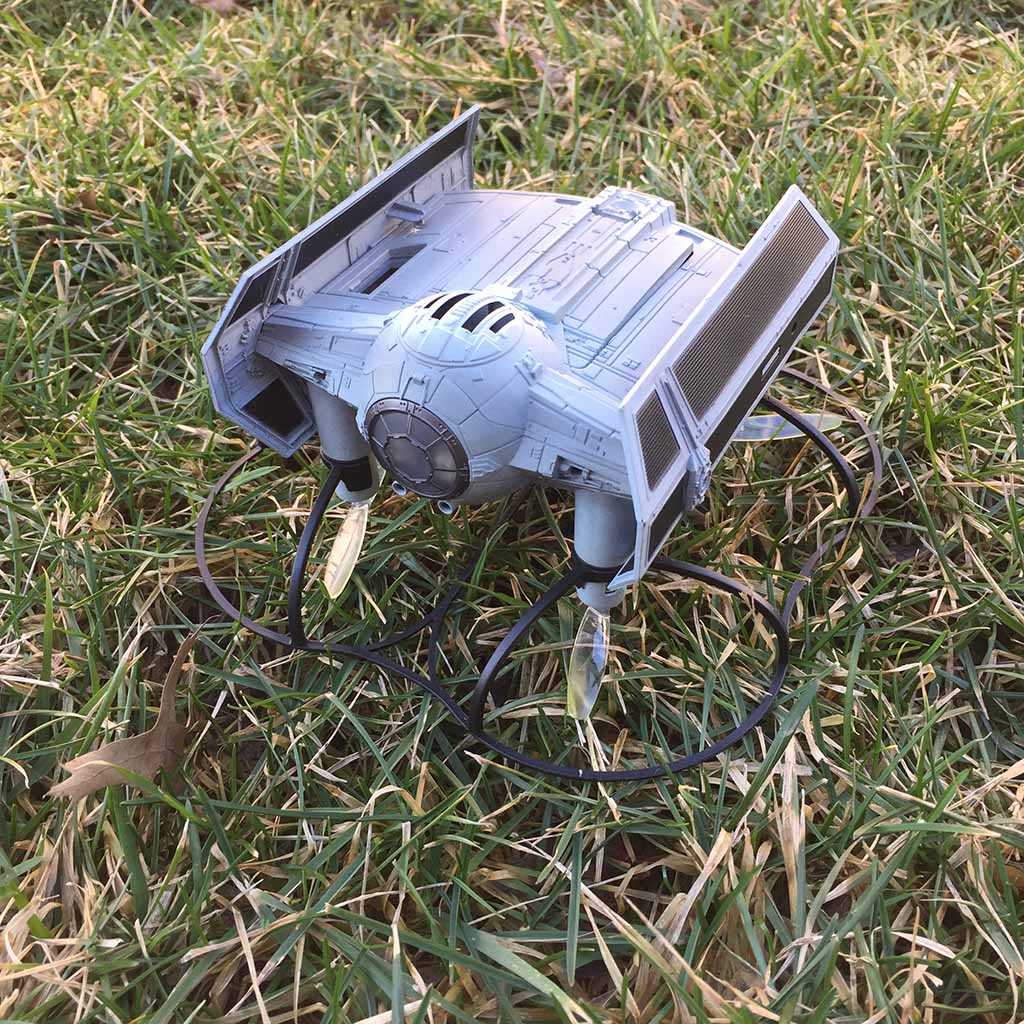
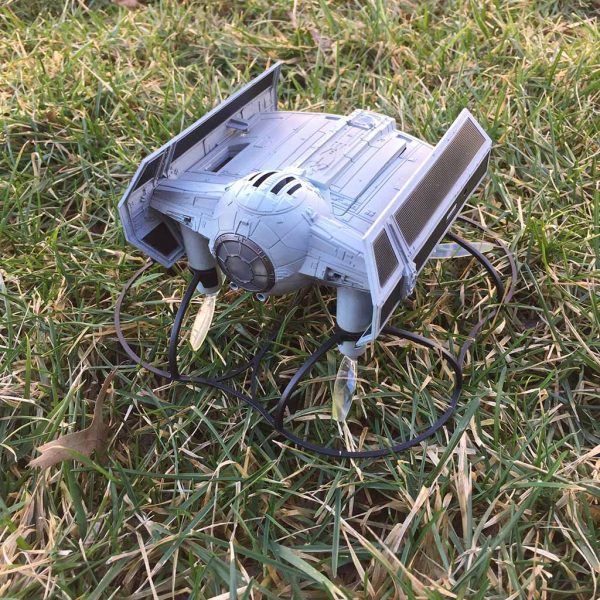 Shortly thereafter, we had a fairly warm day outside, so I thought I’d give the drone a try outdoors. The first thing I discovered was that the drone couldn’t launch while sitting in the grass. The blades of grass would slow the drone’s propellers down enough that it prevented lift.
I later placed a box in the yard as an elevated launchpad, which worked better than attempting to launch it from the grass, but this wasn’t before I noticed that the propellers had become a bit grass-stained (see image above).

As I had done inside, I went through the manual, looking for anything that I had missed, then initiated the drone’s launch sequence and as it had done previously, it leaped into the air in a random direction and rapidly drifted away from me, climbing quickly. Before it flew too high and drifted into my neighbor’s yard, I initiated the Auto-Land command, which I thought would gently bring the drone back to earth. Instead, it fell out of the sky like a rock, crashing into the ground. Thankfully, the drone was intact, with the exception of having lost each of its four propellers, which had shot off in all directions upon impact. Because the propellers are transparent, it took me a while to find them (I can’t believe I actually did), and I used the multi-tool to quickly re-attach them. After that incident, I ran the drone and controller through the calibration again, as I had done several times with my indoor flight attempts, and then attempted another Auto-Start in T-Mode. Same frustrating result.
Next, I contacted Propel and explained the situation. The customer service person that responded to me was polite and apologetic, but unfortunately, they suggested that I calibrate the drone and controller. Disappointing, since if you are following along at home, I had already performed the calibration per the instruction manual several times. But I wanted to give the drone a fair shake, so I dutifully ran the calibration again, attempted another Auto-Start launch, and… the same result. At this point, I basically gave up on the actual flying the Propel RC TIE Advanced X1 Collector’s Edition Drone. This was very disappointing, because I had not even been able to attempt any of the many aerobatic maneuvers built into the drone, nor fire the weapons systems, not to mention try out an aerial dog-fight against an opponent using the IR Battling feature (to be fair, I would have needed someone with another Propel Star Wars drone to attempt any of this).
What I like
- Incredible packaging
- Attention to detail and accuracy
- Immersive Star Wars experience
- Lots of cool and fun features (Allegedly—I didn’t get to use the vast majority of them)
What needs to be improved
- Unflyable—Nearly impossible to control and calibration was ineffective
- Instructions can be confusing in spots
- A bit fragile
Final thoughts
I was very impressed with the Propel TIE Advanced X1 Collector’s Edition Drone’s amazing packaging, its movie-authentic realism and attention to detail, and its super-immersive Star Wars experience, including its display case, Star Wars sound effects and many, many other features. However, I was unsuccessful in actually flying the TIE Advanced X1 drone. I just couldn’t get it stable enough in the air to actually fly it without it shooting off in a random direction, even using the drone’s T-Mode as well as Auto-Start and Auto-Land, all of which are functions designed to help stabilize the drone for newb pilots like me. Perhaps I was doing something (or multiple somethings) wrong, but I don’t think so. I really wanted the TIE Advanced X1 drone to work out better for me, considering that I am a ginormous Star Wars fan and all. However, as they say, YMMV (Your Mileage May Vary) and perhaps your experience with the TIE Advanced X1 Collector’s Edition Drone may be different.
Price: $149.99 MSRP
Where to Buy: Propel and Amazon
Source: The sample of this product was provided by Propel
The post Propel Star Wars TIE Advanced X1 Collector’s Edition Drone review appeared first on The Gadgeteer.
Filed in categories: Reviews
Tagged: Drone, Star Wars
Propel Star Wars TIE Advanced X1 Collector’s Edition Drone review originally appeared on The Gadgeteer on March 30, 2018 at 11:00 am.
Note: If you are subscribed to this feed through FeedBurner, please switch to our native feed URL http://the-gadgeteer.com/feed/ in order to ensure continuous delivery.