Oberon Design’s Sonoma Tote carries your gear and does some good, too

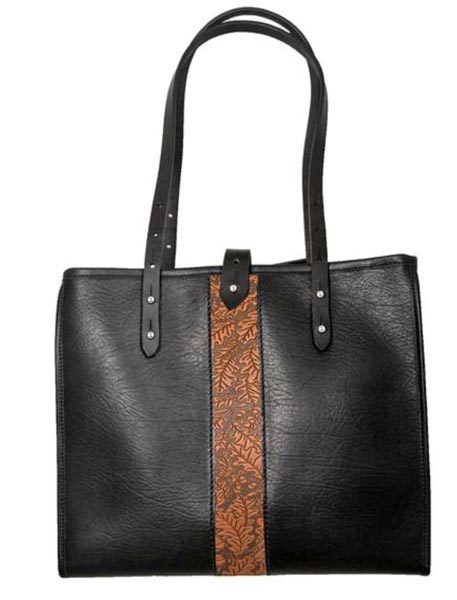
The new Sonoma Tote from Oberon Design is beautifully designed and US bench-crafted, as we expect from Oberon Design.  The bag is made of black leather with tooled leather panels on the front and back of the bag.  The image seen here is the Oak Leaf design in the middle; other choices for the tooled panel include Acanthus in navy, Cloud Dragon in wine, Paisley in orchid, and Wild Rose in black.

Each bag measures 12″ X 14″ X 5″, has straps with a maximum of 12″ under-arm space, and weighs 1.8 pounds.  Construction details include triple-stitched, taped, and bound seams and solid brass Sam Browne studs to attach the straps and close the bag.  The interior has a 9″ x 7″ zippered pocket, 2 additional pockets, and a pen pocket; these are made from spill-resistant, top-grade ballistic nylon.  You’ll also find a key loop at the mouth of the bag, so you’ll never need to scrounge for your keys.

The Sonoma Tote is $295.00, priced according to their new Oberon Direct program, which means no wholesaling of this bag results in a very reasonable price direct to the customer.  And now for the “do good” part:  In support of the vital ongoing efforts controlling the Sonoma, California fires, with this introductory offer,  $20 of every purchase will go directly to the Sonoma County Fire Relief Fund.  The Sonoma Tote can be purchased at Oberon Design.

Conbrov T17 Car Dash Cam review

While cars have gotten much safer over the years in terms of protection, there is still little to protect you from other drivers. In the event of an accident, even a little fender bender, it’s easy to miss important details that could prove vital in an insurance claim. We could all use a little more peace of mind in that regard, and that’s exactly what Conbrov hopes to bring you with their T17 Car Dash Cam.

What is it?

The Conbrov Car Dash Cam is a tiny HD video recorder that can be easily secured to the windshield of your car for recording events and details while driving. It automatically records while your car is running and could provide vital proof in the event of an insurance claim or if you like to record yourself on off-road adventures.

It’s like a little spy camera.

Hardware specs

  • Camera size is 2” x 1.4” x 0.3”
  • Captures 1080P HD resolution footage
  • Loop Recording
  • Night vision mode
  • “World’s Smallest Dash Cam”
  • 1.5” LCD screen
  • Auto accident detection feature triggered by G-sensor automatically locks videos in event of an accident
  • Supports up to 32GB microSD cards (not included)
  • 12-month warranty
Everything you need … except an SD card!

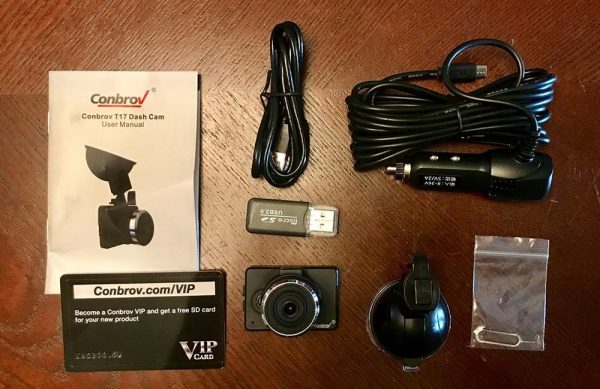
What’s in the box?

  • T17 Car Dash Cam
  • Car charger
  • USB cable
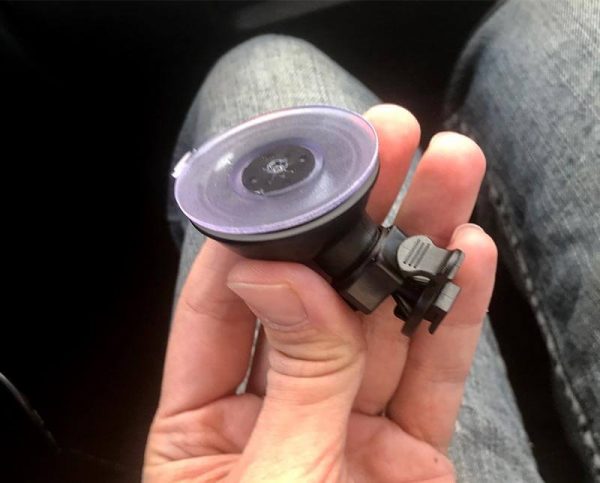
  • Car bracket with suction cup
  • Card reader
  • Pin for reset button
  • User-manual
  • VIP registration card

Design and Features

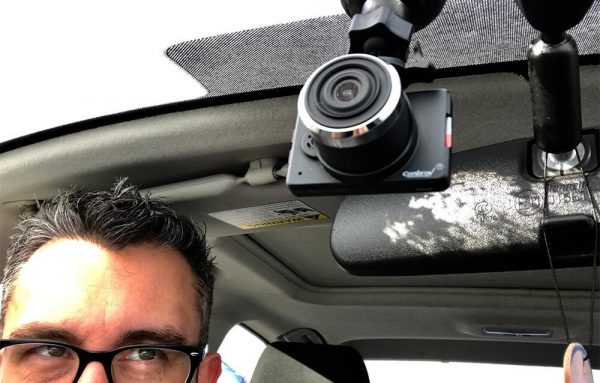
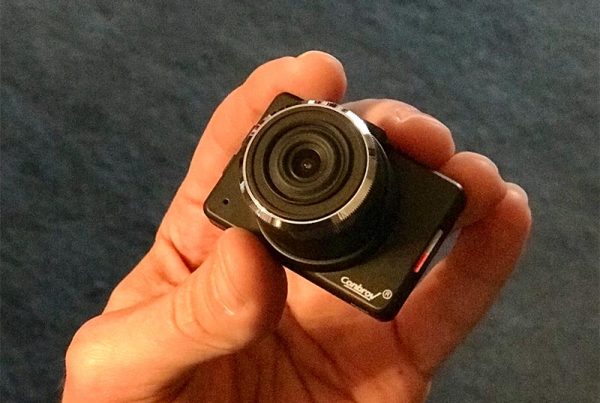
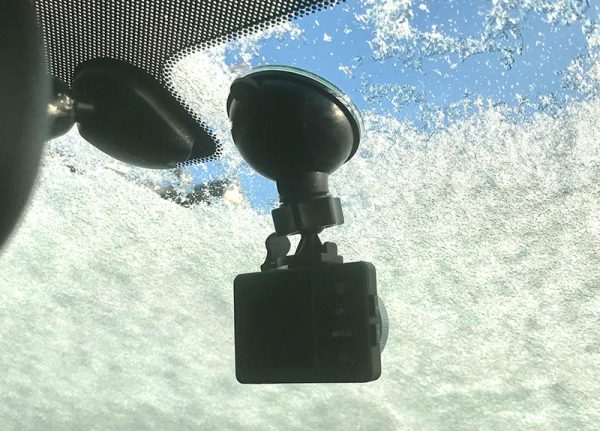
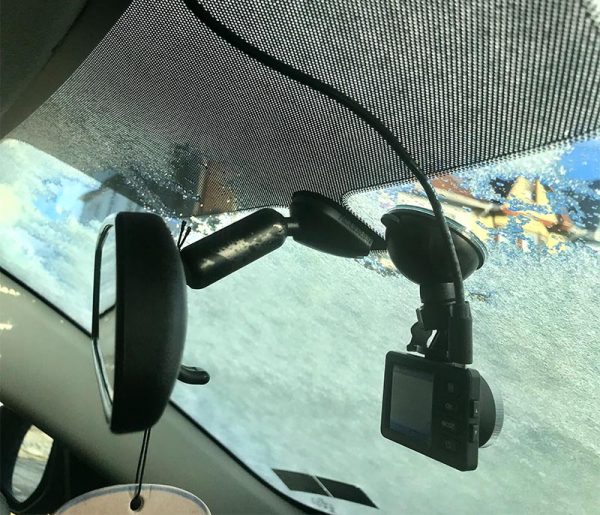
Let me start by saying this camera is tiny. Conbrov claims it’s the smallest dash cam in the world, which always seems to be a haughty claim, but they might be right in this instance. This allows the camera to be positioned in an area that’s out of direct sight from the driver, namely obscured by the rear view mirror, and that’s great for reducing distractions from a tiny, floating rectangle while driving at night.

Installation and usage are straightforward, as seen below.

Setup

The Conbrov Dash Cam was very simple to set up.

Handy little suction cup stayed on tight.

Once I found a spot on my windshield that was just out of my field of vision (I placed it so that it was mostly obscured by my rear view mirror).

Hang in there, baby.

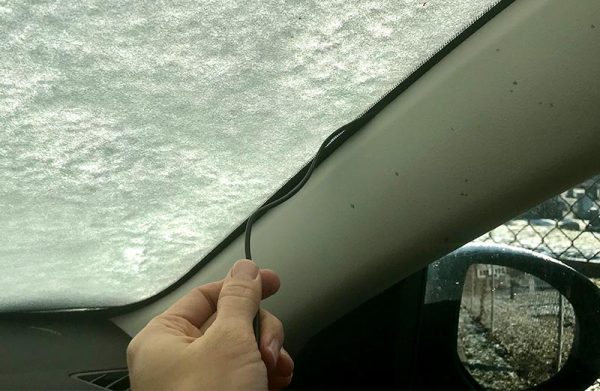
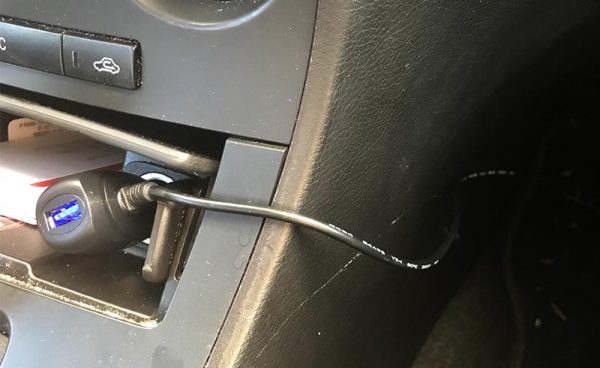
I secured the suction cup bracket, attached the camera, plugged in the charger and ran the lengthy cable from the passenger side floor, up the side of the door, and around the edge of the windshield to obscure it from sight.

The wire wedged nicely into the plastic around the windshield, but your milage may vary.

Once the cable was plugged in, I turned on the car and the camera turned on as well and instantly started recording.

The supplied adapter includes a nice USB throughput so you can continue to use it with other devices.

Usage

The thing about a dash cam is that, like most safety features on your car, you don’t really actively use it unless you have to, and you hope that you never have to. Once I had the camera in place, I didn’t touch it, save for checking out the footage that I had recorded. It was easy enough to forget about completely while in use.

Set it and forget it.

More on that point, it’s entirely hands-off. Once you start your car, the camera recognizes the power source and begins to record immediately. When you turn your car off, the camera continues to record for a set time (1 minute default, adjustable in the settings) and turns off.

While it does have a still camera setting, and you could use it like a pocket-sized video camera, the size and interface aren’t very practical for that purpose. It’s perfect for what it was meant for, a constant recording device that sees what you’re seeing behind the wheel, providing proof in the event of something eventful.

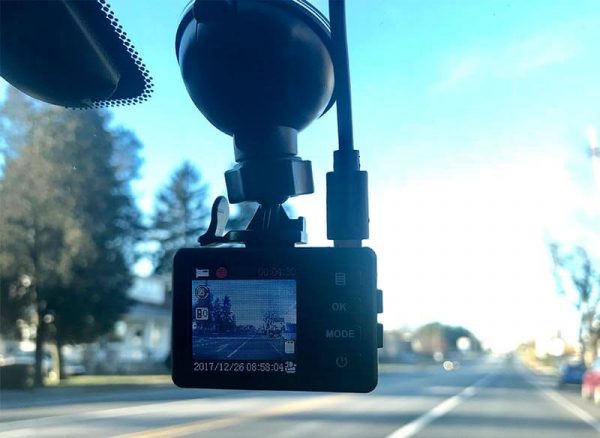
It never takes its eye off the road.

The camera features an adjustable loop recording feature. You can select the length of the recordings in the settings, in 1, 2, 5 and 10-minute increments. The loop recording basically means that it creates video files until the SD card is filled and then starts overwriting the oldest file. The size of the SD card determines how long the videos are archived.

For instance, the video files at full resolution took up about 800MB on average for a 5-minute clip. Given that, the oldest record on my 16GB SD card was about an hour and a half of drive time.

Fortunately, the camera features a G-lock setting which detects sudden stops, such as in an accident, and automatically “locks” the currently recording video. This prevents accidental deletion or overwriting of that important video file. One note: I found that a lot of the videos were locking themselves, which means the were not being overwritten and my card was filling up. I can’t figure out if it was because of the G-lock system being a little too finicky, so I ended up turning that setting off.

Video quality

Below are two examples of day and night recordings. The camera was set to 1080p resolution and highest quality.

Daytime

Nighttime

While reviewing the videos, I found the quality slightly lacking. It’ll do just fine for recording the cause of an accident in front of the car, but if you’re looking to capture something like the license plate of a hit-and-run vehicle, or any car that’s further than 20 feet away, that might prove difficult. Overall, it gets the job done. The night mode was pretty decent.

Positives

  • Very small and visually unobtrusive
  • Auto-start and stop
  • Relatively inexpensive

Negatives

  • Doesn’t come with a required SD card (which is common among dash cams I’ve found)
  • Power cable could be visible on dash
  • Mediocre video quality
  • Smaller SD cards fill up really quickly

Final thoughts

I was impressed with the Conbrov Dash Cam’s simple set-and-forget functionality. Thought it might not be the sharpest camera, its size and cost are very well suited for those looking for a little extra protection on the road.

Price: $42.99
Where to buy: Amazon
Source: The sample of this product was provided by Conbrov.

Wine bottle not empty? Put a planet-sized cork in it!

Well, these wine-bottle stoppers aren’t planet sized, but they are planet shaped.  The Solar System Glow-in-the-Dark Bottle Stoppers are made by Chinese artisans using lamp-working techniques to turn colored glass rods into beautiful spheres representing the Sun and some of the planets.  As they are being made, a luminescent powder is mixed into the molten glass to make the spheres glow in the dark.

The stoppers are made of chrome, glass, and silicone.  The stoppers are 3.75″ tall, and the glass spheres are 1.5″ in diameter, except for Saturn, which is 2.25″.  In addition to the Sun, you can also select from the Earth, Moon, Mercury, Saturn, or Neptune.  Saturn is $26.00; all other designs are $24.00 each.  Choose your glow-in-the-dark cosmic bottle stopper at UncommonGoods.

Catsby food dish for cats, SHOTBOX photo studio, PITAKA Pixel 2 XL case, and more – Review updates

Here we go with the first set of review updates for the new year. What are review updates? They are quick blurbs added to the end of our past reviews where we comment about how the product has performed since the review was posted or since the previous update. You can click the links below and then scroll to the end to read the latest update (except for the first one… I’ve made numerous updates to the favorite gear page).

Julie’s favorite gear page

Dr. Catsby’s bowl for whisker fatigue review by Julie Strietelmeier

SHOTBOX portable photography light box review by Julie Strietelmeier

OROS Discovery jackets review by Julie Strietelmeier

PITAKA Aramid Pixel 2 XL case review by Julie Strietelmeier

PhotoLemur v2.2 Spectre photo software review

Back in May, I reviewed the first version of PhotoLemur, a Mac app that lets you computationally enhance photos for better colors, light, skies, and faces.  Well, here in this holiday time of year, the elves have been busily applying their digital hammers and saws to the code and have offered a significant upgrade. I was given an opportunity to test the new program and want to share my findings with you. I started this review working with version 2, but it’s been recently upgraded to 2.2 Spectre, and it’s quite a bit improved!

Note: Photos may be tapped or clicked for a larger image. Images may take some time to load.

What is it?

The first version of PhotoLemur was a one-trick, one-shot, stand-alone deal: Here’s your photo, or here’s your photo with our program applied. Take it or leave it. In version 2.2, they have the same singleness of purpose and application (you can’t select a single area and change just it – it’s still all-or-nothing on the photo itself), but the level of change and enhancement can now be modulated. Also, in addition to stand-alone, there are plug-ins for the two largest photo-editing programs: Adobe LightRoom and Apple Photos.
Design and features

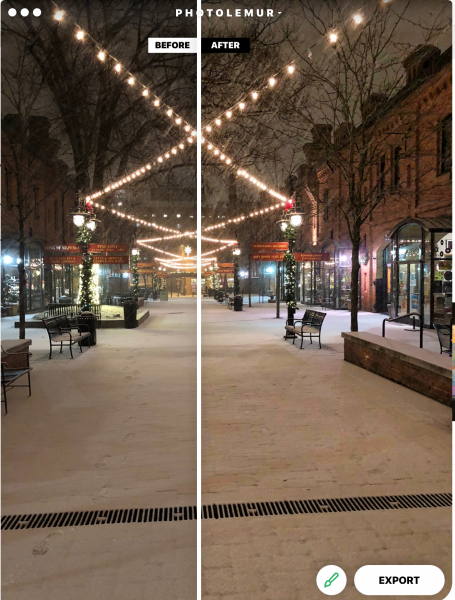
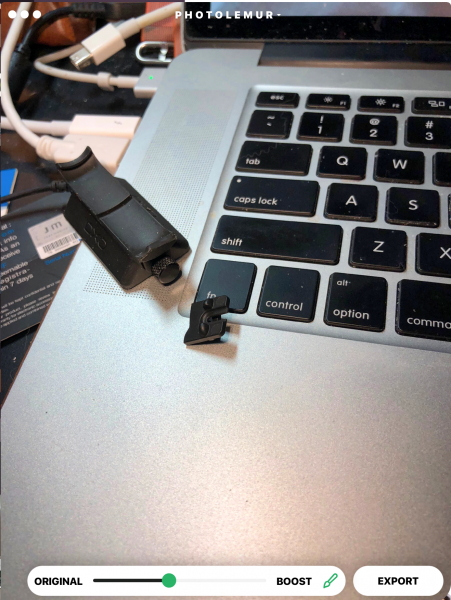
The interface is almost identical: open an image, and you’ll see a partition with your original photo on the left, and the enhanced version on the right. But in the right corner beside the “Export” button, there is a new button with a paintbrush. When you click on this, you are able to view the entire altered photo. There is a slider at the bottom where you can basically choose the amount of processing you want to use. Rather than the 100%, all the way to the right (which was the original version’s only setting), there is now an infinite slider where you can say “For this photo, I only need 40% Lemur, but for this other one, it needs maybe 70% Lemur.” (And, yes, I am officially verbifying a noun, and you can’t stop me! It’s the 21st century, and making up new words is a cottage industry these days.)
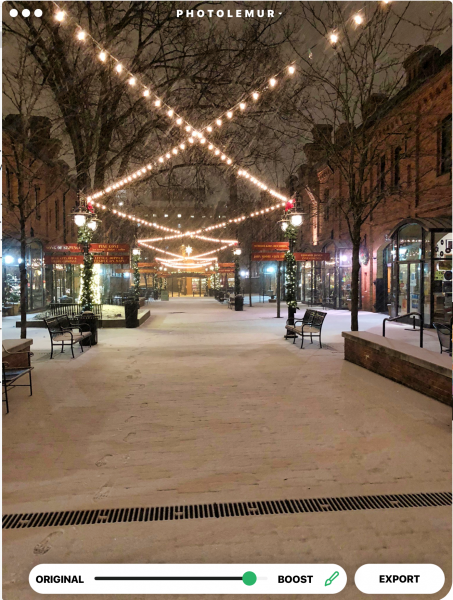
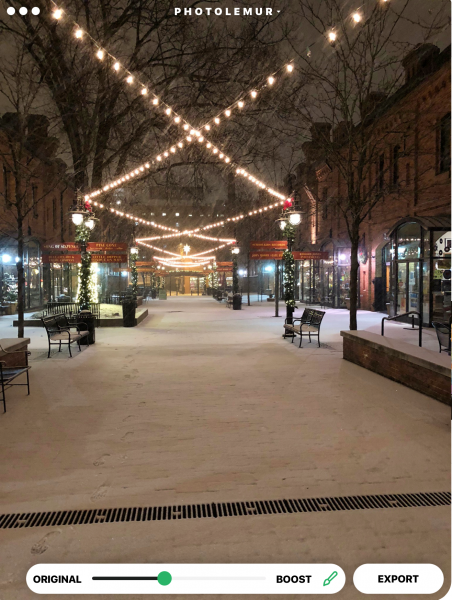
I ran a couple dozen photos through PhotoLemur during the first review, mainly from my back-catalog of early digital photos, and there were some really nice changes that were made to these images. For this next version, I decided to up the challenge. I have been using quite nice computational cameras for the last few years: an iPhone 6s Plus and recently an iPhone 8 Plus. In spite of this, there are some photos that need to be “fixed” – the sky is wrong, or the grass is wrong or the skin tones are wrong or whatever. No matter the finesse of the algorithm, the final judgment is always the viewer’s eyeballs. Here are a few representing varying levels of Lemur. Above, a night scene, just as it’s begun to snow. Note the details in the building to the right under the software’s effects, as well as the patterns in the sidewalk where the snow was drifting.

The finish of the process has changed as well. The initial version was pretty cut-and-dried – hit export, choose a filename and location, and your freshly Lemured photo is ready to go, and the program is ready to start on another. Now, there are sharing options for email, online storage, social media, other programs to move the photo to… It’s a whole new world!
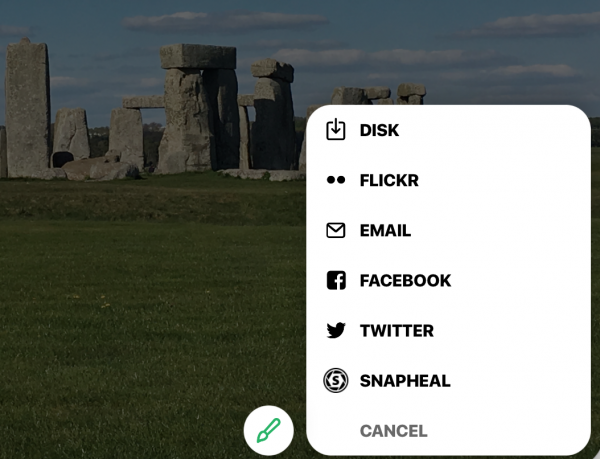
If you’re in the plug-in version, it will save to your camera roll. In standalone, you can also add a group of photos and work through them, rather than having to hunt down each one individually.
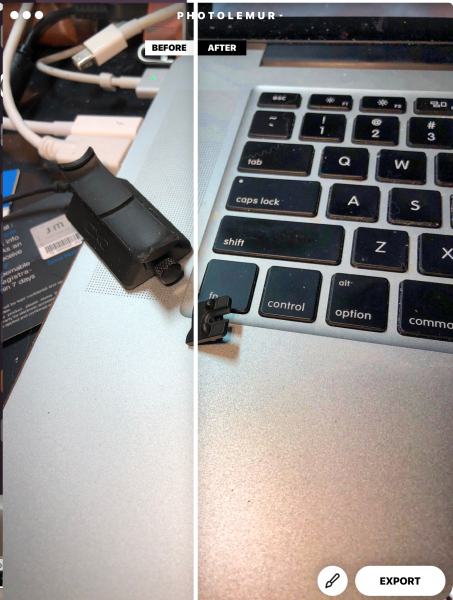
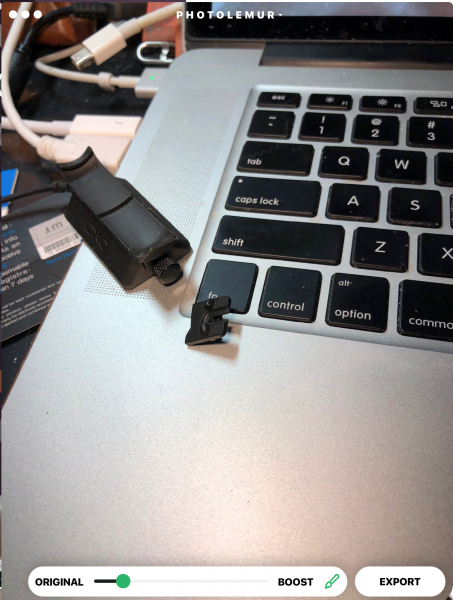
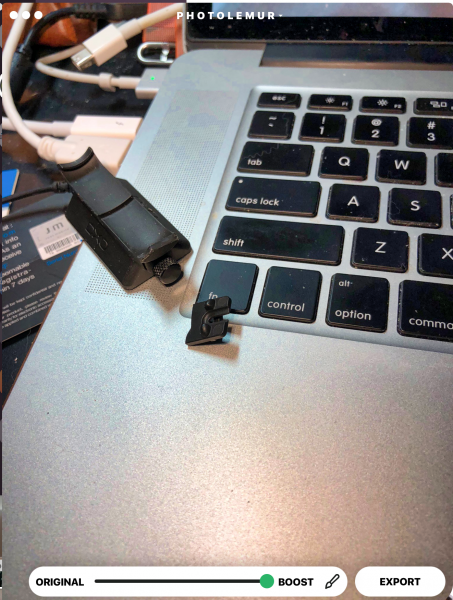
The second photo was taken with normal room lighting (all digital) of a broken part I had to return. Note the noise created by the bead-blasted finish on the MacBook Pro’s palm rest in the 100% correction.
 Tech Requirements

  • Windows

    • Intel® Core i3 or AMD Athlon® 64 processor; 2 GHz or faster processor
    • 4 GB of RAM (8 GB recommended)
    • 1024 x 768 display (1280×800 recommended)
    • 4 GB of available hard-disk space
    • DirectX 10-capable video adapter
    • Microsoft Windows 7, 8,10 (64-bit)
    • Internet connection and registration are necessary for required software activation, validation of subscriptions, and access to online services.
  • MacOS

    • Multicore Intel processor with 64-bit support*
    • 10.11 (El Capitan), 10.12 (Sierra)
    • 2 GB of RAM (8 GB recommended) 1024 x 768 display
    • 1 GB of Video RAM (VRAM).
    • 4 GB of available hard-disk space
    • Internet connection and registration are necessary for required software activation, validation of subscriptions, and access to online services.

Performance

The photos load fast, and once it is loaded, the changes are all updated instantly. You only have to swipe the dividing line to see before and after or the paintbrush to decide how much effect you’d like.

What I Like

  • Easy interface – two sliders
  • Solid upgrade with great user-oriented enhancements.
  • Much better pricing strategy
  • no confusing tools or masks
  • Integration into existing photo software is amazing!

What could be Improved

  • Limited – full frame editing only
  • No way to know what will be changed or enhanced – it’s a black box

Final thoughts

The bottom line is this: How much do you want to post-process your photos? When I first started in digital photography 20 years ago, I had to run every photo through some sort of software, originally because I knew little about the mechanics of how the process worked and was just shooting things and expecting that to fix my lack of knowledge and preparation, as well as the shortcomings of my beginner-level equipment. Over time, as I started to learn how to adjust settings to prevent some of the things I had to correct post-capture, I was able to edit less, but also to move into less intrusive tools.

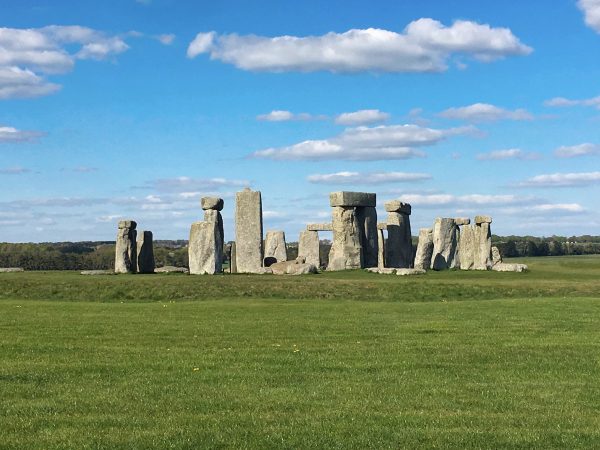
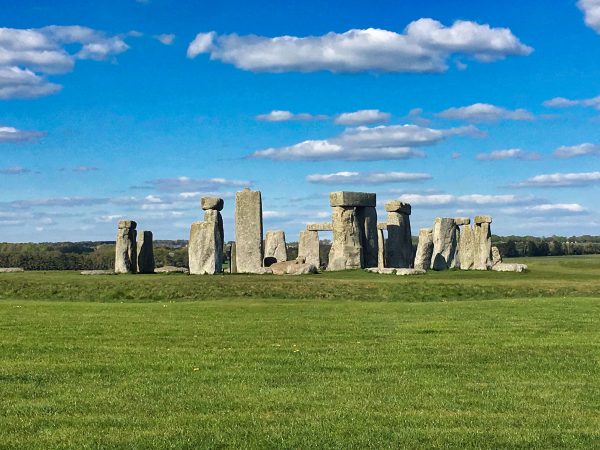
Now, with hardware tools at a level where you really don’t have to worry about all those mechanics, the software options have come down to tiny tweaks that you may or may not care about. Many look at a photo and say to themselves, “Yeah, that’s how I remember it.” A few will want to change how those memories are stored. If you’re one that wants to fix certain things in photos “just so,” you may want to consider PhotoLemur. At $30, for me, I’d probably have bought it after trying the free version. Let me show you a photo that sold me, which I took just last spring. Just another day on the Salisbury Plains, right?
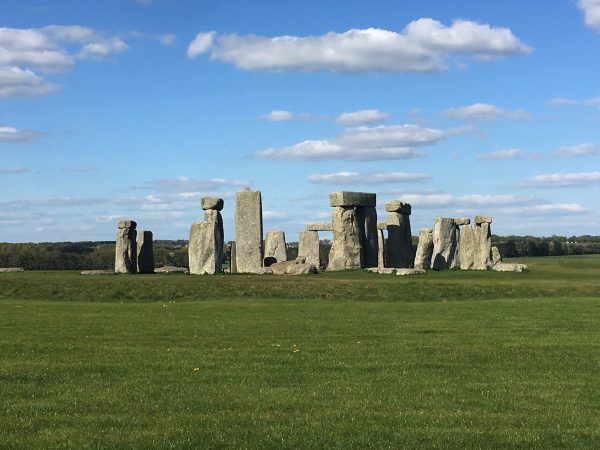
At 40% Lemur, the difference in the grass, the sky, the colors of the stones all were amazingly more real.
But at 100% Lemur, it pops your eyes out!
If you’re not one who wants to tweak, it may help with your back-catalog, but then, your current photo software may do more than you will ever use. Know it’s out here, and, if the need presents itself, grab it. You may find you are a tweaker more than you realized. You are, after all, reading a gadget website. ;-).

Price: $29 for one device/$49 for 5 devices
Where to buy: The software is available through the company website.
Source: The sample of this product was provided by PhotoLemur.

Other Gadgeteer posts that you might like…