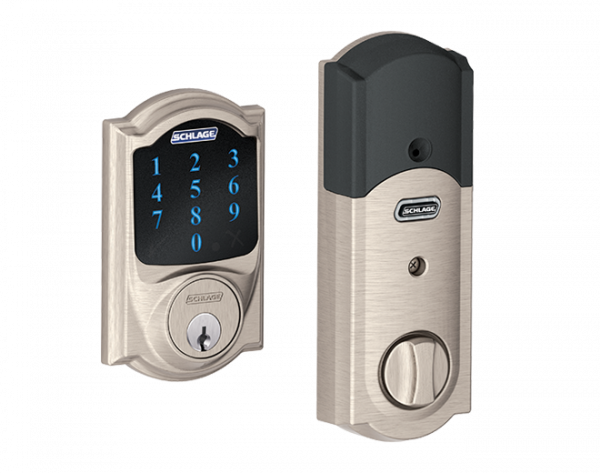
Schlage Connect Touchscreen Deadbolt door lock review

Keyless number pad door locks have been a familiar sight at airports and other commercial settings for years. These locks are especially useful for applications where multiple people must share access to a secure location, control of physical keys must be maintained, entry and security access must be logged, and tampering or unauthorized access must be alarmed. Historical installation cost of these commercial systems was a minimum of a few thousand dollars. Today, Schlage offers the Connect Touchscreen Deadbolt Door Lock. This lock is designed for residential use but is capable of providing all of the professional features listed above and is available for under $200 (not including the Z-wave hub). Read on to see what I think!

Installation
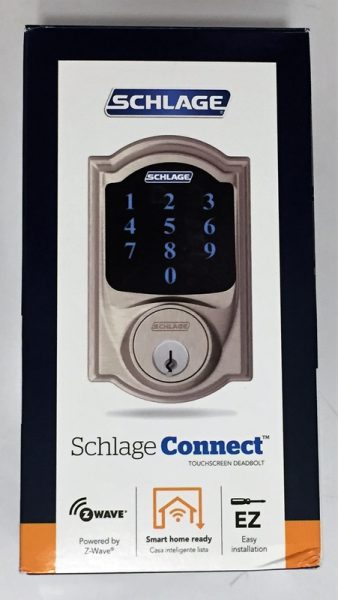
The Schlage connect comes with everything that you need to install the lock into a brand new door or to replace an existing lock. The lock does have some prerequisites:

  • the door should be able to be locked without pushing or pulling against the frame
  • the door must be easy to lock and unlock in the summer and winter.
  • the frame has at least 1″ for the bolt to extend into
  • the door is not more than 1 3/4″ thick (or Schlage will provide a thick door kit)
  • there is a minimum of 5″ between the doorknob latch and the bolt hole
  • a single cylinder installation is warranted (deadbolt operated by key from the outside and by the turn unit on the inside)

Since I meet all of the requirements I’m going to replace an existing deadbolt door lock.
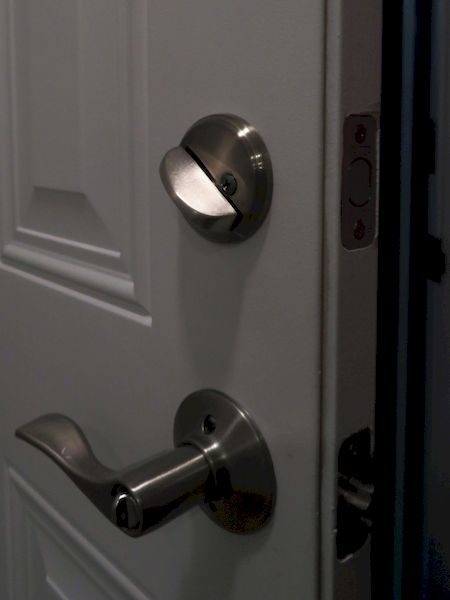
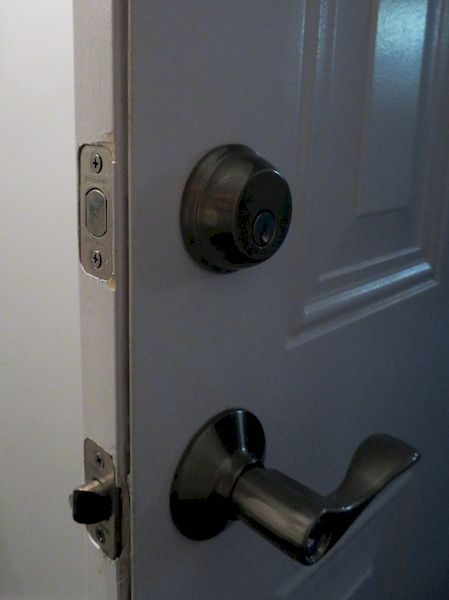
I installed this in a door that already had a Schlage deadbolt so I did not need to replace or alter the existing strike plate (the part that goes against the door frame).  The strike plate included with the package uses two reinforcing bolts that secure a steel reinforcing plate to the door frame with two 3″ long hardened steel wood screws. This plate is covered with a strike plate with smaller screws. This enhances the resilience of the lock to withstand being able to be struck up to 10 times with 150 ft-lbs.

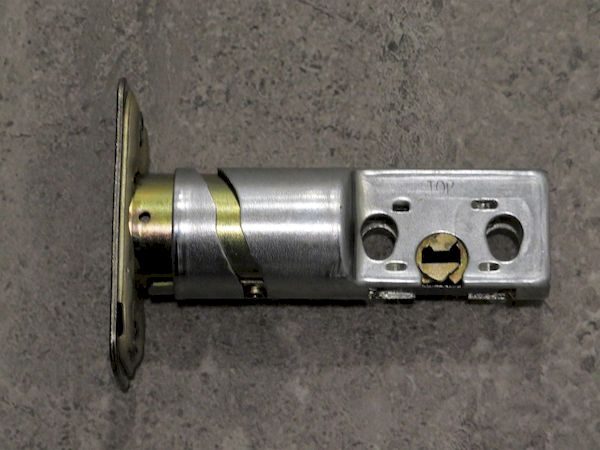
The bolt that comes with the lock is designed to be reconfigured depending whether the door has a mortise or not around the bolt hole, and also depending on the depth of the crossbore. Therefore the faceplate is either removed or replaced, and the faceplate is twisted, if necessary, to increase the length of the bolt. The latch bolt extends 1″ when engaged, but it is tapered somewhat towards the front, perhaps to aid in automated opening and closing. Therefore, even if you have a compatible bolt it is important to use the one that came with this system.  The tapered portion of the bolt is well behind the strike plate when engaged, so it shouldn’t impact the security performance. The robustness of the lock and mechanism has been rated Grade 1, the most secure, by BHMA and ANSI.
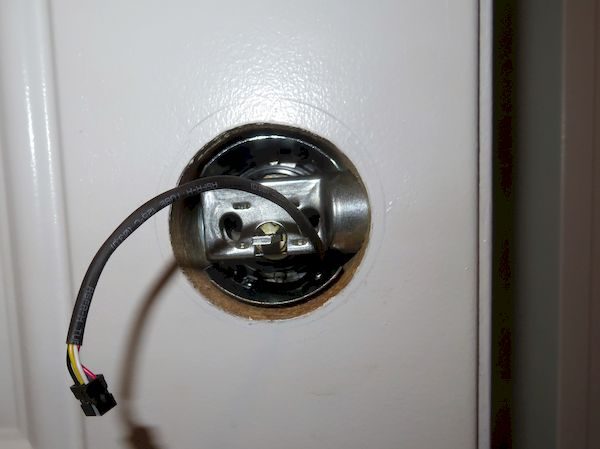
After installing the bolt and testing its operation, it is time to install the touchscreen. The tricky part of this is getting the keypad to mount vertically on the door and to ensure that the interface cable is fed correctly below the bolt through the crossbore. The lockset on the keypad is a standard Schlage assembly but with a custom stem (with tab) to mate with the actuator on the inside. I re-keyed the lock myself by carefully removing the weiser cap, exchanging the lock stem between this new lock and the lock I had at my house, and replacing the weiser cap.
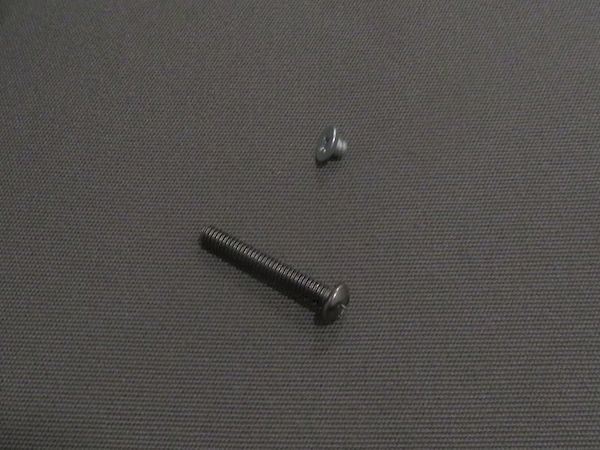
The keypad and cylinder are bolted to a steel plate with hardened machine screws. The steel plate, while not attractive or useful, functionally completes the lock. The lock can be opened and closed from the key on the outside or the stem on the inside. The remaining parts, the actuated turn unit, and the alarm are what make this lock stand out from the competition.

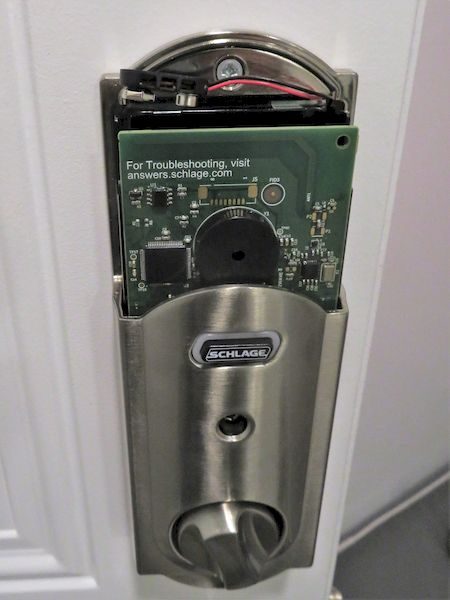
The picture below shows the interface cable connected and the actuator about to be installed. The pre-configured 4 digit key codes and 6 digit master code are printed on the label on the inside of the lock. Because this label is in an easy to access place by any unsupervised visitor to the house, it is recommended that the master and preset codes be changed or that the sticker be removed.
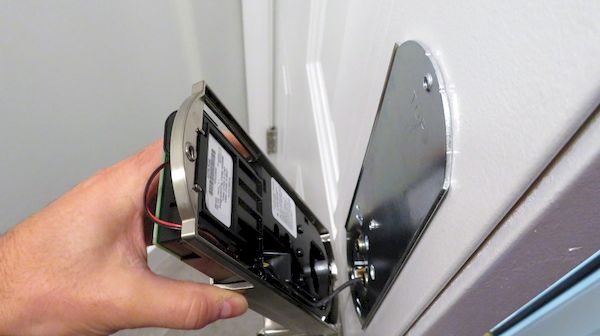
The screw which holds the top of the actuator and housing against the steel doorplate is tiny. Make sure you don’t lose it!
The kit comes with 4 Duracell AA batteries
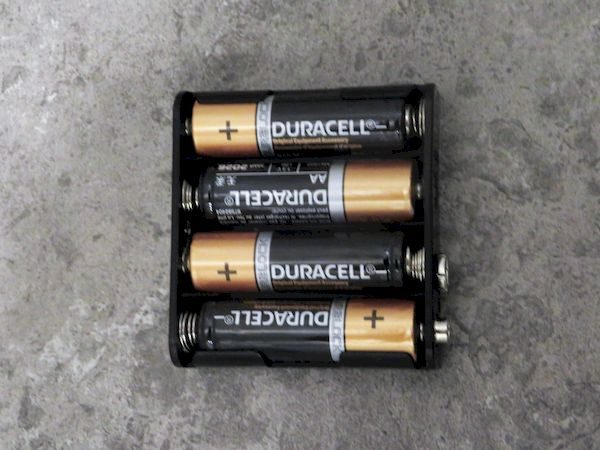
The battery compartment exposed. The battery cover slides on to the metal frame.
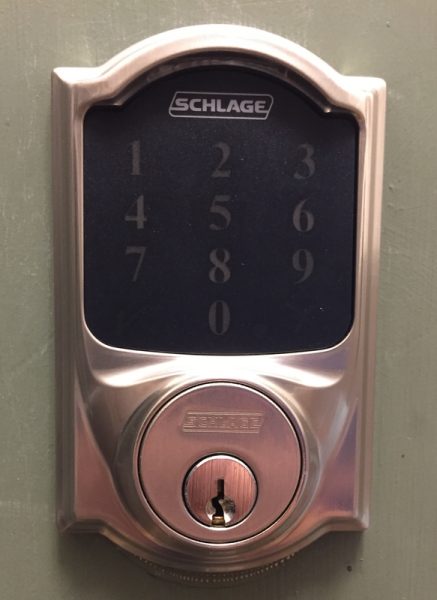
The installed keypad (on another doorframe)
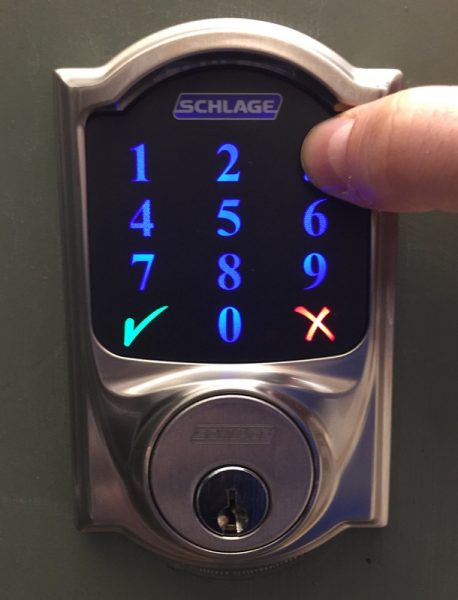
and with backlighting:
Local Operation

After installation is complete the lock performs a calibration to learn which side of the door the lock is installed on to. After calibration, the directions require that several exercises be conducted to ensure the door operates correctly.

If the door alignment is slightly off it may take more power than minimally required to open and close the door lock. The Schlage Connect has two power settings to conserve battery power. It will try to open the door with low power first and then use high power if necessary. If the door requires high power on three consecutive occasions it will use high power mode exclusively until the lock is reset.

The lock has the following features:

  • Storage of up to 30 individual user codes
  • A vacation mode that disables all user code access (entered by using the Programming code)
  • An option to turn on or off the beep to provide feedback of button presses
  • An option to be able to lock the door by pressing the Schlage logo on the keypad without entering a code
  • An auto lock feature to automatically re-lock the deadbolt 30 seconds after opening. This feature may be temporarily disabled

Programming is accomplished by opening the door and extending the deadbolt. The sequences are all initiated by pressing the Schlage button, entering a 6-digit programming code, and entering a function code (1 – 9).  It’s not the most user-friendly experience, but should not be done that frequently, and may optionally be completed by the Z-wave system if it is enabled and configured to access these setup codes.

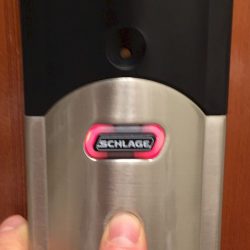
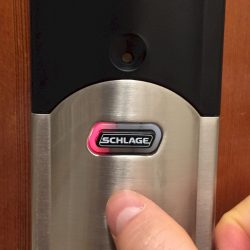
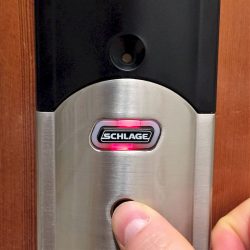
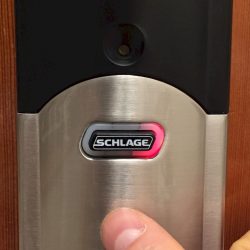
The alarm function is activated and configured using the inside Schlage button. The button is surrounded by three LED zones that are used to convey the alarm configuration. The alarm may be turned on or off, set to three different modes and may also be adjusted to 5 different sensitivity levels. These settings are all configured by pressing and holding the inside Schlage button for different amounts of time and releasing depending on LED flashes and beeps generated by the lock. Even with the manual in hand, it is a difficult process to go through.

The pictures below show the different LED patterns of the inside Schlage button.


The alarm is loud enough on the inside of the house that it should be heard on the other side of the door. However, I think the true benefit of this system is that you can be alerted when you are inside of your house and someone is trying to break into your front door. (Sorry for the chilling thoughts)

In addition to the tamper alarms that are generated by moving the door, the keypad enters a 30-second pause if 3 wrong entries are entered in a row. This is done to lower the chance of a successful brute force attack. For a 4 number code, this should only take about 8 hours, on average, assuming a 5 second entry time. However, adding a 30-second pause after 3 wrong attempts increases this to 18 hours. Clearly, there is a lot of benefit to having a longer code and I would recommend using the maximum 8 digit code for improved security and resistance to a brute force entry.

Remote Operation

The Schlage Connect lock is equipped with a Z-Wave radio. The radio is disabled as a default setting to conserve battery life but can be enabled to permit remote control of the lock. I integrated the lock with my SmartThings setup, but this can also be used with IRIS or Wink hubs

The stock SmartThings device handler shows the status (locked, locking, unlocked, unlocking, jammed), has soft buttons for lock, unlock, and reset, and a panel that shows the battery level. The SmartThings Community has a code available for enhancing this default handler.  Some code is free and others are for purchase. The type of additional features you might expect includes support for Schlage to enable/configure the Alarm modes as well as the sensitivity of the alarm; support for using the lock as a motion sensor device that generates a motion event when the alarm is set off so it can be used as a trigger;  support for enable/disabling the AutoLock features, enabling/disabling one-touch locking/lock and leave, enabling/disabling the Keypad (vacation mode) and enabling/disabling the audio alerts. Support may also include the ability to capture invalid user code attempts and lock tampering and being able to report if the door was locked/unlocked manually internally, externally, or remotely. Other functionality may include dynamically configuring the list of people that have access to open the lock.

Being able to configure the alarm state remotely also means that with a little programming the alarm could be set based on routines so that the alarm is set before bed but disabled in the morning.

One of the best features is that the SmartThings app issues alerts about the door operation so that verifying the door is locked is easy to do with just a glance at a phone.
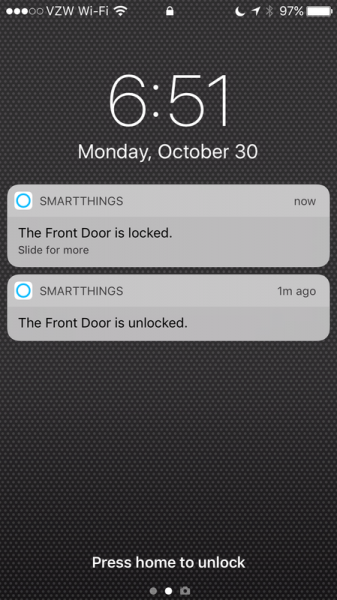
SmartThings plays well with Amazon Alexa so after a home automation query, the deadbolt, which I have named front door, shows up on Alexa’s home automation interface. Below is a movie which shows how the door can be activated with Alexa.

Performance

The lock has performed quite reliably for about two months now. I have not noticed that the door jams or that the lock fails to engage. The lock carries its own log of operations; from querying the correct parameter I can determine that the lock as operated with normal power 586 times, failed 27 times (I believe almost all of these are “test” runs), and operated with high-preload power 184 times.  The door is adjacent to my SmartThings hub so I’m not sure how much power the radio is consuming, but the Z-wave radio has been on the whole two months as well. With all of this activity, the battery is at 98%. Some people have reviewed this product and observed that the battery is quickly depleted but it does not seem to be the case with my experience.

The actuator is a bit loud but not unlike the other units that I have heard reviewed online. If I’m returning home late and I don’t want the lock to be loud, I use the key to open the door.

Having the door lock installed has allowed me to go for keyless jogs around the neighborhood. Also, I have provided our cleaning service with codes so that I can monitor the time that they are here and change the code if our cleaning service needs change.

Conclusion

The Schlage Connect is a well designed, feature rich door lock that combines keyless entry with remote operation and monitoring. The Schlage model offers the ability to enable and disable the keypad and includes built-in alarms; features that competitive offerings from Yale and Kwikset don’t include. The cost of the Schlage Connect is currently about $180, which is in line with the competitive offerings from Yale and Kwikset, although about ten times the cost of an equivalent Schlage single cylinder deadbolt. If you have a need for monitoring and controlling access by multiple people or just an interest in home automation then the Schlage Connect is a solid performer.

Source: The sample for this review was provided by Schlage. Please visit their site for more info and you can order one from Amazon.


Product Information

Price: $179.17
Manufacturer: Schlage
Retailer: Amazon
Requirements:
  • the door should be able to be locked without pushing or pulling against the frame
  • the door must be easy to lock and unlock in the summer and winter.
  • the frame has at least 1" for the bolt to extend into
  • the door is not more than 1 3/4" thick (or Schlage will provide a thick door kit)
  • there is a minimum of 5" between the doorknob latch and the bolt hole
  • a single cylinder installation is warranted (deadbolt operated by key from the outside and by turn unit on the inside)
Pros:
  • Storage of up to 30 individual user codes
  • A vacation mode that disables all user code access (entered by using the Programming code)
  • An option to turn on or off the beep to provide feedback of button presses
  • An option to be able to lock the door by pressing the Schlage logo on the keypad without entering a code
  • An autolock feature to automatically re-lock the deadbolt 30 seconds after opening. This feature may be temporarily disabled
Cons:
  • Program master code and default user codes are in conspicuous location
  • actuator can be loud
  • Programming and alarm operation is difficult using keypad and alarm key

Filed in categories: Reviews

Tagged: ,

Schlage Connect Touchscreen Deadbolt door lock review originally appeared on The Gadgeteer on November 8, 2017 at 11:00 am.

Note: If you are subscribed to this feed through FeedBurner, please switch to our native feed URL http://the-gadgeteer.com/feed/ in order to ensure continuous delivery.

More barware for the chemists from ThinkGeek

ThinkGeek had a set of Laboratory Shot Glasses some years ago that I just had to own.  The cute little set of beaker- and flask-shaped shot glasses are decorating my home office now.  ThinkGeek hasn’t let us chemistry nerds down, because they now have an Erlenmeyer Flask Martini Glasses Set that would be a great gift for any chemist, chemistry student, or The X-Files fan.  The set of four glasses have Erlenmeyer-shaped stems, each apparently filled with a different colored liquid, so guests will easily know which glass is theirs.  The glasses are made of silicate and borosilicate glass.  Each martini glass holds 12 ounces.  The Erlenmeyer Flask Martini Glass Set is $79.99 from ThinkGeek.


Filed in categories: News

Tagged:

More barware for the chemists from ThinkGeek originally appeared on The Gadgeteer on November 8, 2017 at 10:00 am.

Note: If you are subscribed to this feed through FeedBurner, please switch to our native feed URL http://the-gadgeteer.com/feed/ in order to ensure continuous delivery.
WESN Titanium EDC pocket knife, BAT Trident multi-tool, handmade Kukri pocket knife, and more – Notable crowdfunding campaigns

This week we have a metal themed edition of our weekly notable crowdfunding campaigns post with five projects that are made of all metal. Click through to read more details about these five crowdfunded products.

The WESN Titanium Micro Blade EDC Pocket Knife Keychain

What is it?
The WESN Titanium Micro Blade EDC Pocket Knife Keychain is a pocket knife that measures only 3.75 inches long when it’s fully deployed and a tiny eye squinting 2.24 inches long when it’s folded.

Why do I like it?
I like the WESN pocket knife because it’s a very well made knife that is a perfect addition to your EDC because it’s so small that it can fit on your keychain or in a pocket without feeling the extra weight. They sent me a sample and I have to tell you that this little guy is an over-engineered marvel. Even though it’s tiny, it feels great in hand. There are no sharp edges on the grade 5 Titanium handle, and the heat hardened steel blade is tiny but effective for all sorts of everyday chores like opening boxes. If you like tiny pocket knives, don’t miss this one.

Where can I find more info?
The WESN campaign ends in 31 days and they have already passed their funding goal of $12,000. You can pre-order a WESN starting at $40. After the WESN campaign ends, rewards are estimated to start shipping in February 2018. Visit their Kickstarter page for all the details.

Spoke Note

blurb by Andy Jacobs

What is it?
A cool-looking, super tough, CNC-machined aluminum sticky note holder.

Why do I like them?
I think most sticky-note holders look boring and are poorly built—just hunks of injection-molded cheap plastic. Brian Conti, inventor, designer, maker and veteran of several successfully-launched brands and Kickstarter campaigns, felt the same way. When he couldn’t find anything better in the market, he designed and built his own, the Spoke Note. Spoke Note breaks that mold (pun intended). CNC machined from aircraft-grade aluminum, it looks tough and is tough. Its shape, style, and machined holes give it a cool an industrial vibe. Spoke Note holds a single 3-in x 3-in 100-sheet sticky note pad and has four “micro-suction” disc feet/pads, which can even allow it to be attached to many vertical surfaces. Do I need an over-built but cool-looking sticky-note holder? Probably not, but I sure do want this one.

Where can I find more info?
The Kickstarter campaign just kicked off (pun intended again) and will end November 21, so there is still plenty of time to become a backer. Already as of this writing, the campaign still has 14 days to go and has already achieved surpassed its $1,000 funding goal with over $4,000 in pledges. Pledge package pricing starts at $30 for a single early bird Spoke Note and increases from there. Estimated delivery is December/January 2018. Visit their Kickstarter page for all the details.

B•A•T Trident: 12 Function Mini Multi-tool

What is it?
The B•A•T Trident is a trident-shaped bead-blasted stainless steel multi-tool that has 12 functions and a 2.5 inch long and 1.5 inch wide form factor.

Why do I like it?
I like the B•A•T Trident because it’s a one-piece multi-tool that’s flat, which means it can fit in a pocket in your jeans or gear bag. This particular multi-tool has all the main tools that you want in an EDC tool. It offers the following functions:

Phillips head screwdriver
Razor sharp cutting edge
Sharp piercing point
Captured cutting edge
Small flathead screwdriver/pry tip
Wire stripper
Serrated fire rod scraper
Saw edge
Laser-etched 1” ruler
Bottle opener
Fire starter rod (included)
BAT TRIDENT comes with a small SOLAS reflective sticker that you can choose to attach for emergency signaling or leave off for stealth

Where can I find more info?
The B•A•T Trident campaign ends in 24 days and they are well on their way towards reaching their funding goal of $7,000. You can pre-order a B•A•T Trident starting at $35. After the B•A•T Trident campaign ends, rewards are estimated to start shipping in March 2018. Visit their Kickstarter page for all the details.

Urban Kukri knife family

What is it?
The Kukri knife collection are eye-catching friction style folding knives that have been made by hand using basic tools by Ukrainian maker Konstantin Shaporenko.

Why do I like it?
I like the Kukri knives because they look more like a work of art or a sculpture than a cutting tool. But don’t get me wrong, they can still be used as an EDC knife that you can carry in a pocket or even wear around your neck if you opt for the tiny 30mm Kukri knife. They sent me a sample and I was very impressed with the workmanship and overall design of this knife.

Where can I find more info?
The Kukri knife campaign ends in 29 days and they are working towards their funding goal of $12,000. You can pre-order a Kukri knife starting at $25. After the Kukri knife campaign ends, rewards are estimated to start shipping in January 2018. Visit their Kickstarter page for all the details.

NeoKeys – Low Profile Self Organizing Keys

What is it?
NeoKeys are narrow key blanks that have a magnet built into the top that keeps all the keys stacked and connected to reduce the size and key jingle.

Why do I like it?
I like NeoKeys because they shrink each individual key and add an embedded neodymium magnet. It’s a more elegant alternative to the MagKeys stick on magnets that I reviewed a couple of years ago. If you’re looking to downsize and simplify your key carry, this looks like the perfect way to do so.

Where can I find more info?
The NeoKeys campaign ends in 13 days and they are working towards their funding goal of $2,000. You can pre-order a NeoKeys pack of 2 keys starting at $10. After the NeoKeys campaign ends, rewards are estimated to start shipping in December 2017. Visit their Kickstarter page for all the details.

Filed in categories: News

Tagged:

WESN Titanium EDC pocket knife, BAT Trident multi-tool, handmade Kukri pocket knife, and more – Notable crowdfunding campaigns originally appeared on The Gadgeteer on November 8, 2017 at 9:00 am.

Note: If you are subscribed to this feed through FeedBurner, please switch to our native feed URL http://the-gadgeteer.com/feed/ in order to ensure continuous delivery.
The Apple Watch band with a Twist-O-Flex!

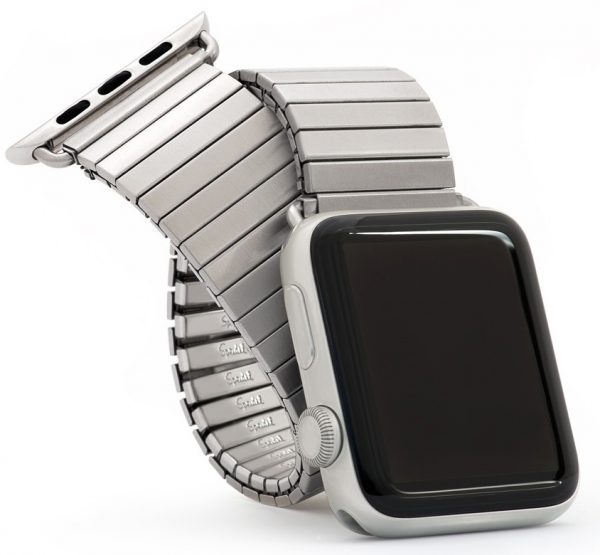
Gadgeteers of a certain age will surely remember Speidel watchbands.  I owned many Speidel expansion bands for various watches over the years.  I was recently pleasantly surprised to see that Speidel is making bands for the Apple Watch.  These retro-cool bands are made of stainless steel for high strength and resistance to water and sweat, which would make them suitable for workout wear, but they are sophisticated enough to fit in with a business suit.  The Speidel Twist-O-Flex band is available in small, medium, or large sizes for both the 38mm and the 42mm Watches, and they are available in satin black, silver aluminum, or brushed stainless finishes. The Speidel Twist-O-Flex Band for the Apple Watch is available for $50.00 at Speidel and Amazon.

Filed in categories: News

Tagged:

The Apple Watch band with a Twist-O-Flex! originally appeared on The Gadgeteer on November 8, 2017 at 8:00 am.

Note: If you are subscribed to this feed through FeedBurner, please switch to our native feed URL http://the-gadgeteer.com/feed/ in order to ensure continuous delivery.
LandingZone 12-inch MacBook docking station review

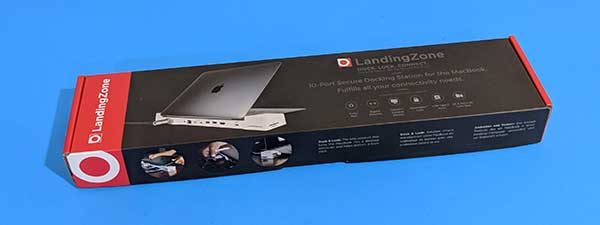
I’m not a stranger to LandingZone docking stations. I had their 15-inch MacBook Pro docking station on my Julie’s Favorite Gear page for 3 years. But then I downsized from the 15-inch MacBook Pro to a 12-inch MacBook and could no longer use it. To make matters worse, a docking station is a must-have accessory for the 12-inch MacBook because it only has one USB Type-C port that is used for everything. Luckily, LandingZone makes a docking station for Apple’s smallest MacBook. Let’s take a look.

What is it?

It’s a docking station for the 12-inch Apple MacBook (released in 2015 – present) that provides 11 ports and connections to address the fact that the MacBook only has one USB Type-C port that is used for connecting devices and for charging the laptop.

Design and features

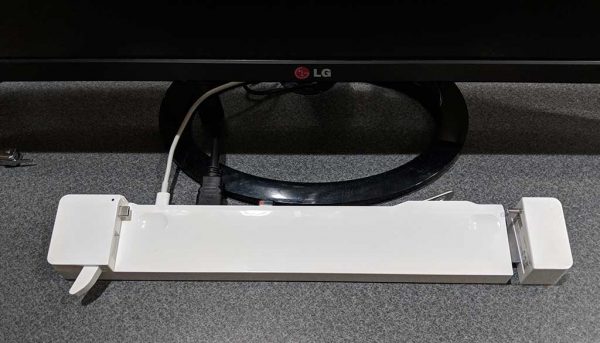
The docking station is made of shiny white plastic with two connectors that plug into the MacBook when it’s docked. There’s the USB Type-C connector that plugs into the left side of the laptop and a 3.5mm headphone plug on the right side of the MacBook.

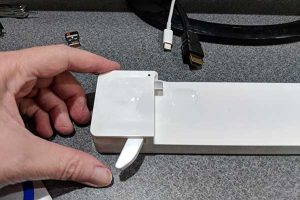
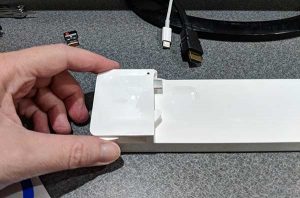
The right side of the docking station slides out to make it easier to position the MacBook in the docking station.

The ports are located on the back edge of the docking station. From left to right, there’s a Kensington security slot that can be used to secure the laptop with a cable, a 3.5mm audio out port, Gigabit Ethernet port, USB 3.1 Type-C high speed charging port, another USB 3.1 Type-C port, 2 USB 2.1 ports (one is a high speed charging port), an HDMI port (that supports 4K monitors at a resolution of 3840 x 2160) and the USB 3.1 Type-C port that charges the MacBook when it’s docked. You’ll need to use your MacBook power adapter for charging.

The docking station is designed so that you can only charge one smart device at a time and it is not recommended to plug in more than two high power or high transfer devices at once like a smartphone and external hard drives.

I’ve been using the LandingZone 12-inch MacBook docking station with an LG 29-inch monitor which plugs into the HDMI port on the back of the dock.

To dock the laptop, you just slide out the right side of the dock.

Then you plug the audio plug on the right side of the docking station into the MacBook’s audio port on the right side and line up the USB Type-C connector on the left side and slide both ends securely in place.

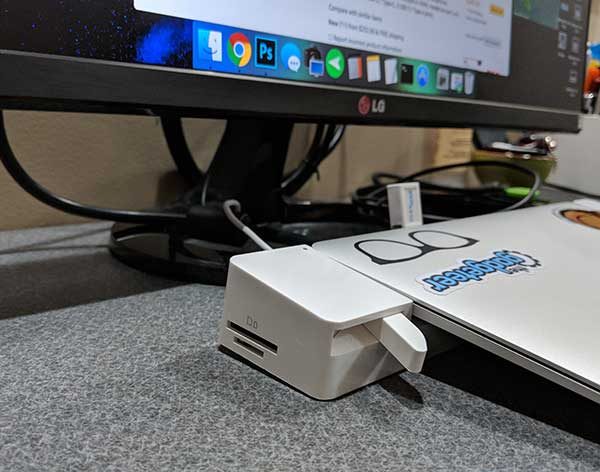
Here is my 12-inch MacBook docked and ready to be used. There’s a small status LED on the left side of the docking station near the USB Type-C port. This LED shows the MacBook’s battery charging status. It will glow yellow while charging and green when the battery is fully charged.


Undocking is just as easy. All you do is press the release lever on the left side of the dock which pushes the MacBook to the right and disengages the USB Type-C connector from the left side of the laptop. You can then slide out the right side of the docking station to unplug the audio connector. The docking and undocking procedure is smooth and easy.

The LandingZone 12-inch MacBook docking station even has a built-in card reader for SD and microSD cards. But from my testing, it looks like you can only use one of the slots at a time. If you have a card in the SD card slot and insert one in the microSD card slot or vice versa, it will automatically eject the other card.

During my testing of the LandingZone 12-inch MacBook docking station, I had no problem using it with a monitor and a USB dongle connected keyboard. I also used the high-speed USB Type-C port to charge my Pixel 2 XL and connected other accessories with no issues.

Final thoughts

I love my 12-inch MacBook but connecting accessories and peripherals is a pain in the rear due to it only having one port. the LandingZone 12-inch MacBook docking station comes to the rescue and solves that issue easily and elegantly. This docking station gets two thumbs up from me and easily earns a spot on my favorite gear page.

Source: The sample for this review was provided by LandingZone. Please visit their site for more info and Amazon to order.


Product Information

Price: $229.00
Manufacturer: Landingzone
Retailer: Amazon
Requirements:
  • 12-inch Apple MacBook 2015 – present
Pros:
  • Adds multiple ports to the 12" MacBook
  • Easy to use
Cons:
  • Can only use one of the card reader slots at a time

Filed in categories: Reviews

Tagged: ,

LandingZone 12-inch MacBook docking station review originally appeared on The Gadgeteer on November 7, 2017 at 1:26 pm.

Note: If you are subscribed to this feed through FeedBurner, please switch to our native feed URL http://the-gadgeteer.com/feed/ in order to ensure continuous delivery.