Saddleback Leather Company just got game


Saddleback Leather Company is very well known for their “they’ll fight over it when you’re dead” leather bags and gear. But you probably would not have guessed that one of their newest products is a set of dominoes. Unexpected? Yes. But not unexpected is that the dominoes are made of leather. 

This full set of 28 dominoes is made from thick vegetable tanned carbon black bull leather that has been cut so the dominoes can stand on end in either orientation.

Pounded into the center of each domino is a metal spinner. I’m not a domino aficionado, so I don’t know if there is a significance to the center spinner, but it sounds cool.

The set of leather dominoes is housed in a box made from one piece of thick leather that is stitched with boot cord.

Like most of Saddleback Leather’s products, the price will make you catch your breath, but also like Saddleback Leather products, you’ll need need to replace this set because it will last longer than you will.

Head over to Saddleback to check out their leather domino set which is priced at $189.

Filed in categories: News

Tagged:

Saddleback Leather Company just got game originally appeared on on July 5, 2017 at 10:07 am.

Note: If you are subscribed to this feed through FeedBurner, please switch to our native feed URL http://the-gadgeteer.com/feed/ in order to ensure continuous delivery.

Wemo Wi-Fi Smart Dimmer Light Switch review


As I slowly add parts to automate my home, I’m always interested in the gadgets that are being released to make life easier or… just cooler.  The WemMo Dimmer is one of those devices that just makes sense. 

The dimmer arrived in, okay, I’m man enough to admit, sexy packaging. Outside, the box is your run-of-the-mill cardboard color with some white graphics showing the WeMo logo, a line drawing of the dimmer, and a diagram of “suggested†dimmer settings with such settings as “3 am  bathroom run.†  It made me smile. Inside, the box is an almost shocking shade of green. A green that could wake up a sleepy Gadgeteer! Lots more with graphics adorn the tri-fold enclosure.  Opening the package reveals the elegantly designed dimmer switch and a slot marked “get set.â€
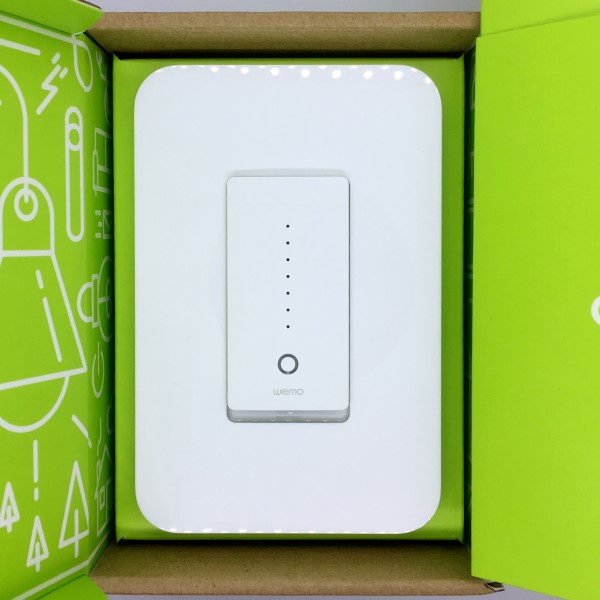
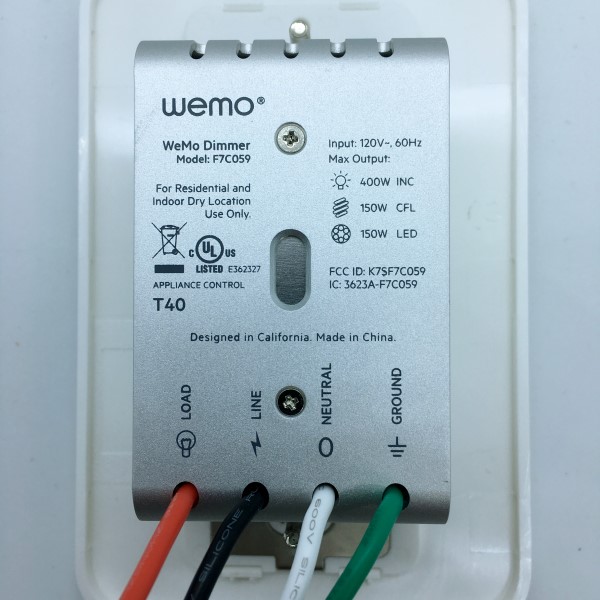
Wemo’s “Let’s go†manual is a comprehensive instruction manual for installing the dimmer. Graphics and text are easy to understand, waking an installer, even a novice, through the sometimes frightening aspects of home wiring this installation requires. The kit even includes the wire nuts and labels to make sure (no pun intended) wired don’t get crossed.

I had no trouble identifying the wiring and what needed to be done to replace a hallway ceiling lamp switch, probably the most often used switch in my home. Turning off the circuit breaker, I removed the old-style switch and wired the WeMo. One note of caution: the Wemo Dimmer is considerably more bulky that the switch it’s replacing. If there are additional wires in the back of your electrical switch box, you might have a challenge fitting everything back in. Tucking the wires back as far as they will go helps. Make sure you don’t pop the wire nuts off when you do this or you will likely get a surprise when you turn the breaker back on. Of course, if you’re uncomfortable doing this wiring yourself, ask a handy friend or hire a professional. Above all, please be careful.
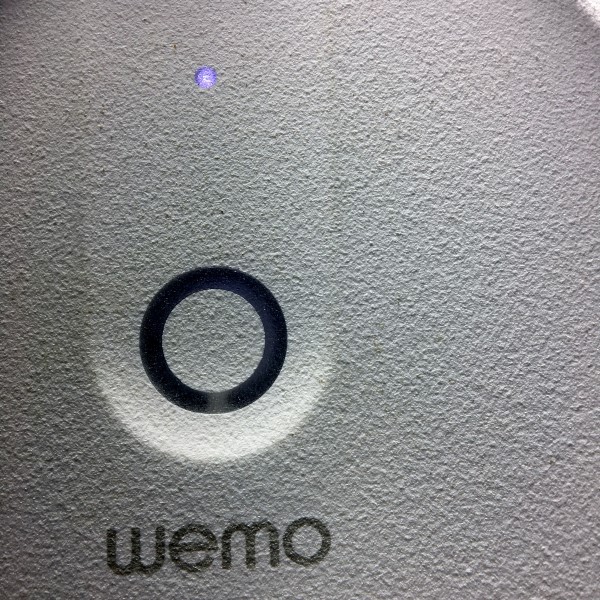
Once the switch was in and the juice turned back on, the Dimmer flashes some funky disco lights and settles into a flashing blue. I downloaded the app and followed the instructions from the manual. Similar to many typical smart devices, my phone connected to the Wemo Dimmer’s Wi-Fi and walked me through setting my bulb type, pairing with Alexa and connecting to my home network. At no point did I feel lost and the entire process progressed very smoothly.

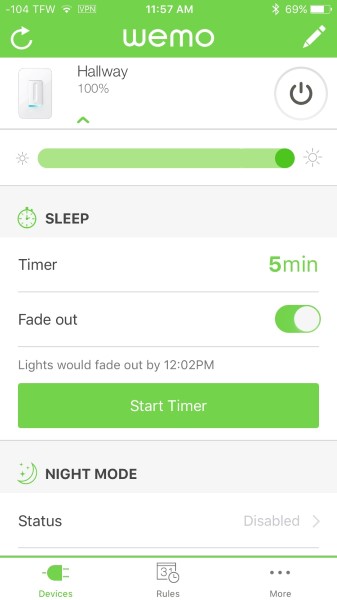
Now the fun part… Now that the dimmer was paired with Alexa, I could issue voice commands to turn on, off or even set a brightness percentage. Pretty slick! I fiddled around with the app and found I could access any lamp function I desired on my home network and through cellular 4G with very little lag. I even connected through a VPN in Thailand and found the same, fast, results.

Moving on, I was able to set timers, set the app to turn off the light after a specific time, and put the dimmer into “Away†mode to randomize turning the light on and off for home security. The app also connects to IFTTT, but I have yet to see what goodies I can find. It seems Wemo really thought things out. Well done.
So far, I am thrilled with the ease of use, functionality, and reliability of the Wemo Wi-Fi Smart Dimmer Light Switch. Given the opportunity, I would gladly replace every switch I have with them.

Source: The sample for this review was provided by Wemo. Please visit their site for more info and Amazon to order.


Product Information

Price: $79.99
Manufacturer: Wemo
Retailer: Amazon
Pros:
  • Well written directions
  • Simple setup
  • Great connectivity
  • Lots of functionality options
Cons:
  • Expensive

Filed in categories: Reviews

Tagged: ,

Wemo Wi-Fi Smart Dimmer Light Switch review originally appeared on on July 5, 2017 at 8:46 am.

Note: If you are subscribed to this feed through FeedBurner, please switch to our native feed URL http://the-gadgeteer.com/feed/ in order to ensure continuous delivery.

Julie’s gadget diary – I returned the LG G6 and even I’m surprised by the phone I’m using now


Are you confused by the title of this post because you remember that I just purchased an LG G6 a few weeks ago? It’s true, I did buy one and I enjoyed using it… for awhile. Then a few bugs crawled in that annoyed me enough that I decided to return the phone while I was still within my 30-day return window with B&H Photo. The problem is that I had already sold my Nexus 6P. So I didn’t have another phone to use while I figured out what to get next. 

I tried putting my Verizon SIM into my ancient LG G3 and it complained that I had no service. So I tried an even older iPhone 4S and had the same result. I came to find out later that older phones like the LG G3 and iPhone 4S will not work with the newer SIM cards due to not being able to work with 4G LTE.

Not having a working smartphone would normally not have caused me to panic had it been a few weeks prior, but I had also recently disconnected my landline phone at home meaning that without a smartphone, no one could contact me.

First I thought about the higher end Android phones currently on the market that I might want to buy. The main ones I considered were the Samsung Galaxy 8, and the Pixel XL. Since I’m not a fan of the S8’s curved screen, I put an X through that choice. Then I gave some thought to the Pixel XL and although that would be the best choice for an Android fan like myself, I just couldn’t get excited about buying one.

So what did I do? I bought an iPhone 7 Plus and I’m as surprised by that as you probably are considering my last attempt to switch from Android to iOS failed 9 months ago with an iPhone 7. But this time is different for two reasons.

First of all, I don’t have any other Android phones to fall back on right now. So that means that I am forced to give the switch a better effort than I did the last time.

Secondly, I am ready for something different. Even though I always harp on the fact that Apple won’t let you customize your home screens like Android does, and that they lock down certain features like NFC, and their phones don’t have Qi wireless charging, I have to be honest with myself that I’ve been living without Qi charging for the past year with the Nexus 6P and I don’t use NFC at all these days. I do like to customize my home screens by moving around icons and adding widgets, but I rarely pay attention to the widgets I use. So my arguments for not liking iOS limited customization features are weak.

This past Saturday, I walked into my local Verizon store and walked out a few minutes later with a black 128GB iPhone 7 Plus. I’ve been using the phone for 3 days now and I have almost zero buyer’s regret. I say almost zero because the price of the iPhone is stupidly expensive, which makes me feel guilty for buying something so pricey for myself.

After 3 days do I miss Android? So far the only thing I miss is being able to arrange the icons exactly the way I want on the screen with black spaces here and there. But other than that one thing, I’m actually really enjoying the iPhone which surprises the heck out of me.

I’m especially impressed by how well all my other devices like my Kevo lock are working with the iPhone. With Android, it would take minutes to lock or unlock the door using the app on the phone, but with the iPhone, it only takes about 15 seconds. I also noticed that my Flic wireless smart buttons react faster with the iPhone than with my past Android phones.

Am I going to stick with the iPhone this time? It’s still really early in the switch, but so far it’s looking good!

Filed in categories: Articles

Tagged:

Julie’s gadget diary – I returned the LG G6 and even I’m surprised by the phone I’m using now originally appeared on on July 4, 2017 at 5:21 pm.

Note: If you are subscribed to this feed through FeedBurner, please switch to our native feed URL http://the-gadgeteer.com/feed/ in order to ensure continuous delivery.

Look! Down on your feet! It’s a bird, it’s a plane, it’s caped socks! Wait what?


I believe that there’s a superhero in each one of us and now is the time to put on a cape and show the world! But if you’re not quite ready to come out of the closet… er, phone booth. Consider these fun superhero caped socks from Bioworld that will let you keep your secret identity safe.

These knee-high acrylic blend socks are available in a variety of styles, from Superman to Wonderwoman, Batman, Spiderman, and more.

The price per pair of Bioworld socks varies depending on the style and size, but most of them are less than $9 a pair through Amazon. Go be super!

Filed in categories: News

Tagged:

Look! Down on your feet! It’s a bird, it’s a plane, it’s caped socks! Wait what? originally appeared on on July 4, 2017 at 11:25 am.

Note: If you are subscribed to this feed through FeedBurner, please switch to our native feed URL http://the-gadgeteer.com/feed/ in order to ensure continuous delivery.

Mychanic Blade Multi Light rechargeable work light review


I may have a flashlight problem.  No, I definitely have a flashlight problem!  Why can’t someone make the perfect light? I believe there is no such thing because every situation calls for something different. This time, I get to try out the Mychanic Blade Multi Light, a rechargeable light that flexes to your needs.

  • Weight: 1.4 lbs
  • Blade: x 7″ tall 1 1/2″ across x 5/8″ deep
  • Extended: 17.5″ tall x 2″ across x 2″ deep
  • Folded:  10″ tall x 2″ across x 2 1/4 deep
  • LI-Ion rechargeable battery with micro USB AC charging adapter
  • Durable ABS housing
  • Low heat output
  • Patent pending

My sample didn’t come in retail packaging.  I received a sheet of instructions, wall charger, and microUSB cable for charging.

You can use any microUSB cable (as I did here).  Note the red LED that indicates charging.  It turns green when full. Why can’t all manufacturers do it this way?

There’s a hook that at first, I could not figure out.  To extend the hook, you push IN to the light. I naturally tried to gorilla-pull the hook out, to no avail.

There’s also a magnet along the green rubbery strip where the microUSB is.  The problem?  Once you’ve stuck it on a surface, you’ve just covered up the power button.

There are four different lighting modes:  Full bright (250 lumens), Low (difficult to photograph!), red flashing, and directional.  The direction pattern consists of one red LED flashing in one direction, sequentially.

Here’s the light attached to the underside of a hood using the magnets.

And, here’s the light again, this time hung by the hook.

How long does the battery last?  On the brightest setting, I got 4 hours.  It’s likely longer on the low setting.

My only complaint about the Mychanic Blade Multi Light is that there’s no obvious way to have it sit upright on a desk or flat surface.  It may take you a moment of twisting and flexing to figure it out.  The magnet isn’t the strongest, so a bump could dislodge the lamp.  I’m still slightly embarrassed about the hook thing, too.

What I do like is the light weight (1.4 lbs), and the USB charging. The red/green LED indicator is simple genius that I wish was more commonplace.

Source: The sample for this review was provided by Mychanic. Please visit their site for more info.


Product Information

Price: $34.99
Manufacturer: Mychanic
Requirements:
  • Charges via microUSB
Pros:
  • Light weight, four light modes, magnet and hook mounts. MicroUSB rechargeable.
Cons:
  • Not totally obvious how to get the light to stand on a flat surface without some trial and error.

Filed in categories: Reviews

Tagged: ,

Mychanic Blade Multi Light rechargeable work light review originally appeared on on July 4, 2017 at 8:22 am.

Note: If you are subscribed to this feed through FeedBurner, please switch to our native feed URL http://the-gadgeteer.com/feed/ in order to ensure continuous delivery.