Porsche brings the power and performance of a sports car to the home theatre with their 911 soundbar

I’ve been fascinated with Porsche’s 911 sports car since I was old enough to even think about driving. I even owned a scale die cast model in midnight black. So when I saw that Porsche had designed a soundbar using parts from a 911 you can bet it peaked my interest.

I never could afford that 911 I dreamed of as a kid and quite frankly even the sound bar is a little too rich for my blood. But, it’s oh so cool! Porsche Design took the original rear silencer and twin exhaust from a 911 GT3 and used them to resonate sound. The rear silencer acts as an onboard subwoofer. The result is a deeper, measurably louder audio experience with a higher maximum volume. Design wise it’s awesome. The look is raw, right down to the visible soldering marks on the rear silencer and the glossy black of the twin exhaust. A real collector’s piece to be sure. 

The 2.1 virtual sound system has a powerful 200-watt output and is loaded with features. A Dolby Digital decoder, DTS TruSurround, Bluetooth 3.0, a LED display and more. As far as connections go, there are 2 digital inputs (coaxial and optical), an analog input and a Subwoofer output in case you want to add your own subwoofer to the mix. The soundbar also comes with a basic remote control.

The Porsche 911 soundbar can be yours all for the low, low price of $3500. After you pick your jaw up off the floor, head over to their website for more info. Vrooom! Vrooom!


Filed in categories: News

Tagged:

Porsche brings the power and performance of a sports car to the home theatre with their 911 soundbar originally appeared on on July 11, 2017 at 7:00 am.

Note: If you are subscribed to this feed through FeedBurner, please switch to our native feed URL http://the-gadgeteer.com/feed/ in order to ensure continuous delivery.

SnapPower SwitchLight review

I love products that are simply designed, simply packaged, and easily installed. Products from SnapPower tick all three of those boxes. Three years ago I reviewed their GuideLights outlet covers plates which I still use today and today I’m going to show you their newer SwitchLight covers.

What is it?

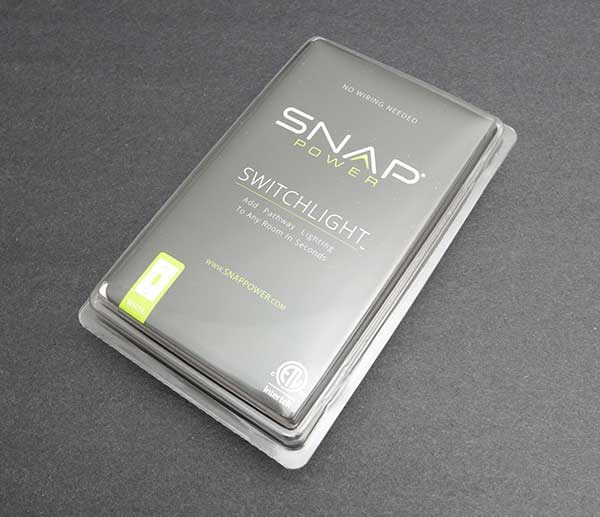
The SnapPower SwitchLight is a cover that turns your ordinary switch light cover into a night light without any special wiring, batteries or a complicated installation.

What’s in the package?

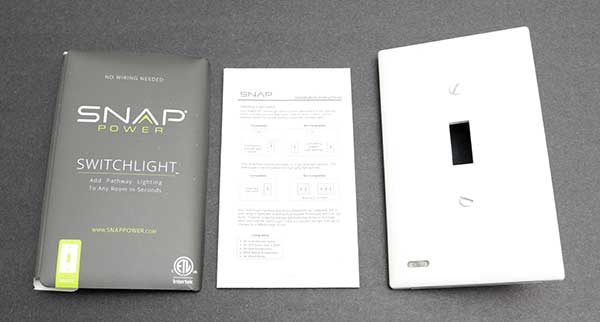
SnapPower SwitchLight
Instructions

Design and features

SnapPower SwitchLights are available in two styles that include the Toggle style and a Decor style. They also come in white, light almond, and ivory colors. I was sent a Toggle style in white.

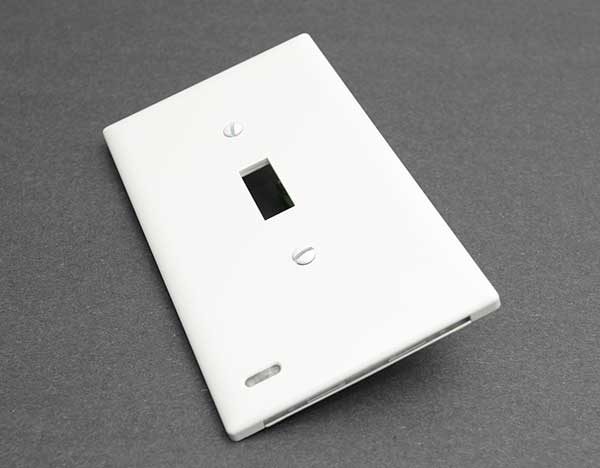
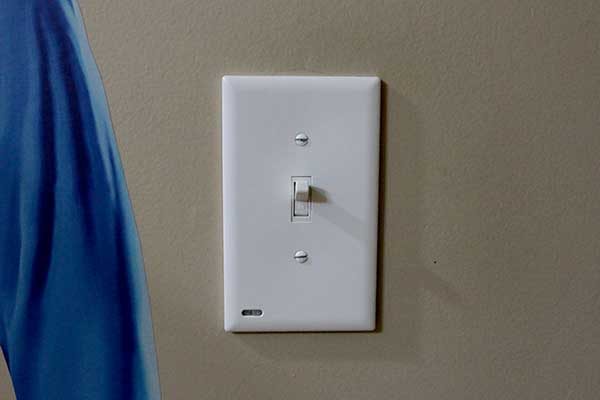
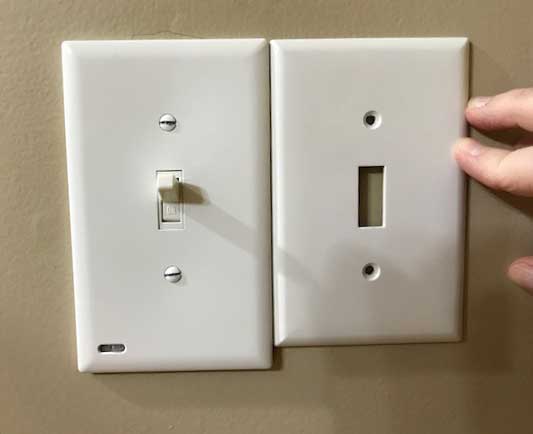
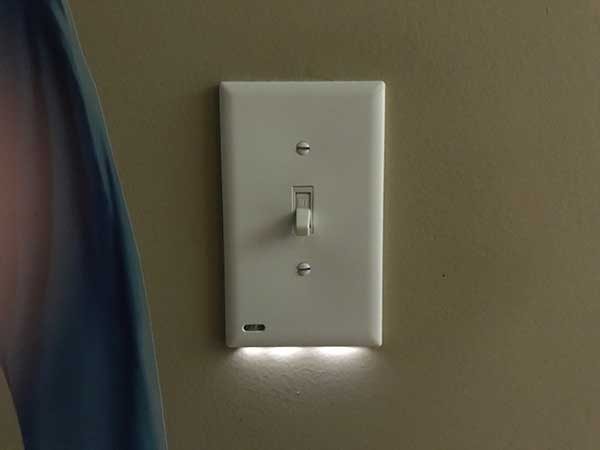
The SwitchLight looks like an ordinary switch light cover until you look closely. Then you’ll notice the small switch / ambient light sensor in the lower left corner and a row of LEDs along the bottom edge of the cover.

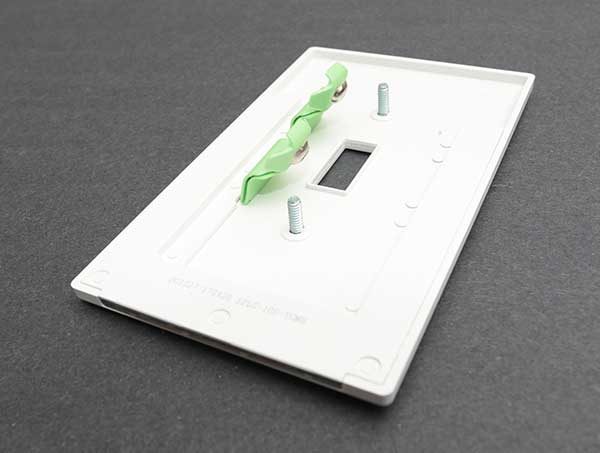
When you flip the SwitchLight over, you’ll see two tabs with electrical contacts on the end. These expertly designed tabs make installation literally a snap.

Installation

Installing the SnapPower SwitchLight will take you less than 5 minutes. All you will need is a light switch in a room that has a light fixture that is controlled by just one switch. You’ll also need a flat head screwdriver, a flashlight, and you’ll need to know where your electrical panel is located.

Step 1. Turn off the power to the light fixture by flipping one of the switches in your breaker box / electrical panel.

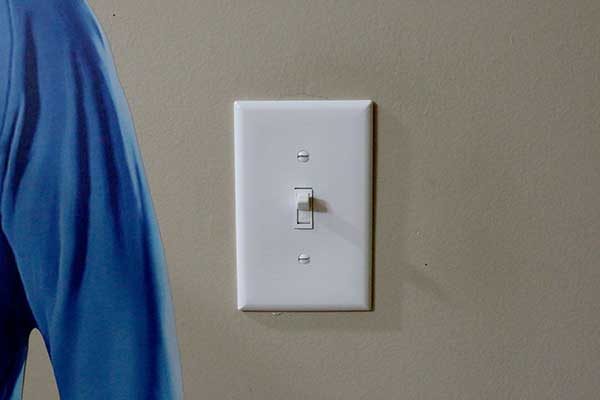
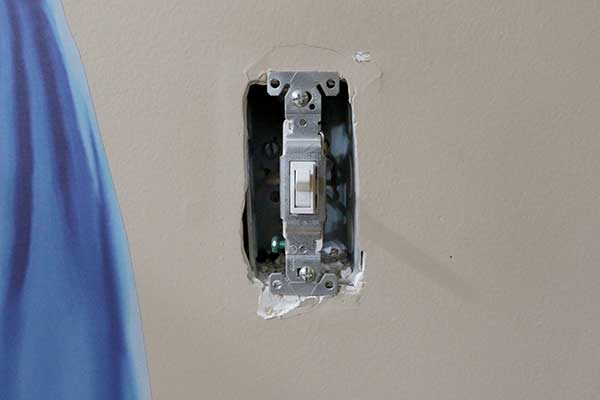
Step 2: remove the existing switch cover.

When I did this, part of the paint and drywall chipped off and I was immediately dreading the annoyed looks that I knew I would be getting from Jeanne as soon as she noticed that I damaged the wall.

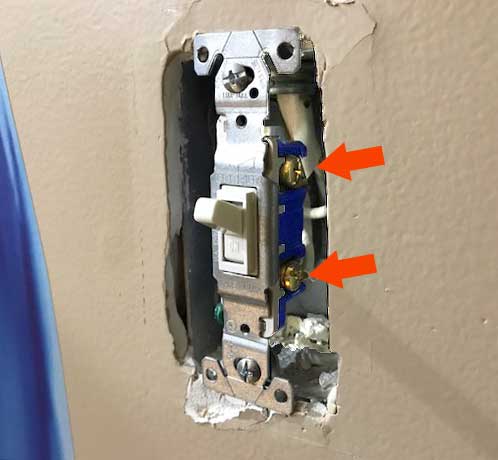
Step 3: Notice the screws on the side of the switch. The tabs on the SwitchLight press against these screws to power the built-in LEDs. Genius right?

Step 4: Snap the SwitchLight in place.

Step 5: Tighten the screws.

Step 6: Turn the power back on.

That’s it!

I was overjoyed that the SnapPower SwitchLight plate is slightly longer than the original switch light cover. The extra length hides the chipped paint. Crisis averted!

It’s time to try it out!


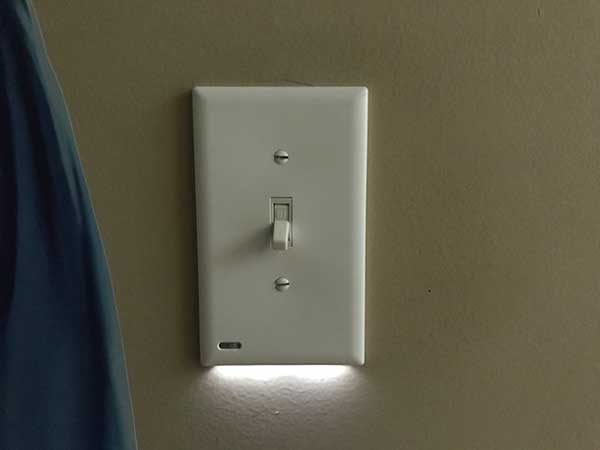
Turn off the light and make sure the switch in the lower left corner is set to low or high brightness instead of off. Then as the room gets darker, the LED lights along the bottom edge of the SwitchLight cover will start to glow. The LEDs turn off as the room gets brighter. Simple!

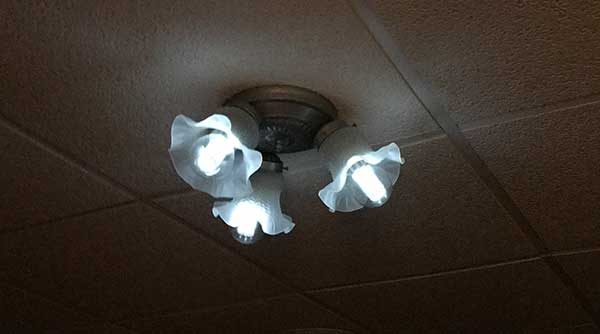
However, I did notice something strange with the SwitchLight cover. If I have the switch set to bright and turn off the overhead light fixture by toggling the switch where the SwitchLight is installed, the LED bulbs in the fixture will still glow dimly. The image above makes the bulbs appear brighter than they are in real life. If I move the switch to the lower brightness setting, this doesn’t happen.

Final thoughts

I think the SnapPower SwitchLight is a great way to add ambient night lights to a room, hallway, etc., without complicated wiring or electrical know-how. Installation is incredibly fast and easy. The LEDs in the SwitchLights should last for 25 years and will only cost about 10 cents a year to power. You can’t beat that!

Source: The sample for this review was provided by SnapPower. Please visit their site for more info and Amazon to order.


Product Information

Price: $17.00
Manufacturer: SnapPower
Retailer: Amazon
Pros:
  • Fast and easy to install
  • Simple "night light" without batteries or wiring
  • 3 light settings
Cons:
  • High setting causes LED bulbs in ceiling fixture to continue glowing (dimly)

Filed in categories: Reviews

Tagged:

SnapPower SwitchLight review originally appeared on on July 10, 2017 at 5:25 pm.

Note: If you are subscribed to this feed through FeedBurner, please switch to our native feed URL http://the-gadgeteer.com/feed/ in order to ensure continuous delivery.

Julie’s gadget diary – Another successful gadget giveaway day has just ended

Being the Gadgeteer certainly has its perks. I’m very lucky that I get a chance to play with and test the latest and greatest gadgets. But what do I do with all those great gadgets and gizmos once my reviews have been published? I continue to use some products, but the ones I don’t use end up cluttering the shelves of Gadgeteer Headquarters (otherwise known as the basement office of my house). When I can no longer see the floor in the office, it’s time for a gadget purge and another gadget giveaway day at Cummins Inc. (otherwise known as my day job).  

Once or twice a year I fill storage bins with forgotten and unused products sitting on my office shelves, in drawers, in baskets under the desks, and even sitting in the middle of the floor.

That’s what I did this past weekend and was able to fill three large storage tubs with goodies. Then yesterday, Jeanne and I brought the tubs into work so they would be ready for another gadget giveaway day. I always like to bring the items in on a Sunday and then have the giveaway bright and early Monday morning.

The image above shows the bins under my desk filled with gadgets that are ready for a new home.

Before the gadgets are set out. It’s still dark outside because I get to work at 6 AM each day 🙂

At 8 AM I get some helpers to help me move the bins and set out all the items. I then take a picture and give the thumbs up for everyone to grab what they want.

It’s a lot of fun to watch everyone’s excitement as they look through the items and ask me “what’s this?”, “how does this work?”.


My co-workers look forward to gadget giveaway days as much as I look forward to clearing the clutter out of my office!

After 30 minutes, the majority of items are gone and by tomorrow, almost everything will be gone. If anything is left after that, I usually take the leftover items and put them in the vending area with a FREE sign and within just a few minutes, they will be gone too.

It feels good to free up some shelf and floor space in my office, but I know that will be short lived.  The life of a Gadgeteer is tough, but someone has to do it! 😉

Filed in categories: Articles

Tagged:

Julie’s gadget diary – Another successful gadget giveaway day has just ended originally appeared on on July 10, 2017 at 9:51 am.

Note: If you are subscribed to this feed through FeedBurner, please switch to our native feed URL http://the-gadgeteer.com/feed/ in order to ensure continuous delivery.

SZNS Burnt Sienna wallet review


The popularity of minimalist wallets is driving innovation in this field, providing the people with what they have been craving – the downsizing of the traditional men’s and women’s wallets of the past. I’ll admit that I’m one of those people who has been craving a smaller wallet. This time I’m reviewing the SZNS (pronounced “seasons”) Burnt Sienna wallet. Thus far, I’ve found that it is an attractive minimalist wallet for today’s professional, it’s a nice size for credit cards and business cards, it’s made of very thin leather to minimize thickness, and has RFID blocking in each of its three pockets. However, because it is made of very thin leather, I wonder about the longevity of the wallet.

The SZNS wallet came in an attractive black box with a sliding drawer.

The wallet also came with an SZNS decal and a microfiber cloth to clean the wallet.

Design & Build Quality


First Impression: One of the first things that you notice about the SZNS Burnt Sienna wallet is that it holds your cards and paper money vertically. I love that feature. The front and back of the wallet are similar. Each side has a pocket with a diagonal opening to insert cards and/or banknotes. The front of the wallet displays the “SZNS” logo located along the bottom right corner and the back of the wallet contains a very nice self-retracting pull tab used to extract the cards or banknotes in the center pocket.

When I received the SZNS wallet, I took some pictures of it while it was empty. Then after having inserted all my cards and money into the wallet, I noticed a 5 mm slit in the leather above the logo that I don’t think was there before inserting my cards. It was such a clean cut that it was difficult to see, but it was there. I’m not sure how it happened since I hadn’t even started using the wallet yet – I only inserted my cards and money. However, Mr. Amir Sigari, the co-creator of the SZNS wallets with his mother, was very courteous and very quickly sent out a new wallet. They offer free returns on wallets with defects and will exchange it or give you a full refund. They also offer a two-year warranty on this wallet

Leather: The wallet is made of semi-aniline leather. What is that? Pure or full aniline leather is a full grain leather that has been dyed throughout and “has not received any coating of pigmented finish” (By the way, you want full grain leather as opposed to top grain, genuine leather, or bonded leather). Semi-aniline leather is also a full grain leather that has been dyed throughout like aniline leather, however, semi-aniline leather additionally has a “small quantity of pigment, not so much as to conceal the natural characteristics of the hide” (from leatherusa.org) which gives it a more consistent look, protects the leather from some stains, and makes it more durable. Since this wallet has a small amount of pigment on the surface, it will not develop a patina like full aniline leather wallets.

Thread: The thread used in this wallet is a thin a cotton/nylon thread. Although, according to Mr. Sigari, they intend on increasing the size of the thread in the future.


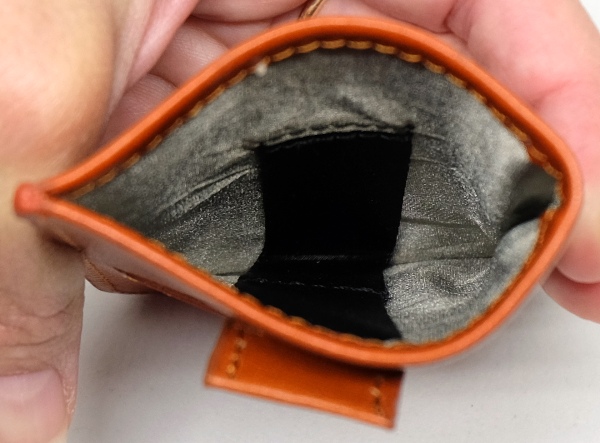
Lining: Each of the three pockets of the wallet is lined with a satin-like lining that incorporates RFID blocking. The above photo on the right shows how the center pocket has sewn into it a black elastic strap with a leather pull tab which extends through the top of the pocket to the back side of the wallet.

According to Mr. Sigari, “both the leather and the RFID blocking inner fabric are die cut by a large stamping machine, after that everything is done by hand.”

Size: The thickness of the wallet when it is empty is about 5 mm.

The wallet is about 4.25″ long (~11 cm). This is a good size to accommodate credit cards and especially business cards. 

When compared to the Benjamin Bott Chickadee leather wallet that I recently reviewed, the SZNS wallet is taller but about the same width. You can also tell the difference in the leathers and thread used, both of which are thicker in the Chickadee wallet.

Use


I placed two plastic cards in the front pocket and six cards (two plastic cards, 4 paper cards) in the center pocket. I also placed two plastic cards in the back pocket as well as some cash (two banknotes).

Extracting the cards from the center slot was easy with the self-retracting pull tab. It was also easy to extract the cards from the front and back of the wallet because they were exposed enough to do so. The wallet was tight when filled with all these cards/bills but not too tight to make extracting the contents really difficult and yet not too loose so that you would lose your money or cards.
When full, the wallet was a little less that 0.75 inches thick (or about 1.8 cm thick). The wallet fits well in my hand and comfortably carries everything that I need. It really does minimize the bulk of traditional wallets.

Final Thoughts

The SZNS Burnt Sienna wallet is a professional looking lightweight leather wallet. It has the benefit of having three pockets, each lined with RFID blocking material and is tall enough to accommodate business cards as well as credit cards and cash. I was able to insert all of my necessary cards without having to leave anything out (six plastic cards and four paper cards). The wallet was not too tight to make extracting the cards really difficult and yet not too loose so that I would lose cards or money. However, the wallet is made with very thin leather and thin cotton/nylon thread. In addition, the wallet has only a two-year warranty and it is my impression that the wallet may not last a lifetime.

When comparing the SZNS wallet to my two favorite wallets, the Benjamin Bott Chickadee wallet and the Garzini Essenziale Finestra wallet I find that I still prefer the other two. Even though the SZNS wallet has RFID blocking and a self-retracting pull tab, the Chickadee wallet is the best made and the most minimalistic of the three but I also love the design of the Garzini wallet for the accessibility of my cards and money.

Source: The sample for this review was provided by SZNS Apparel. Please visit their site for more info.


Product Information

Price: $45.00
Manufacturer: SZNS Apparel
Pros:
  • All three pockets are RFID blocking
  • Attractive wallet for today's professional
  • Tall enough to accommodate buisiness cards and credit cards
  • Easily accommodates six plastic cards and four paper cards
  • Not too loose or tight
Cons:
  • Leather is thin
  • Thread is thin

Filed in categories: Reviews

Tagged:

SZNS Burnt Sienna wallet review originally appeared on on July 10, 2017 at 8:00 am.

Note: If you are subscribed to this feed through FeedBurner, please switch to our native feed URL http://the-gadgeteer.com/feed/ in order to ensure continuous delivery.