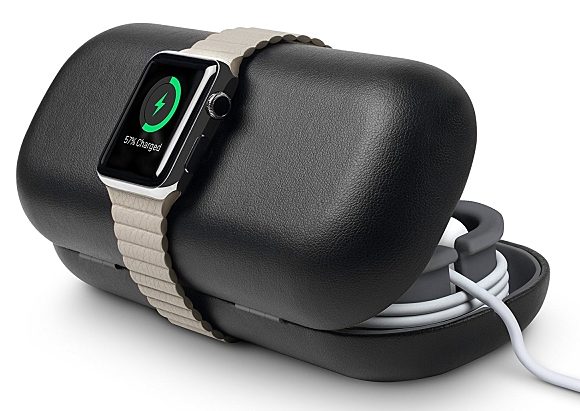
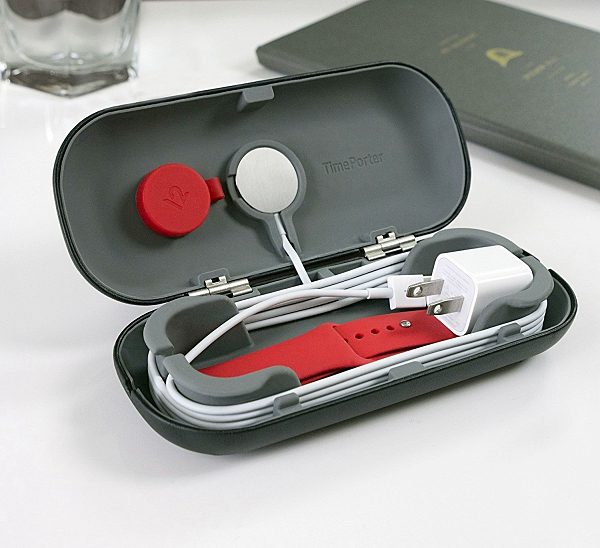
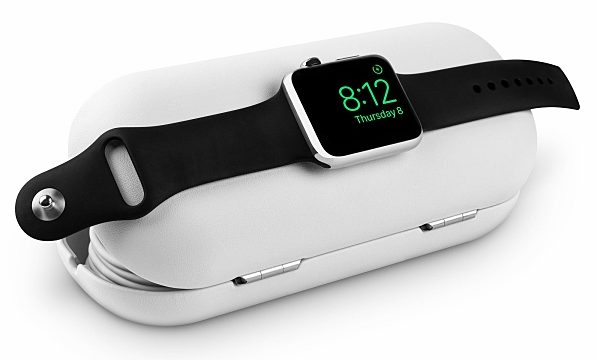
If one owns an Apple Watch then one can never have enough accessories to go with that Watch. Whether its extra bands or charging do-dads, Apple Watch accessories are almost as essential as the watch itself. The Twelve South TimePorter is an accessories tote, portable charger and travel stand for the Apple Watch. TimePorter holds the charging cable, USB power adaptor, extra band(s), and more in a neatly designed, silicone-lined case. To charge your Apple Watch simply pop the charging disc into the integrated opening inside TimePorter and drape the Apple Watch across the top.
The case opens to create a multi-angle travel charging stand. Perfect for viewing incoming alerts and notifications while your Watch charges. You can even rotate the watch and use it in nightstand mode.
A built-in spool neatly manages extra cable while charging, leaving you just enough to plug into the nearest outlet. TimePorter is the perfect bedside companion whether you’re traveling or just using it on your nightstand at home. The Twelve South TimePorter is available in black or white for $33.99 on Amazon.
Do you keep a fire extinguisher in your kitchen like safety experts recommend – and sometimes homeowner’s insurance policies require? If you have one, do you know how to use it? Or even how old it is? If you have a kitchen grease fire and don’t aim the spray from the extinguisher correctly, you can spray burning oil all over the kitchen and yourself. There are other ways to put out kitchen fires – baking soda and pot lids, for example – but you have to have them in easy reach to be effective. If you mount the red nylon packaging of a Kovenex fire retardant blanket near the stove, you’ll be able to extinguish that fire before you could find the fire extinguisher and pull out the pin.
The Kovenex blanket is a 35″ x 32″ piece of high-performance fabric with inherent fire-resistant, heat-blocking, burn-protection, and tear-resistant properties. Simply rip open the Velcro closure of the red mounting package, unfold the blanket, and place it over the fire to quickly put it out. The fabric is not chemically treated and doesn’t emit toxic fumes. It’s safe for contact with your skin and even protects your arms as you lay the fabric over the fire. In addition to smothering a fire, you could wrap the Kovenex blanket around someone as they escape from a fire.
With fire extinguishers, you have to worry about their fill level, but it’s never a problem with the washable and reusable Kovenex blanket. The Kovenex Home Safety Fire Blanket is $36.00 at The Grommet.
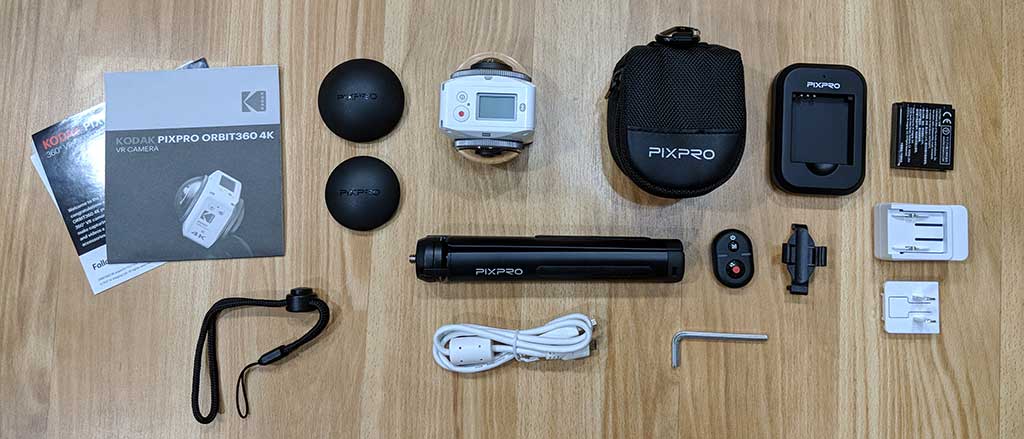
The Kodak Pixpro Orbit360 4K VR Camera is a consumer level camera that has been designed to let you get your feet wet in the world of VR/360 cameras in an easy and fun way. They sent me their Pixpro Orbit360 Satellite Pack that includes a collection of accessories. Let’s take a look.
What is it?
The Kodak Pixpro Orbit360 VR Camera is a 3 in 1 camera that can shoot 4K video like GoPro action camera, 4K 360-degree video, and 4K 180-degree video. Although it sports the Kodak brand, this isn’t actually a Kodak camera. It’s made by JK Imaging who is a licensee of the Kodak camera brand.
Hardware specs
Image Sensor A
Effective Image Sensor Pixels: 20.68 Megapixels
Focal Length: 1.633 mm
F number: F2.4
Lens Construction: 7 groups 8 elements
Focus: Fix Focus
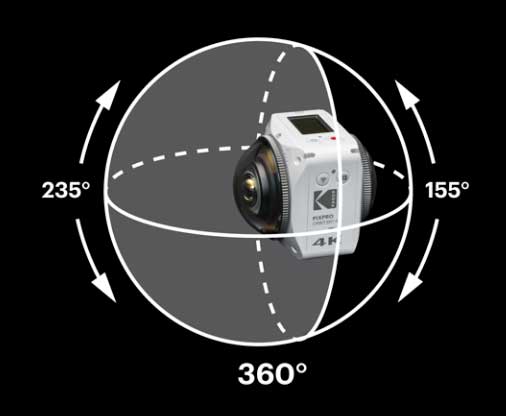
Field of View: Max. 197 Degree [For Front Mode (16:9)]
Max. 155 Degree [For VR Mode (2:1)]
Focusing Range: 30 cm — ∞
Image Sensor B
Effective Image Sensor Pixels: 20.68 Megapixels
Focal Length: 1.257 mm
F number: F2.4
Lens Construction: 7 groups 8 elements
Focus: Fix Focus
Field of View: Max. 235 Degree [For Front Mode (16:9)]
Focusing Range: 30 cm — ∞
Electronic Image Stabilization (EIS)
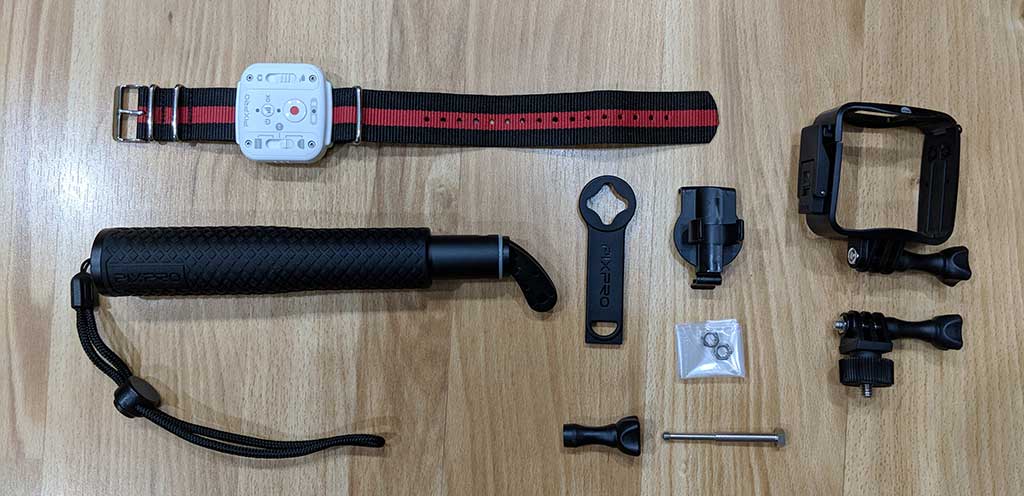
What’s in the box?
Kodak Pixpro Orbit360 4K VR Camera
Lens Covers
Protective Covers
Li-ion Battery + Charger
USB Cable + AC Adapter
Camera Carrying Case
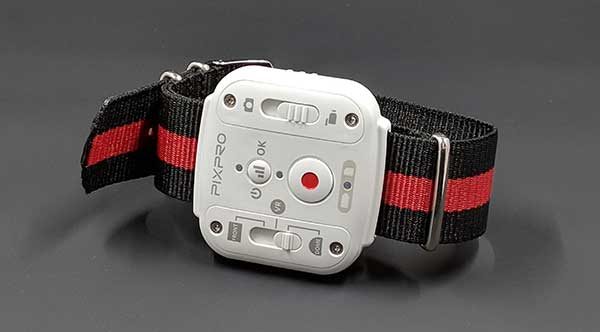
Wearable Remote Control, Mini BT Remote Control
Remote Control Mounts
Standard Housing
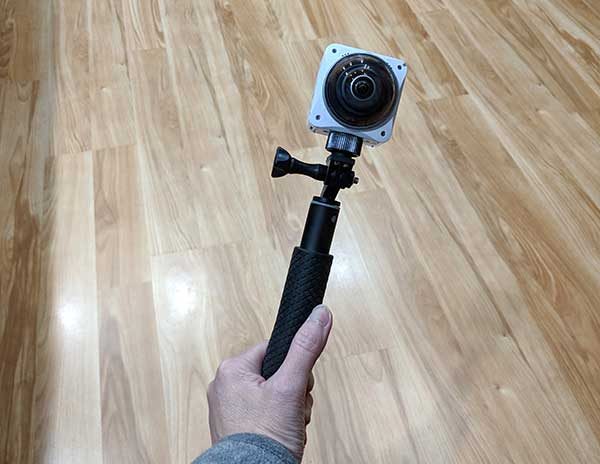
Selfie Stick, small tripod
Accessory Tool & Thumbscrew Adapter
Screw Mount
Cleaning Cloth
Quick Start Guide, Service Card, Online Company Store Card, Warranty Card, Team 360 Sticker
Design and features
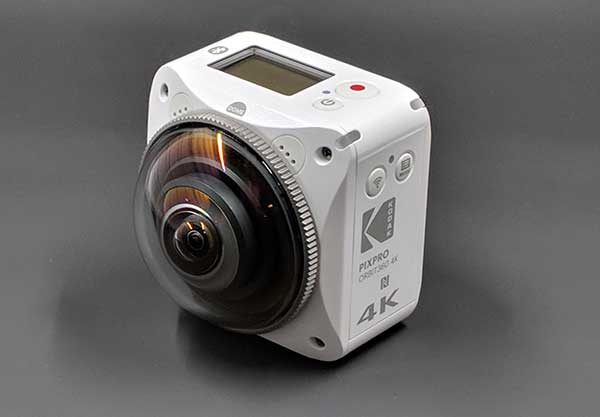
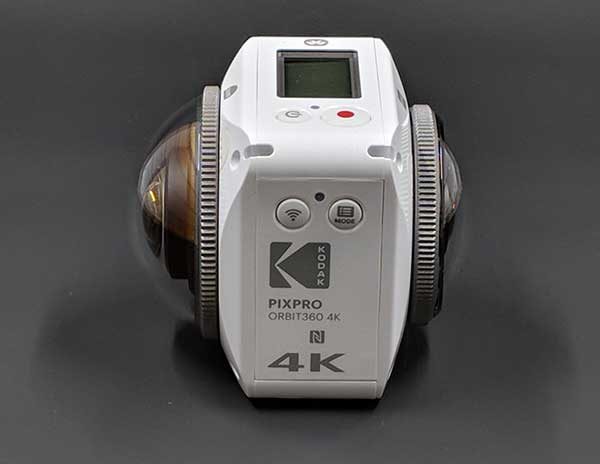
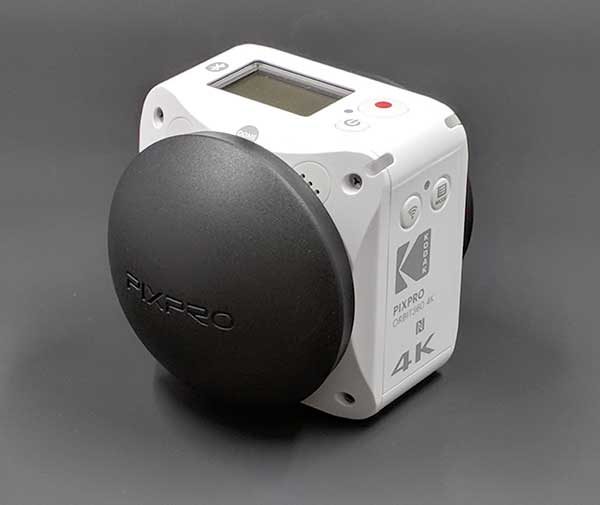
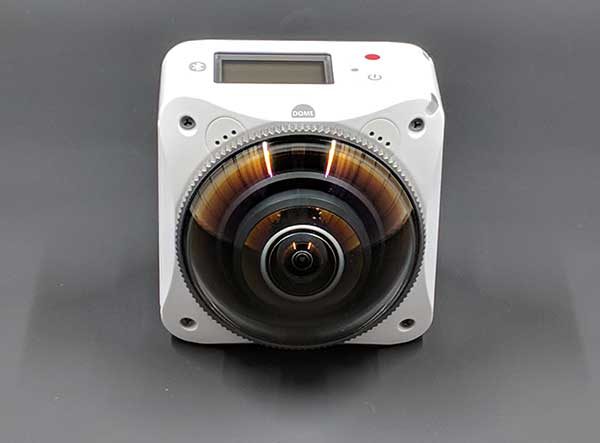
At first glance, the Pixpro looks like an action camera. But that’s just at first glance. It doesn’t take long to realize that the Pixpro is not an ordinary action camera. One give away is the dome-shaped lens cover that protects the 20.68MP lens.
But the Pixpro doesn’t have just one lens, it has 2! The larger dome-shaped lens (B) is the 235-degree lens and the smaller lens (A) on the opposite side is a 197-degree lens.
To get a 360-degree image, both lenses are used and the images/video are stitched together.
Included with the Pixpro are 2 lens covers that protect the lenses when the camera isn’t being used. The covers do not have a way to attach them to the camera itself or anything else, so it seems like it would be easy to accidentally misplace them.
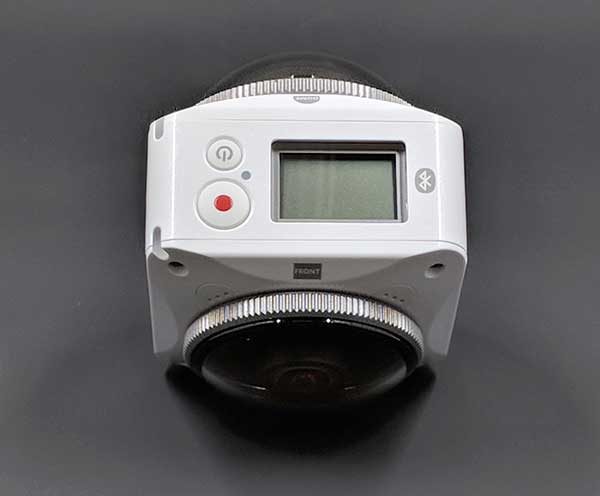
You would think that a 360-degree camera with two lenses would have all sorts of buttons, switches, dials, and displays, but the Pixpro has a relatively simple design.
On one side of the camera, you will find the WiFi toggle button and a menu button.
At 10 and 2 o’clock above each lens are built-in microphones and on each upper right corner is a status LED for each lens so that you will know which lens is recording video.
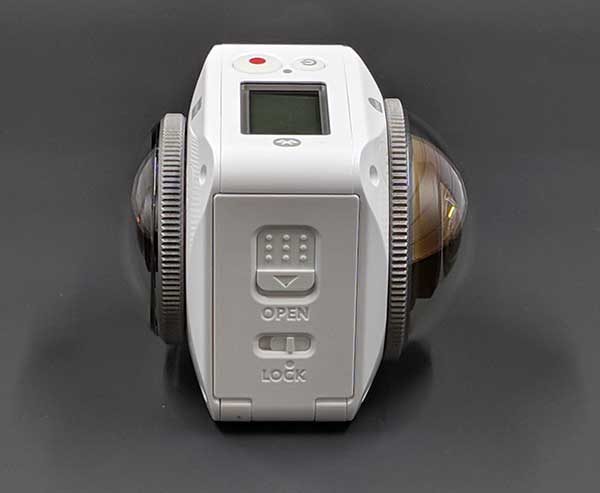
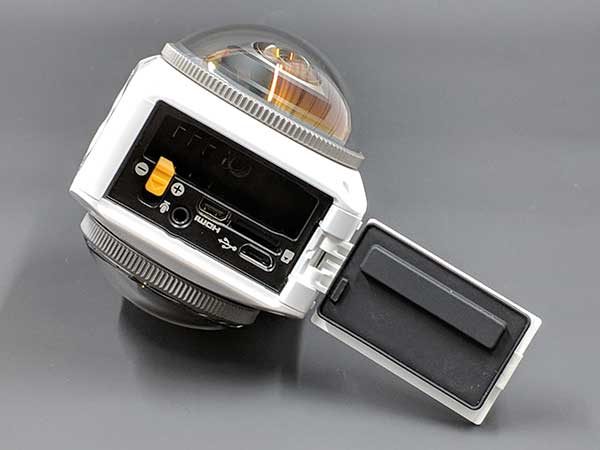
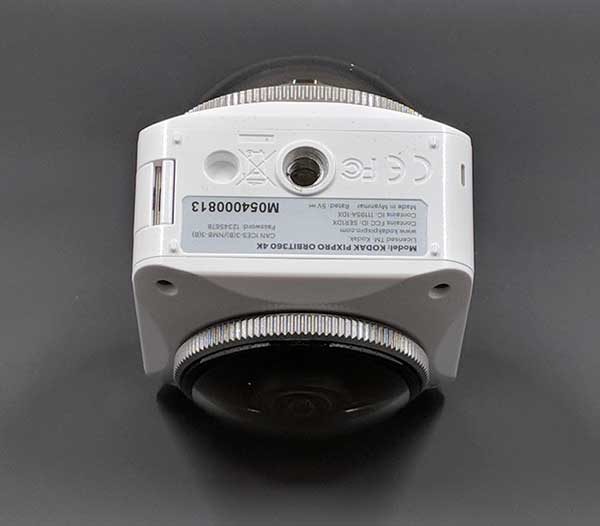
The other side of the Pixpro has the battery compartment.
Opening the latch reveals a removable battery, a micro USB port, a micro HDMI port (cable not included), a microphone jack (cable sold separately), and a micro SD card slot (also not included). You’ll want to use a Class 10 or higher 8GB – 256GB micro SD card with this camera.
The bottom of the Pixpro Orbit360 camera is a standard sized threaded tripod socket.
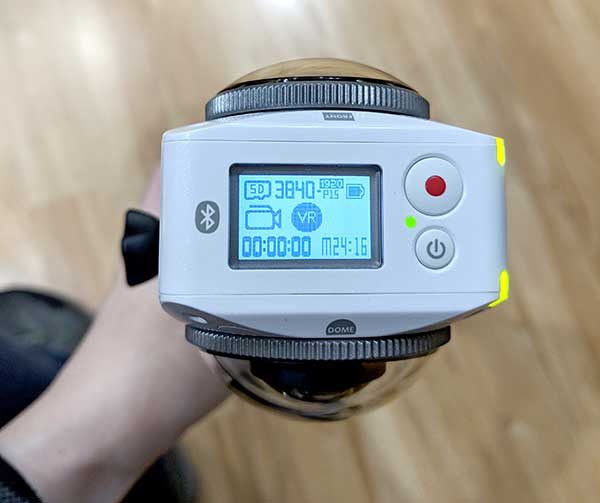
And the top of the camera has a small LCD, power button, and shutter/record button.
Unlike a lot of midrange action cameras on the market, the Pixpro’s display is very basic with no touch features. You have to use the menu button and WiFi button to navigate through the menus.
Luckily, the Pixpro Satellite Pack comes with a wearable remote control that lets you easily switch modes from camera to video and VR modes without wandering around in the menus.
Before you can begin using the Kodak Pixpro Orbit360 4K VR Camera, you’ll need to charge the battery using the included battery charger or by connecting a micro USB cable to the camera and a computer or a USB AC adapter.
Once the Pixpro’s battery is charged and you’ve inserted a micro SD card, you can begin capturing images and video.
Desktop software
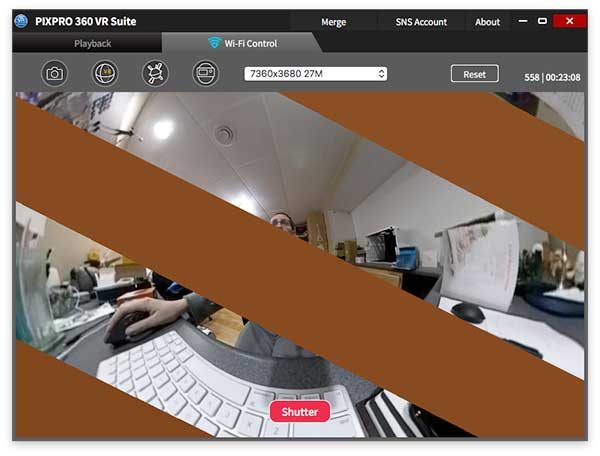
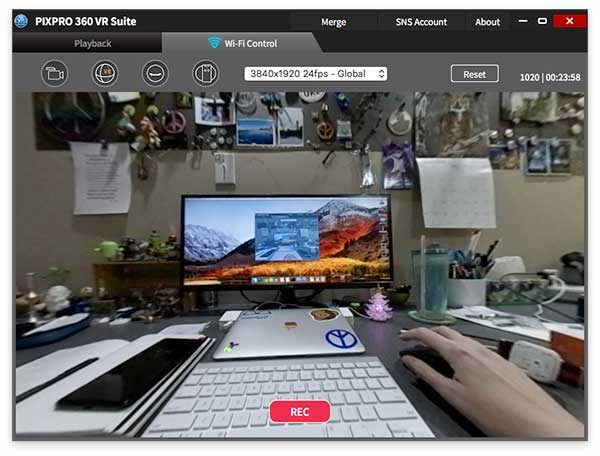
After you capture some images and video, you can install software on your PC, Mac, or smartphone that will provide a live view of the camera and help you process certain types of images and video.
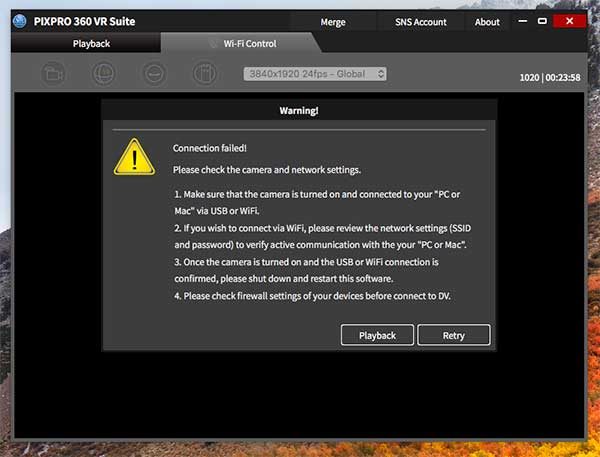
I downloaded and installed the free Kodak PIXPRO 360 VR Suite software on my 12-inch MacBook and had a lot of difficulties getting the camera to connect to my Mac and/or stay connected for any length of time.
I also experienced odd graphical issues which I was told was due to my computer not being able to handle the streaming video connection to the camera.
Overall, I found the desktop VR Studio software to be buggy and frustrating to use.
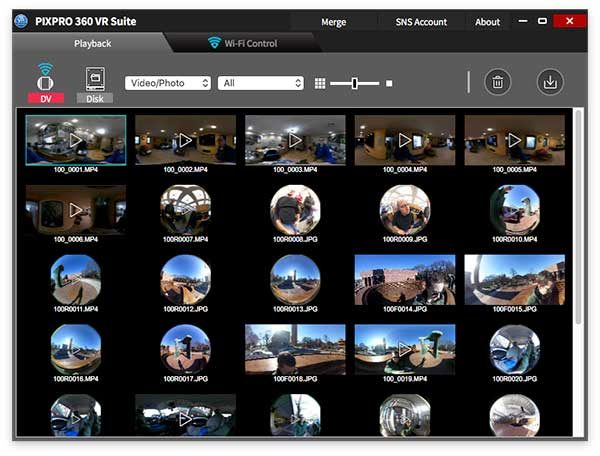
Loading thumbnails of the images and video stored on the micro SD card in the camera was painfully slow and anytime you would leave the file view to go to another part of the app, the list would have to load again when you came back to the list view.
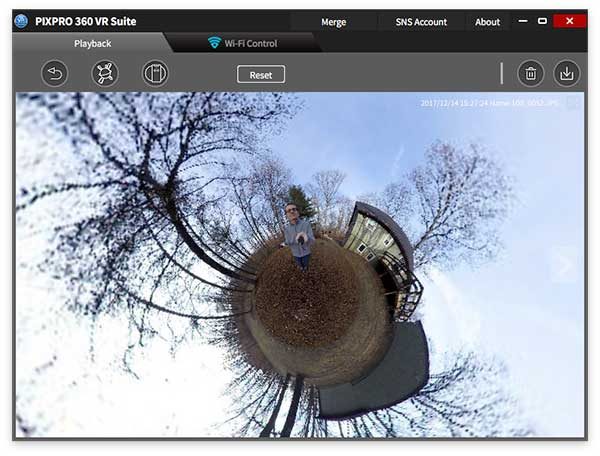
The only reason I even wanted to use the VR Studio software was to be able to create Tiny Planet pictures like the one you see above. I was finally able to create such a picture on my MacBook using the VR Studio macOS software but then found out that you CAN NOT export the Tiny Planet pictures from the desktop software to a new file on your computer. The only way to export it is to use the smartphone version of the software. What the heck?!
Smartphone software
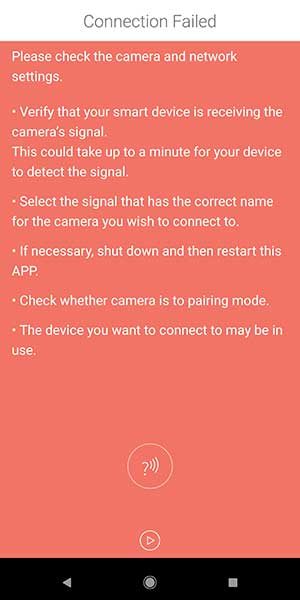
I had no luck at all connecting the Pixpro to my Pixel 2 XL using the Android app, but I was able to get it working on my Samsung Galaxy Tab S3.
Using the app isn’t difficult, but there’s way to live stream to Facebook or Youtube because the camera has to be paired with the mobile device in order to control and view the saved images and videos. While your mobile device or desktop computer is connected to the camera, it uses it’s own WiFi connection so you aren’t connected to the internet. The app will allow you to save video and images to the mobile device but it can take awhile to process a 360-degree video.
Image and video samples
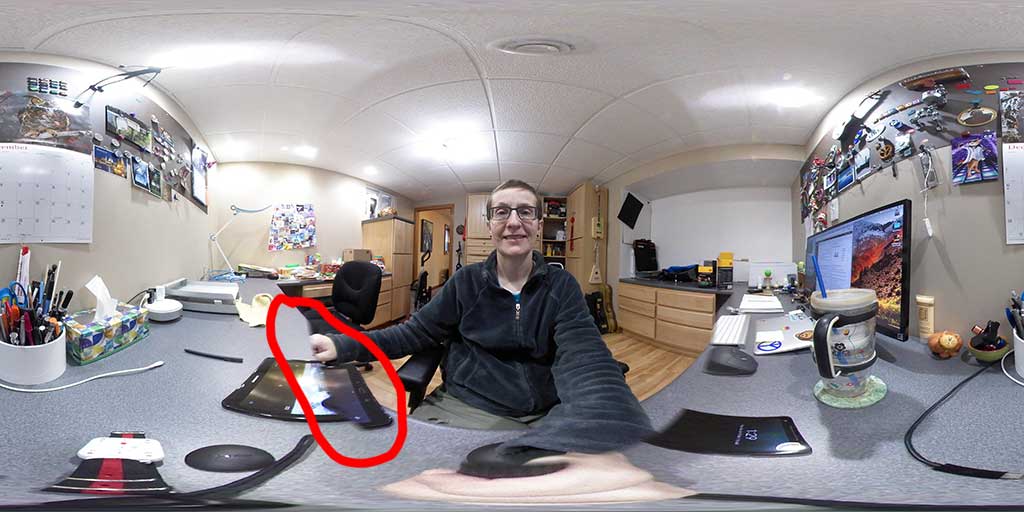
Here are a couple images taken directly from the micro SD card.
You can click the image to see the original size but you won’t be able to pan around to see the 360-degree view when you’re viewing the JPG on your computer.
The problem with the images are the stitch lines. You don’t notice them that much in the image above…
But in this image, the stitch lines are pretty obvious.
I’m sure you’re wondering why you can’t pan around in these images since the Pixpro is a 360-degree camera. For a 360-degree view of static JPG images, you can view them through the VR Studio desktop or mobile app or you can upload the JPGs to social media sites like Facebook. Here’s a sample. Click to view.
Pixpro video is the same way, if you view the MP4 files on the micro SD card on your computer, they will have a weird ultra-wide angle look to them but no panning features. But your video will automatically have the panning feature when you upload them to Youtube (other social media sites like Facebook have this feature too, but I only tested video uploads on Youtube). Here are a couple 360-degree video samples:
You can pause and drag your mouse around in the video to see different views.
The Pixpro image and video quality were ok when captured in a bright setting, but low light video and images left a lot to be desired.
Positives
3-in-1 camera
Easy to use
Removable battery
Nice build quality
Wearable remote makes camera control easy
Dustproof, freezeproof, splashproof and shockproof
Negatives
Expensive
Can’t live stream
Image quality isn’t impressive; visible video stitching seams
Desktop and smartphone software is slow and buggy
No way to attach protective lens caps or a safety tether to the camera
A waterproof housing is currently not available
Final thoughts
The Kodak Pixpro Orbit360 4K VR Camera was my first experience using a 360-degree camera. I wanted to love this camera and although I did have fun using it, I was disappointed in the video quality and quickly became frustrated when I wanted to view the images and video using the apps. Using the desktop and mobile app was annoying because you have to use a live connection to the camera instead of just loading the video files on your computer from the micro SD card. The app wouldn’t work at all on my Pixel 2 XL, felt slow on my MacBook, and was just ok with my Samsung Galaxy Tab S3. Considering the price, I feel this camera is overpriced for what it can do.
Price: $499.99 Where to buy: Amazon Source: The sample for this review was provided by Kodak.
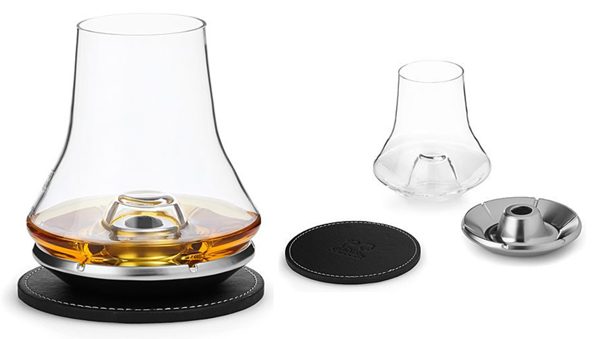
This tasting glass was inspired by the Glencairn, the traditional whiskey-tasting vessel. But this one has a wider base with a dimple in the middle designed to hold it in place on a cooling metal base. Place the metal base in the freezer for a few hours before using, and it will be ready to chill your whiskey without ice cubes that dilute your drink – and without those metal balls or stone cubes that risk the safety of your teeth.
The metal cooling base should chill your drinks for 30 minutes. You should pour to keep the level of the whiskey below that of the dimple in the glass, which is said to divide the whiskey and “prevent overpowering alcohol vapors from hitting your nose while you taste”. The tasting set is completed with a faux-leather coaster to protect your table from the cold metal.
The Whiskey Tasting Glass and Chilling Coaster is $40.00 at UncommonGoods.
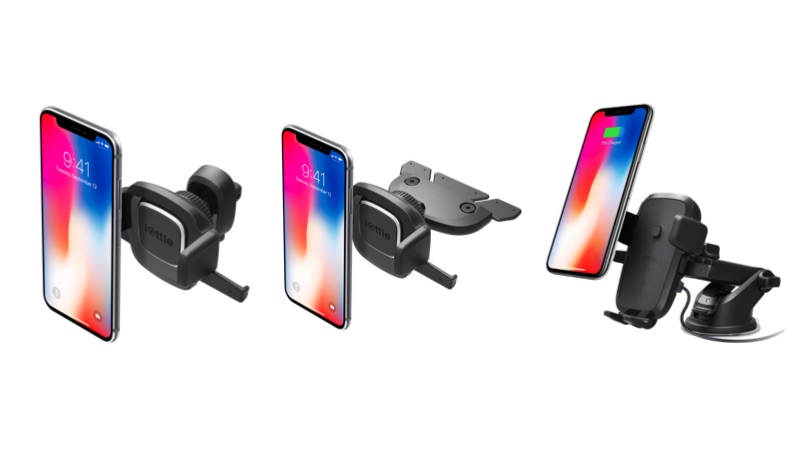
As long as there have been mobile phones, I’ve struggled with figuring out a place to mount them in a car. I’ve had iOttie car holders before, but I had a chance to try out some of the newest in the Easy One Touch lineup.
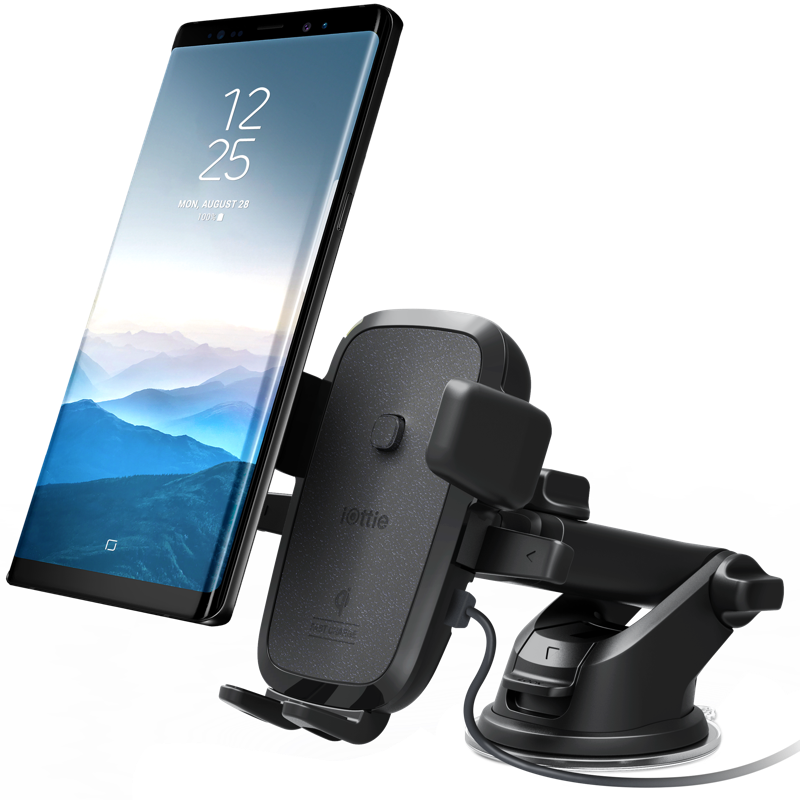
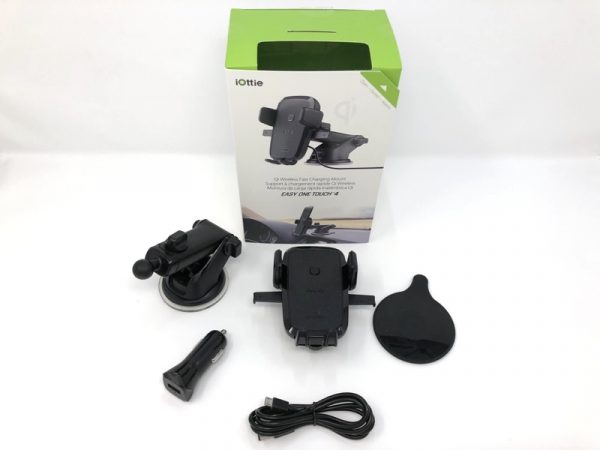
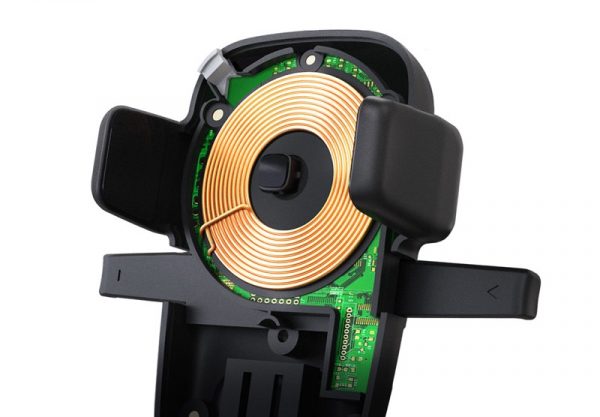
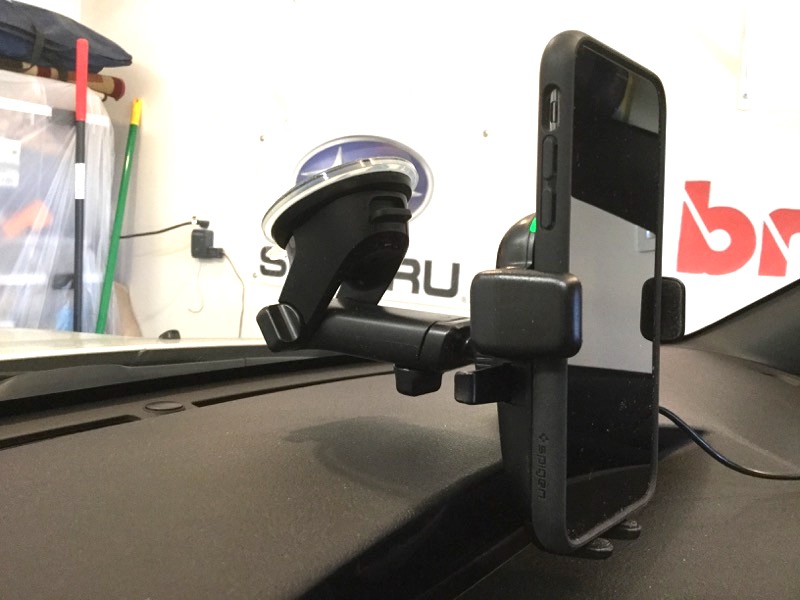
I recently purchased the Apple iPhone X, which finally features wireless Qi charging. Now I have a chance to try out the iOttie Easy One Touch Wireless Fast Charging Dash & Windshield mount.
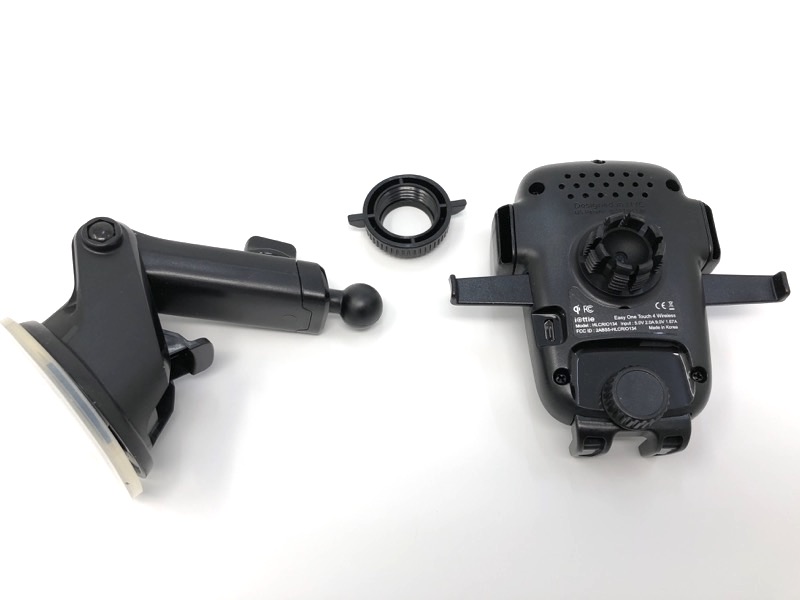
In the box, you get the cradle assembly and a USB adapter with plug (micro USB).
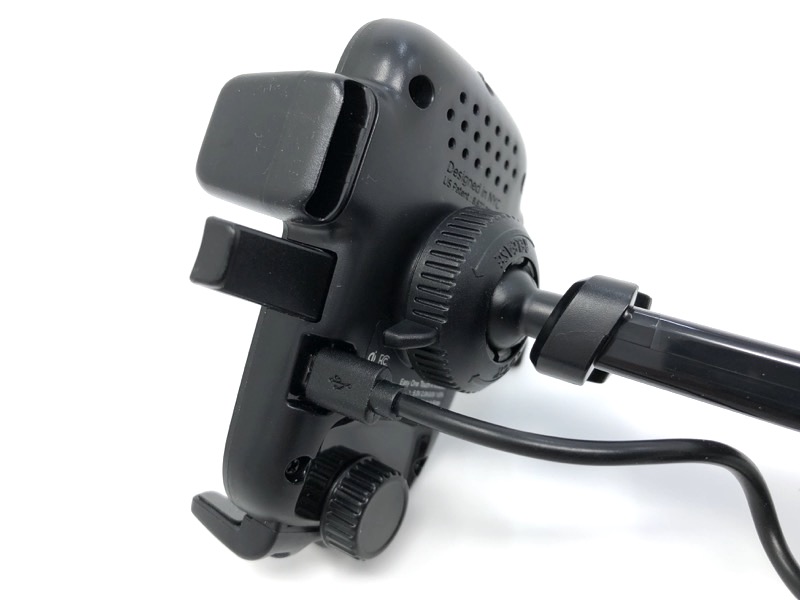
Somehow, iOttie managed to cram in a Qi charging coil around the holder trigger button.
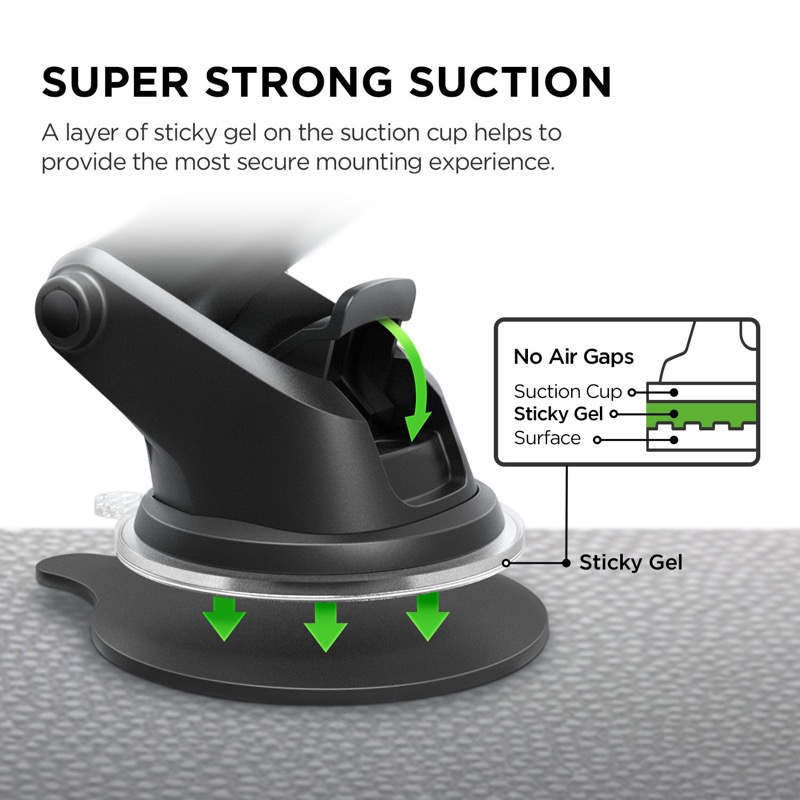
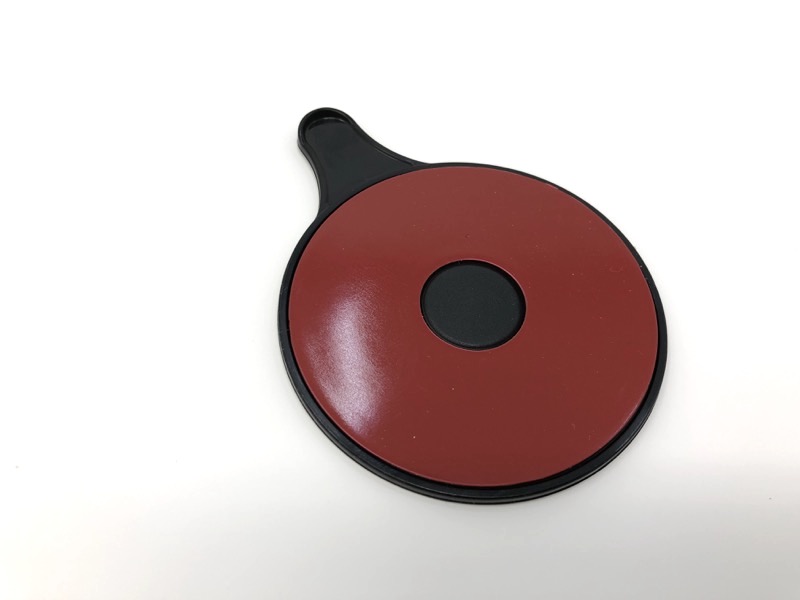
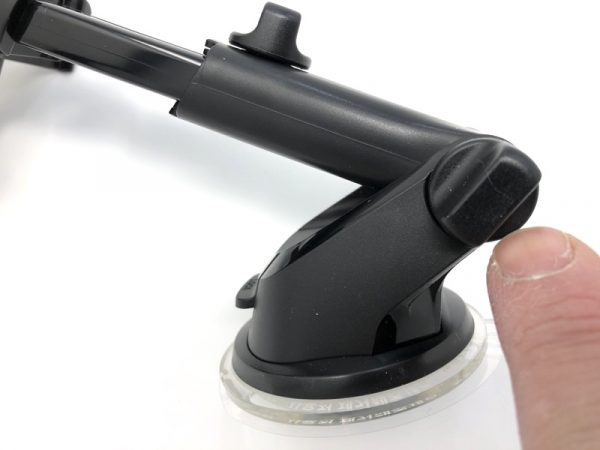
iOttie uses this sticky, gummy suction cup that’ll attach to darn near anything. If you have a curved or uneven surface, they’ve included an adhesive disk to help with adhesion. The dark red circle is a peel-off backing.
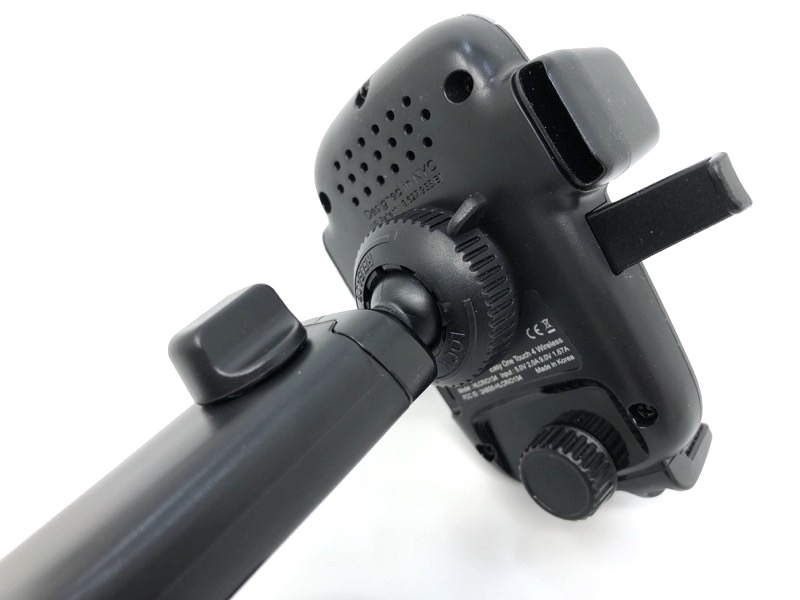
The back of the holder is a ball and socket joint. A wingnut-style ring adds tension, keeping things in place. Note the ventilation holes on the back of the cradle for the charging electronics.
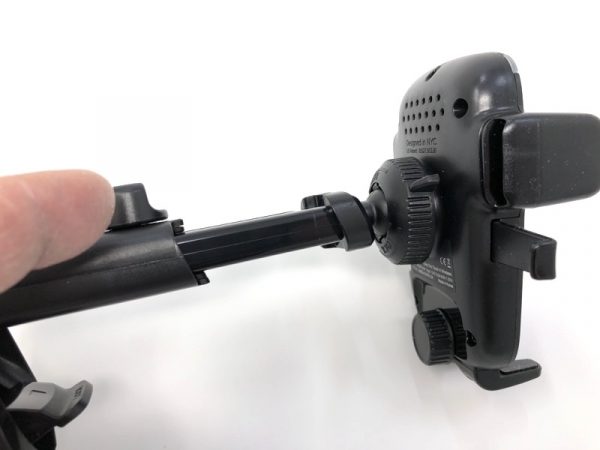
There are so many adjustments on the iOttie wireless fast charging cradle. You can extend the holder…
…or adjust the angle…
…and even change the resting height of the phone itself. I found that with the iPhone X, this bottom “claw” could remain at the smallest position.
The included micro USB plug goes in the back of the cradle as shown.
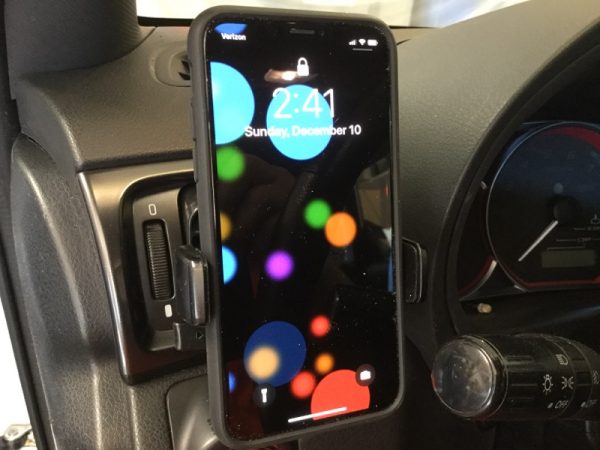
In this mounting example, I have the mount attached to the center of my windshield. Always obey local laws when mounting your iOttie cradle. You can see the green charging LED in the upper-left corner of the cradle holder, next to the volume down button on the phone.
It’s a little hard to describe how the holder works, so take a look at the video.
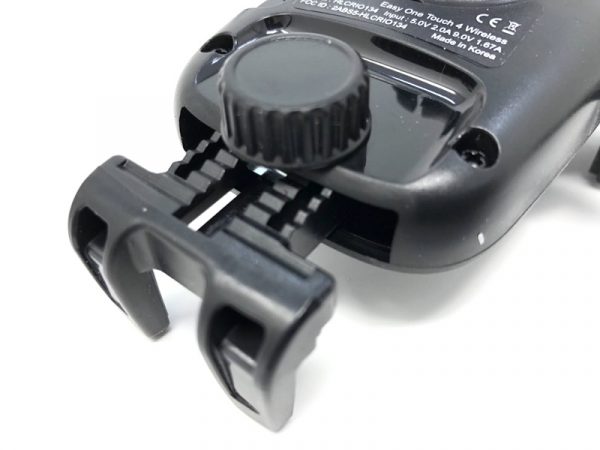
When the “arms” are open, simply drop your phone in and the button/trigger on the backplate activates the spring-loaded grip. If your phone is Qi-compatible, charging begins. To release, simply squeeze the two release tabs.
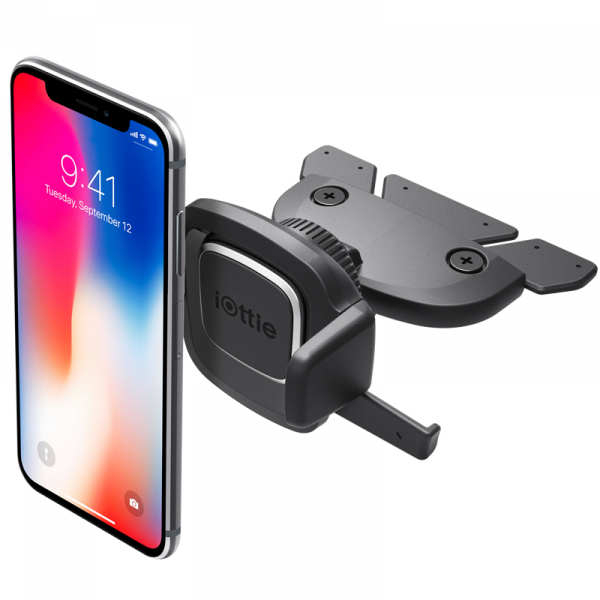
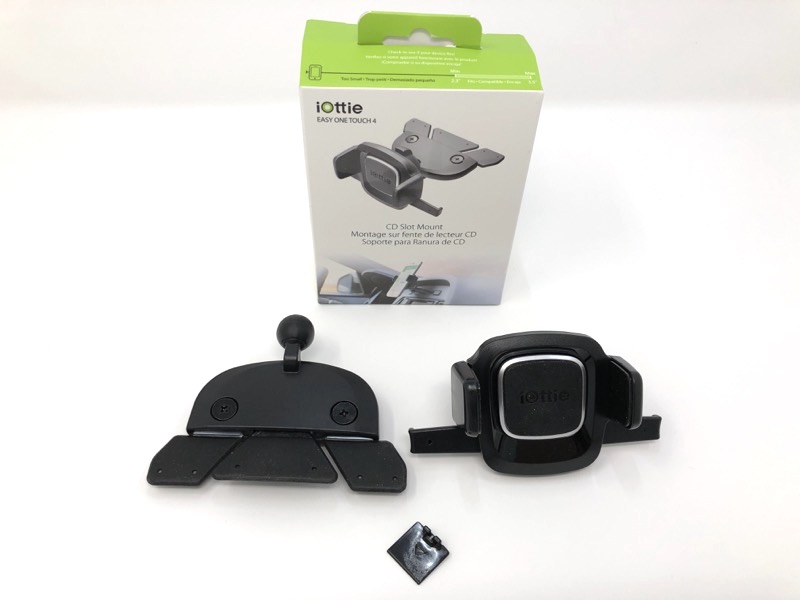
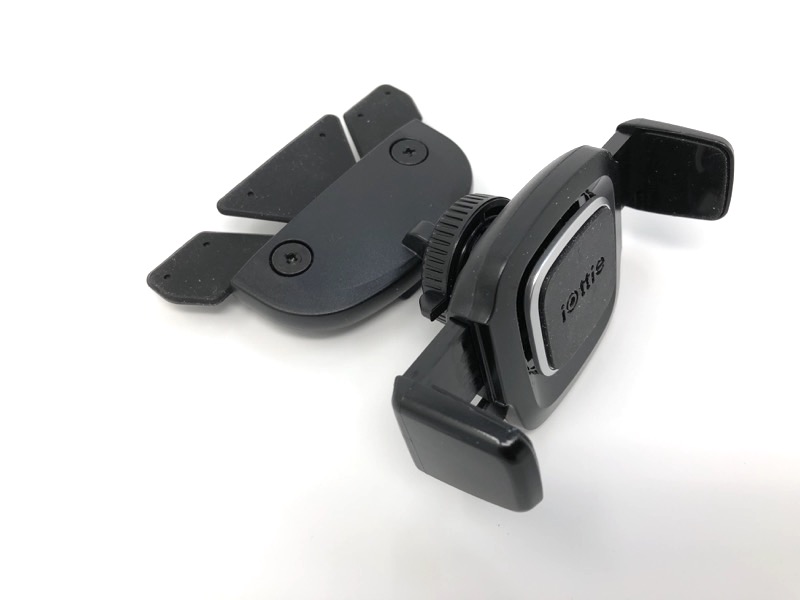
The folks at iOttie also sent me two other phone holders. One was the Easy One Touch 4 CD Slot Mount.
This is another style of phone mount that uses the CD slot in your car audio system. I haven’t used a CD in a very long time, so it made sense to use a part of the car that was not being used.
There’s not a whole lot to the package. There was a tiny black spacer which I didn’t use.
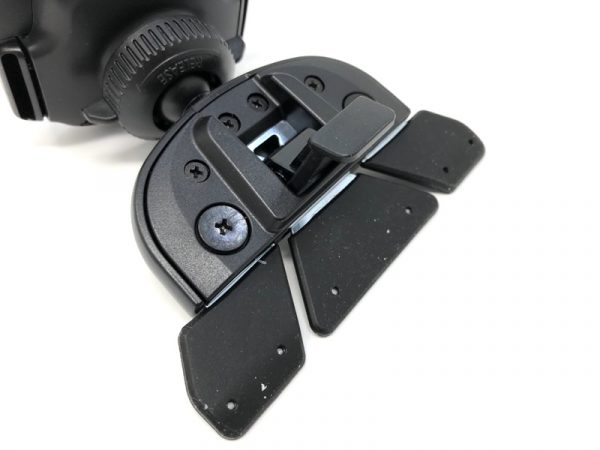
Like most of iOttie’s phone holders, the CD Slot Mount also uses a ball and socket mount, but a very peculiar “paddle” that goes into your CD slot.
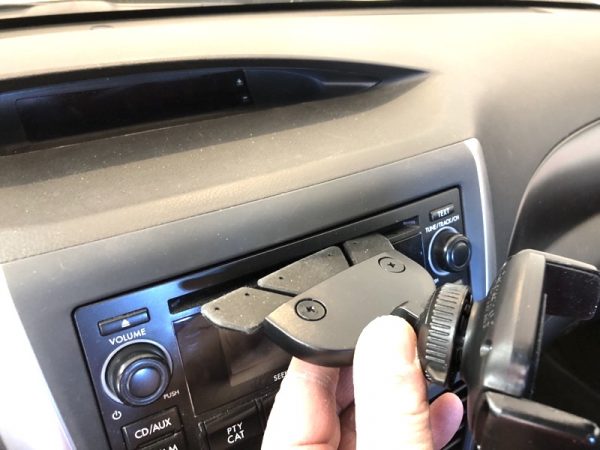
Here, I’m inserting the “paddle” into my unused CD slot.
Once in place, you flip the locking tab in the up position. This spreads the “paddle” inside the CD slot, giving the whole thing grip.
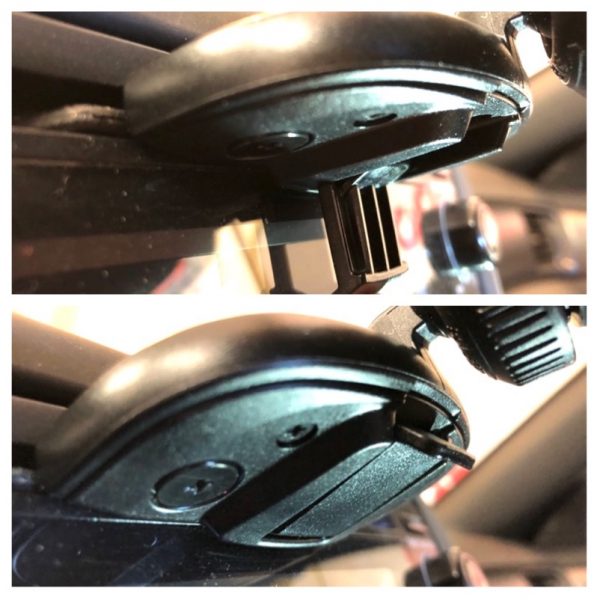
Here’s the holder in place…
..And the holder plus iPhone X. I thought the iOttie Easy One Touch 4 CD Slot Mount was a pretty clever system, but it obstructed the view of my radio display. Of course, your results may vary, but this wasn’t quite for me.
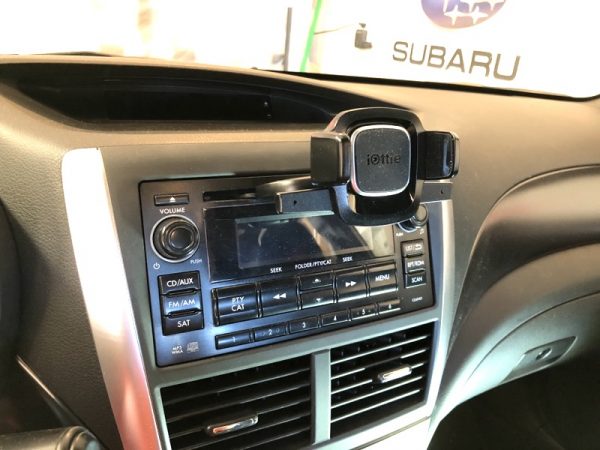
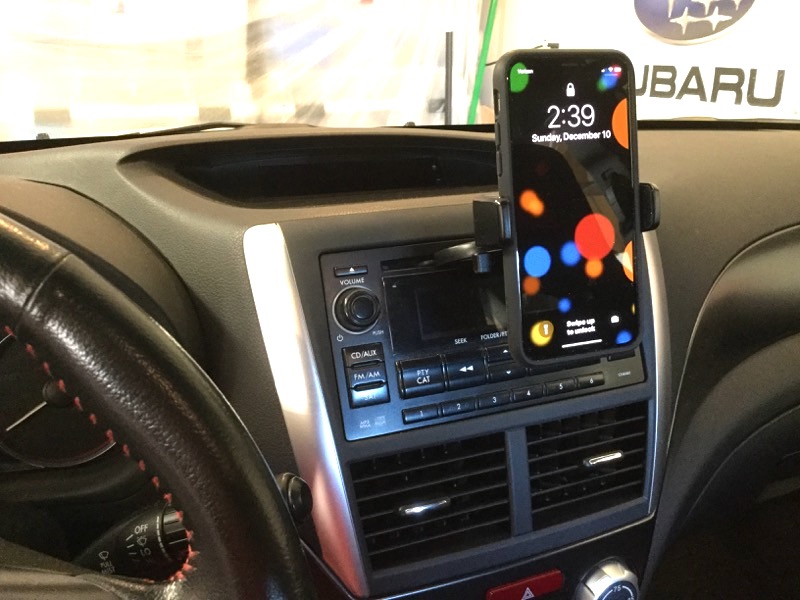
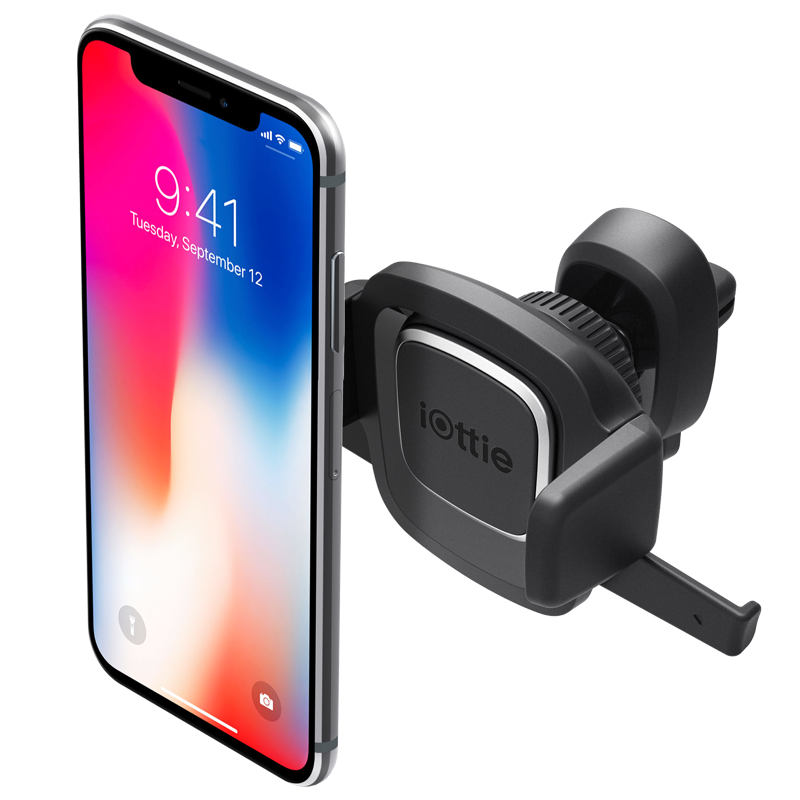
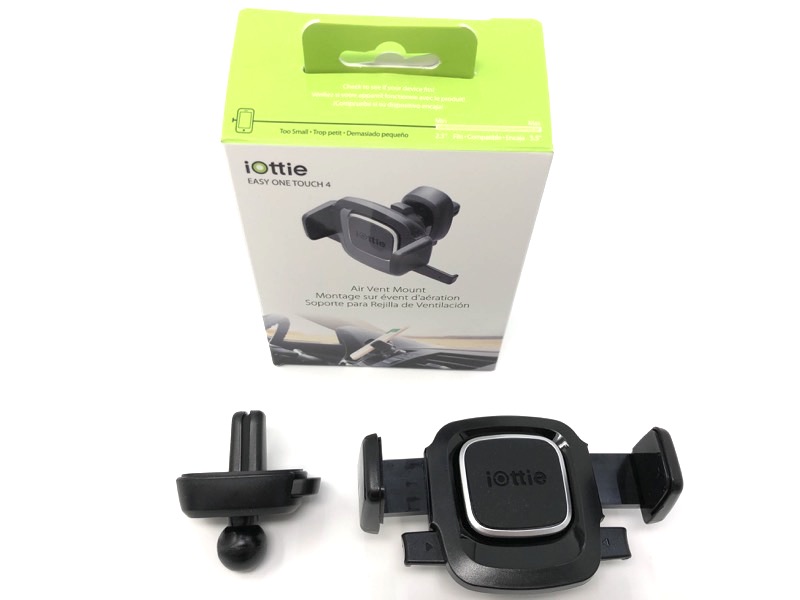
Finally, I tried out the iOttie Easy Touch 4 Air Vent Mount.
This mount is even more straightforward: It consists of just the spring-loaded mount and a duckbill-shaped vent grip on a ball mount.
The “duckbill” opens up just a little with a firm squeeze of the button. It’s pretty tight.
In my car, I found out that the mount causes my vents to sag down a bit. I had to play around with slot selection to get something that worked.
The results look great, however. In my car, this position doesn’t block my view of the road or my car stereo display. The iOttie Easy One Touch 4 Air Vent Mount is a little more dependent on how sturdy your air vents are. In my car, they’re pretty wobbly.
Positives
The One Touch mechanism really works
Suction cup, CD slot, air vent… there’s probably a mounting solution that works for you
Qi charger lines up every time (Wireless Fast Charging model only)
Negatives
CD slot model may block displays or controls on your dash (CD Slot Model)
If your air vents are loose, you may get a wobbly fit (Air Vent Model)
Final thoughts
Not all of the iOttie car mounts worked perfectly, but I’d say the Easy One Touch Wireless Fast Charging Dash & Windshield Mount is my runaway favorite, but only because my CD slot location isn’t optimal, and my vents are a bit on the wobbly end.
Price: $54.95 (Easy one Touch Wireless Fast Charging Dash & Windshield Mount), $24.95 (Easy One Touch 4 CD Slot Mount or Easy One Touch 4 Air Vent Mount) Where to buy: www.iottie.com and Amazon Source: The sample of this product was provided by www.iottie.com.