Nima Portable Gluten Sensor review

I have celiac disease, an inherited autoimmune condition that affects about one in every 100 people. When I eat gluten – think pizza, pasta, bread, cake and cookies – my body revolts against the enemy intruder and starts attacking itself, resulting in a number of seemingly unrelated and ugly reactions from which I’ll spare you a description. But let’s just say some involve the gut.

People will sometimes offer me food they insist is safe for me (which, according to the FDA, is less than 20 parts per million), and sometimes I end up experiencing a variety of effects – some immediate, some less so, but all unpleasant and potentially contributing to premature mortality. This can happen at a get-together or at a restaurant.

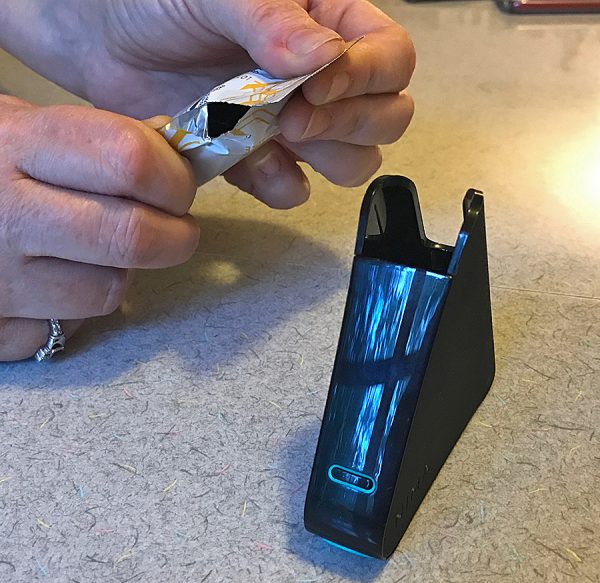
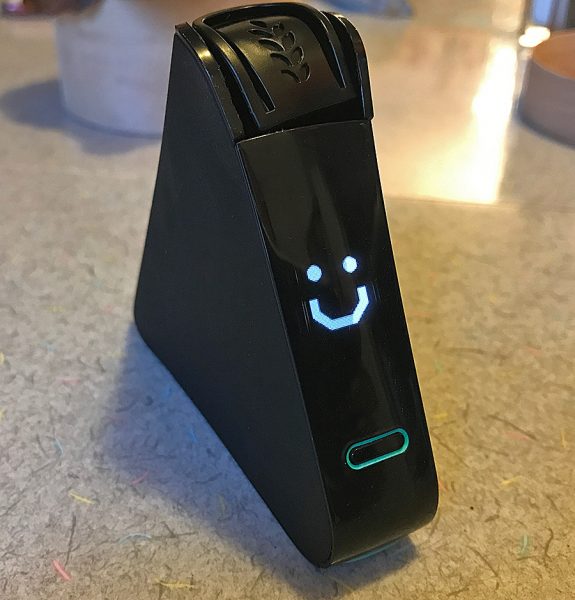
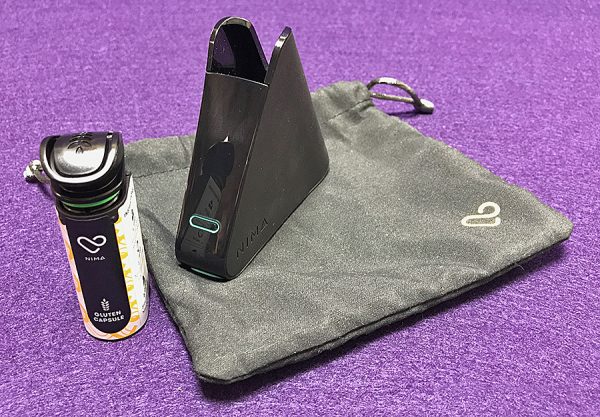
So I was thrilled to be able to review the Nima Portable Gluten Sensor, a compact device that allows you to test for gluten. The unit, which retails for $279, comes with three test vials, a micro-USB recharging cable and a carrying pouch, which fits in a purse or pocket. I was given an extra 12 vials for review purposes.

The unit measures 3.5 inches wide and 3.1 inches high and has Bluetooth connectivity so it can sync to your smartphone. Users can contribute their test results to the Nima community using a free Nima app, which also provides a list of Nima-tested restaurants. That all was great when I paired my Nima with the phone I had initially, but the unit would not pair with my replacement phone a couple of weeks later, greatly limiting my ability to be part of the online Nima community where test results are shared.

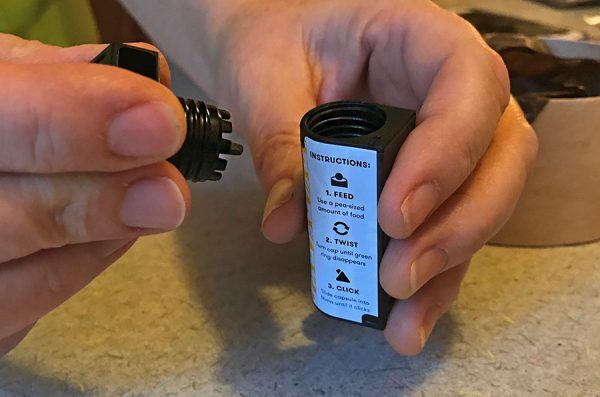
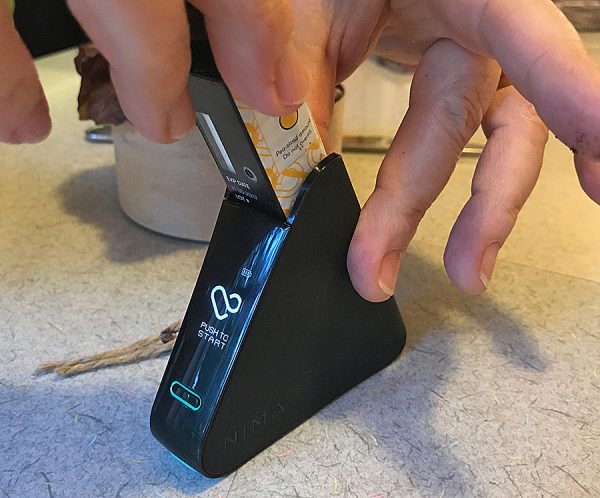
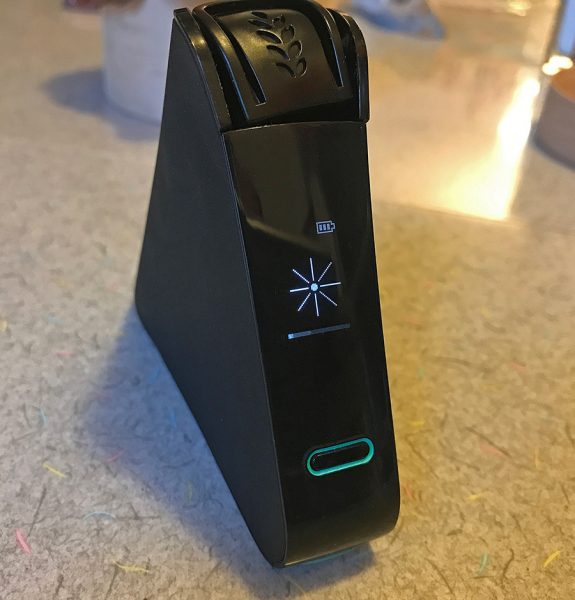
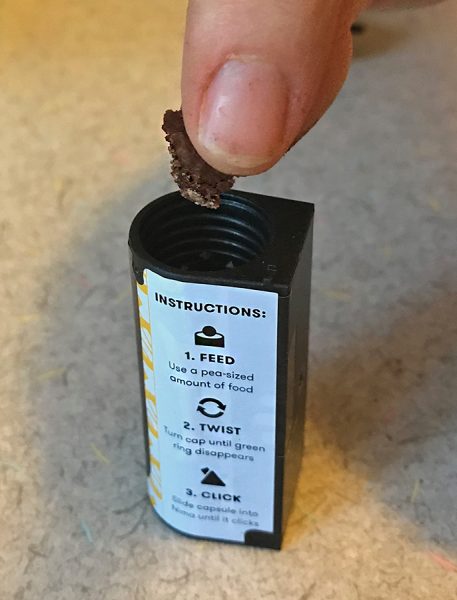
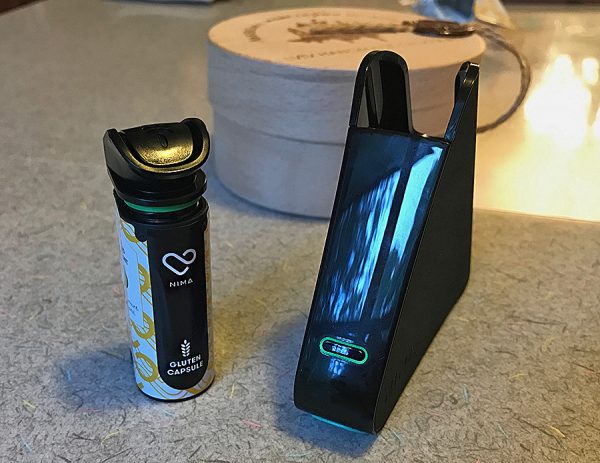
To test for the presence of gluten, users put a tiny sample of food – liquid or solid – into a vial and insert the vial into the device. In three minutes – a theoretical estimation because my test times amounted to more like five minutes – a wheat icon and a “gluten detected” warning will warn users if their food is not safe to consume; a smile icon gives diners the go-ahead.

The unit and single-use vials use a combination of chemistry and sensors. Subscriptions are available for $59.95 per month for 12 capsules or $61.95 for 12 vials every other month. Those who eat restaurant or processed food often can opt for the $116.94, 24-capsule plan per month, trusting if they can afford to eat out all the time, they can afford the subscription cost. Some foods – soy sauce, pure vinegar, beer, or alcohol – cannot be tested, leaving diners to make educated judgment calls before consumption. The unit also is glitchy with frozen foods such as ice cream, but we’ll get to that in a bit.

For those who are pretty good at math, the ongoing cost comes out to roughly $5 a vial. That $5 vial allows you to test a sample about half the size of a pea. So forget the notion of trying to test a mixture of your entrée and sides. You’ll do well to fit a whole grain of rice in the vial, which means you could go through three vials to test an entire plate of food at a restaurant. Don’t even consider testing your way through a buffet line unless you have very deep pockets and a whole lot of time.

I also discovered the device is very sensitive and prone to capsule errors. My first test was a gluten-free roll at Cooper’s Hawk Winery, one of my favorite restaurants for its extensive and delicious gluten-free menu. I have never reacted to anything I’ve eaten there, but I decided to test the roll as an academic exercise. I only had one capsule with me, and I got a “capsule error” warning. I ate the roll anyway and didn’t get sick.

A couple of days later, I made my homemade cornbread using Quaker yellow cornmeal. (The only other ingredients are oil, salt, baking powder, baking soda, buttermilk and egg.) I successfully tested the finished product and got a smiley face icon. And I happily ate.

However, I received another capsule error when I tried to test my steak salad at Longhorn Steakhouse. This might have been a result of the difficulty in reducing my salad to a half-pea-sized test sample. Fortunately, I had better luck at Bonefish Grill, where my Chilean sea bass with mango salsa tested safe. My birthday dinner at PF Changs – the gluten-free Hokkien Street Noodles – also earned a smiley face from my Nima unit and my belly, as did my mushroom truffle pizza at Uncle Maddio’s Pizza during the continuation of my birthday celebration.

My husband had bought me a strawberry birthday cake made by Inspired by Happiness. Though that was marked gluten-free, I tested it anyway and was happy to learn it was safe. I also tested the Talenti double dark chocolate gelato he bought for me, only to receive a capsule error after waiting five minutes for results – longer than it actually took me to eat the gelato.

However, a few days later – or a few days too late, depending on your perspective – an email from Nima addressed the capsule errors that were occurring when testing ice cream. The company suggested a smaller sample size with a drop of water. I realized it would have to be a very small sample and a very small drop.

So I decided to test Talenti’s mango gelato (because the chocolate had inexplicably disappeared) using the updated testing parameters. I even waited a couple of minutes to begin the test while I photographed what the sample looked like. But this time I got no results whatsoever. Crickets. And when I pushed the start button a second time, I, of course, got a capsule error.

Here’s a case in which my Nima saved the day. One of my husband’s coworkers sent him home with a box of dark chocolate truffles from a Ukrainian company called LVIV Handmade Chocolates. I’m all about dark chocolate all day long (and this may incriminate me regarding the chocolate gelato), but I don’t speak or read Ukrainian and couldn’t decipher the ingredients list. I cut a sliver of truffle and put it into my Nima. Five minutes later, the smiley face icon told me my pig-out session was about to begin. Sometimes it’s the little things.


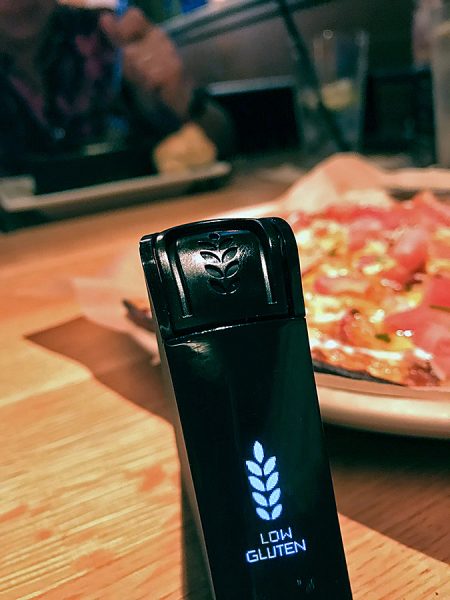
But let’s talk about a case in which my Nima truly saved the day. I met some ladies at a local BJ’s Restaurant & Brewhouse to celebrate a friend’s birthday. My friends had me choose the restaurant so I could be ensured a wide variety of selections. I ordered a gluten-free chicken-bacon-ranch pizza, which looked and tasted amazing. But I began to notice my mouth, which is prone to blisters when exposed to gluten, began feeling weird, so I pulled out my Nima and tested a piece of the cheese-covered crust. A few minutes later, I got a new icon: low gluten with a wheat stalk. In my hunger and impatience, I had already eaten one piece of the pizza. The rest went back to the kitchen and was replaced with salad.

The technology has tremendous applications and promise, but it’s still glitchy, and the cost is burdensome. It also can be difficult to get food into the capsule. Including tiny disposable tweezers or a sample-sized scoop would help, but that, no doubt, would only add to the cost.

As one who cooks from scratch and typically doesn’t eat out a ton, I will not become a monthly subscriber just yet, but I will pack my Nima with me when I travel, particularly in unfamiliar areas or overseas. I commend the company’s efforts, and I anxiously await improvements to the technology and reductions in the cost. Nima is a great beginning to addressing a serious health and quality-of-life issue for people like me for whom gluten-free isn’t a fad but a necessity. For the time being, it’s a valuable, somewhat fickle and costly ally for celiacs.

Source: The sample for this review was provided by Nima. Please visit their site for more info.


Product Information

Price: $199 US (was $279); 12 capsules $72.95 US (subscriptions available)
Manufacturer: Nima
Pros:
  • Works as advertised
  • Can save you from much unpleasantness
  • Simple to use
Cons:
  • Prone to errors
  • Unit expensive
  • One-time use capsules expensive

Filed in categories: Reviews

Tagged:

Nima Portable Gluten Sensor review originally appeared on The Gadgeteer on August 18, 2017 at 9:01 am.

Note: If you are subscribed to this feed through FeedBurner, please switch to our native feed URL http://the-gadgeteer.com/feed/ in order to ensure continuous delivery.

Always be prepared with the Adventure Mate 5-in-1 outdoor multi-tool

I’ve never been camping, but when I daydream about being more outdoorsy, I can picture myself with all sorts of gear for both utility and protection. The problem is that too much gear weighs you down. Conrad Sayer of Australia has designed a modular 5-in-1 multi-tool that eases the burden of carrying too much gear but provides the essential tools you’ll want and need.

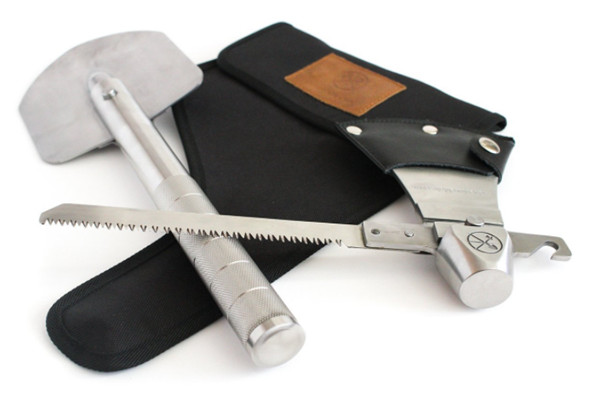
The Adventure Mate is a multi-tool constructed of rust-resistant carbon rolled steel that will stand up to chopping, sawing, hammering and digging activities.

The 5-in-1 provides a hatchet, saw, shovel, hammer, and a hook.

The design looks pretty well thought out. The knurled handle can be used with the hatchet head, the shovel, or the saw blade.

There’s a hammer built into the back of the hatchet head for any smashing activities, and the hook can be used for lifting pots off the fire, opening beers, and more.

When you get tired of the bugs and the dirt, the Adventure Mate tool packs into the included canvas pouch for easy transport to your next Adventure.

You can read more about the Adventure Mate at www.adventuremate.com and you can buy one for $149 – $169 from The Grommet or Amazon.

Filed in categories: News

Tagged: ,

Always be prepared with the Adventure Mate 5-in-1 outdoor multi-tool originally appeared on The Gadgeteer on August 18, 2017 at 8:00 am.

Note: If you are subscribed to this feed through FeedBurner, please switch to our native feed URL http://the-gadgeteer.com/feed/ in order to ensure continuous delivery.
4 ways to watch the total solar eclipse on Monday (8/21/17)

You’ve no doubt been hearing about the total solar eclipse for many weeks now. It’s a big deal because it’s the first solar eclipse to cross the entire continental United States in 99 years. All this time, you have probably been telling yourself to read up on the subject and order some special solar eclipse glasses so you can experience what might be a once in a lifetime event. If you actually ordered the glasses, have your DSLR camera, 600mm telephoto lens and tripod ready to go, then yay for you. You get a special geek star award for always being prepared. What do the rest of us procrastinators do on Monday so we won’t feel left in the dark (literally)?

1. Get a pair of solar eclipse viewing glasses so you won’t go blind.

No, your regular sunglasses will not protect your eyes from the damage of looking at the sun during the eclipse!

Is it too late to buy a pair of solar eclipse glasses? No, not if you don’t mind paying ticket scalper prices like I’m finding on Amazon.

You are better off looking for some freebie glasses locally in your town. Contact the nearest high school or library and ask if they have any freebies. Just double check that the glasses are ISO certified safe if you do end up scoring a pair. You can check out this excellent and very detailed article on the subject at https://eclipse.aas.org/eye-safety/iso-certification.

2. No eclipse glasses? No problem. Build a camera obscura pin-hole viewer instead.

Even though I was lucky and was able to get some eclipse glasses at the last minute at a decent price from ThinkGeek, I’m still going to build one of these viewers because I like geeky arts and crafts. It’s also pretty much free if you already have a box, some tape, a piece of white typing paper, foil, and a pin. For easy instructions, check out these articles that show different styles of pin-hole viewers that you can easily create in just a few minutes:

How to make a handheld solar eclipse box viewer
How to make a wearable solar eclipse box viewer
How to make a group solar eclipse viewer with a pair of binoculars and a tripod

The group viewer requires some extra gear, but I think that’s the one I’m going to try to make.

3. Watch the eclipse without glasses or a pin-hole viewer.

If you don’t want to track down a pair solar eclipse viewing glasses, build your own viewer or even make the effort to go outside, you can still watch the solar eclipse from the comfort of your favorite chair. There will be many sites live streaming the event like the CBS News eclipse coverage through CBSN, CBS News’ 24-hour online streaming platform. Their coverage will begin at 12 p.m. ET on Monday.

4. If you happen to take a nap and sleep through the whole thing, you can still watch it later.

After the total solar eclipse event has ended, you still can tune into your favorite news sites where there will be all sorts of commentary on the event and replays that will show the total eclipse of the sun. This is not the laziest way to watch the total solar eclipse because not everyone will see the eclipse in its totality. Live streaming or watching it later will be the way most people will get to see the full total eclipse.

What will the eclipse look like where you’re located and what is the best time for viewing? You can find out here: https://eclipsemega.movie/simulator

If you have some more good advice on this subject please share it in the comments below.

Filed in categories: Articles

Tagged:

4 ways to watch the total solar eclipse on Monday (8/21/17) originally appeared on The Gadgeteer on August 17, 2017 at 4:10 pm.

Note: If you are subscribed to this feed through FeedBurner, please switch to our native feed URL http://the-gadgeteer.com/feed/ in order to ensure continuous delivery.
SANSI 30W LED Security Motion Sensor Outdoor Light review

We’re in the middle of remodeling the exterior of our house. It had wood painted wood siding and it’s currently (I can hear the contractors hammering right now…) getting vinyl siding. As luck would have it, a few weeks ago SANSI contacting me to ask if I might like to review their 30W LED Security Motion Sensor Outdoor Light (model C2440-FW). Since we’ve been actively replacing all the indoor incandescent lights with LED lights, I was happy to start the process outdoors as well. Let’s see how the update turned out.

What is it?

The SANSI 30W LED Security Motion Sensor Outdoor Light is a bright light that is designed to be installed outdoors and automatically turns on the light when motion is detected.

What’s in the box?

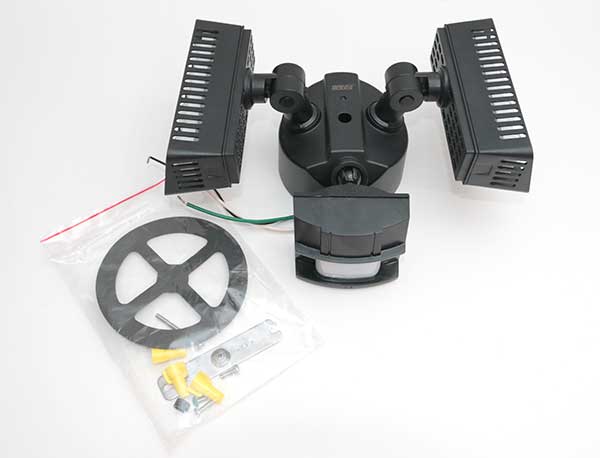
SANSI LED Security Light
Bar shaped mounting plate with 3 screws
Waterproof gasket
3 Wire connectors
Mounting bolt
Rubber screw plug

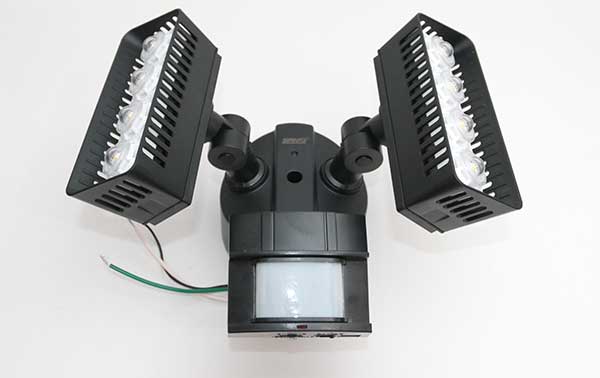
This outdoor security light looks similar to other motion activated security lights that I have on the outside of my house.

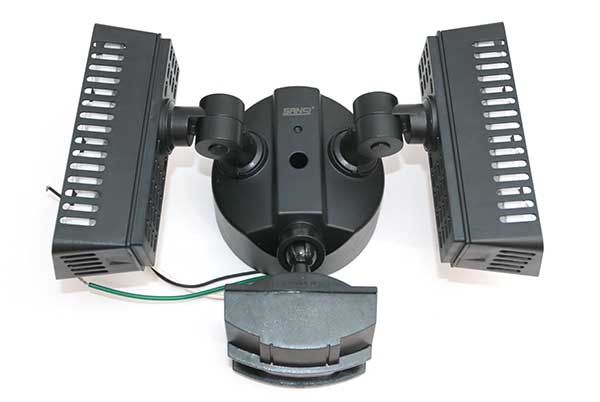
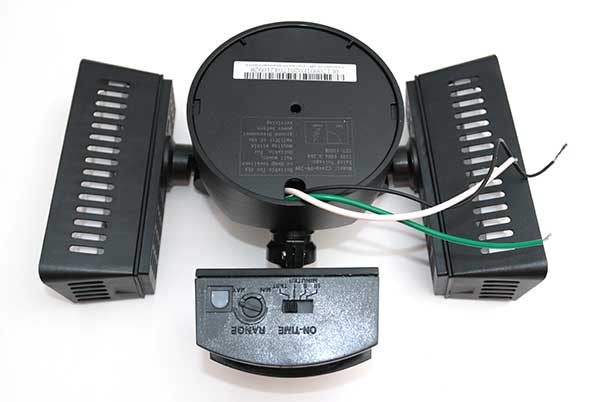
The SANSI has a swivel motion sensor in the center with two banks of lights on either side.

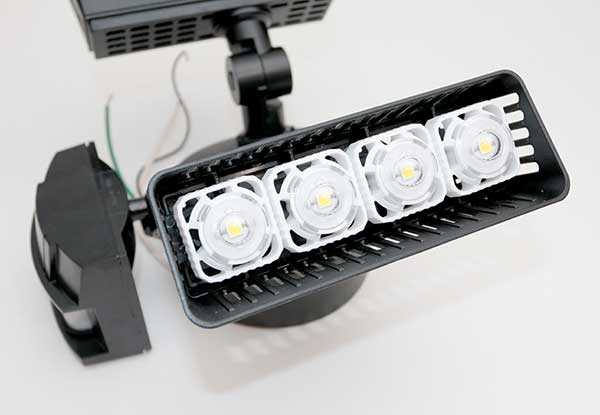
Where this security light differs from my others, is that the lights have LEDs instead of expensive halogen bulbs that can be a hassle to replace.

Each bank of lights has 4 LEDs arranged in a line. SANSI sells a different version of this light that has the lights in a 2×2 configuration instead of a 1×4 configuration like you see above.

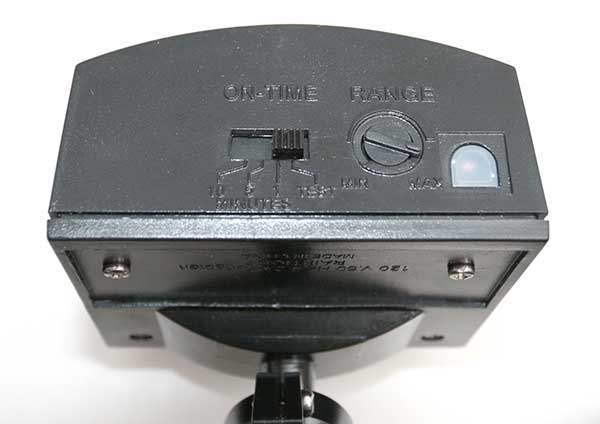
The light has 3 wires coming out of the base, and there are two switches and a light sensor on the bottom of the motion sensor.

The switches can be configured to set how long the lights will stay on (1, 5, or 10 minutes) and the motion detection range.

Most people will want to use this as a motion activated light, but you can set it to manual mode which only works at night and can cause the light to be on for up to 6 hours at a time. When I asked for more details about this mode, here’s what the SANSI rep told me:

Manual Mode (Working Mode) Which is similar to dusk to dawn mode, because the default mode of this product is the Motion Sensor Mode. If you need the Manual Mode, you may have to set it up to Manual Mode every time you need.
Set-up: Flip the light switch off for one second then back on to toggle between AUTO and MANUAL mode.
Function: Under Manual Mode, the light could be on at night for 6 hours.

*Note: Manual mode only works at night and with the ON-TIME switch in the 1, 5, or 10 minutes position.

Installation

I was going to install the SANSI light myself so I could write about any issues that came up while doing so. But the contractors saw the box and did the install before I even realized it. The included instructions are pretty straight forward and with only 3 wires it is probably hard to screw up the install, so let’s just say it was really easy especially if you’re replacing an existing light. Just know that the SANSI light has to be connected to a 120V power source.

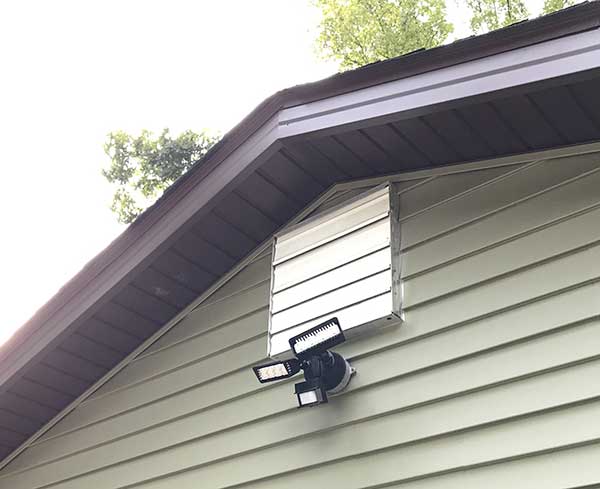
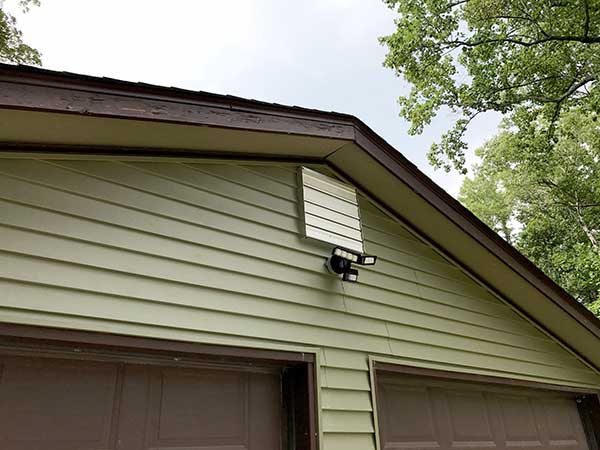
This is what the SANSI 30W LED Security Motion Sensor Outdoor Light looks like when it’s installed.

You can adjust the angle of the motion detector as well as the lights.

Although the image above doesn’t really give a good indication of how bright the SANSI security light is, let me tell you, it’s a very bright flood light! It’s much brighter than the light I previously had in the same spot. The LEDs are equivalent to 250W incandescent light. I have noticed that the SANSI LEDs have a colder look instead of the warmer yellow light of my other security lights. The specs say that the SANSI LEDs are 5000K Daylight. All I know is that they are bright.

They’ve been installed for about a week and are working as expected. I have them set to come on when motion is detected and stay on for 1 minute. The motion sensor is triggered when I walk under the light and when I pull out of the garage every morning when it’s still dark outside. The sensor has a range of 180 degrees and max 50 feet. I have it set for my short driveway and it’s been working great.

Final thoughts

If you want to update your outdoor lighting to LED lights that are as bright (or brighter) than incandescents, but use less electricity, SANSI’s 30W LED Security Motion Sensor Outdoor Light is a good choice.

Source: The sample for this review was provided by SANSI. Please visit their site for more info and Amazon to order.


Product Information

Price: $59.99
Manufacturer: SANSI
Retailer: Amazon
Pros:
  • Very bright
  • Easy 3 wire install
  • LED bulbs should last for many years
  • Motion settings for time and range
Cons:
  • None

Filed in categories: Reviews

Tagged: ,

SANSI 30W LED Security Motion Sensor Outdoor Light review originally appeared on The Gadgeteer on August 17, 2017 at 12:15 pm.

Note: If you are subscribed to this feed through FeedBurner, please switch to our native feed URL http://the-gadgeteer.com/feed/ in order to ensure continuous delivery.

ThinkSound ts03+mic headphone review

You Gadgeteers all remember wired earbuds, right? What am I saying – everyone gets a pair of these with their phone, even if it’s an iPhone 7 with no headphone jack! The quality of those bundled earbuds, however, can vary widely. ThinkSound has been doing a lot of work on improving the sound of headphones and earbuds by incorporating wood enclosures into them, like fine speaker cabinets of old. Their latest creation is the ts03 + mic, which brings light weight and crisp bass together for your music and phone talking. Guess who got a pair to test. Yep. This guy!

Note: Photos may be tapped or clicked for a larger image.

Here are the specifications from their website:
• Microphone + call/music control for mobile communication
• Compatible with iOS and Android devices
• Wooden housing for crisp, accurate music reproduction
• 20 Hz – 20 kHz frequency response
• 99 ±3 dB @ 1KHz 1mW sensitivity
• 16 ohm impedance
• 45˚ angled gold plated plug for increased clarity & durability
• Acoustically enhanced 8mm driver
• 10g Ultra-lightweight design
• Kevlar-reinforced, tangle-resistant 4 foot long cable
• Passive Noise Isolation minimizes ambient sounds
• Sweat-resistant design, perfect for the gym
• Four flexible silicon ear inserts for a secure fit (s/m/l/xl)
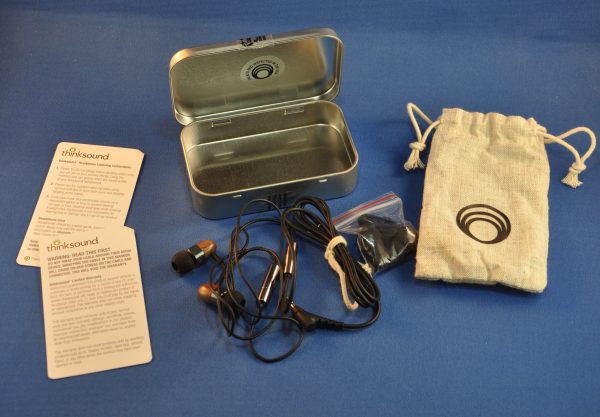
• Cord clip, cotton carrying pouch & hard case
• One (1) year limited warranty

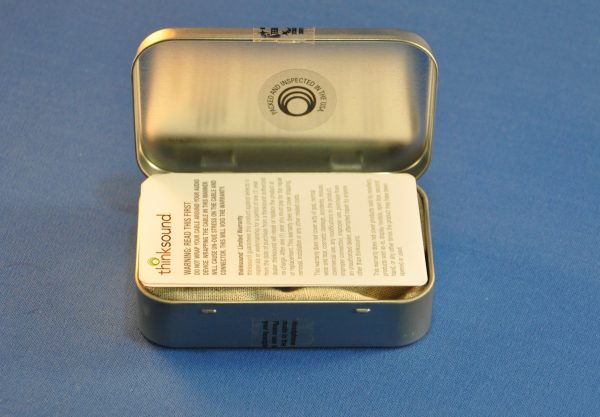
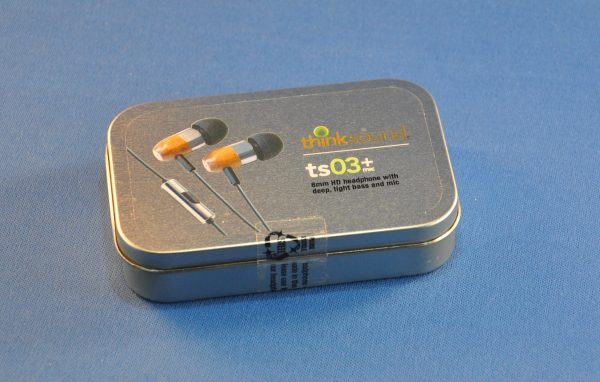
The earbuds arrived in ThinkSound’s new “package-free” packaging: It’s all packed into a tin box with clear labels that can be used to protect the ts03s in your bag or pocket. If you don’t need that much protection, there’s also a light cotton drawstring bag. I really like it, but I’m curious to see how this packaging design fits into brick and mortar stores. It’s one thing for a $1 box of mints, but for a $200 set of earbuds, that’s another story.

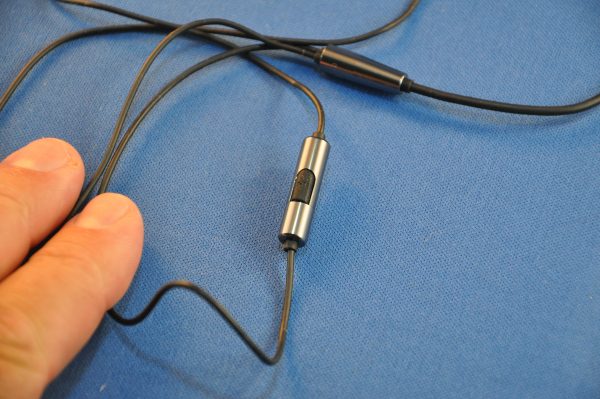
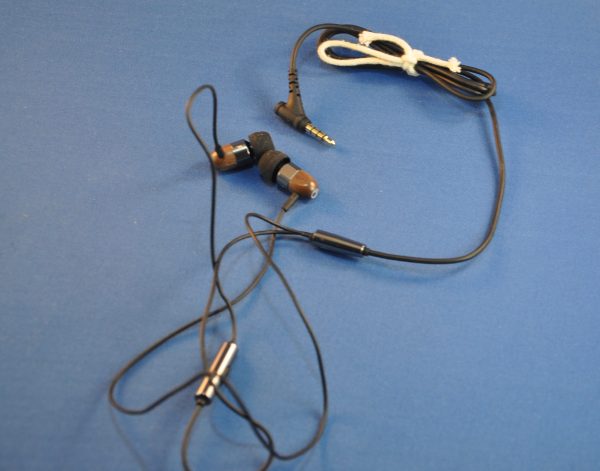
The angled plug is a nice touch, sticking out at 45° from the line of the jack. This gives a bit of strain relief. There are three feet of cord from the plug to the branded metal divider, and 15” of cord for each earbud from the divider. With lead-in cords this long, it’s easy to route them behind your head, in case they would be in the way during exercise. There was a little ambient noise from touching or rubbing on the cable while wearing them, but not enough to be distracting. If you’re doing highly active exercises, it may get in the way, but for biking, walking, or running, it shouldn’t be an issue, once you turn on a little music. I found I could listen at about half volume on my iPhone 6s Plus for most music. Depending on mike placement and the audio engineering, many podcasts were listenable at this level as well.

The fit of the ts03’s is adjustable with 4 sizes of tips. The collar of silicon stands out from the central core, to isolate the speaker into the center of your ear canal. I was pleased with the sound space this provides. I listened through the ts03’s for several hours via Spotify, including tunes from The Rescues, Joshua Radin, Van Morrison, Train, and Jeff Buckley. The acoustic pieces were like you were sitting in the front row of a live set. I tend to listen for little things, like turning on guitar pickups, turning pages of music, and the like. The scrape of a pick against the wrapping of a string, or an overdubbed vocal line. These buds let you dig into the picky little bits like that if you want to. Or you can just enjoy the feeling of being there. I never had the feeling that the earbuds were going to fall out. Once I started listening, everything else outside of the sound fell away.

I have really gotten used to wireless earbuds, but every now and again, usually when I’m reviewing a pair of wired earbuds, I’ll remember how quick and easy it is to plug in a cable and immediately have the sound in my ear. There’s no worry about video lag-time, where you hear the sound a split-second before you see what caused it. There are no batteries that may fail halfway through a listening session. (This is my current pet peeve for wireless earbuds!) The mic is right there on the cord by my jaw, rather than up on an earpiece, so if I want to have a quick aside with someone, or sneeze before I can get to the mute or whatever, I can grab the mic and block out my caller. Plus, wired headphones are never paired to another device that you have to go hunt down in another room or in your backpack, unpair, and re-pair to your current device. They just jack in and are playing, and that can be a good thing.

At $199.99, these are not throw-away units, by a long shot. They give you a truly deep experience of listening. If you want to hear the quality of what you’re listening to, the ts03s are going to deliver it. Yes, they are still earbuds, but they give an incredible amount of sound to you through that form.

Source: The sample for this review was provided by ThinkSound. Please visit their site for more info and Amazon to order.


Product Information

Price: $199.99 on think sound website, $119.99 on Amazon
Manufacturer: ThinkSound
Retailer: Amazon
Requirements:
  • AUX/phone sound source
Pros:
  • Quality cables (wiring) and connectors
  • Great sound and isolation
  • Warm, low tech outer look belies high tech insides
  • Waste-free packaging
Cons:
  • none, really

Filed in categories: Reviews

Tagged:

ThinkSound ts03+mic headphone review originally appeared on The Gadgeteer on August 17, 2017 at 9:11 am.

Note: If you are subscribed to this feed through FeedBurner, please switch to our native feed URL http://the-gadgeteer.com/feed/ in order to ensure continuous delivery.