Tronsmart Element T2 Bluetooth speaker review


Outdoor party season is fast approaching, folks! At my house, that means it’s time to fire up the grill, dust off the patio furniture, put the drinks on ice, and fire up the tunes. To help in the music department I’m testing the Tronsmart Element T2, an outdoor water-resistant Bluetooth speaker, to see how its holds up under outdoor party conditions. Does it rock? Let’s find out!

Unboxing and Overview

First impressions are always important, and Tronsmart does a nice job with packaging on the Element T2. The unit comes in an attractive, durable box that opens book-style with a magnetic clip that will be great for storage. In addition to the speaker, you’ll also find all the accessories you’ll need for operation: a USB power cable, an audio connector cable, and two options for carrying (a lanyard and a carabiner). It’s got everything you need to get started.

The Element T2 is very portable. At 5.6″ by 2.75″ by 1.8″ and 14 ounces, the Element T2 is roughly the size & weight of a can of soda (or your favorite beverage). The lanyard or carabiner attaches to an integrated loop on the speaker, enabling you to either clip it to an attachment loop on your bag. This is especially handy if you are hauling your stuff to the beach or the campsite.

Rounding out the details, the Element T2 is encased in a rubberized housing that looks pretty durable. The control buttons are molded into the housing for water resistance. You’ll find the auxiliary jack, micro-USB charging port, and a micro-SD card slot hidden behind a sealed panel on the side of the speaker. There’s a pair of LED indicators on the top of the device, and rubber feet on the base to keep it from skidding off of slick surfaces. Generally speaking, the construction is tight and seamless.

Setup and Use

One of the first things I noticed on setting up the Element T2 Bluetooth speaker are the friendly controls. Each isthe 5 buttons are big with good tactile feedback, and have simple icons to indicate their purpose. The system also uses distinctive sound effect cues to indicate functions such as powering up, discovery mode, etc. This all makes for easy setup; I didn’t feel that I needed to go digging through the user guide to figure out how it all works.

Pairing and switching between devices is easy. When you power up the unit, a blinking Bluetooth LED indicated that the device is in discoverable mode. Once you connect it to your device, a tone indicates successful pairing. The device automatically connects to the last device it was paired with, but you can also press and hold the Bluetooth button for two seconds to put it in discoverable mode if you wish to switch devices. If using the auxiliary cable is your thing, you can push the Bluetooth button once to toggle between the aux cable and Bluetooth connection. Over the course of a few weeks, I have played the speakers all over my house and yard using multiple devices, and have yet to encounter an issue.

Once you’re connected, it’s all go-mode from there. Play your music through your favorite app, and you’re off and running. There’s a built-in “pause/play” button on the device that works just fine with every app I have tried in Bluetooth mode, but all the other controls come from your device. You can adjust the volume from either the speaker or your device, which comes in handy if you find yourself on a sudden phone call and the speaker is on the other side of the room.

The Element T2 uses Bluetooth 4.2 and sports a strong connection with a 50-foot range. I’ve tested the speaker & paired devices on different floors of the house as well as 50-60 foot distances with no loss of quality.

Power usage is excellent. Tronsmart claims a 12-hour life on the battery without a recharge, and I have found this to be pretty accurate in testing. You do need to keep the included power cable handy and have a USB-enabled port for charging, but this does give you options for charging from your computer or stealing your USB-enabled outlet or converter.

The Element T2 also supports Bluetooth calls. If your phone rings while paired to the unit, you can press the Bluetooth button to answer, and again to disconnect. It’s a nice bonus feature, which allows you to keep your phone stashed safely away from the elements (or in the house).

Does it bring the rock?

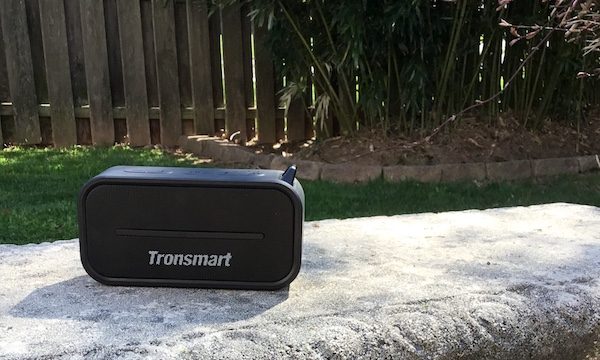
After extensive indoor and outdoor testing, I was pleasantly surprised at how much punch the Element T2 possesses for a compact, inexpensive speaker. The sound is crystal clear with a broad range thanks to enhanced bass and a 20 band equalizer adjustment capability. The bass is ridiculously good, especially if you’re listening to pop music (or old school funk and hip-hop, in my case). In the picture below, we were loading up the island themed tunes. 🙂

It’s important to note that this speaker is not designed to produce 360 degree sound. I found this out by trial and error, because it was not clear in any of the documentation. The reason for this is that the main speakers are designed to project from one side of the device, while the bass projects from the back. This means that you will want to position the speaker at the edge of the desired space, directing it towards the listening area. I found that this wasn’t a problem in use; I’d position the speaker open the far end of my kitchen or the deck to get the full sound. Tronsmart has designed this speaker so that you can pair two of the units together to provide full stereo sound; I did not test that feature here, but I would imagine that the quality would be excellent.

To take full advantage of the sound quality, You’ll really want to use the Tronsmart Element T2 Bluetooth speaker in more open spaces. I tested the unit in my home office (12’ by 14’), my kitchen (14’ by 25’), and outside in numerous locations. The bigger spaces really allow you to take full advantage of the speaker’s power and deep bass enhancements. It will do fine in a smaller office area, as volume is very manageable… but you really want to rock, right?

A quick note on the equalizer capability: not all music apps and devices support equalizer modes. My apple devices do, and it works great when switching from one style of music to another. There is no equalizer control on the speaker, however, so check your device and software if this feature is important to you.

One last note: we did do a test using the aux plug on our turntable, and sound quality was just as good playing vinyl with the old-school plug. We tracked through AC/DC’s “For Those About To Rock”… and we did rock. Well.

It gets the hose…

One of the benefits of being a device tester is that you really get to stress test stuff to see if it meets the claims of the manufacturer. For the Element T2, this meant the dirt & hose treatment.

The Tronsmart Element T2 has an IPX rating of 56, which effectively means that it is resistant to small particles (dirt, sand) and direct exposure to water. To validate this claim, we dragged the speaker around the yard all day while mowing the yard, planting the garden, etc. When finished, we gave it a bath with the garden hose while playing music. I think it was Bob Marley’s “Trenchtown Rock” that was on the playlist at the time this photo was taken.

The speaker endured the hose at full blast for about a minute and continued to play without missing a beat… even when the speaker bay was pooling with water from the continuous hose blast. There was some minor fuzz in the sound as it dried out from residual water on the speakers, which disappeared in about 5 minutes of drying in the sun. Considering that the speaker is not rated to withstand being submerged in water, that’s really impressive. I’m confident that it will survive sudden downpours, drink spills, or the stray water balloon with no issues whatsoever.

Conclusion and Pricing

The Tronsmart Element T2 is a portable, durable, compact, water-resistant Bluetooth speaker that brings excellent sound quality to the party with a couple extra bonus features like super-long battery life and Bluetooth-compatible phone pickup. What else is there left to talk about?

The price. As in under $25 on Amazon Prime right now. I was ready to give the Tronsmart Element T2 a full-fledged endorsement, but at this price, I think it’s a steal. You can even get two of them to take advantage of the paired stereo capability… just drop me a line and let me know how it works out for you!

Rock on!

Source: The sample for this review was provided by Tronsmart. For more info visit their site and order one from Amazon.


Product Information

Price: $49.99 MSRP
Manufacturer: Tronsmart
Retailer: Amazon
Pros:
  • Amazing sound with broad range and deep bass.
  • Slim and portable.
  • Fully water resistant.
  • Easy to setup for bluetooth pairing with multiple devices.
Cons:
  • Directional speaker — should be pointed towards the listening area, not set up in the middle of it.

Filed in categories: Reviews

Tagged:

Tronsmart Element T2 Bluetooth speaker review originally appeared on on April 21, 2017 at 8:00 am.

Note: If you are subscribed to this feed through FeedBurner, please switch to our native feed URL http://the-gadgeteer.com/feed/ in order to ensure continuous delivery.

Pelican introduces the Protector Phone Case for LG G6


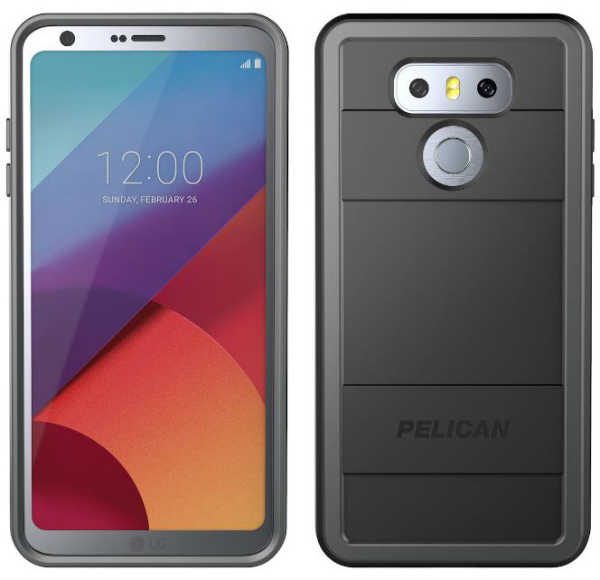
I know everyone seems to be batting their eyelashes and drooling over the Samsung S8 and S8+ right now, but there’s another very nice phone that shouldn’t be overlooked – the LG G6. If you opted for G6 instead of a Samsung and you’ve been looking for a rugged case to keep it protected, the new Protector Phone Case from Pelican should cover it – literally. Designed to military specifications to survive drops, bumps, and bruises.

The Protector case features a soft-touch over molded dual-layer design that is made from the same indestructible, proprietary materials that Pelican has been using in their products for over forty years. The LG G6 case which is warranted for life provides impact absorbing protection while remaining as slim as possible. You can buy one for $39.99 at pelicanphonecases.com and at Amazon for a bit less.

Filed in categories: News

Tagged: ,

Pelican introduces the Protector Phone Case for LG G6 originally appeared on on April 21, 2017 at 7:09 am.

Note: If you are subscribed to this feed through FeedBurner, please switch to our native feed URL http://the-gadgeteer.com/feed/ in order to ensure continuous delivery.

Gaming ain’t so tuff when using the Scuf Elite Paddle Control System & Directional Bias Dpad for the Microsoft Elite controller


If you are a hardcore console gamer or just an informed one then you should know about Scuf gaming gear. They make high-end gaming controllers and accessories for the Xbox and PlayStation consoles. So it would make sense that they would adapt some of their popular innovations to the MS Elite Controller, and that’s just what they did by introducing Scuf Elite Paddle Control system & Directional Bias Dpad for the MS Elite Controller. 

This kit consists of four Scuf Elite Paddles and one Directional Bias Dpad. The Scuf Elite Paddles are designed to replace the standard MS Elite Controller Paddles making the controls layout more like a Scuf controller which is great if you are a long time Scuf user. The Directional Bias Dpad replaces one of the two Elite controller Dpads and is tapered to allow for easy touch identification while playing. The Scuf Elite Paddle Control System & Directional Bias Dpad is available on the Scuf website for $39.95.

Filed in categories: News

Tagged: ,

Gaming ain’t so tuff when using the Scuf Elite Paddle Control System & Directional Bias Dpad for the Microsoft Elite controller originally appeared on on April 20, 2017 at 3:32 pm.

Note: If you are subscribed to this feed through FeedBurner, please switch to our native feed URL http://the-gadgeteer.com/feed/ in order to ensure continuous delivery.

Your half-eaten bags of Doritos will never go stale again


It is not unusual for us to open a new bag of chips, pour out a couple servings and then fail to find a clip to keep the top of the bag from unfolding and going stale. Sometimes we end up using a paper clip or use one clip to secure two bags. Clips and twist ties are not a very good solution for keeping bags closed and food fresh. What you really need is a way to easily reseal the bag like the Air Lock from FRESHeTECH.

The Air Lock is a small hand-held bag reseller that reminds me of a miniature version of a Food Saver, but without the vacuum feature. We use a Food Saver when we freeze leftovers, but it’s not economical to use it for things like chips, crackers, and cereals because you have to use special bags with it.

The Air Lock does not require special storage bags because it can create an airtight seal on any existing plastic bag using micro-thermal technology.

The device has a built-in rechargeable battery that charges through a USB cable, so you don’t need to feed it batteries. You just clamp the edges like you would with a stapler, but you slide the Air Lock across the end of the bag to create the seal.

The Air Lock even has a built-in magnet so you can store it on the side of your fridge.

You can read more about the FRESHeTECH Air Lock by visiting freshetech.com and you can buy one from The Grommet or Amazon for $15.

Filed in categories: News

Tagged: ,

Your half-eaten bags of Doritos will never go stale again originally appeared on on April 20, 2017 at 10:59 am.

Note: If you are subscribed to this feed through FeedBurner, please switch to our native feed URL http://the-gadgeteer.com/feed/ in order to ensure continuous delivery.

Pearl RearVision wireless rearview camera review


We have reviewed numerous dash cams over the years, but I believe that this is the first backup cam that we’ve reviewed. If I’m wrong about that, then the Pearl RearVision rearview car camera is definitely the first wireless backup cam that we’ve ever reviewed on The Gadgeteer. Let’s put the car in reverse and check it out.

What is it?

The Pearl RearVision is a backup camera for your vehicle that doesn’t require you to route wires for power or to a display. It uses a solar charger to keep its battery charged and it uses WiFi and Bluetooth to transmit images to a smartphone.

What’s in the box?

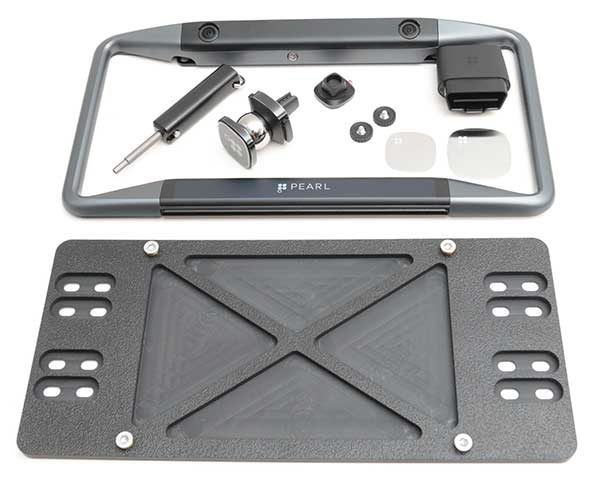
Pearl RearVision license plate frame camera
License plate frame adapter
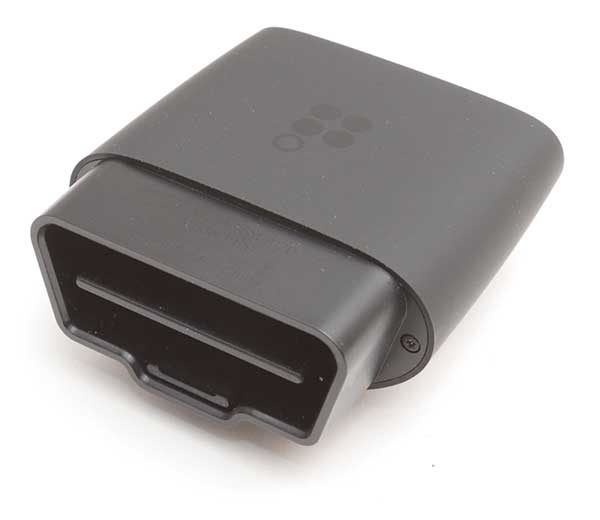
OBD adapter
Smartphone car mount
Installation tool

Design and features

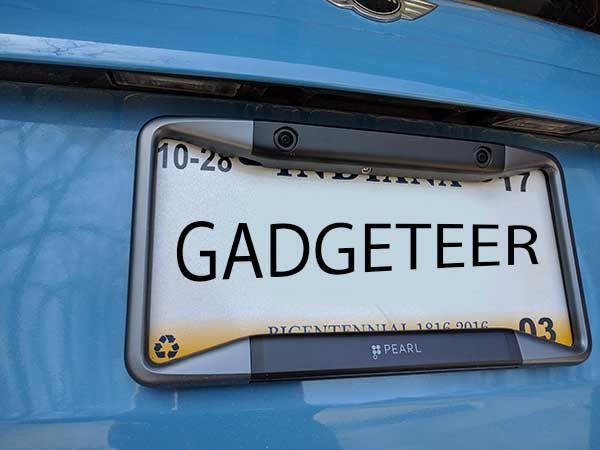
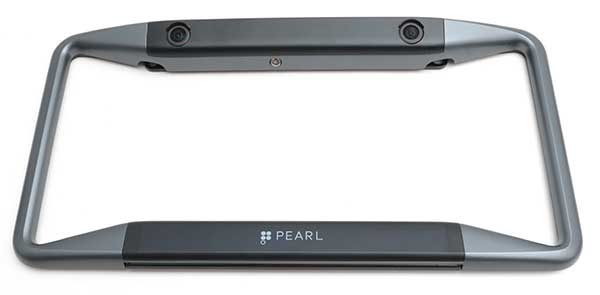
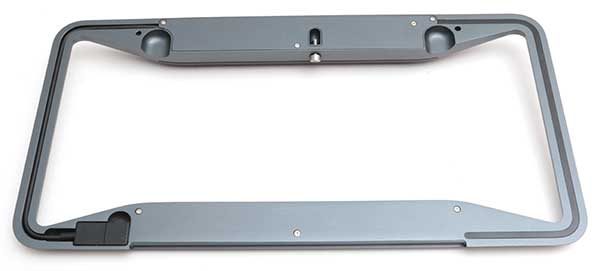
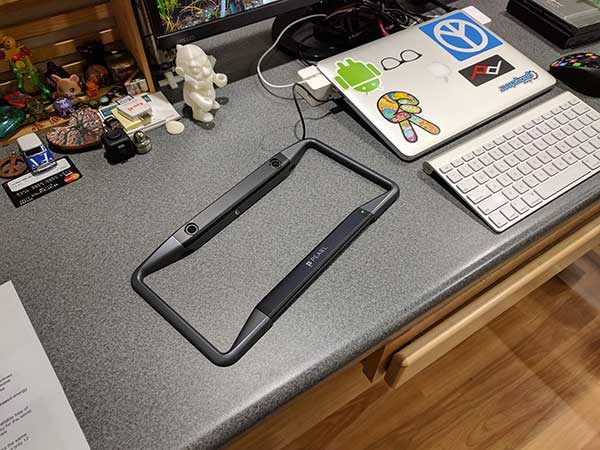
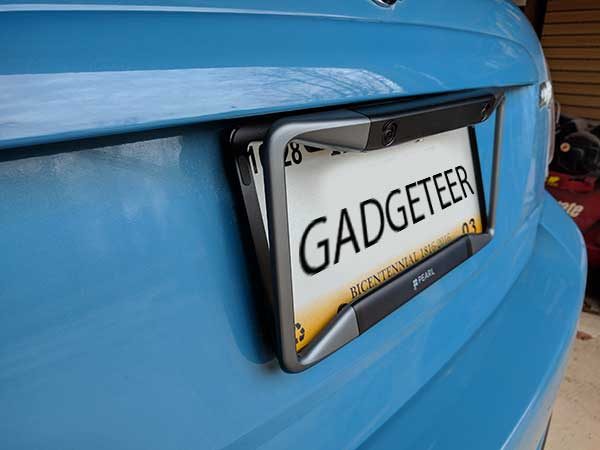
The Pearl RearVision looks like a license plate frame, but the frame has two cameras along the top edge. The cameras have up to 180° field of view and a special coating that repels water. One of the cameras has infrared for night vision, and the other one is optimized for daytime.

The frame also has a built-in solar panel that charges the internal battery on bright sunny days, as well as cloudy days.

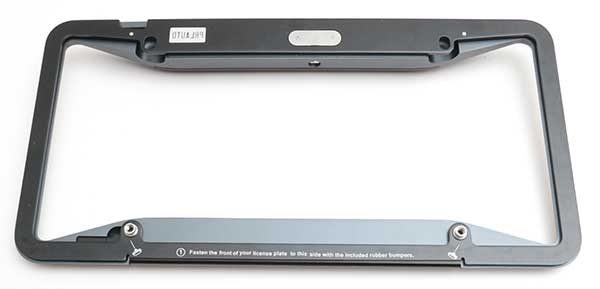
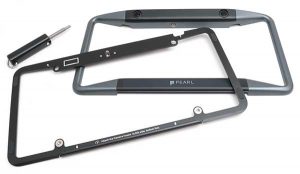
The frame is composed of two pieces that include the black metal frame that installs on the rear of your vehicle.


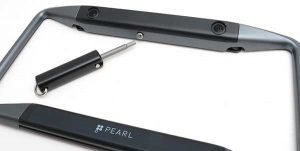
A special tool is included with the RearVision. This tool is used to detach the RearVision from the metal frame so that it can be installed on the vehicle.

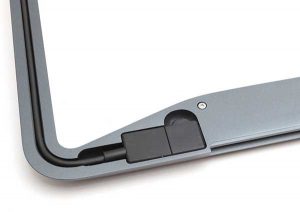
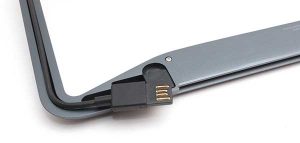
Although the Pearl RearVision does not require any wiring to a power port inside your car since it can use solar power to charge its internal battery, you can also charge it with the built-in USB cable.


The USB cable is integrated into the frame with a rubber cover that protects the connector from moisture and weather.

Installation of the Pearl RearVision rearview camera

Although not required, the first thing I did before installing the Pearl RearVision was to charge it using the built-in USB cable.

I then took the RearVision, the special tool install tool, the included OBD adapter, and my Nexus 6P Android smartphone out to the garage.

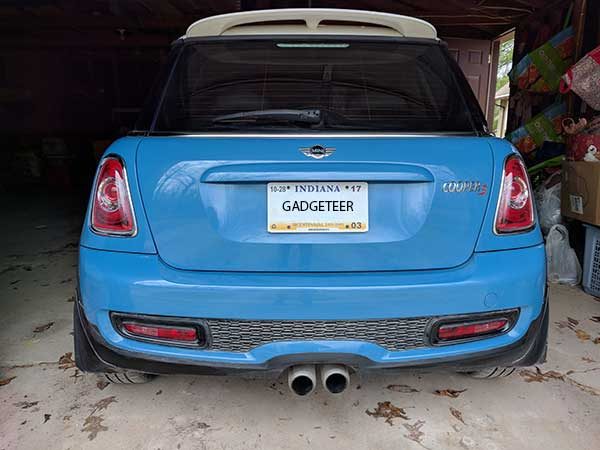
First I removed my existing license plate which was attached to the back of my 2013 MINI Cooper with 4 Phillips screws. Note that the Pearl RearVision is compatible with cars 1996 and newer.

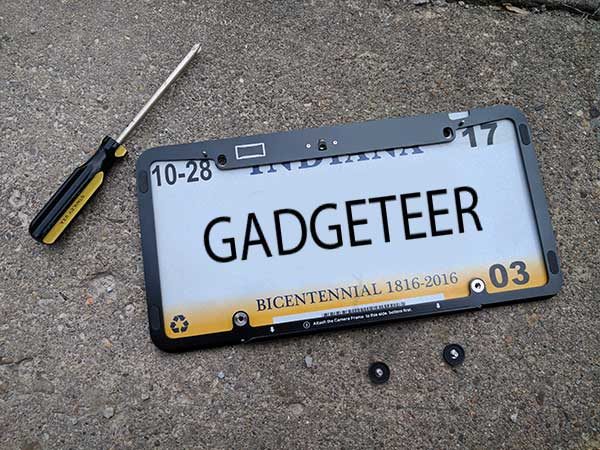
I then attached the RearVision frame to my license plate using the provided screws and then attached the frame and plate to my MINI using 2 of the original screws that were holding the license plate in place.

The RearVision hooks to the bottom of the frame and then snaps in place. The special install tool is used to tighten the theft-resistant set screw which holds the camera securely to the frame.

Looks great, although I was a little concerned that the frame covers and partially obscures some of the info on my license plate including the state and expiration info. I haven’t been pulled over by a cop yet, so I guess it’s not a problem.

The next step of the installation is to plug the OBD adapter into the OBD port in the MINI. This adapter communicates to your phone and the RearVision frame using Bluetooth and WiFi and has a built-in speaker for audio alerts.

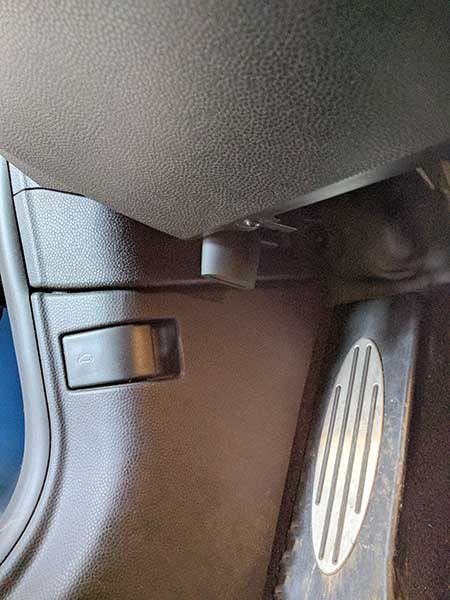
The OBD port in my MINI is located under the dash on the driver’s side. The location of this port varies per car make and model.

Installing the adapter is easy but awkward because I had to do it mostly by feel.

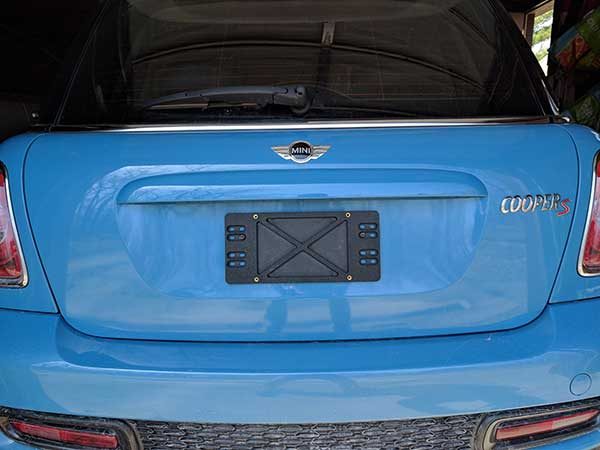
I thought I was all set until I needed to get into my trunk and discovered that the top edge of the RearVision camera blocked access to the trunk latch. Whoops… Lucky for me, the folks at Pearl had included an adapter plate which I didn’t think I needed to use. Wrong!

I removed the RearVision, installed the adapter plate which lowers the frame to allow access to the trunk latch. The extra step was easy, but I felt foolish for not noticing the problem the first time around.

Ahhh, that’s much better.

Note that the frame adapter is not included with the RearVision. But if you find that you need it, they will send you one for free according to their installation troubleshooting page.

You can use the included magnetic car mount to locate your smartphone inside your vehicle for optimal viewing. I skipped this step because I already use the iOmount iOauto Pro mount in my MINI.

After the RearVision is installed on the outside of the car and the OBD adapter is installed inside the car, the last step is to install the mobile app which detects the OBD adapter and RearVision camera to complete the setup.


There is a setting in the Pearl app to automatically launch the app when you put the phone on the included magnetic mount, so the mount must have an NFC chip in it (I am just guessing and haven’t proven this theory). I have noticed that my Nexus 6P will sometimes (not always) automatically launch the app when I get in the car and turn on the screen even if the Pearl app wasn’t the last app that I had been using. This doesn’t happen every time though.

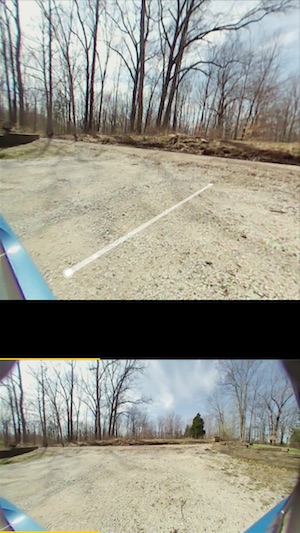
The app shows a live view with white guidelines to help you avoid obstacles. These guidelines can be calibrated through the app’s settings by doing a few easy measurements.

The image will show ripples, a red border will show along the edges of the screen and the OBD adapter will sound an audible alert if there’s an obstacle in the path of the car. I tested this by walking behind the car. The RearVision also picked up my cat Max as he walked behind the car.

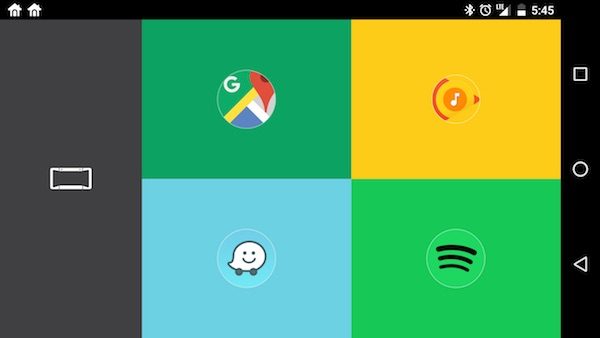
The RearVision live view disappears after a minute and then shows the app launcher screen that you see above. You can modify the delay from 10 seconds to 2 minutes before the launcher appears.

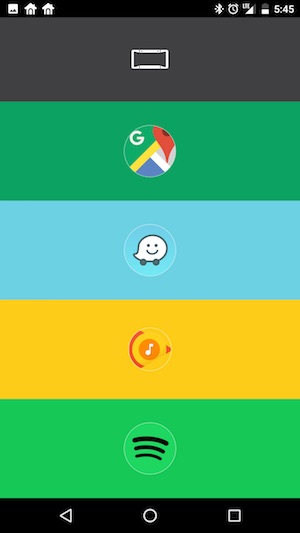
The launcher can be customized to add apps from a list of music, navigation, and utilities. Unfortunately, you can’t add your own apps to the list.

You can change the view from landscape to portrait mode.


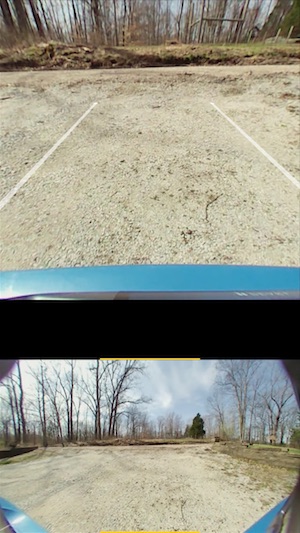
In portrait view, the backup camera shows a split screen that has a wide angle and zoomed views. You can swipe the top to zoom the edges.

I have been testing the Pearl RearVision rearview camera for several weeks. It works well 90% of the time and provides a clear view of what is behind my vehicle.


The view from the RearVision cameras works equally well in daylight and night.

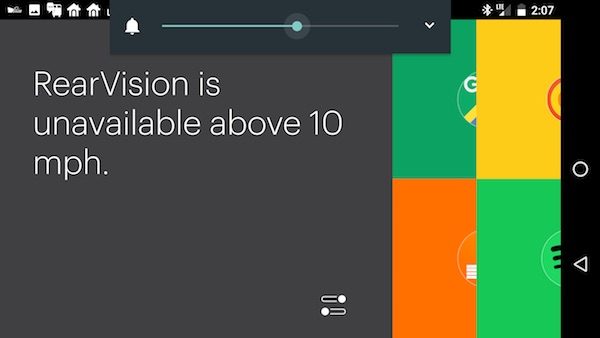
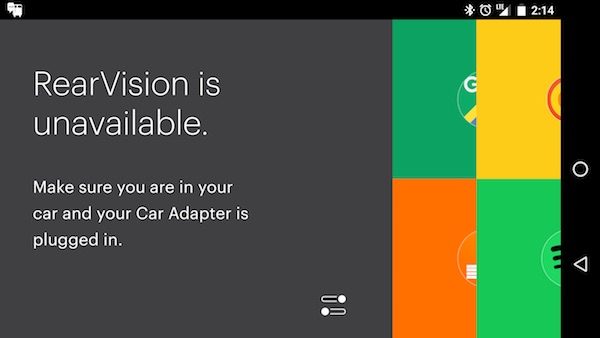
If you try to access the cameras while you’re driving, you’ll see this message.

I’ve seen the message above on more than one occasion. I’ll usually have to close the app, toggle Bluetooth off and on, and relaunch the app to fix the issue. After a recent update to the system, I don’t believe I’ve seen the message, so it could have been a bug that has been fixed.

See it in action

I’ve been using the RearVision for several weeks now and it works well although it hasn’t alerted me of obstacles (yet).

Sorry for the jerky video. I was holding a phone in one hand to capture the video and trying to drive backwards with the other hand while just looking the display.

It has been tough making myself look at the screen since my brain is programmed to only use my rear view and side mirrors when I’m backing up. When you’ve been driving for 30+ years like I have, it’s hard to teach an old dog new tricks 🙂

Something to consider before buying the Pearl RearVision

It’s important to realize that to use the Pearl RearVision camera, you have to have your phone with you. Without it, you will not be alerted of obstacles in your path. If someone borrows your car and doesn’t have the paired phone, it will not work.

Final thoughts

I like the Pearl RearVision rearview camera because it doesn’t require a complicated/expensive install or modification of your vehicle. The all wireless design including the solar charging frame makes this rearview camera system attractive to people who want a quick and easy setup. However, the price of this system is considerably higher than other DIY backup cameras systems with dedicated displays. Pair that with the fact that you MUST use your phone with it are issues to keep in mind before considering a purchase.

Source: The sample for this review was provided by Pearl. Please visit their site for more info and Amazon to order.


Product Information

Price: $499.99
Manufacturer: Pearl Auto
Retailer: Amazon
Requirements:
  • 1996 or newer vehicle
  • iOS or Android device
Pros:
  • Easy to install
  • Solar powered and wireless
  • Simple app
Cons:
  • Expensive
  • May need a frame adapter which is not included in the package
  • Only works if paired with an iOS or Android device
  • Can't record video or take snapshots

Filed in categories: Car Gear, Reviews

Tagged: ,

Pearl RearVision wireless rearview camera review originally appeared on on April 20, 2017 at 8:08 am.

Note: If you are subscribed to this feed through FeedBurner, please switch to our native feed URL http://the-gadgeteer.com/feed/ in order to ensure continuous delivery.