Penclic Mouse R2 Wireless pen-style mouse review

Workplace ergonomics have become a significant problem in the U.S., with repetitive strain and related injuries costing over $20 billion annually in healthcare costs and lost productivity. Swedish-based Penclic looks to combat this problem through design, producing ergonomic and comfortable computer accessories that emphasize comfort and productivity.

For this review, I am testing the Penclic Mouse R2 Wireless, the latest generation of their pen-style mouse. It’s a slick little piece of engineering, with some additional productivity features on top of excellent ergonomics. Let’s take a walk through the details and see if it’s right for you.

First Impressions

The base of the unit is about a half the size of a traditional mouse, with a pen-style grip attached vertically to the base. A USB nano receiver is included for wireless use. A USB cable is also included for charging the rechargeable battery, and can also be used to drive the mouse while charging. The package includes a felt bag, a nice touch for traveling and commuting.


Out of the box, the Penclic Mouse shows its heritage in Scandinavian engineering. The design is compact, sleek, and balanced. Materials and build quality are excellent, with nice tactile feel to all the appropriate surfaces. There are no whimsical color schemes or artsy design flares here… it looks and feels like a business tool, ready for action.

Device Setup and Walkthrough

I tested the mouse on three devices (a 13″ MacBook, a 15″ Thinkpad, and an iMac desktop), and found that setup was seamless every time. You remove the protective tab to activate the rechargeable battery, plug in the USB receiver, and flip the “on” switch under the base. That’s it. No drivers to install. You’re off and running!

The pen itself is a bit thicker than a standard pen and attaches to the base via a ball joint that allows 360-degree rotation. There is a total of five buttons on the pen itself. The top of the pen sports a primary “left click” button and a set of rocker-panel-style buttons for “right click” and “middle click” actions. The thumb-side of the pen includes two additional buttons for “back click” and “forward click”. A scroll wheel is positioned on the base, designed to be used with your pointer finger when holding the device is a classic pen-style grip.

(Speaking of thumbs: I should note that the model I tested is only made for right-handed users. Penclic does offer left-handed models as well as ambidextrous models on their web site.)

Under the base, you’ll find the on/off switch, a button to reset the wireless connection (typical on all wireless mice), and an access panel to get to the battery. There’s a port on the front of the base to plug in the wired USB cable when a recharge is required.

Using the Penclic Mouse R2 Wireless

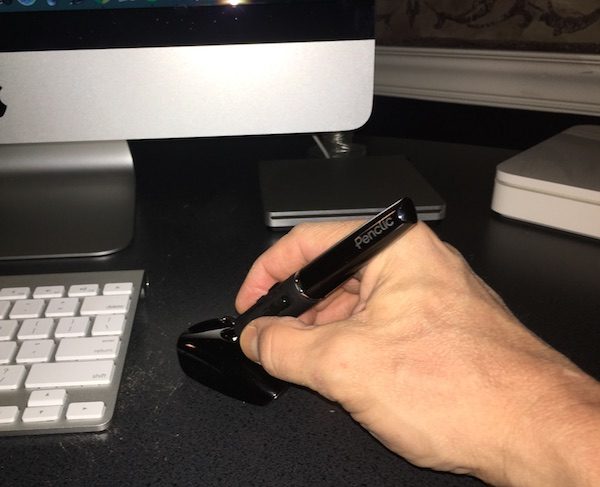
I quickly learned to appreciate the overall design of this mouse. You grip it and use it just like a traditional pen. You can position it at just about any angle that is comfortable for your hand and wrist, and the base stays solidly planted on your work surface. The base and pen are substantial enough that it doesn’t feel like it’s going to slip out of your hand, and rubberized grip surfaces ensure that you have steady control of the mouse through all ranges of motion. It really does feel good to use for extended periods of time.

As far as performance goes, I was pleasantly surprised by the fluidity of motion the mouse presents in actual use. Response is light and easy, requiring much less hand movement than a traditional mouse to get across the screen. Control is precise with smooth, fluid response to your hand gestures without any additional calibration or adjustments. You can tweak the control for different screen resolutions, but I never had to make an adjustment switching between laptops and desktops. It also works consistently on just about any surface without a dedicated pad, which is great for work on-the-go.

The buttons and scroll wheel took a little more time to get used to. I’ve included an illustration from the Penclic web site so you can see how the arrangement works. Everything is positioned naturally where your thumb and pointer finger fall when you grip the barrel, and tactile feel is excellent. It is different from a traditional mouse or track pad, however, and takes some practice to adjust to the configuration. I would expect that you would have a much faster adjustment if you are used to other stylus-type pointing devices.

Battery use is very efficient. The product claims that it can last 3 months on a single charge. Another nice touch: battery life is improved by an automatic shut-down after 10 minutes, and re- activates on first click. There’s an LED indicator on the base that glows red when recharge is required and switched to green when fully charged. I did have to charge it after the first day of use but haven’t had to charge in two weeks of regular activity.

Overall, I would say that it took a couple of hours before I was completely comfortable with using the Penclic. Once I got there, I actually found it to be easier to perform all the usual tasks (web browsing, working in spreadsheets, traversing e-mail, etc.) with significantly improved comfort and less strain on my hand and wrists. I’m a believer.

Conclusions and Pricing

After two weeks of constant use, I completely appreciate the benefits of the Penclic R2 Wireless Mouse. Not only does it deliver on comfort and ergonomics, but it’s clear that Penclic has carefully examined all aspects of the device to improve your day-to-day performance. If you’re having trouble with strain or discomfort related to using a traditional mouse, the Penclic R2 Wireless Mouse may be right for you. In fact, I would say that the ergonomics and design make it worth a look even if you don’t have these issues.

Penclic offers a series of models and options ranging in price from $70 to $100 USD, in addition to some great information about office ergonomics on their web site. Visit the penclic web site to learn more!

Source: The sample for this review was provided by Penclic. For more info visit their site and Amazon to check prices and order.


Product Information

Price: £59.99
Manufacturer: Penclic
Retailer: Amazon
Pros:
  • Ergonomic, comfortable design
  • Easy to setup
  • Solid, substantial feel in regular use
  • Solid construction
  • Excellent design and usability details
Cons:
  • Takes some adjustment to get used to

Filed in categories: Computer Gear, Reviews

Tagged:

Penclic Mouse R2 Wireless pen-style mouse review originally appeared on on April 2, 2017 at 10:03 am.

Note: If you are subscribed to this feed through FeedBurner, please switch to our native feed URL http://the-gadgeteer.com/feed/ in order to ensure continuous delivery.

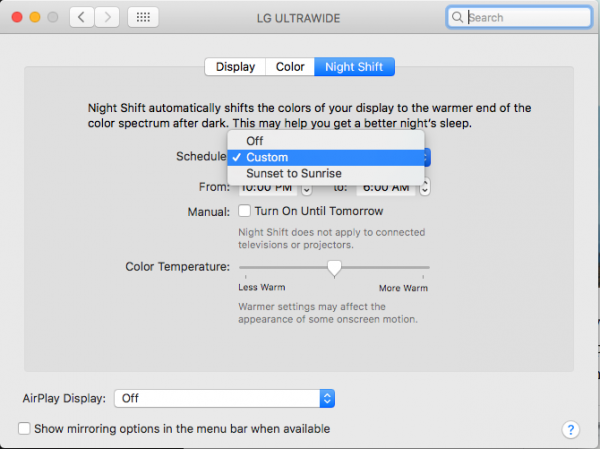
Night Shift available now on the Mac desktop

Apple has finally rolled out Night Shift on the newest update to macOS Sierra. Night Shift is a program that gradually removes the blue light of your display to help relieve eye strain and help you sleep better. A similar program, f.lux, has been available cross-platform for a while now, but Apple decided to include a similar software on iOS and now macOS. Check your Mac for update 10.12.4 if you are looking forward to this feature for your desktop.

Filed in categories: Health, Fitness, Sports, News

Tagged: , ,

Night Shift available now on the Mac desktop originally appeared on on April 2, 2017 at 8:59 am.

Note: If you are subscribed to this feed through FeedBurner, please switch to our native feed URL http://the-gadgeteer.com/feed/ in order to ensure continuous delivery.

Pelican bottles, standing desks, earbuds and more – Weekly roundup

It’s Saturday evening, and you know what that means… The week is over in just a few short hours. To make sure that you don’t miss one of our reviews, articles or riveting news posts, I’ve made a list of everything we post this week. Click through and enjoy all the listy goodness.

Reviews

Articles

News

Filed in categories: News

Tagged:

Pelican bottles, standing desks, earbuds and more – Weekly roundup originally appeared on on April 1, 2017 at 6:30 pm.

Note: If you are subscribed to this feed through FeedBurner, please switch to our native feed URL http://the-gadgeteer.com/feed/ in order to ensure continuous delivery.
Eufy RoboVac 11 robotic vacuum review

When you live in a nearly 100 year old house with hardwood floors and 2 dogs that are over-achievers when it comes to shedding, you learn to live with pet hair.  Seriously, Steve – our older dog – sheds enough each week to create a 1/3 size replica of himself.  There are many automated solutions out there for vacuuming up the excess pet hair, but many of those devices have interesting definitions of how much is “excess”.  How well does the Eufy RoboVac 11 stack up against the competition?  Let’s find out!

The RoboVac 11

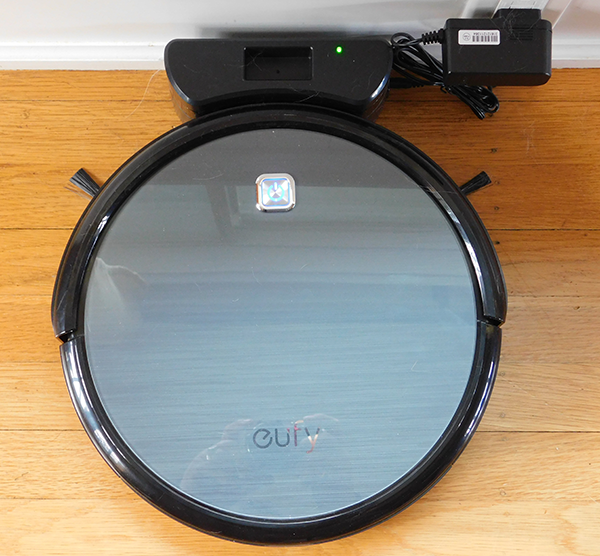
Eufy is about 13 inches across, 4 inches tall and weighs in at around 3 and a half pounds.  Pretty average, size-wise.  As you can see from the picture below, Eufy has 2 side brushes on the underside that spin as the vacuum moves to help dislodge dirt and debris.  The vacuum sits just ever so much higher off the floor than other robo-vacuums, and there is a pretty good reason for this.  More on that shortly.  Setup is easy – snap on the 2 side brushes, peel off the plastic cover that protects the body in shipping, place the unit on the charger and you are ready to go.

The manual tells you to place the base unit/charger in a place where you can have approximately 3 feet on both the right and left sides, and 6 feet behind – assuming you place the base against a wall.  Problem is, our house is 1200 square feet split among 2 humans and dogs, so finding anywhere with that much open space is as statistically close to impossible as you can get.  I am happy to say that is merely a guideline – I was able to get this in our dining room with about 2 feet on either side and maybe 3 feet behind, and Eufy seems to like that arrangement just fine.  After an initial charge of about 6 hours (unusual to say the least, and no subsequent charge has taken that long), Eufy was ready for action.

A remote control is supplied in order to program Eufy.  You’ll need 2-AAA batteries as they are not included in the package.  Once the batteries are in, you can set the time.  A word of caution here: whenever you use the remote, you should have it pointed at Eufy.  The remote does not operate on radio frequencies but rather on infrared, so if the command from remote does not reach Eufy directly, you may end up wondering why things don’t work as expected.  My example: I did not aim the remote at Eufy when setting the time, so I can only assume that Eufy’s internal clock started ticking at midnight.  That assumption was proven when Eufy started working on its schedule – which was off by as exactly the difference between midnight and the time when I set the remote.  Lesson learned.

But does it vacuum?

Like other robotic vacuums, Eufy has a bumper guard on the front and sensors elsewhere to help guide it through what it calls “obstacles” and you call “furniture”.  The RoboVac 11 does not come with any sort of electronic fence but it does appear to have a cliff sensor because not once has Eufy ever tried to fall down the basement stairs.  There are a few operating modes: spot (moving in ever-widening circles), edge (find the edges of the space and clean along them), single room (good if you don’t have an open floor plan) and manual (you guide with the directional keys on the remote).  There are also a couple of automatic modes including a max clean which amps up the suction for carpeting but drains the battery faster.  You can also program Eufy to clean at a specific time of day and when the time comes, it will clean using a variety of the modes to cover the most space.

The front of Eufy showing off the bumper:

And the back where the collection drawer and HEPA-filter is located:

This has to be one of the quietest vacuums I have ever seen.  I mean, this guy is astonishingly silent and yet effective.  Every time I empty the container I am surprised by how much dirt has been collected.  And the house shows it – in the couple of weeks Eufy has been on the job, there is a marked reduction in the dog hair hanging around.  The house just looks good.

The quirks

And you knew there had to be some, right?

The first one really isn’t a quirk, but more of a wish for different behavior.  Eufy does not have an app to control it as some others do.  It would definitely add to the price (which is tantalizingly low), but having the option would be nice, especially if it could tell me things via the Internet – like that it is stuck somewhere, the battery is low, it missed a cleaning cycle.  Just a bunch of different “smart-home” type data that is becoming common with automated appliances.

On the getting stuck thing: I suppose Eufy does not get stuck any more or less than any other vacuum, but there are a couple of places in my living room where Eufy just doesn’t seem to learn to avoid.  One is a cold air return grate of the floor, another is under an ottoman in the living room, and another behind the TV where the dangerous octopus collection of power cords live.  Eufy will wander into these traps a couple of times a week, and when Eufy becomes trapped, he beeps a few times and shuts down.  The first obstacle is easy, but if Eufy runs while you are gone, you may play an elaborate game of hide and seek when you see he isn’t on the charge base.  And the remote does not help.

Another quirk: carpeting.  Most of our house is hardwood flooring, but we have an area rug in the living room that Eufy navigates just fine.  Weirdly, though, we have a thinner runner rug by the front door, and about half the time Eufy gets on that carpet and then can’t keep going.  It must be something to do with the way the wheels interact with the carpet, but often I have to rescue Eufy from the rug.

Finally, getting back to home base can sometimes be a challenge.  There does not appear to be any sort of system that would allow Eufy to home in on the charge base, or if there is it is somewhat ineffective.  At least once a week I have to pick Eufy up and put him back on life support because he died in the field.  One afternoon just for laughs (thanks to the cold medication I was taking) I put Eufy on auto and let him clean a while, then hit the home button.  What ensued was a weird dance around the charge base even though he was only about six feet from it when he received the recall order.  All told, from the time I told him to go home until he finally parked on the base it took nearly 10 minutes.  And he was not vacuuming during that time.

One thing that isn’t a quirk, however, is the dog reaction.  The first couple of days Eufy was in the house, the dogs ran up to him and barked, and when he turned they ran away.  Steve spit tennis balls at him those first few days, but Eufy took it like a champ and kept on going.  Now Eufy is just another thing in the house and the dogs are OK with him as long as he doesn’t run into them while they sleep on the living room carpet.

Maybe the last quirk is that after having him around long enough, you too might anthropomorphize the device and start thinking of it as a “him” with the name “Eufy”.

The verdict

The Eufy RoboVac-11 is a great automated solution.  It works as well as any of the other big names but does so at a fraction of the cost.  It is very well made and appears that it can stand a very long life running into the sofa legs.  The house regularly looks cleaner than it has for some time, and in the end that is the reason you buy something like this.  Replacement supplies like the HEPA-filter and side brushes are available on Amazon, so you should have no trouble keeping your Eufy running smoothly for a very long time to come.

Source: The sample for this review was provided by Eufy.  For more info visit their site or check Amazon for pricing.


Product Information

Price: $240.00
Manufacturer: Eufy
Retailer: Amazon
Pros:
  • Low price compared to others in the same class
  • Well made
  • Incredibly quiet
Cons:
  • No app to control

Filed in categories: Home and Kitchen, Reviews

Tagged:

Eufy RoboVac 11 robotic vacuum review originally appeared on on April 1, 2017 at 5:41 pm.

Note: If you are subscribed to this feed through FeedBurner, please switch to our native feed URL http://the-gadgeteer.com/feed/ in order to ensure continuous delivery.

Autonomous SmartDesk 2 standing desk review

In my business travels, I’ve been starting to see more standing desks appear in the offices of both large corporations and small startups.  As health related studies have recommended periodic standing breaks for workers that are desk-bound, the convenient benefits of a standing desk are obvious.  Here, we will be reviewing the SmartDesk 2 from Autonomous.

SMARTDESK 2 OPTIONS

The SmartDesk 2 has several standing desk options to choose from.

Tabletop options include:

  • 5 different surface finishes from simple white or black to wood grains.
  • 6 different table shapes with different lengths(53″ or 70″), “cutout” styles, and curvatures

Frame options include:

  • 3 different colors consisting of white, black, or grey.
  • 2 different frame platform options:
    • Home Edition consisting of a single motor capable of supporting 220 lbs through a 29″ to 47″ height range
    • Business Edition consisting of dual motors capable of supporting 300 lbs through a 24″ to 51″ height range

For this review, we have a white rectangular 53″ tabletop with a white Business Edition frame platform.

DELIVERY

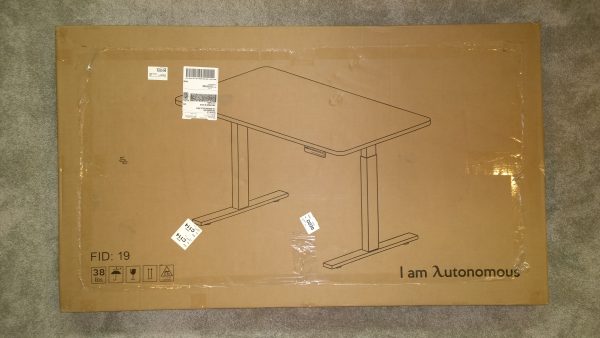
Your order comes in two boxes, presumably so they can efficiently send you separate tabletop/frame color options according to your order.
The box containing the frame is the heavier of the two, checking in at 67 pounds. It was laid down horizontally on my porch, and wasn’t the easiest package to handle as the size of the box was slightly unwieldy.
The tabletop package weighs a much more manageable 38 pounds and had outer nylon straps, enabling you to use those as handles to lift the package inside.
Overall, bringing the frame box indoors may require two people, or the box can be opened outside where the individual components can be removed separately.

Since my desk would be installed in a 3rd floor office attic space, it was easier to remove the contents from the frame box and bring each of the components individually upstairs.

UNBOXING

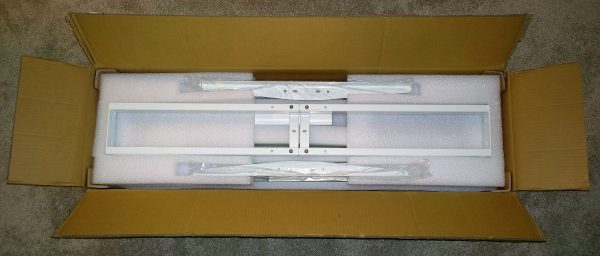
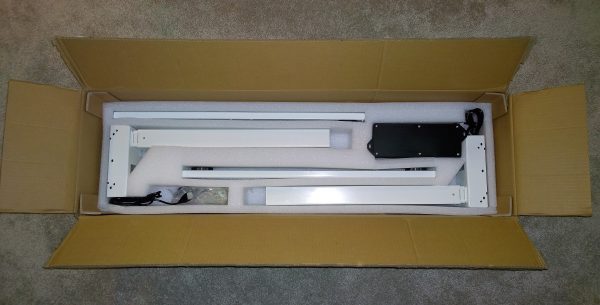
Opening the frame box, each of the components were housed with foam inserts protecting the contents from each other and from external damage.
In fact, my frame box had a sizable gouge on the side, but the foam did its job as all the components were undamaged.
Tucked away inside the foam inserts were a few more accessories.  A parts bag included bags of screws, adhesive backed cable organizers, and your standard fare Allen wrench.  The screw bags were each labeled with fastener specifications (i.e. Mx12) which removed any doubt for screw selection during assembly.
A few electronics components were stored here including a controller box, a control pad, a power cord, and two cables that connect the actuators to the controller box.

Likewise, there were foam inserts for the box containing the tabletop protecting both its edges and surfaces.

TABLE DESIGN

The frame platform consists of several parts:

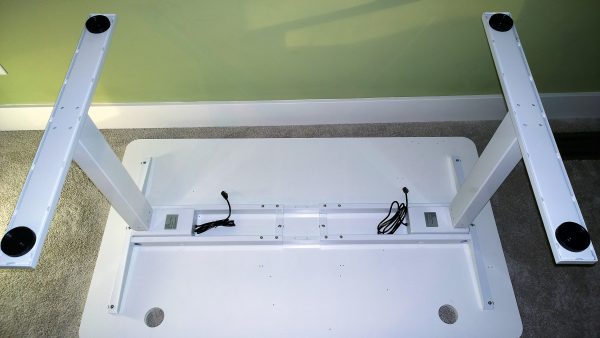
The tabletop is supported at each end with an “I” beam shaped configuration.  The horizontal pieces are comprised of the “side bracket” on the top, and “feet” at the bottom.  The vertical section, the “leg”, feature 3 tiered ‘telescoping’ structures that extend via a linear actuator.  The telescoping action is what ultimately gives the standing desk it’s height adjustability.

The tabletop is supported by horizontal components consisting mainly by 2 “crossbar ends” at each end of the table.  Both “crossbar ends” are joined together with lengthwise adjustable “center rails” that can accommodate all the different length tabletop options.

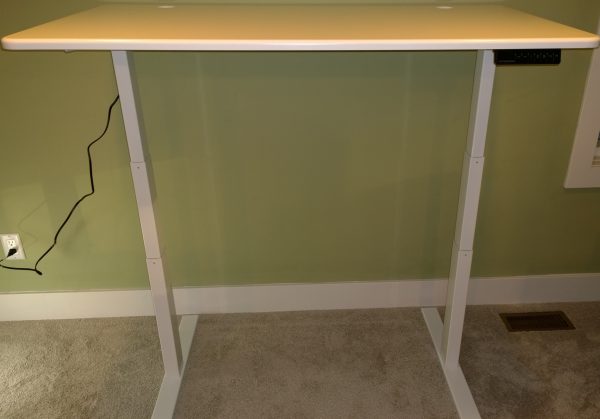
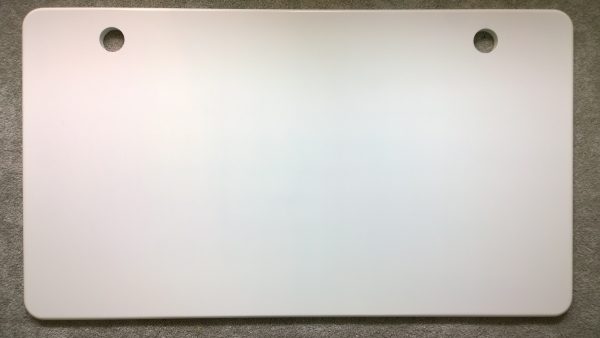
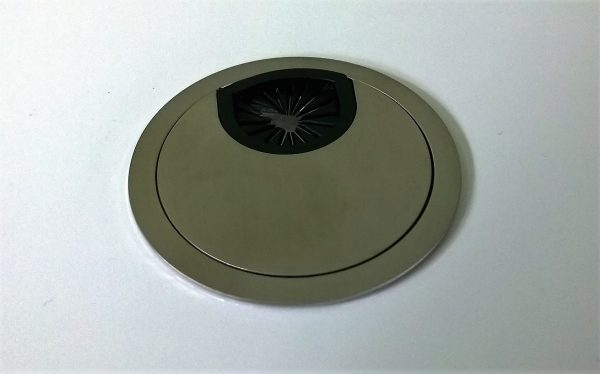
The tabletop itself is a nice semi gloss surface with rounded edges.  A “switch” panel at the right front edge controls the height of the table.  There are two cable holes at the rear of each side of the table to provide some measure of cable management.

ASSEMBLY

Assembly of the Smartdesk was straightforward and felt similar to putting together a piece of furniture from IKEA when it came to degree of difficulty.
The assembly manual consisted of two sheets with diagrams and instructions on half of a page.  The diagrams were small and sometimes it was difficult to discern details like screw placement.  I think I would have preferred a full sheet per page to have much larger diagrams to view.
Additionally, λutonomous had an assembly video on their YouTube channel.  I personally prefer paper instructions, but the video showed exactly how everything is installed/fastened to make things clear.
Assembly started with laying the desktop with the finished surface down and with the predrilled holes facing up.
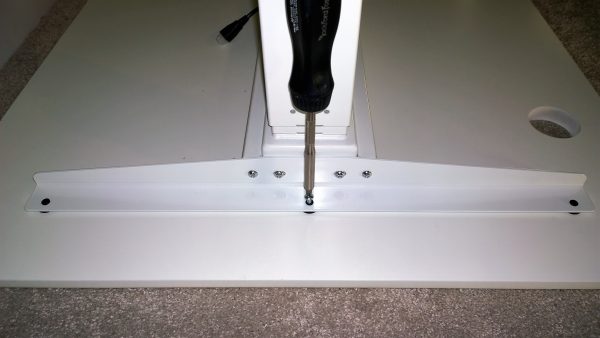
The horizontal frame support for the desktop was initially positioned into place using the specified predrilled hole locations as a guide.  The vertical legs were then positioned into receptacles on the frame.
The toughest part of the install was here, where you had to line up the holes of the leg and frame.  The leg needed to be raised just about a millimeter or two to line up the holes.
The relative locations of all the holes between the frames, desktop, and legs fit well and you never felt you had to force fit anything. Overall, the Smartdesk felt well manufactured from an assembly standpoint.
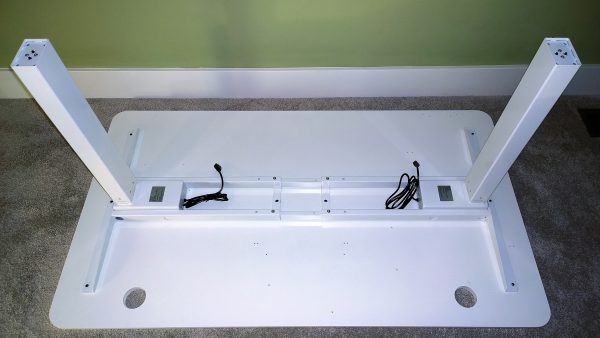
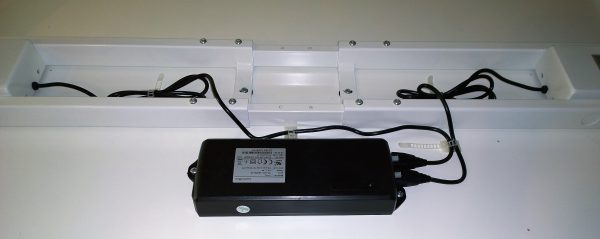
The last part of assembly involved the wiring of the linear actuators and the control panel.  A “controller box” serves as the junction between the power cable, and the wiring for the other electric/electronic components.  It was unclear where the “controller box” needed to be mounted, despite the paper and video instructions.  I suspect that different tabletop options may have different locations for the controller.  I assumed it would be located towards the back of tabletop, around the center.  I moved the controller into different predrilled screw hole locations until the hole brackets on the controller lined up with them.
The “switch” panel mounting point was in a far more obvious location based on its screw holes.  One thing to note, the “switch” sticks out on an angle beyond the perimeter of the tabletop.  So, if the table is upside down, care must be exercised to ensure you don’t bend the panel when you attempt to flip the table right side up.
 Once all the electronic components were mounted, it was a matter of routing wires from each leg actuator to the “controller box”.  There weren’t any instructions in the manual or video to guide you with this.  It was a matter of common sense to plumb the wires as neat as possible, and the included adhesive backed cable clips held the wires into their final position.
Finally, a metal flange and cover were inserted into the 2 cable holes of the desk.

I would estimate that it would have taken me 20 minutes to assemble the desk if I wouldn’t have stopped to take notes and pictures for review purposes.  It probably could have gone faster if one were to use an impact driver on the fasteners.  However, there weren’t that many screws to deal with, and I felt more comfortable in this case using simple hand tools to ensure that I didn’t cross thread the metal holes or over torque the wood holes.

AESTHETIC IMPRESSIONS

I tend to prefer minimalist modern furniture with clean lines and minimal decorative details.  So I liked the look of the all white table top/frame combination of my SmartDesk.  It blended in well with the mid-century modern style furniture and seating I had in my office space.

USAGE IMPRESSIONS

Operation of the SmartDesk was pretty straightforward via the control switch.  There are buttons for “up” and “down” along with four numbered “memory” positions.
Pressing any of the buttons moved the tabletop in a smooth fashion with a satisfying “whirring” sound.
I liked how the actuator attenuated as it reached it’s minimum or maximum heights.  It eased into those extremes which prevented jarring of the components and it felt sophisticated.
The “memory” feature was a convenient feature, as you could store positions for multiple sitting and standing heights.
At my height of six feet, I found that a 43-inch tabletop height was the most comfortable setting to type on a keyboard while standing.  With an additional potential for 9 more inches of travel, I imagine that this desk could easily accommodate someone well over 6 feet tall.
As far as stability goes, even at it’s highest tabletop height on a carpeted floor, it still took some effort to topple the table over.  So the length of the feet of the frame seemed to provide sufficient leverage from easily tipping the table over.
After using the SmartDesk for a few weeks, everything still worked nominally and the table still felt sturdy.  All this despite constant everyday abuse from my kids who liked to all sit on the desk and fiddle with the controls to mimic an elevator ride.
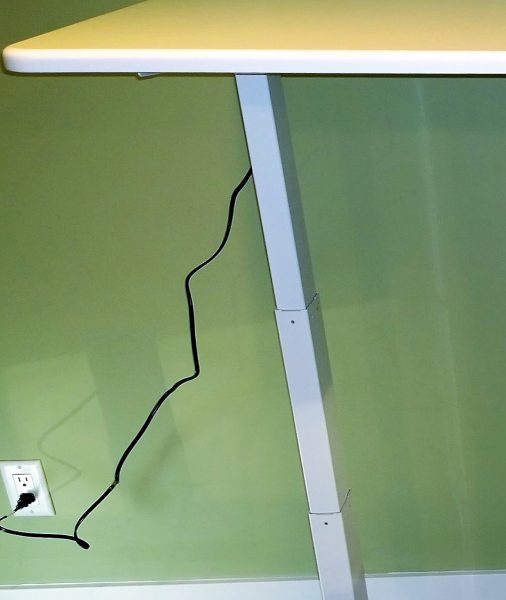
The only critique I had about the SmartDesk was that the power cable could stand to be longer.  You will need to have a power outlet within 2 feet outside of one of the legs in order to accommodate a fully raised desk position.

Additionally, once you set various electronics on the table, like a computer, laptop, and/or monitor, you’ll have power cables dangling from the tabletop.  You’ll have to exercise care and judgment to ensure that when the tabletop is at its fully extended position, that the power cables are sufficiently long enough and don’t snare on other objects while the table is in motion.  It would be nice if there was some sort of cable management system or hardware to make the cables tied in a neat fashion while maintaining freedom of movement.  I suspect this is generally an issue with most, if not all, standing desks.

FINAL THOUGHTS

The Autonomous SmartDesk 2 is a welcome addition to my space.  The clean lines, sturdy build, and well-executed height adjustability add up to a desk that will stay in my home office for the foreseeable future.  I feel far more productive now that I have the ability to periodically work from a standing position.
Source: The SmartDesk 2 was provided by λutonomous for this review.  For more information, please visit Autonomous.ai
 

Product Information

Price: $299.00
Manufacturer: Autonomous
Pros:
  • – easy assembly
  • – well constructed and manufactured
  • – fits in well with modern and contemporary room designs
Cons:
  • – Could use longer power cable
  • – Could use some sort of cable management system

Filed in categories: Computer Gear, Reviews

Tagged: ,

Autonomous SmartDesk 2 standing desk review originally appeared on on April 1, 2017 at 9:00 am.

Note: If you are subscribed to this feed through FeedBurner, please switch to our native feed URL http://the-gadgeteer.com/feed/ in order to ensure continuous delivery.