SoundMagic BT100 Bluetooth over-ear handphones review

We all know the logic: the larger the speaker, the better the bass. With headphones, this means that over-the-ear units are going to sound better than similar quality on-ear or earbud units. So I was really excited when I was offered the SoundMagic BT100s to test.

Note: Photos may be tapped or clicked for a larger image.


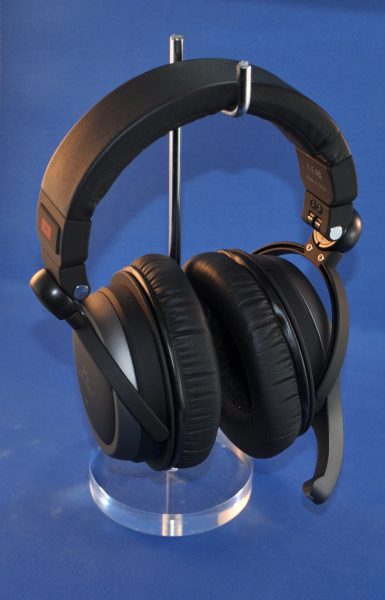
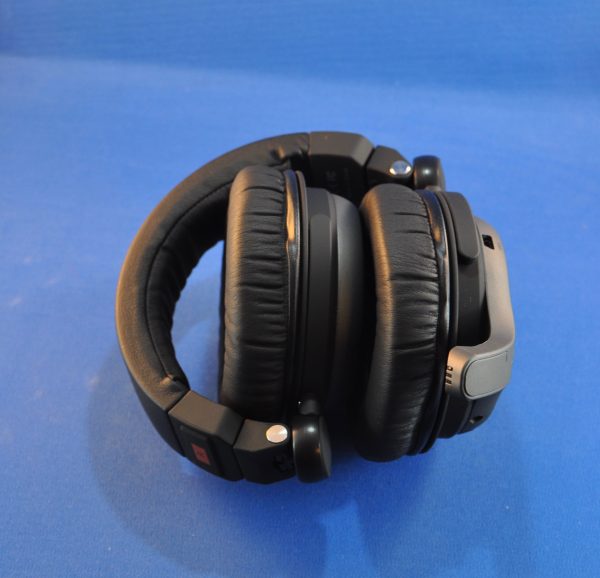
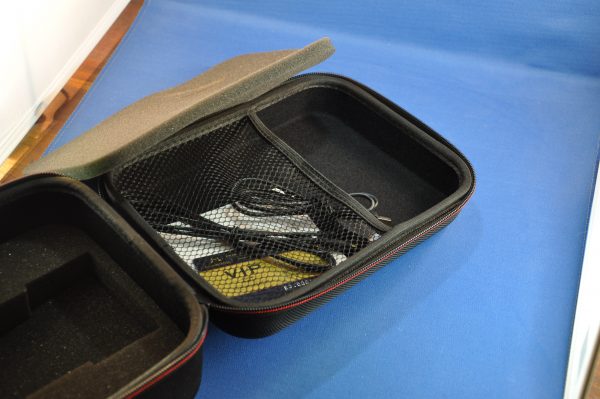
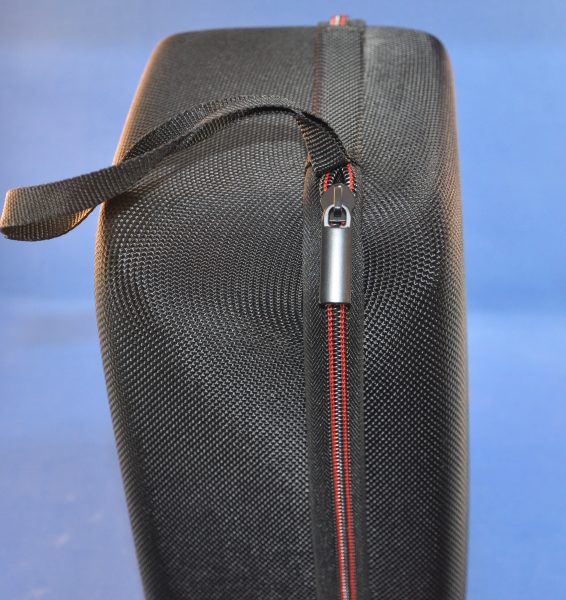
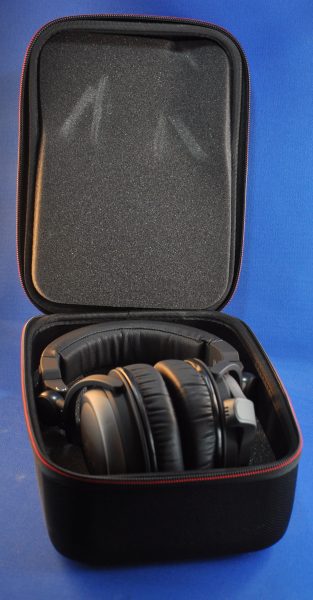
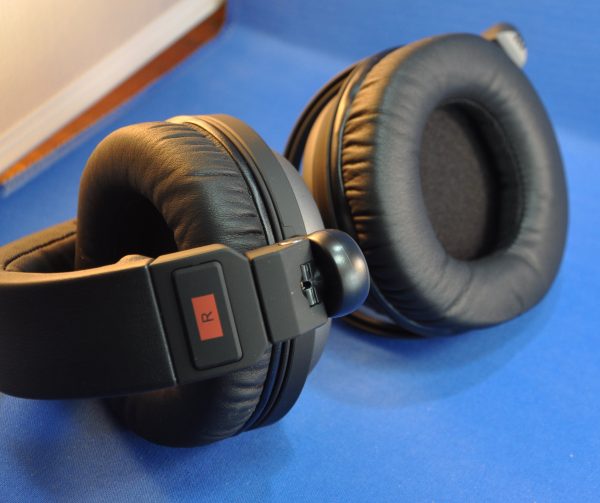
The Soundmagic BT100s arrived in a semi-rigid case, along with a microUSB and .125″ AUX cable and a sheet of instructions. The earcups fold up into the cushioned headband for travel, and the whole unit is very compact.

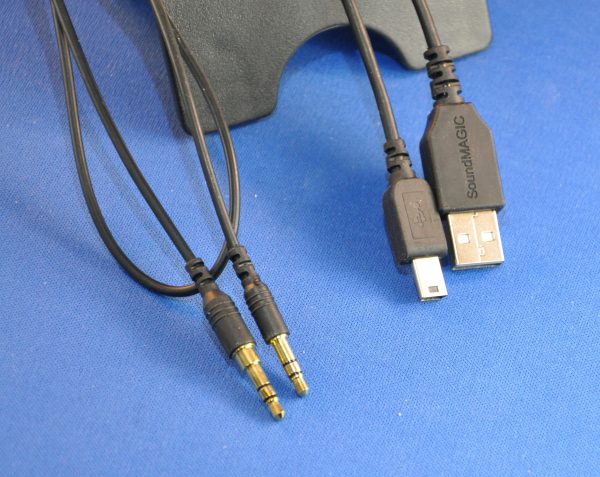
If you use the case, it’s a little larger, but you can carry along the cables and some other small things in the net pocket in the lid. This may be important because I found that the cables are not standard. Both jacks are extra long, in order to connect to the recessed ports on the earcup. This was the most infuriating part of the whole unit. I’m not sure why they would build something that can’t use a standard cable, either for audio or for charging. It’s the single reason I can’t recommend the headphones, no matter how good they sound. Who cares if they sound great, if you can’t connect or charge the batteries because you lost or broke or forgot the cables?


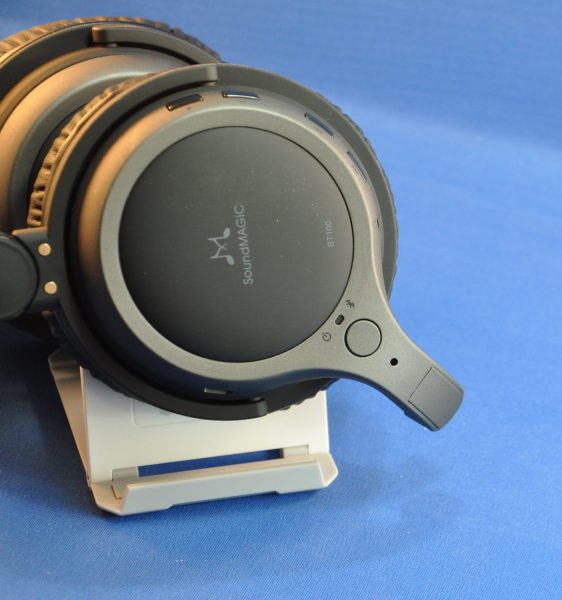
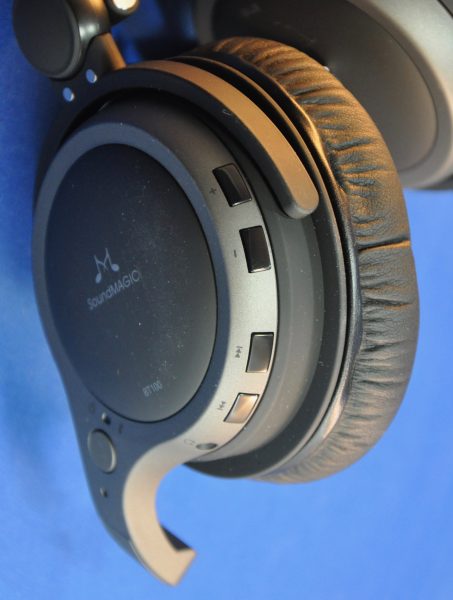
All of the features are controlled from the left earcup. One of the most interesting features of the BT100s is the built in mic.

It is a short, solid arm that extends 1.5″ from the left earcup, and is a great point of reference when you’re reaching for the multifunction button to stop/start sound, change pairing, or turn the headset on/off. I found the system produced clear sound using the phone or Siri or taking voice memos. Across the back of the left earcup are the track change buttons, and, up on the upper rear side, are the volume control buttons. The AUX cable plugs into the lower side of the same earcup, and the power/charge cable plugs into the front side of it.

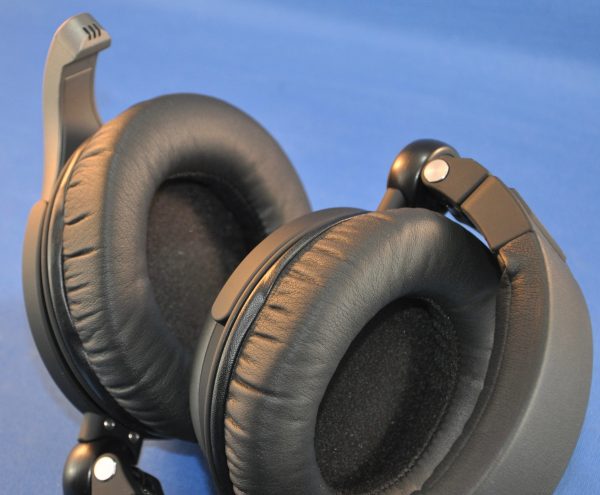
The large earcups house great speakers but are also very comfortable.

I was able to easily sync the BT100s with my iPhone 6s Plus, with my iPads, and with the Hammo TV headphones I reviewed a while back. I did have an issue with the first unit I was shipped, where the Bluetooth connection stopped working in the right channel. Wired connections were fine, and I thought for a while that I had somehow changed a setting, and checked out the online support for information. I sent in a ticket and waited a week or more with no reply. We finally contacted the PR company and got a second set, but as far as the SoundMagic support desk is concerned, I’m still out here with a busted headset. I’ll let you know if I ever hear back from them.

As fine as the sound is for the cans, I can’t recommend them, due to nonexistent support and proprietary cables. But if you’re willing to take a chance, they are comfortable and deliver full, rich, deeply textured sounds from movies, games, and music on both wired and wireless connections.

Source: The sample for this review was provided by SoundMagic. Please visit for more info and Amazon to order.


Product Information

Price: $149.99
Manufacturer: SoundMagic
Retailer: Amazon
Requirements:
  • Sound source with Bluetooth or AUX output
Pros:
  • Large, comfortable ear cups
  • Big, lush sound for a mid-price set of headphones
  • Collapse for packing
  • Semi-rigid storage case
Cons:
  • Cables are not standard – both have longer metal jacks. Nothing on their website mentions replacement cables
  • Support never responded to my request for assistance after a brand-new unit failed

Filed in categories: Audio, Video, TV, Reviews

Tagged:

SoundMagic BT100 Bluetooth over-ear handphones review originally appeared on on April 11, 2017 at 7:23 am.

Note: If you are subscribed to this feed through FeedBurner, please switch to our native feed URL http://the-gadgeteer.com/feed/ in order to ensure continuous delivery.

Julie’s gadget diary – I have finally found my perfect travel computer

After years of trying and failing to force an iPad or Android tablet to work like a laptop when I travel, I have finally found what I think is going to be my perfect travel computer. The 12″ MacBook. I ordered a refurbished unit from Amazon last Friday and it was delivered Saturday morning. I’ve been using it since then and I am almost giddy about how much I like this laptop!

If you have been following my gadget diary posts for any length of time, you’ve probably grown tired of my whining every time I travel. I either moan about how my laptop is too bulky to carry through an airport or I cry about how my tablet won’t do Gmail the way I want in full desktop mode.

I’ve even annoyed myself year after year when I complain about the same issues. But it looks like I can move on thanks to Dave Rees and a some of you who have told me to check out the 12″ MacBook. I decided not to splurge for a brand new one but did like Dave had done and bought a refurb. He bought his through Swappa and I opted to order through Amazon’s Warehouse Deals.

With refurbs, you can end up with some scratches, dents or other wear and tear, but the one I ordered is perfect as far as I can tell.

Compared to the early 2015 13″ MacBook Pro that I’ve been using for over a year, the 12″ MacBook feels like an iPad when it comes to weight and size. The MacBook only weighs 2 lbs compared to the almost 3.5 lb MacBook Pro. 1.5 lb doesn’t sound like a lot, but it really makes a big difference to me.

I was concerned that the display and especially the keyboard would feel too tiny, but that hasn’t been the case at all. I’m completely happy with the display. It is a retina display after all.

The keyboard and trackpad feel very roomy. More so than I had anticipated. The keys on the keyboard are even a little larger than the keys on my MBP, but they don’t stick up as high. That took a little getting used to, but it didn’t bother me for more than an hour or so. Now I can touch type as fast as I do on other keyboards.

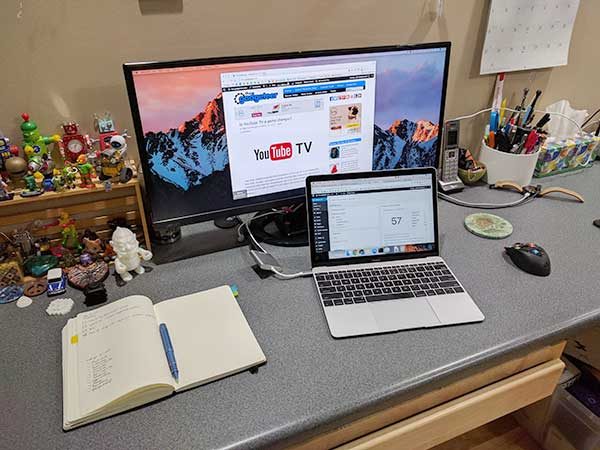
Yesterday I decided to order a Type-C dock adapter with HDMI, pass-through charging, and a USB-A port so I could hook the MB up to my 29″ LG monitor like I’ve done with the 13″ MBP using a LandingZone Dock. You might be thinking “Julie, why are you connecting this laptop up to a monitor when you’re just going to use it when you travel?” Good question! It’s because I am about 90% sure I’m going to make the 12″ MacBook my main/only computer. That’s right. I like it so much that I don’t think I even need my 13″ MBP any longer.

The Travel Inspira USB-C to HDMI Hub works great! It only offers HDMI and one USB-A port, but that’s fine. I don’t really plug that many USB devices into my computer anyway.

The HDMI output with this adapter is fantastic and looks better/sharper than my 13″ MBP using the LandingZone Dock’s HDMI connection.

I’ve installed almost all of the apps that I use on a regular basis: Photoshop, Chrome, iMovie, Garageband, Wondershare Filmora, OpenOffice, FileZilla, Canon EOS Utility, TypeIt4Me and more. So far I’ve not noticed any real lag or sluggishness from the MacBook’s mobile processor.  I haven’t done any video editing yet though…

I’m really happy with the 12″ MacBook and plan to use it for the next couple of weeks to see if there’s any reason why it can’t be my main computer. If it succeeds which I think it will, I’ll be selling my MBP.

Now I need to find a new bag to carry the 12″ MacBook. It’s kind of like when you get new rugs or carpet in your house and all of a sudden your couch looks shabby 😉 It’s time for a new bag too.

Filed in categories: Articles

Tagged:

Julie’s gadget diary – I have finally found my perfect travel computer originally appeared on on April 10, 2017 at 5:57 pm.

Note: If you are subscribed to this feed through FeedBurner, please switch to our native feed URL http://the-gadgeteer.com/feed/ in order to ensure continuous delivery.

Is YouTube TV a game changer?

Last week, Google announced the introduction of YouTube TV in the Philadelphia, New York, Chicago, Los Angeles, and San Francisco Bay areas as an alternative to traditional cable television subscriptions. But is it a game changer that will enable you to finally cut the cord on cable TV? Let’s take a look at what we know so far. 

For under $40 a month, here’s what you get:

  • Live streaming from your regional major networks including NBC, CBS, ABC, Fox, and popular cable networks like Fox News, MSNBC, and ESPN.
  • 40 channels in all including the likes of SyFy, The Disney Channel, National Geographic, and a host of sports channels.
  • Unlimited DVR recording with simultaneous recording of multiple channels.
  • Streaming across all of your devices through the YouTube TV app, which is required for use.
  • Lots of on-demand content from channel providers.
  • Free access to YouTube Red content.
  • Up to 6 accounts for simultaneous viewing.
  • 1 month free trial (with a valid credit card).
  • Add on networks for additional charges (options may vary based on your location, but we’re offered Showtime and Fox Soccer Plus in my area).

Sounds pretty good, right? Well, there are some things to consider before you jump:

  • Registration is very specific to your location. You’ll need to sign up while your device is located in your local market.
  • You’ll need a Chromecast-enabled TV or Chromecast device to play it on your set top box. Google is currently offering the device for free with your first month’s payment, but it does mean another HDMI adaptor to plug into your TV if your setup isn’t currently compatible or you don’t have a media connection to your existing device.
  • It looks like downloading the service through your apple devices requires a monthly upcharge ($39.99 per month as opposed to $35).
  • Several of the big cable channel networks such as Time Warner, Turner/Viacom, Scripps, and AMC are currently not available. This means no Comedy Channel, Cartoon Network, Nickelodeon, HGTV, Food Network, CNN, etc. It looks like AMC is on the horizon, but details are not clear regarding timing (this also seems to be dependent on your region).
  • Since this is a streaming service, live broadcasts governed by regional blackout agreements. This means that where you are registered and where you are watching live TV could impact what is (or is not) available to you at any given time. If you are a sports fan, this could be particularly problematic for your local teams.

As far as user experience goes, it sounds like Google is getting all the basics right. Most of the early reviews praise both the well-designed user interface and excellent streaming quality across devices and available bandwidths (I’d highly recommend checking out the in-depth reviews  CNET and Gizmodo for details). The biggest drawbacks seem to be in the limited channel lineup and potential regional blackout restrictions, which may not work for you based on your viewing habits. I’ll be curious to see if pricing also remains consistent with the addition of new network content, and how this could potentially work in combination with other services (such as Hulu) to get the channel coverage viewers are looking for.

So what do you think? Does YouTube TV offer a potential game changer in the cable TV service?

Filed in categories: News

Tagged:

Is YouTube TV a game changer? originally appeared on on April 10, 2017 at 1:42 pm.

Note: If you are subscribed to this feed through FeedBurner, please switch to our native feed URL http://the-gadgeteer.com/feed/ in order to ensure continuous delivery.

Solo Altitude backpack review

Why another backpack review from me you ask? I may ask myself the same question. I do have several excellent backpacks that I have reviewed in the past such as the Razer Tactical Gaming backpack and the Altego 17″ Polygon Sunfire backpack to name a few. While these two backpacks are great for carrying a lot of items including a laptop and iPad, I have found myself in need of something a little less extreme, with a smaller footprint, something like a day pack. The Solo Altitude backpack looks like it could be just the right pack for my new needs.

Note: Images can be clicked to view a larger size.

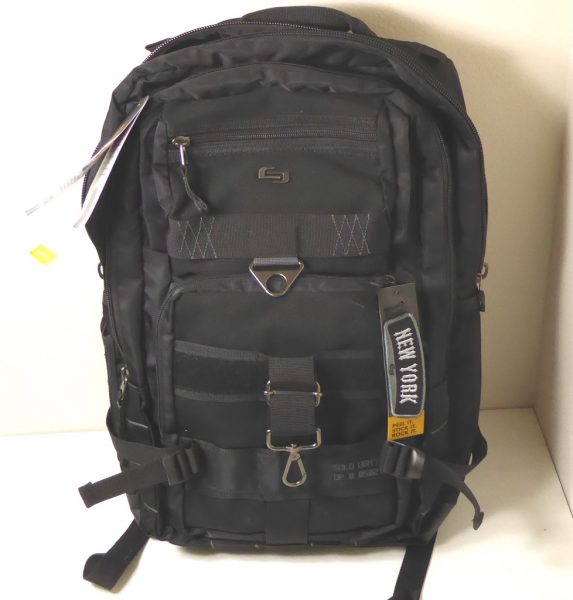
The Solo Altitude is part of Solos Black OPS collection, designed to be lightweight and ultra durable. The Solo is made of lightweight parachute nylon, with aviator-inspired hardware and military grade velcro. The Solo dimensions are 18.50″ x 12.6″ x 4.92″ and the weight is 2.2 pounds. The Solo features a 17.3″ padded laptop compartment, an internal iPad/tablet compartment, a front zippered organizer section and side pockets.

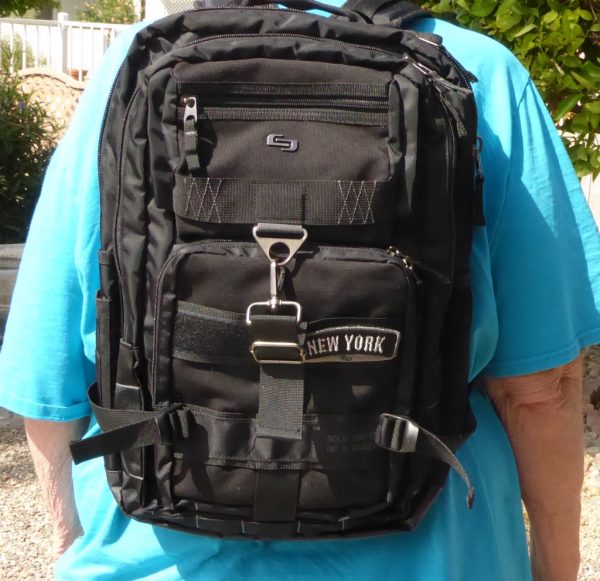
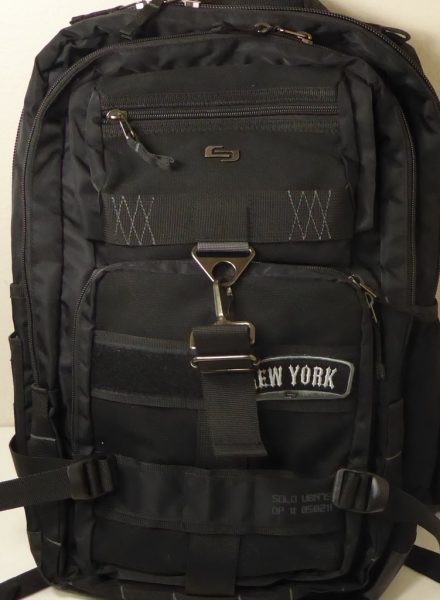
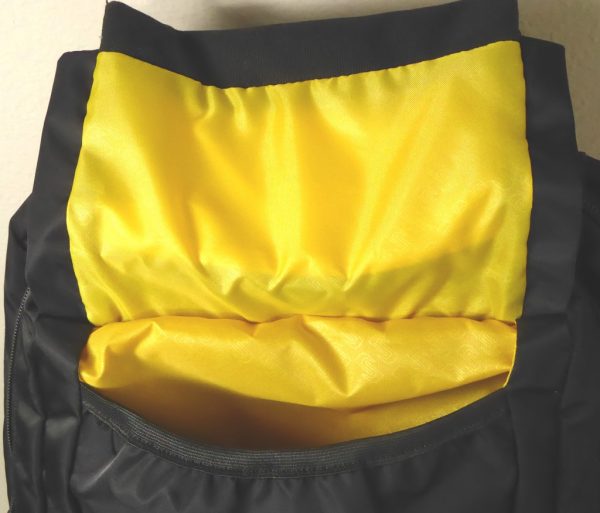
The front of the Altitude has a lower zippered compartment with a large velcro strip gong across it and a vertical strap with a buckle designed to attach to a top flap that covers a cargo area. The flap also has a zippered compartment good for holding keys and phones. The front has a set of buckles on the right and left sides to compress the Altitude making as compact as possible. The interior of the lower zippered compartment has a yellow lining and is designed to hold pen, pencils and other supplies. At the top of the front section is yet another zippered compartment good for carrying file folders or magazines.

The compartment under the upper flap runs the width and depth of the front section making it a great place to store a light jacket or sweatshirt. The top of the opening has elastic in it to help keep items inside.

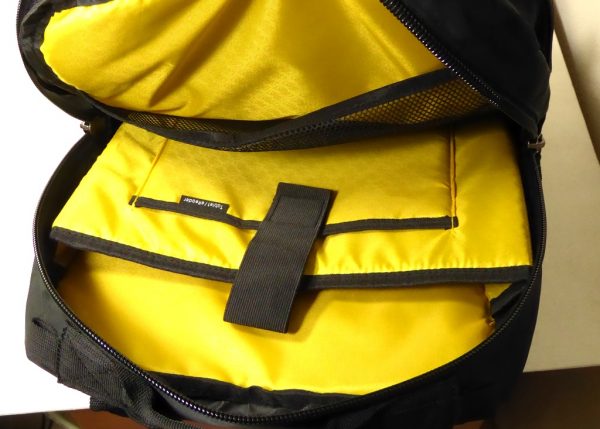
The inside of the Altitude backpack’s main compartment is designed to hold up to a 17″ laptop and a tablet device. It also has a cargo net section that can be used to hold cables and other accessories. Like the other interior sections of the Altitude, it is lined with a yellow colored material. The laptop pocket also has a strap with Velcro on the end to keep your laptop and tablet from sliding out of the pocket.

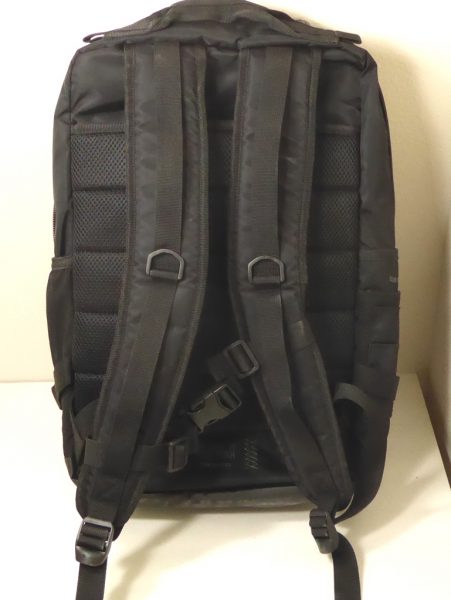
The back of the Altitude backpack has adequate padded straps with a plastic D-ring on each strap. The straps also have a chest strap to keep the shoulder straps on your chest area. The back section is nicely padded and has an opening to allow the Altitude to slip over the handle of a rolling suitcase or similar item. All of the buckles and D-rings are made from sturdy plastic and should hold up to normal use and then some. At the bottom, sewn to the back of the backpack, is a manufacturers tag.


The right side of the Altitude has a mesh water bottle holder that has some stretch to it allowing for the use of different size water bottles.

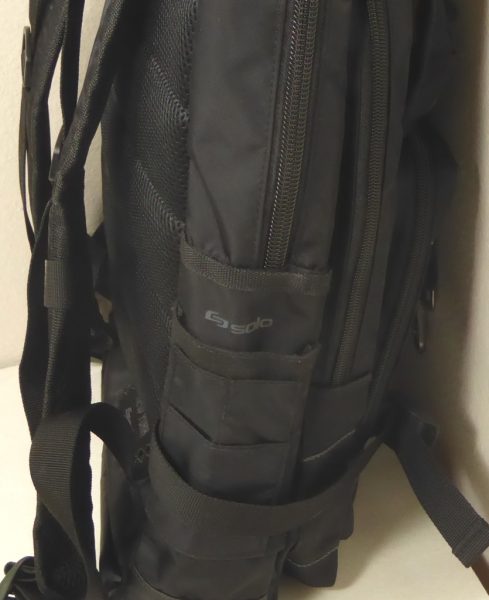
On the left side, the Altitude backpack has what I would describe as pen and pencil pockets with Solo printed on one of them. On both, the left and right side of the backpack are cinching straps designed to compress the sides of the backpack making it a tight package so it is not flopping around on your back.

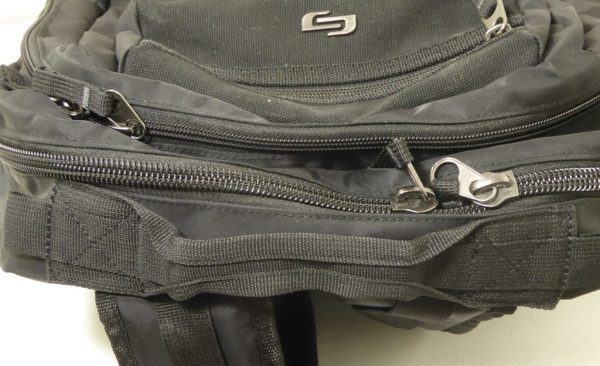
The top of the Altitude has a nylon handle for easy carrying while the bottom has a nonporous type material to allow you to set the pack down and not get the contents wet if the ground is wet.
So, what’s my bottom line here? First, let me say that you should not think of the Solo Altitude as a traditional backpack, it is more like a briefcase backpack. The design is great for a person on the go who is not interested in lugging a traditional computer back or messenger bag to work. The metal zippers are a great feature and are sturdy. With a mix of metal aviation inspired hardware and the lightweight plastic buckles, the backpack is both stylish and practical. There are enough pockets, nooks, and crannies to hold almost any kind of doodads you could think of. For a pack this small there is a lot of storage space for your computer and other larger objects. The included Velcro “New York” patch is a nice styling touch along with all the printed nomenclature info placed around the backpack. At a price of $79.99 on the Solo website, the Solo Altitude is on the moderate to high side of pricing in my opinion, but I do think it is worth the price. If you’re looking for a laptop bag for work, travel or just recreation you should check out the Solo Altitude.

Source: The sample for this review was provided by Solo. Please visit their site for more info.


Product Information

Price: $79.99
Manufacturer: Solo
Requirements:
  • None
Pros:
  • Plenty of pockets and storage
  • Great size for a laptop backpack
Cons:
  • None

Filed in categories: Bags, Laptops and Gear, Reviews

Tagged:

Solo Altitude backpack review originally appeared on on April 10, 2017 at 11:31 am.

Note: If you are subscribed to this feed through FeedBurner, please switch to our native feed URL http://the-gadgeteer.com/feed/ in order to ensure continuous delivery.

Logitech ZeroTouch air vent car mount review

When I find a gadget that can make my life easier in some way, that gadget tends to stay in my life.  And the gadgets that just look pretty usually don’t end up finding a place in my day-to-day routine.  So when I ran across the Logitech ZeroTouch car mount (air vent model), with its plethora of features, I was willing to give it a try.  I love my Kenu Airframe+ for its simplicity and ease of use, but I was willing to try another car mount if it could make my life easier somehow.  So how did the Android-only Logitech ZeroTouch measure up?  Let’s discuss.

First things first, let’s see the specs from Logitech:

Dimensions (Height x Width x Depth):

  • ZeroTouch Air Vent: 1.50 in x 1.50 in x 1.22 in
  • ZeroTouch Dashboard: 2.83 in x 2.56 in x 2.40 in
  • Inner case adapter: 1.50 in x 0.02 in
  • Outer phone adapter: 1.50 in x 0.78 in x 0.02 in

Package Contents:

  • ZeroTouch Air Vent or ZeroTouch Dashboard
  • 2 metal adapters
  • Documentation

System Requirements:

  • Android™ device OS 5.0 or later
  • Bluetooth® Smart technology
  • For full functionality, an active mobile data and text message plan are required.
  • Carrier charges may apply.
  • For full music functionality, an active account with Spotify™, Pandora, Google Play™ Music, or SoundCloud® is required.

Setting it up

Setting up the ZeroTouch was a breeze.  You download the free app and follow the instructions on the screen to connect the Zerotouch to the phone.  You’ll need Bluetooth of course, and I was able to use both the ZeroTouch and my Plantronics Bluetooth headset at the same time with my Samsung Galaxy S6 Edge+, which is good because that would have been a deal-breaker for me.  The Zerotouch enables you to control many apps and services on your phone (more on that later), but I found that one minor hassle with the setup is that you’ll have to log into each one in the ZeroTouch app settings.  So I had to add my login credentials and email settings for all my email addresses, Spotify, my home and work address, and Amazon Alexa.  All of those things are already setup/specified on my phone, so I was hoping that ZeroTouch would recognize those automatically, but it did not.

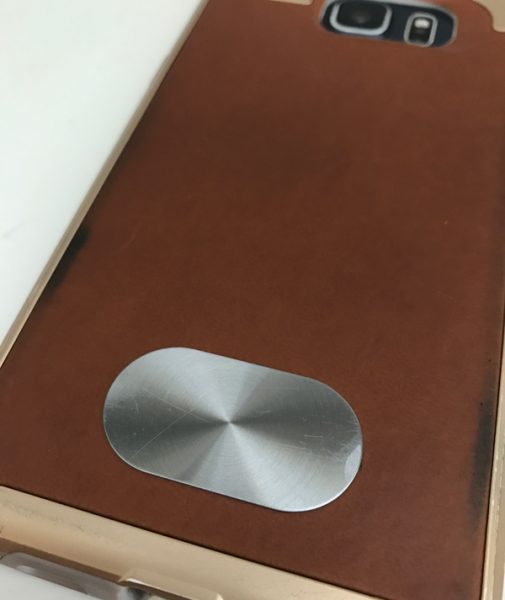
The ZeroTouch comes with 2 adhesive metal pads to attach either to your phone or your phone case.  I have a case, so I choose to attach the oval pad to the outside of my case.  I should also mention that once you attach the pad, it ain’t coming off!  You should also pay close attention to where you attach it because you can’t attach it in the same area where the wireless charging part is.  So for me, I had to attach the pad to the bottom on the back of the phone.  That means that my phone is somewhat top-heavy when I connect it to the ZeroTouch in my car, and attaching it in landscape orientation isn’t an option for me.
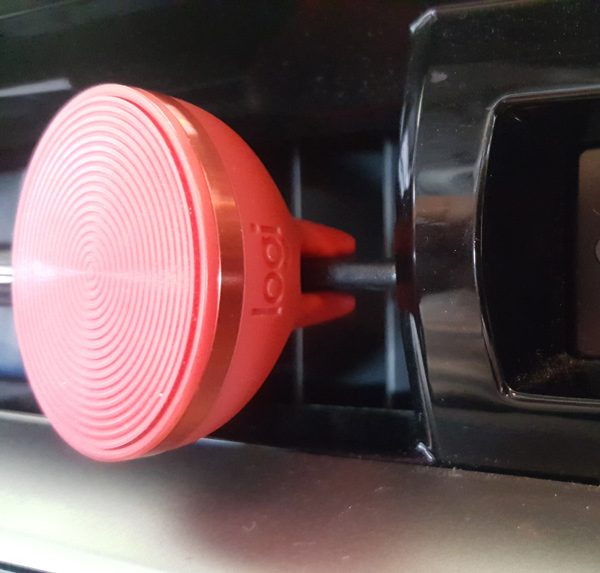
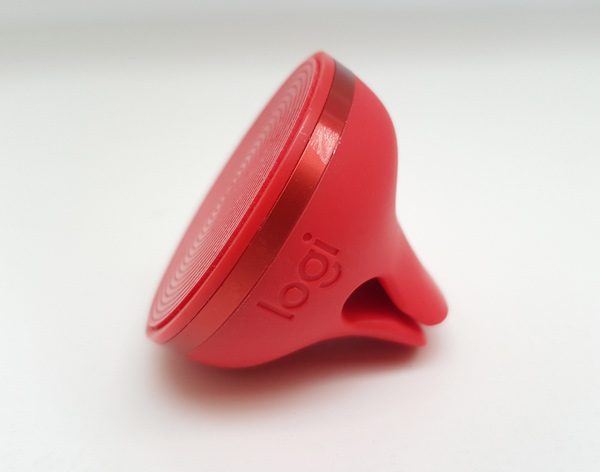
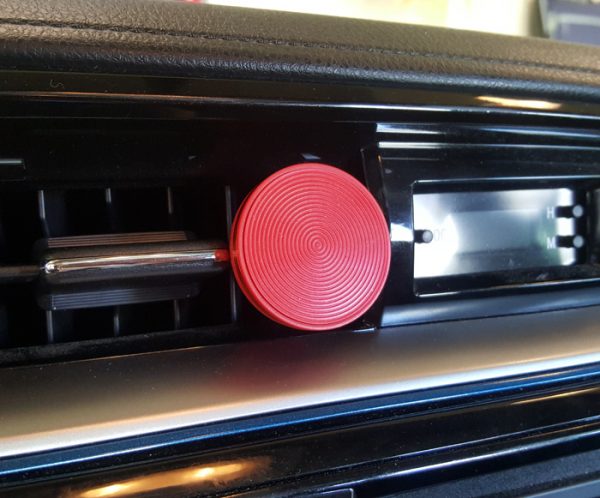
Finally, you have to attach the ZeroTouch to either your dashboard or the car vent in your car.  I got the car vent model, and I can tell you that the gap between the rubberized fingers on the back of the ZeroTouch is very small, and it took quite a bit of force to get it attached to my car vent.  I had to use both hands, but that isn’t a negative to me because that means there is no way it will ever just fall off the vent.
What I liked

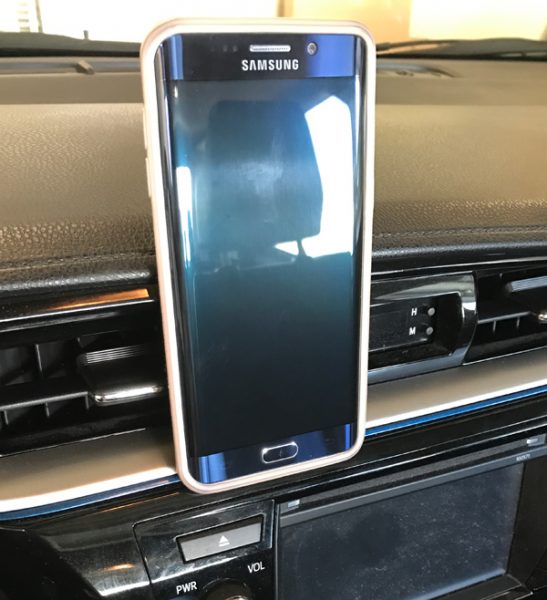
As mentioned, the ZeroTouch only works with Android phones which is good for me, but not so good for iPhone users.  I feel sure a ZeroTouch for you is in the works though.  Connecting your phone to the ZeroTouch requires almost zero effort. (See what I did there?)  The magnet inside the ZeroTouch snaps quickly and easily to the metal pad adhered to the back of my phone.  And removing it is just as easy.
The app has big letters and drop-down menus, and lots of white space.  It is pretty intuitive and easy to setup.  There are options for setting the speed of the voice, the gesture that you use to activate the app, and how long the prompts are that are used to interact with you while using the app.

I liked how Amazon Alexa worked.  I will admit up front that I don’t have any smart devices in my home, so I wasn’t able to control any lights or security systems.  But I still used Alexa to give me weather updates, read my news, order Starbucks, and more.  Basically, anything that Alexa can do for you at home, you can do in the car.  Which is pretty nice.  I can see the power of controlling things in the house before you get home or if you forget to set something.  The ZeroTouch car mount can do those things for you, so if you are an Amazon Alexa user, this car mount will be pretty sweet for you.

I liked how the app read my text messages to me and allowed me to send a response simply by speaking.  The vast majority of the time it worked just great.  It took me a little time to learn how to make myself understood, but I had to do that with Google’s voice service as well.  The ZeroTouch shines in this area of reading and handling text messages and emails.  It provides a truly hands-free experience in this regard, which is great if you want to use your phone while you are driving.  I would often turn this off if I had other people in the car though because I didn’t want the phone reading texts and emails to everyone in the car.  And you also have the option in the settings to automatically respond to texts and emails with a message to tell folks you are driving and will contact them soon.  That’s pretty neat too.

What I didn’t like

Some folks have complained that the ZeroTouch doesn’t charge your phone like some other car mounts, but that doesn’t bother me.  I am not crazy about the fact that the adhesive metal pad is pretty much a one and done setup.  It isn’t coming off your phone/case, which isn’t going to bode well for resale value.

I experienced some spotty performance with the app voice prompts.  For example, there were random times when I would ask it to play Pandora and the app would respond that Pandora wasn’t supported when clearly it is.  I would reboot my phone and it would start working again.  Same thing with Spotify, so maybe it has something to do with just music apps, I don’t know.  I will also say that as an Android user, it is pretty easy to become spoiled with the various ways that Google is integrated with the phone, including their voice search.  The voice recognition with the ZeroTouch just isn’t as robust or easy to use as Google’s.

In my daily use of the ZeroTouch for over a month, it has been my experience that my battery performance suffered greatly when I started using ZeroTouch.  The Bluetooth inside the ZeroTouch as a low-energy Bluetooth 4.2 radio, and yet it is killing my battery all day.  I found myself having to charge my phone multiple times a day.  When I uninstalled the ZeroTouch to test out my theory, my battery life no longer suffered like it had been.  I have always left my Bluetooth on 24-hrs a day because I use a Bluetooth headset all day, but I saw a noticeable performance hit to the battery after I started using the ZeroTouch.  Maybe because my phone was constantly searching for the ZeroTouch all day, I am not sure.

Probably the main thing that I don’t like about the ZeroTouch has to do with how you activate the voice recognition.  You can’t just speak out loud “Ok Alexa” and then Alexa responds.  You have to wake the app first by waving/holding your hand in front of the proximity sensor in the upper left corner of the screen.  Nothing happens until you do that.  Then the app prompts you and you tell it what to do.  The waving my hand in front of the screen is a little awkward when you are driving, but that isn’t really why I dislike it.  The reason is that for Android users we spend a great deal of time swiping down from the top of the screen to pull down the window shade to interact with notifications.  When you use your right hand to do that while driving, you invariably swipe your finger near the proximity sensor, activating the ZeroTouch app.  I have lost track, literally, of the number of times that I have had to say “cancel” to the ZeroTouch voice prompt because I didn’t mean to activate it.  It is driving me bananas.  And before you comment, yes, I have tried to train myself to not do that.  Trust me, I’ve tried.

The bottom line

I love the low profile and ease of use of the ZeroTouch.  The app is easy to use and has many features.  I also love the Amazon Alexa integration.  That’s where the strength of this product really shines.  Folks who are already Amazon Alexa converts will get some immediate benefit from this car mount even though it is $60, which is expensive for a car mount.

But for those of us who haven’t gone all-in with Amazon Alexa, I don’t think there is enough here to compel you to need the expensive ZeroTouch.  The voice control, while you are driving, is robust, and for some folks that may be enough to justify the cost and the learning curve.  But for me, the battery performance hit and the false-positives I get every time I try to use the pull-down notification tray will probably cause me to go back to my Kenu Airframe.  If/when I get my Amazon Alexa device at home, and I start automating my home, I could see myself changing my mind.  Amazon Alexa is pretty awesome.

Source: The sample for this review was provided by Logitech. Please visit their site for more info and Amazon to order.


Product Information

Price: $59.99
Manufacturer: Logitech
Retailer: Amazon
Requirements:
  • An Android phone with a cellphone data plan, and Bluetooth.
Pros:
  • Ease of use/setup
  • Outstanding Amazon Alexa integration
  • Robust hands-free voice integration and features
Cons:
  • Proximity sensor false-positives
  • Expensive
  • Battery performance suffered

Filed in categories: Car Gear, Reviews

Tagged: ,

Logitech ZeroTouch air vent car mount review originally appeared on on April 10, 2017 at 7:23 am.

Note: If you are subscribed to this feed through FeedBurner, please switch to our native feed URL http://the-gadgeteer.com/feed/ in order to ensure continuous delivery.