SOLIUM G1 360 degree dual dashcam review

REVIEW – With all the dash cams on the market, how do you make one that stands out from the rest? You can be like Soliom and make a dashcam with two cameras. One that points out the front of the vehicle’s window and one that points inwards into the car. Why would you want to record what’s going on in the car in addition to outside the car? Maybe you’re a Uber driver or maybe you want to create your own karaoke videos like James Corden. Either way, let’s take a closer look at the G1 360 degree dual dashcam from Solium.

What is it?

The Solium G1 is a 360 degree dual dashcam with a camera that points out the front of the car and one that points inside.

Hardware specs

Processor: Dual Sunplus 6350A processors
Image sensor: Dual Sony Exmor IMX323 sensors with 6 lens fixed f/2.0 apertures
Record both cameras at 190° 1920x1080P@30fps or the front camera only 1920x1080p@60fps at 190°
Display: 1.5 inch TFT LCD display
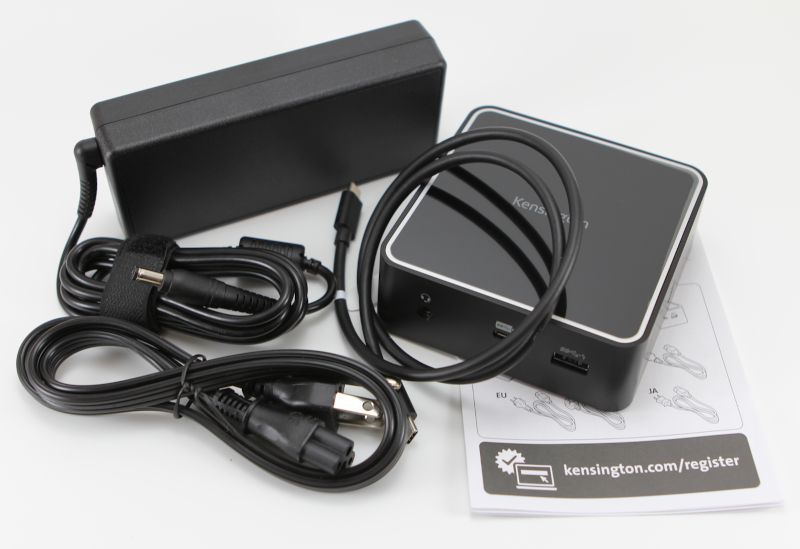
What’s in the box?

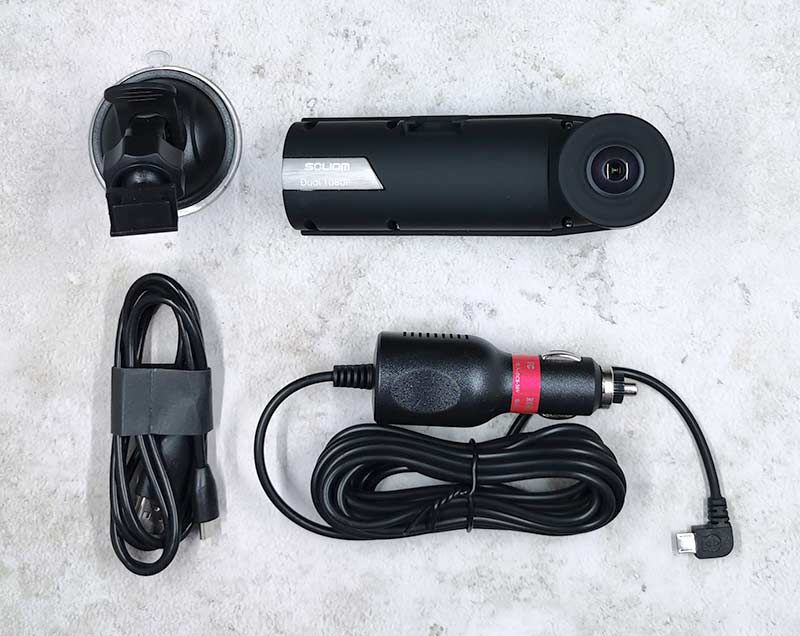
  • Soliom dual cam dash cam
  • Windshield mount
  • 12V power adapter
  • micro USB cable
  • USB card reader
  • Reset pin
  • User manual

Design and features

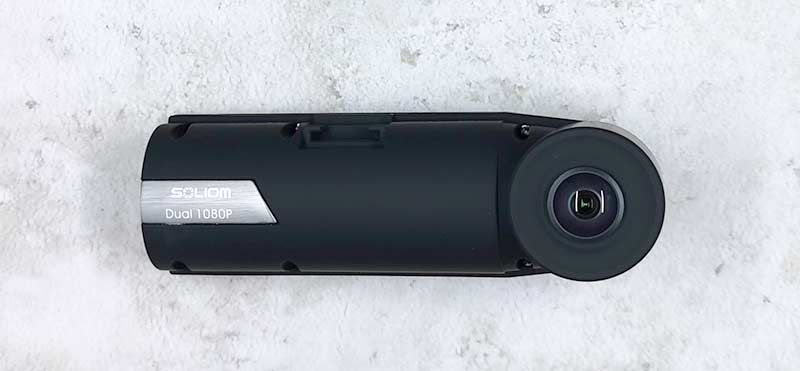
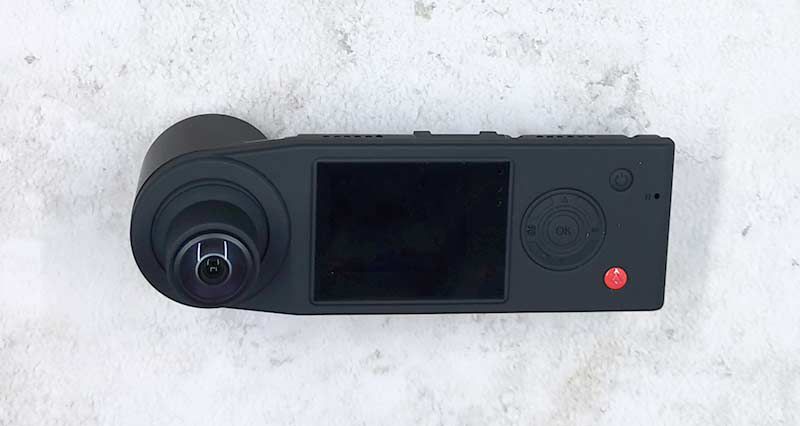
The Soliom G1 is the first dash camera that I’ve reviewed that has two lenses. There’s the standard lens that points out your front windshield to record your travels and there’s an additional camera that points inside the car.

The front camera that points out the windshield is fixed in one position and has a 190° lens that captures 1920×1080 resolution.

The back (interior) lens has the same viewing angle and resolution, but this lens can pivot in its socket sort of like an eyeball.

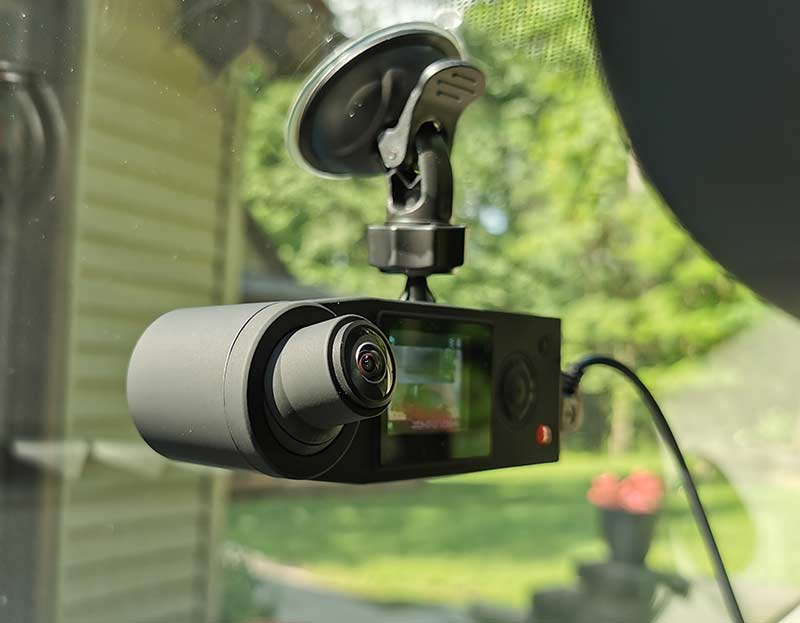
For example, here we see it pointing up.

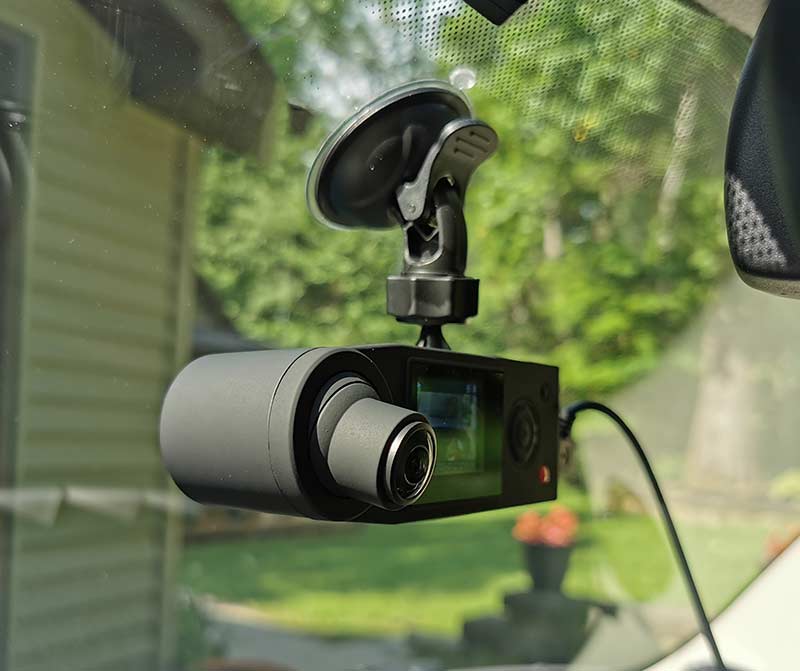
And here we see the lens pointing down. The ability to adjust the angle of the lens is a helpful feature as it helps you get the most coverage inside the car. For example, if I left the lens centered, my rearview mirror would be in the way since I mount my dashcams directly in front of the mirror. You can check out the video clip below to see what the interior video looks like.

The camera is medium-sized with a soft black coating.

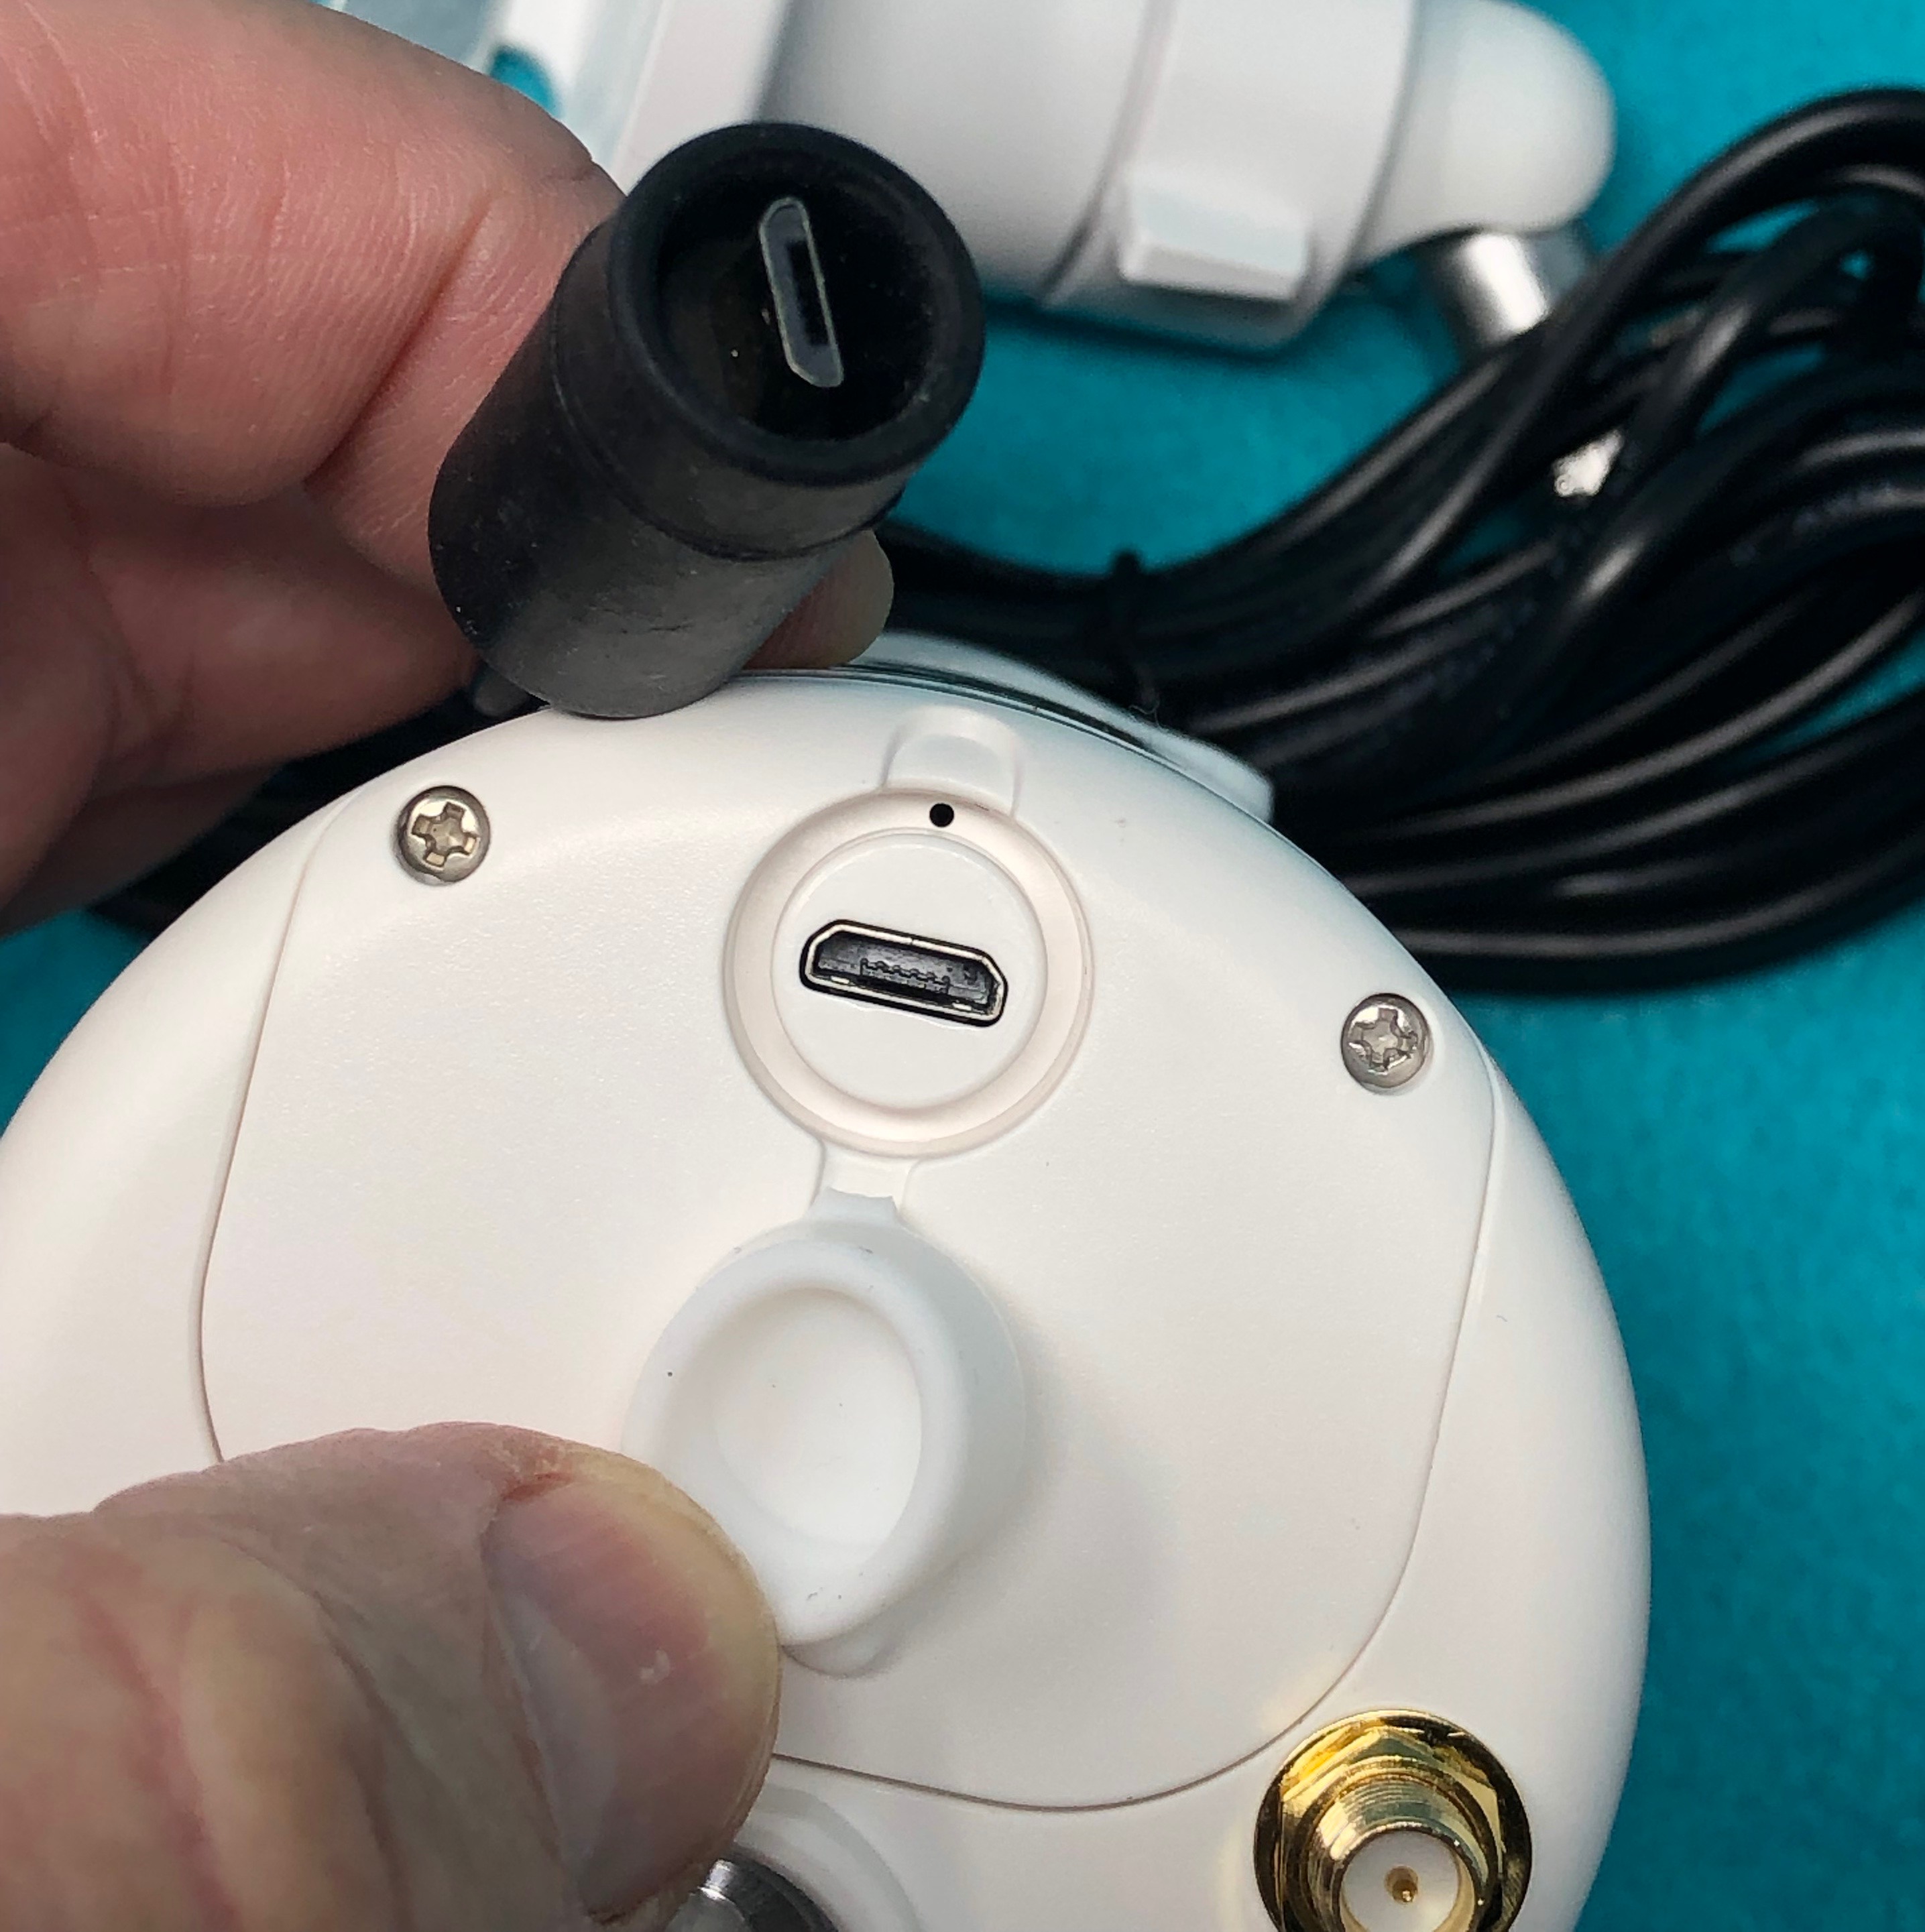
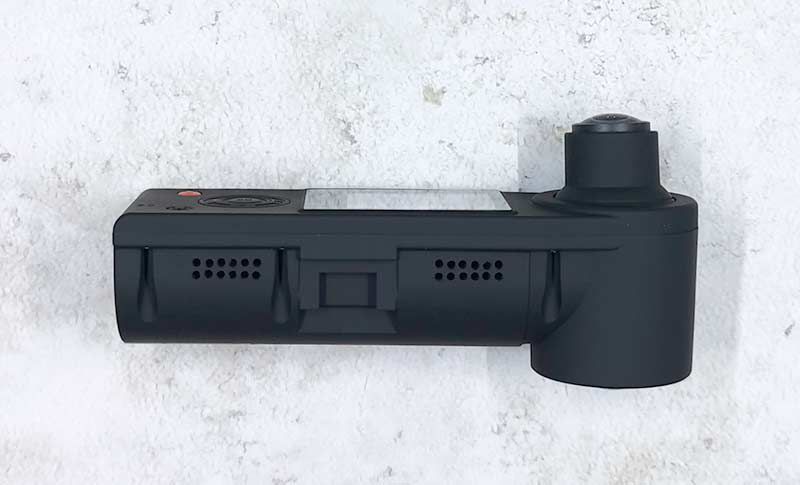
The side has a micro USB port for the power cable, a micro SD card slot and a connection for a GPS module. Soliom did not include a GPS module with the camera that they set me to review. They don’t even sell them on their site so I’m not sure of pricing or availability.

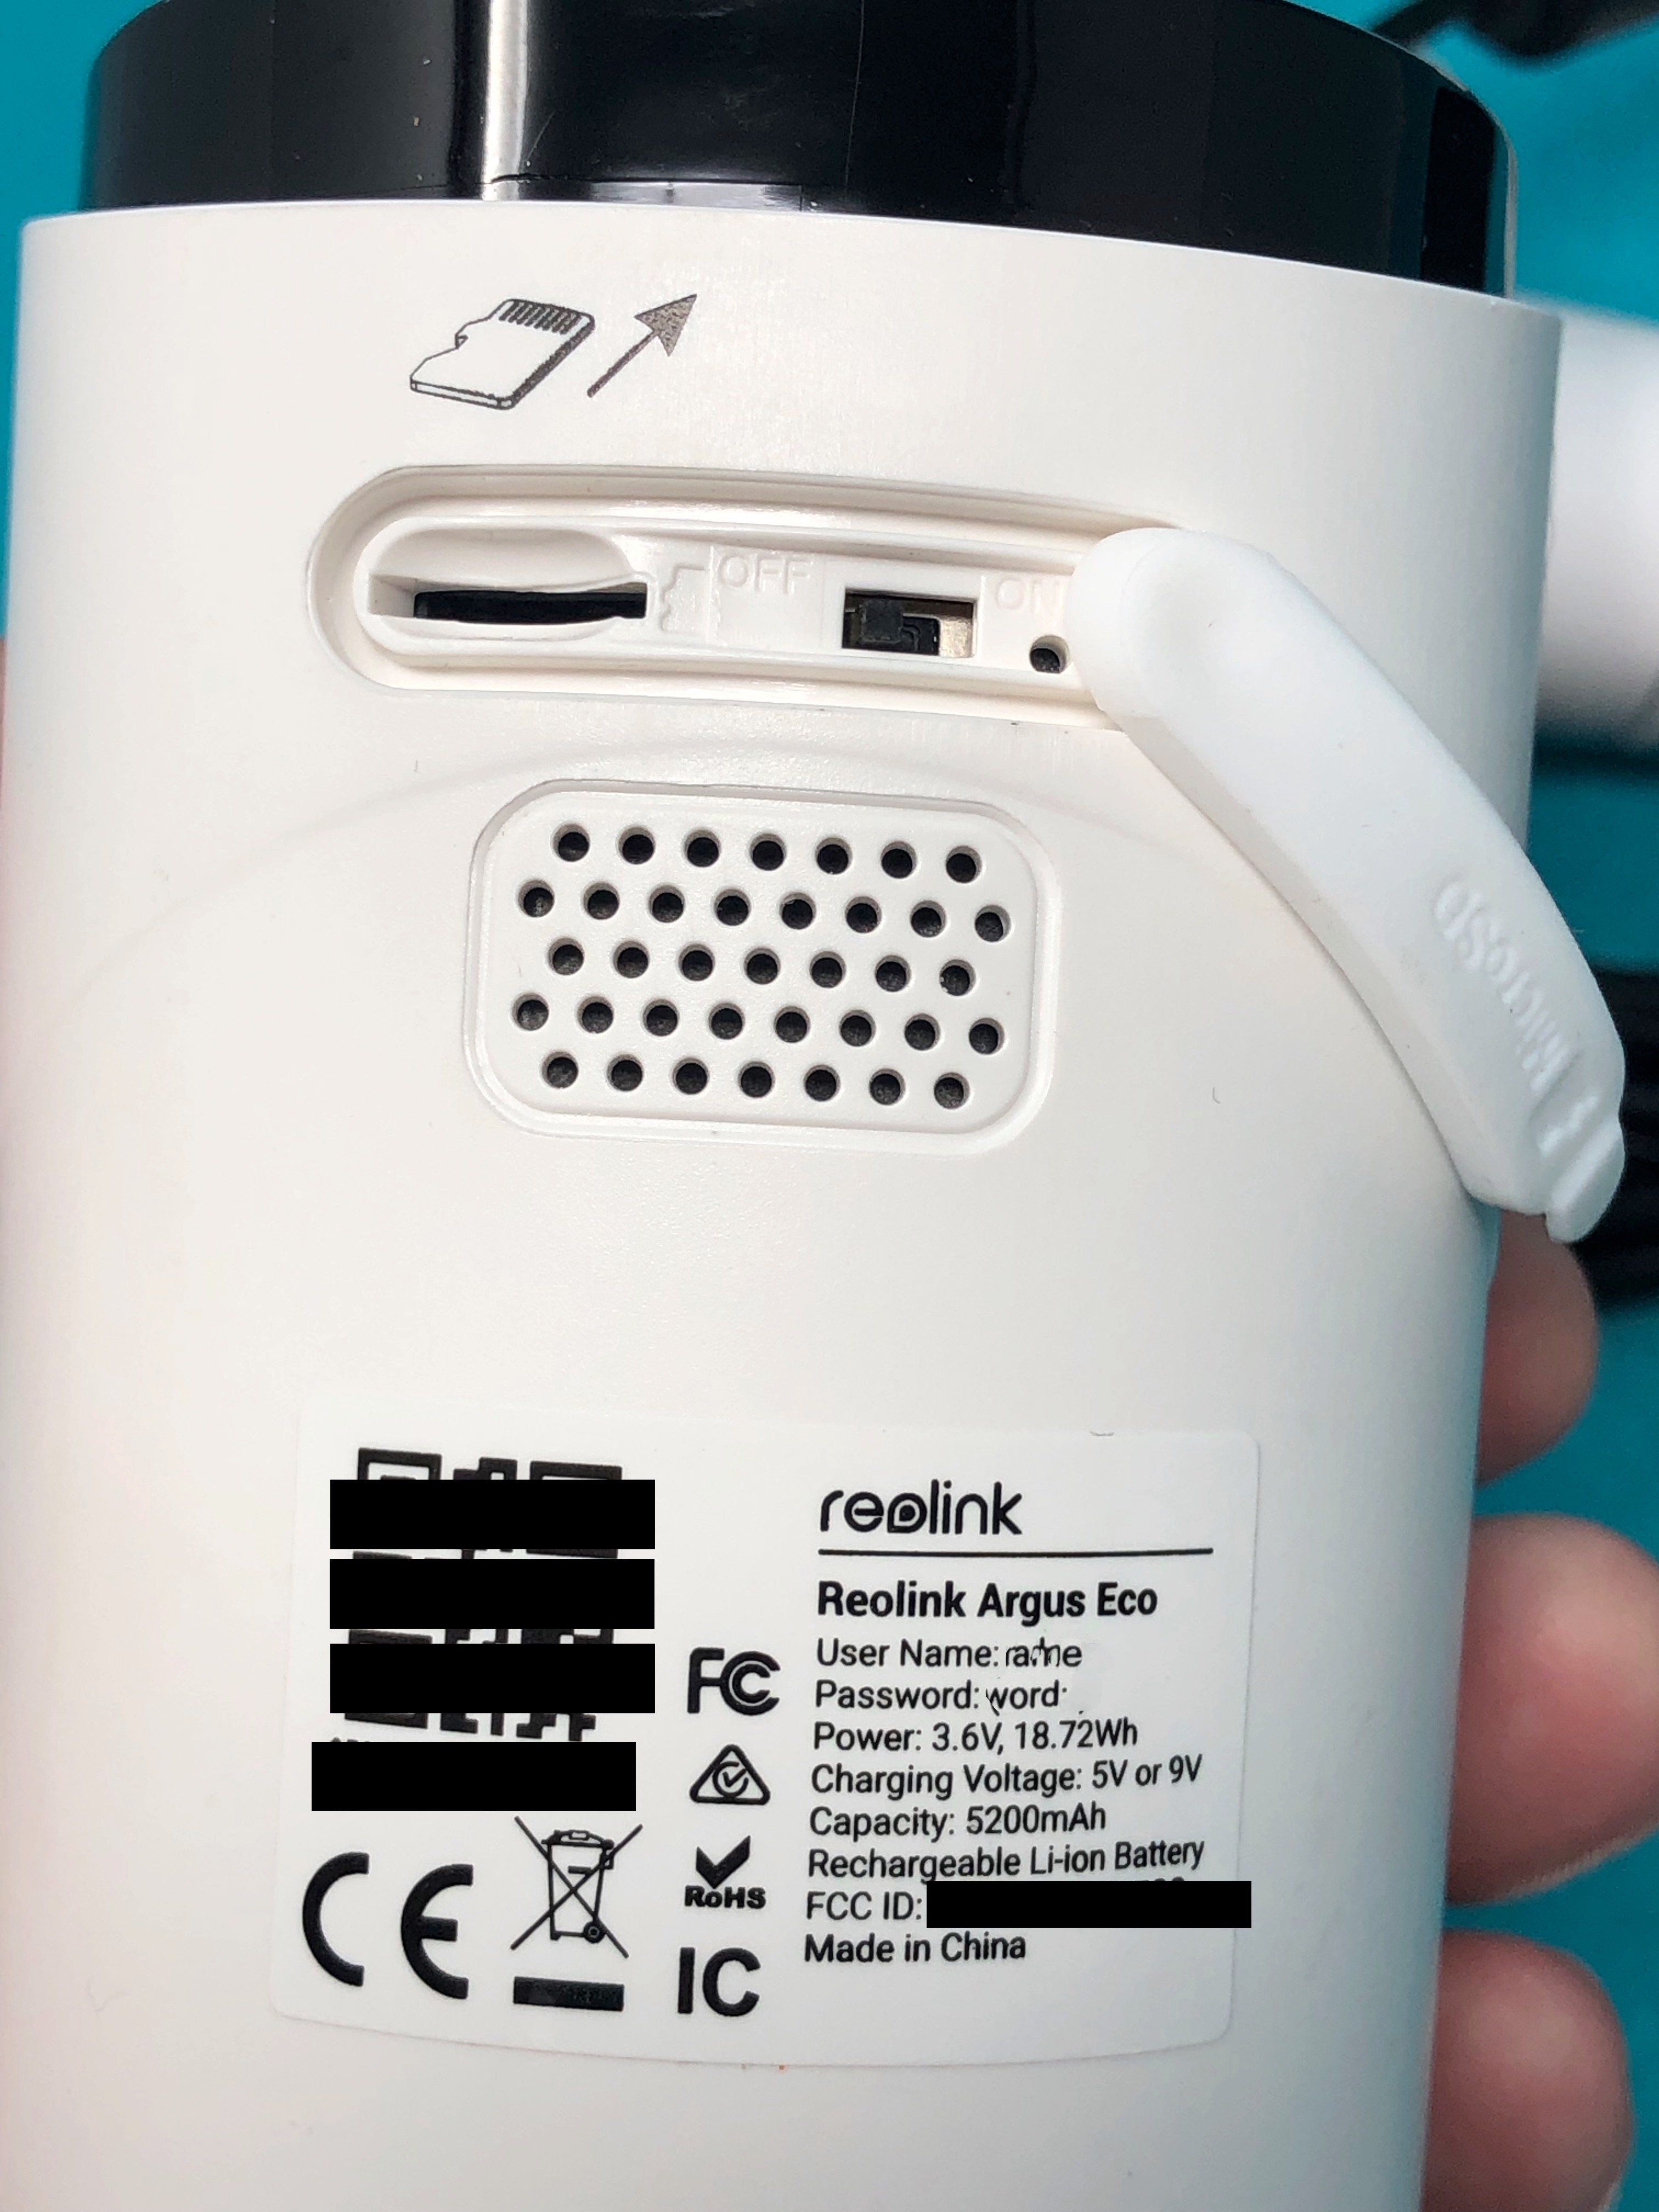
Also note that a micro SD card is NOT included with the G1 dashcam.

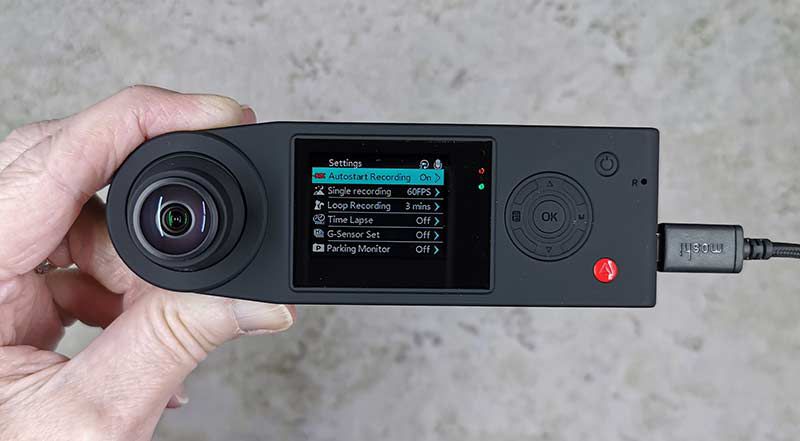
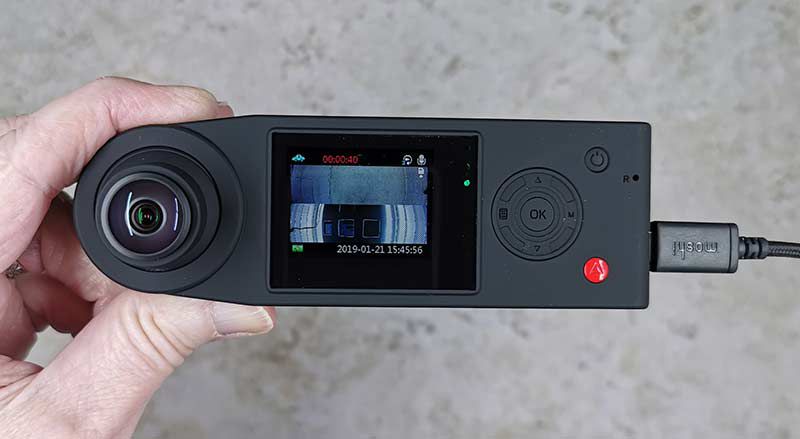
The G1 has a decent sized 1.5in TFT color LCD that you’ll use for a live view of the cameras and navigating the menus to customize the settings. The LCD is not touch capable, which means you’ll have to use the 5-way nav button on the right to scroll through the settings and make changes.

There’s also a small power button, a status LED, and an emergency button which will lock the current video clip if you press it.

By default, the G1 captures video from both cameras in one split screen .MOV video file as soon as you start up the engine of your vehicle.

You can customize the camera to just record video from the front (windshield) camera if you like and you can change the record length from 1, 3, 0r 5 minute length video clips.

Another option will let you capture time-lapse video which will put all the video from 4, 8, or 12 hours in one video file. See the example video below where I include a short timelapse clip at the end.

The Soliom G1 has most of the features that people want in a dashcam including a G-sensor which will detect an accident and automatically lock a video file so that you can use it for personal or insurance purposes.

The G1 also has a Parking monitor with motion detection so that it will automatically capture video if there is a motion collision to your car or motion is detected. To use this feature you will need to hardwire the camera to car’s battery so it’s always powered on.

See it in action

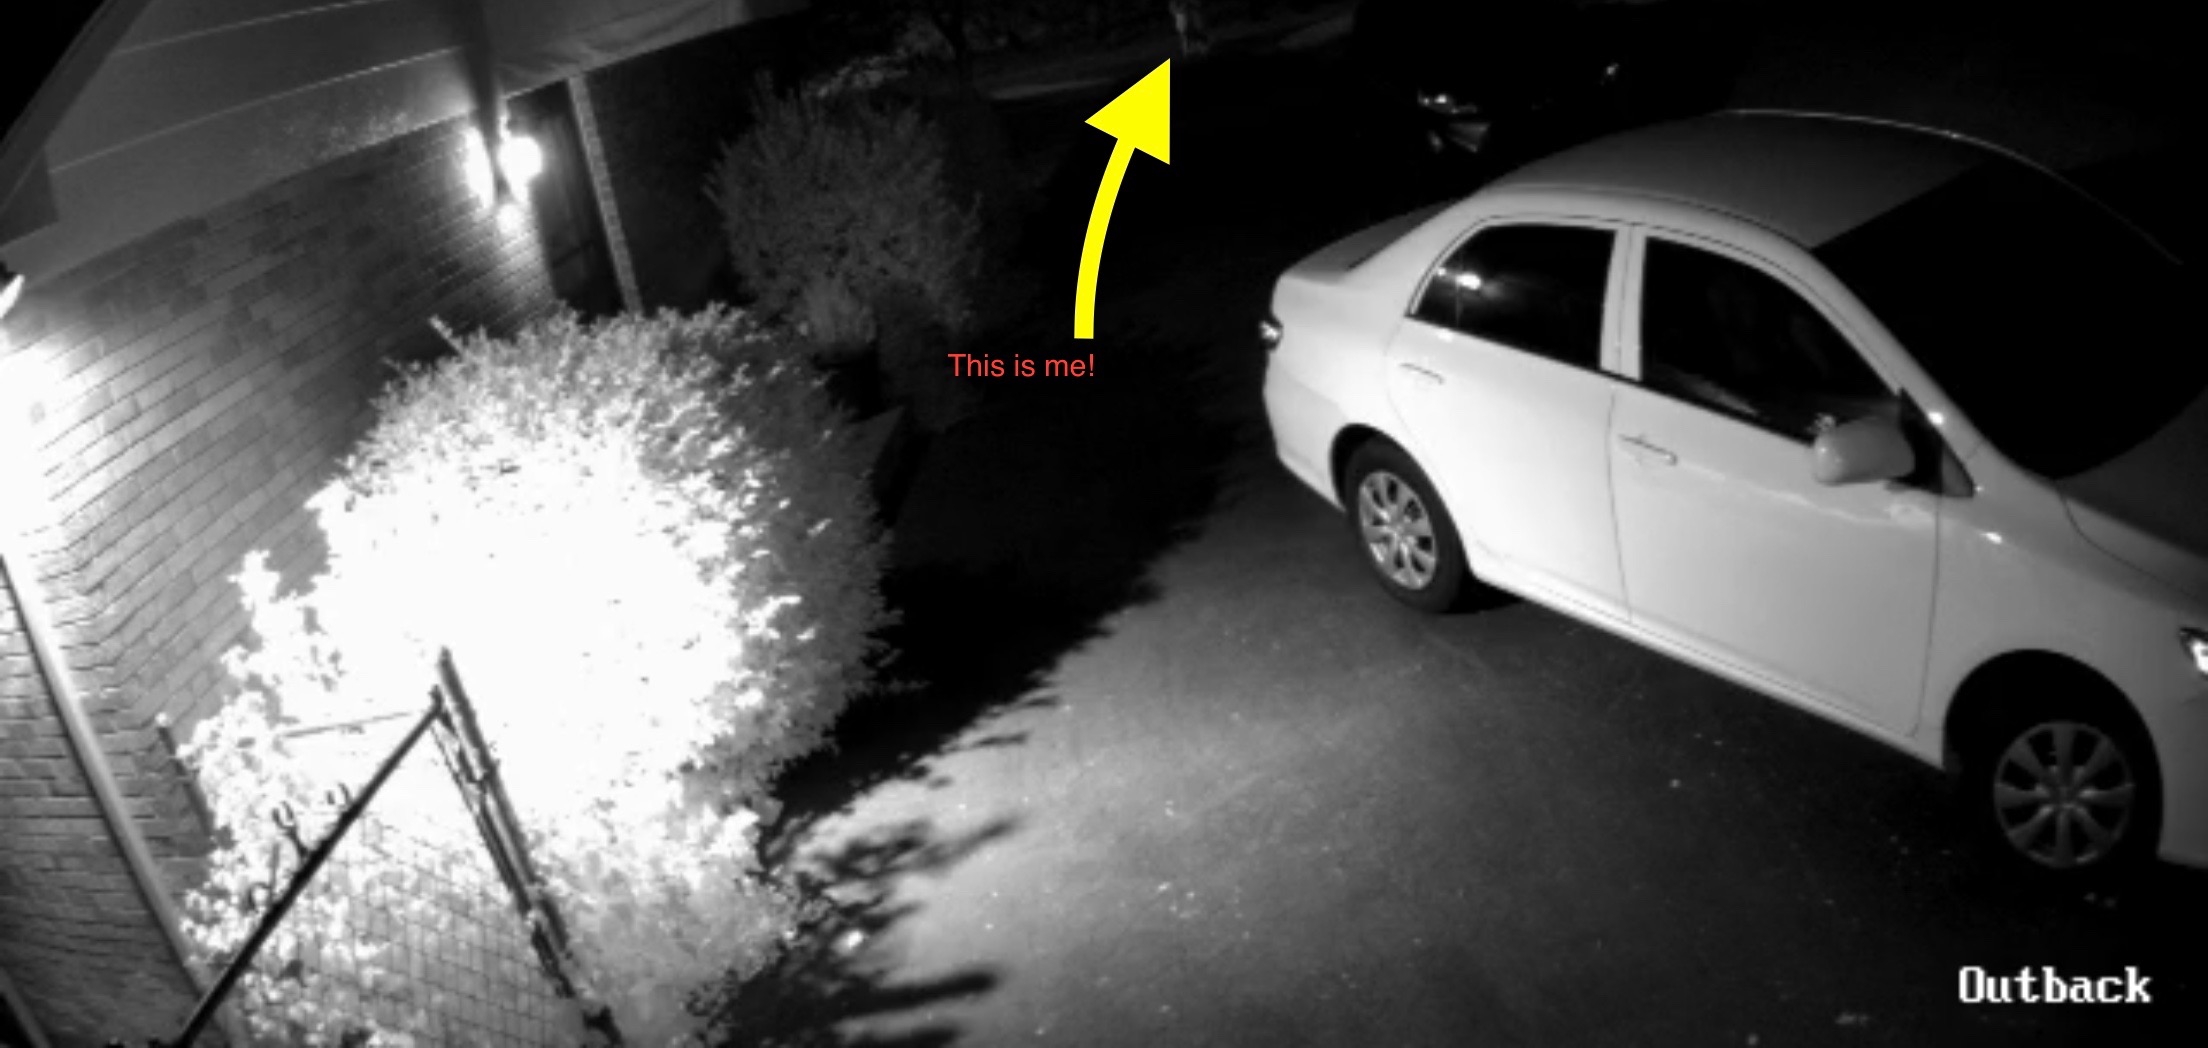
As you can see from the video clip above, the video quality is decent except that the interior camera does not have night vision. That means video captured while driving at night will not show the driver.

What I like

  • Records video inside the car as well as outside the car
  • Both video in one split screen file

What I’d change

  • Add night vision capability to the interior camera
  • Allow separate video files to be captured at once. One for inside and one for outside
  • Add 4K capability
  • Add wireless capability for offloading video without removing the camera or SD card

Final thoughts

I have enjoyed testing the Soliom G1 dual camera dashcam. It’s a unique camera that allows both exterior and interior video capture. Except for that feature, the rest of the functionality is basic. The camera lacks 4K video, wireless video sharing/downloading, and GPS. If those extra features don’t matter to you and you want the ability to automatically capture split-screen video of your travels inside and outside your vehicle, the Soliom G1 is a decent camera worth checking out. I plan to leave it in my car – at least for now.

Price: $109.99
Where to buy: Amazon
Source: The sample for this review was provided by Soliom.

Filed in categories: Reviews

Tagged: ,

SOLIUM G1 360 degree dual dashcam review originally appeared on The Gadgeteer on July 27, 2019 at 9:37 am.

Note: If you are subscribed to this feed through FeedBurner, please switch to our native feed URL http://the-gadgeteer.com/feed/ in order to ensure continuous delivery.

Waterfield Designs Micro Wallet review

REVIEW – We love wallets here at The Gadgeteer, in all shapes and sizes.  One of my favorite types is the zipper wallet, because it holds its contents very securely.  Recently, Waterfield Designs, who has been producing some really nice zipper wallets for some time now, updated their Micro Wallet product line with some new colors and an additional size. Let’s it them out!  Gadget on!

What is it?

The Micro Wallet is a small, thin, compact zipper style wallet with a minimalist style that is designed to hold a few cards and some cash or even act as a small tech gear pouch.

Hardware specs

  • Size options =
    • Compact = 4.0” x 2.9” x 0.75″
    • International = 4.25″ x 3.375″ x 0.75″
  • Material and color options=
    • 1050 Denier Ballistic Nylon in Black only for $25
    • Waxed Canvas in Brown only for $25
    • Full-grain, deer-tanned leather in Brown, Red, or Blue (Blue reviewed here)  each for $39
  • Capacity = Holds about 8 cards and some folded cash, plus 1-2 cards in the exterior quick-access pocket
  • Zipper = YKK self-locking
  • Location of manufacture = Workshop crafted in San Francisco, CA, USA

Design and features

The Micro Wallet has been in the lineup of Waterfield Designs for some time but has recently undergone an update in available materials and sizes.

My initial impression of the Micro Wallet is that it is essentially a more minimalist version of the Waterfield Designs Finn Wallet.  The leather’s texture is as soft and supple as butter and it is very compact, and I really like the bright blue color.

While the full grain, deer-tanned leather of this review sample was quite impressive in look and feel (and available in Red, Brown and this Blue colors), the Micro Wallet is also available in Black Ballistic Nylon as well as Brown Waxed Canvas (a classic Waterfield Designs style).

The Micro Wallet is a very compact, minimalist wallet, and excels at either back- or front-pocket carry, and I used it both ways with great success.  In fact, the softness of the leather helps the Micro Wallet feeling comfortable in your pocket even in front-pocket carry.   It is also designed to fit inside some of Waterfield Designs’ larger wallets for travel, such as the Passport Finn Access Wallet and the Travel Wallet (reviews of these are in-process—stay tuned).

Although it’s difficult to see in this photo, the Micro Wallet starts out quite slim at only 0.75″ thick, and as seen below, it stays quite slim even when loaded.

One of the main features of the Micro Wallet is its zipper that wraps around two of the sides of the wallet.  As with all of the materials and components used by Waterfield Designs in their products, this is a YKK locking zipper, which means that when the zipper pull is in the above position, it is free to be zipped open or closed, but once the zipper pull is flipped the other way and laid flat, it “locks” into that position.  This helps keep the zipper from opening accidentally in your pocket or purse.

You may have already noticed that the Micro Wallet includes a small loop of nylon webbing on one side.  This is a handy feature that allows the Micro Wallet to be attached and secured to all manner of things, from various hooks and clips to locking carabiners, keyrings and the like.

In the example above, I’ve attached the rectangular carabiner that is included with the Waterfield Designs Travel Wallet (NOTE: not included with the Micro Wallet), but this little loop of webbing will fit many different types of hooks, carabiners, and the like.  This allows the Micro Wallet to be attached to a belt loop, purse or messenger bag strap, backpack webbing, keyring or any number of other places.

The inside of the Micro Wallet is very spartan, with no organizational pockets.  This was done purposefully, in keeping with its minimalist design philosophy as well as intent to keep the Micro Wallet as small, thin, and compact as possible.  Although inside pockets would indeed help with the organization of contents, they would also add to the thickness of the Micro Wallet.  It should also be noted that the Micro Wallet is NOT available with an RFID liner option.

To test out the Micro Wallet, I loaded it up with the above items: 6 bills and 7 cards, which is a fair representation of what I might typically carry in my wallet on an average day.

In the above photo, you can see that the bills and cards essentially just sit inside the Micro Wallet since, as mentioned above, there are no internal organizational features.  The 6 bills and 7 cards fit just fine, and in fact, there was room for some additional items. One drawback to the Micro Wallet here is that, if you want to put cash bills into it, you have to double fold them, which can start to add a lot of thickness to it.  This is a good spot to mention that the Micro Wallet is available in two sizes, Compact, which is designed to hold US bills, and International, which has a slightly larger footprint and is designed to hold foreign (non-US) bills.  I couldn’t help but wonder if the International version might have allowed me to only fold my US bills once, which would have reduced the thickness due to not having to double-fold them.  I should also mention that the Micro Wallet’s open interior allows it to be used to hold cables, adapters, memory cards and so forth—sort of a mini tech gear pouch—if desired.

The above photo shows the thickness of the Micro Wallet with the 6 bills (double folded) and 7 cards inside.  Even with the bills double-folded, the Micro Wallet is still very thin and compact.

As seen above, the Micro Wallet is very suitable for back-pocket carry like just about any traditional wallet.

Where the Micro Wallet excels, however, is in front-pocket carry, where its small footprint, thinness, and very soft material make it quite comfortable.

What I like

  • Very small, very slim, very suited for either front or back pocket carry
  • Locking YKK zipper provides quick yet secure access to contents and could also be used to hold small items like cables, adapters, etc.
  • High-quality materials and construction—the leather looks and feels great and seems very durable

What I’d change

  • Find a way to give it an RFID liner but without adding much thickness

Final thoughts

The Waterfield Designs Micro Wallet is an excellent slim, compact, minimalist wallet if you want to carry a handful of cards and cash securely and you aren’t as concerned about organization.  It has a classic look and feel and is quite affordable for a wallet made from these materials and construction, which give me the impression that it will last a long time and only get better with age.

Price:

  • 1050 Denier Ballistic Nylon in Black = $25
  • Waxed Canvas in Brown = $25
  • Full-grain, deer-tanned leather in Brown, Red, or Blue (Blue reviewed here) = $39

Where to buy: Waterfield Designs (AKA SF Bags)
Source: The sample of this product was provided by Waterfield Designs

Filed in categories: Reviews

Tagged: ,

Waterfield Designs Micro Wallet review originally appeared on The Gadgeteer on July 27, 2019 at 8:49 am.

Note: If you are subscribed to this feed through FeedBurner, please switch to our native feed URL http://the-gadgeteer.com/feed/ in order to ensure continuous delivery.

Kensington Thunderport 3 Nano Dock review

REVIEW – My daughter is heading off to college this fall, and like every other college student, she needs a laptop.  We bought her a new MacBook Pro, and while these are nice machines, they don’t exactly have an over-abundance of ports.  In fact, the 13-inch ones have exactly two Thunderbolt 3 (USB-C) ports, one of which is used for charging.  Where is she going to get the extra ports that she needs for a monitor, a headset, a backup drive, and so on?  She’s going to get them from Kensington’s brand new Thunderport 3 Nano Dock.

What is it?

The full name for this dock is the Kensington SD2400T Thunderbolt 3 Dual 4k Nano Dock with Power Delivery.  That’s a mouthful, but that’s because this little gadget packs a lot of capability into a small space.  It allows a laptop to have all the ports of a desktop when back in the dorm room or at the office.

What’s in the box?

  • The dock
  • Power brick
  • Thunderbolt 3 (USB-C) cable
  • A quick start guide with 7 pages of images

There are no actual instructions on how to setup or use the dock, but it doesn’t really any.  Everything (except for one minor detail that I learned) is pretty straightforward.

Hardware specs

The Nano Dock connects to the host computer via Thunderbolt 3 (that’s the underlying connectivity standard) using USB-C (that’s the connector type).  It works with both Windows and macOS computers.  Make sure that you’re connecting the Nano Dock to a Thunderbolt 3, because this is how you get the blistering 40 Gbs throughput.

The front of the Nano Dock has three ports.  The 3.5 mm audio is for headphones.  The USB-C port is data only—this means you can’t use it to power a monitor—so it’s for things like plugging in an external hard drive for a data backup.  The USB 3.1 port is handy for charging a phone or a tablet or connecting a thumb drive.

The right side of the Nano Dock has a power button.

The majority of the ports are on the back of this gadget.  The gigabit ethernet port is for a 1 Gbps wired networking connection.  There are two more USB 3.1 ports.  The two full-sized display ports support either dual 4k monitors (4096×2160 @ 60 Hz) or a single 5k monitor (5120×2880 @ 60 Hz).   There’s also a place to plug-in the power supply and the Thunderbolt 3 connector for connecting to the host computer.

The left side has a pair of Kensington security slots for securing the Nano Dock via a cable lock.  Both the K65020 MicroSaver 2.0 or the K64444/K6445 NanoSaver Keyed Laptop Locks will work, but neither are included.  These can be purchased online directly from Kensington or from third parties like Newegg or Amazon.

The bottom of the Nano Dock has the holes for mounting to any 75mm or 100mm VESA compatible external display.  This allows you to mount the dock on the back of your monitor, thus reducing the clutter on your desk.  You’ll need to purchase a docking station mount, as it’s not included.

Design and features

The dock has some beautiful aesthetics.  It’s sleek and compact and has a minimalistic look to it, somewhat reminiscent of an AppleTV.  In fact, it has nearly identical dimensions at 4×4 inches and 1.5 inches high.  It’s made from plastic, but it has a solid, sturdy feel to it.

Installation and setup

Installation is super simple.  Plug in the power brick and then connect the included USB-C cable to the host computer.

Performance

I tested Kensington’s dock on two different computers.  The first was a 2018 Mac mini, and the second was a brand new 2019 13-inch MacBook Pro.  The Mac mini already has several ports (4 x Thunderbolt 3, ethernet, HDMI, 2 x USB, and audio), but you can never have too many ports.  The MacBook Pro is probably closer to the target audience, as it only has a pair of Thunderbolt 3 ports.

For my first test, I used the Nano Dock with the Mac mini, and I named my test strategy “everything and the kitchen sink.”  I connected the dock to the mini and then connected as many things as possible to the dock to see if it could handle them.  Here’s what I connected to the dock:

  • A pair of 27-inch UltraSharp Dell monitors
  • An Apple keyboard
  • A SteelSeries Rival mouse
  • Ethernet
  • External SanDisk SSD (connected to Time Machine)
  • A Logitech web cam
  • HyperX headphones with mic

As you can see, I used every port.

I didn’t have to install any new drivers to use the dock.  After I turned off WiFi, macOS automatically re-configured itself to use the Ethernet connection via the Thunderbolt port.  The only configuration that I had to do was choose the new input and output sources for the headphones, which was called Realtek USB2.0 Audio.

And the result?  Everything worked, and it all worked at the same time.  I backed up with TimeMachine, watched YouTube videos, and used my camera with FaceTime.  It ran both monitors and allowed me to seamlessly move applications from the primary to secondary monitor.  The Nano Dock never broke a sweat.  When I put my hand on top, it wasn’t even warm.  I’m not sure that my test could have gone any better.

The only thing that I could have done to better stress the dock would have been to use a pair of 4k monitors.  Unfortunately, I don’t have any 4k monitors, so the closest I could get was a pair of 27-inch UltraSharp monitors from Dell running at 2560×1440 resolution.

For my second test, I used the Nano Dock with my daughter’s brand new MacBook Pro, and I named this test strategy “exactly what she needs.”  I connected the dock to the laptop and then connected the things that my daughter will be taking to college with her.

For this test, here’s what I connected to the dock:

I learned something new during this test:  The 2 USB ports on the back of the dock will not charge a mobile device; only the USB port on the front will do that.  After moving the white cable that connects my daughter’s iPad to the front, the Nano Dock passed this test with flying colors.  The monitor worked great, the SSD was available to copy files, and the iPad charged.  Perfect.

What I like

  • Beautiful design and solid construction
  • Wide array of the most useful ports
  • Capable of using everything at once

What I’d change

  • Not a thing

Final thoughts

Try as I might, I can’t find anything about this dock about which to be unhappy.  It looks good and works well.  If you have a computer with a Thunderbolt 3 port, and if you’re looking for a dock to give you some extra ports, then Kensington’s Nano Dock should definitely be on your short list.  Now I just need to pick up one more of these to use with the new MacBook Pro I’m getting at work.

Price: $291
Where to buy:  Amazon
Source: The sample for this review was provided by Kensington.

Filed in categories: Reviews

Tagged:

Kensington Thunderport 3 Nano Dock review originally appeared on The Gadgeteer on July 26, 2019 at 10:31 am.

Note: If you are subscribed to this feed through FeedBurner, please switch to our native feed URL http://the-gadgeteer.com/feed/ in order to ensure continuous delivery.

Reolink Argus Eco security camera with solar charger review

REVIEW – Security cameras are everywhere. Given the advancements in camera resolution and solar technologies, the price of a solar-charged security camera that would have cost hundreds of dollars just a few short years ago is now in the realm of possibility for anyone who has property that needs securing. Reolink has several cameras, but their Argus Eco is weatherproof, WiFi ready, and now has an optional solar charger that can be added. I was sent a white camera with a black solar charger to test.

What is it?

A weatherproof battery-operated camera with WiFi and an optional weather-proof solar charger.

What’s in the box?

The unit comes packaged separately – the camera in one retail-ready box and the solar panel in another. Each unit is able to be installed separately.

The camera package contains:

  • Argus Eco (with sealed internal battery)
  • Screw-on, adjustable Antenna
  • Outdoor Security mount with wall- and tree-mounting options
  • ”Surveillance” sticker
  • Charging cable
  • Quick Start guide

Hardware specs

  • CMOS Image Sensor
  • 1080p HD at 15 frames/sec – H.264
  • Fixed lens, 100° diagonal
  • Night Vision – Up to 10 m (33 ft)
  • 6X Digital Zoom
  • High-quality speaker and microphone
  • PIR Detecting Distance Adjustable, up to 9 m (30 ft)
  • PIR Detecting Angle – 100° horizontal
  • Customized voice-recordable alerts
  • Instant email alerts and push notifications
  • IEEE 802.11b/g/n WiFi at 2.4 GHz
  • Wireless Security – WEP(ASCII)/WPA-PSK/WPA2-PSK

There is no current information on the website or the packaging for the solar charger, other than what is on the tag on the back.

  • Max power 2.8 watts
  • Max voltage 6V DC
  • Max current 480 mA

Design and features

With the rise in home security services and surveillance methods, it’s hard to find a package that doesn’t rely on sending your stored data to a paid service. Reolink has storage plans you can get, but because the video is stored on the camera’s SD card, this isn’t necessary. You can turn on storage for one week of video for a single camera for free, which is nice.

The Argus Eco is a cylinder about 5” long by 3” in diameter. On the business end, there is a central camera lens, a domed motion detector, and four UV emitting lights for night-vision. On the back are three ports: a BNC antenna port, a metallic mounting port, and a weather-sealed charging port. In a slot on the lower side near the front, there is a weather-sealed area with a microSD card slot, an on-off DIP switch, and a recessed reset pin. Nearby is a label with the serial number and password info in English and encoded into a QR code.


The mounting post has a dual tightening ball joint, which allows you to mount it in almost any orientation. Screws and plastic collars for mounting to wood or plaster are included. There is also a metal bracket and a nylon strap that would let you mount it in a tree without having to screw directly into the live wood.
Before mounting the camera, I recommend staying inside in the air-conditioning and download the app to your device, set up the camera, and insert the microSD card. You should probably also charge the camera’s battery. That way, once you’re up on a ladder in the hot sun, trying to read your phone in order to get the picture straight, you’ll only have to turn the camera on and worry with the dual nut joint to get things adjusted.


Once I had the camera mounted, I mounted the Solar charger. This unit is a flat, sturdily built photovoltaic array with a 4.5-meter captive cable and a screw socket built into the back. While the screw attachment is a little less robust than the one for the camera, there’s a good bit of weight difference as well.

The ball joint for this mounting was the same, however, and setting the angle is easy. I cable-tied the extra cord to the mounting post. Where we placed it gets quite a bit of sun year-round. The microUSB plug was a bit fussy since I had to make sure the hated trapezoid was facing the right way, properly aligned, etc, with the silicon cap over the plug blocking my sight. But, in the end, it connected without a hitch. A nice little icon in the app tells you when solar is charging the battery and how much charge the battery has when the sun’s not out.

Setup

Set up is fairly painless. You have to download the app (GooglePlay or iOS App Store), create an account, and scan the pairing QR code. Once it’s set up, it’s pretty solid. I turned off the camera and waited for a few days until I found time in the evening to mount both pieces. It started back up without a hiccough.
There are a lot of settings that can be changed. You can select color/B&W/Auto, resolution, whether to include sound and a plethora of alerts. While watching live, you can snap stills or capture movies that you can easily share.

Performance

The camera performs flawlessly. We watched a squirrel going up the drive beside one of the cars right after installing it and walking inside. My Lovely Bride also got tickled of the video of my ear while I was struggling to get the camera level. It’s easy to call up the camera anytime.

Here’s a video of me taking the lede picture for this article:

We have a light for our backyard that turns on via motion after dark and this can prevent the camera from seeing the far end of the driveway.

When it’s not on you can see all of the drive, the street, and the neighbor’s yard.


There are a huge variety of notification types you can select from. Depending on your situation, you may or may not want to be alerted every time an animal walks past your camera. But, if you do, there’s a setting for that.

What I like

  • All hardware included in both packages
  • Doesn’t require an on-going service charge
  • Data is stored on the device but can be downloaded through the app
  • Cloud storage is available, but not required – one week (1 GB of data) is free

What I’d change

  • A software update that allows sending recorded events to an off-camera storage device or Dropbox account might be nice.

Final thoughts

Our surveillance society has gotten used to everything being recorded. We regularly see photos on social media of porch pirates, would-be car ransackers, and trespassers. We even have motion-activated game cameras to capture shots of wild animals. This product is a great example of how you can easily set up a system that allows you to have awareness of your surroundings (or your vacation home) at a rational cost with no on-going costs. Well done, Reolink.

Price: Argus Eco is $79.99, Solar Panel $24.99
Where to buy: Company website and Amazon
Source: The sample of this product was provided by Reolink.

Filed in categories: Reviews

Tagged:

Reolink Argus Eco security camera with solar charger review originally appeared on The Gadgeteer on July 26, 2019 at 9:00 am.

Note: If you are subscribed to this feed through FeedBurner, please switch to our native feed URL http://the-gadgeteer.com/feed/ in order to ensure continuous delivery.

iOttie Easy One Touch Connect car mount with Alexa review

REVIEW – Andy reviewed the iOttie Easy One Touch Connect car mount almost 2 yrs ago and now iOttie has updated the Easy One Touch with Alexa. Let’s take a look.

What is it?

The iOttie Easy One Touch Connect is a car mount for your mobile phone that can be attached to your windshield or your dashboard and has built-in Alexa functionality.

What’s in the box?

  • iOttie Easy One Touch Connect
  • Adjustable dash/window mount
  • Dash pad
  • 12V power adapter with USB port
  • Instructions

Design and features

The phone holder features a one-handed mechanism that has two gripper arms that hug the sides of your phone, a “foot” rest for the bottom of your phone, and a rubber-covered backrest that doubles as the eject button. There are also two more arms on the sides that you squeeze to open the main gripper arms. See the video clip below that demonstrates how the mechanism works.

A view of the back of the iOttie shows the adjustable footrest at the bottom, the micro USB charging port above it, the adjustable windshield/dashboard mount arm connector in the center, and the microphone mute toggle button at the top.

Attaching the iOttie phone holder to the adjustable mounting arm is as easy as loosening the collar around the connector, snapping the mount in place and tightening the collar again.

The mounting arm has two adjustment points that allow you to customize the length and angle of the arm. In the image above, the arm is at its smallest length.

Now we see the arm fully extended. A thumbscrew on the center of the arm allows you to customize the arm to the desired length.

Another thumbscrew near the base allows for adjustment of the angle of the arm.

I tested the iOttie Easy One Touch mount with my Huawei P30 Pro. The gripper arms had no issues accommodating it or my Pixel 2XL shown in the image above (I was using the Huawei P30 Pro to take the pics). In the image, you’ll also notice that there are LEDs built into the gripper arms. These LEDs provide a visual cue when interacting with Alexa.

Installation

I drive a 2013 MINI Cooper S and didn’t think that I’d have an issue attaching the iOttie mount in my car when I agreed to review it. I knew I wasn’t going to be attaching the plastic mounting pad on my dashboard because the thoughts of sticking something with adhesive to my dash makes me a little queasy. I figured attaching it to my windshield would be no issue because I review dashcams all the time.

Unfortunately, my car is so small that there really wasn’t a good place to put the mount where it wouldn’t interfere with my view of the road. I ended up just stuffing it in one of my cup holders during the testing phase.

Alexa, can you hear me? Alexa? Yoooooo hoooo, Alexa?

After you attach the mount to your windshield or your dash, the next step is to install the iOttie Connect app on your phone. The sole purpose of this app is to connect the mount to the Amazon Alexa app that you also need to install on your phone in order to take advantage of the built-in Alexa functionality.

And here we come to the biggest issue (besides the fact the mount can’t charge my phone) I have with the iOttie Easy One Touch Connect car mount. The Alexa feature just plain sucks. First of all, you have to have the Alexa app on your phone running in the background whenever you want to use Alexa “in” the mount.

I found that even with the app running, the connection between the mount and the app would rarely work without me fiddling with it for a few minutes. Most times the Alexa app would show that the iOttie was offline until I unplugged the 12V power adapter and plugged it back in. Or if I stopped and restarted the Alexa app.

Then when it finally would start working, I would start my drive only for it to stop working at some point during the trip. At least that was my experience many times during my testing of this product. Frustrating for sure.

When the Alexa feature was working, all I had to do was say “Alexa”, and the LEDs on both gripper arms would glow blue and I would hear the iconic Echo tone letting me know that I could give my command to Alexa.

See that’s the thing, the iOttie mount is really just an extra microphone so that you can leave your phone in your bag or pocket. It’s not like a self-contained Alexa device like an Amazon Echo. You have to have your phone for the internet connection AND for the audio which you should setup to go through your car’s Bluetooth.

In all honesty, it is less of a hassle and expense to just leave my phone on the car seat next to me with it paired to my car’s Bluetooth and run the Alexa app on the phone.

See it in action

What I like

  • Easy to mount and unmount device with just one hand
  • Built-in microphone allows you to leave your phone in your bag while interacting with Alexa

What I’d change

  • Add wireless charging capability

Final thoughts

As a vehicle mount, I like the easy one-handed operation of the iOttie. But the fact that it lacks wireless charging capability when it is priced at $70 and the problems that I had with the built-in Alexa feature has me unable to give my recommendation as a good buy. Even if the Alexa feature was reliable, I’d still think this mount is a bit overpriced. Sorry iOttie.

Price: $69.95
Where to buy: Amazon
Source: The sample for this review was provided by iOttie.

Filed in categories: Reviews

Tagged: , ,

iOttie Easy One Touch Connect car mount with Alexa review originally appeared on The Gadgeteer on July 25, 2019 at 11:00 am.

Note: If you are subscribed to this feed through FeedBurner, please switch to our native feed URL http://the-gadgeteer.com/feed/ in order to ensure continuous delivery.