Mousetrapper 2.0 alternative mouse review


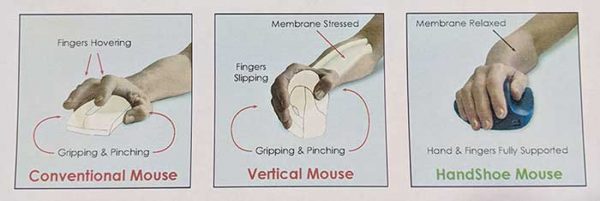
REVIEW – By now, many of us that use computers frequently and as part of our daily lives have felt the discomfort that can occur when using a conventional mouse. The Mousetrapper Advance 2.0 is classified as a Wellness mouse that alleviates the inherent stresses of using the conventional mouse. Let’s see if this is true.

What is it?

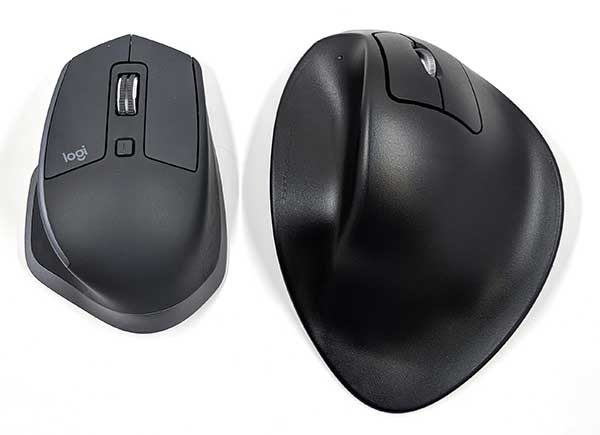
The Mousetrapper Advance 2.0 is designed for ease of use, and to eliminate the stresses that are inherent with the use of a standard/conventional mouse. It is available in two versions with stylish accent colors: white or turquoise. There are six programmable buttons that allow you to customize the settings according to your needs. The reconfiguration of the buttons is accomplished via the MT Keys software which is available for download via the manufacturer’s website. The software lets you easily reconfigure all the button functions, add standard texts, create user profiles and more. MT Keys software is available for both Mac and PC.
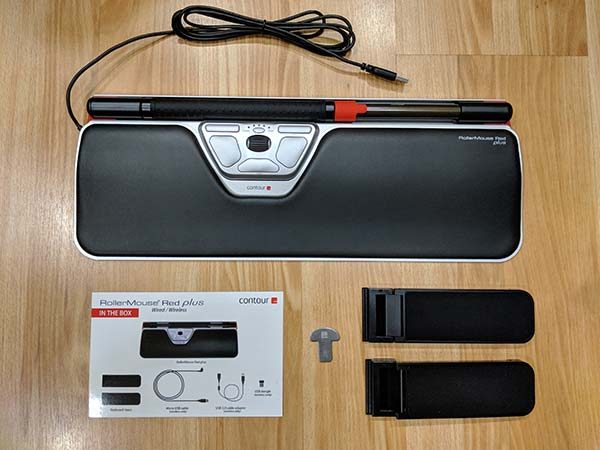
What’s in the box


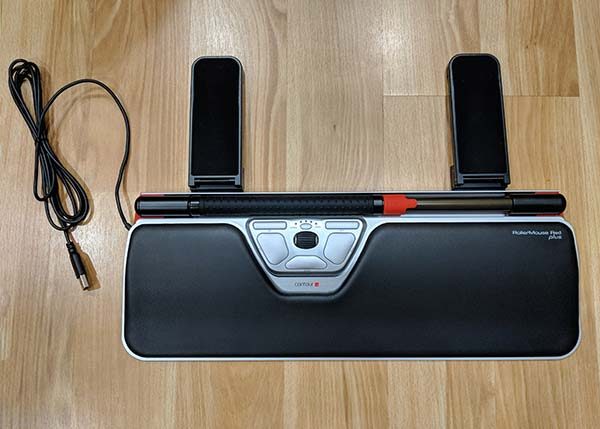
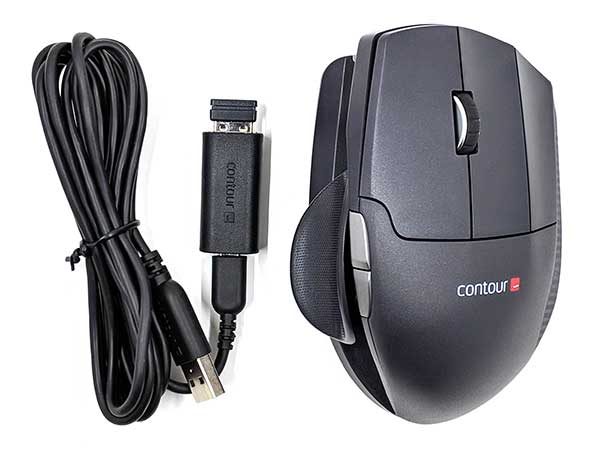
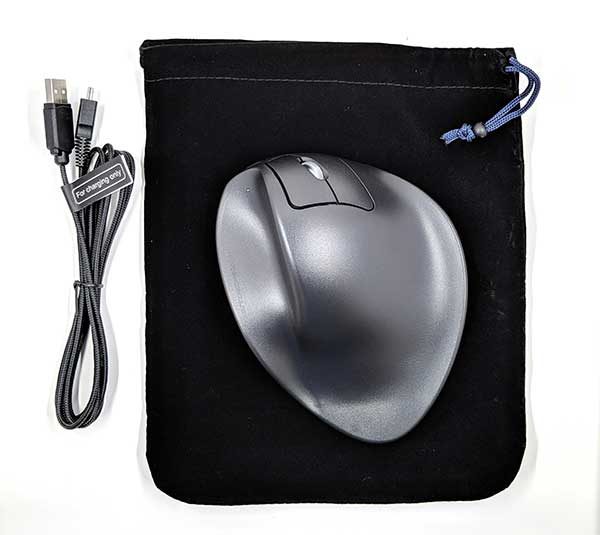
1 x Mousetrapper Advance 2.0
1 x Mini USB Cable
1 x User Manual

Design and features

Features

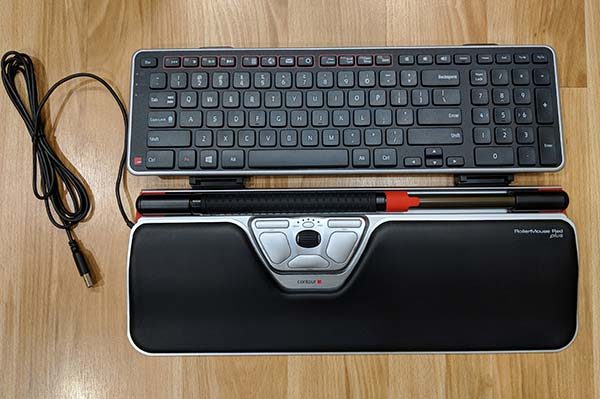
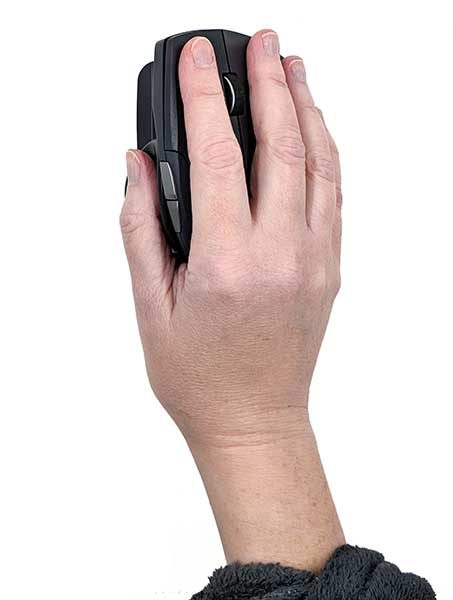
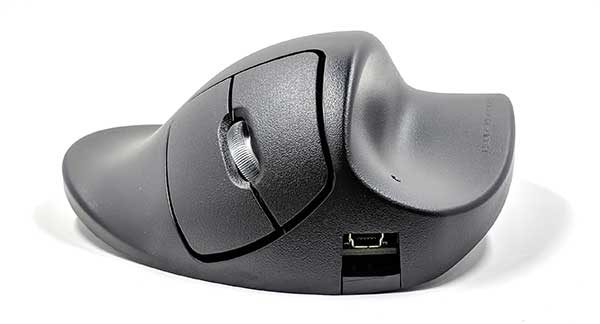
  • Super-slim, ergonomic design
  • Accent colors in white or turquoise
  • Control pad with click and scroll functions
  • 6 programmable buttons for customization to your needs, using MT Keys
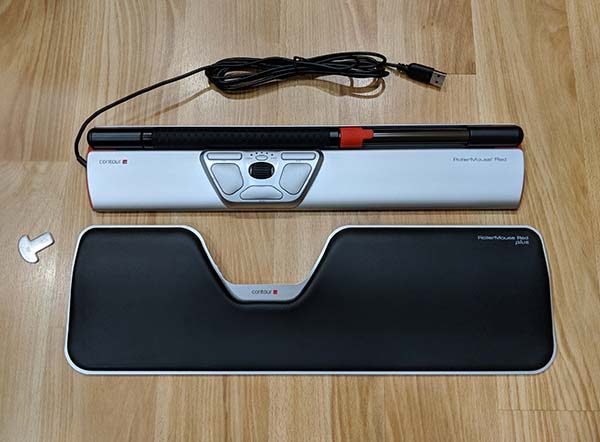
  • Replaceable wrist supports
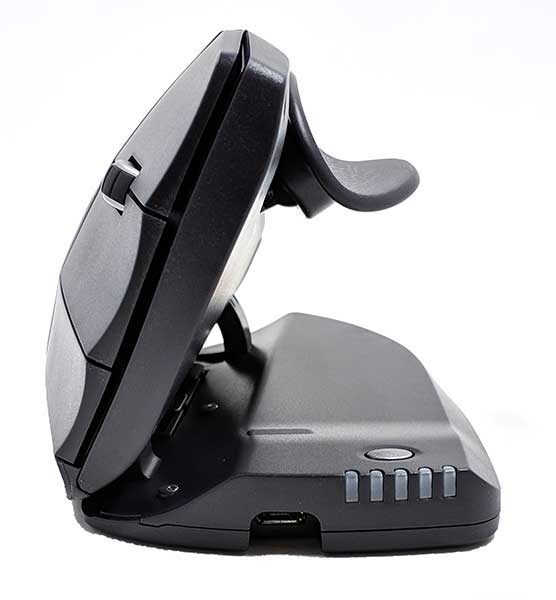
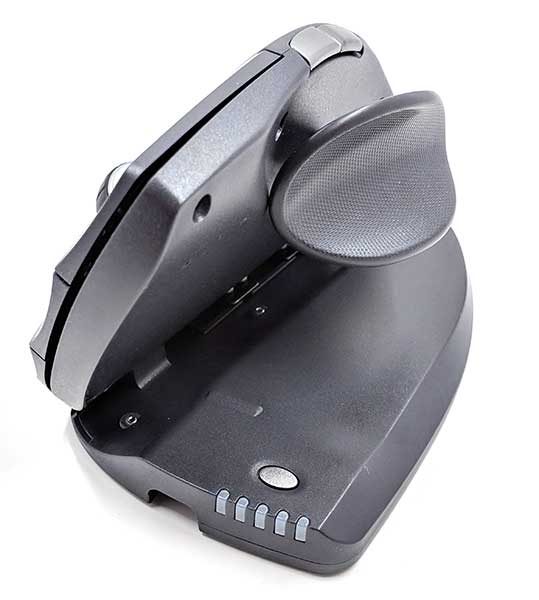
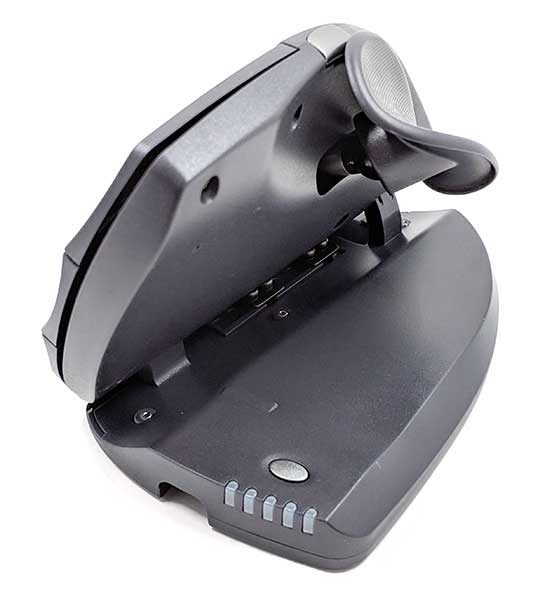
  • Height adjustment with folding non-slip surface
  • 2000 dpi

Specifications

  • Control pad with click function and scroll on the right side
  • 6 programmable buttons
  • USB connection
  • 2,000 dpi
  • Compatible with all PC and Mac computers with a USB port. MT Keys requires Windows 7 or later, or Mac OS 10 or later
  • Width: 480 mm; Height: 20 mm; Depth: 110 mm; Weight: 670 g

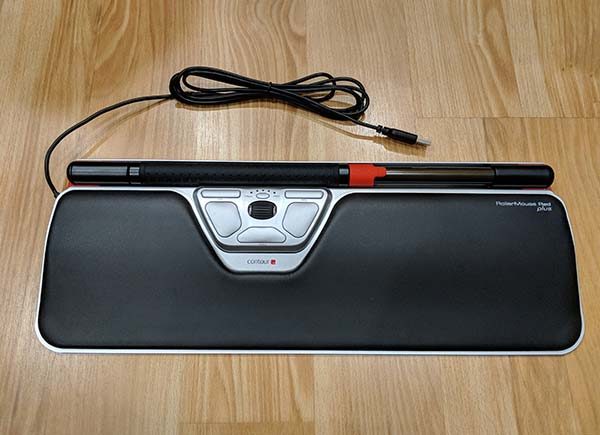
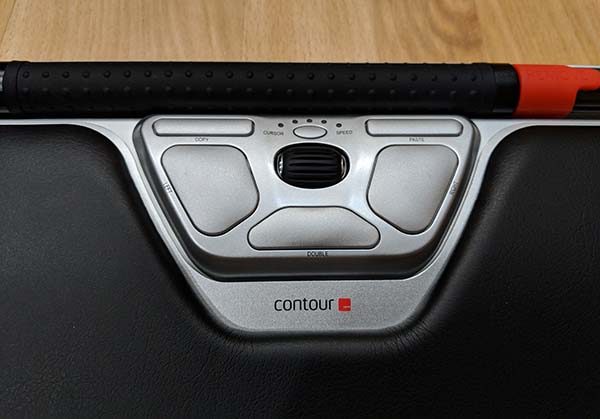
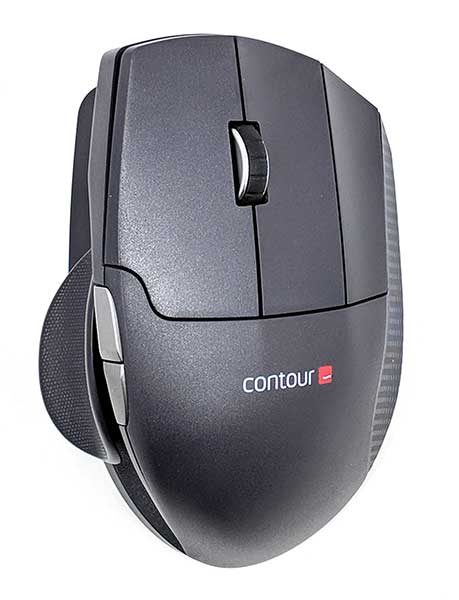
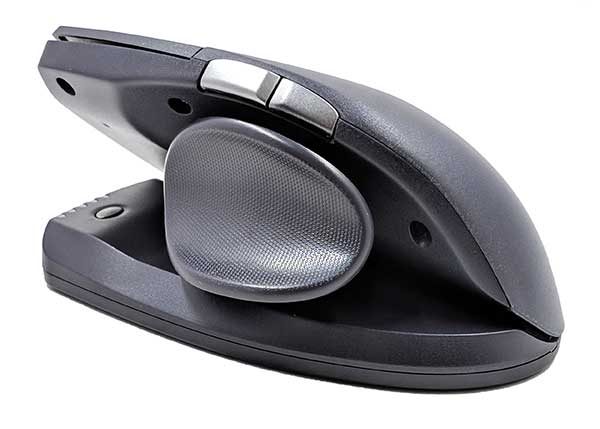
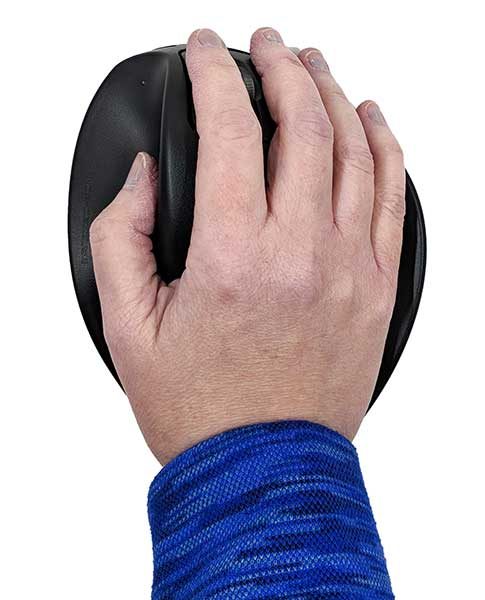
In the immediate mouse control area, there is the mouse in the center which is a ribbed control pad surface that moves as the mouse, and it is surrounded by the six programmable buttons.


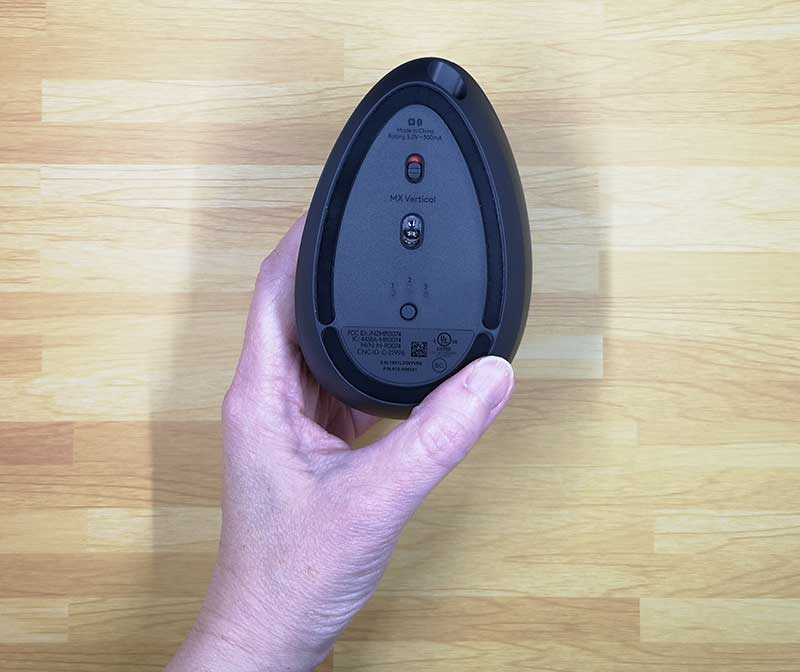
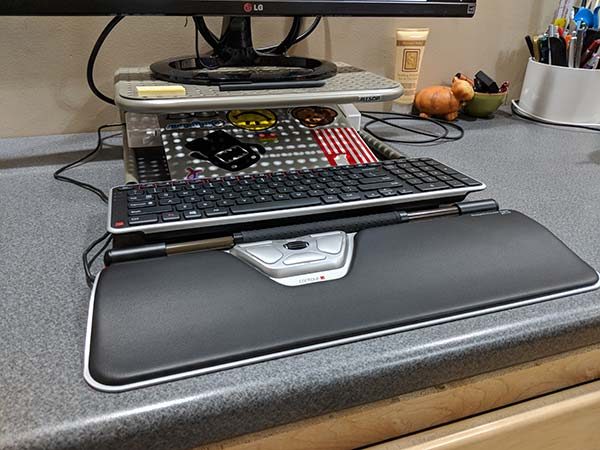
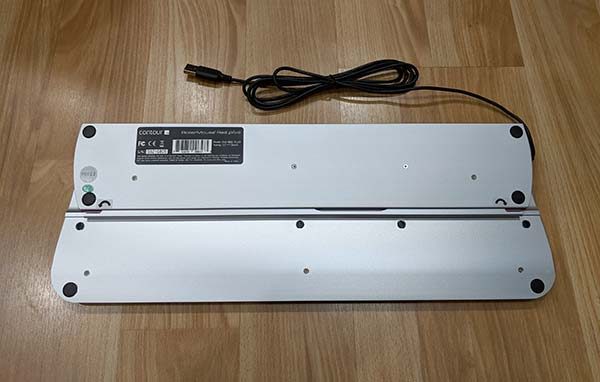
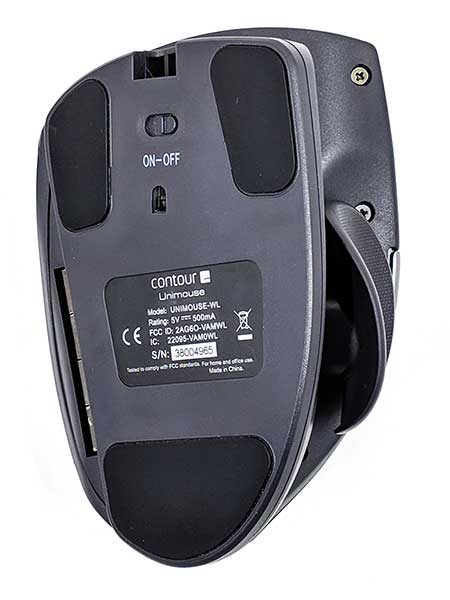
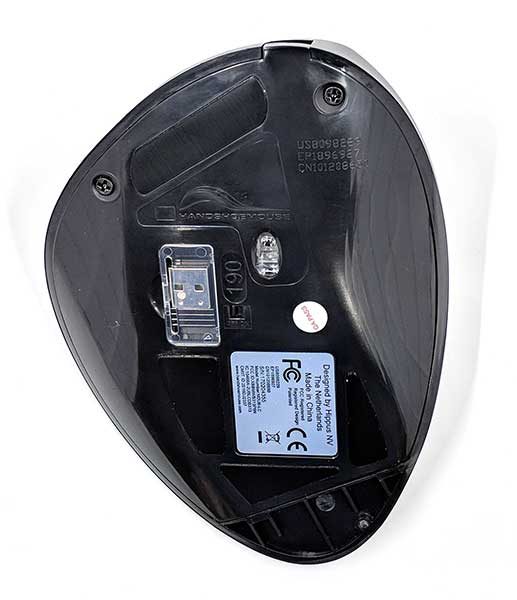
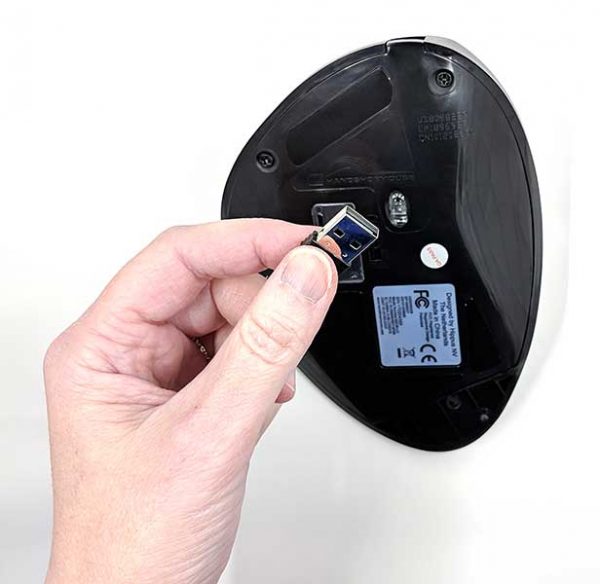
On the bottom of the Mousetrapper, there is a rubber pad that can be used in a few ways such as a surface grip, for height adjustment or in my case I extended it under my laptop. On the hard surface of the bottom, there is a basic instruction diagram.


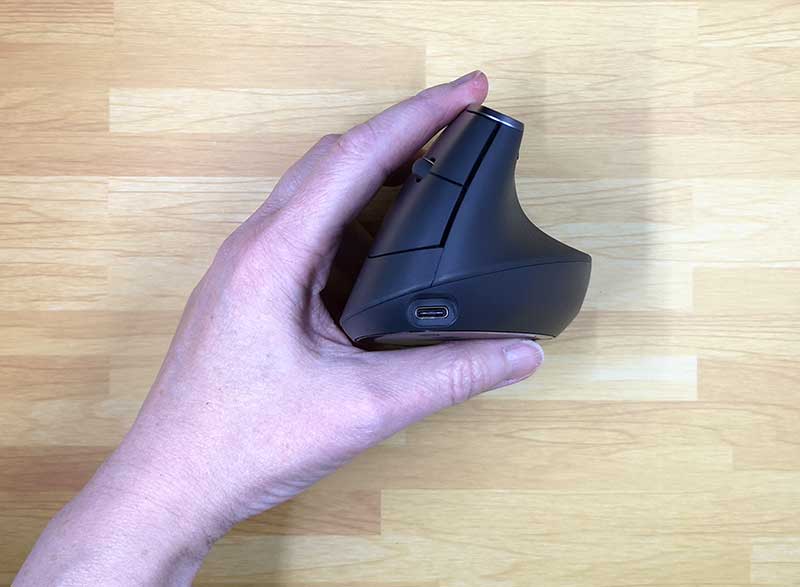
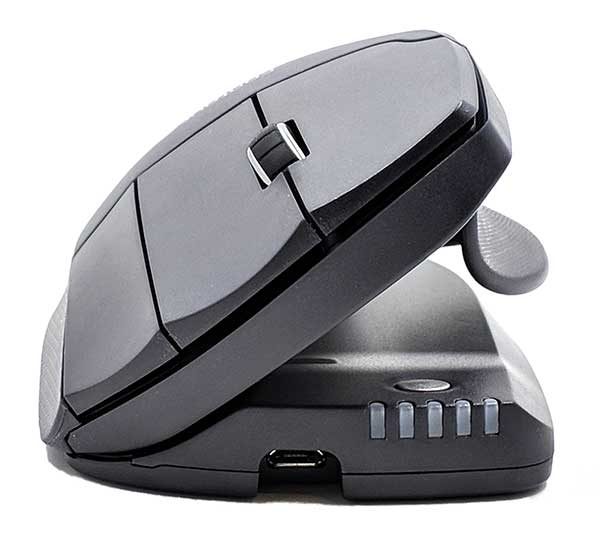
On the left side of the Mousetrapper, there is a mini USB port that allows you to connect to the computer, The device is USB powered.

Performance

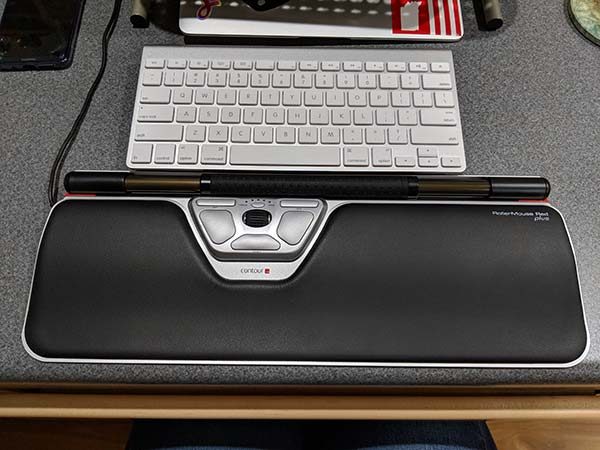
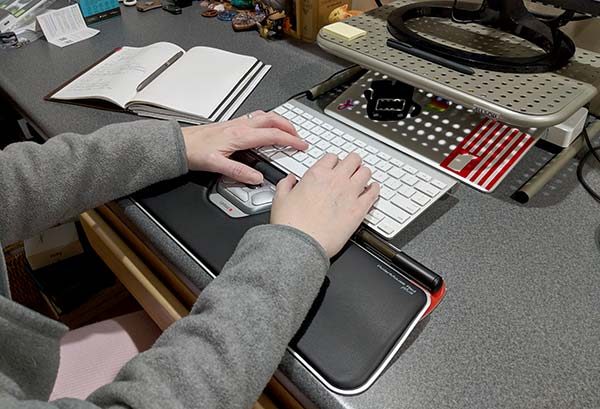
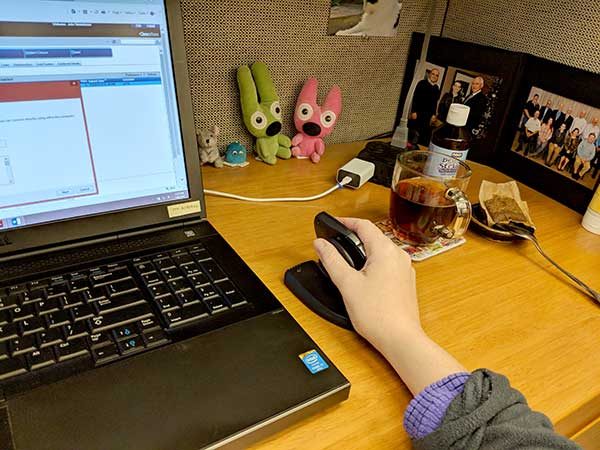
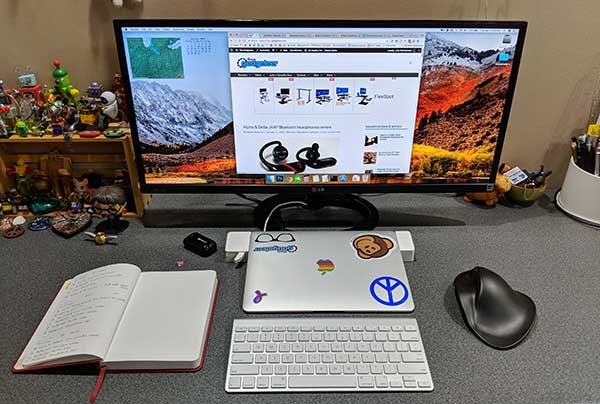
The laptop that I tested this mouse with has Windows 7 installed. Once I connected the Mousetrapper, Windows automatically downloaded and installed the driver. For my use, I placed the rubber pad under the laptop and I was ready to go.

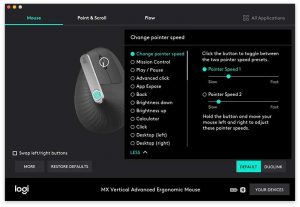
No matter how much I try, I find the control mouse pad to be stiff when moving it and its movement is also very jerky and inconsistent. The control pad does move in every possible direction just like you can a conventional mouse, but to me, it feels really strange and it is a feeling that is a bit difficult to explain. In my mind, it feels somewhat like moving a piece of silicone on a smooth and somewhat lubricated surface. Using it along with the buttons just seems completely awkward to me. Nevertheless, I continued testing and proceeded to the next step to download the software that allows you to program/reprogram the buttons. As shown in the picture below, there are 3 options to download the appropriate MT Keys software. Since I am using Windows 7, I selected the middle option.


No matter how many times I tried, the picture below shows the result I get when I select the Windows 7 option shown in the middle. I was able to get to a proper download screen if I selected the Windows 10 option, but that is not the OS that I am using, and Windows 10 uses a Windows app.

What I like

  • Ease of install
  • The built-in wrist pads

What can be improved

  • Functional application and use as a mouse
  • Website support options/availability

Final thoughts

When I first saw this mouse, I was very eager to try it and to experience its functionality. While I have a feeling that some people may have a better experience than me, I find it awkward and not very practical or functional. There are a large variety of mouse styles and options available to consumers, and based on the Kensington mouse I currently use, in my opinion, many of the available options work better and cost way less. This device is expensive.

Price: $245.63
Where to buy: Amazon
Sample: The sample for this review was provided by Prestige International

Filed in categories: Reviews

Tagged: ,

Mousetrapper 2.0 alternative mouse review originally appeared on The Gadgeteer on March 21, 2019 at 12:22 pm.

Note: If you are subscribed to this feed through FeedBurner, please switch to our native feed URL http://the-gadgeteer.com/feed/ in order to ensure continuous delivery.

Logitech MX Vertical advanced ergonomic wireless mouse review

REVIEW – Do you have hand or wrist issues due to an RSI (repetitive stress injury) from using a mouse with your computer day in and day out? I’ve had some issues with my mousing hand for a year or so and have been trying a variety of ergonomic mice to see if one of them might help with those issues. The newest mouse that I’ll be testing is Logitech’s MX Vertical advanced ergonomic mouse.

What is it?

The MX Vertical is Logitech’s latest mouse which has been designed to provide a more neutral grip to prevent forearm twisting which can lead to RSI.

What’s in the box?

  • Logitech MX Vertical mouse
  • USB receiver
  • USB-C charging cable

Design and features

The MX Vertical mouse has a similar style to Logitech’s other mice including the MX Master 25 which I’ve been using for the past year or so. The MX Vertical has a dark gray / slate colored soft touch covering that provides grip and comfort.

This is a 2 button mouse with a click scroll wheel, and 3 other programmable buttons. A large button on the top and rocker button above the thumb rest area.

On the bottom of the mouse are the power switch and the channel switch that allows you to switch between up to 3 different devices that are paired with this mouse since the mouse can be connected to your computer, or tablet via Bluetooth or the included USB receiver. You can have the mouse connected to your laptop using the USB receiver and your phone or tablet using Bluetooth and easily switch between them with a press of the button on the bottom of the mouse.

You can also connect the mouse to your computer using the included USB-C cable which plugs into the front of the mouse.

As mentioned, the MX Vertical is designed to provide a neutral grip so that you don’t have to rotate your forearm counterclockwise to use it. It provides a 57-degree angle that is supposed to deliver the optimal ergonomic posture for your hand. There’s a ledge for your thumb to rest and your index finger and middle fingers rest on the left and right buttons.

Let’s mouse around!

Like with any battery powered device, the first step before using it is to charge it up. To charge the Logitech MX Vertical mouse, you just connect the included (or any) USB-C cable to your computer or a USB power adapter. A small LED will light up to let you know that the mouse is charging. A full charge power the mouse for up to 4 months and if it does run out of juice, you can get 3hrs of use out of a quick 1-minute charge.

After charging is completed, you can start using the MX Vertical right away but connecting it to your computer using one of the three methods already described above. Out of the box, the left and right mouse buttons work as you would guess they would and the scroll wheel does what scroll wheels do… it scrolls. The scroll wheel can also be clicked to select things like most scroll wheels can do. By default, the top button can be used to switch between two pointer speeds and the rocker button scrolls left and right. However, if you don’t like those settings, you can customize them using the Logitech Options app for PC or macOS.

This app will detect all your Logitech connected devices and let you program and customize buttons and settings.


The options app will also let you setup Duolink which gives you the ability to control the computer using gestures with the mouse while holding a function key on the keyboard.

What I like

  • 4-month battery life on a full charge
  • Smooth movement on desktop
  • Multiple device switchable

What needs to be improved

  • Scroll wheel feel
  • Needs to be heavier

Final thoughts

I’m a big fan of Logitech products and have been using their mice and keyboard for years. I use their Craft keyboard daily and the MX Master 25 mouse daily. I was excited to try the MX Vertical because I do have inflammation in my mousing thumb and thought it might help. But, after using the MX Vertical for the last couple of weeks, I’ve switched back to the MX Master 25 which feels better to me for a couple of reasons.

First of all, I don’t like the feel of the MX Vertical’s scroll wheel. It has a ratchet click feel (and sound) when you scroll it vs. the completely smooth scroll setting on the MX Master 25 mouse which I prefer.

I also found that it was harder to do select text and do finer cursor movement in apps like Photoshop when I use the MX Vertical vs. the MX Master 25.

For me, I didn’t find that the ergonomics provided enough benefit to make me want to switch from my current favorite mouse. All that said, there’s nothing wrong with the Logitech MX Vertical. It’s a nicely made wireless mouse that works just fine for most people and for most tasks. It’s just not going to become my new favorite.

Price: $99.99
Where to buy: Amazon
Source: The sample for this review was provided by Logitech.

Filed in categories: Reviews

Tagged: ,

Logitech MX Vertical advanced ergonomic wireless mouse review originally appeared on The Gadgeteer on September 17, 2018 at 10:00 am.

Note: If you are subscribed to this feed through FeedBurner, please switch to our native feed URL http://the-gadgeteer.com/feed/ in order to ensure continuous delivery.

Contour Design RollerMouse Red plus ergonomic mouse review

I’ve recently been on a mission to find a new mouse to help alleviate some problems that I’ve been having with my right hand and thumb. After reviewing Contour Design’s Unimouse, they followed up with an offer to review their Rollermouse Red plus which they felt might help me more than their Unimouse. I’ve been using the RollerMouse Red plus for the past couple of weeks and am ready to share my thoughts.

What is it?

The RollerMouse Red plus is a unique cursor moving device, aka “mouse”. But unlike a traditional corded or wireless mouse, the RollerMouse Red sits behind your keyboard and moves the cursor by moving a rubber covered tube. That makes it sound much stranger than it really is, so keep reading.

What’s in the box?


Rollermouse Red Plus
Keyboard supports
Key to remove wrist rest

Design and features

The Contour Design RollerMouse Red plus is premium looking and feeling product which features a large padded wrist rest with the roller bar attached above it.

The base of the RollerMouse Red plus is made of aluminum which has enough weight that it does not move around once you place it on your desk.

If you don’t have room or really like the wrist rest, it can easily be removed by using the included tool. I personally like the wrist rest and find that it enhances the comfort of using the RollerMouse Red plus.

Also included with the RollerMouse Red plus are two keyboard supports that slide into slots on the base of the device. These supports allow you to position your keyboard so that it is raised to the level of the RollerMouse Red plus.

Contour Designs also included their Balance Keyboard which has been designed to be used with their roller mice. I started out test the RollerMouse Red plus with the Balance Keyboard, but I ditched it for my original Apple wireless keyboard early on in the process. The keyboard is nice, but the layout of the Balance Keyboard didn’t work that well with my MacBook.

My Apple wireless keyboard looks tiny compared to the RollerMouse Red plus, but it works fine for me.

How does the RollerMouse Red work?

The RollerMouse has an 11.75-inch long tube with another tube over it that can roll up and down and be moved side to side with one or both of your thumbs. This is what moves the cursor on your computer. The roller bar has a rubber cover with nubs that make it easy to move around without slipping under your thumbs.

The roller bar can be clicked to select things. In addition to clicking the roller bar, there are other ways to select items with this “mouse”. Below the roller bar are dedicated left and right mouse buttons, copy and paste buttons, and a one-touch double-click button. There’s also a small roller in the center that is used as a scroll wheel. This scroll wheel can be clicked to open pages in a new tab in your browser.

You’ll also notice a small oval button between the copy and paste buttons. This button is used to customize different settings for the RollerMouse Red plus. You can customize the cursor speed, click force of the roller bar, and the volume of the button clicks.

As I mentioned above, I’ve been using the RollerMouse Red plus for the past few weeks. At first, I didn’t think I was going to like it because it felt awkward to use the roller bar especially to select things by clicking it. When I first started testing the RollerMouse, I still had my Logitech mouse next to the keyboard and I found that I would unconsciously reach for it and use it instead of the RollerMouse without really paying attention to what I was doing. I was using my traditional mouse as a crutch of sorts. After I finally took the Logitech mouse and put it in a drawer, I quickly acclimated to the RollerMouse and it now feels second nature to me.

The whole idea behind this mouse is that you don’t have to move your hands away from the keyboard to use it. I can just drop my thumbs to the roller ball to move the cursor or to the smaller scroll wheel to scroll pages while still keeping my fingers on the home row of the keyboard.

Positives

  • Keeps hands on the keyboard
  • Comfortable
  • Multiple buttons and scroll wheel
  • Can be used with any keyboard

Negatives

  • Slight learning curve
  • Accidental presses of the dedicated left mouse button
  • Expensive

Final thoughts

I really like the Contour Design RollerMouse Red plus ergonomic mouse because it’s comfortable to use and I don’t have to move my hands away from the keyboard like a traditional mouse to use it.

There are two downsides to the RollerMouse Red plus that I want to mention. I noticed that the palm of my left hand would sometimes accidentally press the dedicated left mouse button which would end up moving the cursor to a new location. This usually happens when I’m typing and will cause me to start typing new text in the wrong location. It doesn’t happen to me very often, but when it does, it’s kind of annoying.

But the biggest issue with the RollerMouse Red plus is the price. At $265, it’s not a frivolous purchase. That price will scare a lot of people away from buying one, which is unfortunate because it’s quickly becoming my favorite “mouse” of all time.

Price: $265.00
Where to buy: Contour Design or Amazon
Source: The sample of this product was provided by Contour Design.

Contour Design Unimouse mouse review

I’ve been dealing with pain in my right hand and thumb for a while now and it’s progressed to the point where I know that I need to do something about it. Instead of going to the doctor which I haven’t yet, I’ve been trying to “fix” it myself by doing exercises and trying ergonomic mice. The latest mouse that I’m testing is the Contour Design Unimouse. Let’s take the cursor for a spin and check it out.

What is it?

The Unimouse is an ergonomic mouse with multiple physical adjustments that are used to customize the mouse to your hand for optimal comfort.

What’s in the box?

Contour Design Unimouse
micro USB cable
USB 2.0 cable adapter
USB receiver dongle

Design and features

The Unimouse looks similar to a traditional mouse at first glance, but a second look reveals that it has additional buttons and other features that set it apart from the mouse you may be using now.

First of all, it has three buttons AND a scroll wheel which isn’t all that typical these days. There are also forward and backward buttons on the left side.

The bottom of the mouse has a power switch and a slot that holds 4 weights.

But the most interesting features of the Unimouse are seen from the side. As you can see in the image above, this mouse has a strange looking thumb rest and a clamshell design.

The mouse also has a micro USB charging port which you will need to use every 3 months or so. Next to the port is a row of status LEDs and a button. When you press the button, the status LEDs light up to show the DPI setting and then the battery charge status. If you press the button additional times in succession, it will change the DPI which adjusts the cursor speed from 800 DPI (slowest) up to a maximum of 2800 DPI (fastest).

The tilt of the Unimouse can be adjusted from as low as 35 degrees to a maximum of 70 degrees.

The idea of adjusting the tilt is to put your hand and forearm in a more normal resting angle to prevent RSI (repetitive stress injuries).

The angle of the thumb rest can pivot in all directions, from up and down…

And it can also pivot forwards and backward.

Learning curve or easy from the start?

I thought it might feel awkward to use the Unimouse given the sideways orientation which looks stranger than it feels. But it actually feels pretty natural and comfortable right from the first use of this mouse.

There are a couple things that I’ve after using the Unimouse for a few weeks though. For one, the middle button is set to double click by default instead of a right click. The right click is the right mouse button. I’m not accustomed to using my ring finger to right click, so it would be nice if there was a way to swap the middle and right buttons.

I also noticed that the scroll wheel doesn’t feel as smooth as other mice that I’ve used. It has built-in detents which are fine, but the whole mechanism feels a little cheap when I compare it to a similarly priced mouse like a Logitech MS Master 2S which can be set to free scroll or detent scroll.

Another issue is that the forward and back buttons sit too far back to easily press with your thumb unless you remove your hand from the mouse.


What I like

  • Mouse tilt and thumb rest angles can be customized
  • DPI adjustments
  • Lasts for 3 months on a charge

What needs to be improved

  • Only for right hand use
  • Forward and back side buttons sit too far back to easily press with your thumb
  • Can’t program the buttons

Final thoughts

Did the Unimouse cure my hand and thumb issues? While I have liked using the Contour Design Unimouse, it hasn’t cured my problem. I’m still having issues with my right hand and thumb. Using this mouse hasn’t made my existing problem noticeably better or worse for that matter. Of course, the Contour Design Unimouse doesn’t claim to fix problems if they already exist. This mouse has been designed to prevent the problems in the first place and this is the most comfortable and feature rich ergonomic mouse that I’ve tested so far. So as much as I don’t want to, it’s time for me to go see a doctor.

Price: $89.95 (Wired) or $109.95 (Wireless) MSRP
Where to buy: Amazon
Source: The sample for this review was provided by Contour Design.

Hippus HandShoe Mouse review

I haven’t been to a doctor (yet), but from my own research, I think I may have the beginnings of carpal tunnel or De Quervain syndrome in my right hand. My mouse hand. The fleshy part of my thumb in the palm of my hand and the same area on top of my hand feels inflamed and a little swollen. I also have some pain in my hand when I  touch my thumb to the tips of my fingers or when I try to open jars with that hand. I’m sure this problem comes from years and 1000’s upon 1000’s of hours of using a mouse. So I decided to check out some alternative mice to see if I can halt the progress of carpal tunnel and even hopefully reverse it.

The first ergonomic mouse that I’m testing is the Hippus HandShoe Mouse. It has a weird name, but can it heal my issues? Let’s see.

What is it?

The HandShoe Mouse looks similar to a traditional two button mouse, but it’s much larger and provides a place for your whole hand to rest instead of just two fingers and your thumb.

Design and features

In the image above is a traditional mouse on the left and the HandShoe mouse on the right. As you can see, the HandShoe mouse is significantly larger and it sort of reminds me of a horseshoe crab, which makes me suddenly wonder if that’s where the name of this mouse comes from.

The HandShoe mouse is available in wired and wireless version. I was sent the wireless version which can also be used with a USB cable while it’s charging. This mouse is also available in four sizes from extra small to large. For my hand size, I was sent the medium-sized HandShoe mouse.

The mouse has 2 buttons and a scroll wheel. You can also see the mini USB charging port. According to the directions that come with the mouse, it should work for about 4-6 weeks per charge. There’s a small battery status LED above where your thumb tip would rest. This LED will turn red with the battery is running low. Luckily, you can use the mouse while it’s recharging and connected to a USB port using the included mini USB cable.

The HandShoe mouse does not use Bluetooth as a connection method. On the bottom of the mouse is a holder for the included USB receiver.

The USB receiver plugs into an open USB port on your computer. It goes without saying that this mouse won’t work with a laptop or computer that doesn’t have a USB Type-A port.

This is something to keep in mind for newer computers like my 12-inch MacBook which only has one USB Type-C port. However, I use my laptop with a LandingZone Docking Station which adds 2 Type-A USB ports to my MacBook.

When I first placed my hand on the HandShoe mouse I was worried about how large it was. But the design allows you to place your whole hand on it and helps eliminate the need to squeeze the mouse with your thumb like I do with a traditional mouse. I’ll admit that I still find myself squeezing the HandShoe mouse, but I’m trying to learn to relax my thumb and move my whole arm when I need to move the cursor. Note that you need to support for your forearm on the desk or the arm of your chair.

What I like

  • Comfortable
  • Helps you relax your whole and not squeeze the mouse with your thumb

What needs to be improved

  • Expensive
  • Probably not a great mouse for gamers and people who need really fine cursor movement

Final thoughts

I’ve been using the HandShoe mouse for a few weeks now and have noticed some slight improvement in my hand. It isn’t the fault of the HandShoe mouse that I haven’t noticed more improvements because I have only been using the mouse at home. I have a traditional mouse at my day job. So I’ve only been using the HandShoe about 35% of the time. I plan to take the mouse to work and will update this review in a few weeks.

The biggest issue that I have so far with the HandShoe mouse is that it’s not optimal for making fine cursor movements. I do a lot of image editing and was finding that I would constantly move the cursor past the area where I needed it to be. I tweaked with the mouse sensitivity settings on my MacBook which improved things, and I hope I’ll get better as time goes on.

Other than the fine cursor movement issue, I do like this mouse. It’s comfortable to use and may be just what the doctor ordered for my hand problems. Time will tell though, so look for an update in a few weeks.

Price: $109.99
Where to buy: Amazon
Source: The sample for this review was provided by Hippus.