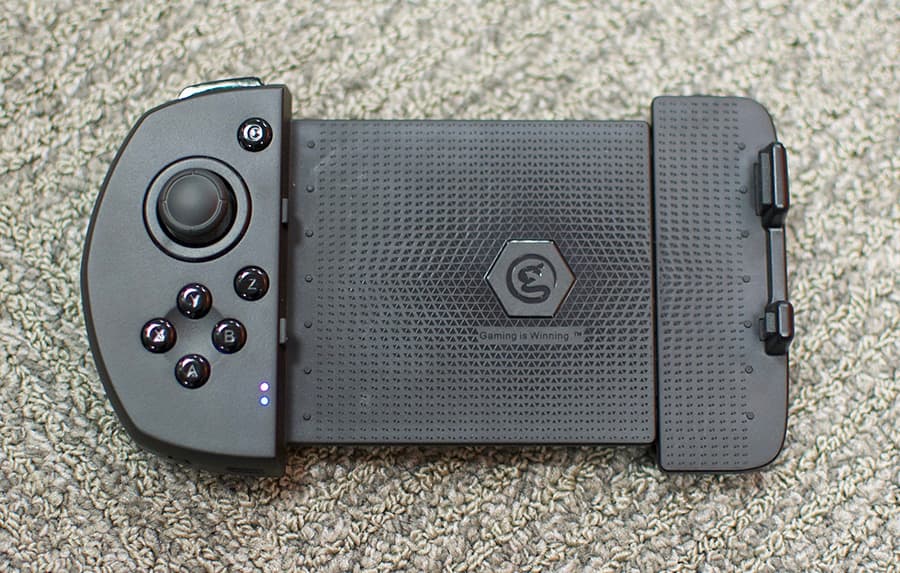
GameSir G6 Mobile Gaming iPhone Touchroller review

REVIEW – Love mobile gaming but hate the virtual controls? GameSir might have just the solution for you with their G6 iPhone Touchroller (an amalgam of Touchscreen and Controller). Does it score a victory royale or an epic fail? Read on!

What is it?

The GameSir G6 Touchroller is a hybrid game controller developed specifically for mobile games. It combines the advantages of an actual analog controller and touch screen control, so you can use the left controller to move or jump while focusing on the precise aiming on the right touch screen. It is only compatible with iPhone.
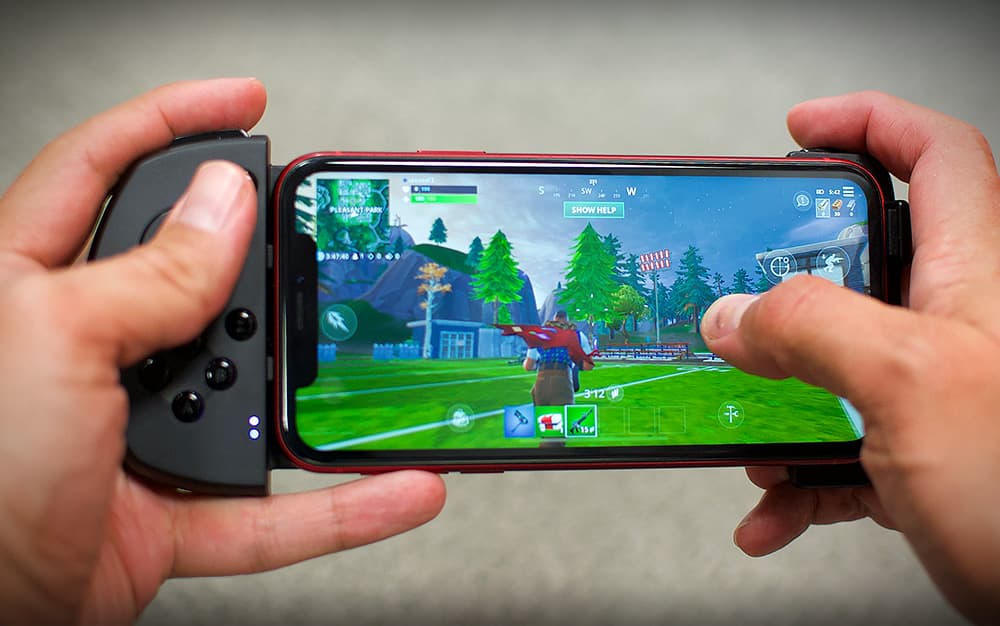
Maybe nabbing that victory royale on iOS will be a bit easier.

What’s in the box?

  • GameSir G6 Mobile Gaming Touchroller
  • Micro-USB Cable
  • User Manual

Hardware specs

  • Wireless Technology: Bluetooth 5.0
  • Working Platforms: iOS 9.0 or later only
  • Compatible Mobile Phone Size: length less than 6.57 in.
  • Battery Capacity: built-in 240mAh rechargeable Lithium battery
  • Working Time: 7080 hours
  • Charging Time: 23 hours
  • Charging Voltage: 3.7V5V
  • Connectivity: Micro-USB (for charging)
  • Up to 3 million keystroke trigger lifespan
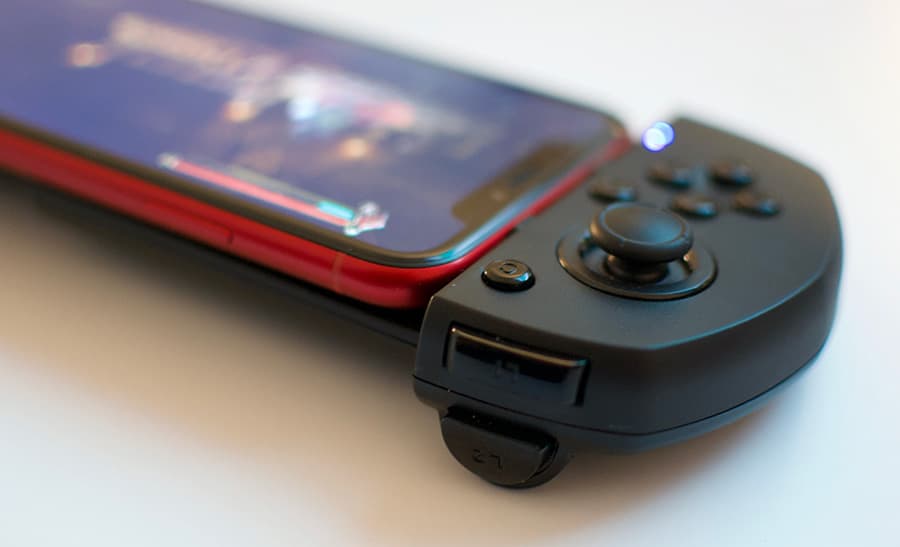
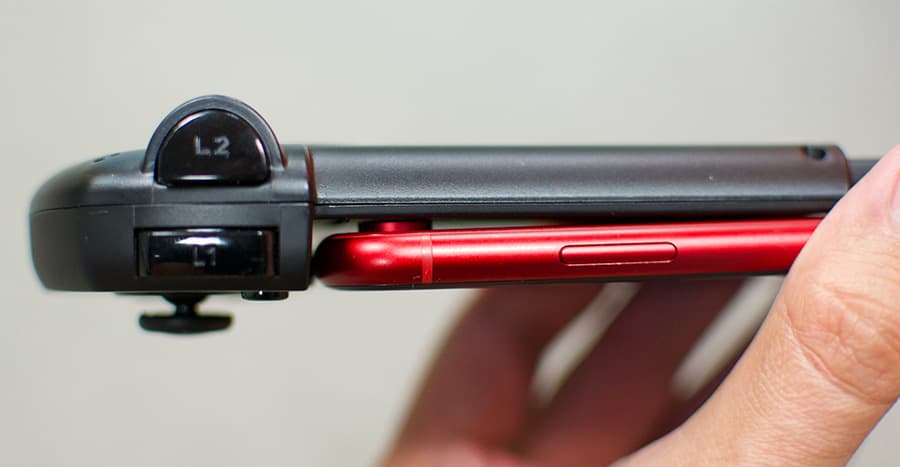
The left side has two shoulder buttons, a joystick, 4 buttons configured in a d-pad shape, and two additional buttons.

Design and features

The GameSir G6 Touchroller is a bit of an odd cookie.

Mobile game controllers aren’t a new concept and have been around for a few years in many iterations and sizes. I have a SteelSeries Nimbus that I break out to use with my iPhone every once in a while, offering a wireless control solution very similar to a PlayStation controller. GameSir’s G6 Touchroller tries to make the best of both worlds: external controllers and smart on-screen control schemes.

I’ll elaborate. If you’ve played Fortnite or PUBG or any good modern mobile game, chances are you’ve used the default touchscreen control interface. You know. All those little semi-transparent virtual buttons on the top, bottom and sides of the screen.

A lot of the major iOS game releases that rely on virtual controls are smartly positioned so your thumbs, while also holding on to your phone, can easily reach all the buttons necessary to play the game. It’s not a perfect setup, but it works in a pinch because it’s a mobile device, and the developer is doing the best they can.

Now, most games are controlled in the same way, with the left thumb moving your character and the right thumb performing actions like aiming, jumping and firing. So for most virtual controls, the on-screen movement is handled with a virtual joystick. This remains one of the most obnoxious methods of controlling your character… it’s just plain hard to get it right, since there are no physical borders for your thumb sliding around on the screen. It’s easy to move your thumb right off the edge of that virtual space, bringing your character to a halt.
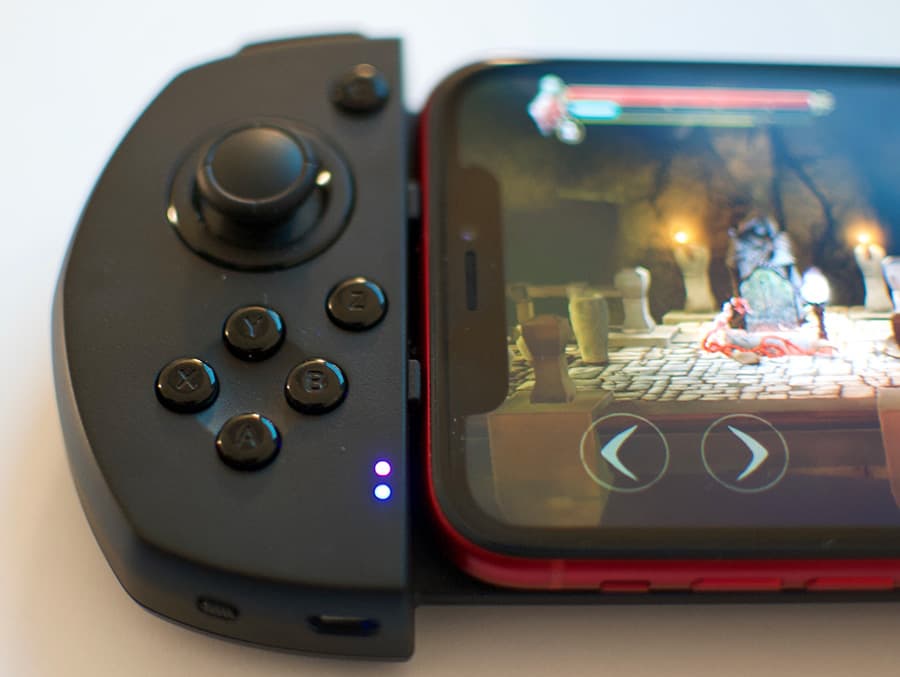
The right thumb doesn’t have much of a problem, though, once it gains the muscle memory of knowing where to tap on the screen to perform an action. In most cases, it’s quite good.
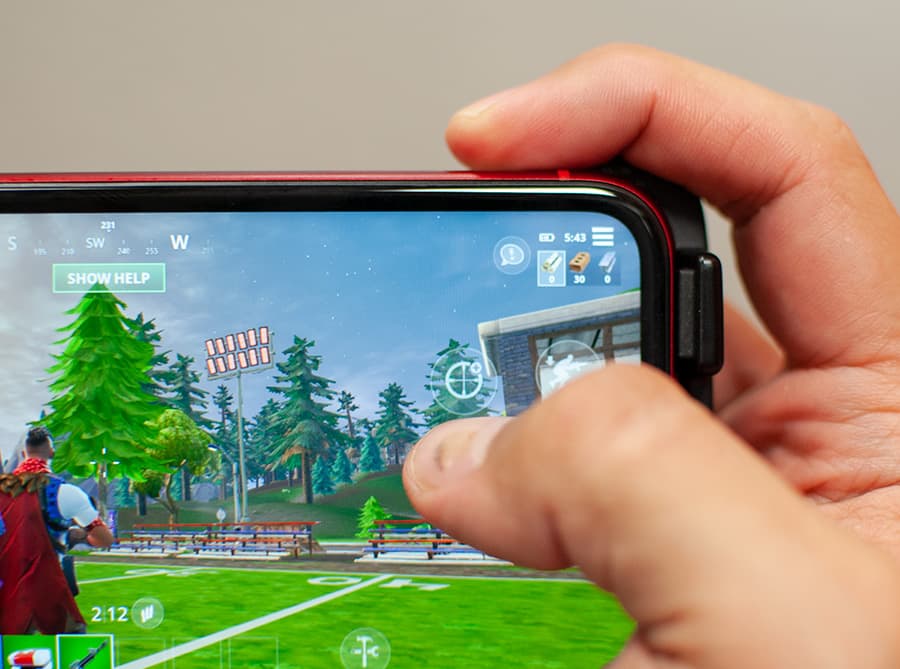
The right side has only one shoulder button.

This is exactly the problem the Touchroller attempts to fix. It gives your left thumb the more traditional control setup of a console gaming system, while keeping your right thumb free to use the touch controls that are inherently good in many iOS games.

Getting the phone mounted in place is simple. The right side of the Touchroller extends to accommodate even the largest iPhone, the Max model. Just extend the side and slide your phone. There is a strong spring and grippy pads that keep the phone firmly in place.
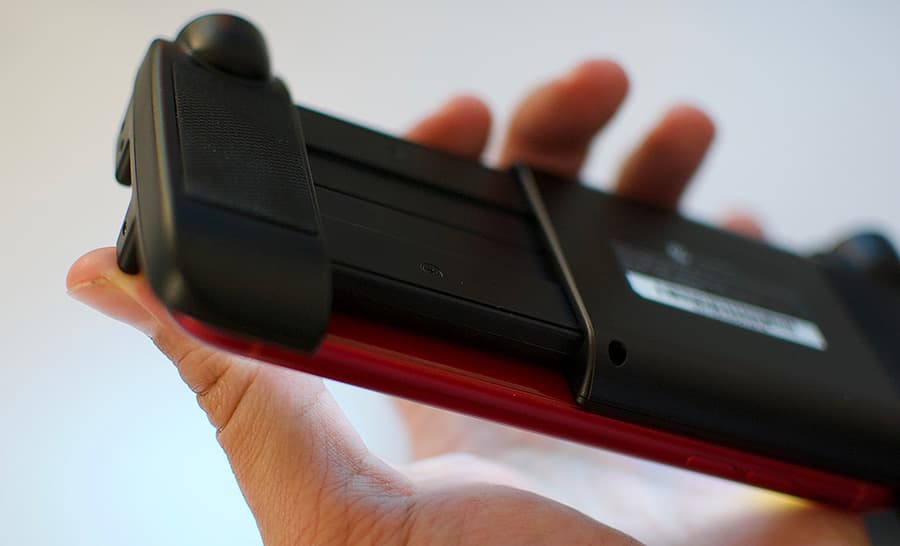
This bit extends out and automatically springs back to hold the phone tightly in place.

I tested several games with the Touchroller… Fortnite (which I probably don’t have to explain), Grimvalor, a side-scrolling platformer, and Death Road to Canada, which controls sort of like an old-school isometric beat-em-up. All of these games feature virtual joysticks and buttons.

Each of these games recognized the controller immediately upon launch, although it took a lot of trial and error to see what buttons on the controller did what, but once I got used to the layout, I was up and running with much tighter control.

The joystick, probably the best feature, is smooth, and comparable to a gaming console. The buttons have a nice clickiness to them, especially the shoulder buttons, which feel more triggery, having a bit more travel than the face buttons. And there are plenty, provided you can figure out what they all do. They are programmable, as well, but that’s something I’ll address in the Weird Issue section.

Overall, the Touchroller feels good in my hands. I like that my hands don’t cover up as much of the screen, too. It’s more comfortable to hold for long stretches, and the phone never felt like it was going to pop out.

Let’s get to the oddities…

Some Weird Issues

One problem I ran into was with the initial setup. Pairing the Touchroller via Bluetooth was easy, but there’s an extra step detailed in the tiny instruction booklet that states “Press Y+power buttons simultaneously, the LED mode indicator light will flash pink and then remain lit.” You need to do this after pairing, so it’s almost like it needs to pair twice. Fortunately, you only have to do this once, but it’s a strange very important extra step.
This isn’t quite GameSir’s fault, but since the surface that the phone rests on is flat, the obnoxious camera bump on my XR made it sit a little off. Since the grips on the right side have such a low profile, using the Touchroller works better without a case on your phone.

Another oddity with this Touchroller is in the proprietary software. Using the G-Crux app, you are able to download control settings for specific games, or, if one does not exist, you can upload a screenshot into the app and map the controller buttons on top of the virtual controls, programming the physical buttons to correspond with the game’s controls. It’s pretty in-depth, and I imagine that once you get through mapping those buttons, it’ll work fine from that point, but I did not have the patience to try that.

Fortunately, you can search for what I’m assuming are user-made game controls and download them in the app. It’s a lot of setup. The games that I tested just sort of “worked.” I say sort of because even though they controlled well, there were buttons that went unused that could have been mapped to other virtual buttons. I didn’t feel the need to try to mess with that.

One last big caveat. With the launch iOS 13 literally a little over a month away, which promises compatibility with Xbox and PS4 controllers (I know right?!), it’s tough to recommend picking up an iPhone-specific controller if you’ve got a spare game system controller laying around. I’d wait to see how that pans out. Personally, I can’t wait to give that a try, because to me the PS4 controller is bonkers good.

What I like

  • makes controlling most games much easier
  • easier to hold the phone for long stretches

What I’d change

  • Initial setup and customization for specific games can be confusing
  • I found myself missing the right joystick in some FPS games
  • PS4 and Xbox controllers will soon be supported (sorry MFi manufacturers)

Final thoughts

Overall, I do like the G6 Touchroller, mostly because the games that I tested it with seem well-suited for it. Most modern games that use touch controls have the buttons smartly mapped onto the screen, and the addition of a physical stick and shoulder buttons to these touch controls enhances the controls a lot more than I would have thought.

Price: $42.99
Where to buy: GameSir’s website and Amazon
Source: The sample of this product was provided by GameSir.

Filed in categories: Reviews

Tagged: ,

GameSir G6 Mobile Gaming iPhone Touchroller review originally appeared on The Gadgeteer on August 17, 2019 at 11:00 am.

Note: If you are subscribed to this feed through FeedBurner, please switch to our native feed URL http://the-gadgeteer.com/feed/ in order to ensure continuous delivery.

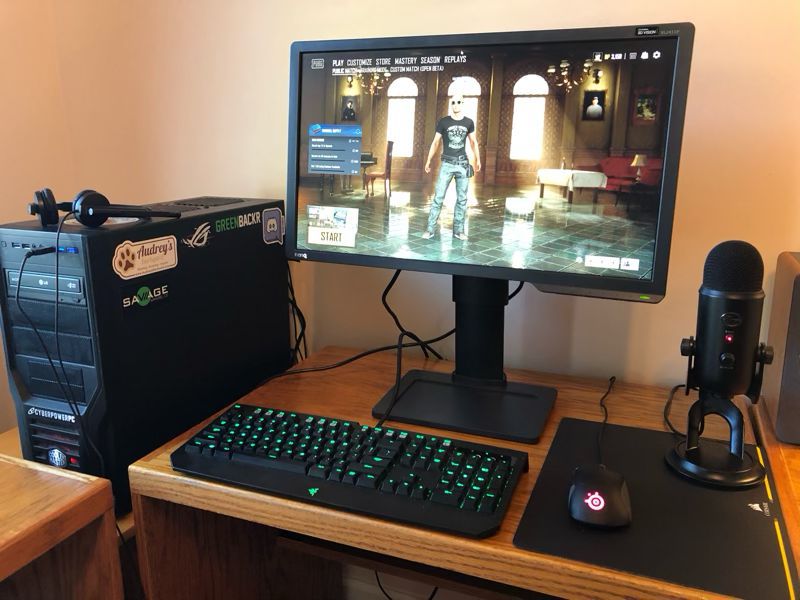
BenQ ZOWIE XL2411P 144Hz 24-inch e-Sports Monitor review

REVIEW – Without a doubt, the two most important components of a good gaming system are the video card and the monitor.  The monitor is what gamers are looking at while playing, and the video card is what renders the games on the monitor.  When I designed my current system, I included a GeForce GTX 1070 Ti, a solid, mid-range video card.  For a monitor, I use a Dell UltraSharp U2715H.  This monitor is a compromise for a gaming system.  On the one hand it’s wonderfully large (27 inches), has great resolution (2560 x 1440), and includes a wealth of ports (including DP, mDP, 2xHDMI, 5xUSB); on the other hand, it has a60 Hz refresh rate and a lethargic 8 ms response time.  It’s a great general-purpose monitor, but it’s not ideal for video gaming, especially for fast-paced, first-person shooter (FPS) games.  This is why I was super excited to get an opportunity to review the BenQ ZOWIE XL2411P gaming monitor.

What is it?

BenQ is a Taiwanese company that sells projectors, monitors, speakers, gaming accessories, and other digital products.  ZOWIE is their line of gaming products, and the XL Series is their premier line of monitors targeted at competitive esports gamers.  The BenQ ZOWIE XL2411P is an entry-level gaming monitor that offers good specifications at a reasonable price point.  It’s targeted at video gamers, especially those who play competitive FPS games like Overwatch, CS: GO, and Rainbow Six Siege.

What’s in the box?

  • The monitor (aka the panel)
  • The base
  • The stand arm
  • Power cord
  • Display port to display port video cable

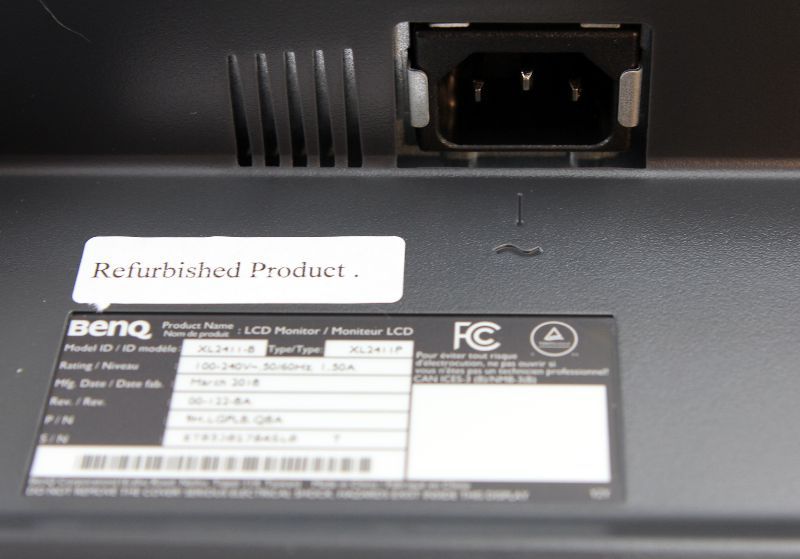
Surprisingly, there were no manuals, quick start guides, or CD-ROMs included with the monitor.  It’s possible that they were not included because BenQ sent me a refurbished monitor instead of a new one.

Hardware specs

  • Panel Type:  TN
  • Refresh Rate:  144 Hz
  • Response time‎:  1ms (GtG)
  • Resolution:  1920 x 1080
  • Pixel Pitch:  0.276 mm
  • Size:  24 inches
  • Aspect Ratio:  16:9
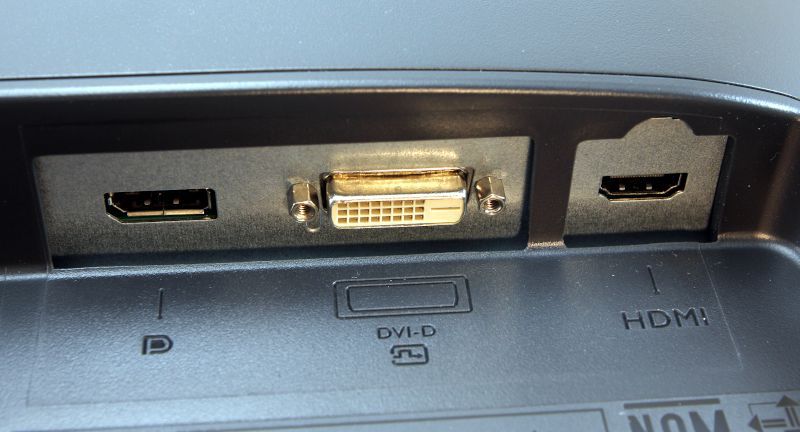
  • Video Ports: DisplayPort, DVI-DL, and HDMI
  • Other Ports:  Audio jack
  • VESA mount:  100 x 100 mm
  • Panel Dimension:  22.5 x 13.5 inches
  • Max/Min Height:  22/17.5 inches
  • Weight:  12.8 pounds

Design and features

When it comes to consumer products, some companies have a “form over function” design philosophy—I’m looking at you, Apple.  With the XL2411P, BenQ has taken the opposite approach of “function over form.”  It’s made out of black plastic, has a nearly ¾-inch bezel all the way around, and doesn’t have any sort of visual bells or whistles.  You might say it’s rather pedestrian to look at.  But this is totally ok, because BenQ has decided to invest in what’s really important for gaming:  The panel.

Installation and setup

The first step for installation is to connect the arm onto the base.  On the bottom of the base is a thumbscrew.  I inserted the arm into the base and tightened the thumbscrew until it was snug.

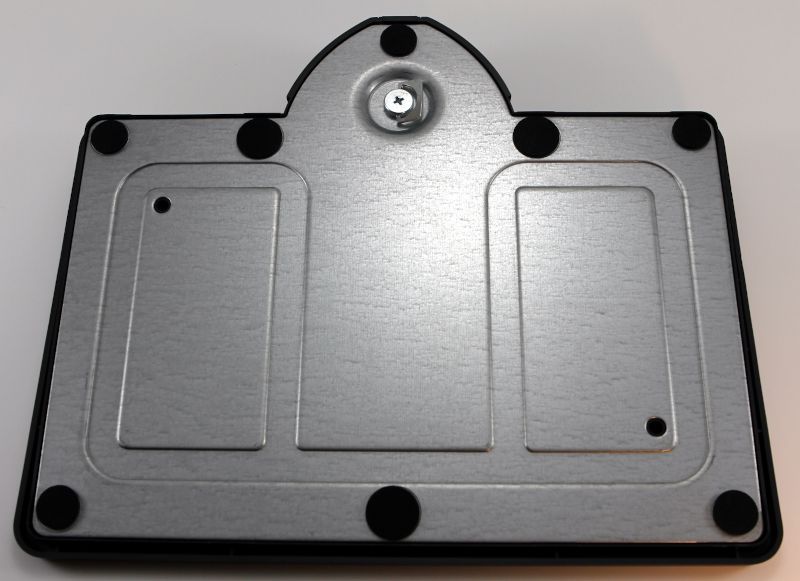
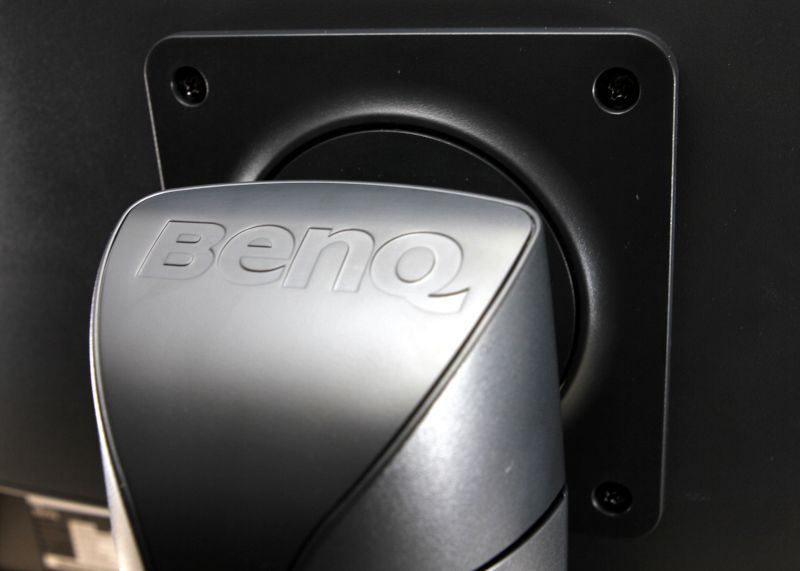
The second step was connecting the panel to the arm, which I found easier to do with the help of a second person, and it requires a medium-sized Phillips screwdriver (not included).  I removed the four screws from the back of the panel, and while my wife held the panel up to the arm, I reinserted the screws.  All of these pieces seem very solid and sturdy; short of giving it a good, hard shove, this monitor’s in no danger of tipping over.  The base has a built-in little tray for storing small items; I promptly put the remote to my speakers in there.

The third step was to insert the power cable and the video cable.  I used the display port cable to connect it to my computer.

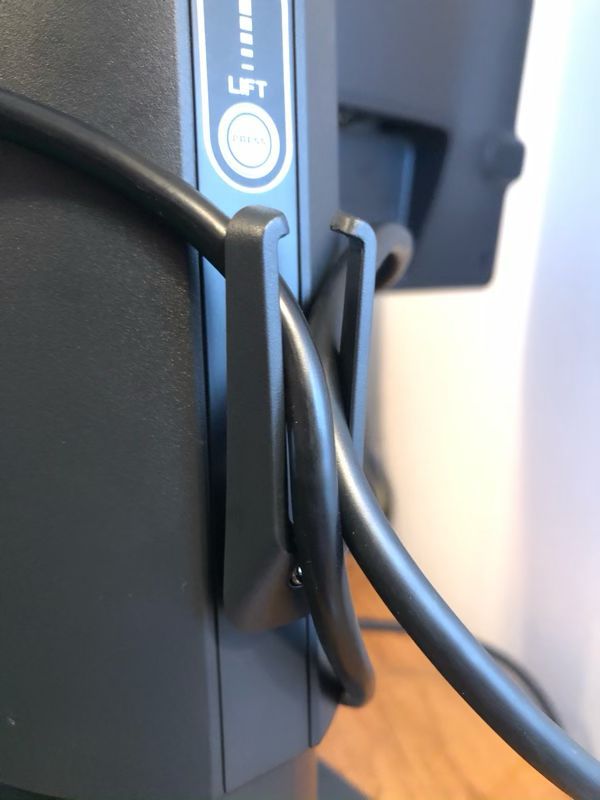
On the back of the monitor arm is a pair of small plastic arms used for cable management.  When I tucked the power cable and the video cable into them, however, they warped and looked like they were going to snap off, so I removed the cables and just left this alone.  I prefer the hole-in-arm solution that their XL2430 monitor uses, which is also what my Dell uses.

This monitor is quite flexible.  The panel can be raised up 4.5 inches by pressing the height release button on the back of the arm, and it can be freely tilted in any direction up, down, left, or right.  This allowed me to position the monitor in my optimal viewing position.

When I started up my computer, Windows 10 used a default driver for the monitor, and that worked, but as it’s a gaming monitor, I thought it would be best to install a specific driver.  I found a driver on BenQ’s website and installed it.

When I turned this monitor on, the first thing I noticed was that the colors were really washed out in comparison to my Dell, and there were two reasons for this.  The first reason is that my Dell is an IPS panel, whereas the XL2411P is a TN panel.  IPS panels are known for their color accuracy, whereas TN panels are known for their fast response time.  There’s also a third type, a VA panel, that takes a middle road.  The BenQ monitor has a much crisper image, especially when objects are moving quickly in a game, but the colors are likely to be less vibrant.

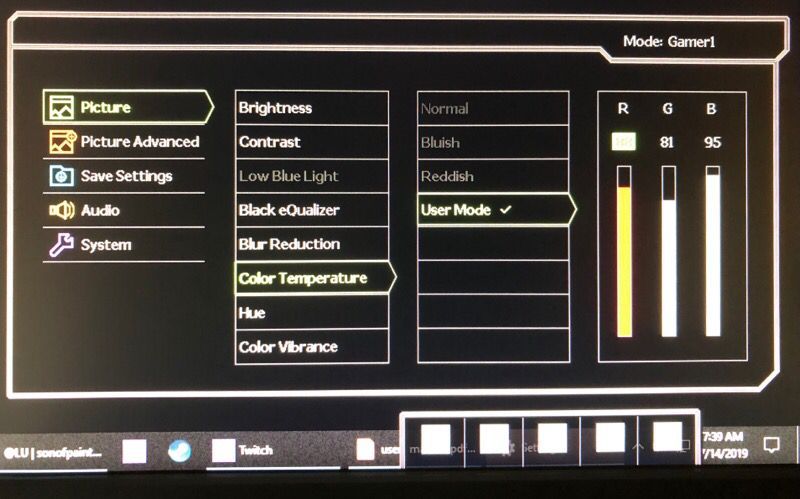
The second reason is that the default settings for the monitor are less than ideal.  The XL2411P has a host of settings that you can use to adjust the display image, including brightness, contrast, color temperature, hue, color vibrance, and sharpness.

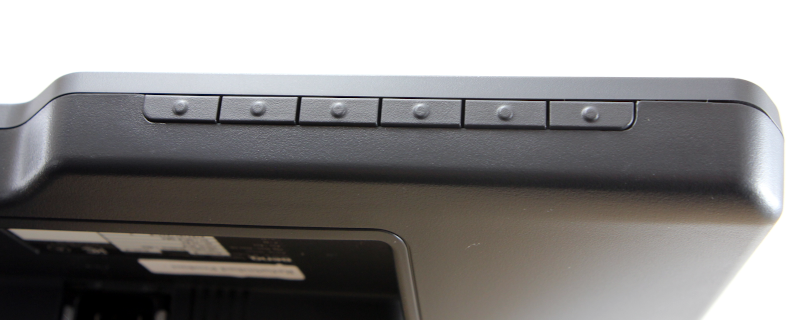
This monitor has 8 pre-defined groups of settings, which it calls picture modes.  You can test any of these, but if none of them suit your fancy, you can choose your own settings and save it in one of three slots.  The modes and settings can be configured with the control keys found on the lower right of the monitor.

With so many choices, it can be a bit intimidating to figure out what the optimal settings should be. The good news is that a host of other people have had this same issue, and a quick search online returns many suggestions.  I tried a few of the suggestions and then began tweaking things until I found a set that worked for me.  If you buy this monitor, you’ll definitely want to spend some time tweaking it for your own tastes.

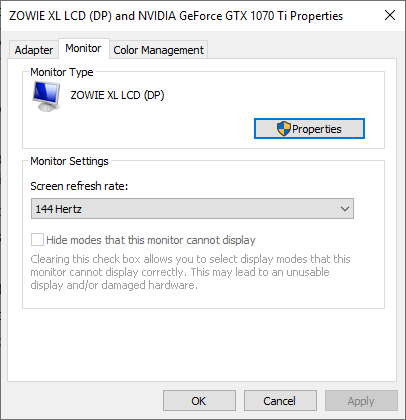
The final step in setting up the monitor was to set the refresh rate.  On Windows 10, I found this setting by going to:

  • Settings
  • System
  • Display tab (on the left)
  • Advanced Display Settings
  • Display Adapter Properties (which opens a new window)
  • Monitor tab

Set the screen refresh rate to 144 Hertz.

If you want to learn more about this monitor, you can download and read the user manual.

Panel Features

The XL2411P has a refresh rate of 144 Hz.  The higher the refresh rate, the more images per second, the smoother the game appears to be.  60 Hz is fine for ordinary activities; 144 Hz is great for gaming, especially for FPSs; and 240 Hz is for those at highest levels of competitive gaming.

This monitor has a response time of 1 ms (GtG).  The grey-to-grey (GtG) response time is a measurement of how long a pixel takes to changes colors.  The lower the value the better, and the higher the refresh rate, the more important it is to have a lower response time.  Low response times prevent ghosting, which is where fast-moving objects on the screen leave a trail behind them as they move across the screen.  Most monitors are under 10 ms; my Dell, for example, has a response time of 8 ms.  Gaming monitors should have 5 ms or less, and a 1 ms response time is good.   To achieve a 1 ms response time, the XL2411P has a feature known as advanced motion acceleration (AMA) that must be enabled using the control keys.  This drives more voltage to the liquid crystals, thus producing images faster.

BenQ’s monitor also has a feature known as the Black eQualizer.  In some games, enemies will tend to hide in dark corners of the map in order to ambush other players.  The Black eQualizer can be used to lighten up these dark spots, making it easier to see other players.  This will slightly decrease overall image quality, but that’s a small price to pay for avoiding ambushes.

It’s Color Vibrance feature makes it possible to tune the colors so that images are more realistic and colors are more vibrant.  This is more of a “personal preference” feature than it is a “make the game easier” feature.  It’s Flicker-Free Technology is an eye strain reducing feature.  Normally LED panels don’t have flickering, but apparently, it can be an issue when using poor cabling or outdated graphics cards, and this can cause eye strain when gaming for a long time.  The XL2411P eliminates this flicker, thus increasing eye health and comfort.

My Testing

Reading a list of features is fine, but the real test comes when playing games.  I began by testing the monitor with Dota 2, a multiplayer online battle arena (MOBA).  First, I tried various ways to create rapid movement, such as panning back and forth and zipping around with Storm Spirit’s ultimate.  Second, I played many games, switching back and forth between my Dell monitor and the BenQ ZOWIE monitor.  When it comes to movement and refresh rate, I honestly can’t tell any difference between these monitors.  I doubt this due to any lack in the XL2411P; rather, I think this is more about Dota, which is a slower-paced game that doesn’t take advantage of the XL2411P’s capabilities.  I can, however, see a difference in appearance.  Dota is sharper and more vibrant on the Dell, which is probably due to it having an IPS panel and a higher resolution.

I continued testing with Player Unknown’s Battle Grounds (PUBG), a battle royale game, using a first player perspective (FPP), my personal preference.  In this game, I can definitely tell a difference.  When looking around in game, I can visibly see the game refresh faster with XL2411P.  Trees and rocks look crisper, and cars that are driven are clearer.  Now if the monitor could help me shoot straighter, that would be something!

Expert Testing

I don’t play very many FPS games, so I decided to get some expert help from a couple of guys who do.  My son, Jacen, is the President of Liberty University’s Gaming Club and Director of Liberty Esports.  Jacen and his business partner, Jaden, started the College Call of Duty League (CCL) where universities compete against each other regionally and nationally each year.  Jacen (pictured left) plays on Liberty’s Overwatch and Dota teams.  His friend, Trevor Ray (pictured right), is the manager of Liberty’s Dota team, and he plays on Liberty’s Dota and Rainbow Six Siege teams.

Together they tested the ZOWIE monitor on four FPS games, CS:GO, Rainbow Six Siege, Apex Legends, and Overwatch, and the following is a summary of their thoughts.

The Black eQualizer definitely made it easier to spot enemies who were trying to hide in CS:GO and Rainbow. These games are more realistic, and they tend to have dark places on the map.  This feature was not as useful in Apex and Overwatch, as they are already very bright games.

The high refresh rate and low response time were helpful in all the games, but they were most noticeable in Rainbow, Apex, and Overwatch, as these games have a lot of very fast movement.  They saw no trace of ghosting, especially once they set the AMA to the highest setting, “premium.”  Even when they were zoomed in with a sniper rifle and tracking an enemy across the screen, there were no signs of blurring or trails.

Jacen preferred the sturdier base of the XL2411P over the base of his monitor, an MSI Optic G24C.  Trevor liked the UI of the XL2411P as well as its rich set of features and options; he found changing the settings with the control keys to be easier on the BenQ than with his monitor, an AOC G2460P.  Both of these guys, however, echoed my observations that the color on the XL2411P was worse; they spent more time on the BenQ adjusting the settings than they did on their own monitors, though in the end they were happy with their settings.  Here are the settings that Trevor uses, if you need something to get you started:

  • Brightness: 15
  • Contrast: 50
  • Low Blue Light: 0
  • Black eQualizer: 2
  • Blur Reduction: off
  • Color Temp: R:92 G:92 B:97
  • Hue: 50
  • Color Vibrance: 11
  • AMA: Premium
  • Instant Mode: ON
  • Sharpness: 7
  • Everything else:  Default

In addition to gaming, Trevor ran a set of tests designed to detect backlight bleeding.  This is a problem common with TN panels where excess light from behind the panels “bleeds” around the edges, causing a visual distraction. Trevor ran the Eizo Monitor Test, which can highlight backlight bleeding, as well as other problems.  I’m happy to report that he found no sign of this problem on the ZOWIE monitor.

In summary, Jacen and Trevor declared the XL2411P to be a solid monitor that is good for gaming and a great value at its price point, so long as you are willing to spend some extra time adjusting the settings.  If buying a new monitor now, Trevor asserted that he would definitely consider buying the BenQ over his AOC, as it can take advantage of his EVGA GTX 1070 video card.  Jacen, however, gave a more nuanced answer.  If gaming on a laptop—he games on a Razer Blade 14 RZ09—he would probably stick with his MSI, as all the video ports on his MSI are capable of 120 Hz, the max refresh rate that his Razer can push, whereas on the BenQ, only the DP port can do 120 Hz.  If, however, he switched to a desktop with a more capable video card, which he would prefer to do, then yes, he would also consider buying the BenQ over his MSI.

The experts have spoken.

Extra Features

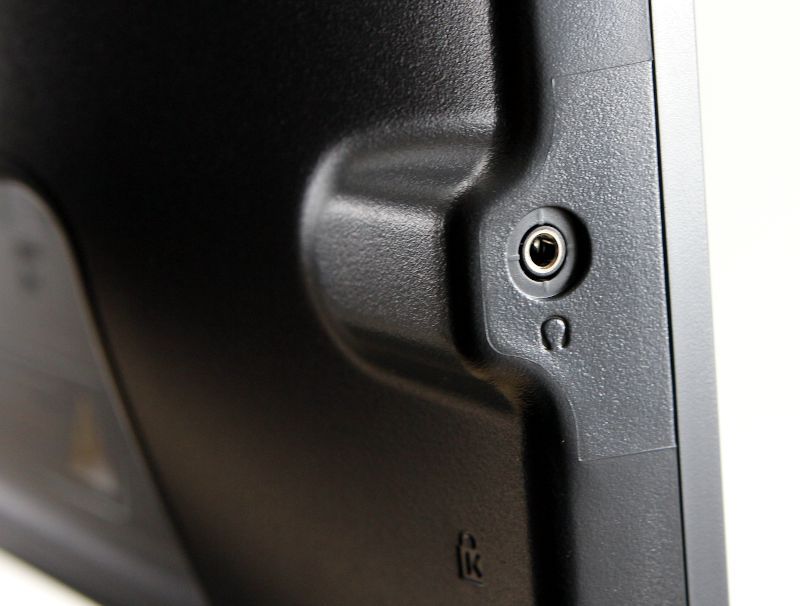
There are no built-in speakers on the XL2411P, but it does have an audio jack on the left side, which works great.

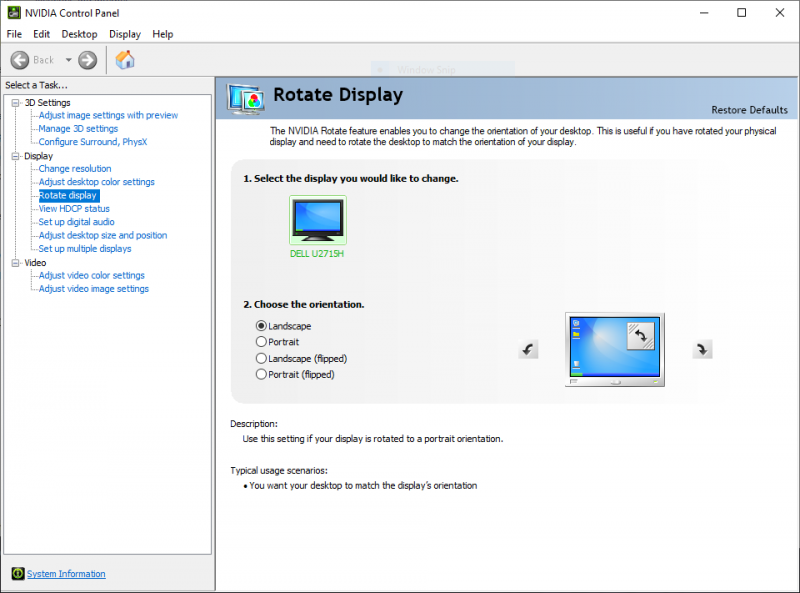
The monitor can also be rotated 90° so that it’s in portrait mode.  On my PC, I used the NVIDIA Control Panel to let Windows know that I wanted to rotate the display.  This feature is typically used with Microsoft Word or other editing tools where it’s advantageous to see an entire page of text at once.  I’m honestly not sure how this would be useful for a gaming monitor, but it’s here if you need it.

The XL2411P also has a Kensington lock slot on the back to help secure the monitor if necessary.

What I like

  • Great set of features, like the Black eQualizer, especially for this price point
  • High refresh rate, low response time
  • Solid base, flexible arm for adjusting the panel

What I’d change

  • Improved default color settings
  • Studier cable management system

Final thoughts

If you’re looking to get into the fast-paced world of competitive FPS video games, or if you want to upgrade your current monitor without breaking the bank, then I think you should take a hard look at the ZOWIE XL2411P monitor.  It may not be the most attractive monitor on the outside, but it’s got it where it counts, a rich set of features that are going to help you take your game to the next level.  Just keep in mind that you will have to spend some extra time configuring this monitor.  I think, however, that you will find it to be worth the time you spend.  Game on!

Price: $199 (new), $187 (refurbished)
Where to buy:  BenQ Direct (new, refurbished) and Amazon
Source: The sample for this review was provided by BenQ.

Filed in categories: Reviews

Tagged: ,

BenQ ZOWIE XL2411P 144Hz 24-inch e-Sports Monitor review originally appeared on The Gadgeteer on August 13, 2019 at 8:00 am.

Note: If you are subscribed to this feed through FeedBurner, please switch to our native feed URL http://the-gadgeteer.com/feed/ in order to ensure continuous delivery.
Plugable HS53 Gaming Headset review

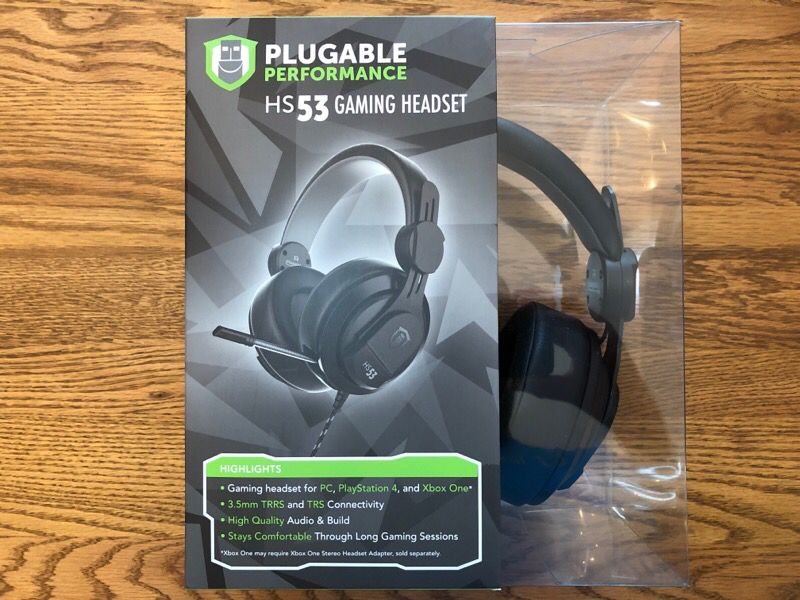
REVIEW – I have a confession to make:  Although I have a nice gaming rig and a set of quality peripherals, I’m still using a Logitech H570e for my headset.  While this $35 device might be fine in the office for making the occasional Slack call, it’s not exactly a high-quality gaming headset.  It’s time for an upgrade, so I’m checking out Plugable’s HS53 gaming headset to see how it compares.

What is it?

The HS53 is a budget, wired, gaming headset from Plugable.

What’s in the box?

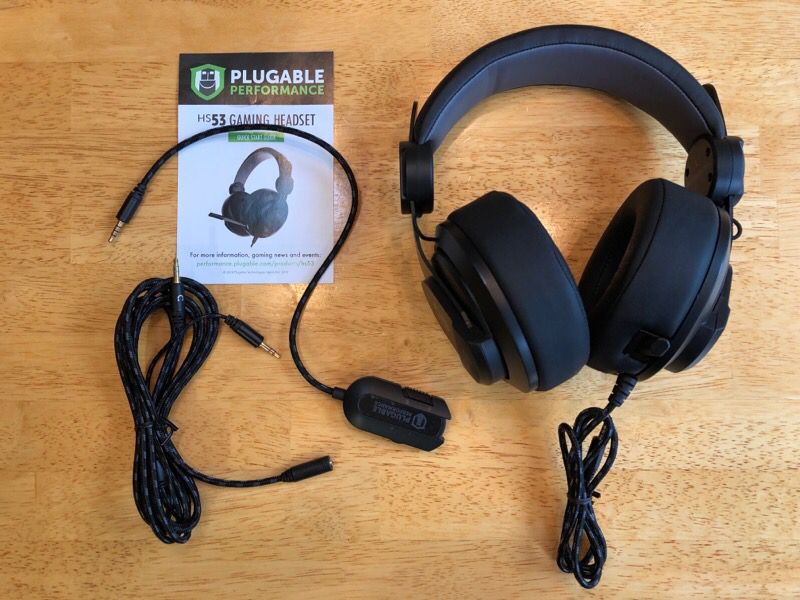
  • The headset with microphone
  • In-line remote
  • TRRS-to-TRS Y cable
  • Quick start guide with 1 page of English instructions

Hardware specs

  • Compatible with PC (Windows, Linux, and macOS), PlayStation 4, and Xbox One.
  • 53 mm drivers
  • 3.5mm TRRS connection for the microphone and headphones channels

Design and features

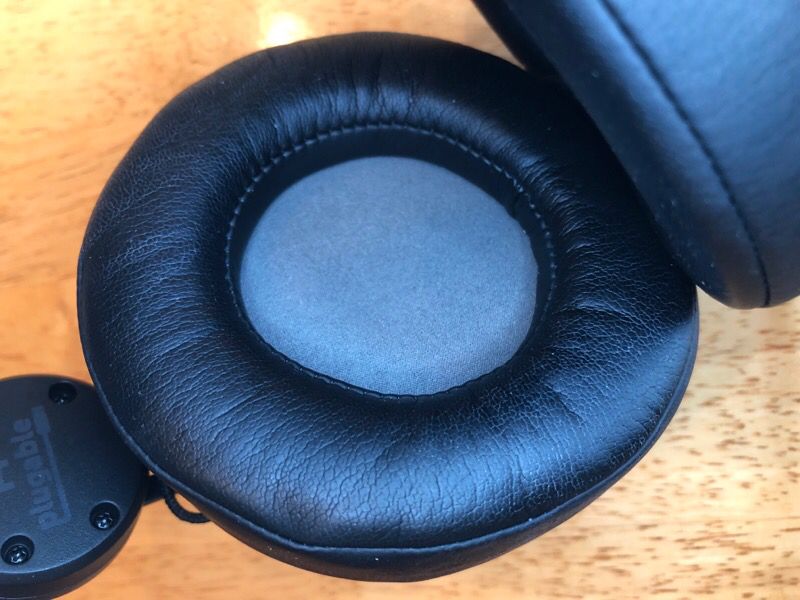
When I pulled the HS53 from the box, the first thing I noticed was the earcups.  On gaming headsets, most earcups are oval, roughly in the shape of an ear.  Those on the HS53, by contrast, are round.  They still fit over my ears, which they can do as they are rather large.  This size is what allows Plugable to include speakers with 53mm drivers, which are larger than most headsets.

The second thing that I noticed is that the TRRS-to-TRS Y cable is really, really long; in fact, it’s almost 15 feet long.  This cable is obviously intended to be used with a PlayStation or an Xbox, and thus makes perfect sense.  The cables that come with just the headset and the remote together are only 4 feet 4 inches long; personally, I wish they were 2 feet longer to give me a bit more flexibility.  If your PC is really close to where you sit, you’ll be fine, but if it’s further away, or if you like to move around, you’ll either need to use the very long cable (and deal with cable management) or buy a different cable.  The cable on the headset is not detachable.

Installation and setup

Installation was simple.  I plugged the audio cable from the headset into the remote and then plugged the cable on the remote—although Plugable calls this a remote, it’s really just an inline volume control—into the green audio jack on my soundcard.  On the remote, one side has a switch that mutes the mic, and I had to look closely to see which way was muted and which way was not.  The other side has a volume wheel, which was equally difficult to see which way was loud and which was soft; I set it to the middle to start.  If Plugable would make the symbols on here white instead of grey, they would be a lot easier to see.

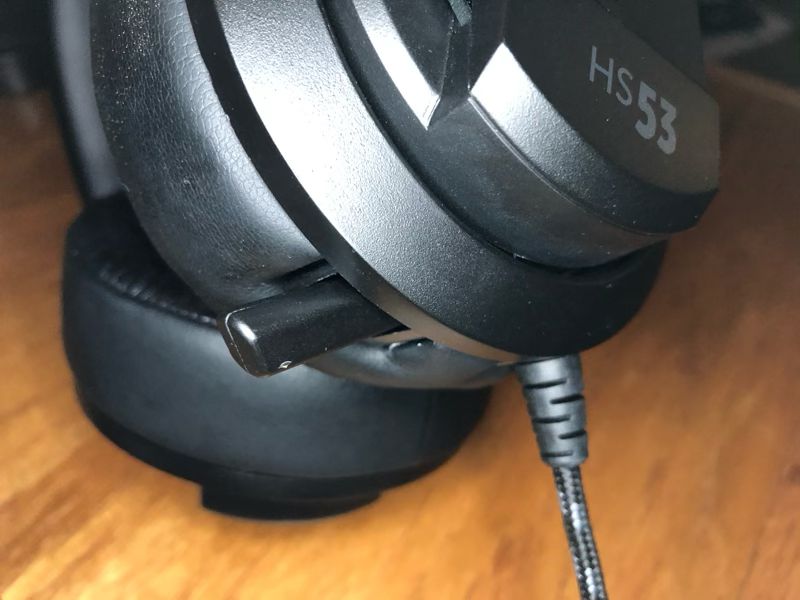
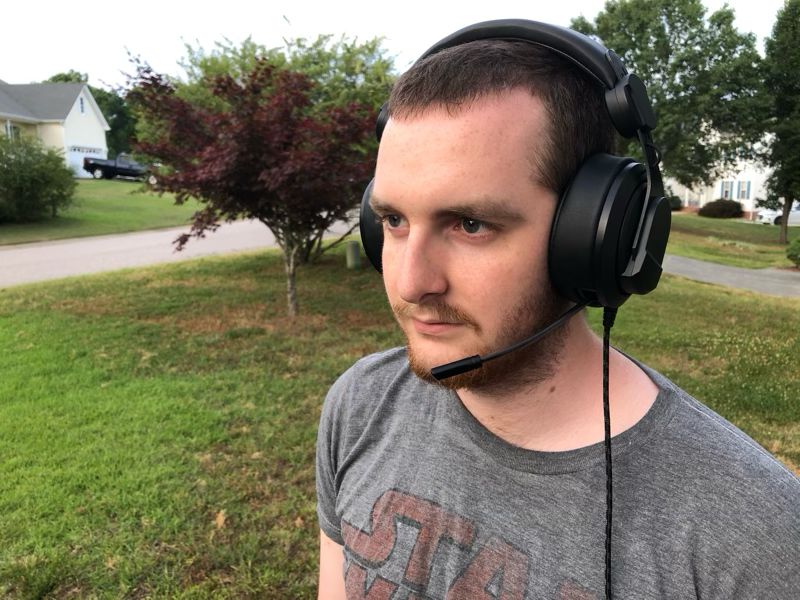
The mic is connected to the left earcup and extends out about 4 inches.  If you choose not to use the mic, it can retract into the earcup.

Performance

The earcups are certainly soft and comfortable to wear.  They tend to be a bit loose on the head and not fit very well, at least at first.  After wearing them for a couple of hours, however, they seem to tighten up a bit.  I’m not sure if this the memory foam, which is in the earcups and on the headband, kicking into gear or what, but they definitely feel better over time.

The headset has good sound.  The music, the game sounds, and the voices of other players are all very clear, and they are certainly richer than my old Logitech.  There isn’t a notably deep bass sound, but that was fine with me, as too much bass tends to create a mushy sound.

Although the HS53 does not have any noise canceling capabilities, the earcups completely cover my ears and do a decent job blocking external sounds.  Plugable’s website says that the earcup pads create a seal that will keep my ears cool and comfortable.  While I agree with the comfortable part, I found that the lack of airflow left my ears on the warm side.

Features

Most gaming peripherals, including headsets, come with some sort of ambient lighting.  The HS53 does not.  This doesn’t detract from the actual game play, but it does lower the “cool factor” of this gadget.  I suppose the lack of lighting is a way to keep costs down, but even a simple lighting scheme would be welcome.

The cables are braided and feel like they are of a decent quality.  The remote, on the other hand, feels cheap and plastic.

What I like

  • Good sound
  • Soft and comfortable

What needs to be improved

  • Longer cable attached to remote

Final thoughts

This is a solid headset from Plugable.  It’s not a fancy headset, but it’s comfortable and has good sound, which are the two most important features.  If you’re looking for an entry-level headset, the HS53 is worthy of your consideration.  It’s certainly a huge step up from my Logitech headset.

Price: $44.95
Where to buyAmazon
Source: The sample for this review was provided by Plugable.

Filed in categories: Reviews

Tagged: ,

Plugable HS53 Gaming Headset review originally appeared on The Gadgeteer on June 6, 2019 at 9:00 am.

Note: If you are subscribed to this feed through FeedBurner, please switch to our native feed URL http://the-gadgeteer.com/feed/ in order to ensure continuous delivery.
E-WIN Champion Series gaming chair review


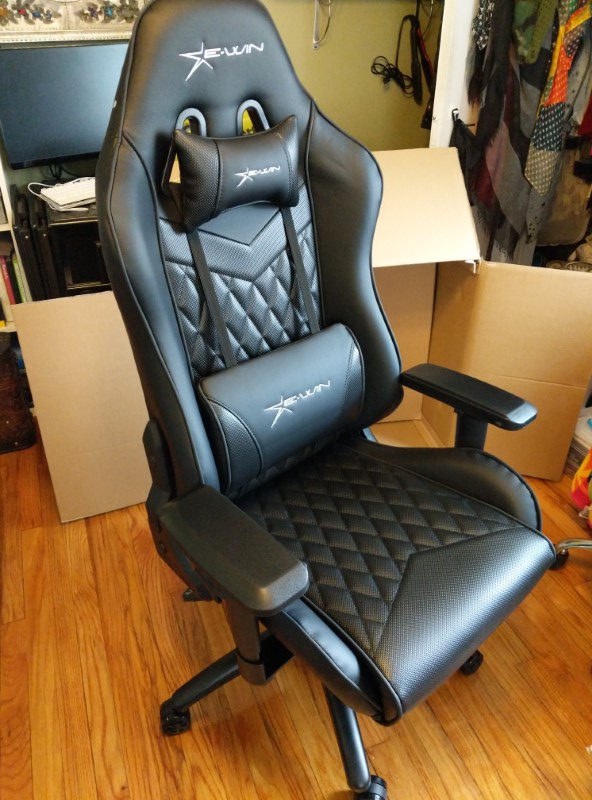
REVIEW – Gaming; it’s something we are capable of doing for hours at a time, but don’t give any thought into the chair we sit in! I’ve recently started to get back into PC gaming after a bit of a hiatus and realized that the chair I have is not all that comfortable. I wanted something that would give me more back and bottom support, as well as keep me happy while working or gaming for a few hours. I recently got the chance to review one of E-WIN’s gaming chairs, so I chose the awesome looking E-WIN Champion Series Gaming chair. Let’s take a look!

What is it?

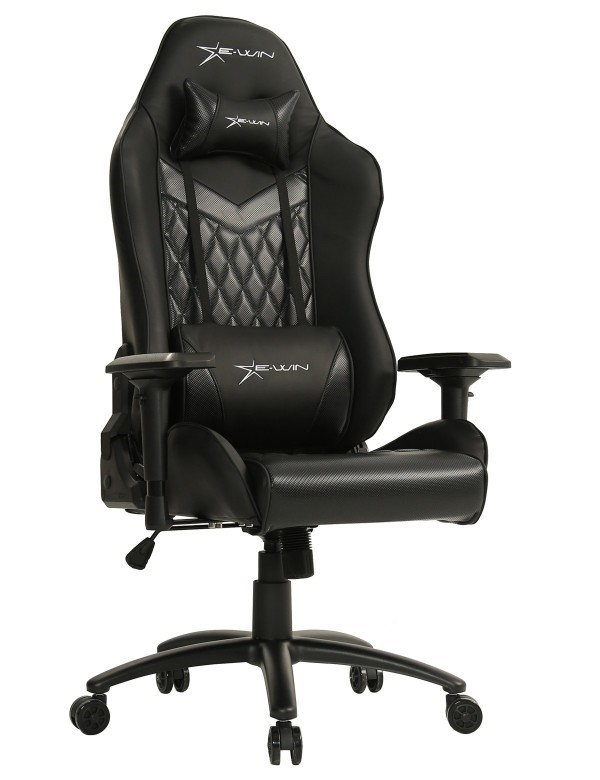
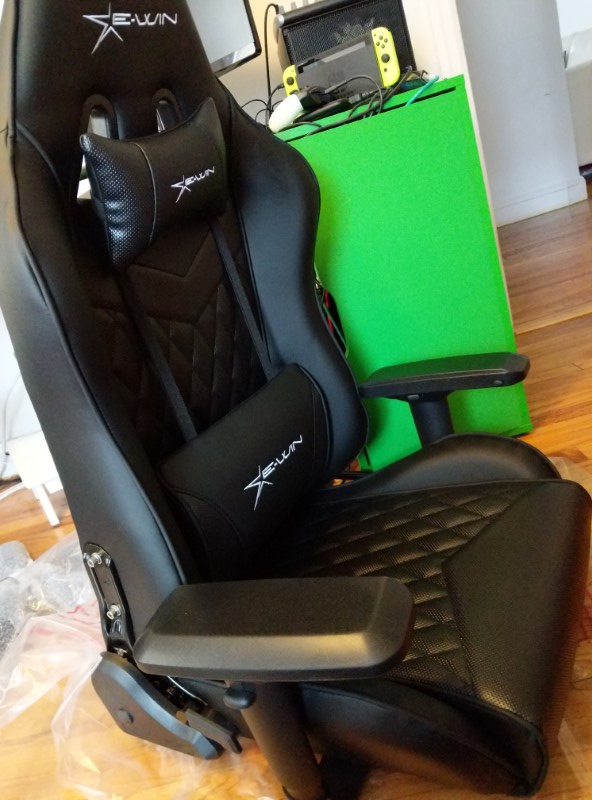
The E-WIN Champion Series Gaming Chair is ergonomic, padded with a racing seat design and PU leather material. It has vertical adjustments along with adjustable armrests, and a quilted surface. It comes with both a neck and back pillow for comfort.

What’s in the box?

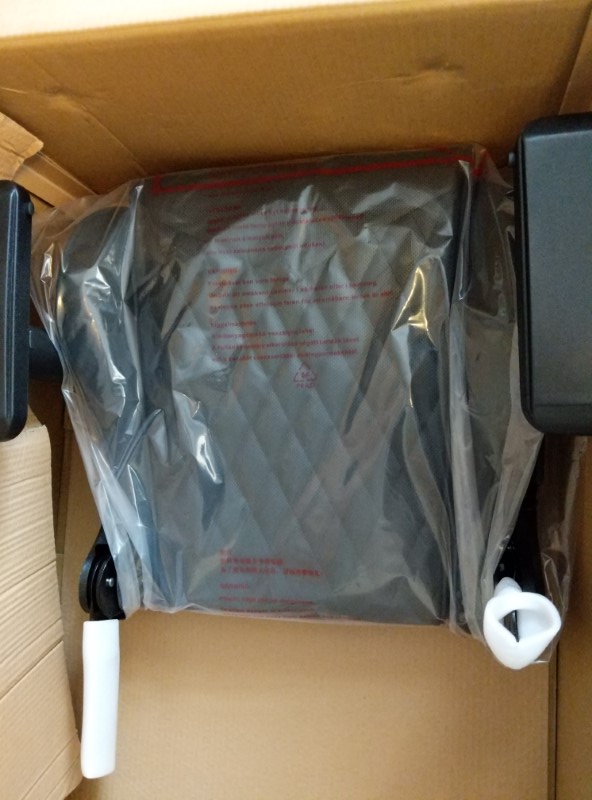
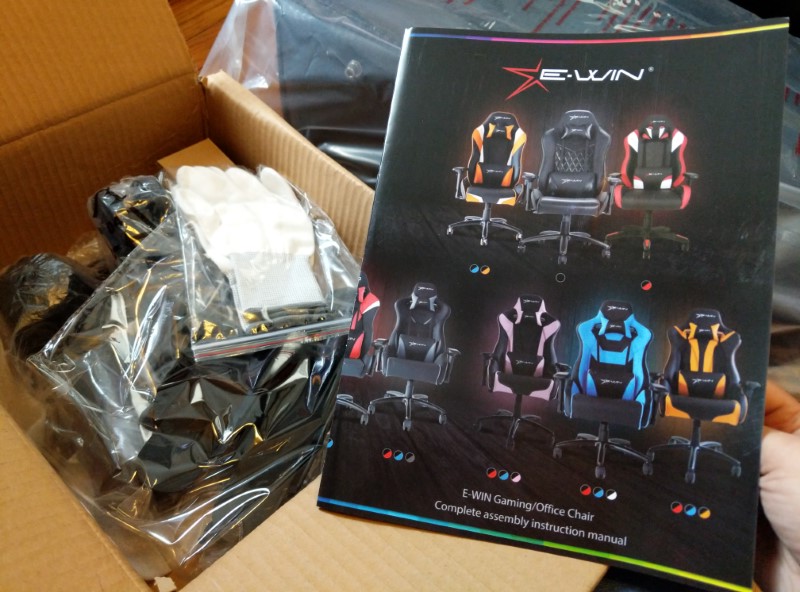
  • Disassembled chair
  • Screws, bolts etc
  • Instruction manual
  • White gloves

Hardware specs

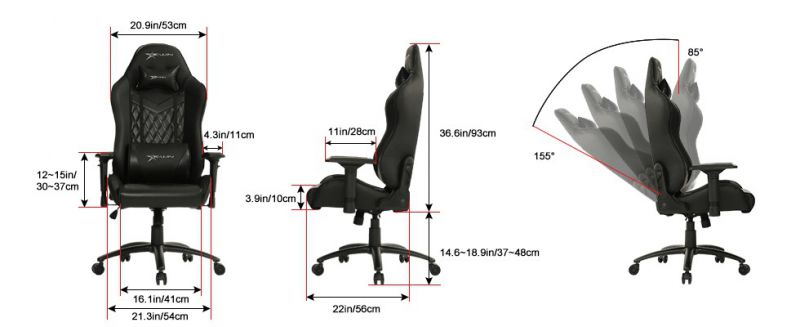
The E-WIN Gaming Chair’s frame construction is metal, with high-density separated foam. The rolling wheels and base are made of aluminum, and the cover of the entire chair is PU leather with a quilted pattern down the middle. The height of the chair goes from 14.6 in – 18.9 in, and the width is about 29.6 in including the armrests. The angle at which the chair tilts forwards and back is between 85 – 155 degrees. The max supported weight is 330lbs.

Design and features

The E-WIN Champion Series Gaming Chair is designed for comfort in mind while gaming or office work. The armrests have front, back, left and right sliding buttons, which are great for someone like me who is constantly adjusting the comfort level of the chair. The seat height is adjustable and the back can recline between 85 and 155 degrees.
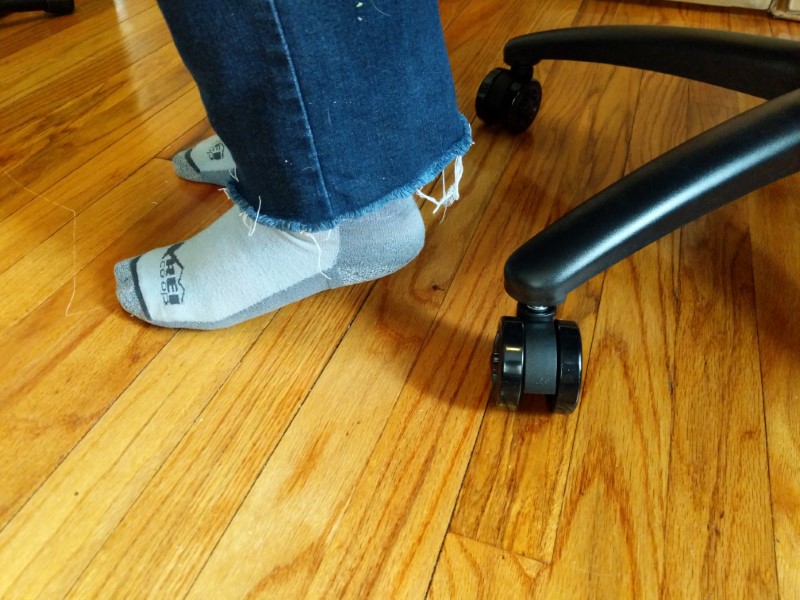
The lowest height setting of the chair is a slight problem for someone my height (5’4″) who has shorter legs (26″ inseam) since my feet don’t hit the floor flat. While this isn’t a deal breaker, I sometimes had trouble getting up without the chair tiling forward a bit. I’d love for it to be an inch or two lower like other office chairs.

There are adjustable and removable neck and back pillows attached with straps. I liked the support of having the back pillow the best since it fits my lumbar region nicely.

Setup

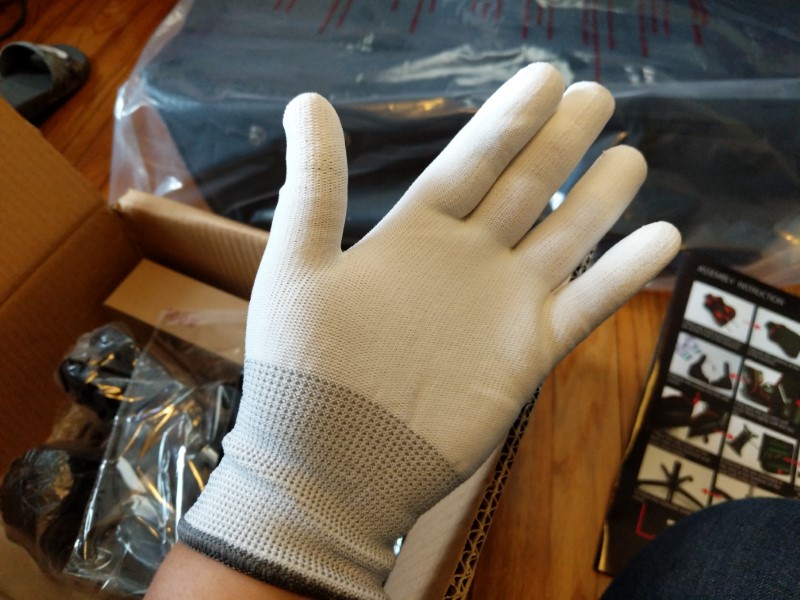
Set up was pretty easy compared to traditional office chairs. E-WIN provided white gloves to protect your hands, which was a nice touch. The instructions were pretty clear and it took me a couple of hours to assemble. The parts weren’t too heavy so I was able to lift and put it together myself.

What I like

  • Sturdy feel
  • PU leather has a decent feel
  • Very comfortable for many hours (4+) of sitting

What needs to be improved

  • Height adjustment should go lower

Final thoughts

I really enjoyed using the E-WIN Champion Series Gaming Chair for everyday use. I love the back support/pillows, how wide and tall the chair is, and is breathable. It’s very ergonomic and has great support for the lower back. I’d probably recommend it a bit more if you’re a bit taller or have longer legs, but overall it’s extremely comfortable!

Price: $309.00
Where to buy: ewinracing.com and Amazon. If ordering from the EWIN site, you can use the
code “Gadgeteer” for 20% off
Source: The sample of this product was provided by E-WIN Racing.

Filed in categories: Reviews

Tagged: ,

E-WIN Champion Series gaming chair review originally appeared on The Gadgeteer on May 29, 2019 at 10:00 am.

Note: If you are subscribed to this feed through FeedBurner, please switch to our native feed URL http://the-gadgeteer.com/feed/ in order to ensure continuous delivery.
HyperX QuadCast USB Gaming microphone review

REVIEW – I record training videos in my day job so it is important that my voice is captured under the best possible conditions.  For a while I used a HyperX gaming headset but I had complaints from my audience that the sound was a little “tinny” and that plosives were a real problem.  I switched to a Blue Yeti mic and while the sound was greatly improved, between the size of the mic and the pop filter I disliked the amount of space the solution consumed on my desk – not to mention how it blocked the bottom of my monitor when in the desk stand.  So when the opportunity came up to review HyperX’s new gaming mic, I jumped at the chance.  Would this be the best of both worlds?  Read on to find out…

What is it?

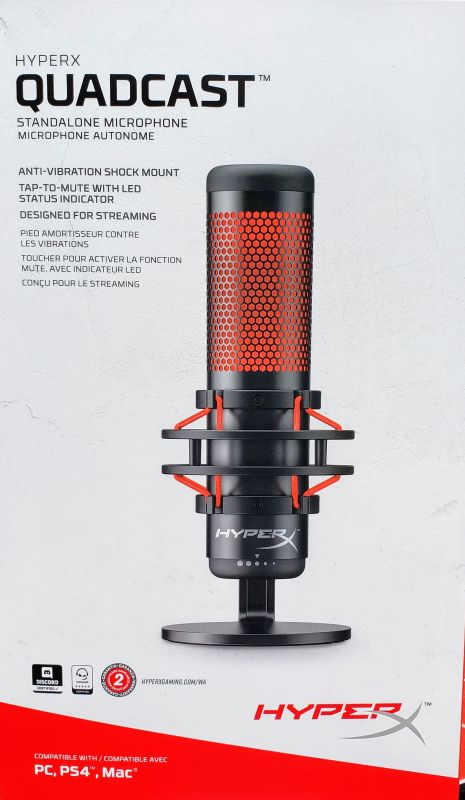
The HyperX QuadCast is a standalone USB microphone aimed at the gaming community.

What’s in the box?

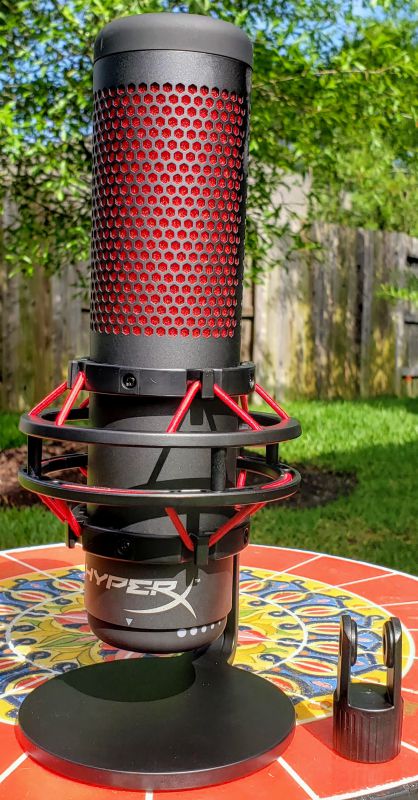
  • HyperX QuadCast microphone with built in pop filter
  • Shock mount
  • Desk stand
  • Mic mount adapter
  • Micro USB to USB type A cable

Design and Features

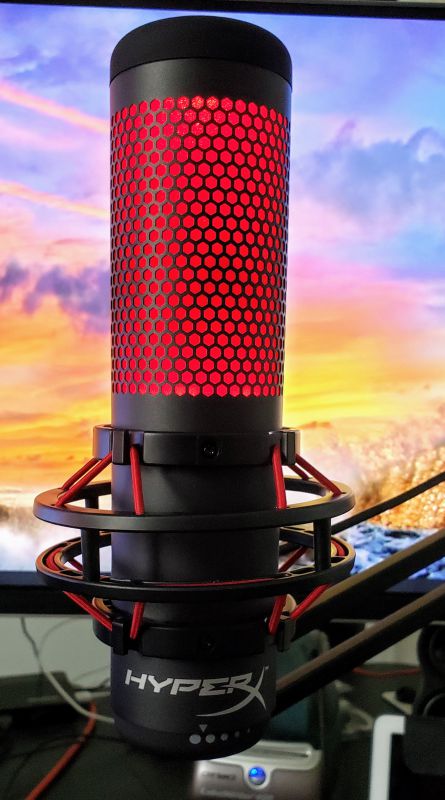
The body of the mic is metal which gives it a solid feel and the impression of longevity.  Top to bottom, the mic is about 8.5 inches tall, so it is by far not the shortest mic out there.  With the shock mount, it is 4 inches wide, but that is a tad less wide than competitors so what you lose in height you make up for here.  The top half of the mic glows red when the mic is on and not muted.  Here is the mic connected to my mic arm:

On the bottom of the mic is the gain control – simply rotate to increase/decrease the input volume.

On the back of the mic is the polar pattern selector.  Starting on the left side, you have:

  • Stereo – collects sound from the left and right sides of the mic
  • Omnidirectional – gets sound from every side, so great if you are recording a meeting or other event where you can’t control sound source
  • Cardioid – only from the front of the mic, which is the go-to for streaming and podcasting
  • Bi-directional – front and rear (as opposed to stereo’s right/left), a great choice for interviews

Behind the mic mount is the micro-USB plug and the monitor jack.  While it might seem like an awkward place to put these connections, there is actually plenty of room and will allow you to run the cable attached to the boom arm.  This makes the connections less messy on your desk.

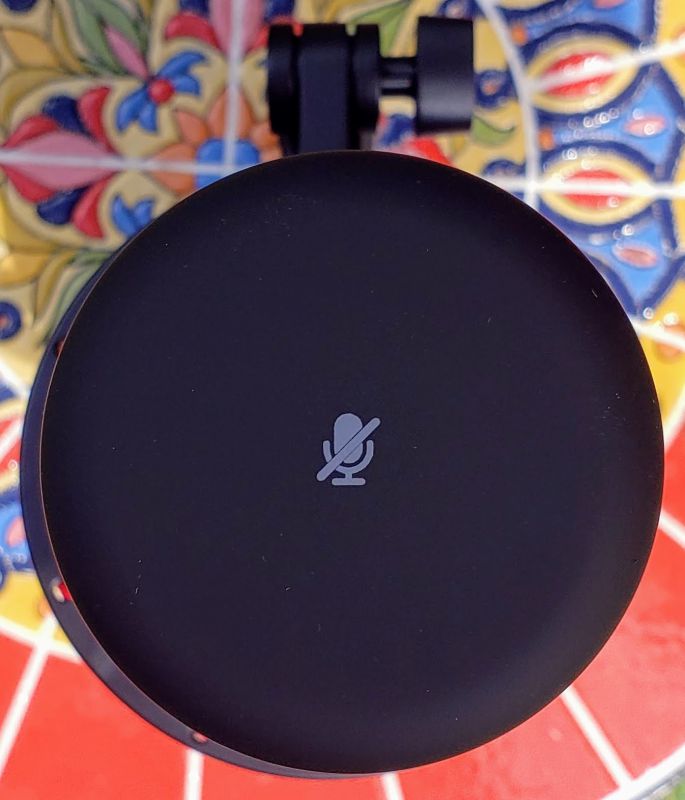
The top of the mic has the mute button.  Simply tap the button to mute/unmute.  When muted, the red glow dims considerably, giving you a visual cue that your sound is off.

The on-paper specs for the QuadCast are similar to the Blue Yeti – sampling at 48 kHz and 16 bit depth, and a response range of 20 Hz to 20 kHz.  Not as good as a studio mic, but more than you need for most purposes.  The sound is warm and seems perfectly matched for voice recording, whether that’s spoken word or singing.  After sampling with this mic and the Yeti I find I prefer the quality the QuadCast produces – it just feels richer and like it has more depth, something my voice could use help with.

The mic is plug and play on Windows – plug it in and the OS finds it.  A few seconds later you are good to go.  No special drivers or other software needed.

A word on the pop filter – it stops a fair amount of plosives (the sound most people make when words start with the letters “B” or “P”) but it is not a match for a real external pop filter.  After a few recordings I added my trusty Knox filter and the quality of recordings improved.  I am willing to concede that it is perhaps the way I speak, but just be aware you may have this issue as well.

And a word on the gain control.  You’d think that you would want to turn the volume up to 100% in Windows and then use the gain control to adjust the actual volume.  You’d think wrong – that produces a “static-y” white noise that sounds horrible.  In testing I found that for solo, cardioid recording I needed to keep Windows and the mic volumes both at about 50% to get the best quality and volume.  Bi-directional, I needed to bump up the mic volume to get a balance between front and back.  Never, though, did I adjust Windows volume beyond 50%.

What I like

  • The sound is warmer and fuller than comparably priced mics
  • Intelligent design – everything you need is easily accessible
  • The polar patterns gives the mic a wide range of applications – it isn’t a “one trick pony”

What needs to be improved

  • The pop filter should be higher-quality
  • You should be able to turn off the red glow – while you would lose the muted visual cue, the glow can be distracting to the eye

Final thoughts

As a first standalone effort, the QuadCast comes off as remarkably polished and ready for (almost) any kind of use.  The sound quality is at least as good and perhaps subjectively better than other mics in the same price range.  While on paper the mic is priced higher than others, by the time you factor in a shock mount and adapter, it might actually be less money.  Because of the red glow I am not sure I would want to use this as a gaming mic, but for podcasts, videos and other uses it seems like a great device.

Price: $139.99
Where to buy: Amazon
Source: The sample for this review was provided by HyperX

Filed in categories: Reviews

Tagged: ,

HyperX QuadCast USB Gaming microphone review originally appeared on The Gadgeteer on May 23, 2019 at 9:30 am.

Note: If you are subscribed to this feed through FeedBurner, please switch to our native feed URL http://the-gadgeteer.com/feed/ in order to ensure continuous delivery.