ARTICLE – Gone are the days when creating a website was something only professional programmers could do. Thanks to modern website building solutions, a good-looking site can be crafted by anyone having a clear purpose and desire to get visible online.
One of these solutions is NING. It is a platform allowing you to make your own website from scratch and build up your online presence. What sets NING apart from the competition is its focus on social networking and content monetization. While other website builders provide tools for making regular, static sites, NING offers an opportunity to create an interactive online community where every member can contribute to the topic and share content on equal terms.
As for monetization, the platform enables users to make money from their websites through selling content, charging a membership fee or accepting donations. Thus, NING is an excellent solution for both internet enthusiasts who want to bring people together around a specific idea and content creators striving to promote their stuff and get paid.
In this brief guide, we will lead you through the basic steps for creating a social website on NING.
Step 1. Create a NING account
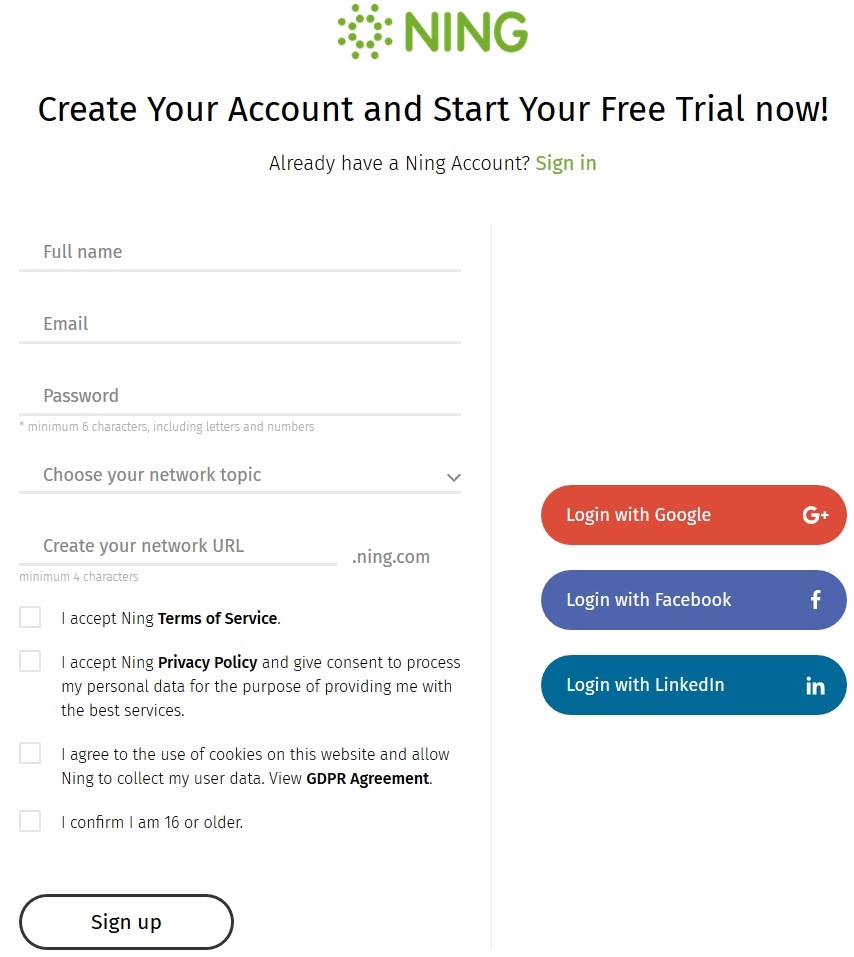
Before you can dive headlong into the creative process, you will need to sign up on Ning.com. Just go to their website and click “Get started” (the green button in the top right corner of the page). You will have to provide your full name and email, as well as specify the topic of your future website. This will determine the default design template which will be applied to your site. It can be changed later anytime.
Also, NING gives you a custom domain name, so you will have to specify the desired URL during the registration. Mind that all native domain names provided by NING end with .ning.com. However, if you want to change it, you can do it later by purchasing a new domain name elsewhere and mapping it to your NING website.
NING offers a free 14-day trial which should be enough for you to figure out whether the platform meets your expectations. Beyond that, there are three subscription plans ranging from $25 to $99 depending on the amount of storage, member capacity, and support privileges you want to get.
Step 2. Customize your website design
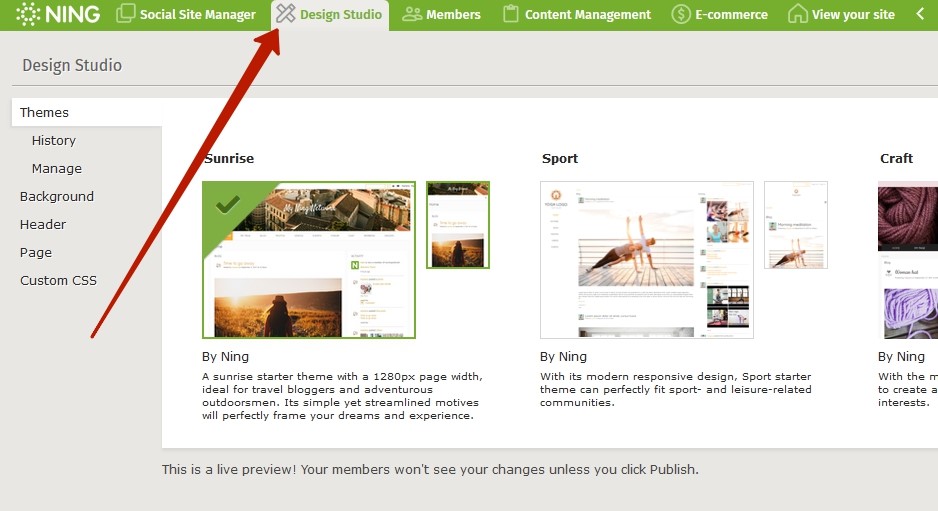
No doubt, you want your website to look unique and convey the idea behind it through dazzling visuals. Your website design can help you get recognized and stand out from the rest. This is why NING offers a broad array of customization tools to let you configure every aspect of your website:
● Design theme: select one of the available visual templates that determine the overall appearance of your website.
● Background: choose or upload an image that would appear at the backdrop of each website page.
● Header: configure a website header by changing its layout and size, adding your website name and logo, customizing a navigation menu, picking a custom background image, and modifying an account bar.
● Page: personalize the overall look of pages by customizing fonts, content blocks, and buttons.
● Custom CSS: insert custom CSS code to achieve advanced customization effects.
Start with selecting a design theme that serves your purpose and matches your industry. NING offers templates for various niches including blogging, business, education, sports, politics, gaming, charity, religion, etc. Then customize the template using the tools mentioned above. All of them can be accessed by clicking a Design Studio tab in the admin panel.
Step 3. Create the pages you need
When you’re through with designing your website, it’s time to think what kind of content you are going to fill it with. Everybody knows that websites consist of individual pages. Therefore, your next task is to create as many web pages as you need to achieve your goals.
By default, your newly created NING website will have several basic pages for different types of content, e.g., Home, Blog, Photos, Videos, etc. However, you can add the new ones or delete pages you don’t need anytime. To create a new page, follow these simple steps:
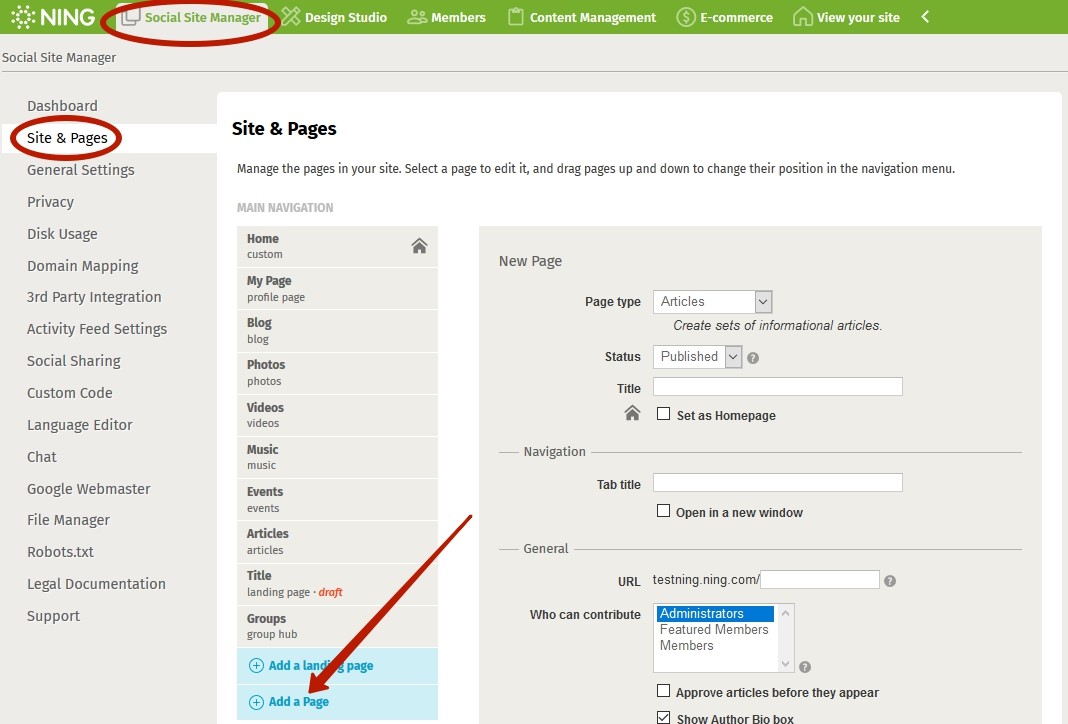
1. Go to Social Site Manager in the admin panel;
2. Select Site & Pages in the sidebar;
3. Click Add a Page;
4. Select a page type (e.g., Blog, Photos, Event, Forum, etc.);
5. Select a page status (published or draft);
6. Enter the page title and tab title;
7. Specify who can add content to the page (administrators, featured members,
all members) and who can view it;
8. Configure comments;
9. Choose the page layout.
Depending on your niche, you can add pages of different types. If your goal is to create a blogging website, focus on text-oriented page types like Blog and Articles.
Making a craft website? Add Photos and Videos pages which are tailored specifically for visual content. To generate more engagement and encourage communication on the network, create a Forum, Poll or Chat page. There are options for any topic or industry. And of course, you are free to add new pages whenever you want.
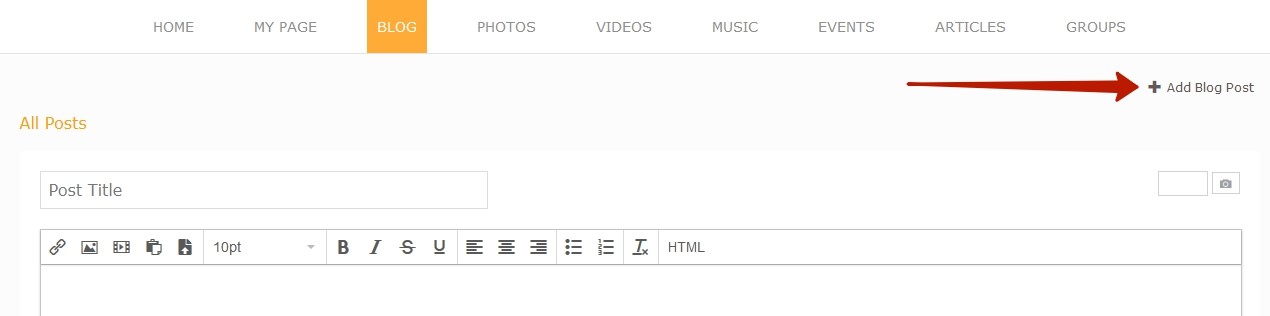
Step 4. Add content
Now, when you have all the pages you need, you can start imbuing them with your unique content. To do it, simply go to the corresponding website page (while logged in as an administrator) and click +Add. Depending on the page type and content added, you will be offered different editing options. Below is an example of a Blog editing page.
If you allow your network members to contribute their own content, you can easily moderate (approve or disapprove) their publications by going to the Content Management tab in the admin panel.
Step 5. Create a landing page
Now your website is almost ready. But you still have to promote it and make it attractive to visitors. Start with creating a professional landing page aimed at converting visitors into your network members. NING has a dedicated design tool for that too:
1. Create a landing page by going to Social Site Manager > Site & Pages and click Add a landing page.
2. Give your landing page a title and configure the basic privacy settings.
3. Click Save.
4. Click Edit layout and content.
Wait for the editing tool to load and start designing the landing page using the available Drag-&-Drop instruments.
Step 6. Grow your community
To grow your audience and stimulate the development of the community, use the extensive social networking features offered by NING, including personal and group messaging, live chat, comments, forums, polls, events, social sharing, and liking, etc.
Step 7. Monetize your website
When your community expands and your audience becomes loyal enough, nothing will prevent you from monetizing your website. Select the E-commerce tab in the NING admin panel and explore three different monetization options. Paid Access is perfect for content creators, Paid Membership is an optimal choice for closed communities, influencers, and celebrities, while Donations will help charities and start-ups to raise funds more effectively.
These were just basic steps for creating a website on NING. Explore more features of the platform by taking a free trial!
Filed in categories: Articles
Tagged: Sponsored Posts, Web
Step-By-Step Guide for Website Building with NING #sponsored originally appeared on The Gadgeteer on November 6, 2018 at 10:00 am.
Note: If you are subscribed to this feed through FeedBurner, please switch to our native feed URL http://the-gadgeteer.com/feed/ in order to ensure continuous delivery.