REVIEW – There’s a big market for home blenders that provide decent power without breaking the bank. Today we’re looking at the Juschef Professional Blender, which promises high-powered function at a price tag of under $100 while adding a heating feature. Let’s see what it’s got!
What is it?
It’s a high speed blender that also heats liquids.
Hardware specs
- 14.6 pounds
- 9” deep by 8.5” wide by 19” tall (22-1/2” with stirring rod)
- 35,000 RPM blade speed
- 900 W motor power, 800 W heater
- 110-120V, 60Hz
- BPA Free glass pitcher
- 56 ounce capacity
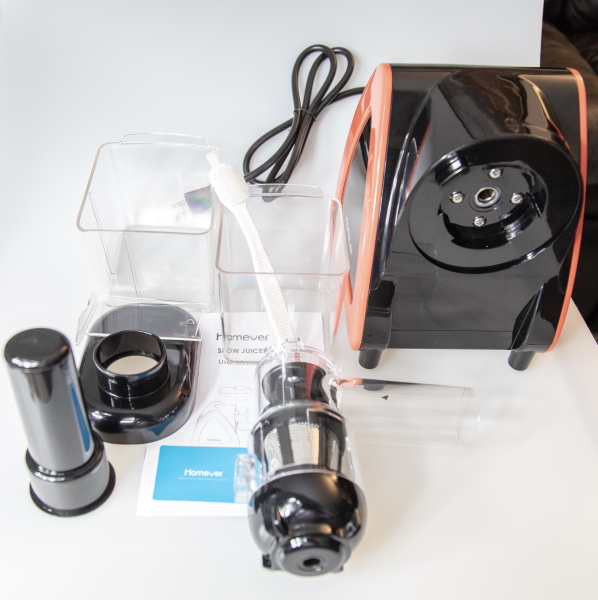
What’s in the box?
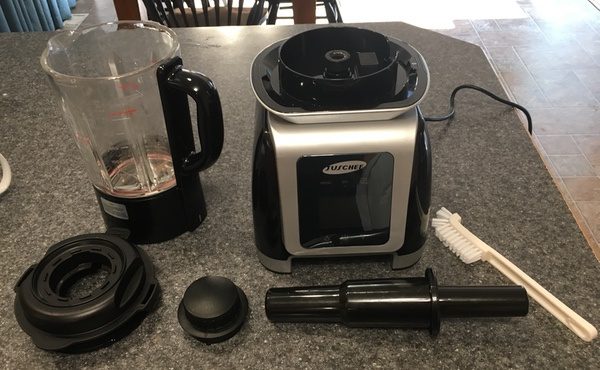
The package includes the blender base, the pitcher, a locking lid, a lid cap, a stirring rod and a cleaning brush. An instruction manual (not shown below) is also included in the kit.
Design and features
The Juschef Professional Blender is a big, heavy beast of a blender. Heavy duty plastics, a weighted base, and a thick glass pitcher give the Juschef what feels like professional-level durability and stability. All the components are substantial and beefy, including the pitcher lid and stirring rod. You’ll want to find a permanent space on your counter for this 15 pound appliance; just note that it’s 19”+ height won’t fit under most cabinets.

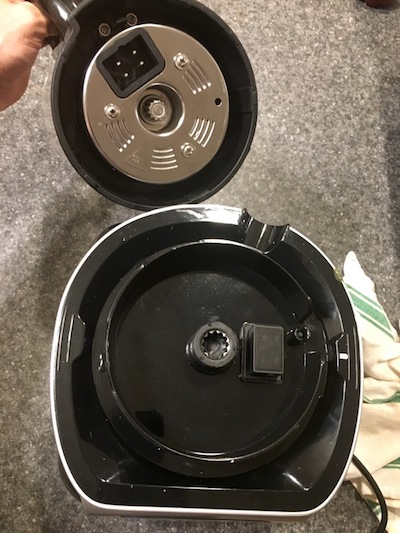
The blender has the ability to heat liquids, and the heating unit is built into the pitcher base. While it’s a nice bonus feature, I’m not crazy about this part of the design because the electronics are exposed. While those elements are sealed off in use, you can’t submerge the pitcher in water for cleaning. It also adds quite a bit of weight to the pitcher.
The pitcher itself is nice and thick, and has a maximum capacity of 56 ounces (40 ounces for heating). Unfortunately, the liquid measurements only start at the 24 ounce mark. The picture below shows 12 ounces of stock in the pitcher, measured separately. Not a huge deal, but it would be nice if the measurements ran down the whole side.
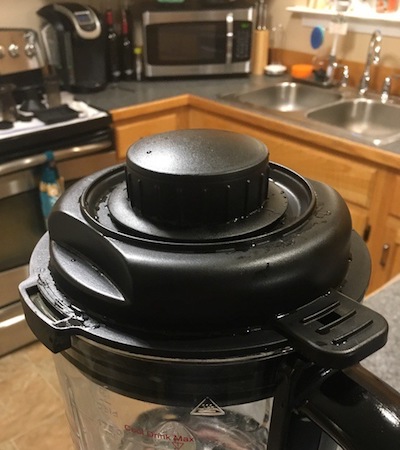
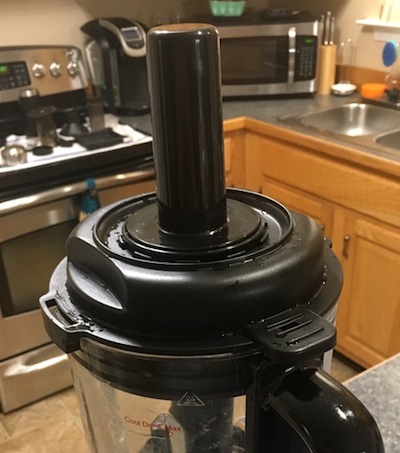
The lid mechanism is nice and sturdy, with a rubber gasket underneath to ensure a tight seal. You’ll need to rotate the lid tab into the locking slot before it will start, which is a good safety feature. I have no doubt that the lid will hold up to extended use.
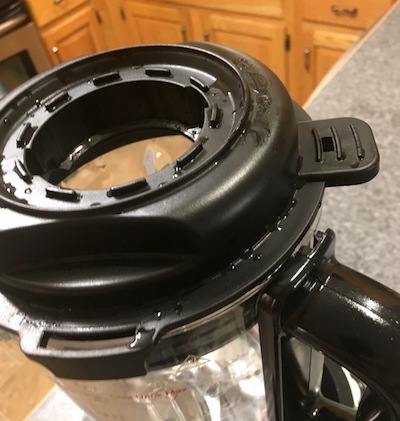

The kit includes a pitcher cap and stirring rod that fit precisely in the lid. Both are built from durable plastic and are just as burly as the lid itself.
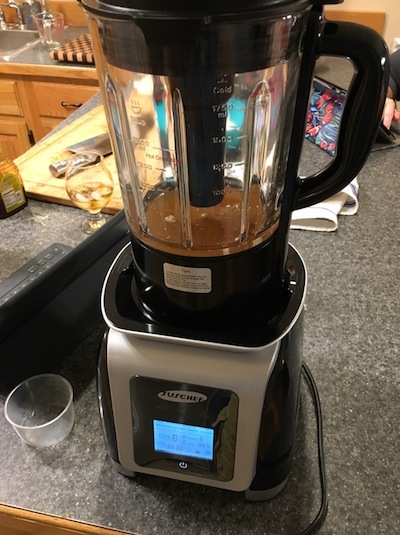
All of your operations are managed through an LED interface. There are 8 preset options as well as a “DIY” function for custom blending. 6 touch-panel buttons are utilized to set your operations. We’ll talk more about this in the Performance section.

The Juschef Professional blender sports a 900 watt power motor, which puts it above your typical countertop blender in terms of power (like the Ninja lineup), but not quite as powerful as high-end home models like the Vitamix or Blendtec. The blade speed is rated at 35,000 RPMs. This combination makes for a blender that, on paper, should handle most of your home needs.
Performance
The Juschef Professional Blender is a good choice for safety and durability. The whole unit is rock solid, and won’t bounce around your counter even when crushing ice at the highest blend settings. You also have to lock the lid to operate the unit, which is great for safety. You’ll find, however, that there’s a bit of a learning curve to understand all of the operations.
There’s no easy way to put this: the manual is just awful. It’s really poorly written with bad grammar and unclear instructions. It’s also incomplete and doesn’t explain how the presets work. The congee function, for example, is simply described as “To make healthy congee.” Do you know what a congee is, or how to make one? I had to google it. It’s basically a rice-based soup or porridge that’s heated and blended. The blender gives no instructions about whether you add raw or cooked rice first, how long it will heat, or how the blend function works to make it. The same goes for “Porridge,” “Chi Soup,” and “Soy Milk.” Some of the functions are more obvious, and a quick reference guide is supplied with a recipe for each function… but I couldn’t tell you what the presets actually do or how long they take to work. There’s no online support either. You’re on your own.
To start things up, you’ll plug in the blender and add your desired ingredients. Lock the lid, and the unit will beep and the display lights up. We’re not “on” yet though. You have to press the power button to get into the features. It’s not particularly obvious, and Amazon reviews point to a bit of confusion and frustration with this.
Once you hit the power button, the rest of the buttons light up to indicate operation. Select “DIY” and you can set your own power level and duration using the up and down arrows at the bottom of the panel. You’ll hit the “DIY” button to cycle through each setting, then “On/Stop” to fire it up.
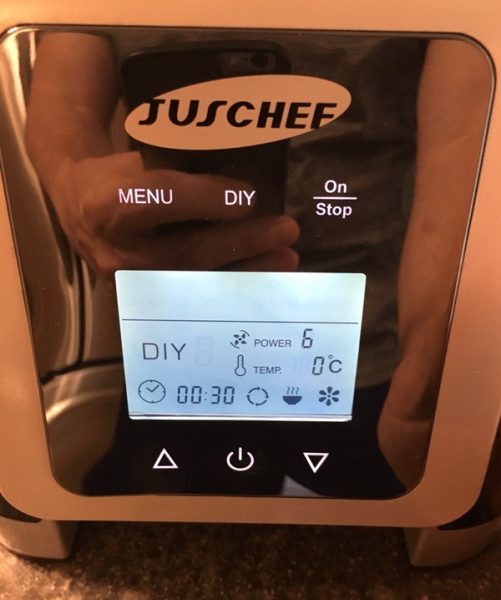
If you choose the “Menu” button, you can now cycle through the available functions. “Menu” or the up/down arrows now toggle through the preset functions, and you hit “On/Stop” to start the function.
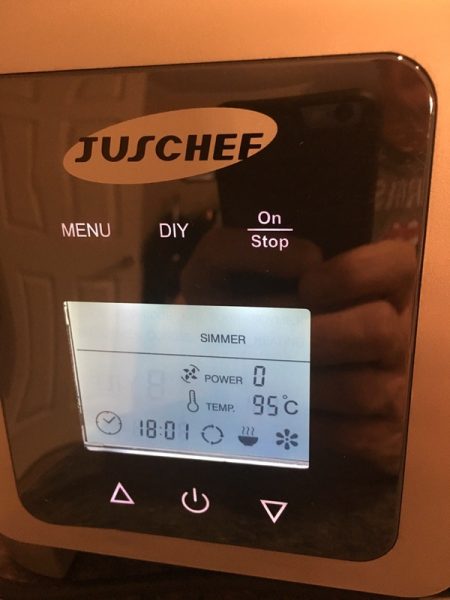
As I mentioned earlier, each function does some combination of blending and/or heating if needed. The Smoothie function, for example, runs a 45 second cycle that winds up the blender to different speeds during operation. All good there. The Simmer function is stated as being used “To make different kinds of smooth soups,” but it doesn’t blend the ingredients other than the occasional 3 second whirl to stir things up. You have to blend your stuff first. It’s all very confusing.
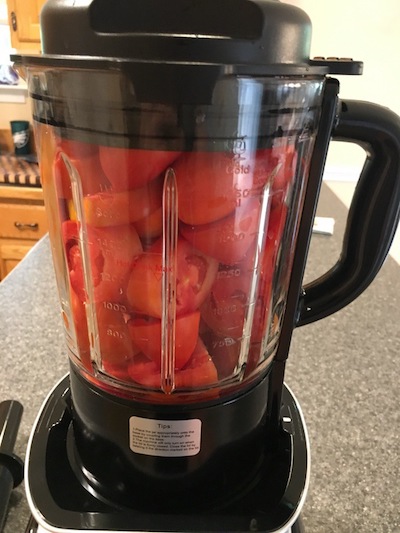
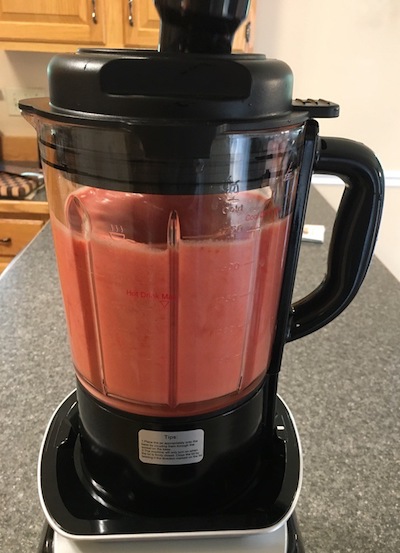
Once we get past the interface woes, the blender actually does a fairly good job. Here’s a pitcher full of fresh tomatoes from my garden that I pureed using the DIY feature in about a minute on a higher setting. The result was pretty well done, with a little thickness, but no seed or skin remnants in the blend:
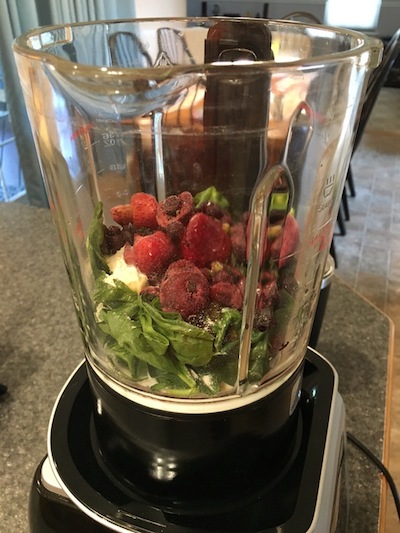
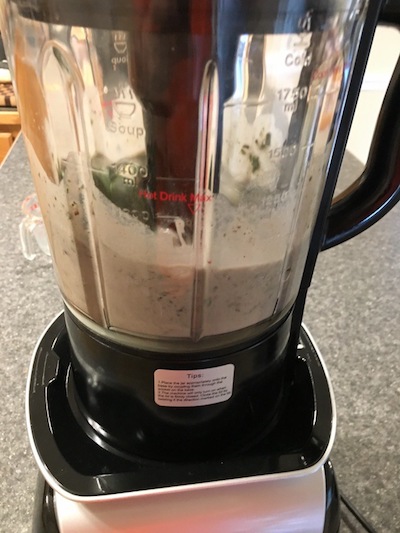
Running on the preset smoothie function, I added a combination of spinach, frozen fruit, almond milk, protein powder, and some diced ginger. It did not completely liquefy the spinach or the ginger and left some frozen fruit chunks, but the results were generally smooth. It’s about what I would expect from a blender at this level.
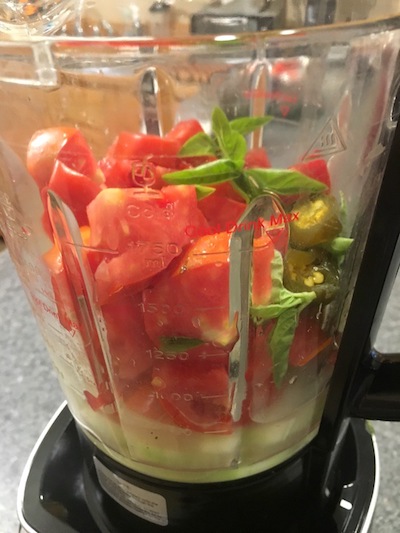
For my next trick, I decided to make a soup using the simmer function. We’ve got cucumbers and tomatoes (my garden is going nuts this week), basil, some chicken stock, a couple picked garlic bulbs, with some jalapenos to give it some oomph:
On my first go I tried the “simmer” function, assuming would also blend as the instructions implied. I got a hot bowl of stuff. This was how I learned that the instruction manual isn’t too clear.
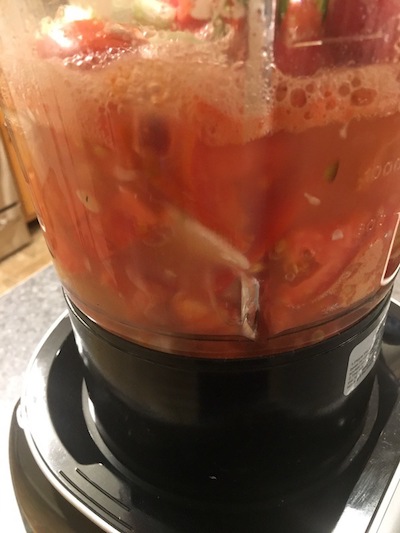
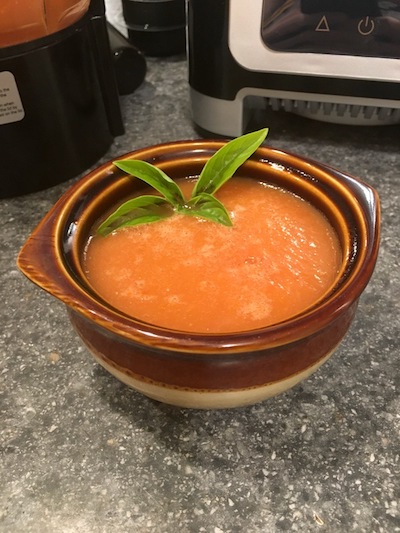
When I realized that it was just heating, I stopped the process, blended the ingredients, and restarted the simmer mode. I did, in fact, get a nice smooth soup out of the deal:
It took about 20 minutes to get to full heat. That may be because simmer is intended to be a slower process. I haven’t quite figured that out yet. After all is said and done, however, I’d probably skip the heating feature and use my stovetop to get faster, more predictable results.
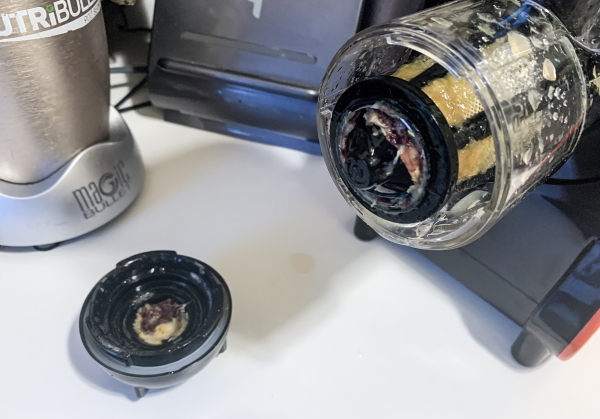
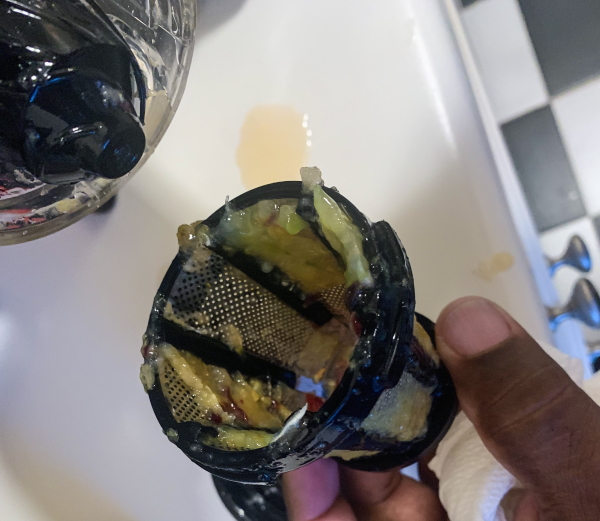
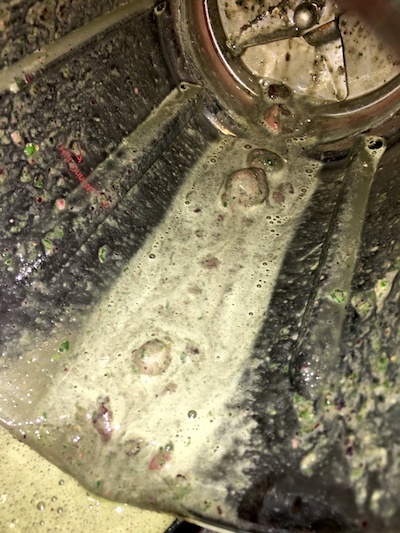
The blending function on the Juschef is plenty strong for most home uses and the stability of the unit is great, but I am also concerned about cleaning. It’s hard to clean since you have to be so careful around those components at the base of the pitcher. There’s also the blade configuration to consider. The blades are three separate components, bolted together to form a six-bladed configuration that cannot be removed from the unit. Here’s the problem: see that discoloration in the crevasses?
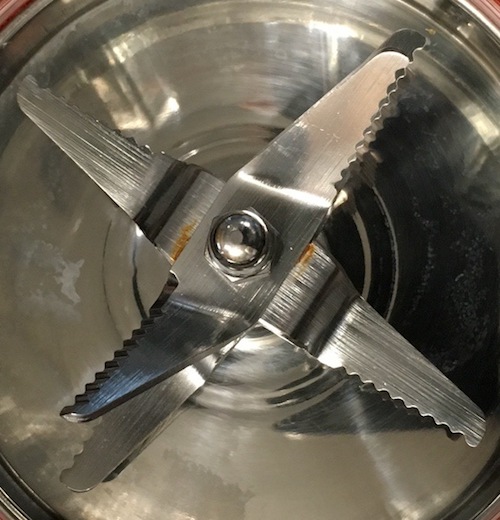
I am hoping that’s not rust. I’ve only used it a few times. Those little nooks and crannies will accumulate moisture and material, and present a real problem for cleaning and potential rusting no matter how well you clean and dry it. The unit ships with a soft brush that’s nice, but I am not sure that it is getting the job done.
What I like
- Heavy, stable unit that won’t bounce around
- Nice safety features
- Well-build components
- Strong blending capabilities
What needs to be improved
- Awful documentation and instructions
- Confusing user interface requires a steep learning curve
- Hard to clean due to electronic components in the pitcher
- Blade assembly will accumulate material, and might be susceptible to rust
Final thoughts
At a retail price of $80-$90, the Juschef Professional Blender seems to be a good value for the money. It’s a stable, powerful unit that will handle most kitchen needs. The heating feature may be useful to some as well. Usability is not good, however, so expect some trial and error to use anything beyond the basic features. Cleaning and maintenance is also a potential trouble spot. I think you’d do well to check out some competitors in this category before buying this item.
Price: Between $80 and $90 depending on availability.
Where to buy: Buy it on Amazon.
Source: The sample of this product was provided by Juschef.
Filed in categories: Reviews
Tagged: Appliance, Cooking, Home and Kitchen
Juschef Professional Blender review originally appeared on The Gadgeteer on September 3, 2018 at 9:00 am.
Note: If you are subscribed to this feed through FeedBurner, please switch to our native feed URL http://the-gadgeteer.com/feed/ in order to ensure continuous delivery.

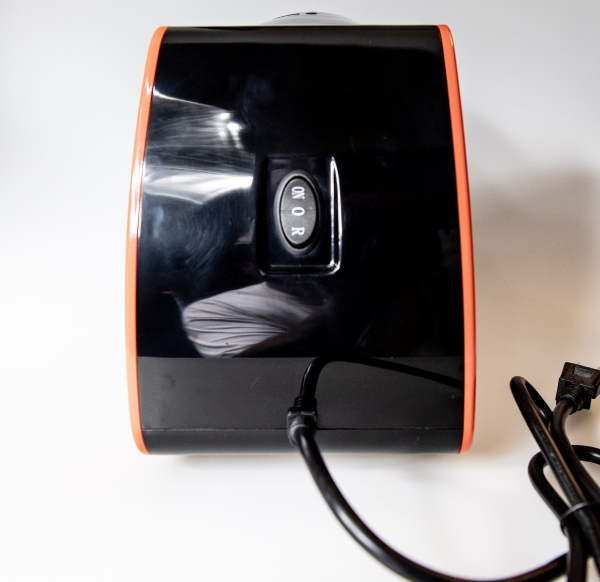
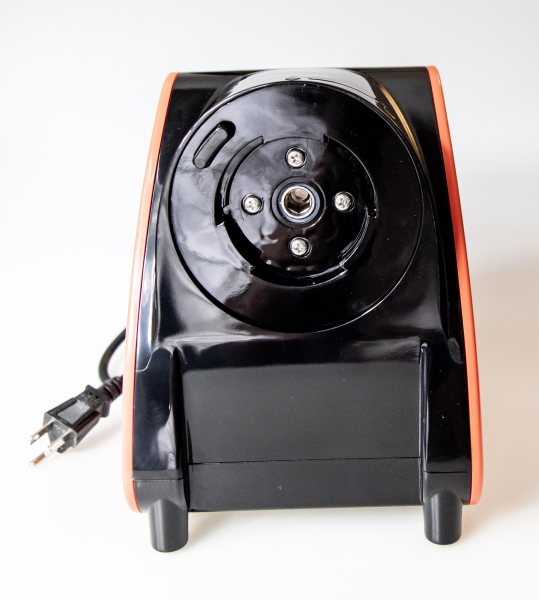 On the opposite side of the base is the power switch. It includes the on, off and the reverse functions. Below the power switch at the bottom is the built-in power cord.