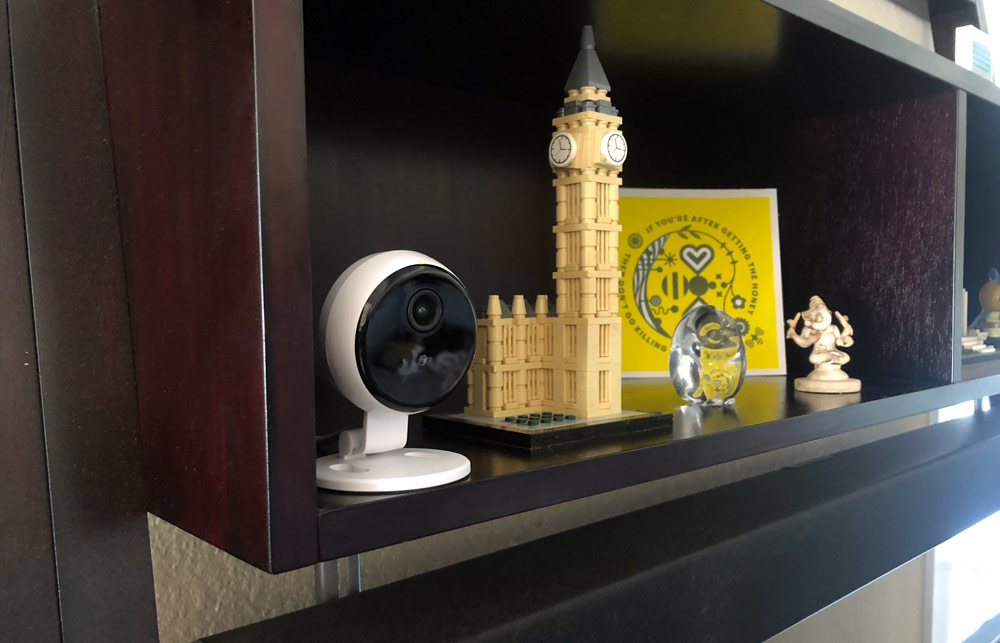
Scout Indoor Camera review

REVIEW – Scout has a new Indoor Camera. Why should this interest you? Scout is a DIY alarm system and service that installs in as little as a few minutes. There are no screws and monitoring can be turned off and on as you need it. It’s great for anyone that wants to slowly build their home security system and possibly the perfect solution for renters that aren’t allowed to make changes to their apartments.

What is it?

The Scout Indoor Camera is an IOT USB powered camera that you can use standalone with the Scout Hub or as part of their larger security system.

What’s in the boxes?
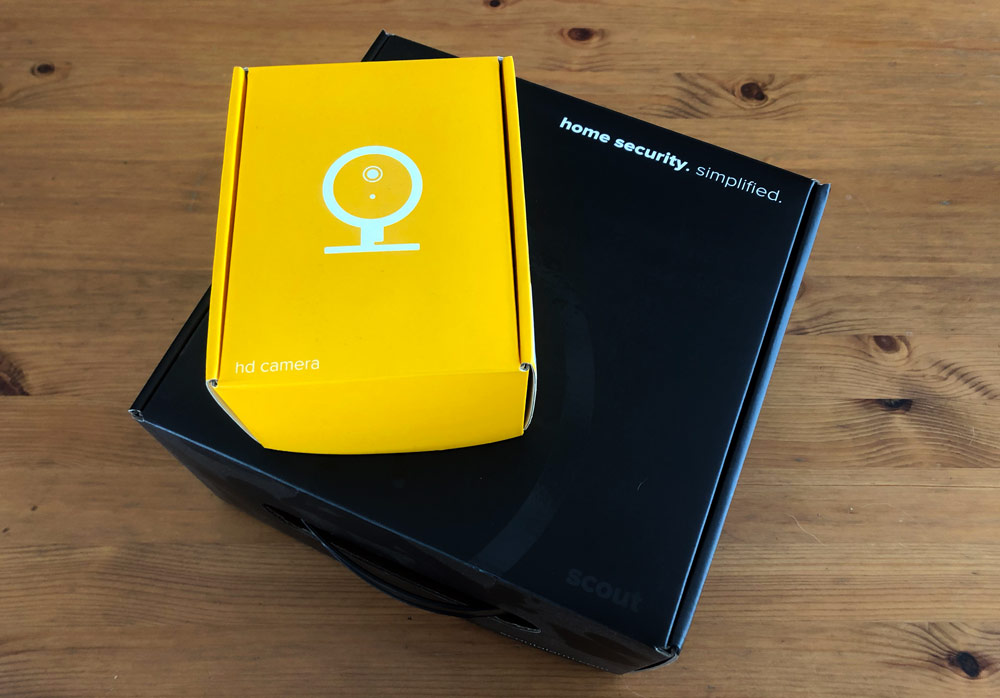
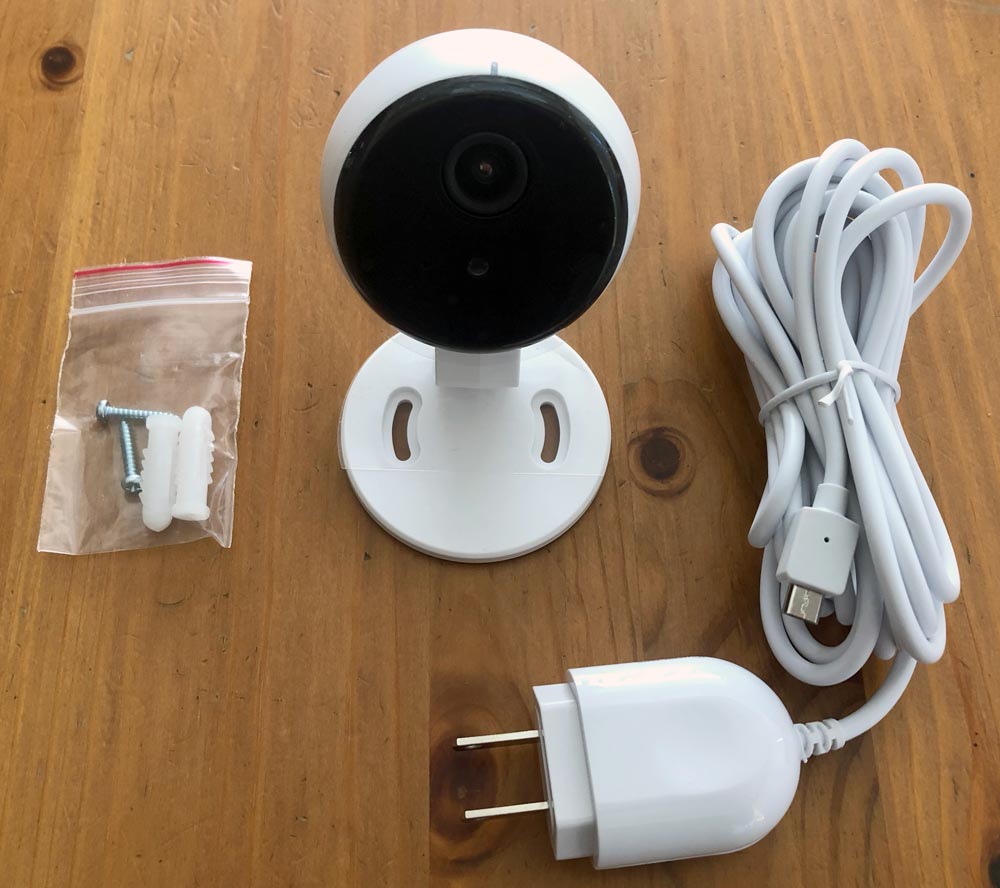
Scout Indoor Camera
(1) Camera, (1) USB-Micro B wall adapter w/ 10′ cord, (1) Mounting screw package with drywall anchors
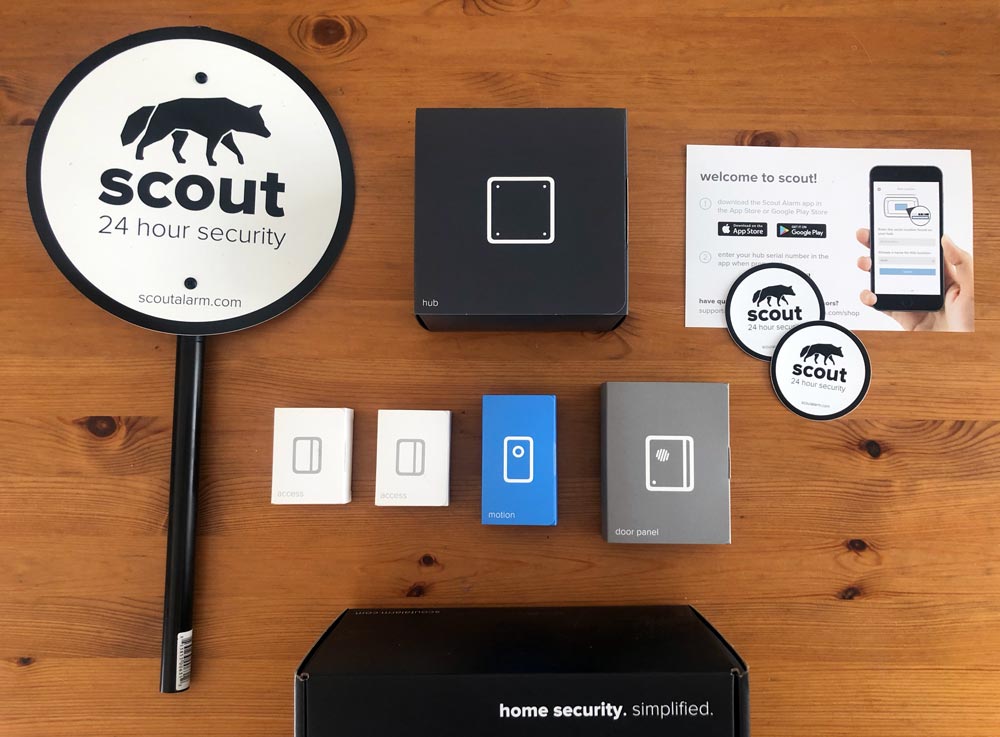
Scout Small Pack
Hub, Door Panel, Motion Sensor, Access Sensors (2), Key Fobs (2), Yard Sign, Info card
Hardware specs

  • 1080p HD video
  • 115º field of view
  • Infrared for night vision
  • 84 x 60 x 60mm
  • Wall adapter with micro-USB cord

Design and features

The system is modular and designed to be easy to install and use. In fact the App is the installation manual and deals with the process quite well. All of the components are available in Arctic (light theme) or Midnight (dark theme) to help them blend in with your home. Out of the parts of the Scout Small Pack, only the Scout hub is hardwired. All of the remaining components are battery powered with CR12 or CR123 batteries. The App is also clean and easy to navigate.

The Indoor Camera is small and inconspicuous.
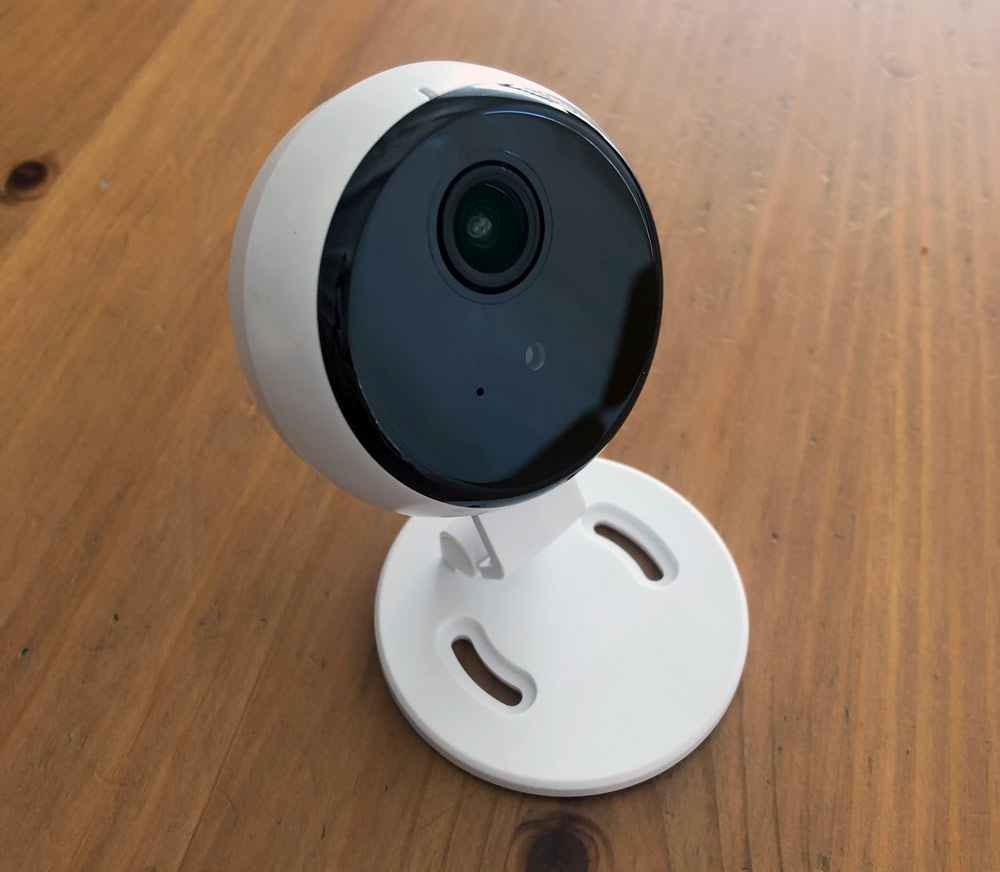
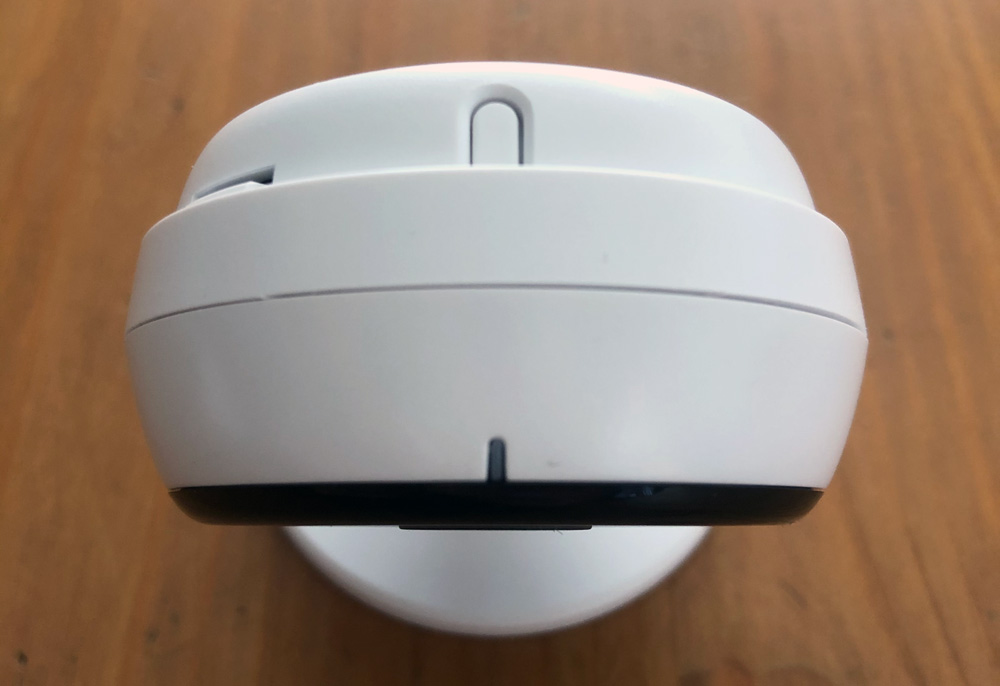
On the top front there’s an LED and behind it a reset button should you need to use it.
System Setup

Here’s a quick primer on setting up the main security system as it’s really the camera we’re reviewing here. As mentioned, all the installation instructions are in the App which will walk you through setup step by step, so make sure you download that first.

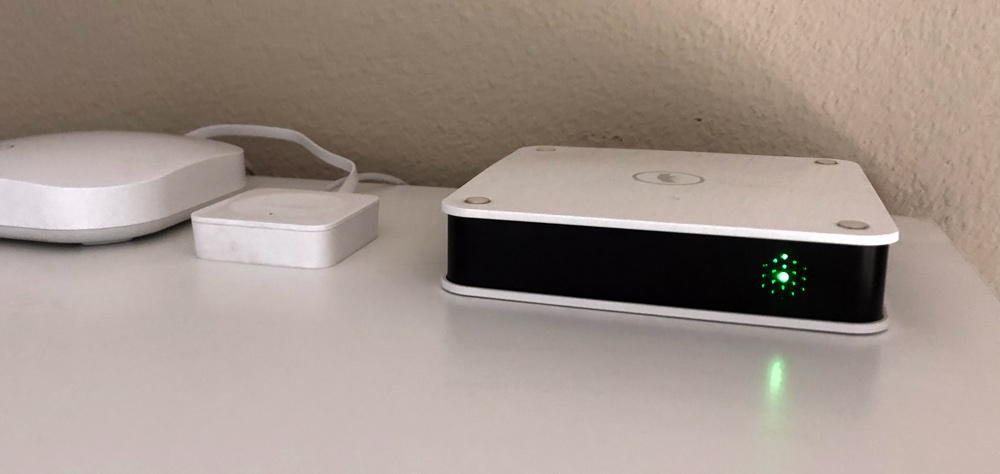
To get started, plug in the Scout Hub’s power cord and connect it to the wall. You’ll also need to connect it to your router with ethernet and then set it up in the App. Mine sits next to our Wemo Bridge and is connected to our eero router. Follow the App instructions to get it set up and it will glow green when all is good.
Now you’ll want t0 install and add your additional sensors. In the App, go to the 3rd tab (with the asterisk type logo shown in the left image below) and click (+) Add Device at the top. Choose the appropriate sensor type (screenshot on the right is after choosing Indoor Camera). I’m on the iOS 13 beta, which I think is causing the font/logo overwriting issue on the middle image.
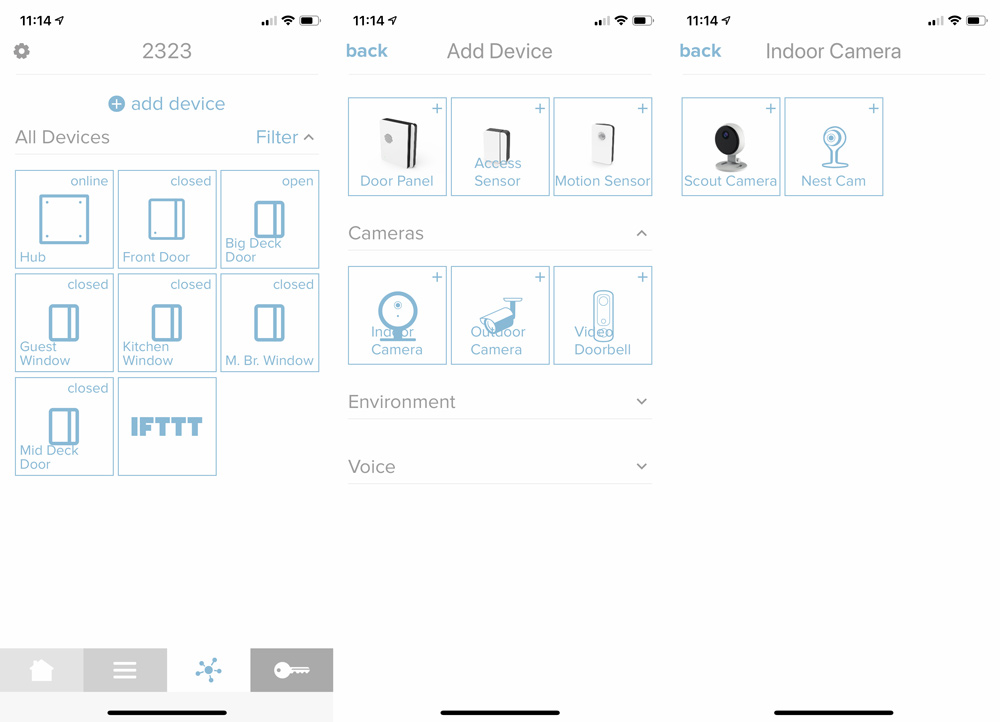
Both the door panel and access sensor have a similar install process. Determine a location where you have room for the panel and the magnet side. Peel the backing off the adhesive to attach the larger side to the door (or moving side of a window) and then pull the label hanging out to engage the battery. The App will find the device and then ask you to temporarily place the magnet side and confirm open/close status before adhering in place. Repeat the install process for any additional sensors and then you can jump into individual settings.

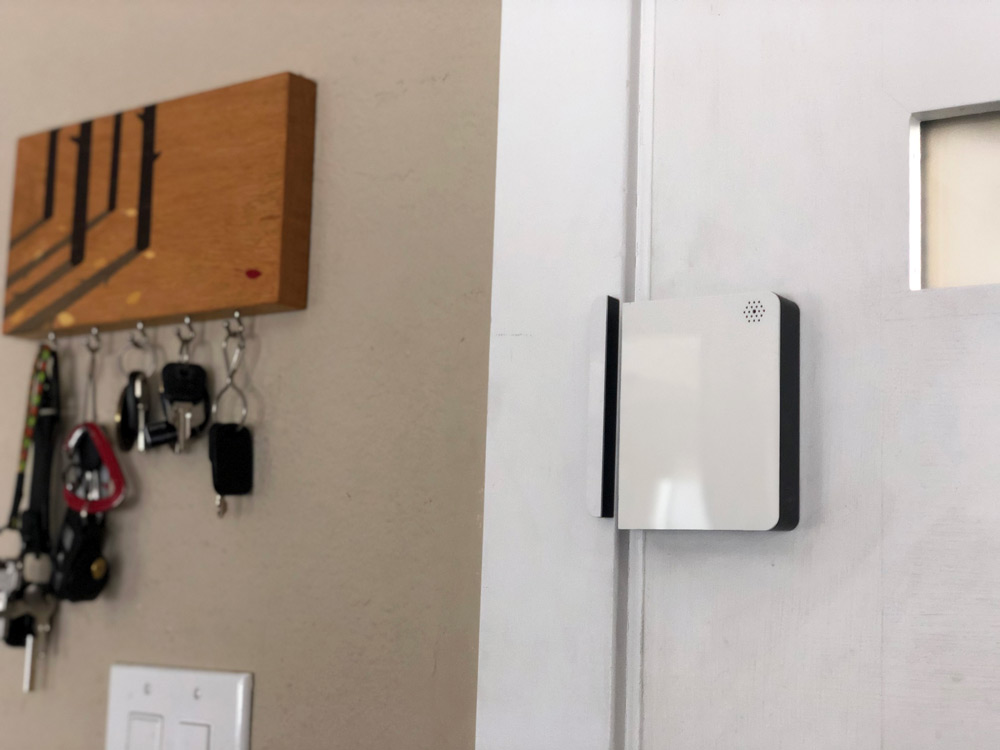
Here’s what each of the modules look like before and after install.
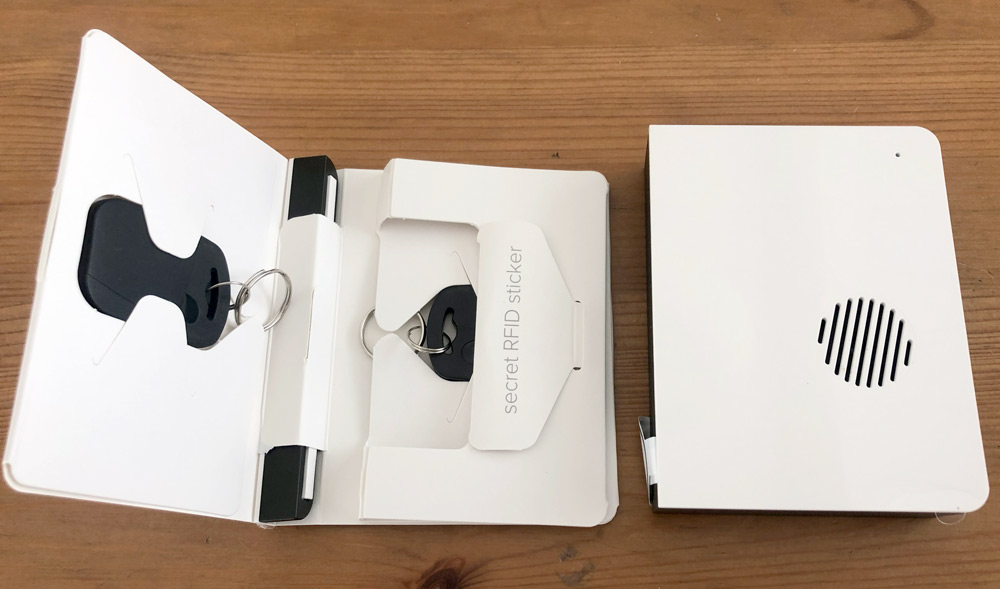
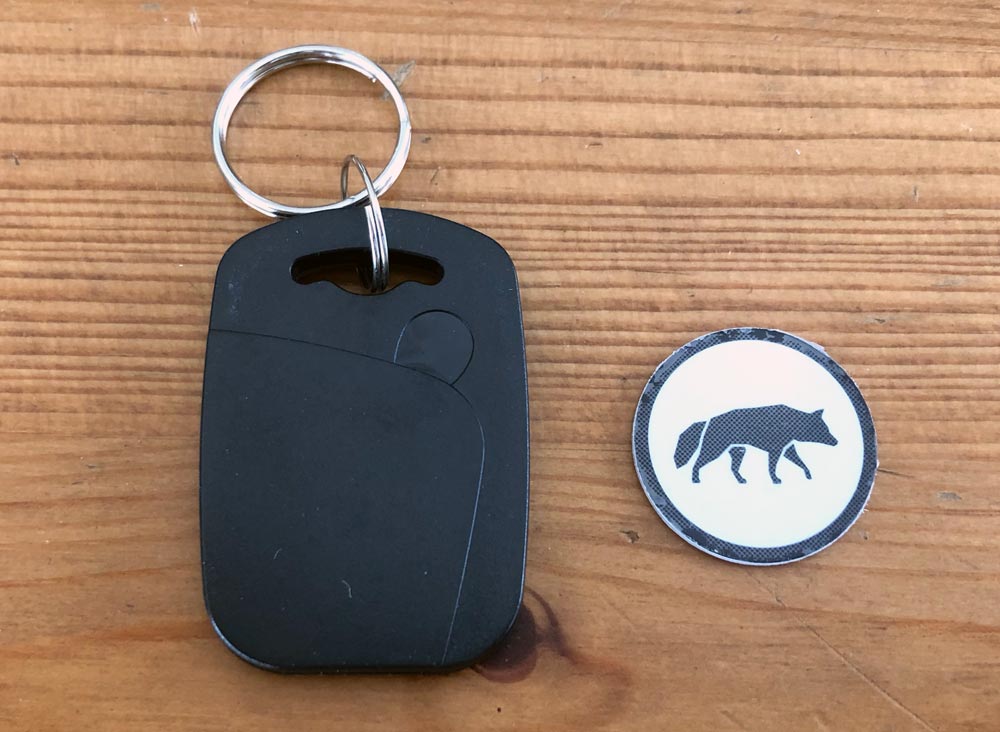
This is the Door Panel on the right. In the envelope is a key fob, the Door Panel magnet, another key fob and an RFID sticker. Here’s a closer look at the fob and sticker.
We mounted the Door Panel on the door at roughly chest height and the receiver on the molding of the door jamb. We didn’t have enough room to mount the magnet piece inside the molding edge, but it is shallower and sits pretty flush with the front of the Door Panel even though it’s sitting on higher molding. My Scout door panel is an older unit without the speaker grill passthrough of the newer model.
To arm or disarm the system, you just hold a fob or RFID sticker to the lower right corner of the door panel.
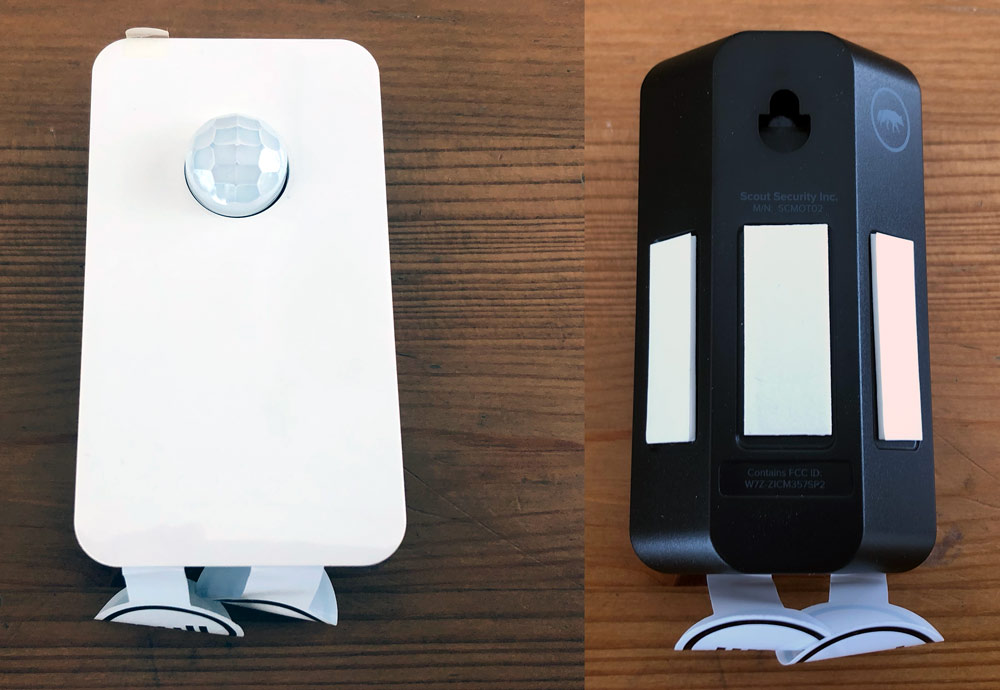
The Motion Sensor is very unobtrusive and has a 90º shape with a flat back so it can be mounted in a corner for a better room view or flat on the wall if necessary.
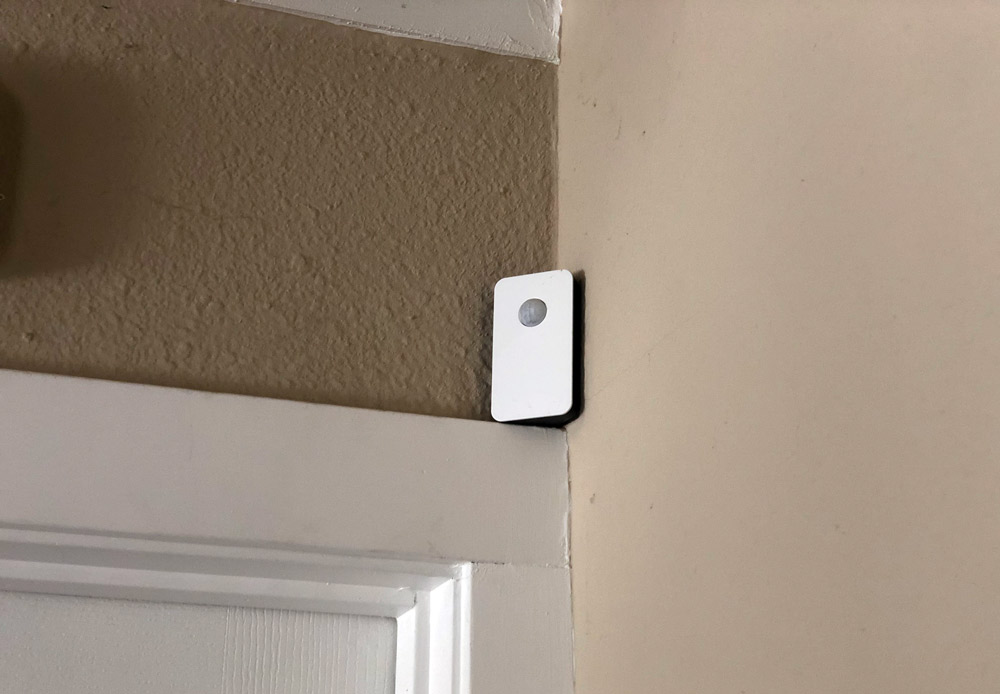
We’ve got ours tucked into a corner resting on a door molding.
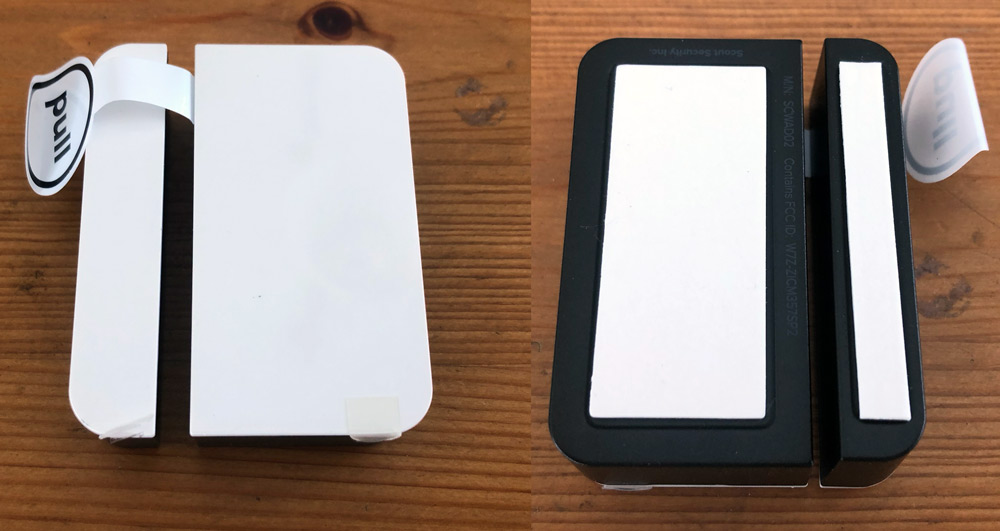
This is an access panel. It can be used on doors or windows, but ones that you aren’t using to arm and disarm the system.
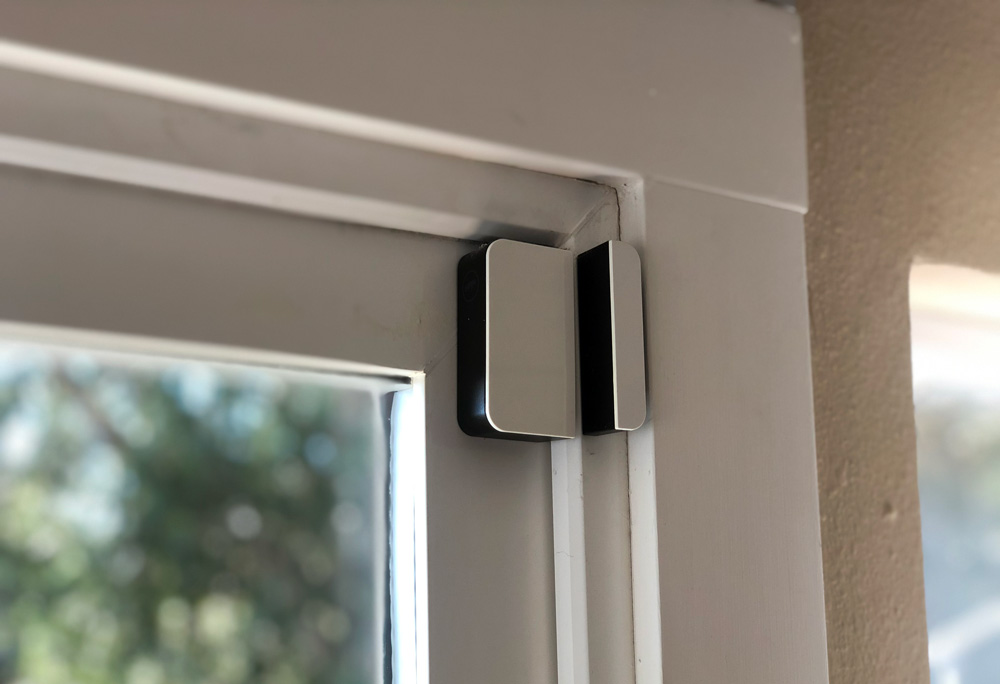
Here’s one installed on the sliding door to our deck.

You can order and install as many as you need, or start with the critical elements and build as you go.

Camera Setup

Having setup other sensors, the camera isn’t too different although there are few more steps.

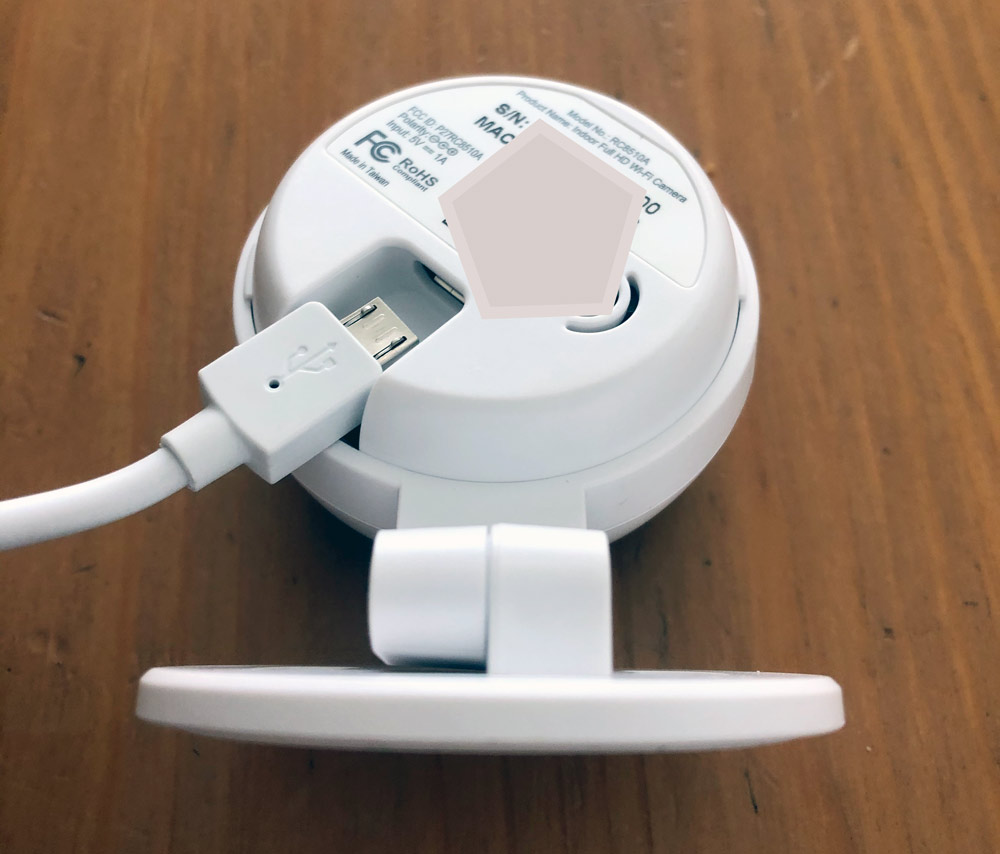
Connect the included cable to the wall adapter and a wall outlet near your install location. On the back of the camera, the USB-Micro port feels very cramped and the foot doesn’t completely bend out of the way.
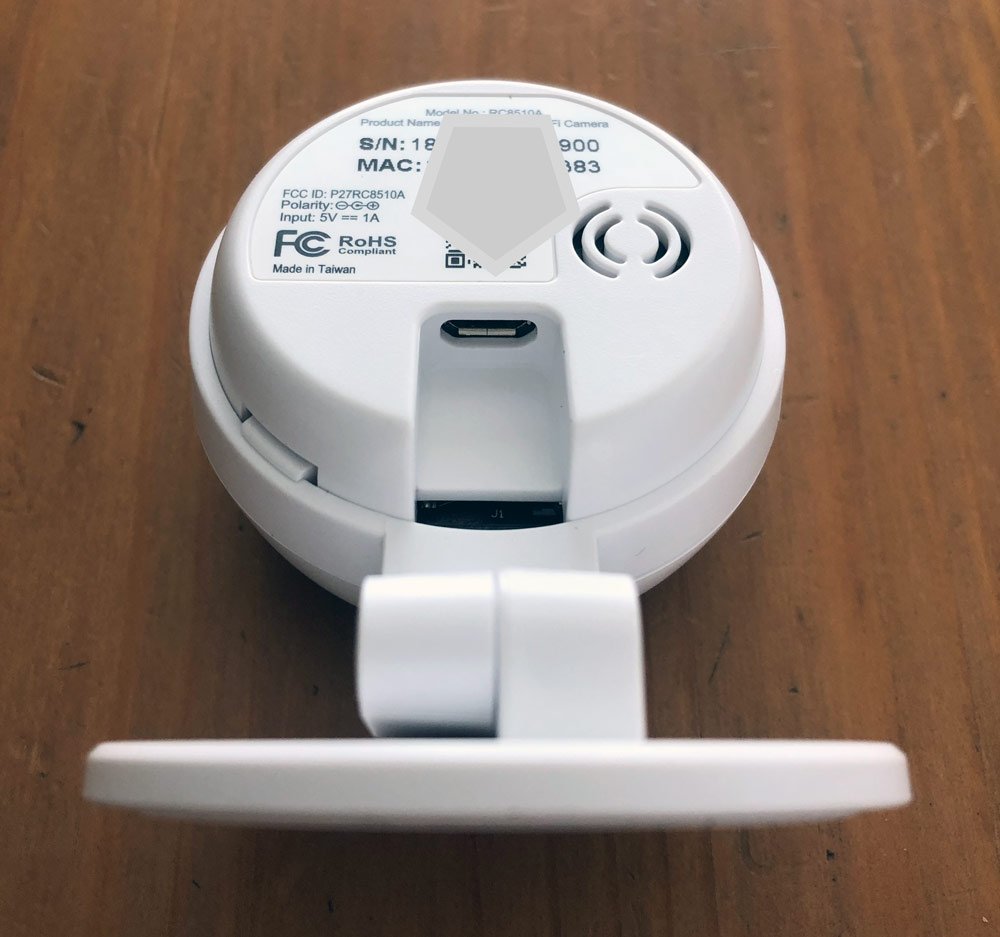
Fear not though, the camera rotates in the holder so you can spin it to get a better angle. Very helpful for installation and even more so for opening up additional mounting opportunities like mounting upside down if necessary.
Now you’ll want to open the App and go through all the steps. I’d recommend doing this near the area where you’ll mount the camera, but don’t worry about installation yet as you’ll want to see what the camera sees and may choose to change location based on that. Follow those previous steps to select the Indoor Camera for setup.
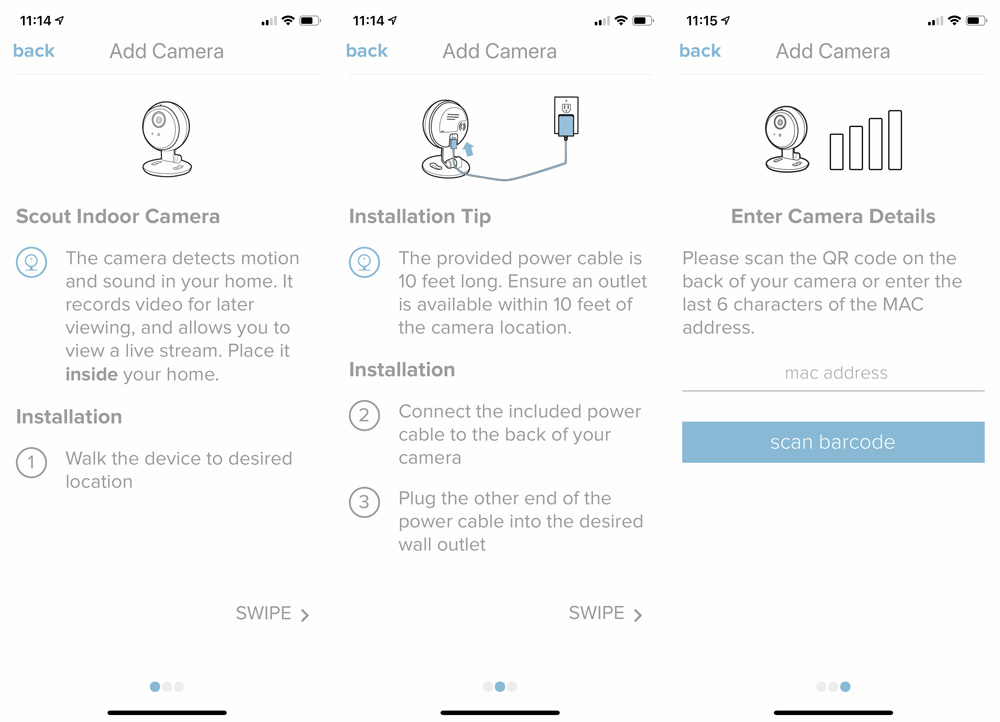
You can scan the QR code or manually enter the last 6 characters of the MAC address. Scanning worked just fine for me.
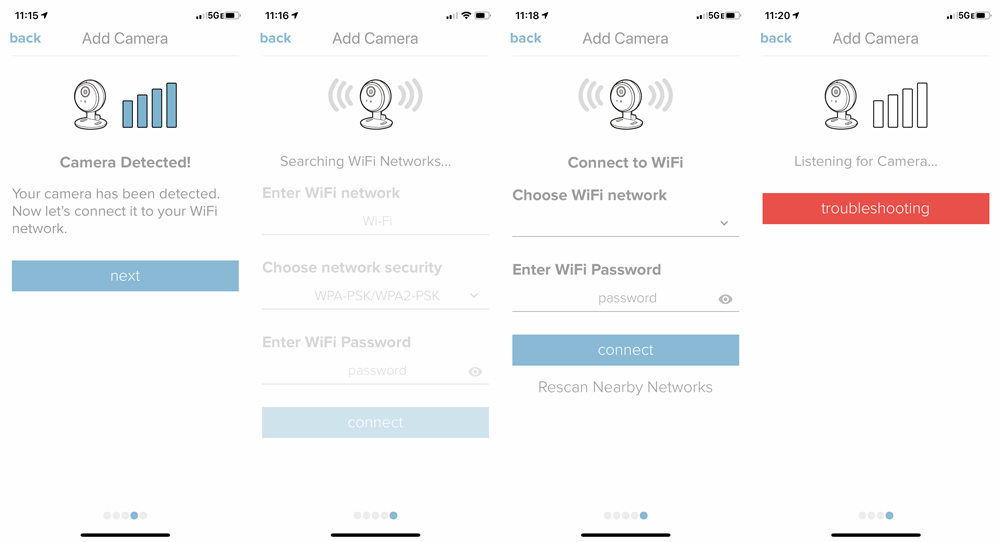
It should find your camera and move you along to choosing your wifi and entering your password. I did have an issue where the app kept failing to connect my camera to my network. I’m not sure, but I believe that my phone was disconnecting from the camera’s wifi too early and returning to my home network automatically. I told my phone to forget my home network, and then tried again and it worked right away. I was then able to re-join my home network with my phone with the password and all was right with the world again. Again this could be my beta iOS acting up.
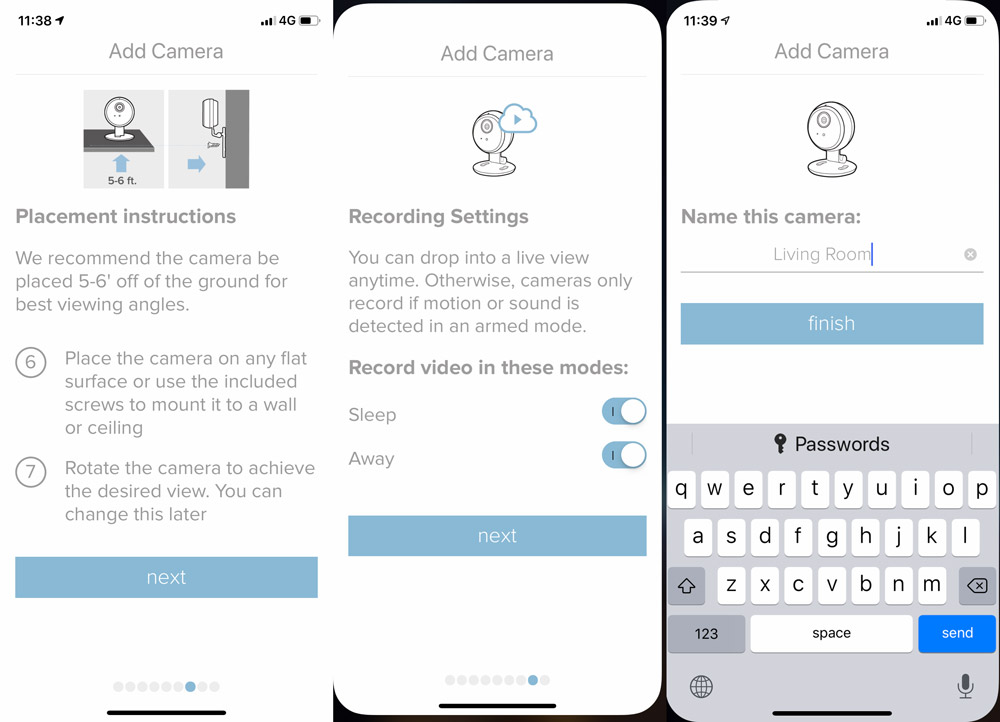
Now you’ll want to place the camera, select recording settings and name your camera.

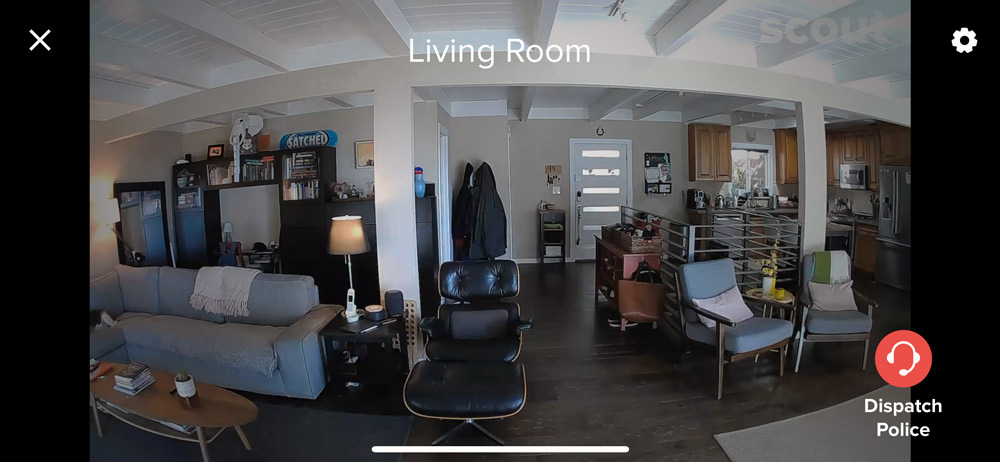
We’ve got an open floor plan in our house and some of the typical mounting areas (high corners) result in sections of the room that feel too far away. I found it helpful to take a picture with my phone from each location to rule out some options before even getting to the camera. In the end we found a good spot in the furniture above the TV. There’s enough knick knacks that it doesn’t scream camera.

This location provides a majority view of the room as well as a clear shot of the front door which is likely to be the point of any unauthorized entry. Here’s a live screen capture from the App.
Performance

Let me start with this. I purchased Scout’s security system over three years ago shortly after we purchased our home. We wanted an easy to use system that didn’t require paying for installation or require a monthly monitoring plan. At the time there were only a couple of options and it was actually the promise of Scout’s camera at that time that sold me on the system. I went ahead and sprang for it even though that camera didn’t end up materializing until this Indoor Camera was announced this year.

What I want to get to is that the system has been great. It installed easily and outside some early generation battery drain issues (which have been solved), it worked exactly the way we hoped it would. The motion sensors didn’t trip with our small dog, although we deactivated those after getting two much larger puppies (45 and 70lbs). The Access sensors reliably detect if windows or sliding doors are open or closed, and the front entry panel worked really well when we all carried keys.

As we upgraded to a smart door lock, and keyless lives in general, we moved from key fobs to one of the RFID stickers that we have on a unique item in the entry area for us to use. Just unlock, enter, grab that item and swipe on the door panel to disarm. Simple. Repeat in reverse to arm the system.

On to the camera. The first thing I did once set up was use it to troubleshoot my DirecTV dish placement. We just had the aging roof replaced and the dish had not been reinstalled. I set the camera up on a stool pointed at the TV, zoomed in much further than this shot below and then got up on my flat roof.
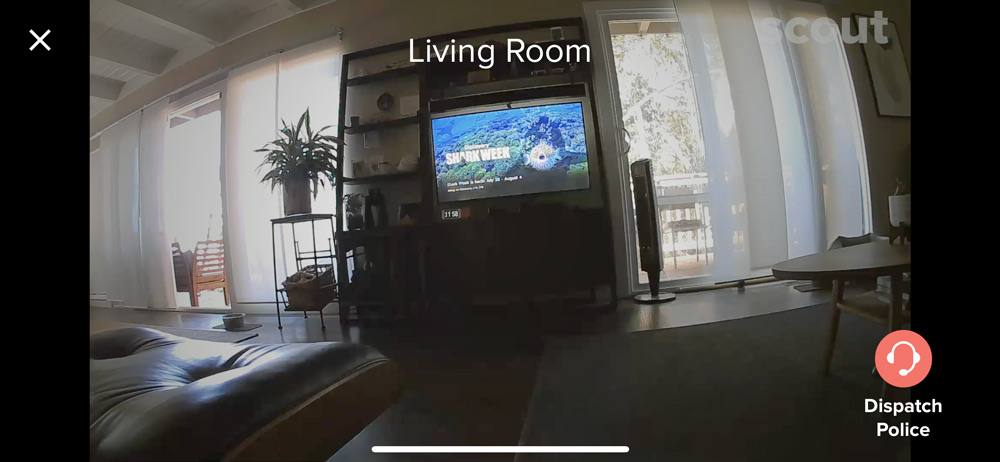
Using my iPad Pro and the Scout App with the volume turned up I watched and listened for the TV to start getting reception as I maneuvered the dish into a good position. It actually worked pretty well once I got the elevation and azimuth for my zip code. Yay!

As for camera performance, it always a bit tricky to review products that are there for ‘in-case-of’ reasons. Security systems can be that way if you don’t use them daily. Right now it’s the middle of summer and my kids are usually home so the system doesn’t get activated. Over the last week however they’ve been out of state, visiting grandmothers.

I’ve been able to open the App during the day to check on the dogs. A quick click on the thumbnail I can look and see that yep, there they are on the sofa where they like to spend their days.
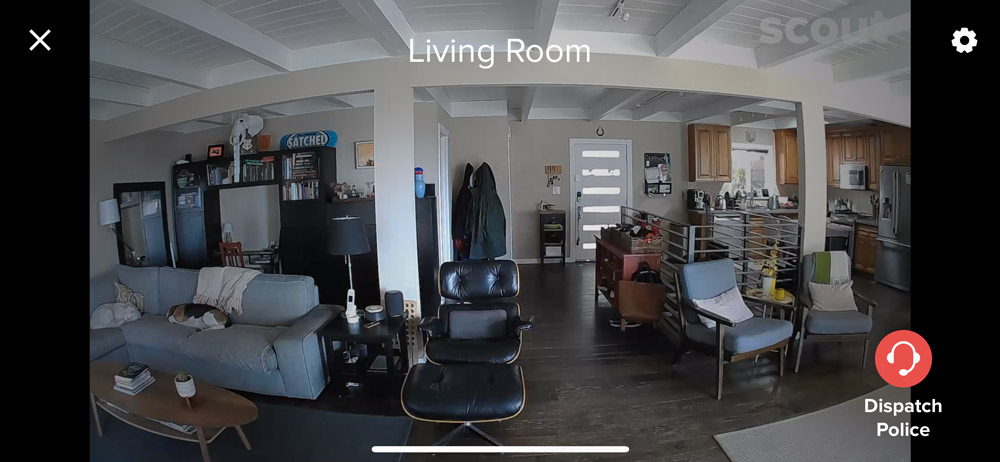
From the main screen in the App, the Home tab shows you the active camera(s) and lets you change the alarm mode. The 2nd tab shows recent activity which details out doors and windows opening/closing as well as new device installations.
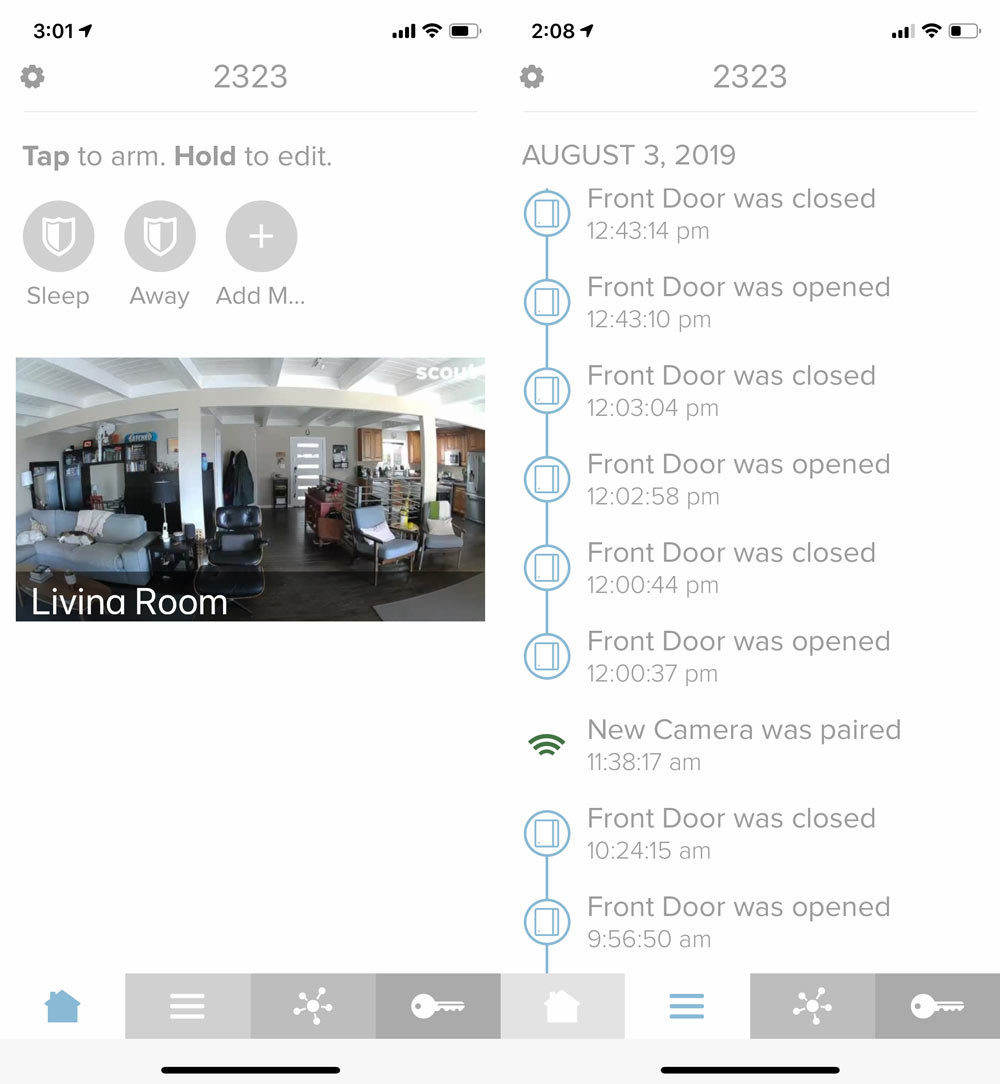
I didn’t get a chance to actually test the alarm getting tripped and recording video. A little cautious when it comes to inadvertently dispatching police and having to deal with any false alarms.

So it’s not all rosy. I did find that the thumbnail above doesn’t auto-update until you click into it, so it’s not always a ‘live’ view there. Good thing to keep in mind.

If you log into the website, the Indoor Camera does not show as being part of the system. Not sure what’s going on there, but my guess would be the majority of users live in the iPhone App.

I also found that the night time view is overstated. Here’s a shot of the room at 10pm with the lights out.
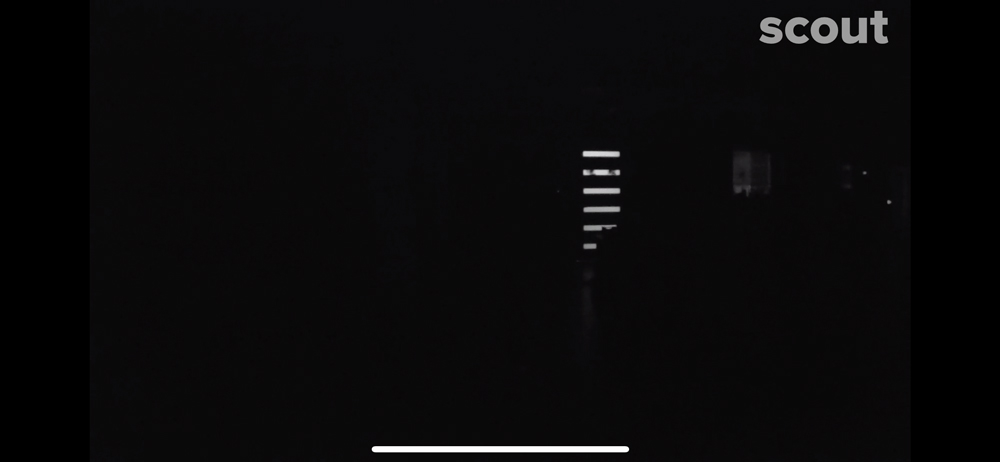
Tried lightening it up in Photoshop, but to no avail. This is the one area where Scout’s Indoor Camera seems to falls short. Google’s Nest Cameras have a much better implementation of this. Funnily enough, you may have caught that Nest Cam was listed as compatible in devices you can add. As you may be aware, ‘Works with Nest’ is undergoing some changes, and the Scout App would not let me connect. Hopefully this is something they’ll sort out soon.

Let’s conclude.

What I like

  • Small size with multiple mounting positions and a long cord
  • Clear video with a good wide view during the day
  • Good live view with the ability to pan and zoom within the field of view

What I’d change

  • Night time visibility needs work. Couldn’t see much at all.
  • Would like to see a “Midnight” or dark color option as well
  • Camera doesn’t seem to be supported by their website log in, only their app

Final thoughts

I’ve been happy with the setup and performance of the Scout Alarm System for the 3 years we’ve been using it. The camera is a great addition and adds a much needed component they were missing. Unfortunately, the performance of the night vision isn’t good enough to recommend the camera as the right solution. Hopefully, this is something they can address with a firmware update as everything else is pretty thought through.

Price: $99
Where to buy: Scout Alarm and Amazon
Source: The sample of this product was provided by Scout Alarm.

Filed in categories: Reviews

Tagged:

Scout Indoor Camera review originally appeared on The Gadgeteer on August 15, 2019 at 9:00 am.

Note: If you are subscribed to this feed through FeedBurner, please switch to our native feed URL http://the-gadgeteer.com/feed/ in order to ensure continuous delivery.

Swann Floodlight Security Camera review

REVIEW – Not all that long ago we had an event where someone let themselves into our unlocked car (my bad), and root through our glovebox. Not unexpected as we live in an area where cars are broken into frequently and packages are stolen all the time. What was infuriating is that I had/have a nest cam clearly visible on the garage and this person sat in the car with the door open for 15 minutes and casually looked through all the papers in our car. Time to up the game. Swann has a new Floodlight Security Camera with motion detection, siren and two-way audio. Review time! To the keyboard.

What is it?

What do you call a floodlight that also has a security camera? It should have a name that aptly describes what it is without further definition… Hmm. How about a Floodlight Security Camera? All kidding aside, Swann has given it a name that ensures it will show up in search results which is likely more than half the battle in getting eyes on your product. As you would expect, this is an all-in-one unit that could result in you having fewer things hanging off the side of your house or garage.

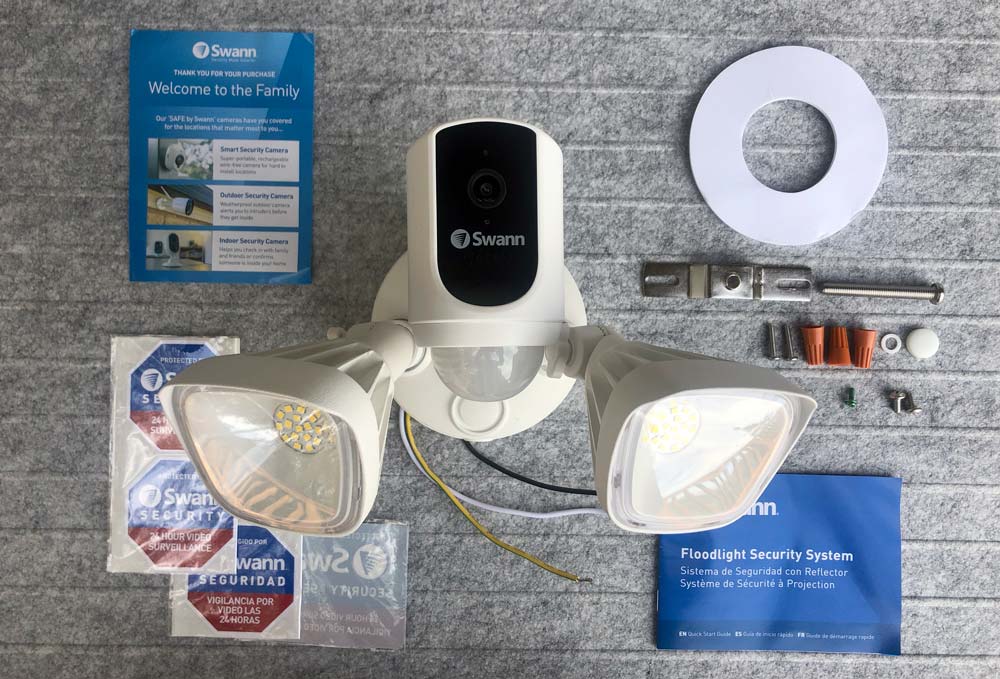
What’s in the box?

  • Security Floodlight Camera
  • Double-sided foam mounting ring
  • Mounting hardware and wire nuts
  • Manual and welcome card
  • Security stickers and window badge

Hardware specs

Video: 1080p (1920 x 1080 px) resolution, Wide 125º viewing angle, True Detect™ PIR thermal/motion sensor (≤ 32ft, 270º)
Night vision: Infrared night vision (32ft in B&W), Floodlit night vision (100ft in color)
General: 2500 lumens brightness, 5000K color temperature
Video storage: Internal & Secure Cloud
Audio: 2-Way Audio (microphone & speaker), Siren (≤ 75dB)
Operating temperature: -4ºF to 140ºF / -20ºC to 60ºC
Dimensions and weight: 9.5″ x 9.5″ x 6.7″, 2.44lbs
Weather resistance: Indoor & outdoor ready (weatherproof IP65 rated)
Power Source: Hard Wired. Connects to existing wiring, 100~240V AC 50/60hz, 30W power
Wi-Fi Frequency: 2.4GHz (wireless range up to 65ft/20m*)
App: SAFE by Swann (available on iOS & Android)

Design and features

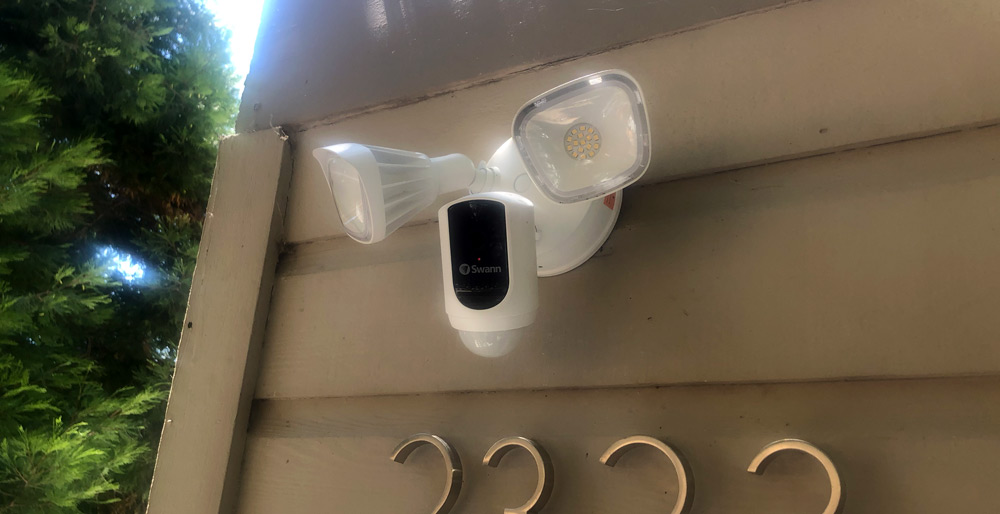
The most relevant design feature is that this looks like a traditional floodlight. It’s not immediately obvious that this product has a camera and that’s to its advantage. Thieves and nefarious types scoping your property may be less concerned with a floodlight than with something that is clearly a standalone camera until that floodlight is more than a floodlight.

It has two-way audio so you that you can use your app to speak directly through the fixture as well as hear what’s going on. A built-in siren can be set to automatically sound on motion detection.

The fact that it’s hardwired is also great as it means you’re not at the whim of battery issues unless of course there’s a black out or your power is cut. You likely have a bigger problem in both of those cases.

Setup

I’ll refer to the Security Floodlight Camera as SFC going forward to keep things easy. You’ll need to be comfortable with some electrical wiring and lightweight home-fix-it skills. For this install, we’ll make the assumption that you are replacing an existing light fixture. Let’s get set up.

Go to your electrical panel and find the breaker switch for the light you’re replacing. Make sure to switch it off and check that power is not present.

1. Remove your current light fixture and mounting bracket (likely a combination of screws and electrical wire-nuts). Take note if this light is connected to a switch. If it is you’ll want to bypass, or tape/mark that switch not to be used as you will not want the SFC accidentally switched off.

2. Install the double-sided mounting tape circle to the back of the SFC.

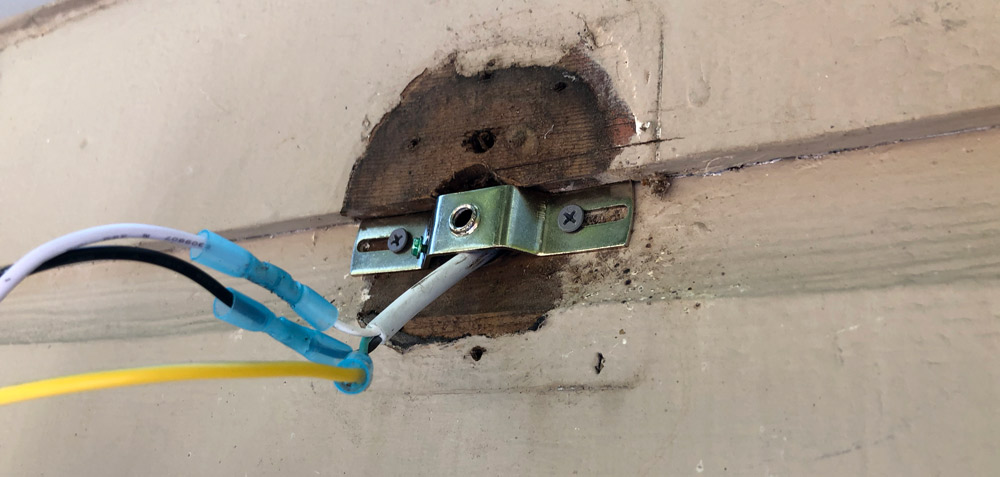
3. Install the mounting bracket for the SFC allowing the home’s electrical wires to extend beside the main arch.

4. Wire the positive, negative and ground wires to your home’s electrical wires using the supplied wire-nuts. (You’re likely to have a more traditional junction box than my above scenario where I used crimp connectors that I had on hand so that I could feed the excess wiring through the hole before mounting.)

5. Turn on your breaker and confirm that you have the SFC correctly connected. The lights should come on initially (but could time out) and the blue LED should start blinking for pairing the wifi. If all is good, turn the power back off and finish the hardware install.

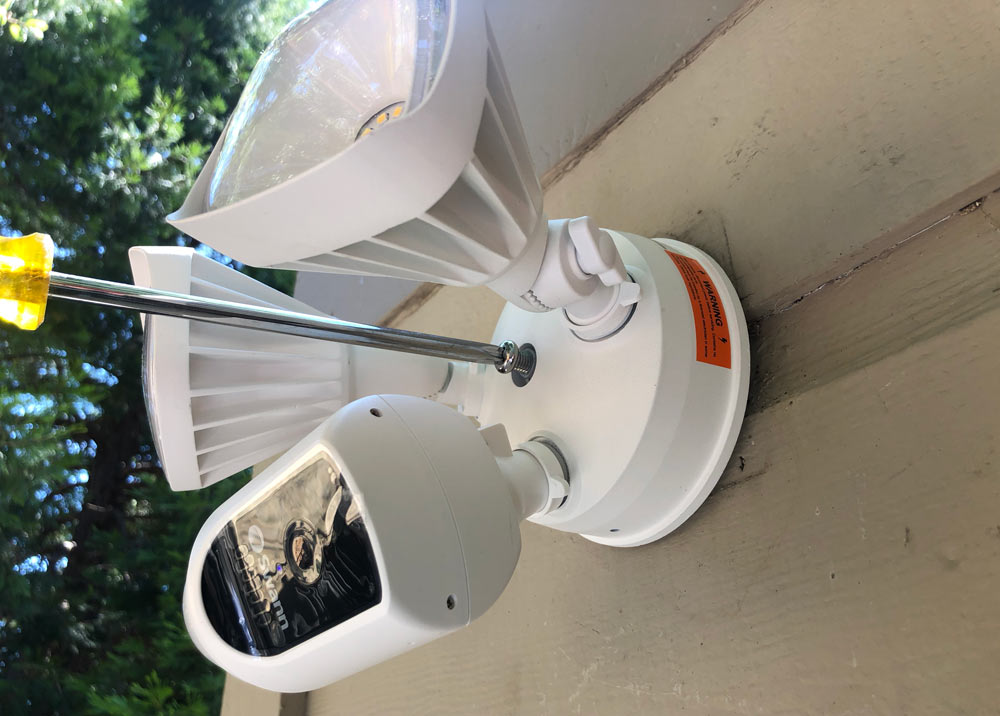
6. Peel the remaining backer off the mounting tape, insert the long mounting bolt through the SFC with the rubber o-ring in place into the mounting bracket and tighten (If you missed the adhesive step earlier, cut the ring in one spot so you don’t have to undo the wiring).

7. Position your lights and camera by using the wingnuts to adjust the toothed pivots. Use the collar to adjust the rotation. Use care to turn any of these in the direction that involves the least rotation to avoid pulling internal wires unnecessarily. Leave them a bit loose as you’ll end up adjusting them to suit your specific situation after the next steps.

Now it’s time to set up the app.

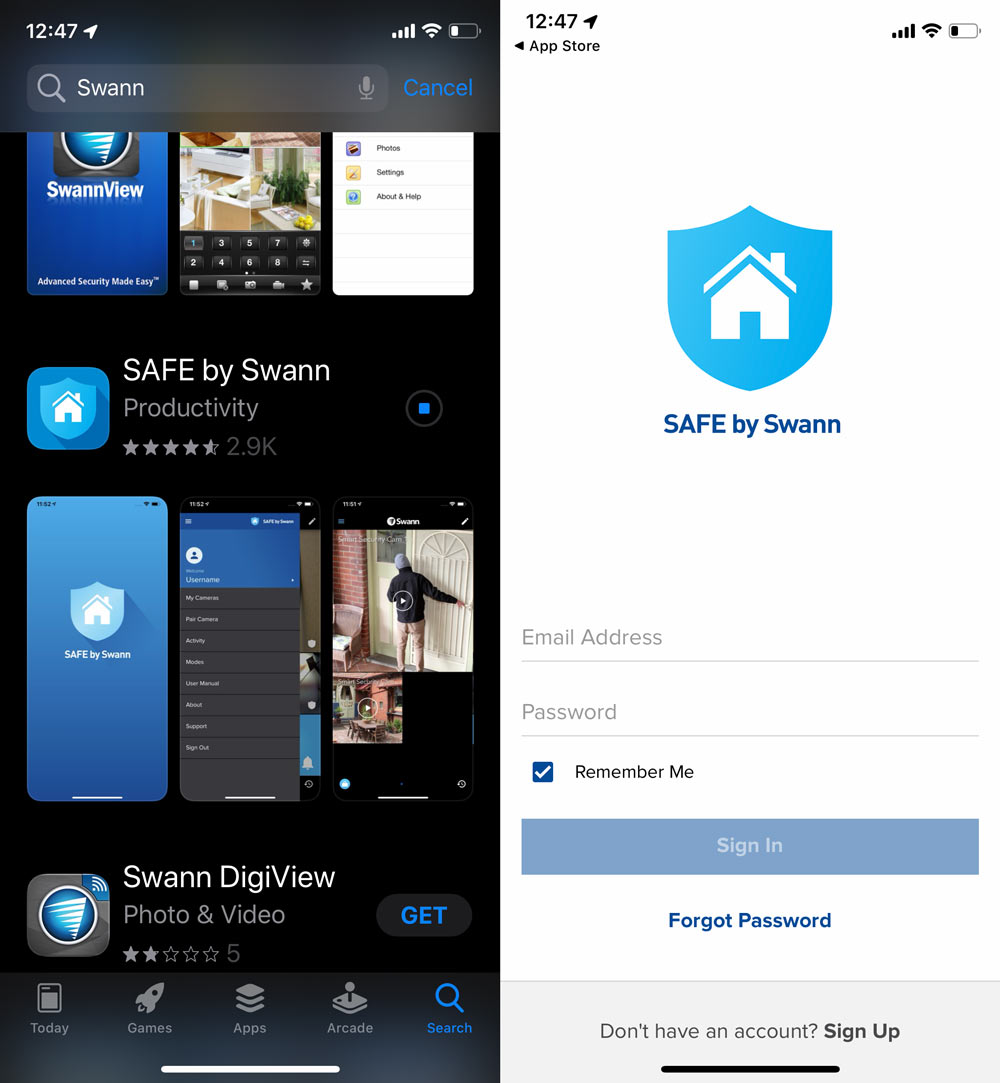
8. Find the app in the appropriate store for your device, download, open and register for an account.


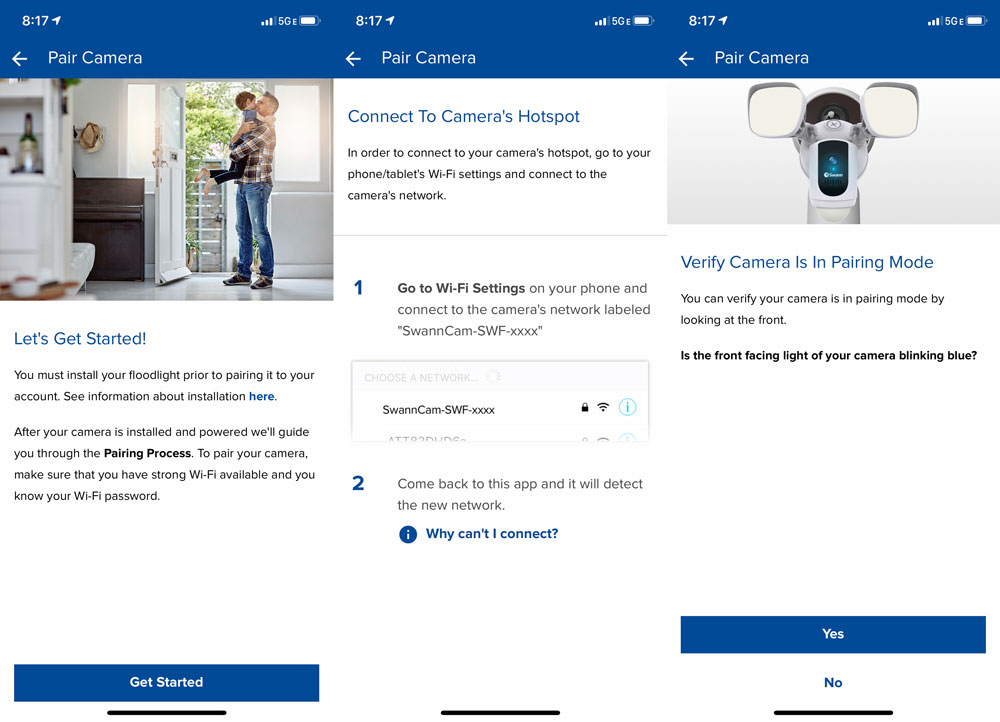
9. Turn on your breaker switch (hopefully for the final time) to power up the SFC and confirm the blue LED is blinking.

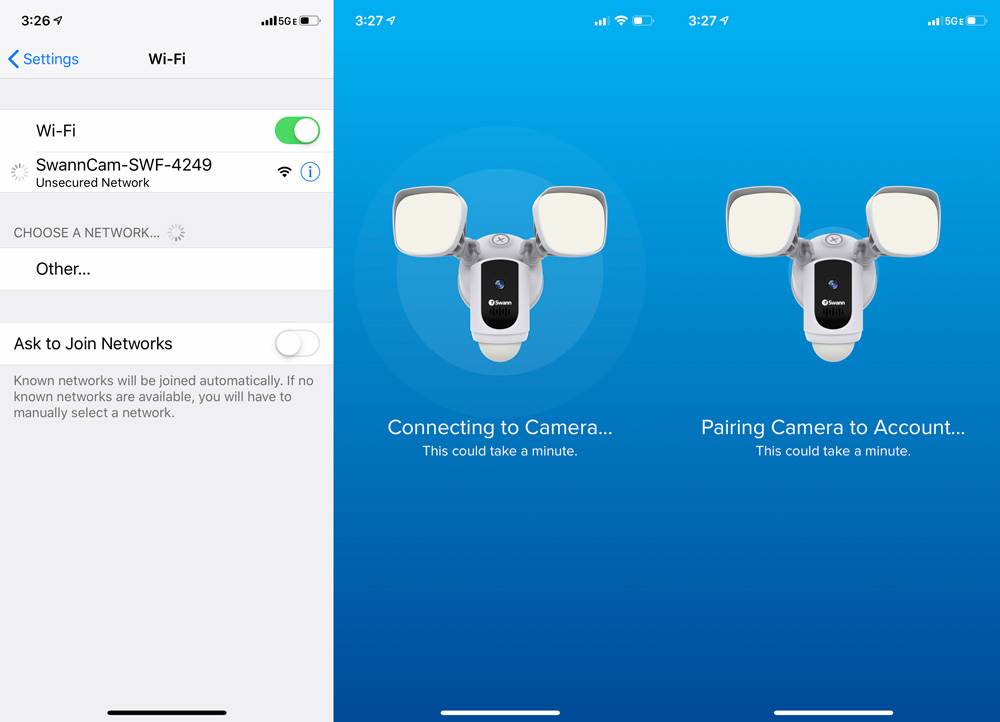
10. Open the app and follow the instructions to pair your new camera. You’ll need to know your wifi network name and password and be prepared to do the app to settings, back to app jump that all the kids are doing these days.

11. If all that finished properly you should be good to go. The remaining set-up is all physical positioning and app preferences which ends up being a bit of back and forth between both of those. Let’s move on to performance and address that in the rest of the review.

Performance

Once everything is up and running, the system works like this…

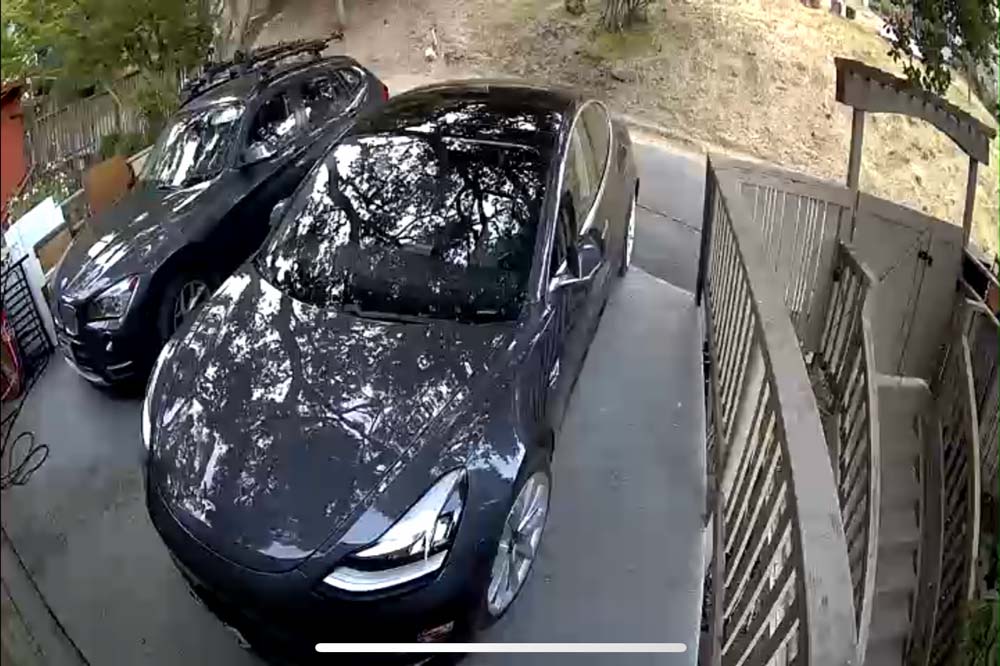
When the Security Floodlight Camera detects motion the light, siren and camera activate based on how you’ve set them up in the app. Simultaneously you will receive a push notification on your device through the app. Click on the message and you’re taken into the app, directly to the Activity page where you will find recorded clips ordered from most recent to oldest. Here’s a screenshot of the video quality which is set to medium quality for this review.

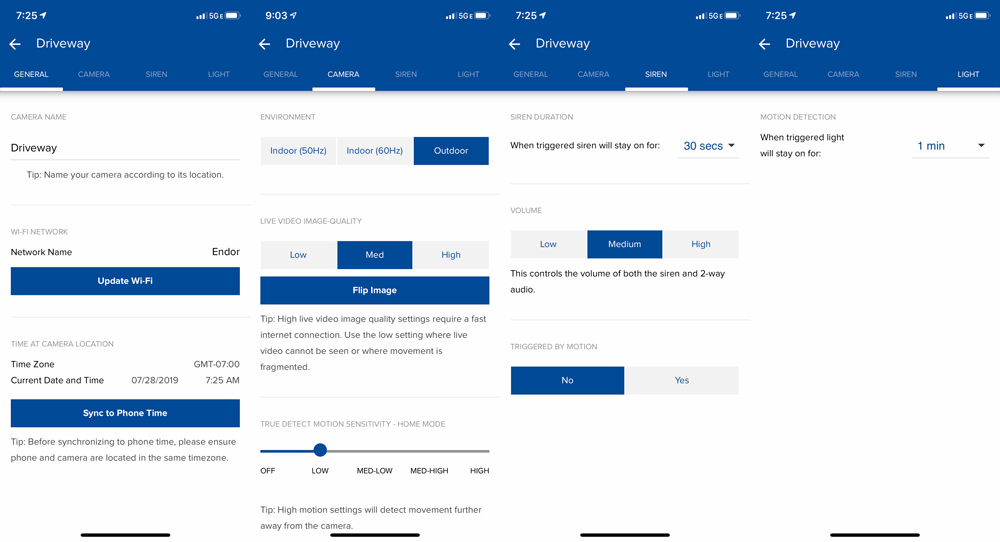
Swann recommends that the fixture is mounted at least 8 ft off the ground. My garage is only 8 feet tall total so using the existing mounting location it sits just under 7′. As you can see my driveway is also pretty short so there are a couple of camera settings I needed to make right away. Here’s what those settings screens look like.

Under the Camera tab, I had to set the motion sensitivity to Low, as anything higher generated an alert for every single car driving by as well as anyone walking their dog. These were also triggering push notifications (as they should) which meant I was getting a couple a minute during the day as we’ve got a lot of construction activity on our street. I went ahead and turned off motion detection until I could fix the settings.

Even at the low sensitivity setting, I was getting too many false motion detects. Each setting is a discrete position on that slider instead of a 0-100% bar where you can just find the real setting you need. To solve that I had to tilt the camera down further to shorten the range. This is a trial and error adjustment as there’s no visual in the app to estimate where the “trigger” line is for motion. My situation may be an edge case so ignore if your setup is more traditional. Now set up, I re-enabled the motion detection.

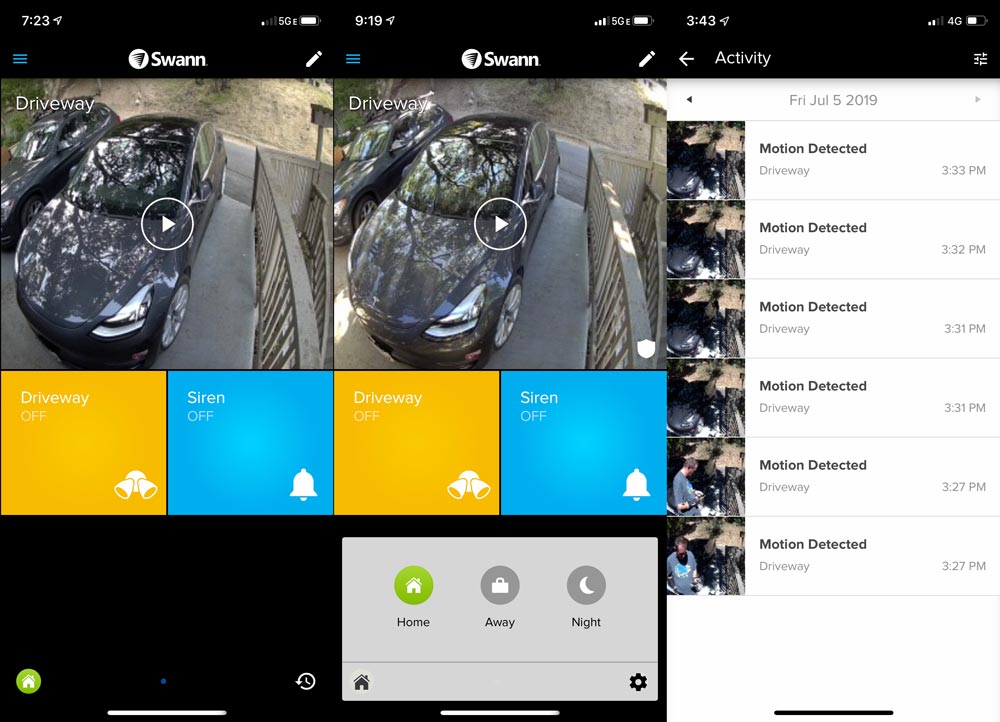
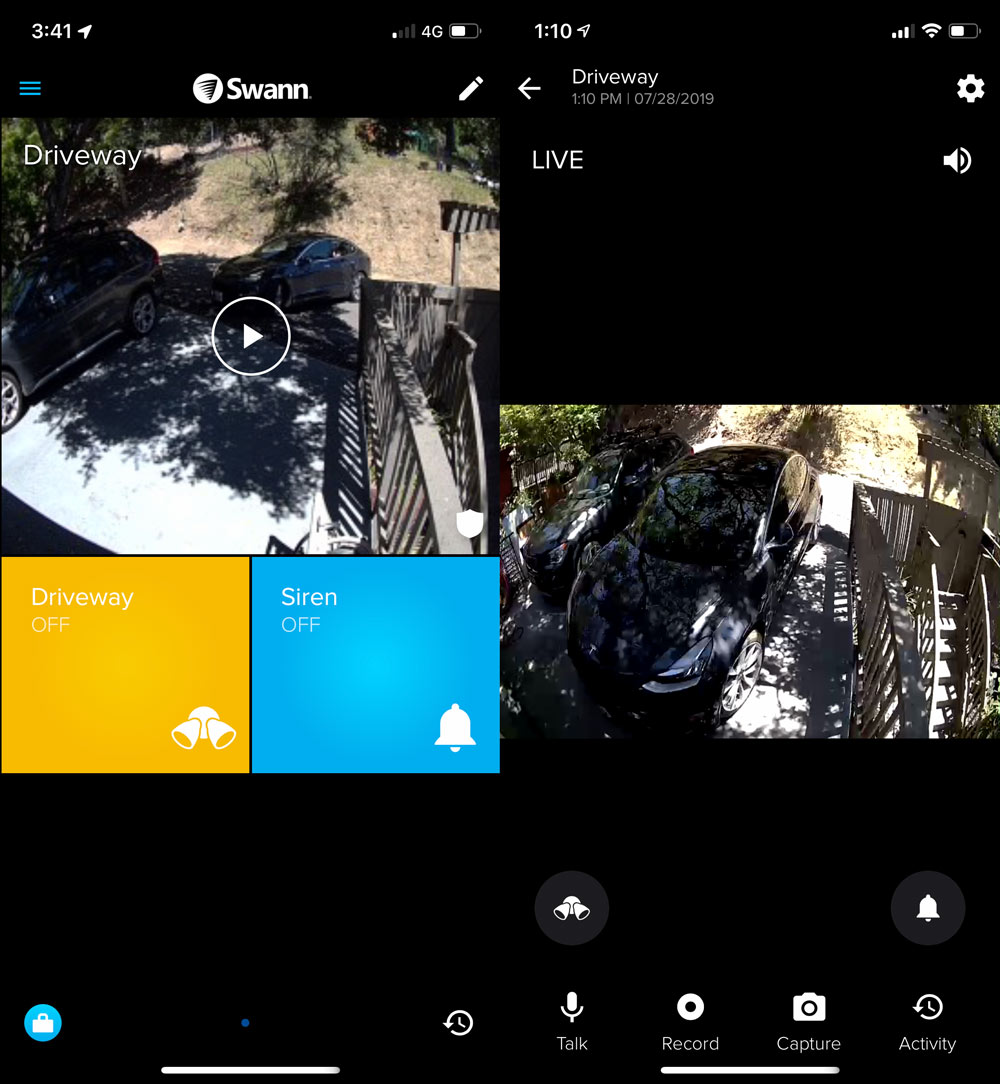
When you hop into the app normally, your landing page gives you access to Lights and Siren toggle buttons as well as a live view you can click into. I named the camera ‘Driveway’ so this will be whatever location name you choose.

The bottom left icon lets you toggle between Home, Away and Night settings and will show whatever icon is currently active. Each of these can be set up with their own settings for camera, siren and lights to match your needs.

The bottom right icon is a quick jump into activity recordings. The built-in memory card stores 8 days on a rolling basis where day 8 overwrites day 1 to start the cycle again. If something isn’t visible on the Activity page, check the backup at the very bottom of the camera settings in the app by pressing ‘View Camera Backup’. You can upload clips to Swann’s Secure Cloud for two days and if you need more storage you can upgrade to a subscription plan that includes 30 days of storage for $4.99/month within the app.

The app takes a little navigating to get used to as almost every screen has additional settings and buttons so allow yourself some time to get comfortable in there. Clicking into the live view (main image) gives you access to lights and siren as well as additional buttons for Talk, Record and Capture.

With talk you can converse with your thief, or tell your kids it’s time to put down the basketball and come in for dinner. Record starts a video recording whereas Capture takes a photo.

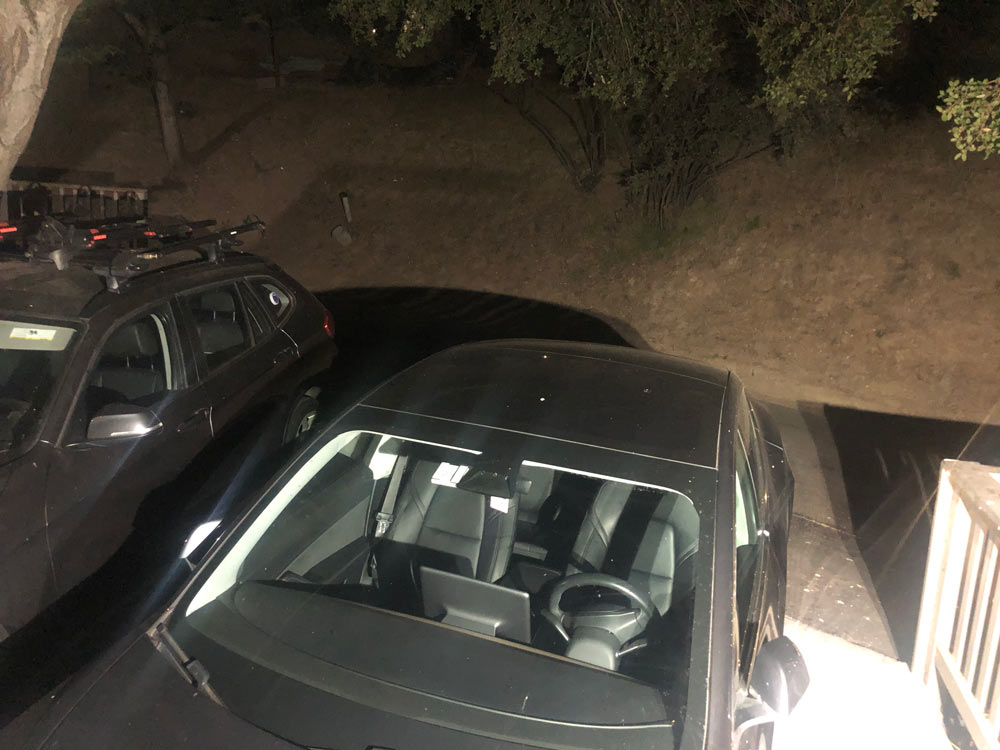
The light settings can be set to stay on for .5, 1, 2, 5, 10 or 15 minutes after motion detection and you can set the brightness level anywhere from 1-100%. You should also know that the lights will not activate in sunlight (which in general shouldn’t be an issue). I’ve currently got the brightness set to 35%, but here’s a shot with the light at 100% for reference. Plenty bright to illuminate a shady character or wildlife in the dark.

The siren has its own Yes/No toggle for responding to motion and can be set to sound for seconds (5, 10, 15, 30) or minutes (1, 2, 5) at Low/Medium/High volume which also sets the level for 2-way audio. Sirens are not very effective here in Oakland unless you’ve got a subscription with a security service to respond, so it’s more for the owner’s benefit in that case. Our driveway is also covered by a large tree that moves a lot in wind resulting in false alarms, so I have the siren set not to activate. I did test the siren though and the low setting isn’t loud enough to cause anyone any fuss, so I’d recommend setting to High if you’re actually trying to use the alarm as a deterrent.

You’ll definitely want to set up the Home, Away and Night settings so that the alerts that come through are ones that matter. With four of us at home on different schedules, it’s unlikely this will get switched when it needs to. Here’s a friendly nudge at Swann to look into supporting IFTTT for helping that automation take a step forward.

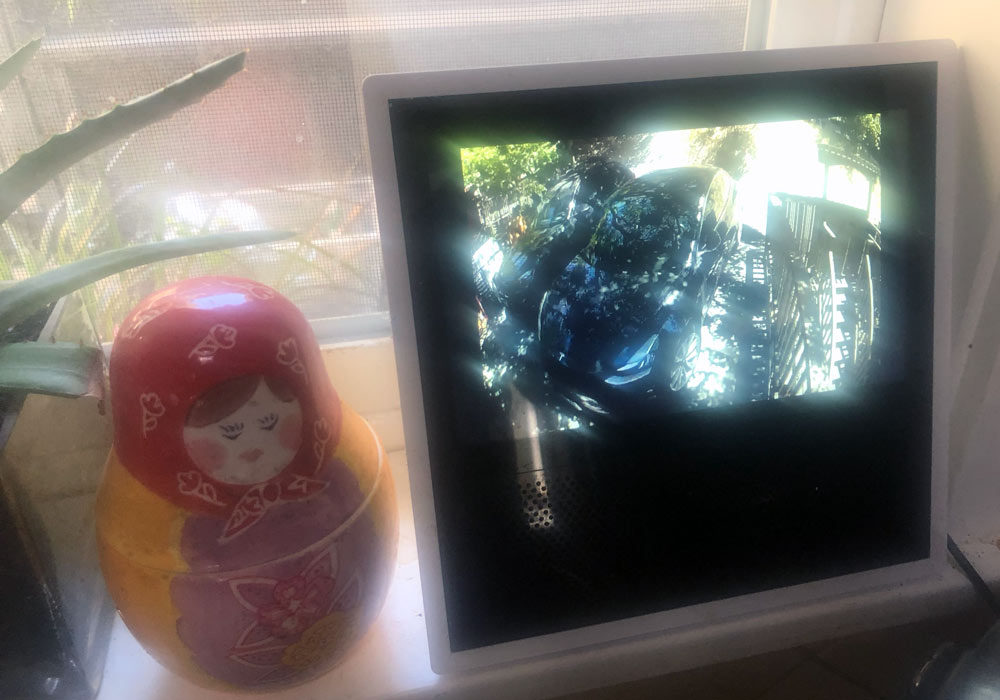
There is integration with Alexa or Google Assistant for working with some home devices you might have. Ask Alexa to “Show Driveway” and you get a live view after about 15 seconds of thinking.

What I like

  • Pretty low effort install
  • Bright lights with good coverage
  • Easy to access recordings without recurring monitoring fees
  • Very configurable (lights, siren, motion detection)

What I’d change

  • Better method for determining detection range during setup
  • Automation for determining Home, Away, Night

Final thoughts

The Swann Floodlight Security Camera is installed and my driveway lights up when entered and I get a motion alert on my phone and watch. I haven’t had and uninvited car visitor since installation and continue to hope I won’t, but I do feel safer and more aware of what’s happening in my driveway. The lighting is superb and the automatic recordings make it easy to see and hear what happens in my driveway when I’m not around. Thanks Swann!

Price: $179
Where to buy: Swann and Amazon
Source: The sample of this product was provided by Swann.

Filed in categories: Reviews

Tagged:

Swann Floodlight Security Camera review originally appeared on The Gadgeteer on August 2, 2019 at 11:00 am.

Note: If you are subscribed to this feed through FeedBurner, please switch to our native feed URL http://the-gadgeteer.com/feed/ in order to ensure continuous delivery.
Reolink Argus Eco security camera with solar charger review

REVIEW – Security cameras are everywhere. Given the advancements in camera resolution and solar technologies, the price of a solar-charged security camera that would have cost hundreds of dollars just a few short years ago is now in the realm of possibility for anyone who has property that needs securing. Reolink has several cameras, but their Argus Eco is weatherproof, WiFi ready, and now has an optional solar charger that can be added. I was sent a white camera with a black solar charger to test.

What is it?

A weatherproof battery-operated camera with WiFi and an optional weather-proof solar charger.

What’s in the box?

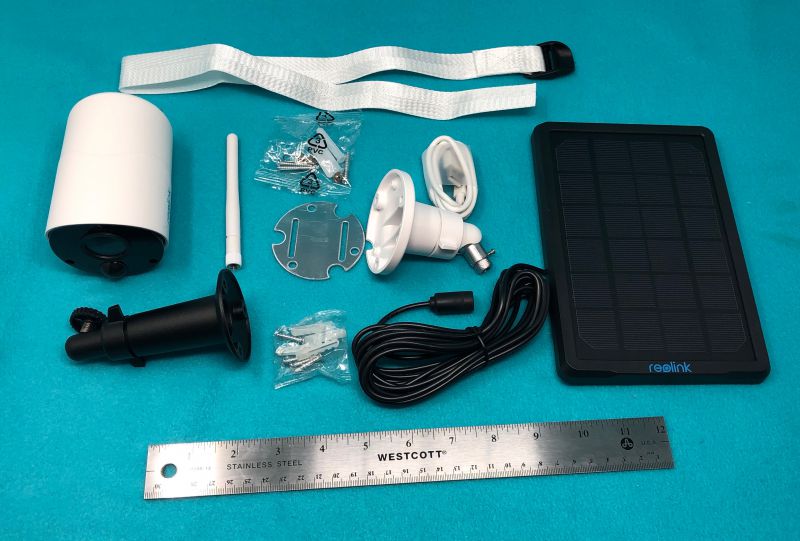
The unit comes packaged separately – the camera in one retail-ready box and the solar panel in another. Each unit is able to be installed separately.

The camera package contains:

  • Argus Eco (with sealed internal battery)
  • Screw-on, adjustable Antenna
  • Outdoor Security mount with wall- and tree-mounting options
  • ”Surveillance” sticker
  • Charging cable
  • Quick Start guide

Hardware specs

  • CMOS Image Sensor
  • 1080p HD at 15 frames/sec – H.264
  • Fixed lens, 100° diagonal
  • Night Vision – Up to 10 m (33 ft)
  • 6X Digital Zoom
  • High-quality speaker and microphone
  • PIR Detecting Distance Adjustable, up to 9 m (30 ft)
  • PIR Detecting Angle – 100° horizontal
  • Customized voice-recordable alerts
  • Instant email alerts and push notifications
  • IEEE 802.11b/g/n WiFi at 2.4 GHz
  • Wireless Security – WEP(ASCII)/WPA-PSK/WPA2-PSK

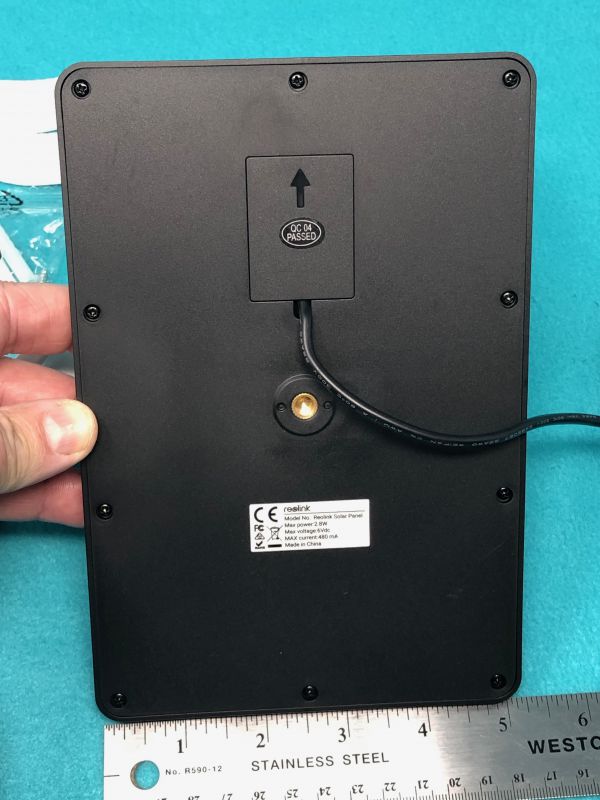
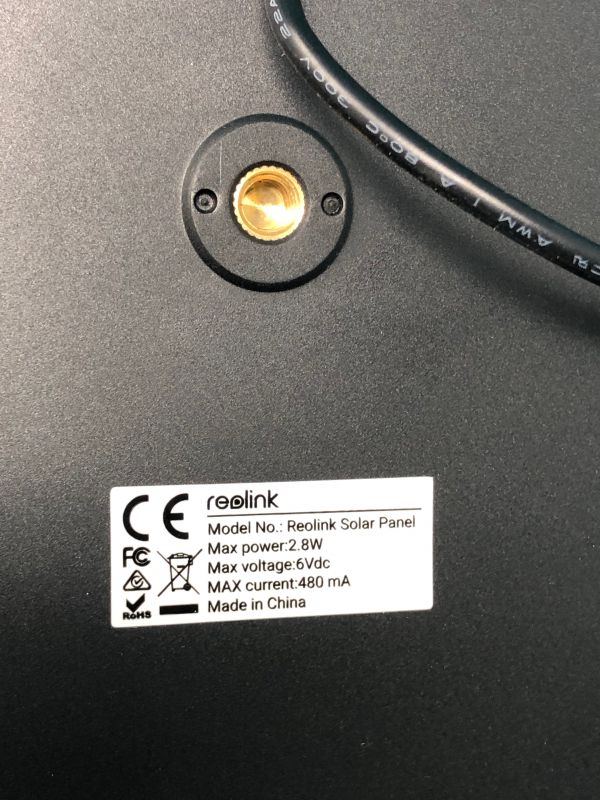
There is no current information on the website or the packaging for the solar charger, other than what is on the tag on the back.

  • Max power 2.8 watts
  • Max voltage 6V DC
  • Max current 480 mA

Design and features

With the rise in home security services and surveillance methods, it’s hard to find a package that doesn’t rely on sending your stored data to a paid service. Reolink has storage plans you can get, but because the video is stored on the camera’s SD card, this isn’t necessary. You can turn on storage for one week of video for a single camera for free, which is nice.

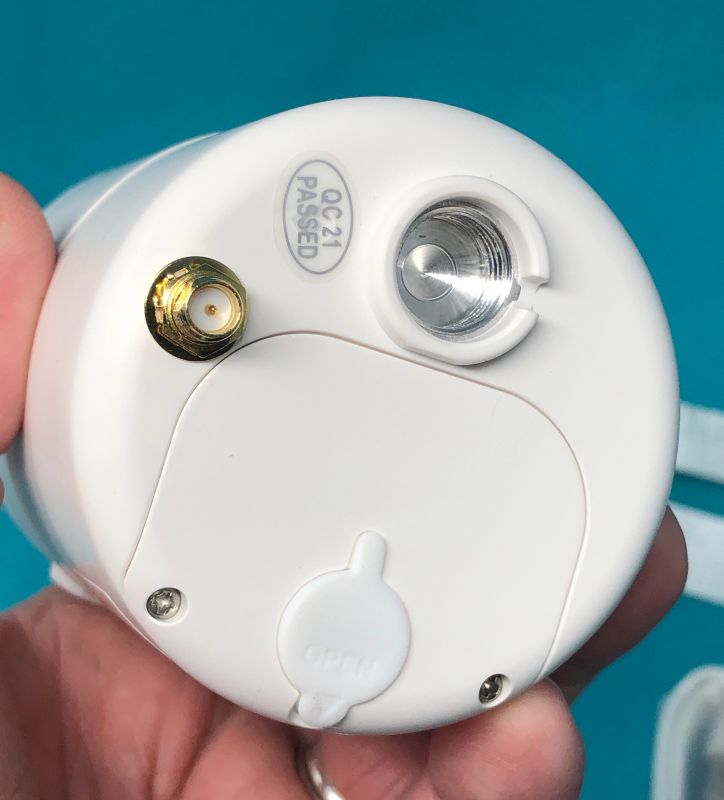
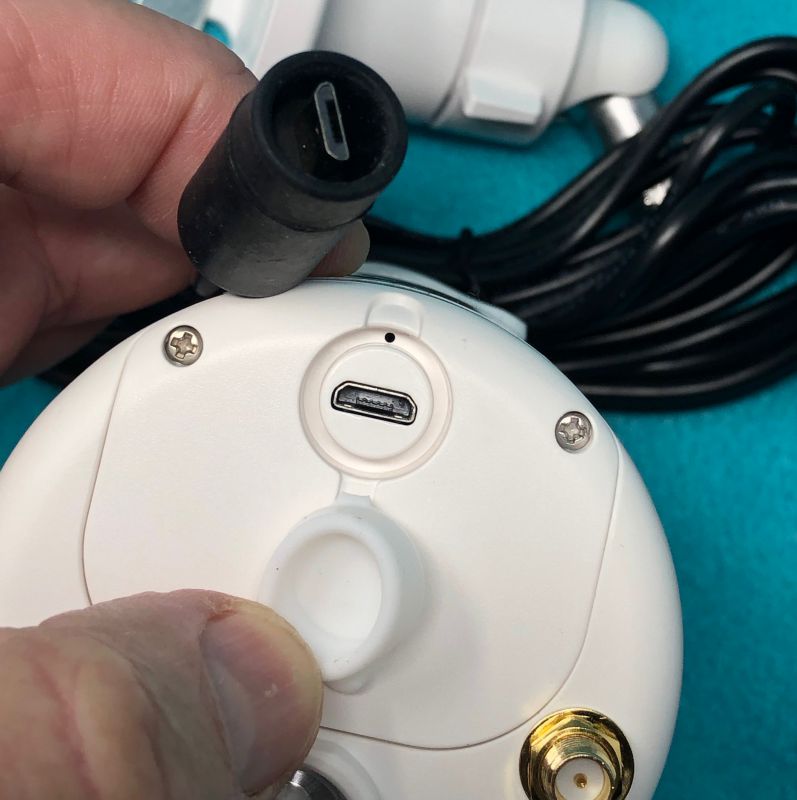
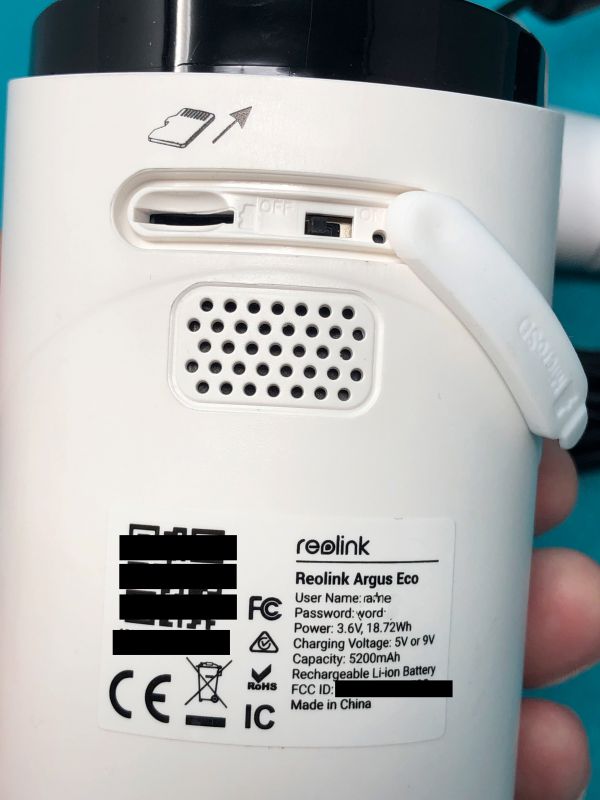
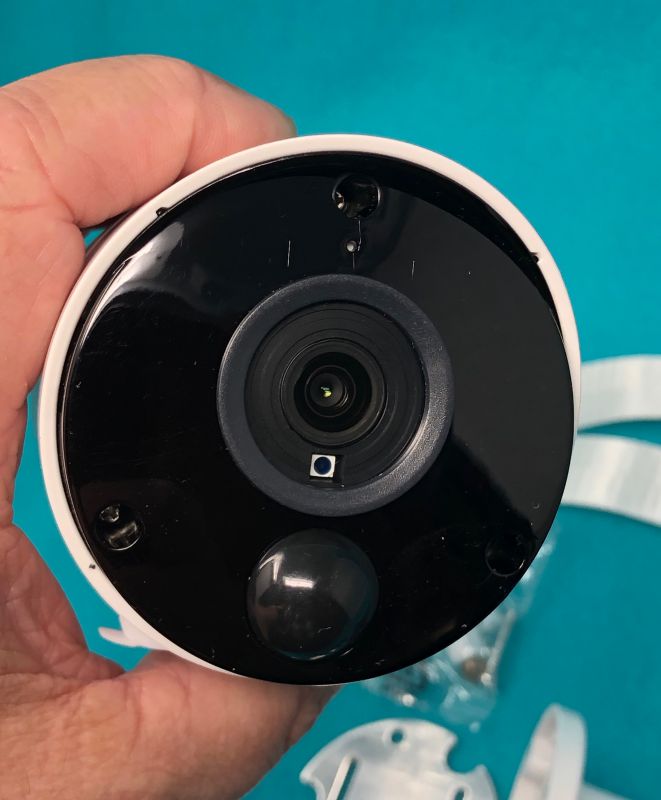
The Argus Eco is a cylinder about 5” long by 3” in diameter. On the business end, there is a central camera lens, a domed motion detector, and four UV emitting lights for night-vision. On the back are three ports: a BNC antenna port, a metallic mounting port, and a weather-sealed charging port. In a slot on the lower side near the front, there is a weather-sealed area with a microSD card slot, an on-off DIP switch, and a recessed reset pin. Nearby is a label with the serial number and password info in English and encoded into a QR code.


The mounting post has a dual tightening ball joint, which allows you to mount it in almost any orientation. Screws and plastic collars for mounting to wood or plaster are included. There is also a metal bracket and a nylon strap that would let you mount it in a tree without having to screw directly into the live wood.
Before mounting the camera, I recommend staying inside in the air-conditioning and download the app to your device, set up the camera, and insert the microSD card. You should probably also charge the camera’s battery. That way, once you’re up on a ladder in the hot sun, trying to read your phone in order to get the picture straight, you’ll only have to turn the camera on and worry with the dual nut joint to get things adjusted.


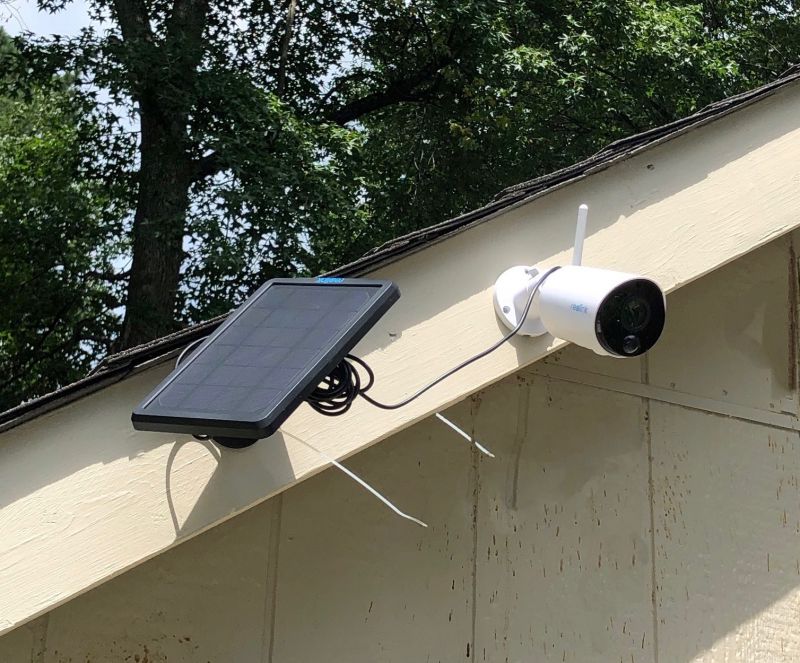
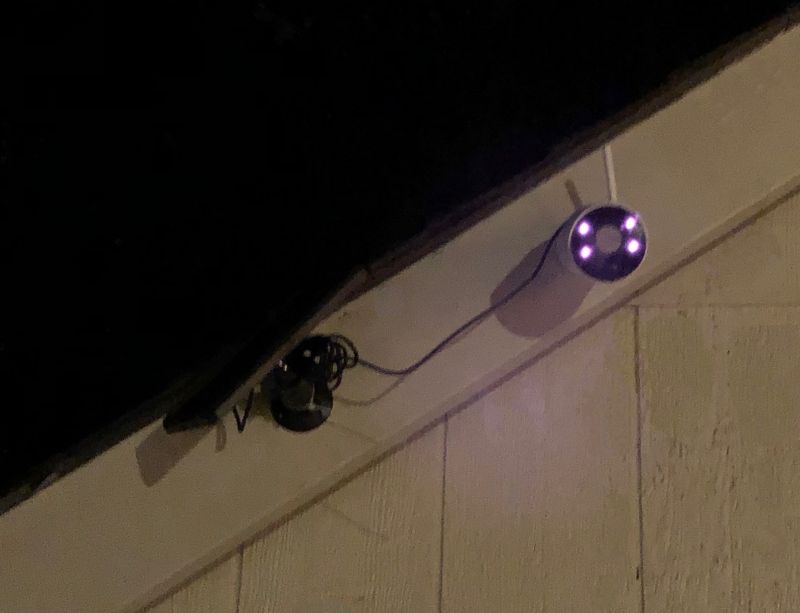
Once I had the camera mounted, I mounted the Solar charger. This unit is a flat, sturdily built photovoltaic array with a 4.5-meter captive cable and a screw socket built into the back. While the screw attachment is a little less robust than the one for the camera, there’s a good bit of weight difference as well.

The ball joint for this mounting was the same, however, and setting the angle is easy. I cable-tied the extra cord to the mounting post. Where we placed it gets quite a bit of sun year-round. The microUSB plug was a bit fussy since I had to make sure the hated trapezoid was facing the right way, properly aligned, etc, with the silicon cap over the plug blocking my sight. But, in the end, it connected without a hitch. A nice little icon in the app tells you when solar is charging the battery and how much charge the battery has when the sun’s not out.

Setup

Set up is fairly painless. You have to download the app (GooglePlay or iOS App Store), create an account, and scan the pairing QR code. Once it’s set up, it’s pretty solid. I turned off the camera and waited for a few days until I found time in the evening to mount both pieces. It started back up without a hiccough.
There are a lot of settings that can be changed. You can select color/B&W/Auto, resolution, whether to include sound and a plethora of alerts. While watching live, you can snap stills or capture movies that you can easily share.

Performance

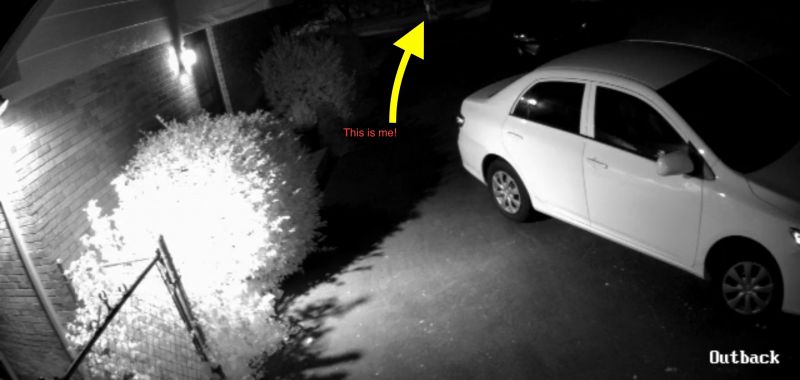
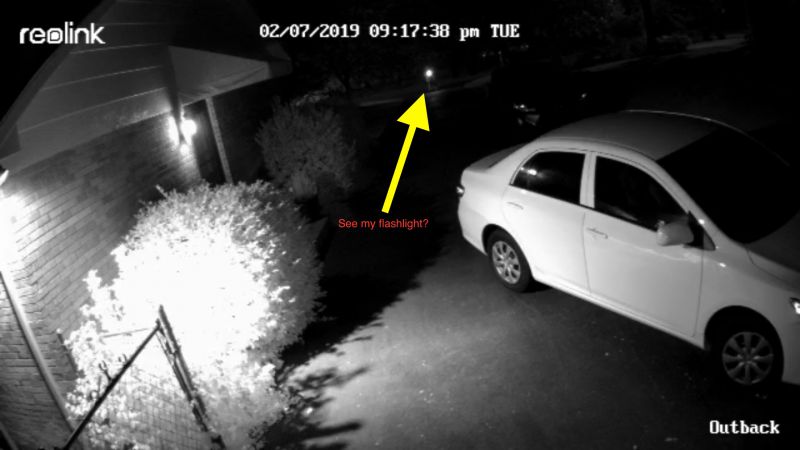
The camera performs flawlessly. We watched a squirrel going up the drive beside one of the cars right after installing it and walking inside. My Lovely Bride also got tickled of the video of my ear while I was struggling to get the camera level. It’s easy to call up the camera anytime.

Here’s a video of me taking the lede picture for this article:

We have a light for our backyard that turns on via motion after dark and this can prevent the camera from seeing the far end of the driveway.

When it’s not on you can see all of the drive, the street, and the neighbor’s yard.


There are a huge variety of notification types you can select from. Depending on your situation, you may or may not want to be alerted every time an animal walks past your camera. But, if you do, there’s a setting for that.

What I like

  • All hardware included in both packages
  • Doesn’t require an on-going service charge
  • Data is stored on the device but can be downloaded through the app
  • Cloud storage is available, but not required – one week (1 GB of data) is free

What I’d change

  • A software update that allows sending recorded events to an off-camera storage device or Dropbox account might be nice.

Final thoughts

Our surveillance society has gotten used to everything being recorded. We regularly see photos on social media of porch pirates, would-be car ransackers, and trespassers. We even have motion-activated game cameras to capture shots of wild animals. This product is a great example of how you can easily set up a system that allows you to have awareness of your surroundings (or your vacation home) at a rational cost with no on-going costs. Well done, Reolink.

Price: Argus Eco is $79.99, Solar Panel $24.99
Where to buy: Company website and Amazon
Source: The sample of this product was provided by Reolink.

Filed in categories: Reviews

Tagged:

Reolink Argus Eco security camera with solar charger review originally appeared on The Gadgeteer on July 26, 2019 at 9:00 am.

Note: If you are subscribed to this feed through FeedBurner, please switch to our native feed URL http://the-gadgeteer.com/feed/ in order to ensure continuous delivery.

Add a video doorbell to your Scout alarm system

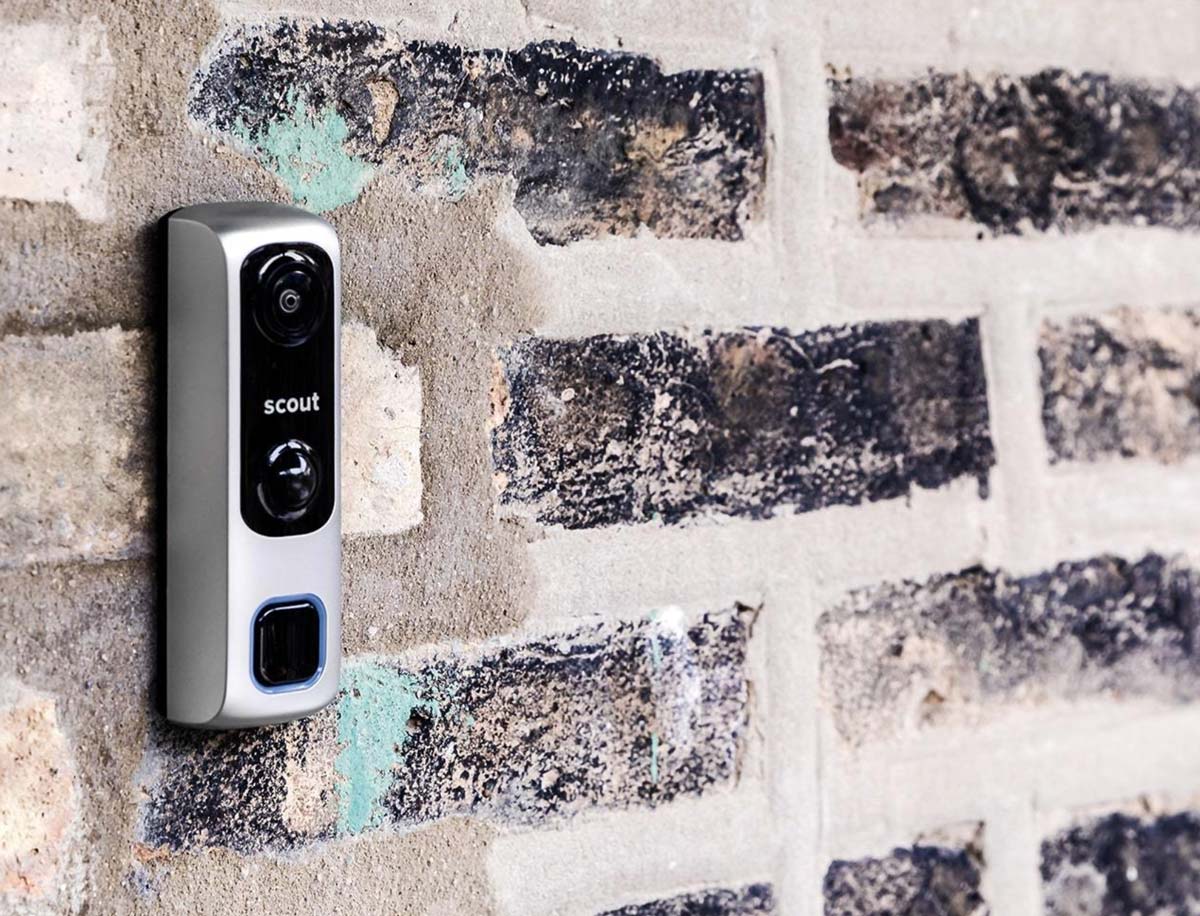
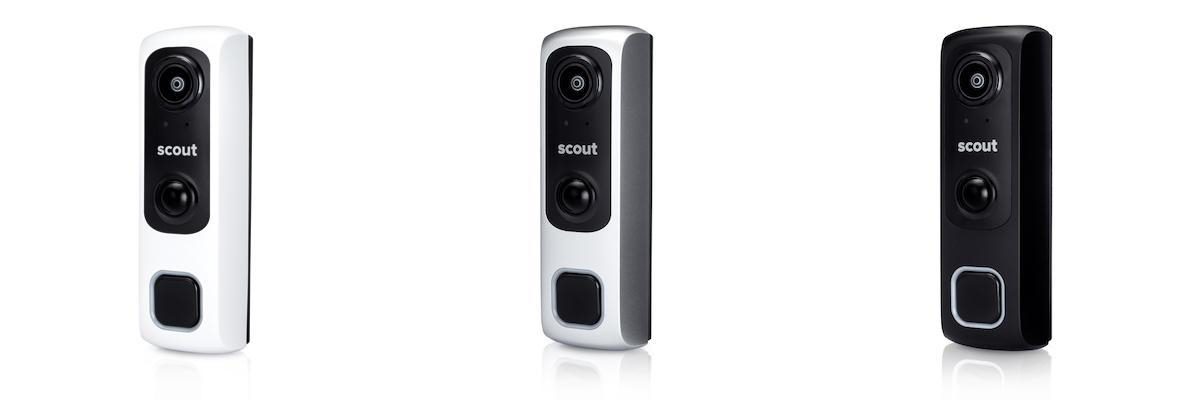
NEWS – Scout has just added the Scout Video Doorbell, expanding their security system to be more all inclusive. While there are plenty of smart doorbells out there, this is a great move to simplify their own user’s experience by being able to stay within a single app for home security.

Here’s some of the feature set Scout has built into their new doorbell…
– 1080HD recording in any lighting
– 2-way audio for talking to your visitors
– Play a pre-recorded message if you’re unavailable
– Notifications when people approach your door
– Connects to your existing 16-24v analog or digital wiring installation

Its narrow and slender design should look at home by your entrance and with it’s three included faceplates (white, silver, black), one is sure to blend in with your color scheme.

It’s available now at $99 for the analog version or $105 for the digital version which includes the power kit. Alternatively you can bundle it with a security system build if you’re in the market. Hop on over to Scout for more information.

Filed in categories: News

Tagged:

Add a video doorbell to your Scout alarm system originally appeared on The Gadgeteer on July 23, 2019 at 8:00 am.

Note: If you are subscribed to this feed through FeedBurner, please switch to our native feed URL http://the-gadgeteer.com/feed/ in order to ensure continuous delivery.

SANSI Stellar Cam Floodlight Camera review

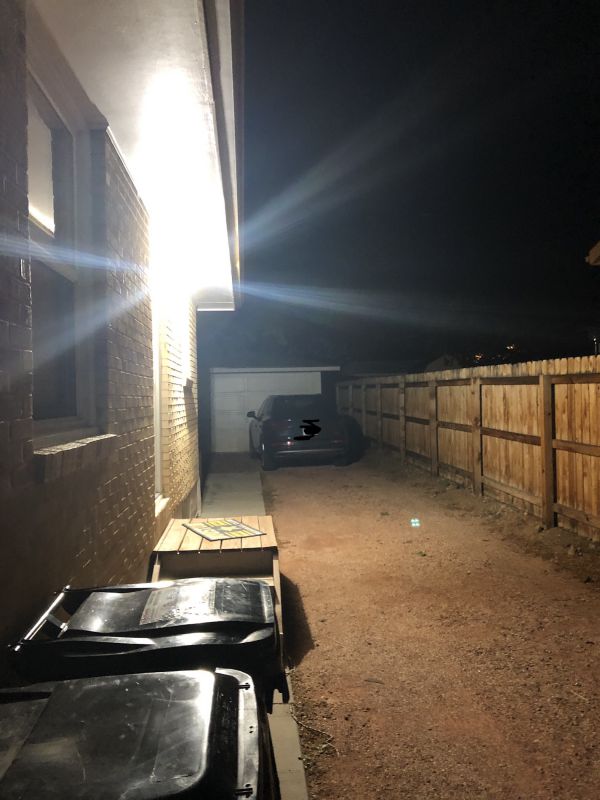
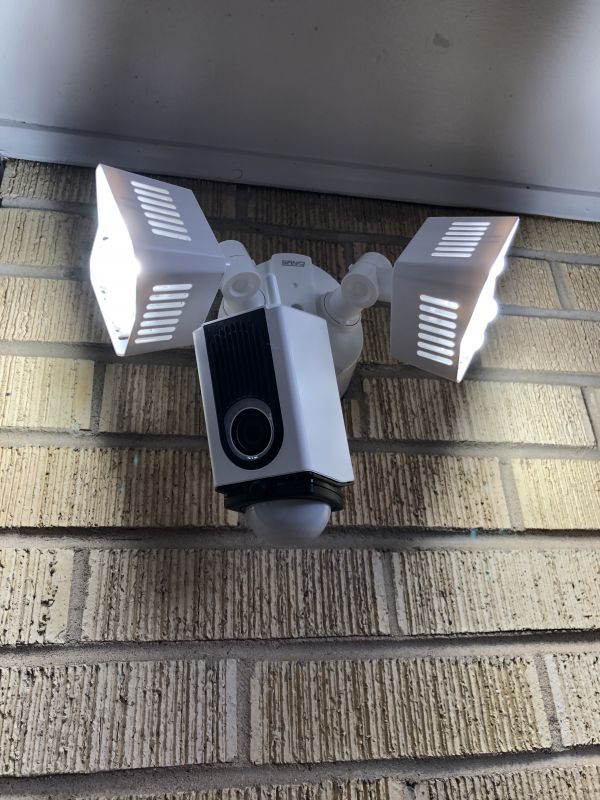
REVIEW – Home security has emerged to be a very DIY sector of the home improvement market and along with our ADT monitored system, we have added cameras to the front, back and now side of the house with the SANSI Stellar Floodlight Camera. We had been wanting to add a camera on the side of the house but knew we would need some lighting as well with the way driveway runs along the side of the house.

What is it?

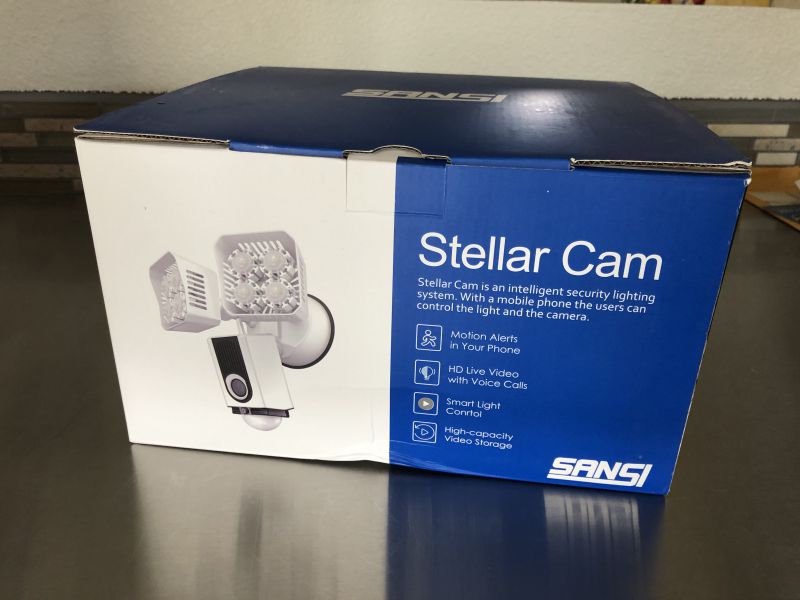
The SANSI Stellar Floodlight Camera is a hardwired, wifi-enabled security camera and floodlight with motion sensing and night vision capabilities.

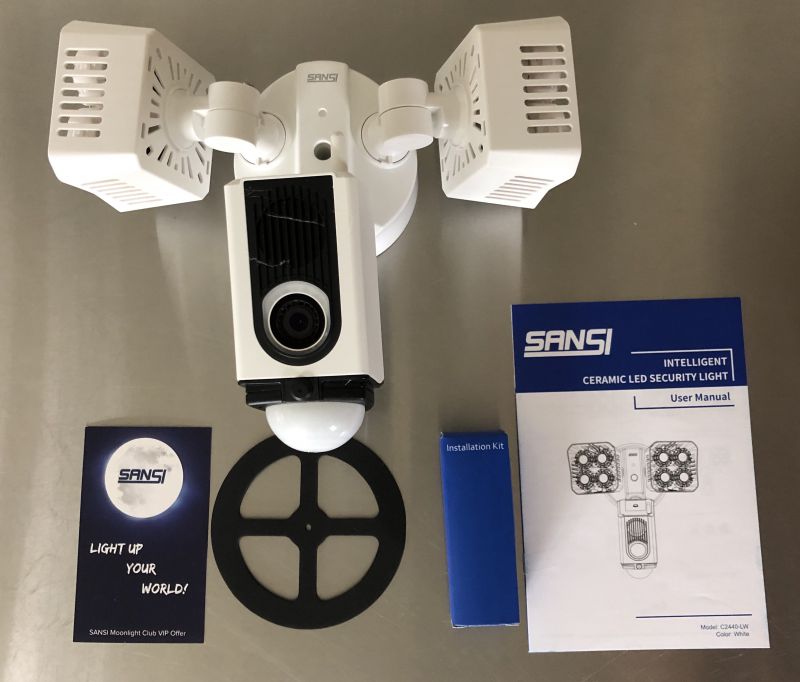
What’s in the box?

  • Camera and Floodlight Unit
  • Instruction Book
  • Mounting Hardware

Design and features

The unit features a full HD camera, with adjustable motion sensing allowing you to choose the distance from the camera you want to have notifications for motion. The camera has a 270 degree viewing angle so it is ideal for an area where you desire a wide angle view. Internal 16gb memory allows for up to 70 hours of recording. The dual LED lights provide 3600lm of light that comes on either by physical command via the app or wall switch, or via motion detection. Additionally, this camera does allow you to talk back and forth through it with whoever is outside. We did test this a bit initially and while it does work, it is on about a 7 second delay so it’s not in real time. Finally, it has an alarm that we did not test as we didn’t want to frighten our neighbors but it is a setting that you can enable for added security.

Setup and Performance

This camera was very easy to physically install, if you’ve ever replaced a light fixture or ceiling fan in your home this isn’t much different. Simply flip the breaker, remove the old light, then follow the step by step instructions to connect the white, black and ground wires properly and mount to the plate included in the product.

The difficult part, however, is when you get to the app and connecting the camera up to your wifi. It was very finicky at first and we had to reset it once to get it to recognize our wifi signal – even then we had to make multiple attempts to get it to recognize and connect to the wifi. Then, it literally took us two weeks of fussing with the app before we were able to sync the time to our current time zone, and this only happened because there was an update to the camera software that was released (I believe). Previous to this, the time was so off sync that we had videos labeled as being in the middle of the night and it was full daylight – also we couldn’t access videos except if they were hours and hours old. But after the update to the camera software, the times synced up and all videos to the current were accessible.

The app itself isn’t the most user friendly, and gets a bit bug-y at times with allowing you to access and download videos. If you aren’t connected with a strong wifi signal, you’ll only get the first 5 seconds or so downloaded – we’ve found we need to be pretty close to it to get the videos to download reliably.

We were able to capture the below video of some vicious intruders into our yard – which, if they had been actual thugs meant to do harm, I believe would provide sufficient and great evidence capable to be turned over to police to help capture the criminal.

As far as storage, it is nice to have 70 hours of recording space on the internal memory, however, it would be nice to at least have the option to store video to the cloud. If you don’t catch it before it’s recorded over then you’ve lost the video forever. This could be a problem if you’re away for an extended period of time without a strong wifi signal to download any videos of interest.

You can set up the app to send notifications when motion is detected – and depending on how much you want to be bothered this can be a blessing or a curse as sometimes the camera picks up simple motions such as moving tree limb shadows and reports them as motion. But realistically, you’re wanting to get those notifications if you have concerns about the security of your home.

What I like

  • Bright lighting to deter thieves or intruders via motion detection
  • HD quality video is perfect for security footage
  • Easy physical install
  • 70 hours of recorded videos on internal memory
  • No subscription plan

What I’d change

  • Cloud access for storage
  • Better app/user interface – too many bugs and glitches and too difficult to make setting changes especially at initial install.
  • Would be nice to have more precise controls over notifications – as is, it’s basically on or off with some limited adjustments to the viewing distance/area.

Final thoughts

Overall, this product has become a welcome member of our home security – now being our 4th camera installed and third different brand. It measures up to the others in both video quality and reliability once we got the kinks out and were able to get the settings right. It definitely isn’t “ready to go” out of the box – so some tinkering and adjustments will need to be made to get it aligned to your needs. But in the end, I think most will be pretty happy with the footage, quality and sense of security it provides. Knowing it picks up even cats and raccoons really puts our mind at ease that if a person or persons were trying to be nefarious, we would not only have the footage to show the officials but we could talk through it or possibly sound an alarm as well to keep our home safe. However, I will say that if we had purchased this unit for install and had the trouble we did with it, I am not 100% certain we would have had the patience to see it through to the point where everything worked correctly. Be patient though, it’s worth the small annoyances in getting it to that point.

Price: $169.99
Where to buy: Amazon
Source: The sample of this product was provided by SANSI.

Filed in categories: Reviews

Tagged: ,

SANSI Stellar Cam Floodlight Camera review originally appeared on The Gadgeteer on June 28, 2019 at 12:23 pm.

Note: If you are subscribed to this feed through FeedBurner, please switch to our native feed URL http://the-gadgeteer.com/feed/ in order to ensure continuous delivery.