Dinosaur loving kids and adults alike will be the envy of every geek in the cafeteria when they in with this T-Rex head lunchbox. The Dino Case is designed like the world’s most popular but extinct reptile, the Tyrannosaurus rex. By the way, did you know that rex means king in Latin? Now you do!
The lunchbox has a functioning jaw that opens to reveal your favorite lunch time yummies.
The carrying handle for the Dino Case mimics a muzzle because roarrrrrrrr! For more info head over to Suck UK and Amazon which is selling the Dino Case for $35 at the end of June.
Note: If you are subscribed to this feed through FeedBurner, please switch to our native feed URL http://the-gadgeteer.com/feed/ in order to ensure continuous delivery.
Usually, I write about a specific product in my news stories and reviews for The Gadgeteer. But recently I came across a website that blew me away with their models. The Little Planet Factory builds models of our solar system including realistic meteors (or small bodies as they are listed on the web page).
These models are made using 3D printing and are incredibly detailed. Besides the Solar System models, the Little Planet Factory also have some novelty type items such as an Earth in a bottle or a Solar System in a bottle but maybe one of the most interesting novelties for me is the Lowellian Mars model with the Martian canals. All the models are highly detailed and most come in various scales.
Prices start as low as £12 (approximately $15) to £700 ($865) and up for full Solar System models. So, if you are interested in this sort of thing or just want to see the incredible 3D printing work that the Little Planet Factory is doing you should check out their web page.
Note: If you are subscribed to this feed through FeedBurner, please switch to our native feed URL http://the-gadgeteer.com/feed/ in order to ensure continuous delivery.
Over the course of my time with the Gadgeteer I’ve had the opportunity to review several different drones. I’ve reviewed big drones, little drones, and video drones.
Two such drones, the Axis Vidius 420P video drone, and the Axis Aerius quadcopter, both flew well, but the Vidius was a bit bigger and had a built-in camera. Although I enjoyed flying both drones, I didn’t feel the quality of the Vidius’s camera footage justified its higher cost.
Recently I was given the chance to review the Vidius’s successor, the Vidius HD. With a 720P camera, the Vidius HD should have far greater video quality.
(It should be noted, shortly after reviewing the Vidius, Axis changed its company name to Aerix)
Specifications
Dimensions – 4.3cm x 4.3cm x 2.5cm
720P Video and HD photos
200 mAh battery
3-Speeds
6-Axis Gyro Stabilization
No FAA registration required
In the Box
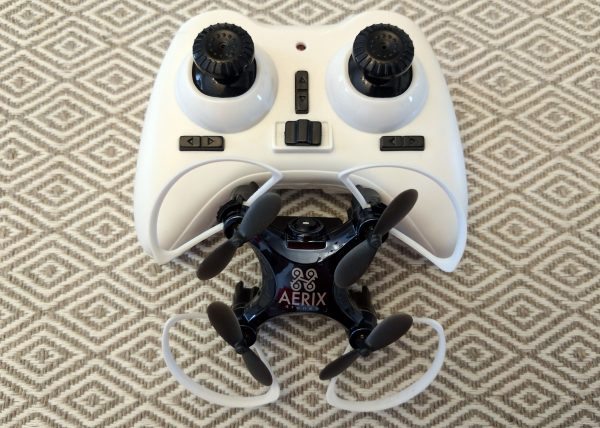
Drone with blade guards
2.4 gHz controller
USB charger cable
4 replacement blades
Mini screwdriver
Mini blade remover
Design
According to the Aerix website, the Vidius and Vidius HD are identical in size. They also state it is the “world’s smallest live Streaming HD video drone”.
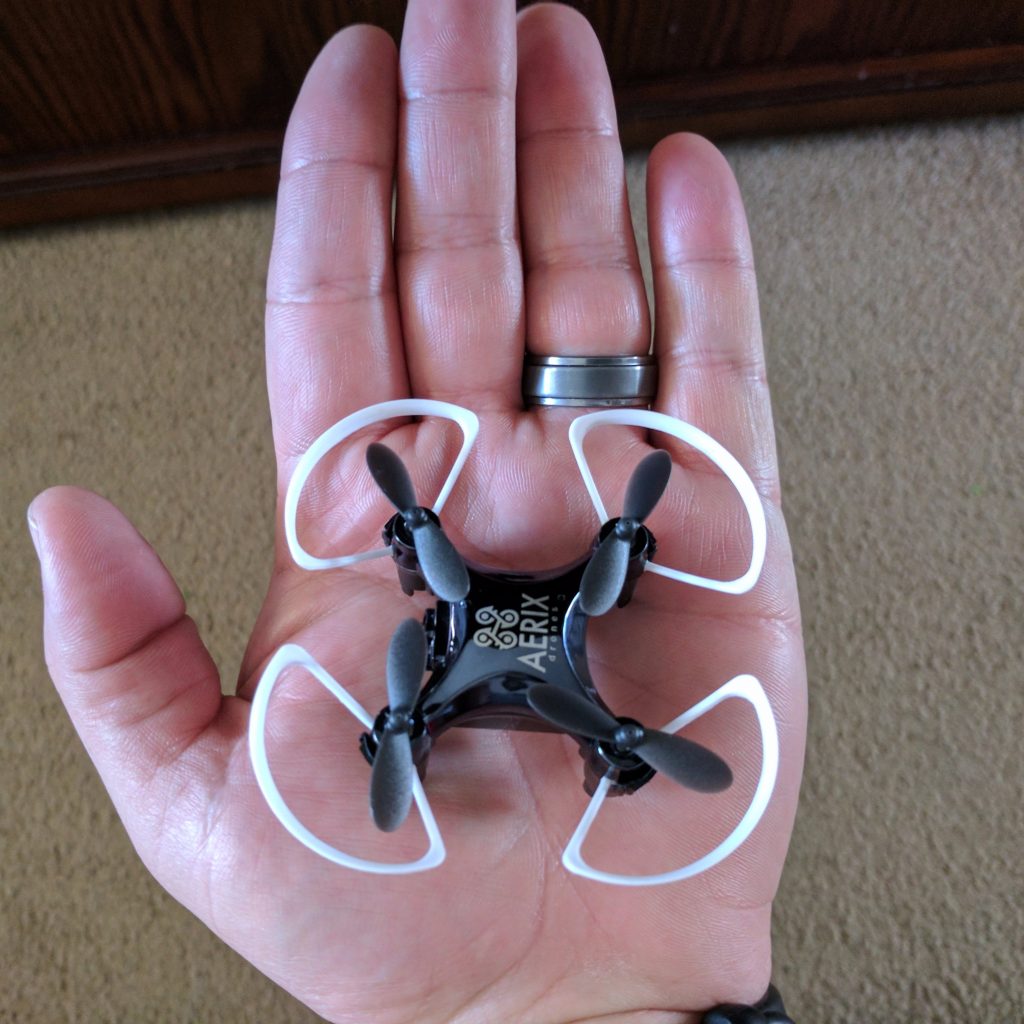
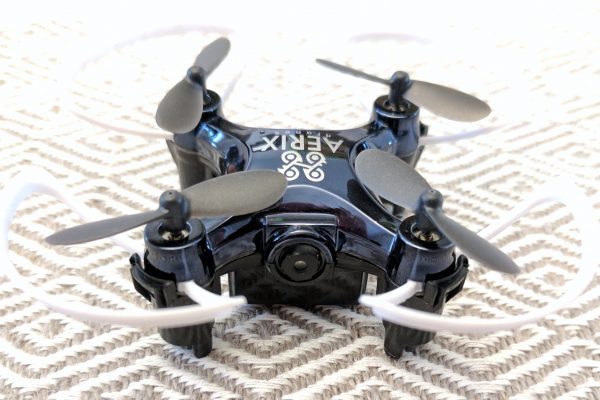
I’m not sure whether or not that claim is true, but the Vidius HD is small enough to fit in the palm of my hand.
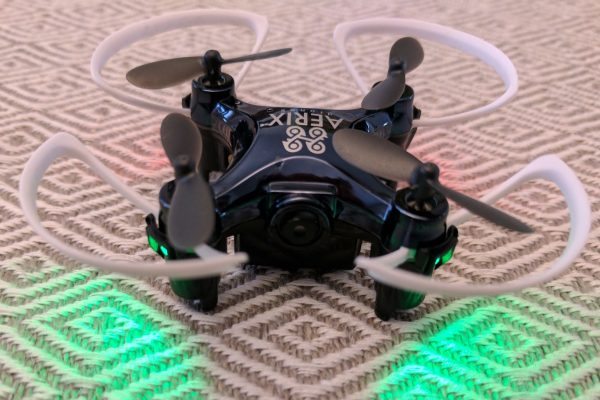
The blades of the drone are each protected by a blade guard.
This is a nice upgrade from the original Vidius; I often found myself crashing, distorting the blades in the process.
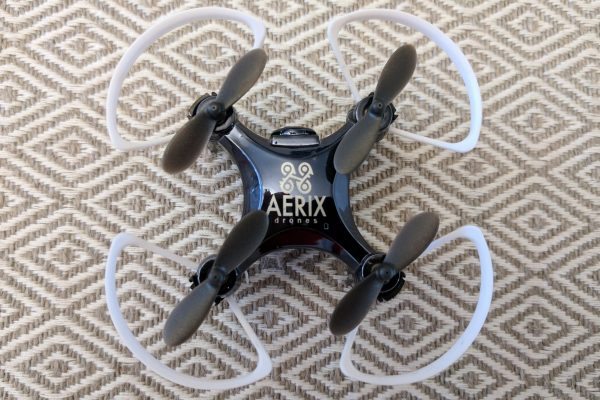
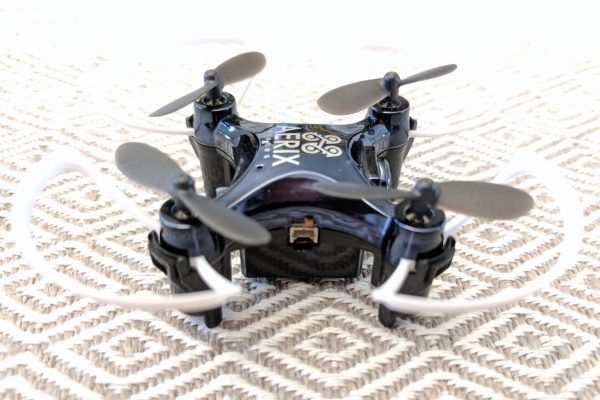
One side of the drone has a small charging port, while the front contains the HD camera.
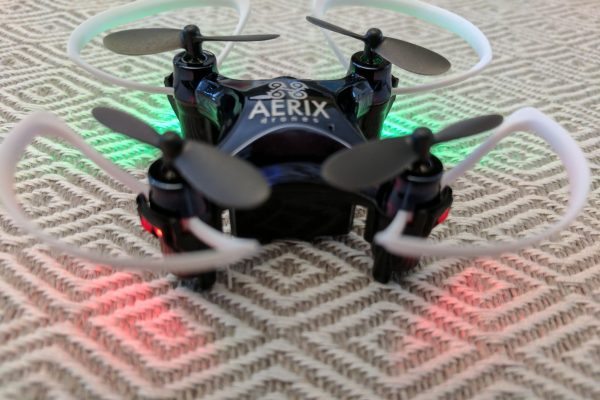
Below each rotor is an LED, red in the rear, green in the front. The LEDs are useful for maintaining orientation.
The drone itself is a pretty standard micro-drone. It appears to be the same body used with the original Vidius.
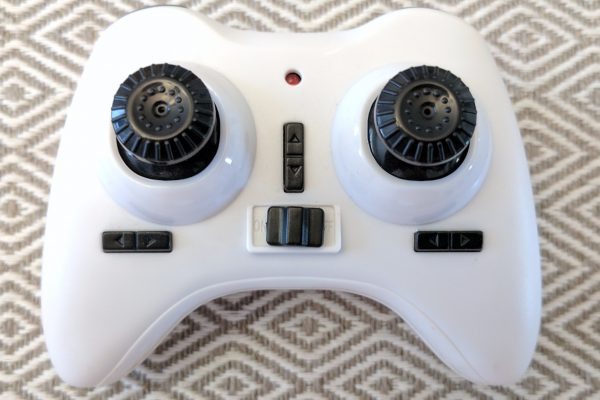
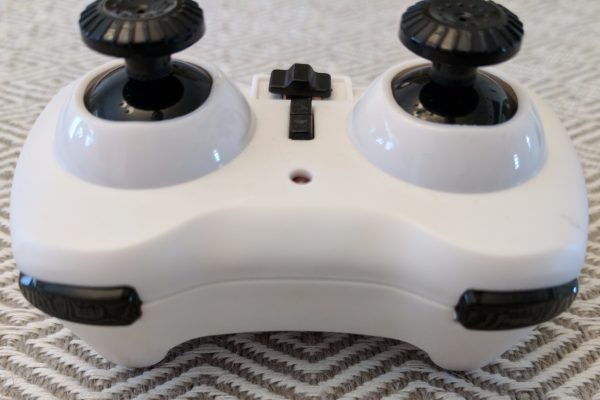
The controller is standard for a micro-drone.
The left joystick controls throttle and rotation, while the right controls forward/backward/left/right movement.
There is also a power switch and two trim controllers on the front.
The left bumper button on the controller activates “headless mode”, which means no matter which way the front of the drone is facing, the drone will move in the direction you push the joystick.
The right bumper button automatically returns the drone to the pilot while in headless mode.
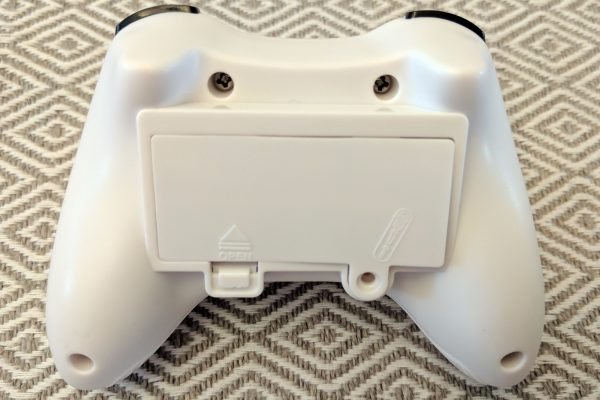
The back of the controller is where the battery compartment is located.
All in all, the drone and controller are almost identical to the original Vidius.
Operation
Like the original Vidius, the drone can be controlled using the controller or a smartphone; although, there have been some minor changes to the way you operate the drone.
To use the controller, you power on both the controller and drone. Next, you move the throttle up, then down; this pairs the devices.
As before, this has to be done each time the devices are powered on. I’m still not certain why the drone and controller can’t be permanently paired together.
With the previous drones I’ve reviewed, the drone could immediately be flown after being paired by pressing up on the throttle. With the Vidius HD, Aerix added a few steps before flight begins.
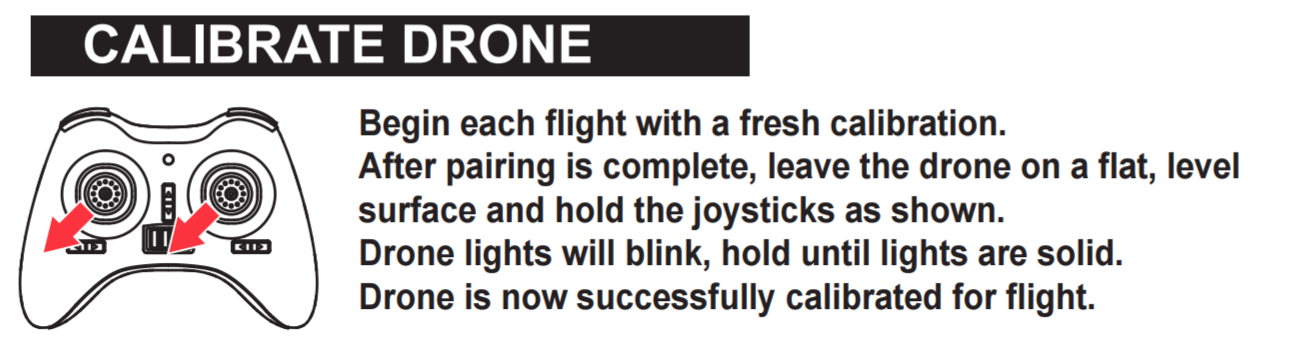
Now before takeoff, Aerix suggests you calibrate the drone. This should help keep the drone stabilized.
Once the drone is calibrated, you can start the motors.
Even though the motors are running, the drone won’t take off until you raise the throttle.
Once you’re finally up and flying, the drone is easy to control. The controls are responsive and easy to get used to.
The Vidius HD is also equipped with “trick mode”. You enter it by pressing down on the right joystick. You then push the right joystick in any direction and the drone will do a flip.
The Vidius HD is a bit easier to fly than the drones I previously reviewed, but not by much.
Despite having “6-Axis Gyro Stabilization”, the drone still doesn’t hover in place and the pre-flight calibration doesn’t prevent the drone from occasionally drifting.
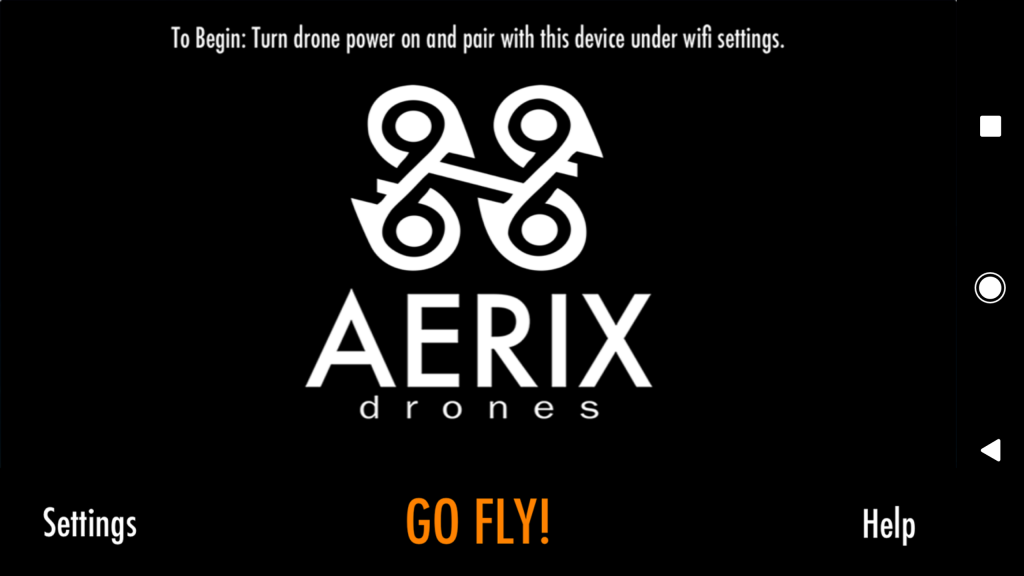
To fly the Vidius using your smartphone or tablet, you go to the App Store or Play Store and download the “Vidius HD” app.
You open the app and you’re instructed to connect to the drone via Wi-Fi. You do this by selecting “VIDIUS Drone” from your Wi-Fi menu.
This is simple enough, but it does present some issues.
First, it’s really annoying to have to manually connect to a different Wi-Fi network everytime you want to use your drone.
Second, many newer phones – like my Pixel XL – don’t want to connect to a Wi-Fi network that doesn’t have an active internet connection. Some will notify you that the drone’s “network” doesn’t provide an internet connection and ask if you want to connect anyway; however, if your phone doesn’t do that, you have to tweak your Wi-Fi settings to allow for the connection.
It would be much better if the drone was able to connect to your phone via Bluetooth.
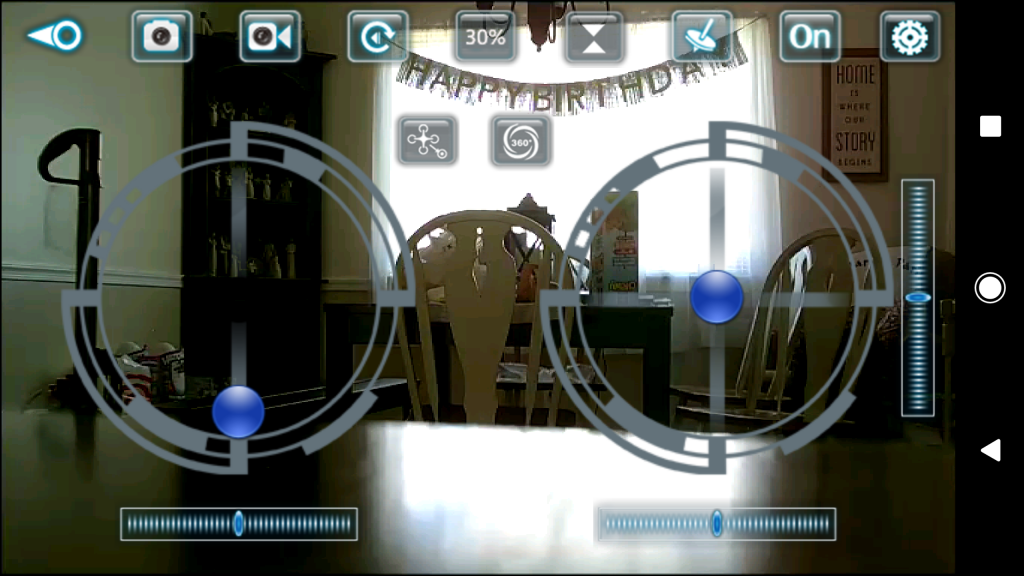
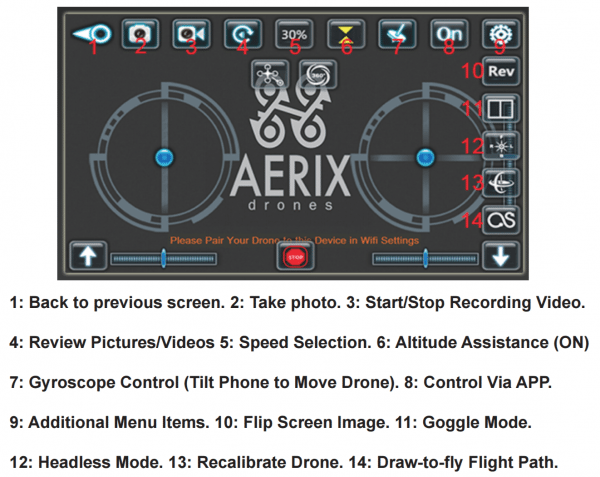
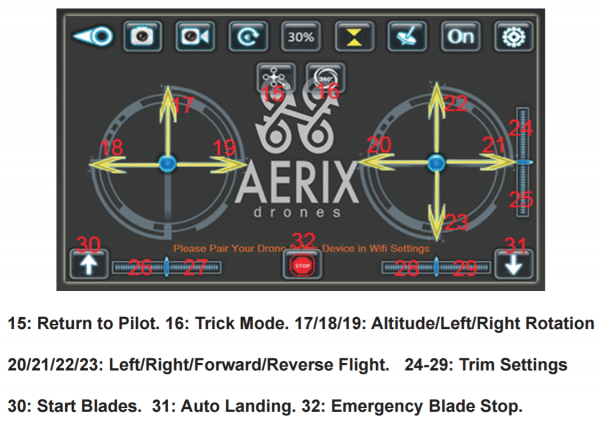
Once your drone is connected to the app, you will be presented with virtual controls atop the drone’s live video feed.
Above is a description of all the functions and controls available within the app.
I didn’t enjoy flying the drone using the app.
When using the on-screen controls, it’s too easy to have your thumbs slip out of the control area. It might be better if the phone vibrated as you reached the outer limits of the virtual joystick’s range.
You do have the option of controlling the drone in gyroscope mode. Instead of controlling motion with the right virtual joystick, you control it by tilting your phone in the desired direction. This isn’t nearly as easy as using the controller.
There is abother control mode that is new with the Vidius HD, draw-to-fly. This mode removes the right controller from the screen and allows you to trace a path along your phone that the drone will follow.
It’s a pretty neat feature, but ultimately not better than using a real joystick.
Finally, there is also a VR mode in which you can place your phone into VR googles. You get a first-person view of what the drone is seeing.
In theory it’s cool; in reality it’s impossible to fly the drone like this. I kept crashing within seconds.
Personally, I found using the controller is the best way to fly to drone, but it is nice to have options.
Video and Photographs
Taking photos and recording video is easy.
To do so, you press the camera or camcorder button in the upper left portion of the screen. Of course, your phone has to be connected to the drone’s Wi-Fi network to work properly.
To view the photos or videos, you press the button that looks like a browser refresh button, or you can use a file manager app and locate a folder named “Drone” on your phone.
The original Vidius was only capable of recording 420P video. I found the quality wanting and didn’t believe it was enough to justify the cost of the drone.
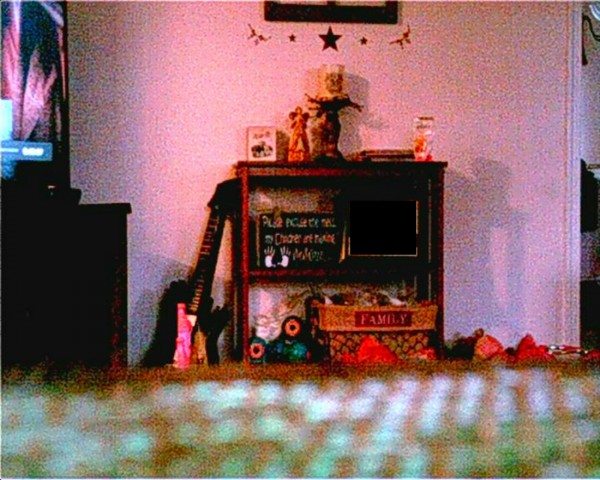
The Vidius HD has been upgraded to 720P and it’s immediately clear the upgrade was for the best.
The picture on the left is from the Vidius HD, while the right is the original Vidius.
The video footage is a marked improvement over the original Vidius as well.
Original Vidius
Vidius HD
The video isn’t perfect. The room was well-lit, yet the video is dark in certain portions, but overall it’s pretty good.
Overall, the video quality is pretty solid. You aren’t going to film documentaries with the drone, but you can certainly create some fun videos.
Conclusion
The Vidius HD is an excellent upgrade from the original.
I immediately dismissed the original due to the awful camera footage; fortunately, Aerix took the criticism and improved the design.
The drone is just as easy to fly as the original, but now it provides usable camera footage.
Aerix added a few gimmicky flight modes like VR mode and draw-to-fly modes; they are briefly fun, but ultimately not an ideal way to use the drone.
The battery life on the Vidius HD is only about 5 minues, but that’s to be expected on such a tiny device. Plus, it only takes 20 minutes to charge, so it’s not a huge negative.
If you’re interested in the Vidius HD you can purchase it for $85. It’s a bit expensive, but it would make a good starter drone for anyone interested.
Source: The sample for this review was provided by Aerix. Please visit their site for more information.
Note: If you are subscribed to this feed through FeedBurner, please switch to our native feed URL http://the-gadgeteer.com/feed/ in order to ensure continuous delivery.
Over the course of my time with the Gadgeteer I’ve had the opportunity to review several different drones. I’ve reviewed big drones, little drones, and video drones.
Two such drones, the Axis Vidius 420P video drone, and the Axis Aerius quadcopter, both flew well, but the Vidius was a bit bigger and had a built-in camera. Although I enjoyed flying both drones, I didn’t feel the quality of the Vidius’s camera footage justified its higher cost.
Recently I was given the chance to review the Vidius’s successor, the Vidius HD. With a 720P camera, the Vidius HD should have far greater video quality.
(It should be noted, shortly after reviewing the Vidius, Axis changed its company name to Aerix)
Specifications
Dimensions – 4.3cm x 4.3cm x 2.5cm
720P Video and HD photos
200 mAh battery
3-Speeds
6-Axis Gyro Stabilization
No FAA registration required
In the Box
Drone with blade guards
2.4 gHz controller
USB charger cable
4 replacement blades
Mini screwdriver
Mini blade remover
Design
According to the Aerix website, the Vidius and Vidius HD are identical in size. They also state it is the “world’s smallest live Streaming HD video drone”.
I’m not sure whether or not that claim is true, but the Vidius HD is small enough to fit in the palm of my hand.
The blades of the drone are each protected by a blade guard.
This is a nice upgrade from the original Vidius; I often found myself crashing, distorting the blades in the process.
One side of the drone has a small charging port, while the front contains the HD camera.
Below each rotor is an LED, red in the rear, green in the front. The LEDs are useful for maintaining orientation.
The drone itself is a pretty standard micro-drone. It appears to be the same body used with the original Vidius.
The controller is standard for a micro-drone.
The left joystick controls throttle and rotation, while the right controls forward/backward/left/right movement.
There is also a power switch and two trim controllers on the front.
The left bumper button on the controller activates “headless mode”, which means no matter which way the front of the drone is facing, the drone will move in the direction you push the joystick.
The right bumper button automatically returns the drone to the pilot while in headless mode.
The back of the controller is where the battery compartment is located.
All in all, the drone and controller are almost identical to the original Vidius.
Operation
Like the original Vidius, the drone can be controlled using the controller or a smartphone; although, there have been some minor changes to the way you operate the drone.
To use the controller, you power on both the controller and drone. Next, you move the throttle up, then down; this pairs the devices.
As before, this has to be done each time the devices are powered on. I’m still not certain why the drone and controller can’t be permanently paired together.
With the previous drones I’ve reviewed, the drone could immediately be flown after being paired by pressing up on the throttle. With the Vidius HD, Aerix added a few steps before flight begins.
Now before takeoff, Aerix suggests you calibrate the drone. This should help keep the drone stabilized.
Once the drone is calibrated, you can start the motors.
Even though the motors are running, the drone won’t take off until you raise the throttle.
Once you’re finally up and flying, the drone is easy to control. The controls are responsive and easy to get used to.
The Vidius HD is also equipped with “trick mode”. You enter it by pressing down on the right joystick. You then push the right joystick in any direction and the drone will do a flip.
The Vidius HD is a bit easier to fly than the drones I previously reviewed, but not by much.
Despite having “6-Axis Gyro Stabilization”, the drone still doesn’t hover in place and the pre-flight calibration doesn’t prevent the drone from occasionally drifting.
To fly the Vidius using your smartphone or tablet, you go to the App Store or Play Store and download the “Vidius HD” app.
You open the app and you’re instructed to connect to the drone via Wi-Fi. You do this by selecting “VIDIUS Drone” from your Wi-Fi menu.
This is simple enough, but it does present some issues.
First, it’s really annoying to have to manually connect to a different Wi-Fi network everytime you want to use your drone.
Second, many newer phones – like my Pixel XL – don’t want to connect to a Wi-Fi network that doesn’t have an active internet connection. Some will notify you that the drone’s “network” doesn’t provide an internet connection and ask if you want to connect anyway; however, if your phone doesn’t do that, you have to tweak your Wi-Fi settings to allow for the connection.
It would be much better if the drone was able to connect to your phone via Bluetooth.
Once your drone is connected to the app, you will be presented with virtual controls atop the drone’s live video feed.
Above is a description of all the functions and controls available within the app.
I didn’t enjoy flying the drone using the app.
When using the on-screen controls, it’s too easy to have your thumbs slip out of the control area. It might be better if the phone vibrated as you reached the outer limits of the virtual joystick’s range.
You do have the option of controlling the drone in gyroscope mode. Instead of controlling motion with the right virtual joystick, you control it by tilting your phone in the desired direction. This isn’t nearly as easy as using the controller.
There is abother control mode that is new with the Vidius HD, draw-to-fly. This mode removes the right controller from the screen and allows you to trace a path along your phone that the drone will follow.
It’s a pretty neat feature, but ultimately not better than using a real joystick.
Finally, there is also a VR mode in which you can place your phone into VR googles. You get a first-person view of what the drone is seeing.
In theory it’s cool; in reality it’s impossible to fly the drone like this. I kept crashing within seconds.
Personally, I found using the controller is the best way to fly to drone, but it is nice to have options.
Video and Photographs
Taking photos and recording video is easy.
To do so, you press the camera or camcorder button in the upper left portion of the screen. Of course, your phone has to be connected to the drone’s Wi-Fi network to work properly.
To view the photos or videos, you press the button that looks like a browser refresh button, or you can use a file manager app and locate a folder named “Drone” on your phone.
The original Vidius was only capable of recording 420P video. I found the quality wanting and didn’t believe it was enough to justify the cost of the drone.
The Vidius HD has been upgraded to 720P and it’s immediately clear the upgrade was for the best.
The picture on the left is from the Vidius HD, while the right is the original Vidius.
The video footage is a marked improvement over the original Vidius as well.
Original Vidius
Vidius HD
The video isn’t perfect. The room was well-lit, yet the video is dark in certain portions, but overall it’s pretty good.
Overall, the video quality is pretty solid. You aren’t going to film documentaries with the drone, but you can certainly create some fun videos.
Conclusion
The Vidius HD is an excellent upgrade from the original.
I immediately dismissed the original due to the awful camera footage; fortunately, Aerix took the criticism and improved the design.
The drone is just as easy to fly as the original, but now it provides usable camera footage.
Aerix added a few gimmicky flight modes like VR mode and draw-to-fly modes; they are briefly fun, but ultimately not an ideal way to use the drone.
The battery life on the Vidius HD is only about 5 minues, but that’s to be expected on such a tiny device. Plus, it only takes 20 minutes to charge, so it’s not a huge negative.
If you’re interested in the Vidius HD you can purchase it for $85. It’s a bit expensive, but it would make a good starter drone for anyone interested.
Source: The sample for this review was provided by Aerix. Please visit their site for more information.
Note: If you are subscribed to this feed through FeedBurner, please switch to our native feed URL http://the-gadgeteer.com/feed/ in order to ensure continuous delivery.
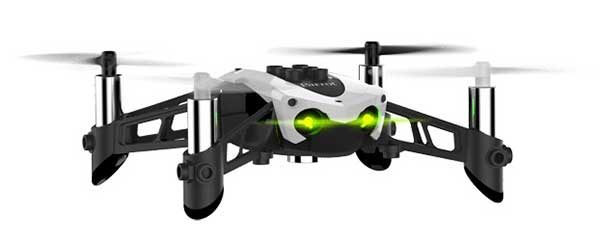
Drones have become a little boring in the last year or two because they are all pretty much the same. Parrot is changing all of that with their Mambo drone that comes with cannon and grabber attachments that take drone flying fun to the next level.
The Parrot Mambo Drone can pair with your smartphone which will be used as a controller, or you can buy the optional advanced flight controller for even easier flight control.
The drone features a built-in camera that can take snapshots but unfortunately, it doesn’t record video.
You can fly the Parrot Mambo with or without one of the attachments like the cannon, the grabber or the hulls. The cannon mounts on top of the drone and can hold up to 6 balls that shoot from the cannon when you activate that feature through the smartphone or advanced flight controller. The grabber arm can be attached to grab and drop small objects and the hulls are snap on cages that protect each of the four propellers.
The Parrot Mambo is priced has an MSRP of $119.99. For more info on the Parrot Mambo, head over to parrot.com or Amazon to buy one for less than $100.
Note: If you are subscribed to this feed through FeedBurner, please switch to our native feed URL http://the-gadgeteer.com/feed/ in order to ensure continuous delivery.