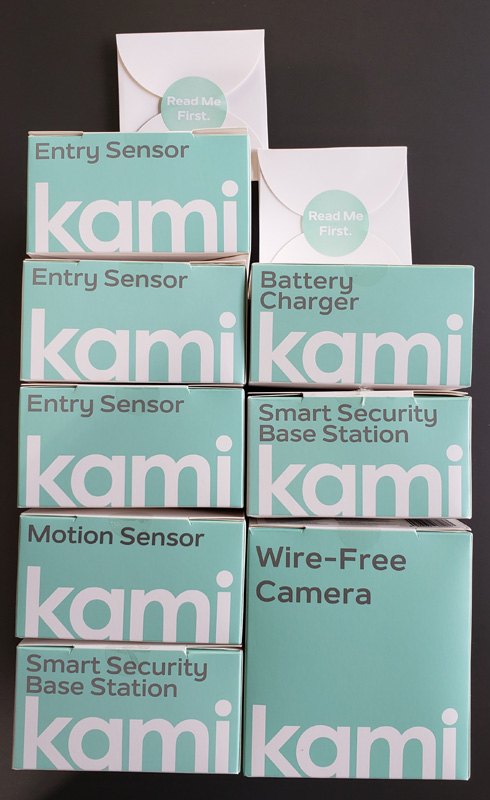
Kami home security system review

REVIEW – Home security is all the rage today. Yi, maker of the Yi Home Camera 3 standalone security camera is jumping into the full system fray with their Kami product.

What is it?

Kami is a modular do-it-yourself home security system.  I was sent the base system that includes the base station, three entry sensors and a motion sensor as well as their wireless HD camera.

What’s in the box?
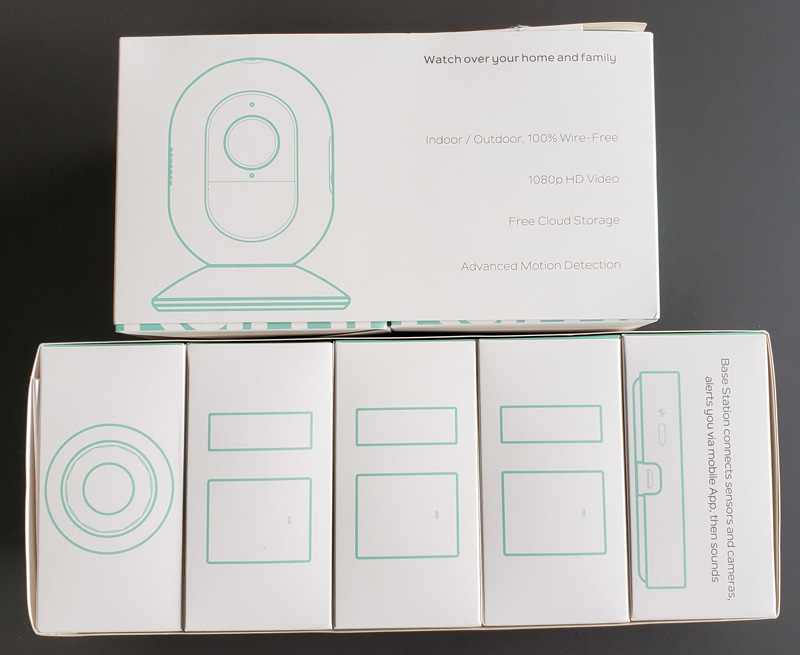
More correctly, what’s in the boxes – there were seven in total.

Box 1 – base station
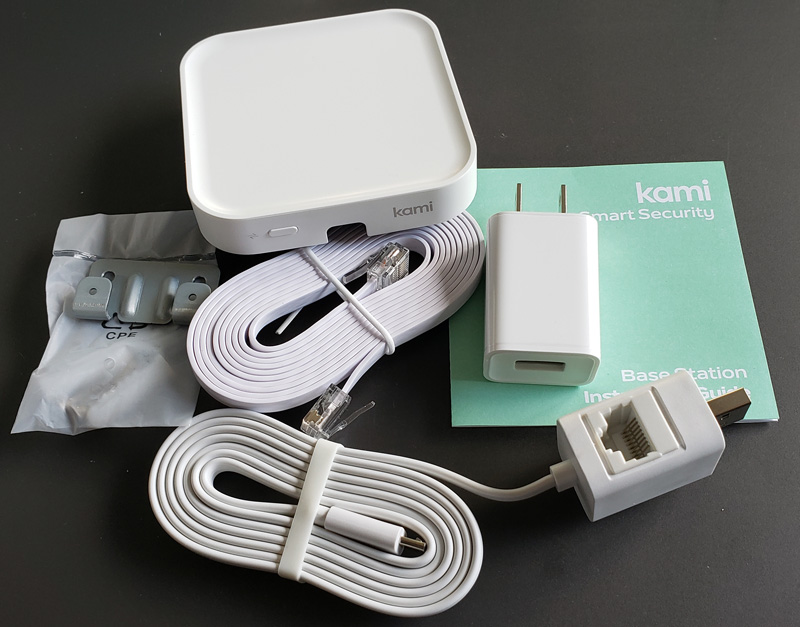
  • Base station
  • USB power adapter
  • USB power cord with Ethernet adapter
  • Ethernet cable
  • Wall mounting kit
  • Instruction guide

Boxes 2,3,4 – entry sensors
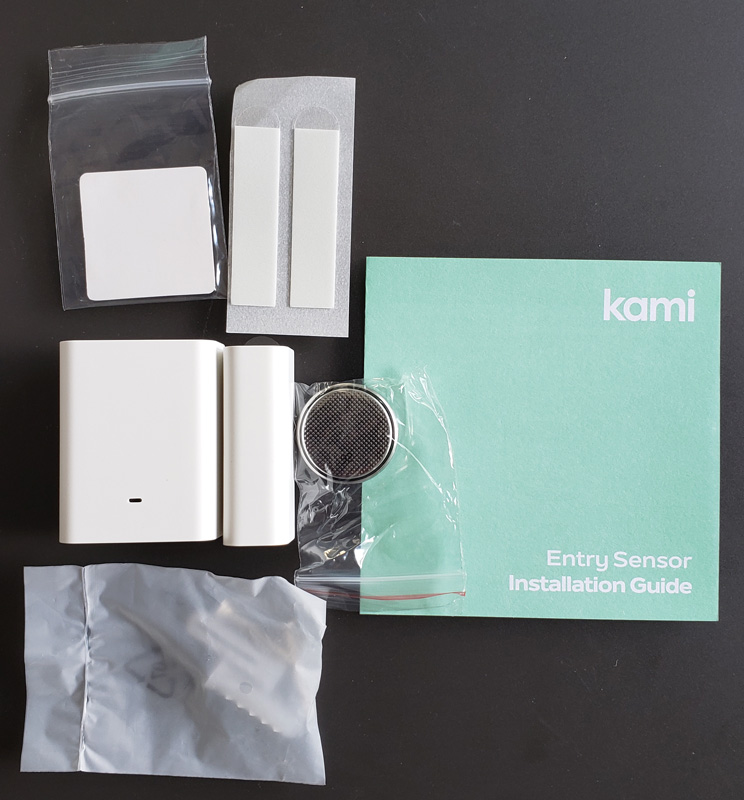
  • Three identical boxes that contain:
    • Entry sensor base (larger)
    • Entry sensor remote (smaller) with adhesive pad attached
    • Adhesive strips for base
    • Base mounting screws
    • Reset pin (not pictured because it’s under that square cardboard piece – doh!)
    • Installation guide

Box 5 – motion sensor
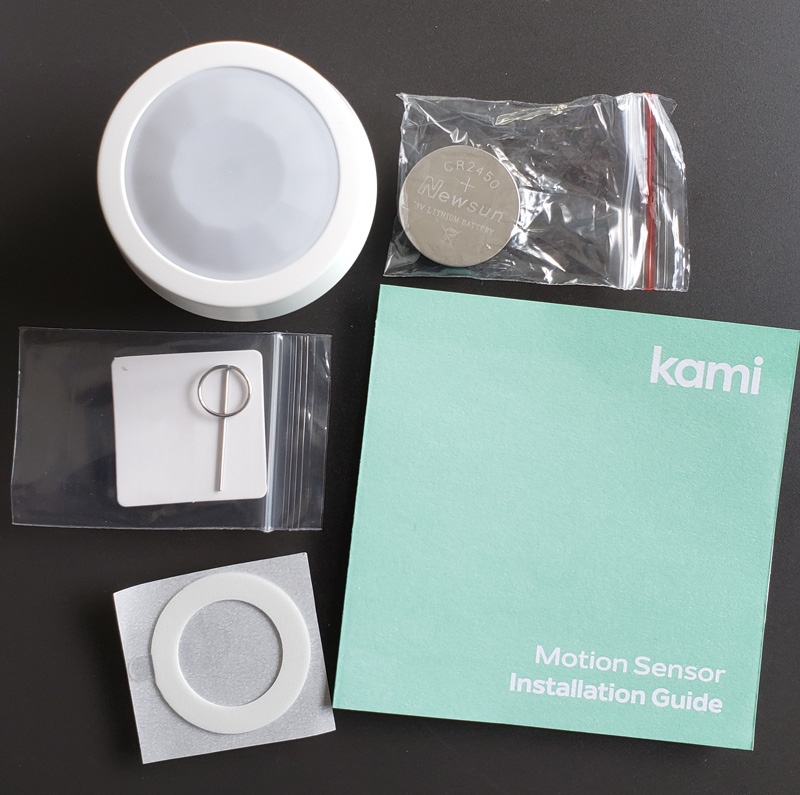
  • Motion sensor
  • Adhesive circle
  • Battery
  • Reset pin (pictured this time!)
  • Installation guide

Box 6 – another base station

  • Exactly like box 1
  • Can be used to set up different zones with different home/away or schedule profiles

Box 7 – wire-free camera
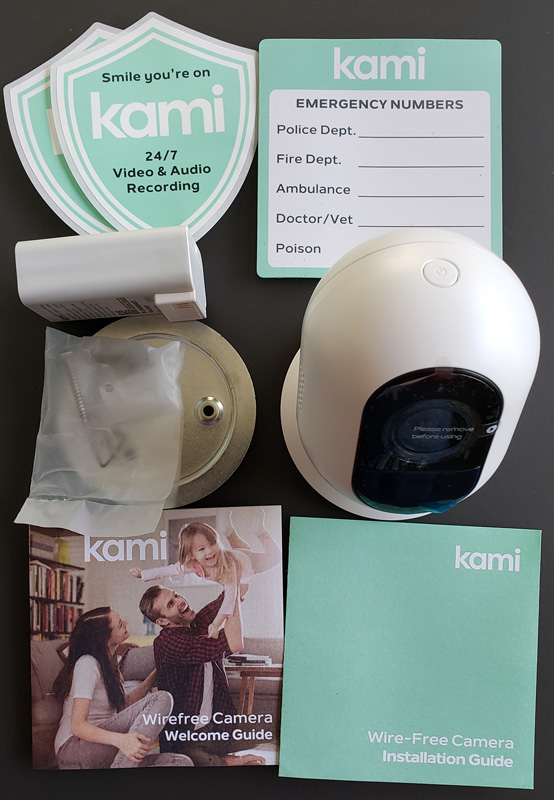
  • Wire-free camera
  • Magnet base
  • Rechargeable battery
  • Mounting plate
  • Mounting screws
  • Emergency number magnet
  • 2 x Kami video surveillance warning stickers
  • Welcome guide
  • Installation guide

Box 8 – wire-free camera battery charger plus a spare battery
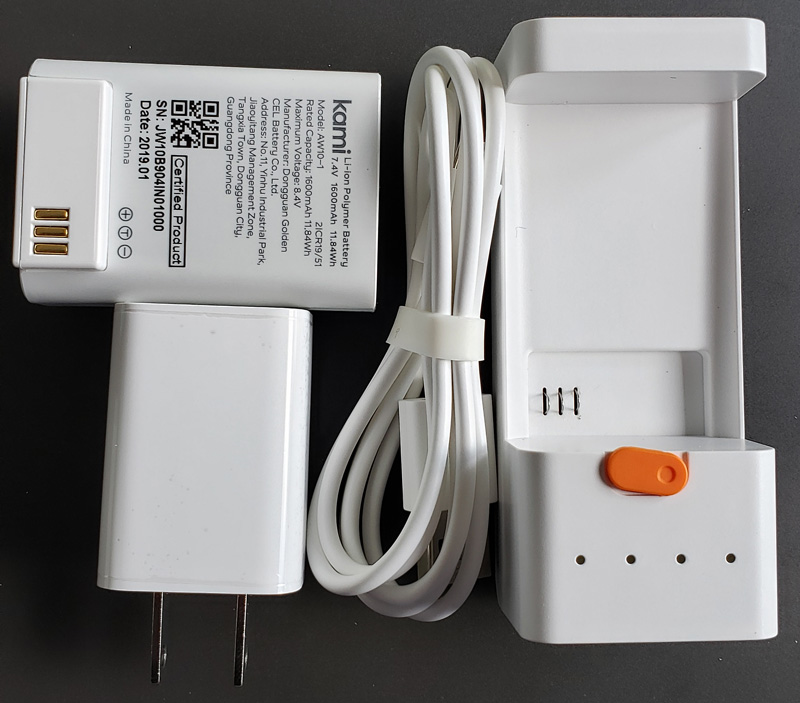
  • Battery
  • Charger
  • USB power adapter
  • USB cord

Hardware specs

Base system

1x Kami Smart Security Base Station:
Wired Network: RJ45
Wireless Connection: 2.4GHZ Wi-Fi
Operating Temperature: 0-45° Degree Celsius / 40°-115° Fahrenheit
Power input: DC 5V/1A

3 x Kami Entry Sensor:
Battery Type: CR2450
Operating Temperature: 0-45° Degrees Celsius / 40°-115° Fahrenheit

1x Kami Motion Sensor:
Battery Type: CR2450
Operating Temperature: 0-45° Degrees Celsius / 40°-115° Fahrenheit

Wire-free camera system

1 x Kami Wire-Free Camera:
Infrared night vision: 18 feet
Camera viewing angle: 113° degrees (H), 59° degrees (V), 140° degrees (D)
Video specification: 1080P / 20fps
Operating temperature: 14-122 Degrees Fahrenheit

1x Kami Smart Security Base Station:
Wireless connection: 2.4GHZ Wi-Fi
Operating temperature: 32-113 Fahrenheit

2 x Battery:
Rated capacity: 1600mAh/11.84Wh

1 x Battery charger:
Rated power: 9W

Design and features

The Kami system is designed to be modular – you add what you need for your specific installation.  Let’s take a  look into the setup.

Setup

Base station

The first thing to do is to download the IOS or Android Kami Home app from the appropriate store.  Once installed, set up a Kami Home account.  This is where I ran into an issue.  As a Yi Home camera user, it turns out that the Yi Home and Kami Home accounts are the same things.  So, I simply logged into Kami Home with my Yi Home credentials.

Now, to get a base station installed. The base station must be plugged into a router.  Luckily, I had a couple of ports available on one of my eero remotes.

Design flaw here:
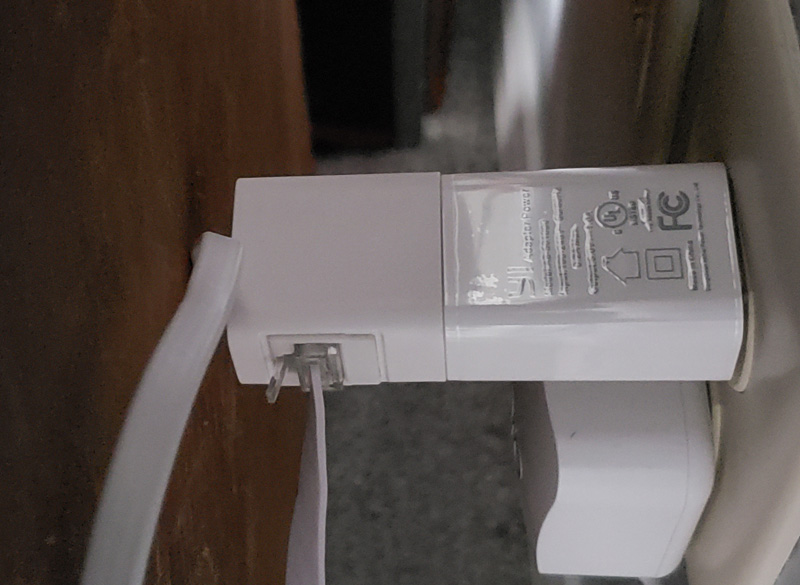
The Ethernet adapter/power cord combo plugs into the end of the USB power puck, creating a two-inch-long monster that is impossible to hide behind furniture without moving said piece quite a distance from the wall.

To start the setup, choose what it is you are installing.
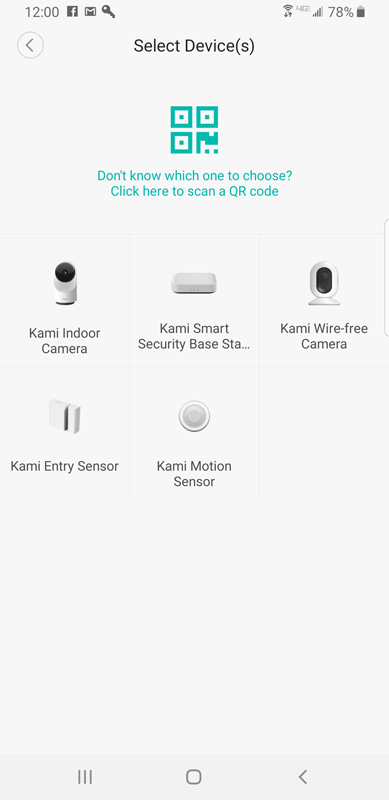
After getting everything plugged in, Yi’s usual, excellent, voice prompts from the device lead you through pairing.  In the app, I chose to add a base station.  The app found the base station immediately and paired as expected.

The base station is very small.  Here it is sitting on top on my eero router.
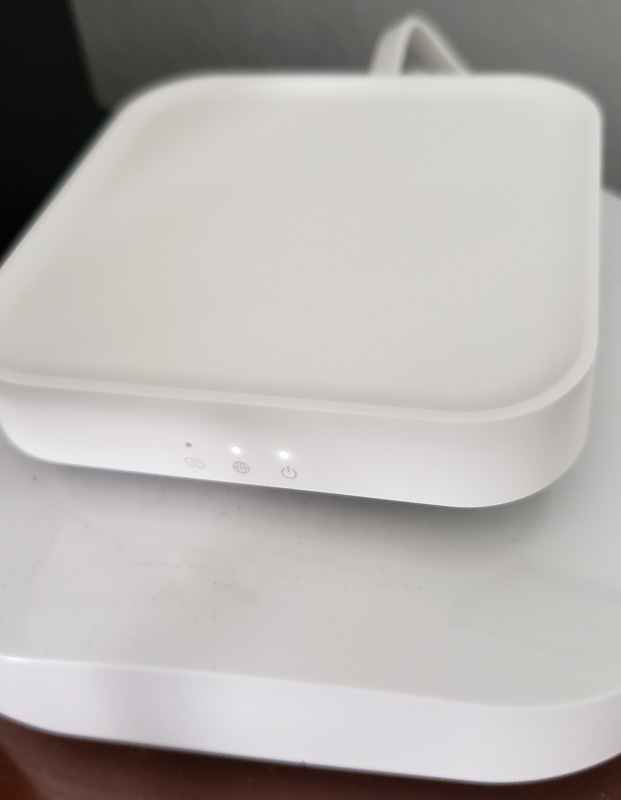
Entry sensor

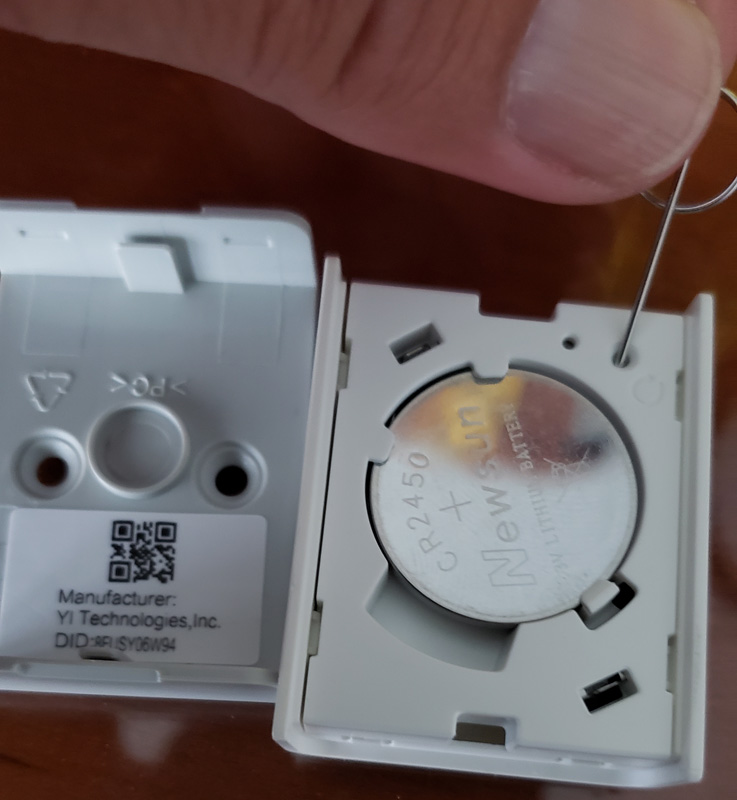
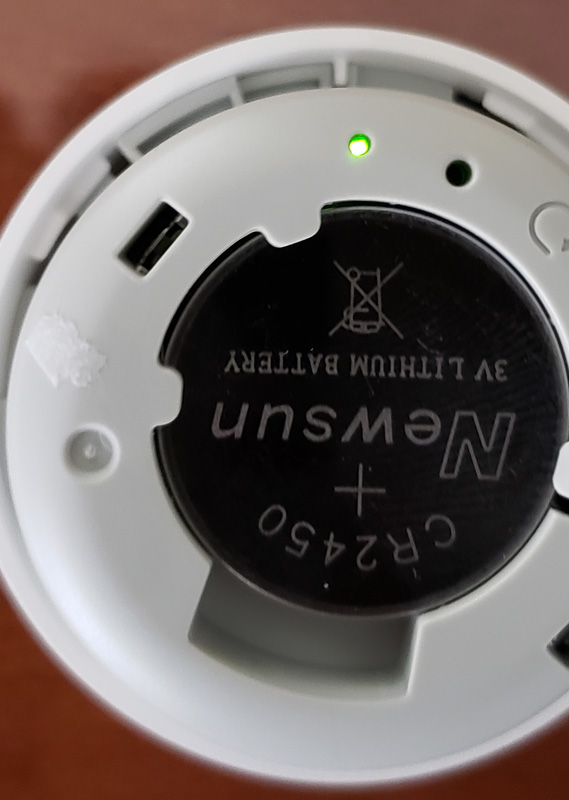
Again, set up is pretty simple.  Choose to add an entry sensor in the app, and the app leads you. Open it up, install the battery – battery orientation is pictured in the app, place it near the base station and scan the QR code inside the cover.  Then the app prompts you to push the reset button with the included reset pin. There is a little green light to the left of the reset hole.  Once flashing, confirm that in the app and the base station reports verbally that the sensor is paired.
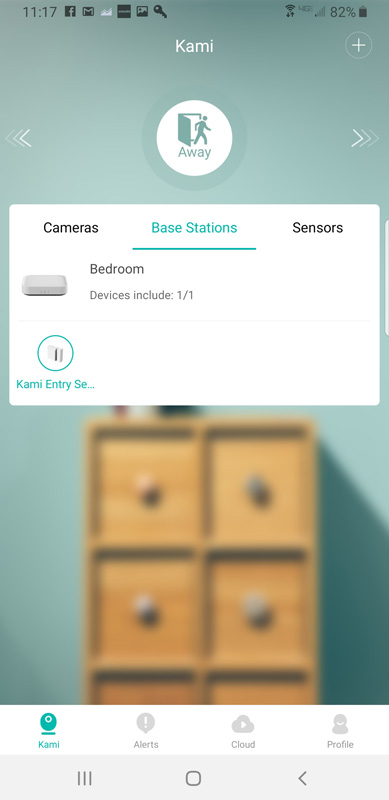
The app shows devices as they are added.
And, the app provides mounting instructions:
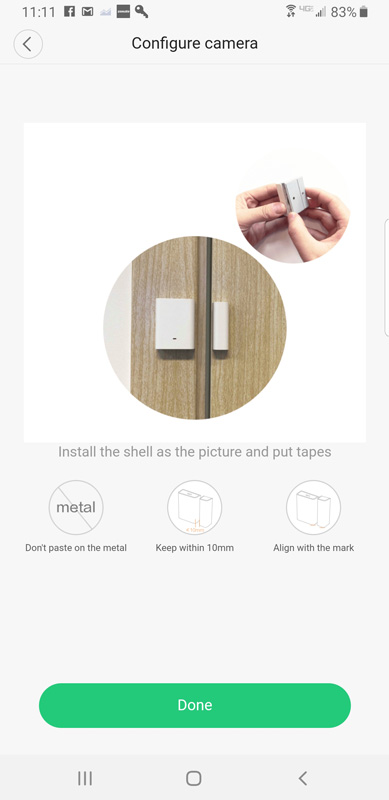
That last item – align with the mark – refers to marks on the two parts of the sensor that need to be matched up.
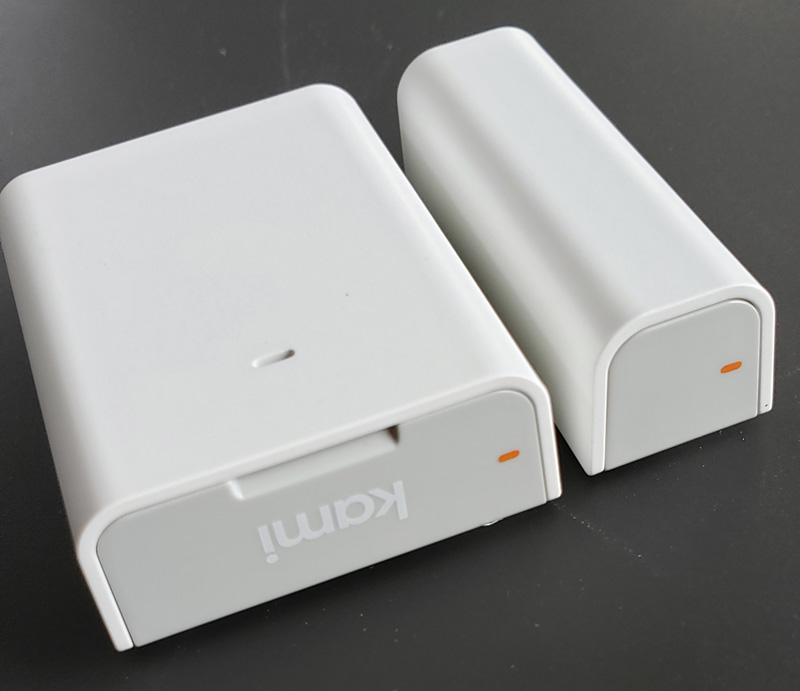
Motion sensor

Setup for the motion sensor followed the same steps as the entry sensor.

Start by twisting the back off.  I couldn’t do it.  Then, I saw the lock indicator.
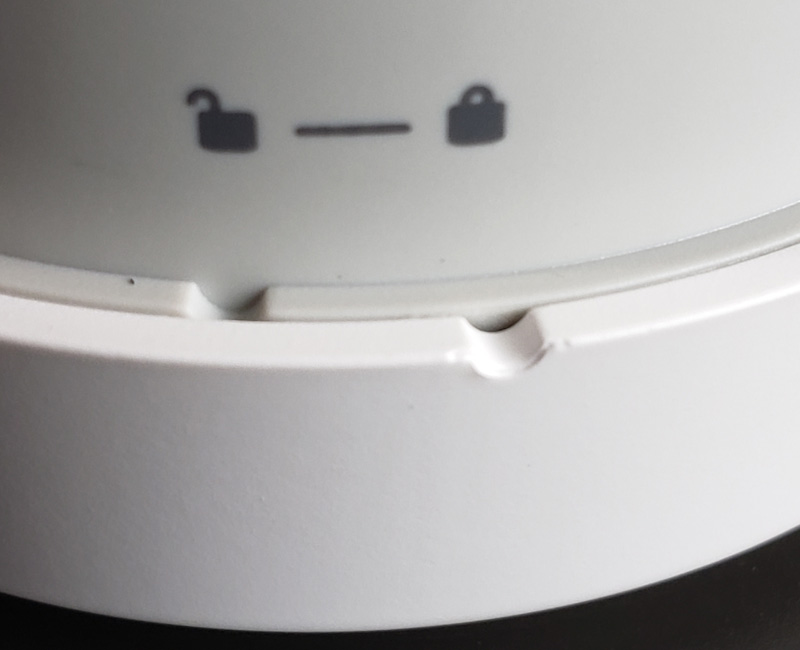
After I twisted it to the unlock position, the back came off easily.

Here is a view of the green LED I mentioned above that flashes after hitting the reset button, indicating it is ready for pairing.
Each device confirms when it pairs.
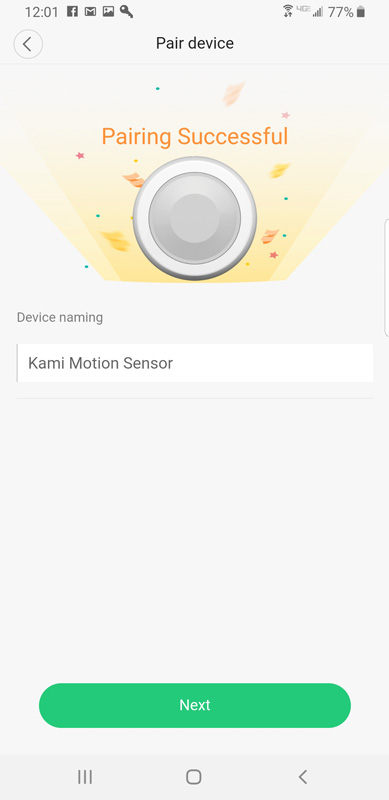
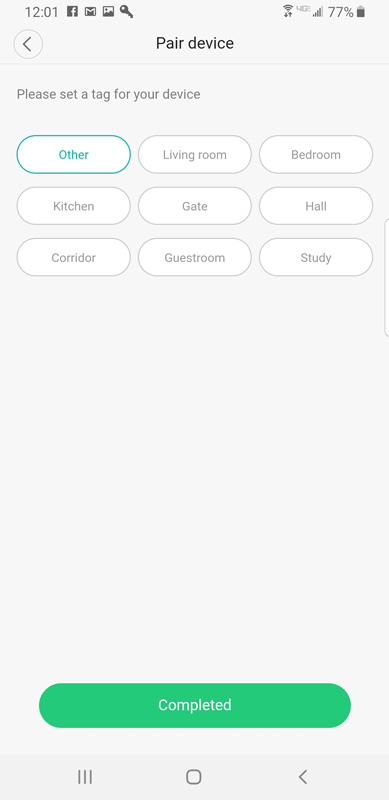
You can set a location tag for each device.
Camera

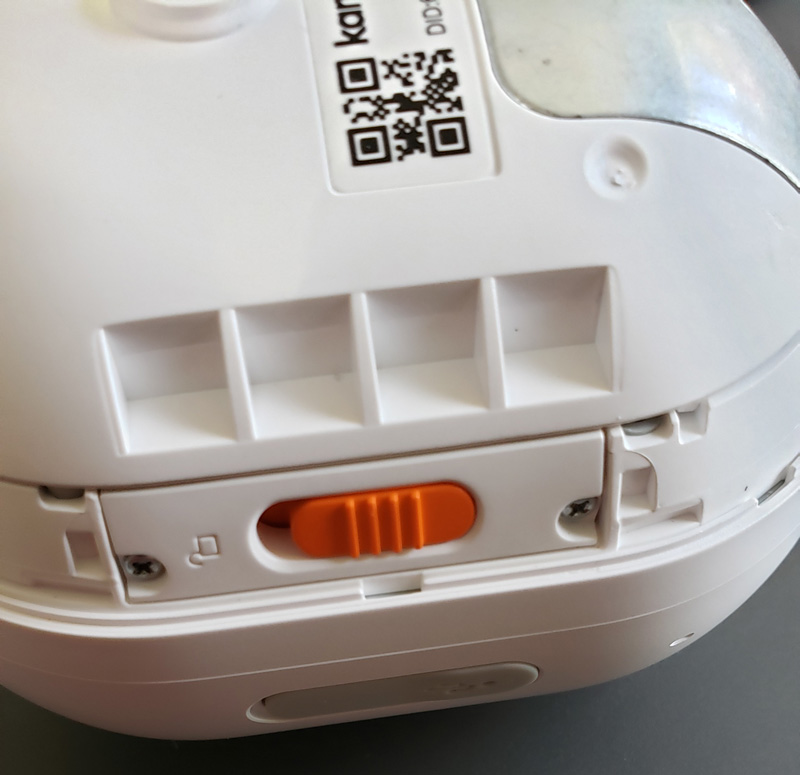
Camera set up is essentially the same as the other devices. Pop off the back to access the door lock for the battery compartment.
Swinging open the door, we find the battery compartment.
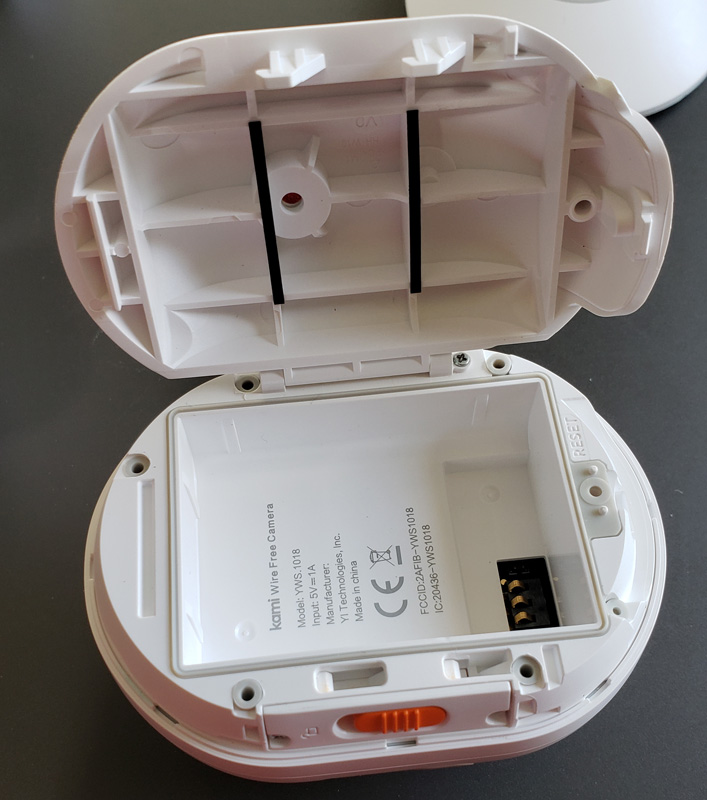
The battery drops in and immediately powers up the camera.  Its voice prompt tells you it is powered up.
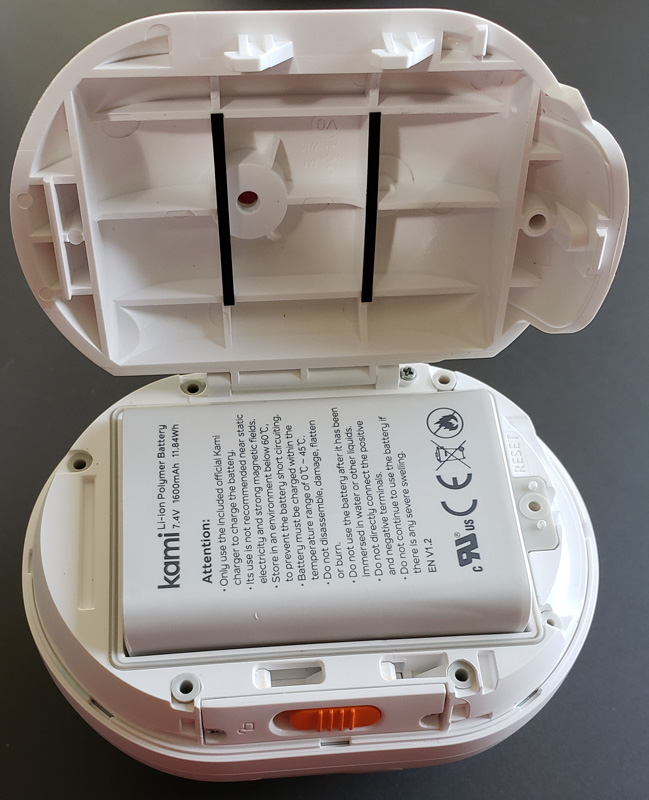
After closing the unit and placing it on the base for stability, place it by the base station, press the main button on top and the app leads you through automatic pairing.  Both the camera and base station’s voice prompts report that the pairing is complete.

One note – the camera is an indoor/outdoor camera, so you can use this to monitor your outdoor spaces.

Battery charger

There is no setup for the battery charger – just plug it in and pop in a battery to charge.  Four LEDs report charging progress.

Performance

After installing an entry sensor, I moved the entry sensor parts apart and back together to test operation.
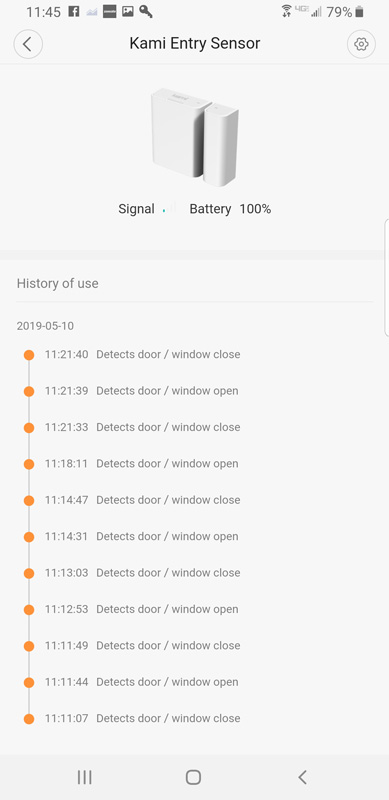
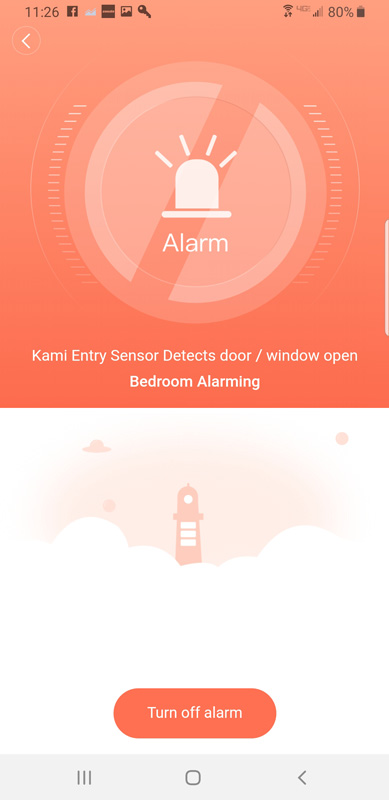
The app recorded each event.  When the system was in away mode, the base station started audibly alarming minutes before I received an alert in the app.  Eventually, I got an alert and was able to see the alert and silence the alarm.
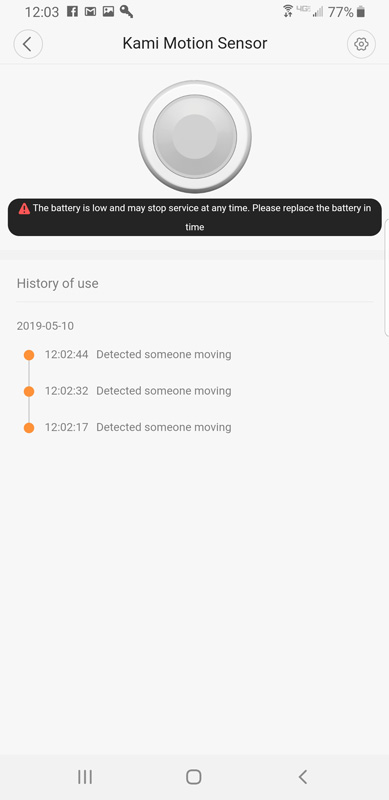
I also tested the motion sensor.  It picked up motion successfully, but looks like they sent an old battery!
After adding the camera, it produced good quality video and images.
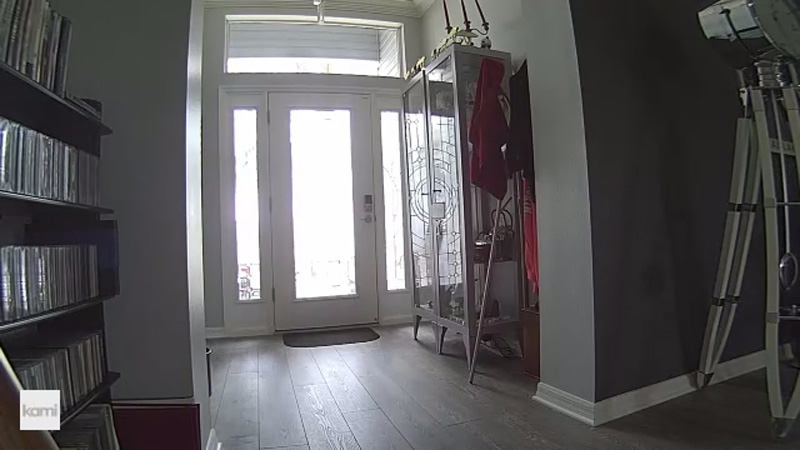
The camera does not have an SD card slot, meaning that you cannot save any video without subscribing to the Kami Cloud recording service.  Pricing runs from $66 to $199 annually depending on how long the videos are saved and whether it records full-time or only motion activated recording.

There are two modes, home, where alarms are silenced and away, where alerts trigger the base station alarm and app notifications, To change to/from home and away mode,  you slide the icon to the right to activate away mode and to the left to activate home mode.

After just a few days, the battery in the camera died.  I was surprised how quickly it died, but it probably really wasn’t fully charged.  Still, there was no notification from the app.  If there was from the camera, it happened at night or when I wasn’t home, so there was no way to know.  I only discovered it when I looked in the app and saw the camera was offline. Speaking of notifications, the app seemed to regularly sleep and notifications from motion would only come in sporadically, and then, in groups.

Finally, after the battery died in the camera, I expected to drop in the other battery and be back in business. Nope. I put in the battery and got the verbal welcome message. I checked the app, expecting to see the camera back online. Nope. The camera didn’t come back online after I put in the battery.  I tried it multiple times with the camera right next to the hub.  Nothing.  I finally deleted the camera from the Kami hub and went through the pairing process again.  Still nothing.  I followed the procedures in the app exactly as I did for the initial pairing and I could never get the camera to pair again.

What I like

  • Simple set up
  • A comprehensive set of sensors for a reasonable price
  • Good quality camera

What needs to be improved

  • The alarm is somewhat quiet
  • Phone alerts are slow and inconsistent
  • The entire system is in home or away mode – no mode for home, but still armed, like a night sleep mode
  • No SD card in the wire-free camera, so no recording without paying to subscribe
  • Wire-free camera wouldn’t come back online after the battery died
  • No options for central monitoring – alerts are audible from the base station and in the app

Final thoughts

Overall, I am not impressed with this DIY security system.  The setup and installation are simple and the sensors and camera all work well until the battery dies.  The alerts take some time to reach your device and the only other alarm is a somewhat muted alarm at the base station.  With no options for central monitoring, it is limited to audibly alerting inside your home and on your phone. Plus, you are required to pay for cloud recording, since there is no SD card option on the camera. It is not documented in the app, but it does include six months of cloud recording.

With spotty alerts and problems when battery-powered devices lose power, I can’t really recommend this system.

Price: Base system: $99.99; Wire-free camera system: $109.99
Where to buy: Amazon – base system and wire-free camera system
Source: The sample of this product was provided by Yi Technology.

Filed in categories: Reviews

Tagged:

Kami home security system review originally appeared on The Gadgeteer on May 27, 2019 at 11:00 am.

Note: If you are subscribed to this feed through FeedBurner, please switch to our native feed URL http://the-gadgeteer.com/feed/ in order to ensure continuous delivery.

Wyze Sense review

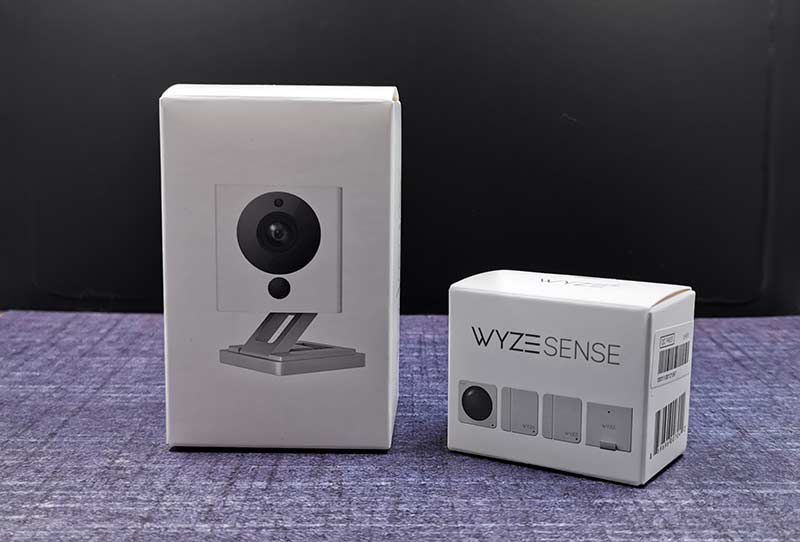
REVIEW – Let me get this out of the way right from the start… I love Wyze products. I reviewed the Wyze Cam and have gone on to buy additional cameras and help my neighbor purchase and set up more cameras for his home. I think they are an awesome bang for your buck when it comes to small home security cameras and now Wyze has added two new sensors that work with the Wyze Cam to create an affordable basic home security system. Let’s check it out.

What is it?

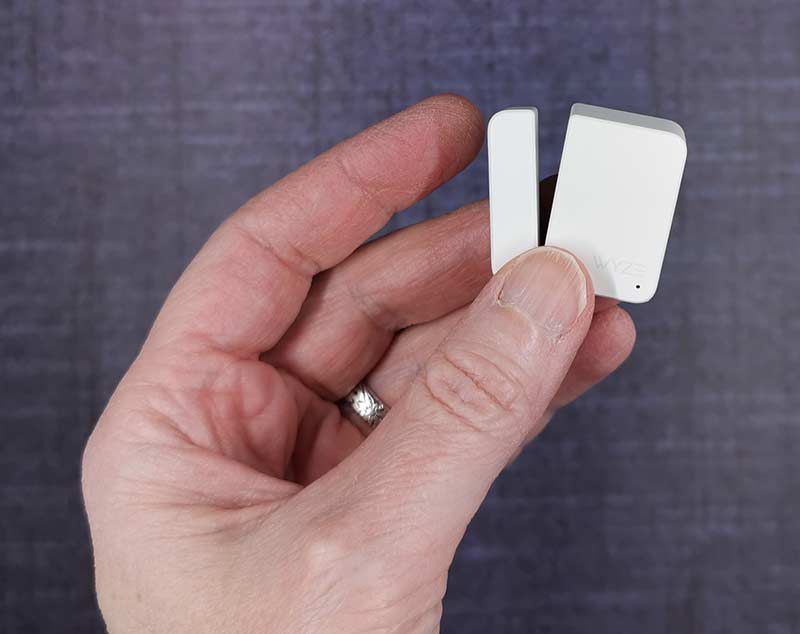
Wyze Sense are small contact and motion sensors that work with Wyze cameras to create a basic home security system.

What’s in the box?

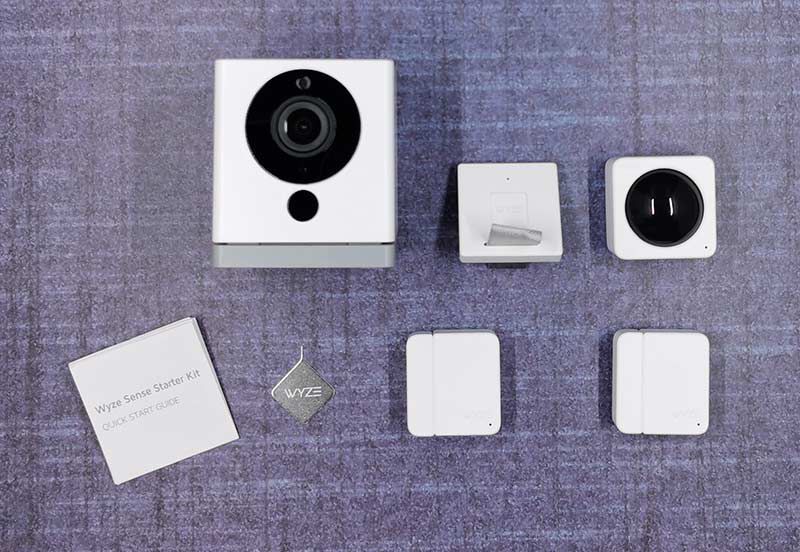
Starter kit comes with:

  • 2 Contact sensors
  • 1 Motion sensor
  • 1 Sensor bridge
  • Reset tool
  • Instructions

A Wyze Camera is NOT included in the starter kit, but one camera is required for the setup.

Design and features

The starter kit comes with 2 sensors.

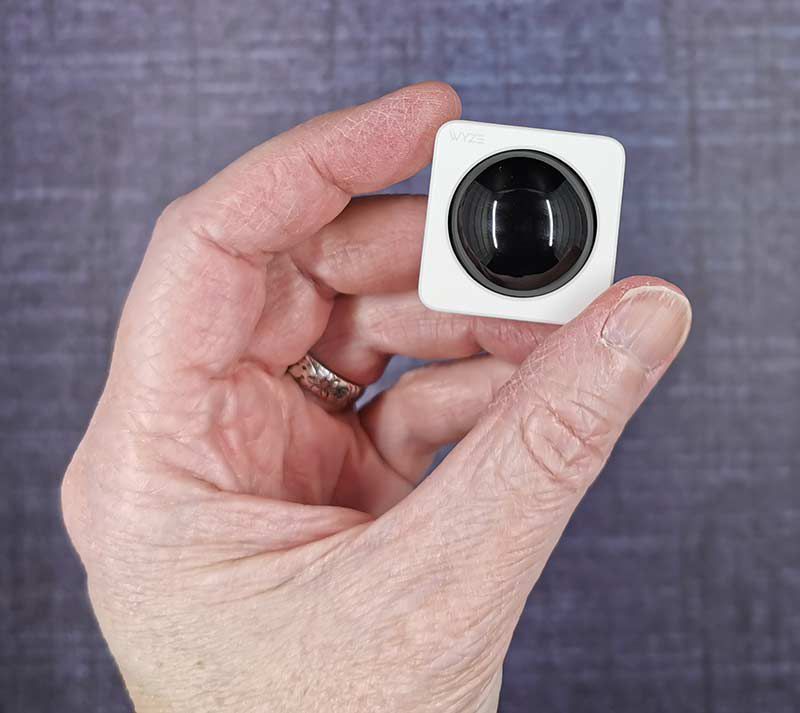
There’s the small motion sensor shown above which can detect motion 120° up to 26′ away. Just place the sensor about 6 ft up on a shelf and it is good to go.

The contact sensor has two pieces that use a magnet to know when the contact between the pieces has been opened or closed.

Installation

Wyze knows how to design a system that anyone can install. The Wyze Sense installation isn’t any different. It takes only a couple of minutes to get up and running and most of that time is just figuring out where to place the sensors.

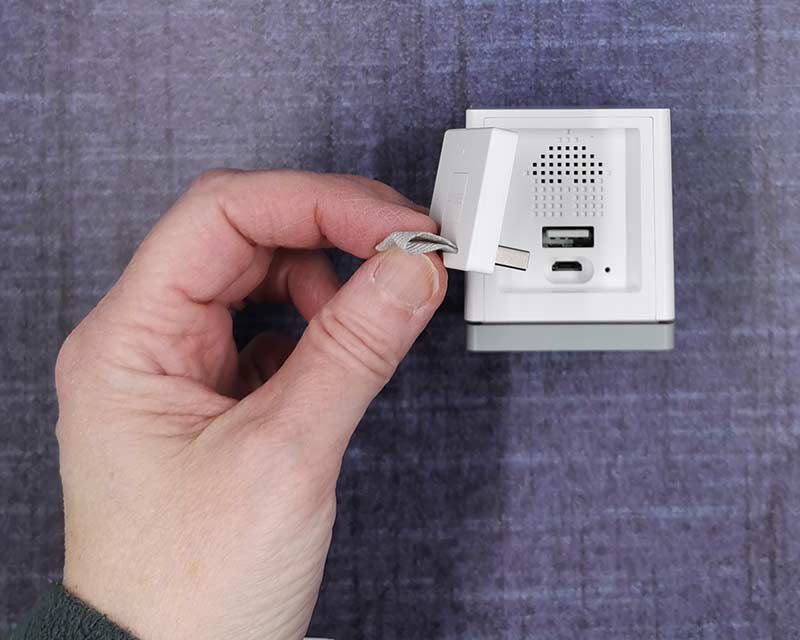
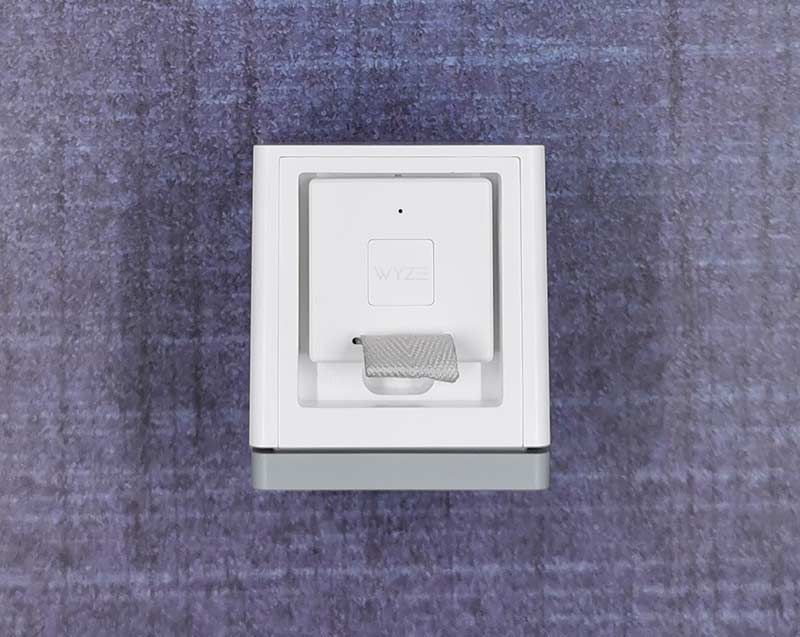
You will need a Wyze camera though. The camera is needed for the Sensor Bridge which plugs into the USB port on the back of the camera.

The Bridge is the module that the sensors will talk to.

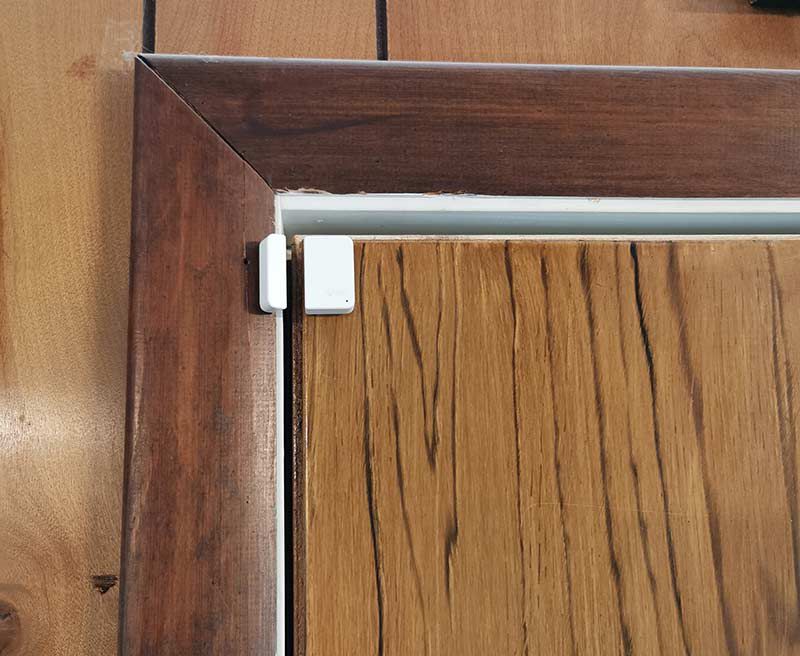
To install the contact sensor, you remove the adhesive on each piece and then stick them on something that will open, like a door, a window, a cabinet, etc.

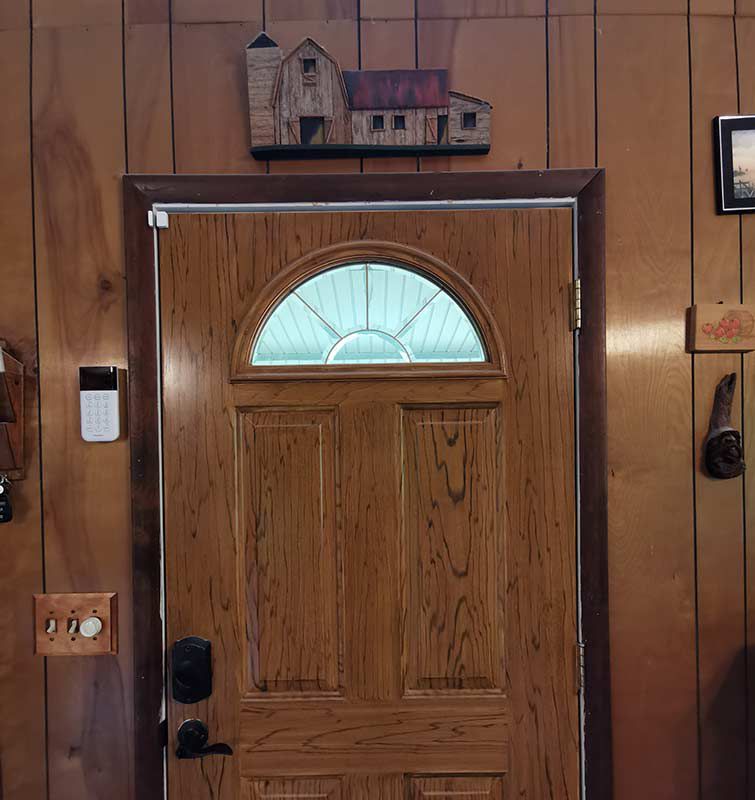
I placed mine on the front door so that when the door opens, the contact between the two pieces is open and when the door shuts, the contacts close.

For the motion sensor, I placed it on a high shelf. Can you find it in the image above?

The only criticism about the sensors that I can think of is that they are bright and stick out since they are made of white plastic. It would be great if Wyze offered them in black too.


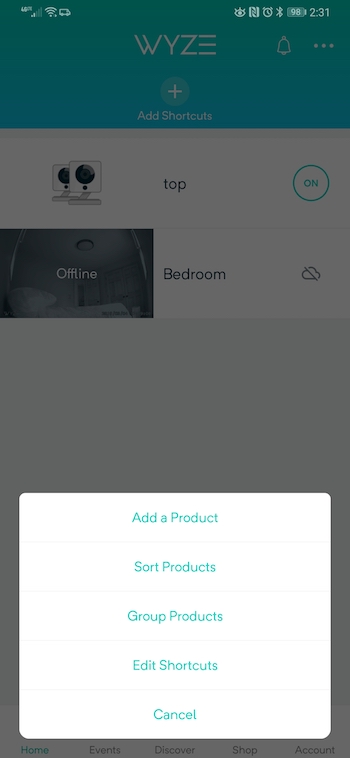
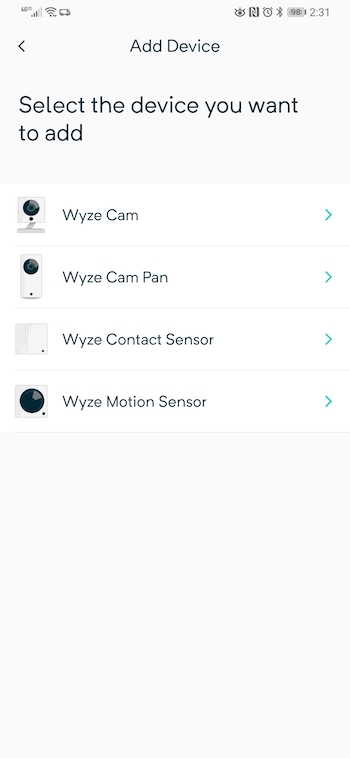
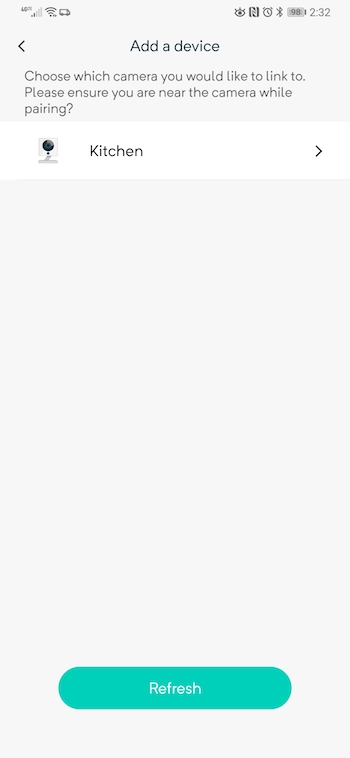
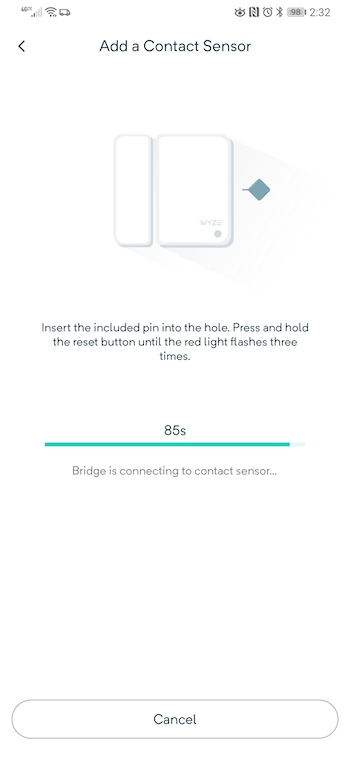
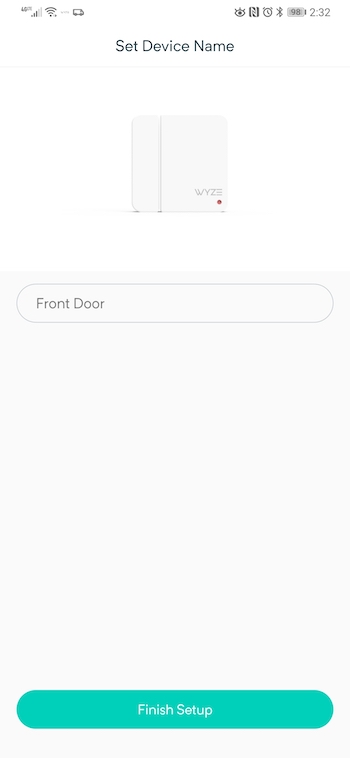
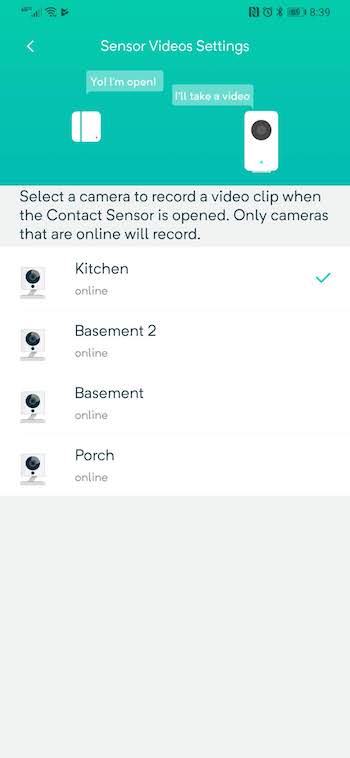
The next step in setting up the sensors requires you to launch the Wyze app on your mobile device and add the new products. The app leads you step by step through the process which only takes a couple of minutes. As you can see, you have to link the sensors with one of the Wyze cameras so that any triggered events will capture a video clip.


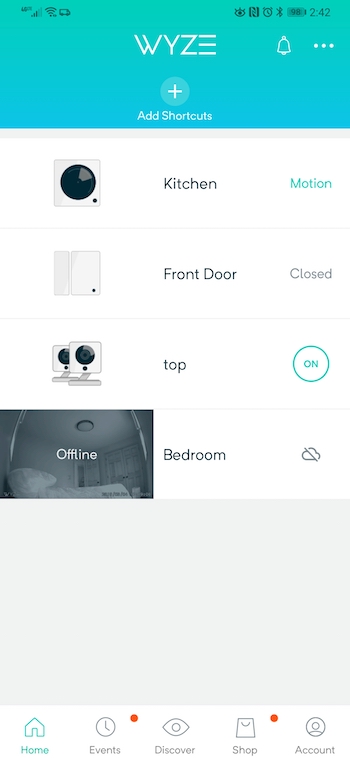
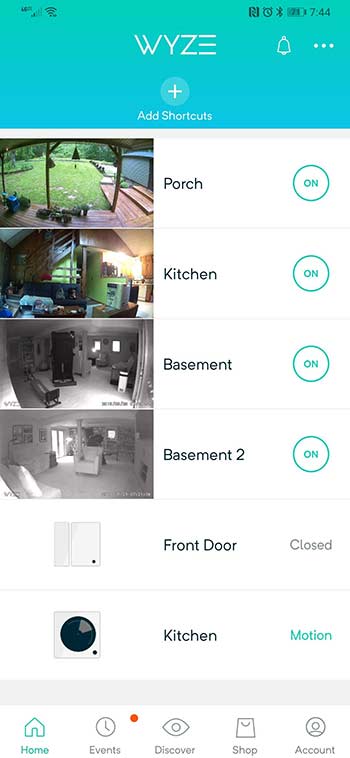
When the setup is complete, the sensors will show up in the Wyze app dashboard where you can quickly see their status.


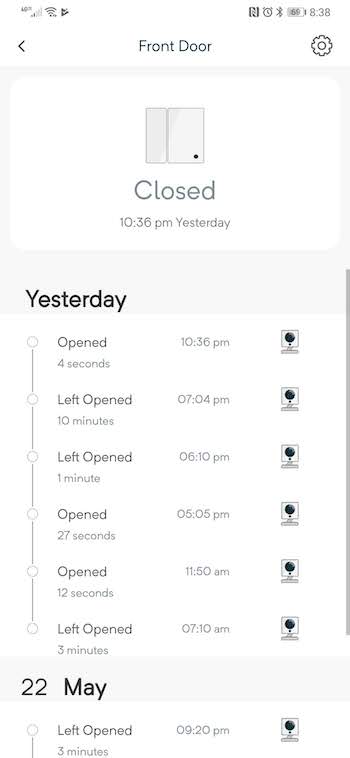
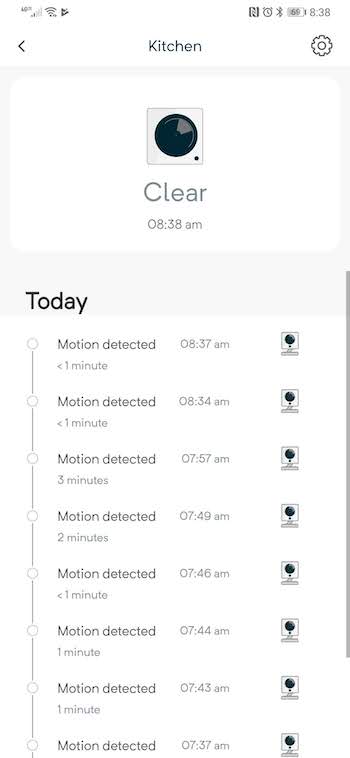
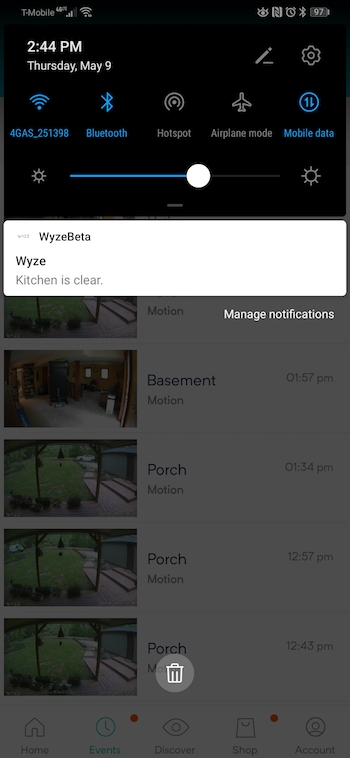
Going into each sensor from the dashboard will allow you to see more info including times when the sensors detected an event. The sensors also send alerts just like camera motion events do.

I’ve been testing these sensors for the past few weeks and have had zero false positives on the contact sensor and the motion sensor has been rock solid too. Just know that it will detect your pets which may or may not be an issue for you.

What I like

  • Inexpensive
  • Simple to install
  • Reliable

What needs to be improved

  • More sensors please! 🙂

Final thoughts

Wyze has done it again. Not only do they offer the absolute most affordable and best experience in security cameras, now they are branching into sensors to create a basic home security system. If I sound gushy that’s just because I have loved using Wyze products in the past and am truly excited about what they will come up with next. FYI, I already know what’s next. It’s a smart light bulb and of course, I’ll have one to review soon.

Price: $19.99
Where to buy: Wyze
Source: The sample for this review was provided by Wyze.

Filed in categories: Reviews

Tagged: , ,

Wyze Sense review originally appeared on The Gadgeteer on May 24, 2019 at 9:00 am.

Note: If you are subscribed to this feed through FeedBurner, please switch to our native feed URL http://the-gadgeteer.com/feed/ in order to ensure continuous delivery.
Lockly Secure Pro Deadbolt Edition smart lock review

REVIEW – I love smart home gadgets. But I have yet to review any type of smart lock. That is up until now. Today I’ll be reviewing the Lockly Secure Pro Deadbolt Edition. This lock is loaded with a lot of unique security features, including a secure digital keypad and  3D fingerprint sensor.  Let’s take a look at the Lockly Secure Pro.

What is it?

The Lockly Secure Pro Deadbolt Edition smart lock is a smart lock that features a digital touch screen keypad, a 3D fingerprint sensor and compatibility with Alexa and Google Assistant.

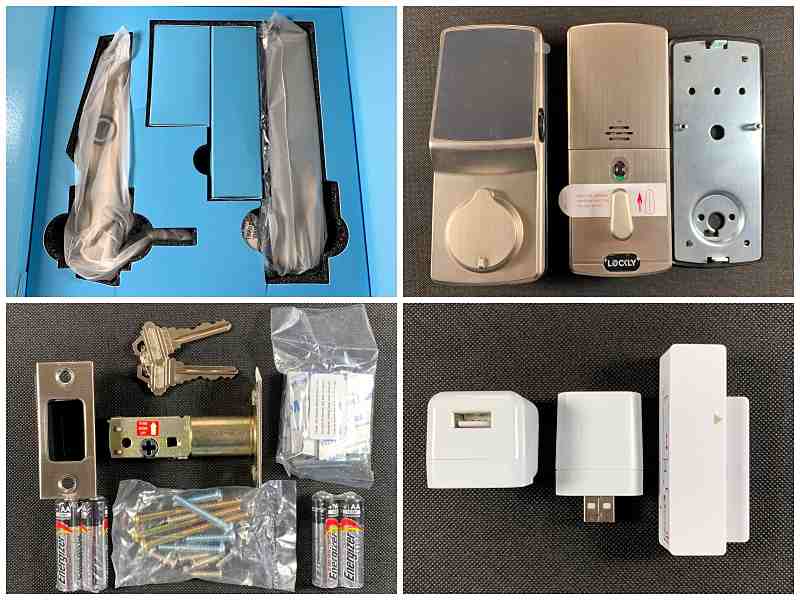
What’s in the box?

  • Secure Pro smart lock
  • Bolt assembly
  • Screws
  • Strike plate
  • Strike plate housing
  • Backplate
  • 2 x physical keys
  • 4 x AA alkaline batteries
  • Secure Link – Wi-Fi hub
  • Secure Link – Power adaptor
  • Secure Link – Door sensor
  • Quick start guide
  • Installation manual
  • User manual

Design and features

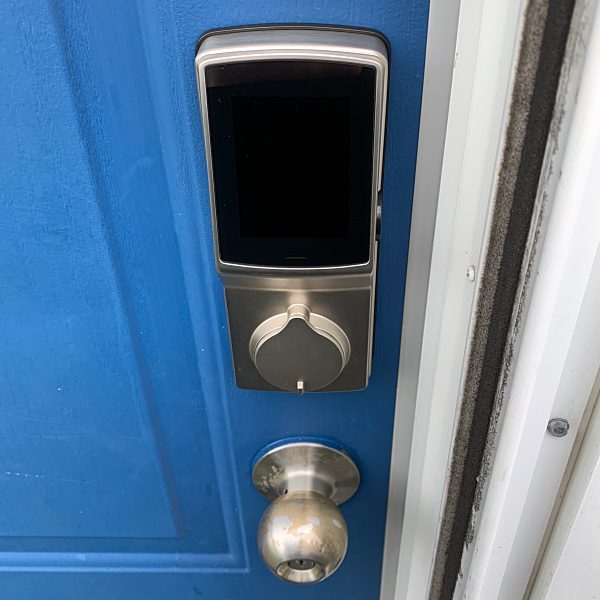
The Lockly Secure Pro has a modern, clean design. The lock is available in two colors, Satin Nickel and Venetian Bronze. I chose to go with the Satin Nickel because it was a close match to my door’s existing hardware.

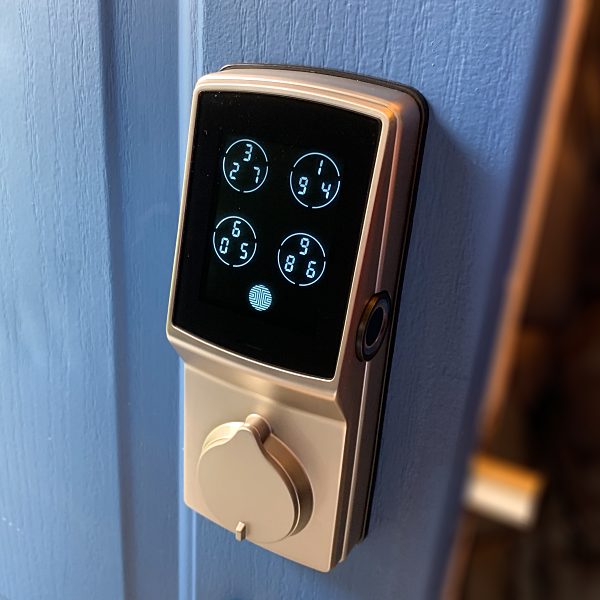
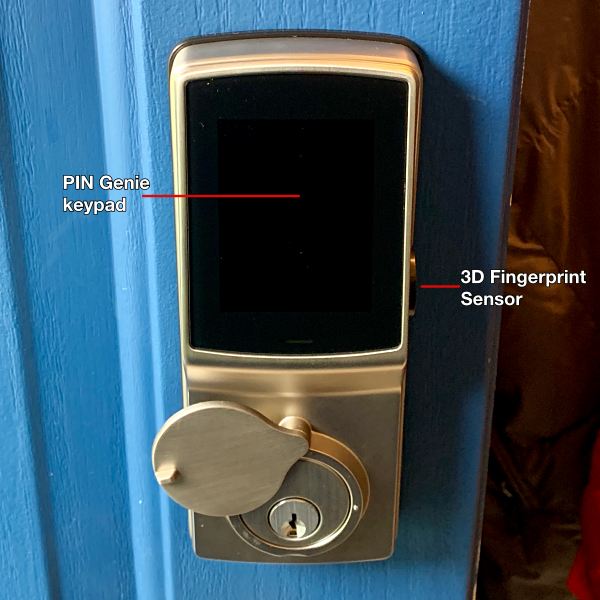
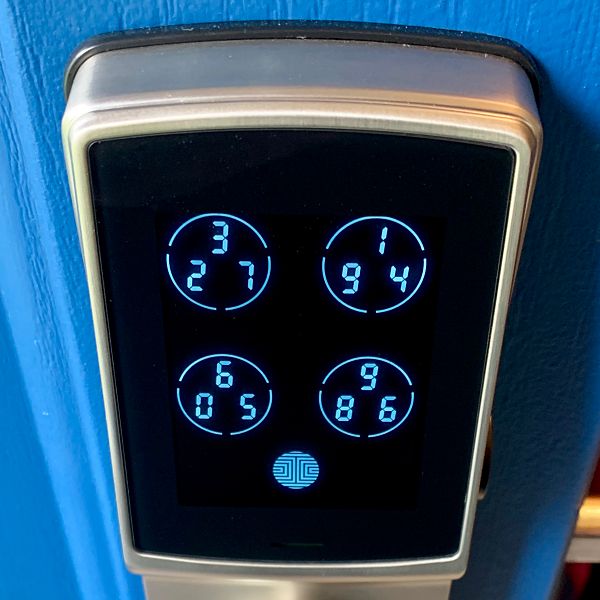
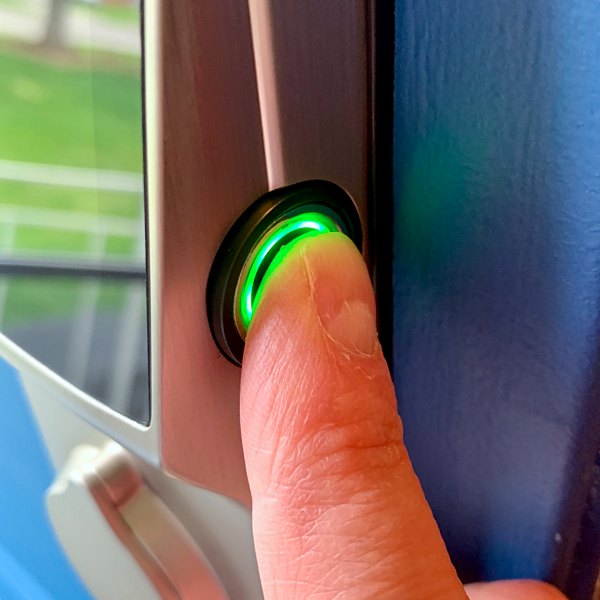
The front of the outer assembly features a digital keypad and keyhole w/keyhole cover. The fingerprint sensor is located on the right side of the assembly. On the bottom, there’s a reboot button and a 9V battery emergency charging socket.

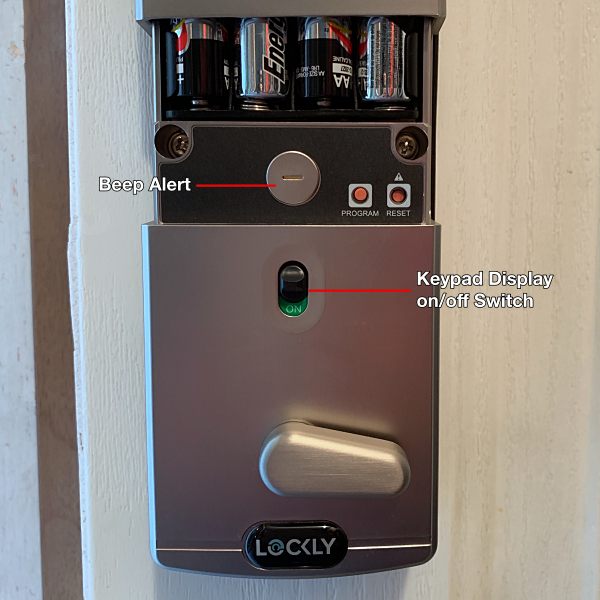
The inside assembly has the Battery Compartment (Operated by 4 x AA Batteries), Battery Cover, Display Keypad on/off Switch (switches off and locks the keypad), and Thumb-turn. Inside the battery compartment, there’s a reset button, Program Button and Beep Alert.

With Secure Pro, you can choose from five unique methods of entry, which include: the PIN Genie keypad, 3D fingerprint sensor, Lockly app, virtual assistant and traditional key.

The PIN Genie keypad allows you to unlock the door using a 6-8 digit access code.

Lockly’s patented PIN Genie Technology makes it virtually impossible for someone to use your access code unwillingly. The video below explains Lockly’s PIN Genie Algorithm and how it works.

The Lockly keypad has 3 different modes Standard, PIN Genie mode, and Random mode. The video below explains how each mode works.

The Secure Pro comes equipped with a capacitive fingerprint reader. Secure Pro uses capacitors and electrical current to form an image of the fingerprint, meaning only physical fingers will be accepted, preventing the use of lifted prints.

With the Lockly app, you can monitor and control your lock using either Bluetooth or Wi-Fi.

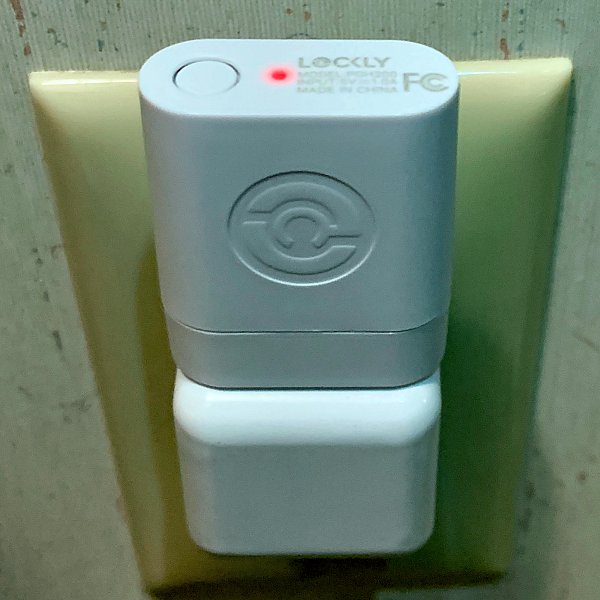
Using Wi-Fi requires the use of the included Secure Link WiFi Hub. The hub allows you to lock, unlock, and monitor your smart lock remotely wherever you have a Wi-Fi connection. Setting up the Hub is easy using the Lockly app.

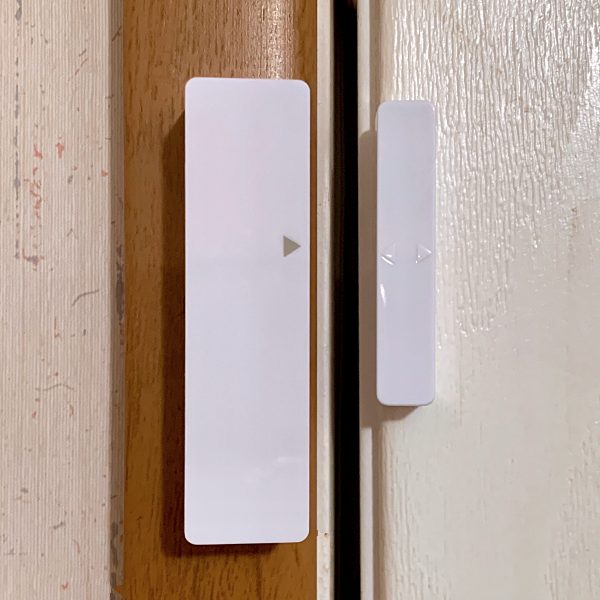
The Hub comes with a door sensor.

The sensor provides the ability to verify that your door is securely closed and not ajar and also send push notifications to your phone on the status of your door when someone opens and closes the door.

Installation

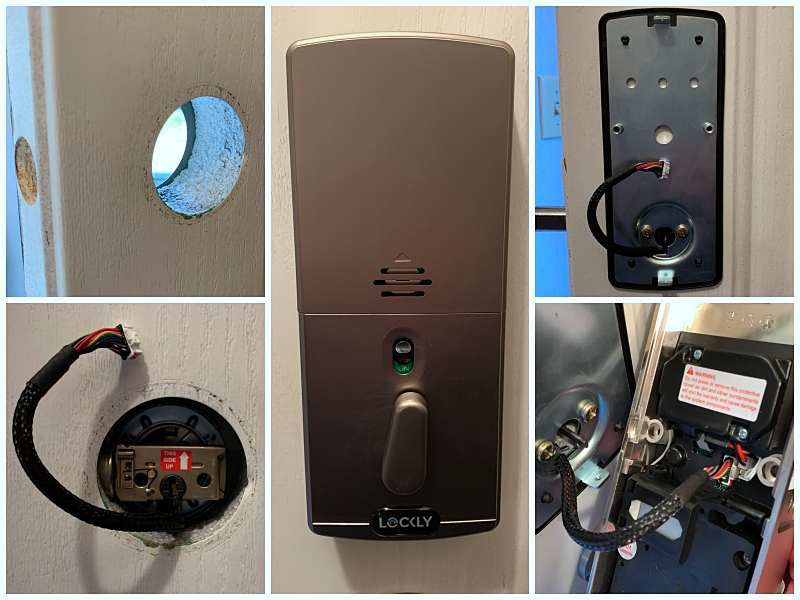
Installing the lock is pretty easy, especially if you’re replacing an existing deadbolt. If you’re not Lockly provides templates to help you out.

The only tools you’ll need are a Phillips head screwdriver and a little patience.

The installation instructions are easy to follow and very detailed. Take it from someone that usually doesn’t bother reading instruction, read these carefully before you get started.

Setup

The lock can be set up with or without the Lockly app, but using the app is recommended and much easier.

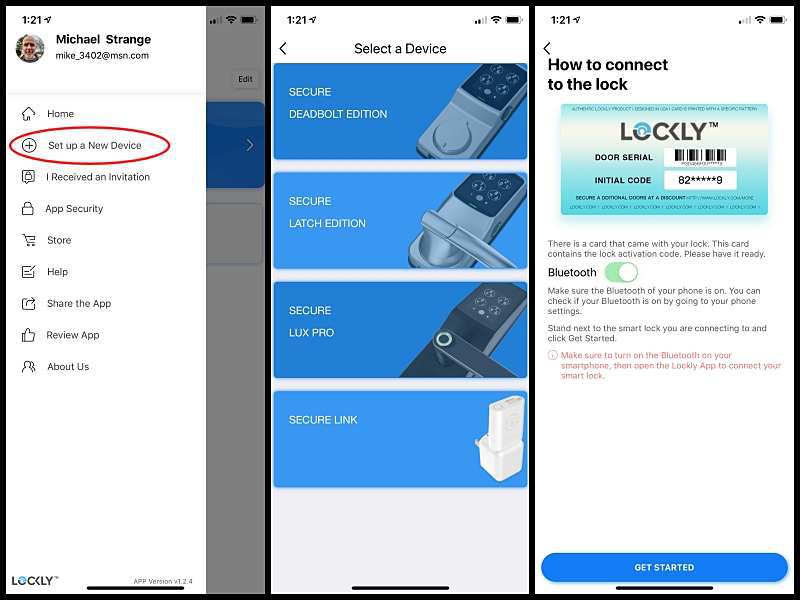
After downloading and launching the app choose Setup a New Device from the slide over menu and follow the instructions.

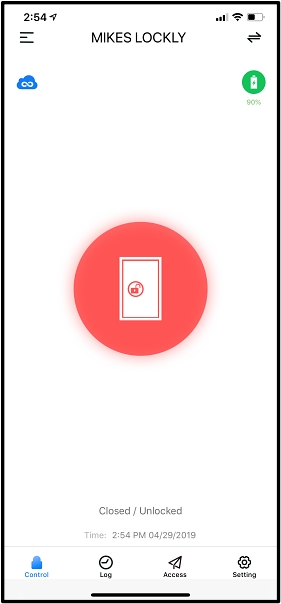
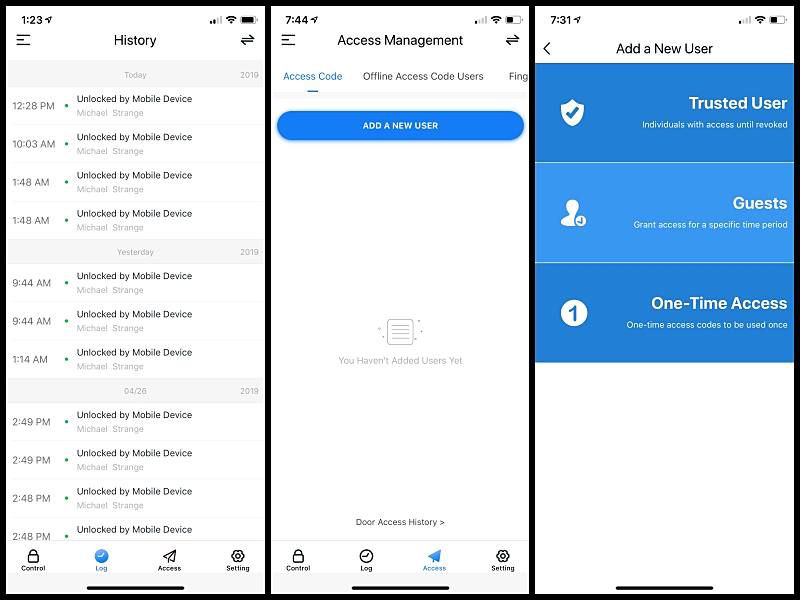
The Lockly app not only allows you to monitor and control your lock, but it also gives you access to the locks key functions.

You can check the access log, grant, monitor, and revoke user access. Issue temporary eKeys, one-time use codes, and set custom durations.

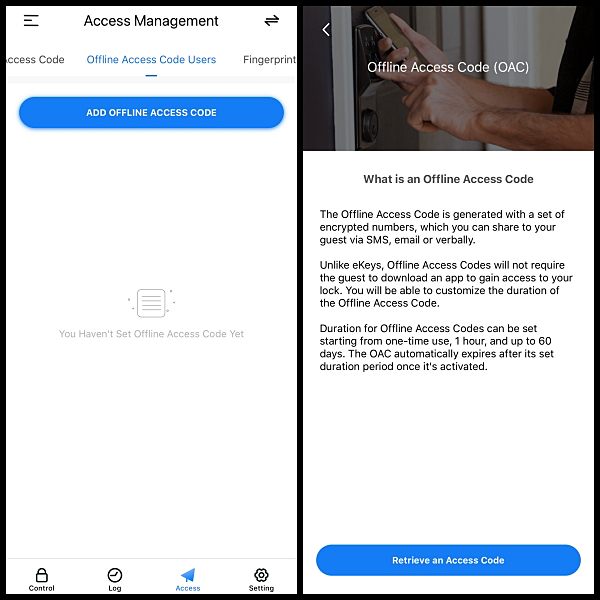
One of the codes you can issue is the Offline Access Code. This unique code allows you to grant access to guests remotely without guests needing to download the app.

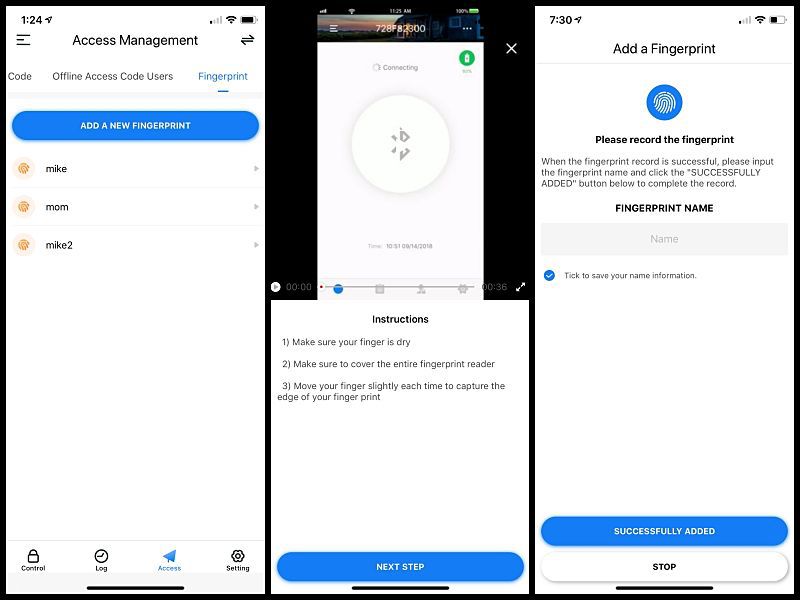
The app is also where you can add and manage Fingerprints. To add a Fingerprint your phone must be connected to the lock via Bluetooth. Select Add a New Fingerprint and watch the brief video. The Secure Pro can store up to 99 different fingerprints.

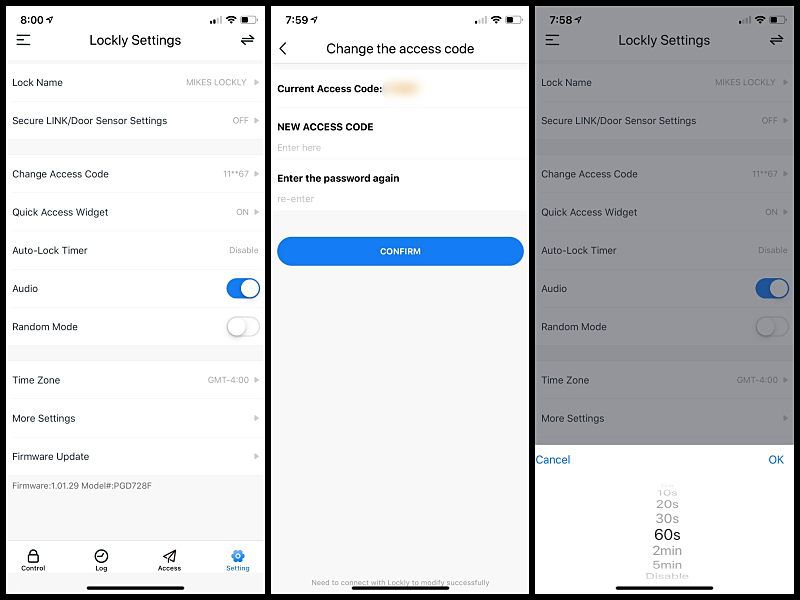
In the app’s Settings, you can change your Access code and enable the Auto-Lock Timer. With Auto Lock enabled, Lockly will automatically auto-lock the door based on your customized timing set between 5 seconds and 5 minutes.

Using Lockly couldn’t be easier. When leaving the house, all I have to do to lock the door is slide my hand across the keypad.

Unlocking the door is just as easy using my access code, the fingerprint sensor, or the Lockly app on my phone.

The Secure Pro also comes Alexa and Google Assistant enabled.

I love this feature. I have a bad habit of not locking my door at night and asking Alexa if the door is locked beats getting out of bed and trudging to the front door to check. And if I do forget to lock it, I can just tell Alexa to lock it for me.

In order to use Alexa, you’ll need to enable the “Lockly” skill in the Amazon Alexa app.

What I like

  • Easy to install
  • Five different ways to unlock
  • PIN Genie digital keypad
  • 3D fingerprint sensor
  • Easy to share secure access codes
  • Alexa compatibility  
  • Long battery life
  • Bluetooth and WiFi connectivity

What needs to be improved

  • Nothing

Final thoughts

I like everything about the Lockly Secure Pro Deadbolt Edition smart lock. From being able to monitor and control my door through my phone. To easy and secure access via the secure digital keypad or fingerprint sensor. And the added bonus of easily being able to share access codes with family and friends. This is my first smart lock, and after using it over the past couple of weeks, I’m convinced it’s the last one that I’ll ever need.

Price: $299
Where to buy: Lockly and Amazon
Source: The sample of this product was provided by Lockly.

Filed in categories: Reviews

Tagged: ,

Lockly Secure Pro Deadbolt Edition smart lock review originally appeared on The Gadgeteer on May 9, 2019 at 9:00 am.

Note: If you are subscribed to this feed through FeedBurner, please switch to our native feed URL http://the-gadgeteer.com/feed/ in order to ensure continuous delivery.
Quick Shelf Safe review

REVIEW – The Quick Shelf Safe, sold by the Home Security Superstore, is a wooden shelf with an RFID activated locking mechanism which grants access to a small hidden storage area within the shelf useful for hiding valuables, important documents, or firearms. The shelf, priced a bit high at $233.97, is well-built, stealthy, and useful, but it does have a few design shortcomings.

What is it?

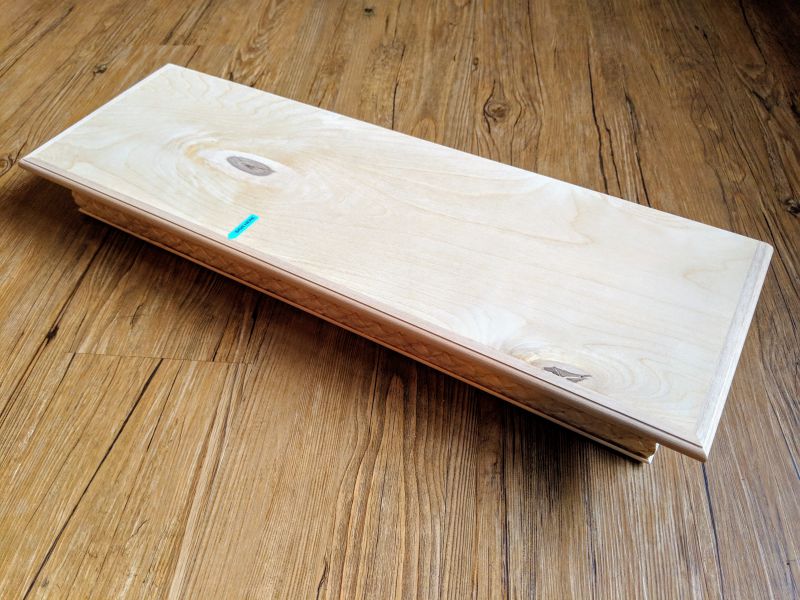
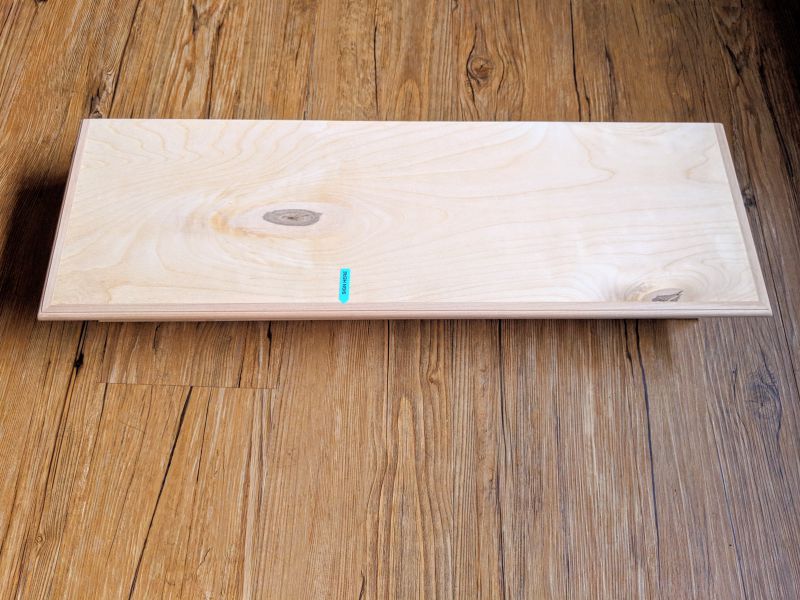
The Quick Safe Shelf is a wooden shelf about 19″ long, 6.5″ wide and 1.75″ deep. To the uninformed, the shelf looks like a normal wall decoration, but with the use of pre-programmed RFID keys and a hidden battery-powered locking mechanism, the shelf opens up to reveal a small storage area. When the shelf is closed, one assumes the bottom portion, which contains the hidden storage area, is made of solid wood.

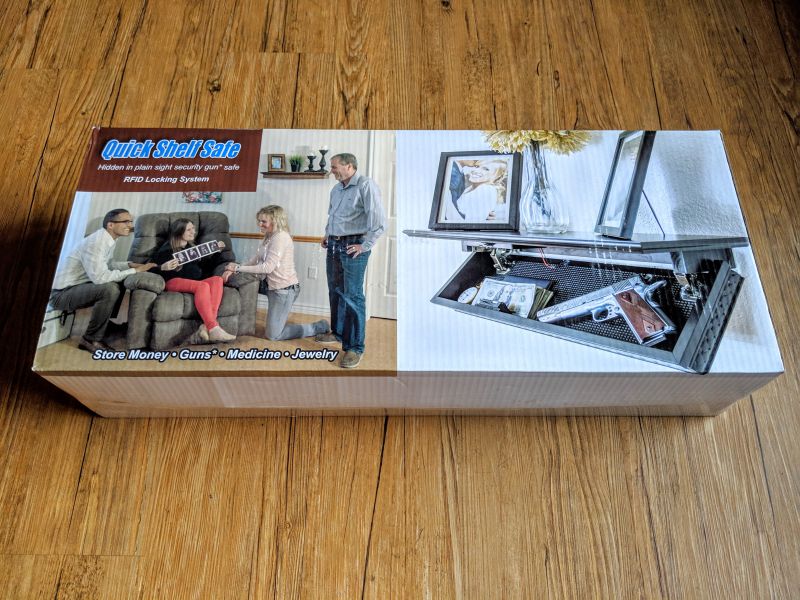
The Quick Shelf Safe arrives in a sturdy box featuring a picture of a family enjoying a happy moment while comforted by the knowledge that they’re able to safely store their valuables and firearm right out in the open with no one the wiser.

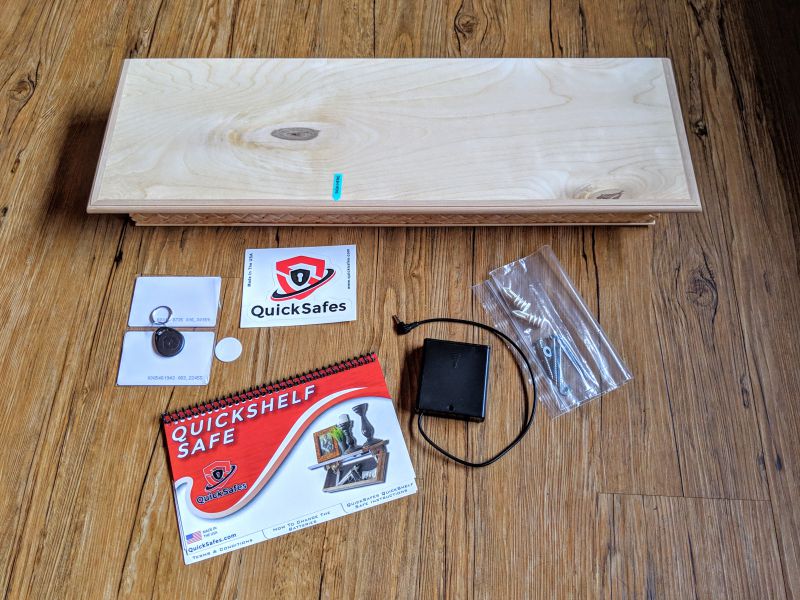
What’s in the box?

  • The Quick Safe Shelf
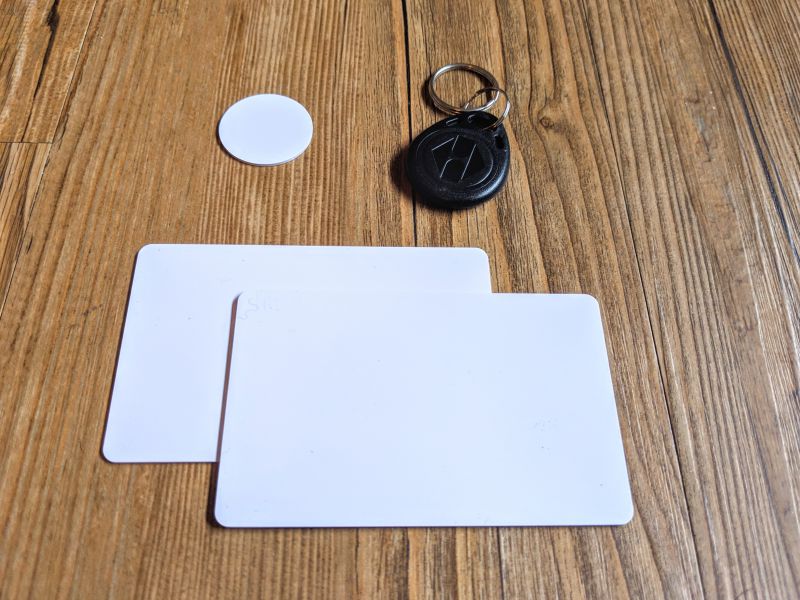
  •  Four RFID keys
    • One key fob
    • One small round tab
    • Two key cards
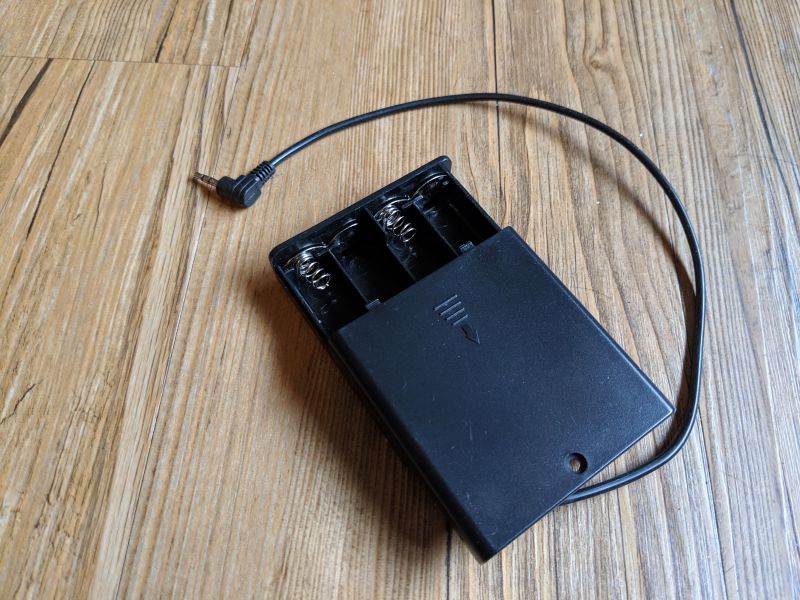
  • External battery pack
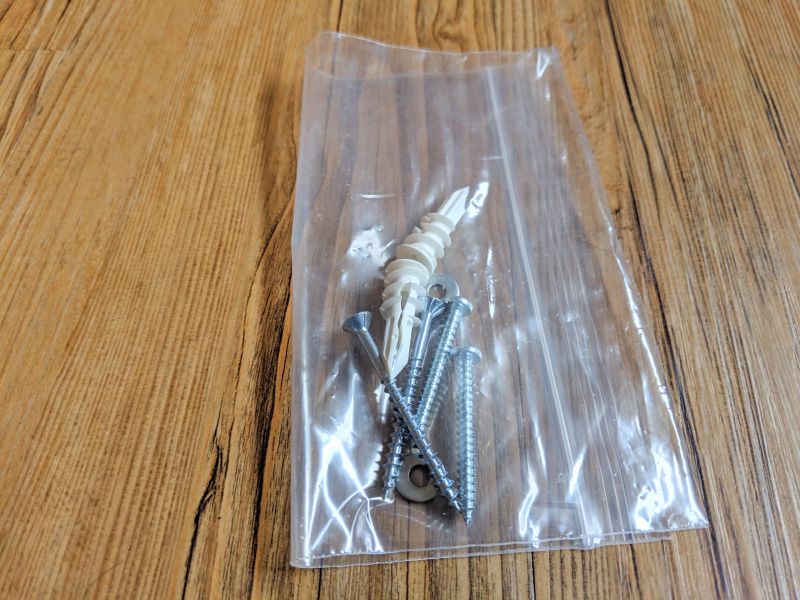
  • Mounting screws
  • Instruction manual

Design and features

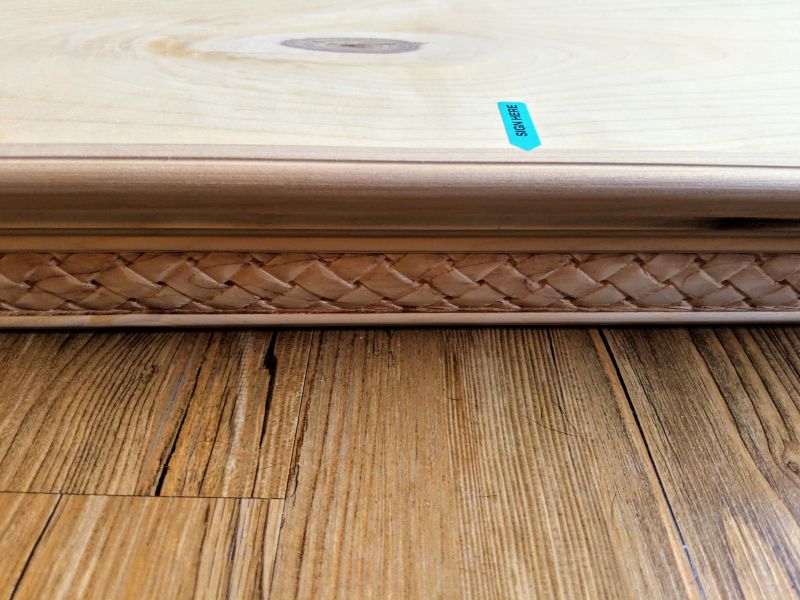
The shelf itself is pretty unassuming. For my review, I chose the unfinished version of the shelf. The shelf is also available in Walnut, Black, and Grey. The seller includes a small removable sticker to indicate where on the shelf the RFID key needs to be placed in order to activate the locking mechanism.

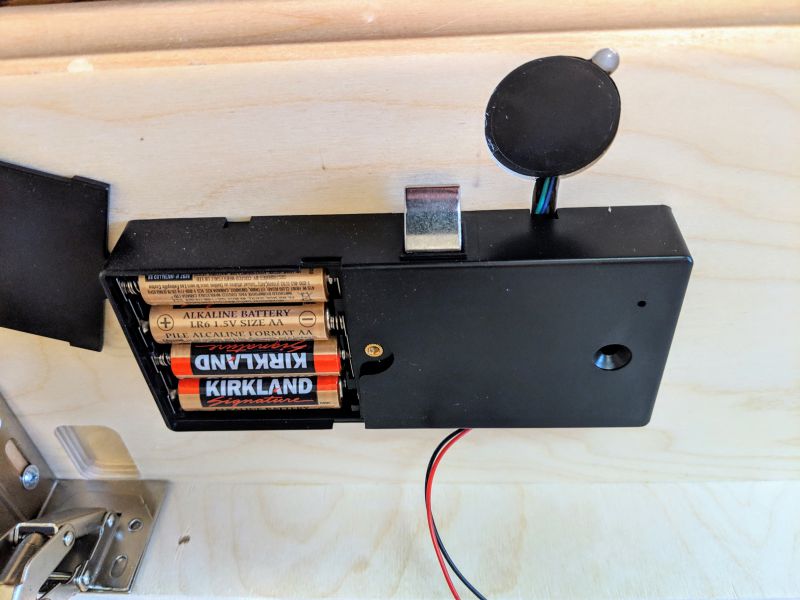
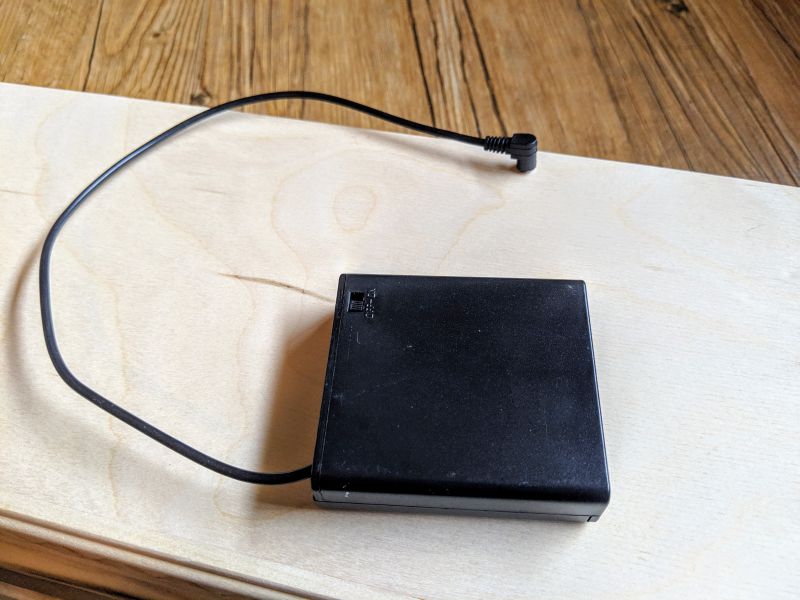
The internal locking mechanism is powered by four AA batteries, which are included. In the eventuality that the internal batteries fail, an external battery pack is included to power the unit and unlock the shelf in order to replace the internal batteries.

Two plastic anchors and four mounting screws are included for mounting your Quick Shelf to the wall.

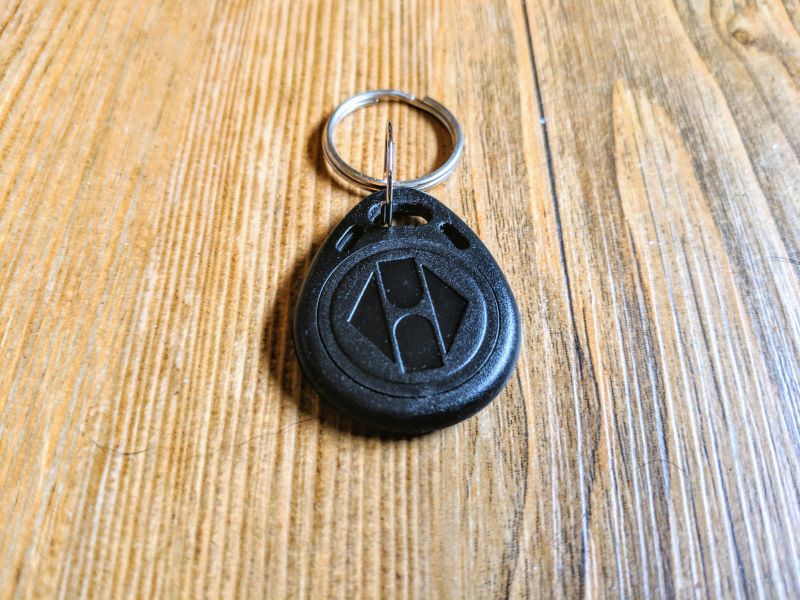
Four RFID keys are supplied to unlock your shelf. There are two credit card sized plastic keys, one small round plastic tab, and one key fob. Any of these keys will open the RFID-enabled lock.

The key fob is the most convenient to use and it looks like a typical car alarm fob.

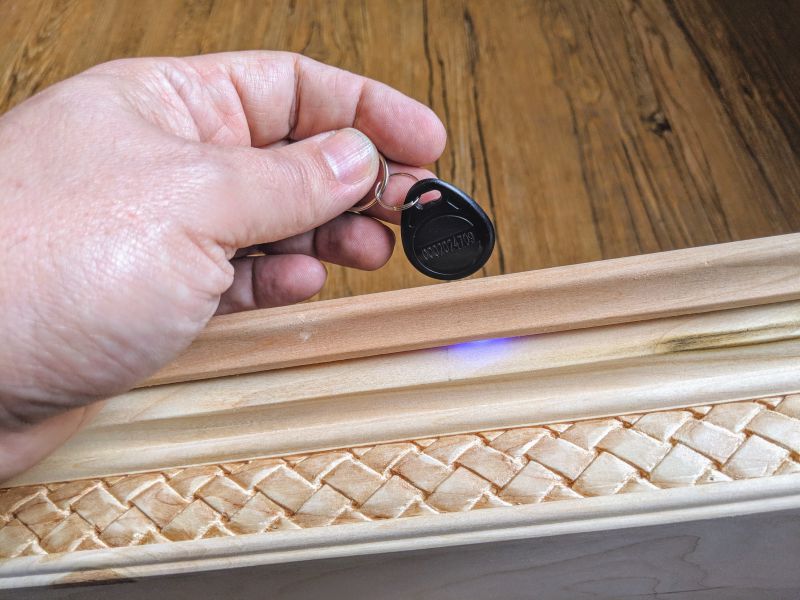
To unlock the shelf, simply pass any of the keys across the top of the shelf near where the internal RFID reader is located, indicated on my shelf by a removable sticker.

A small blue LED will flash and a loud electronic unlocking tone will play. I question the logic of the loud tone unlocking though. If this is being marketed as a stealthy way to store my firearm and if in some scenario I am retrieving my firearm in the middle of the night to, let’s say fend off a home invader, wouldn’t I want my shelf to open as quietly as possible? Unfortunately, there’s no option available to disable the sound.

After the locking mechanism disengages, the shelf opens slightly. I was a bit disappointed here because, again, I’m imagining some scenario where I would need quick access to a hidden firearm, like say zombies are crawling in through my windows and are about to overtake my old blind cat, Chino. In this case, I would want my Quick Shelf Safe to “quickly” pop open and give me access to my firearm so I can dispatch said zombies and rescue my kitty. Unfortunately for Chino, the few extra seconds I will need to open the shelf after it unlocks may spell his doom.

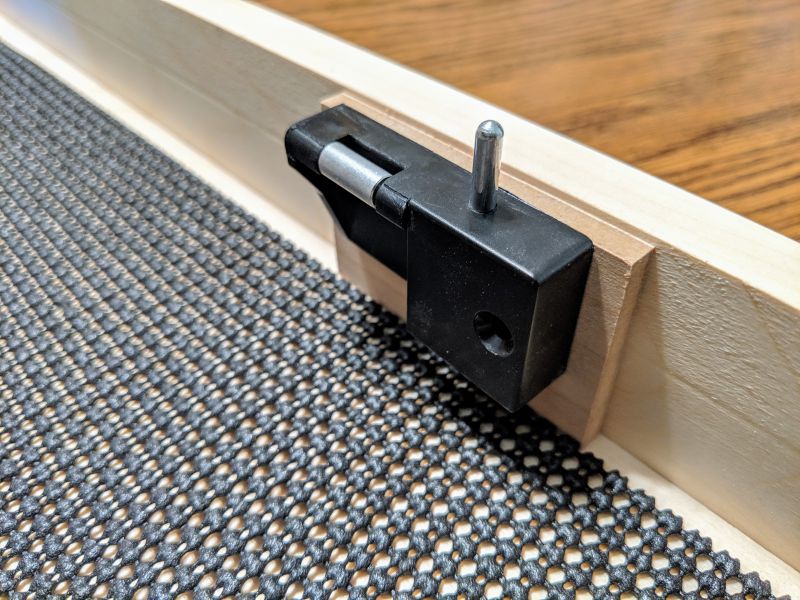
The problem is this little spring-loaded piston. It’s too small and not under enough tension to push the shelf open quickly. A few seconds after unlocking the shelf, the locking mechanism will automatically reengage if you haven’t opened it fully. So the piston serves only to push the shelf open just enough so the locking mechanism doesn’t reengage. The housing for the piston also holds the pin that the locking mechanism latch bolt engages to keep the shelf locked and secure.

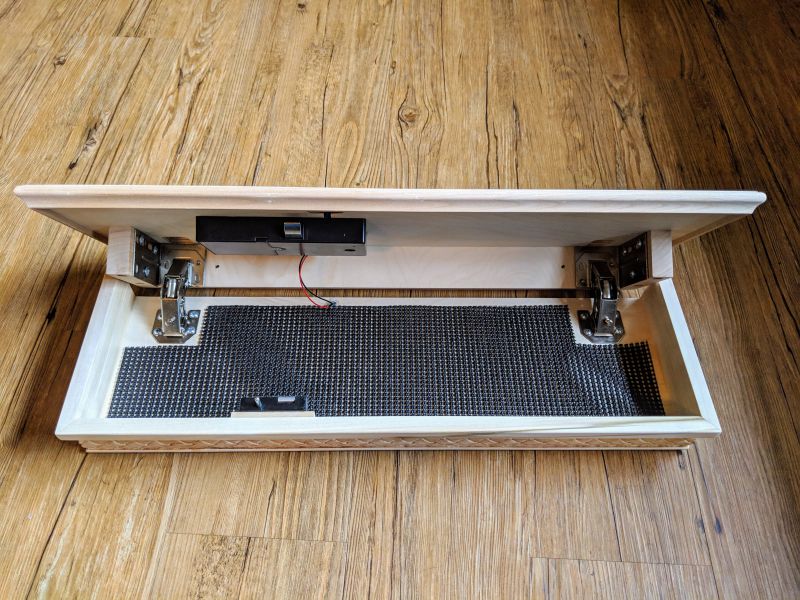
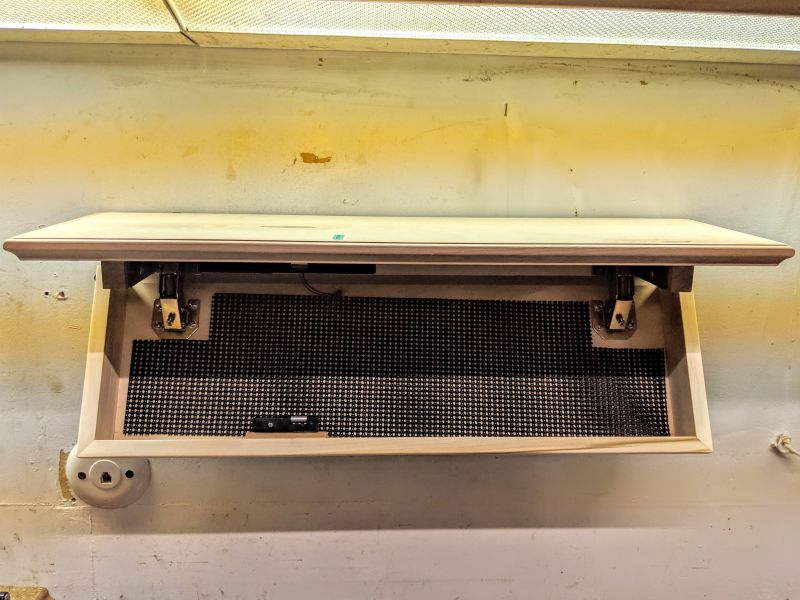
The interior of the shelf is spacious enough to store a moderately sized firearm along with some smaller valuables or cash. The locking mechanism itself takes up a good portion of the storage space, so larger items need to be placed to the right of the mechanism. There’s a patterned rubber mat that lies loose on the inside the shelf.

The mat is spongy rubber and seems to be there to keep your items from sliding around, but it isn’t secured to the bottom of the shelf at all, so the mat itself slides around. A few drops of hot glue on the corners could’ve fixed this easily.

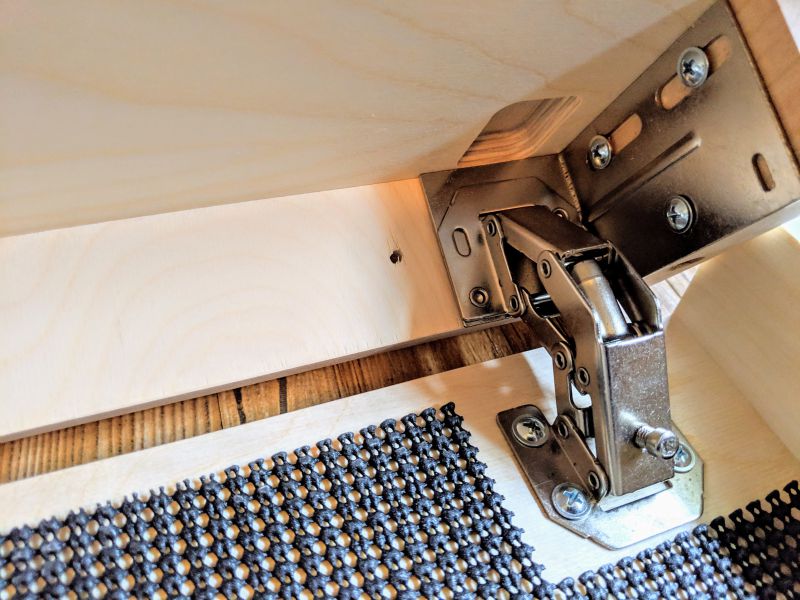
Despite the unsecured mat, craftsmanship of the shelf is impressive and the internal adjustable brackets are firmly attached. Adjusting these brackets allow you to set how far down you want the shelf to open when unlocked. There are two pre-drilled holes in the back of the shelf for mounting.

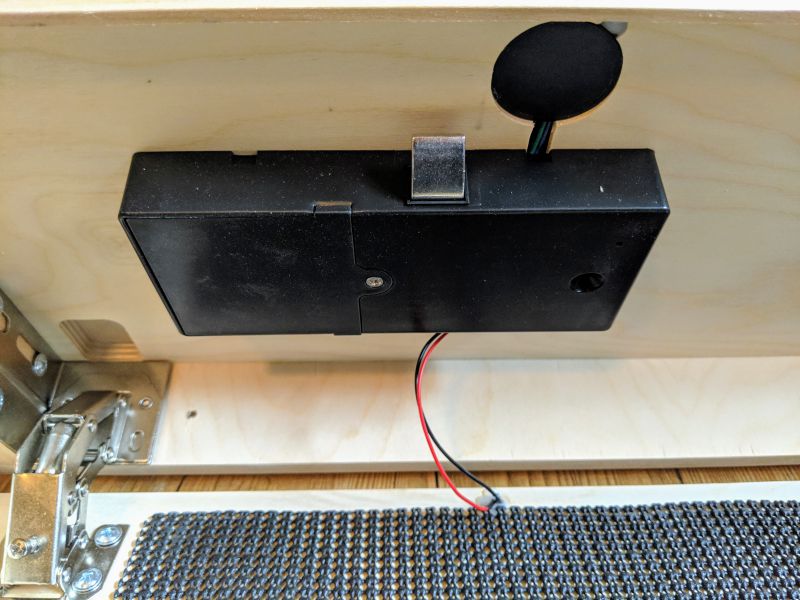
The internal battery pack, locking mechanism, and RFID reader are attached to the inner top of the shelf. When a RFID key is place over the reader, the locking mechanism retracts a small latch bolt away from the holding pin and the shelf unlocks. As I mentioned before, after a few seconds, the latch bolt automatically extends so the shelf can be closed and locked.

The battery compartment is held closed with a small Phillips-head screw. I had to use a very short full-sized Phillips-head screwdriver to open the compartment because of the tight confines of the shelf interior. The included batteries are said to be good for 3000 activations. If the batteries do fail for some reason, the external battery pack will save you from having to take a hatchet to your expensive new shelf.

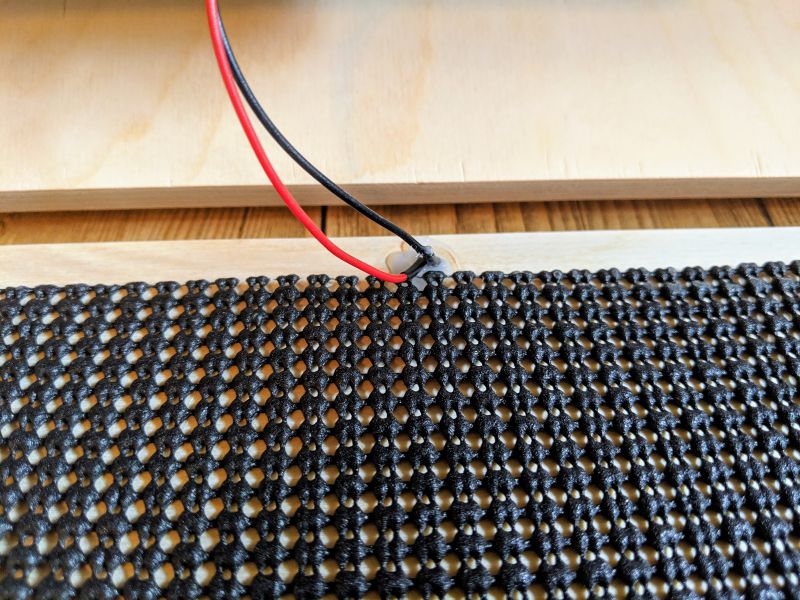
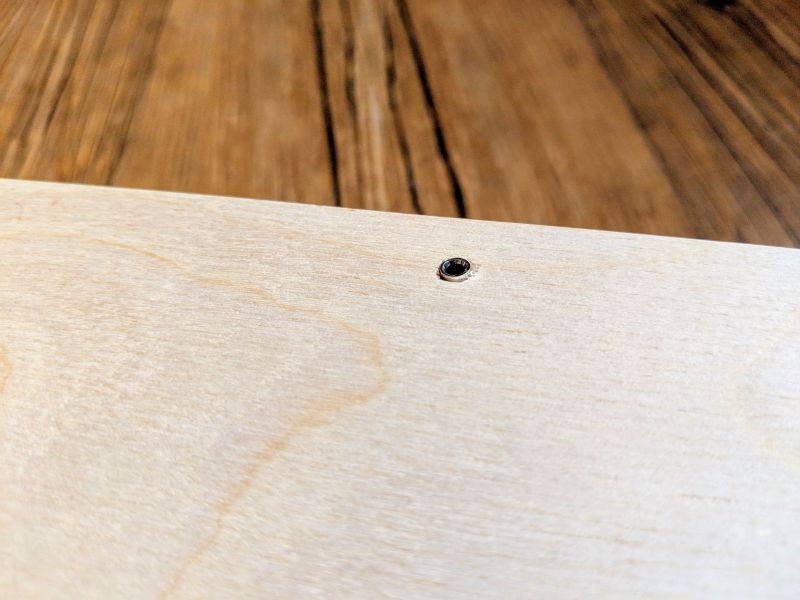
Two red and black power wires extend from the battery compartment to a small hole on the bottom of the shelf.

The wires are hotglued to hole and on the other side of the shelf you can see that they are attached to a small power port. The external battery pack (batteries not included) plugs into this port to provide power to locking mechanism allowing you to open the shelf. I’d advise keeping this battery pack and one of the RFID cards in a safe place, other than the Quick Safe Shelf obviously.

The overall aesthetics of the shelf are pleasing and not so ornate that they would draw attention.

The woodworking craftsmanship is good quality for a mass produced item. All of the gaps, seams, and corners are tight and the hinges work as they should.

Performance

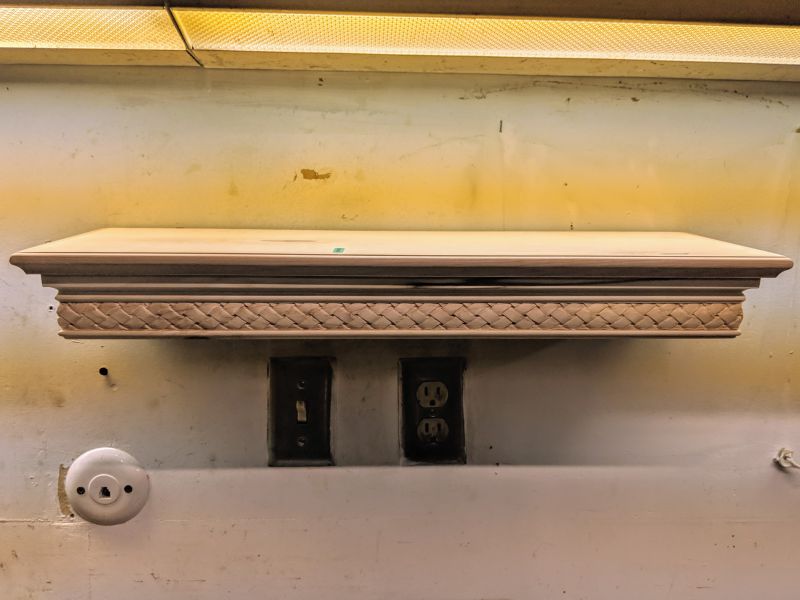
I test mounted the shelf in my garage since I plan on painting it and mounting it in my apartment later on. I used the supplied plastic anchors and four mounting screws. I drove two mounting screws through the pre-drilled holes into the anchors and used the two extra screws to add support by driving them through the back of the shelf as well.

Once mounted, the shelf functioned as advertised, but even with all four screws properly positioned, the shelf did not feel 100% sturdy hanging empty on the wall. When I engaged the lock and pulled the shelf down to open, I could see the bottom edge of the shelf pushing back against the wall as the lower half opened. The more times I opened the shelf, the less sturdy it felt. I worry about the weight bearing capability of this shelf being secured into a wall with four screws on such a narrow plane. If I do install this in my apartment, I plan on adding two L-shaped brackets to the top of the shelf to add support.

Because of the lack of stability after mounting the shelf, I do question the safety of using this shelf to store firearms. It became clear to me that if someone did suspect this shelf contained valuables or a firearm, they could simple rip it off the wall and break it open. Due to this security hole, I take issue with naming this item a “safe” and advertising it primarily as a way to store firearms. Gun safes are usually very secure, and utilize many different means for thwarting access to their contents. If firearms are secured in this shelf, the owner should most definitely employ other means of gun safety and security.

What I like

  • Nice appearance of a normal shelf
  • Shelf hardware and wood craftsmanship are of good quality
  • Cool way to hide valuables

What needs to be improved

  • Shelf does not spring open after unlocking, has to be opened by hand after unlocked
  • Loud electronic sound during unlocking sequence
  • Does not feel sturdy on wall while opening
  • Shouldn’t be referred to as a safe since it isn’t 100% secure

Final thoughts

Quick Shelf Safe, sold by the Home Security Superstore, is an interesting way to secure some valuables and possibly a firearm. The shelf is a bit expensive for what it is, and it shouldn’t be referred to, or thought of, as a safe in the traditional sense since it can easily be pulled off of a wall and broken into. Also, since it isn’t as secure as a true gun safe, any firearms stored in this shelf should have additional trigger locks or other security. It does works well as a place to hide non-lethal items that you wouldn’t want people to find. Additionally, I do have some concerns about the weight-bearing sturdiness of the shelf once mounted on the wall using the included hardware.

Price: $233.97
Where to buy: Home Security Superstore
Source: The sample of this product was provided by Home Security Superstore.

Filed in categories: Reviews

Tagged:

Quick Shelf Safe review originally appeared on The Gadgeteer on April 26, 2019 at 9:00 am.

Note: If you are subscribed to this feed through FeedBurner, please switch to our native feed URL http://the-gadgeteer.com/feed/ in order to ensure continuous delivery.
LifeShield Wireless Flood Sensor review


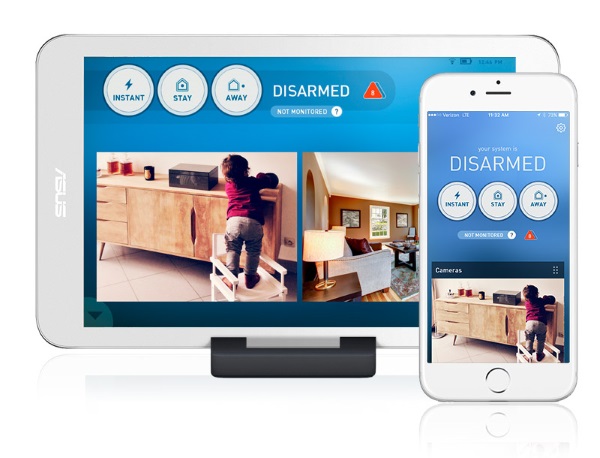
REVIEW – Last year, I reviewed the LifeShield Security System, that included full automation via a touchscreen tablet, base station, wireless keypad, wireless camera, and a number of security accessories and sensors. The system has performed flawlessly, and now I have the opportunity to reviews LifeShield’s Wireless Flood Sensor. I am quite confident that this add-on will be another good experience, but I won’t count my chickens before they hatch. Let’s see if I am right.

What is it?

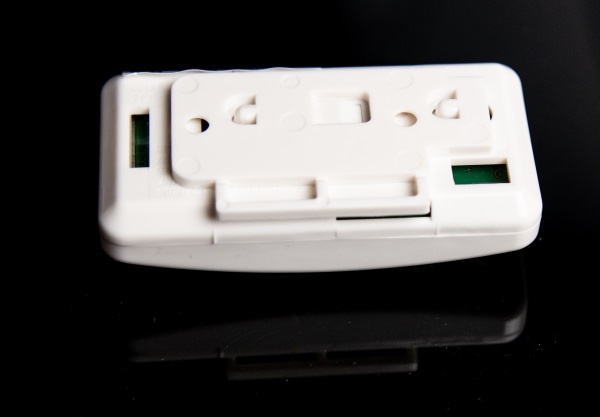
The LifeShield Wireless Flood Sensor connects to the LifeShield Security System and will sound the alarm if water reaches or rises above the level at which it is placed. Since it is wireless, the transmitter is powered by a battery.
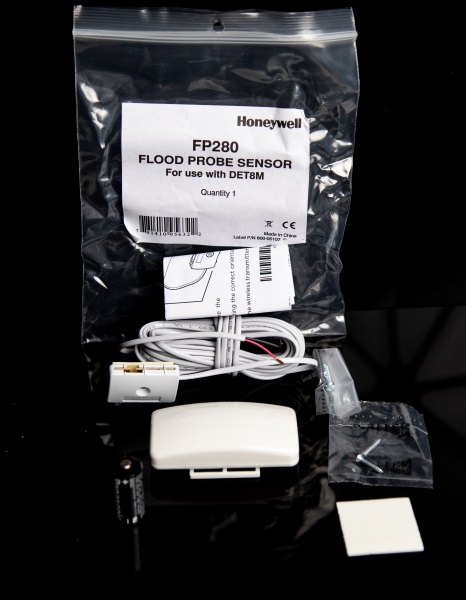
What’s in the box


1 x Wireless Transmitter
1 x Flood Sensor
1 x Battery
2 x Set of Mounting Screws
1 x Adhesive Pad
1 x Instruction Leaflet

Design and features

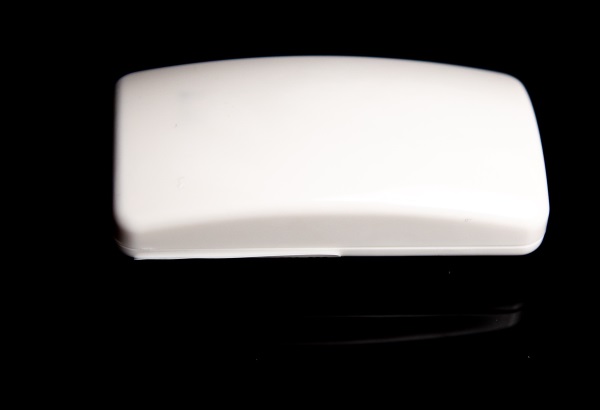
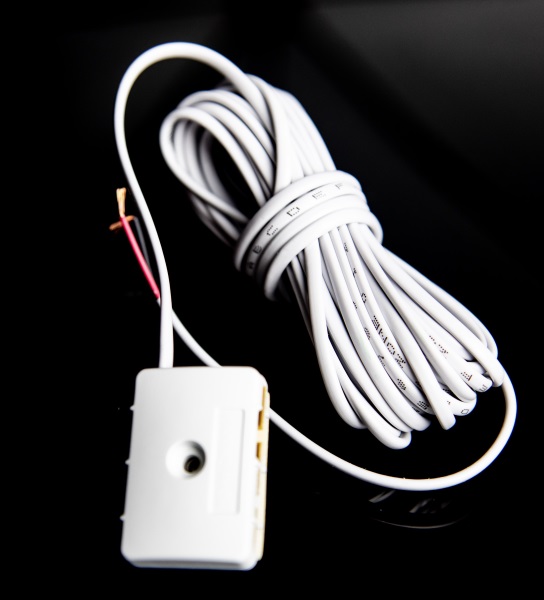
The flood sensor consists of a transmitter and a sensor and the 2 are connected via a wire. The transmitter is battery powered and should be mounted somewhere above the sensor and above any anticipated and possible water level. The transmitter can be used with any one of 4 different types of sensors.

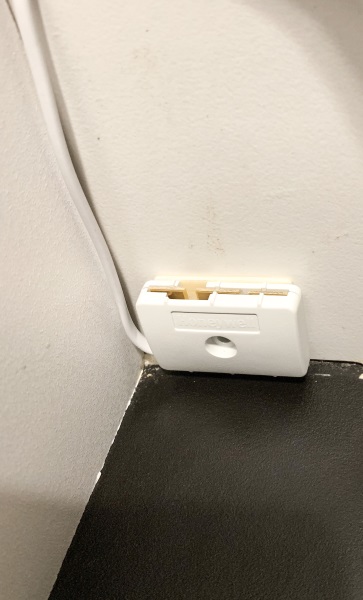
Shown below is the sensor and with the wire that is permanently connected.

Installation

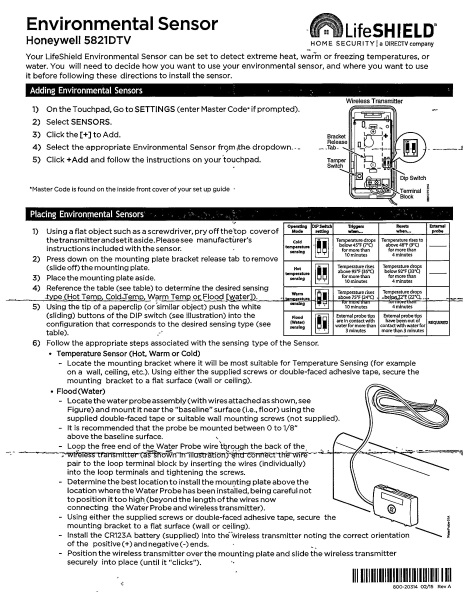
The first illustration below is the one-page instruction sheet that is provided with the sensor. It includes directions on how to open the transmitter, how to set the DIP switches to select the type of sensor that you are connecting, and how to connect the 2 wires from the sensor.

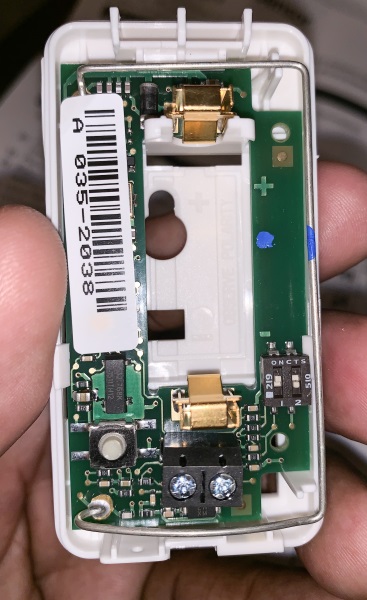
The next picture below shows the inside of the transmitter including the battery holder, tamper switch and DIP switches.
Using the provided double-sided, I attached the sensor on the side of the wall right above the floor and within the recommended height above floor level.

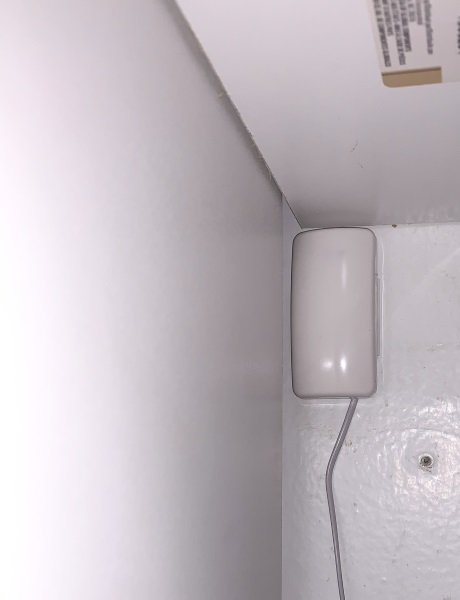
This next picture slows my placement of the transmitter again using the provided double-sided tape. I placed it about 5′ above the transmitter. (By choice).

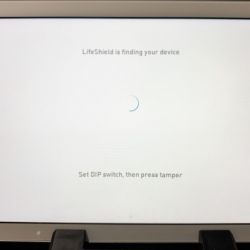
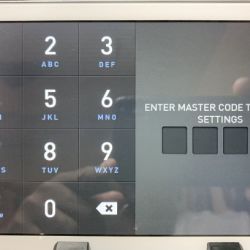
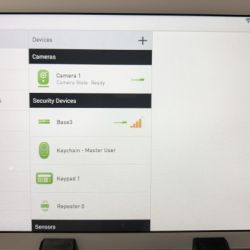
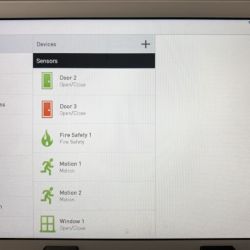
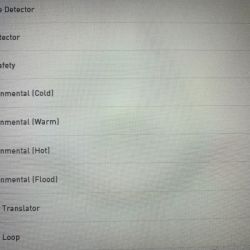
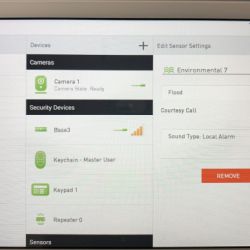
After installing the hardware, there is a simple process that you follow in the settings screen of the LifeShield control panel to add the sensor. The following are screenshots of the process.


What I like

  • Function
  • Easy connectivity with LifeShield Security system

What can be improved

  • Larger print for the provided instructions

Final thoughts

Since I am already a fan of the LifeShield security system, I was very interested when I got the opportunity to try their flood sensor. (They sent 2). Just as I expected, the installation was easy and incident free. Since my 2 young kids are fans of water, and since they have flooded my bathroom more than once before, I readily embraced this device. Just like several other sensors and devices that pair with the LifeShield system, I am happy to give them two thumbs up for this add-on accessory.
Price: $29.99
Where to buy: The LifeShield website
Sample: The samples(2) for this review were provided by LifeShield.
Filed in categories: Reviews

Tagged: ,

LifeShield Wireless Flood Sensor review originally appeared on The Gadgeteer on April 13, 2019 at 10:00 am.

Note: If you are subscribed to this feed through FeedBurner, please switch to our native feed URL http://the-gadgeteer.com/feed/ in order to ensure continuous delivery.