Kenu Airframe and Airbase Wireless car mounts review

REVIEW – To say I am a fan of Kenu products is an understatement.  Look here, and here, and here.  I give them as gifts, I have them in every vehicle, and they are one of the only gadgets I use literally every day.  So when I saw the Kenu Airframe and Airbase Wireless Car Mounts I didn’t hesitate to jump and get one of each.  I love Kenu.  I love car mounts.  And I love wireless chargers.  So let’s go.

What is it?

The Kenu Airframe maintains the functionality of the Kenu you love that clips to your car vent, and adds in a Qi charger that includes the Qi 3.0 high-speed functionality.  The Kenu Airbase provides the same thing except it utilizes a suction-cup base that attaches to either your dashboard or windshield.  In both cases, the Airframe/Airbase uses a USB-C cable from the Kenu to the 12V DC charging connection in your car because the mounts don’t have built-in batteries like a power bank does.

Product specs

Airframe Dimensions:  H 3.2″ x W 2.8″ x D 3.2″
Airframe Weight:  3.6 oz
Airbase Dimensions:  H 4.2″ x W 2.8″ x D 4.5″
Airbase Weight:  5.0 oz
Output:  9V 1A / 5V 1A
Transmission:  10W/9W/7.5W/5W
Transmission Efficiency:  81%
Operating Temp Range:  40°F-86°F
Spring-loaded clip:  stretches from 2.34 inches to 4.3 inches

12V DC charger specs:
Input: 12V-24V DC
Output: 5V 2.4A + QC3.0 (5V 3A / 9V 2A / 12V 1.5A)
Overload protection

Qi-Compatible phones:

Apple (7.5W)

·         iPhone Xs

·         iPhone Xs Max

·         iPhone XR

·         iPhone 8 Plus

·         iPhone 8


Google

·         Pixel 3 XL

·         Pixel 3

Samsung (9W)

·         Galaxy Note 9

·         Galaxy S9+

·         Galaxy S9

·         Galaxy S8+

·         Galaxy S8 Active

·         Galaxy S8

·         Galaxy Note 8

·         Galaxy S7 Edge+

·         Galaxy S7 Active

·         Galaxy S7

·         Galaxy S6 Edge+

·         Galaxy S6 Edge

·         Galaxy S6+

·         Galaxy S6 Active

·         Galaxy S6

·         Galaxy Note 5

What’s in the box?

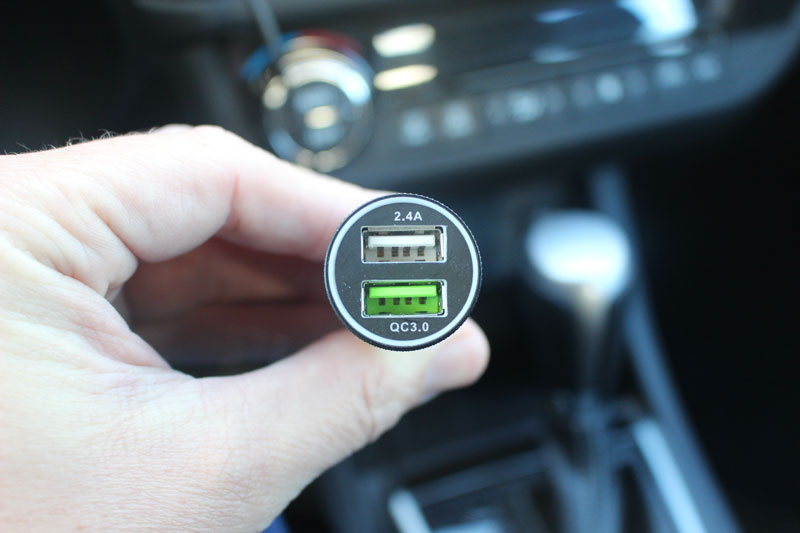
You get the Kenu Airframe or Airbase, a 12V DC car charger that has 2 ports (Qi 3.0 quick charge port & a USB 2.4V port), and a Type-C to Type-A USB cable that is 3.9 ft long.  You also get a simple user’s manual.

Design and function

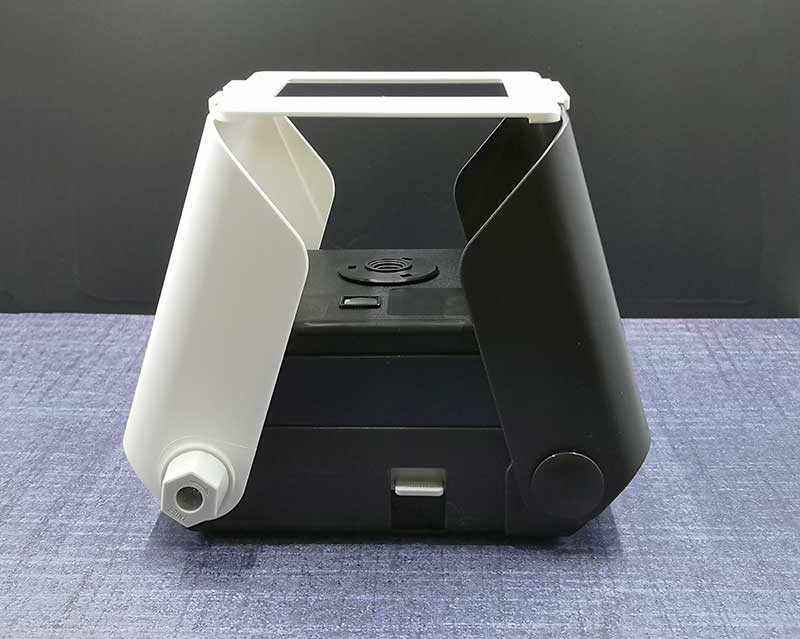
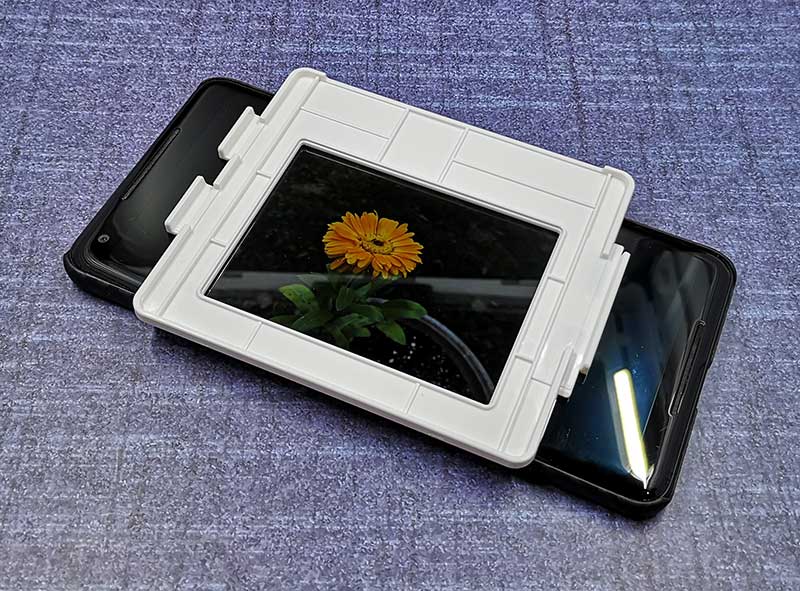
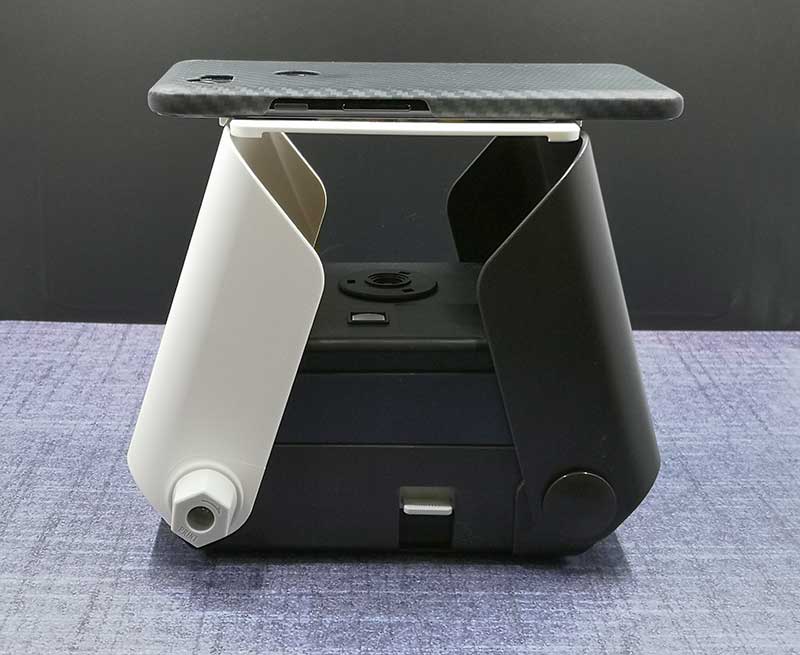
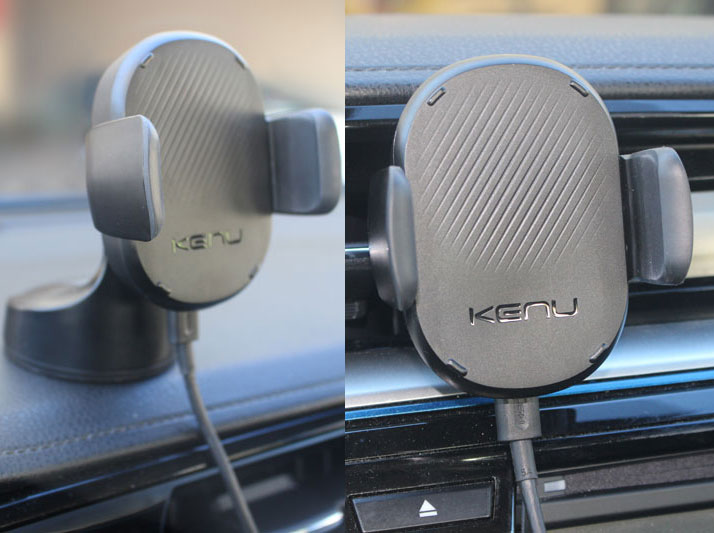
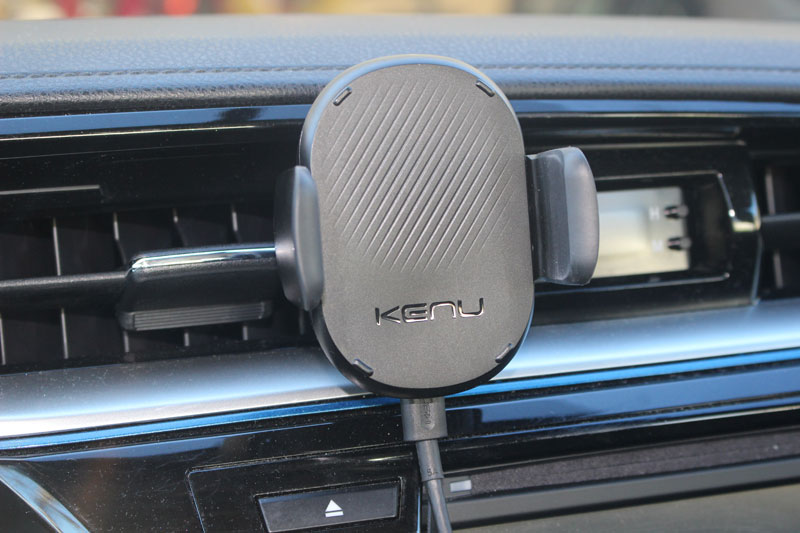
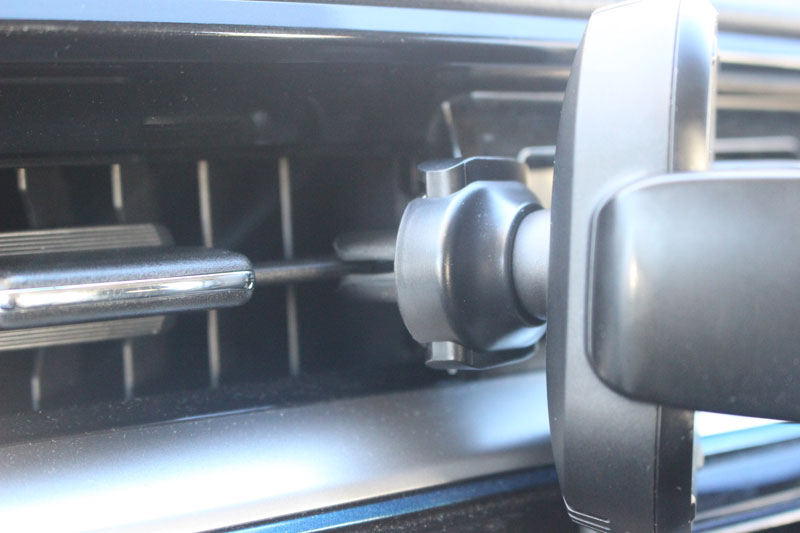
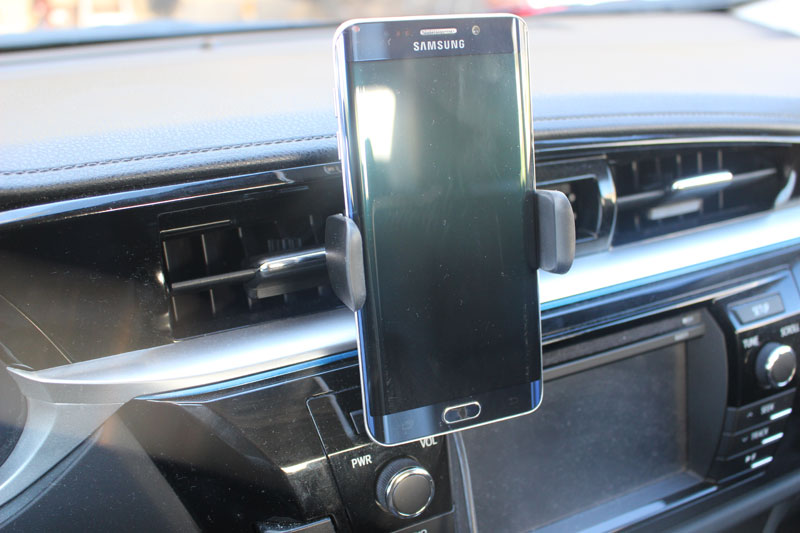
If you are used to the spring-loaded arms that hold your phone on other Kenu products, then you’ll be at home with these car mounts.  In fact, the Airframe Wireless mount has a new mechanism for attaching to the car vent.  Previous Airframes had a rotating set of rubberized fingers that slid onto the car vent slats.  The Airframe Wireless has buttons that you press with your fingers that open up the rubberized fingers that then attach to the vent slat.  It makes for a much more sturdy attachment to the vent clip.  Very sturdy in fact.  You have to put a good amount of effort into removing the Airframe Wireless from the vent without depressing the buttons to release it.  So I never had any issue with the Airframe Wireless falling off the vent.

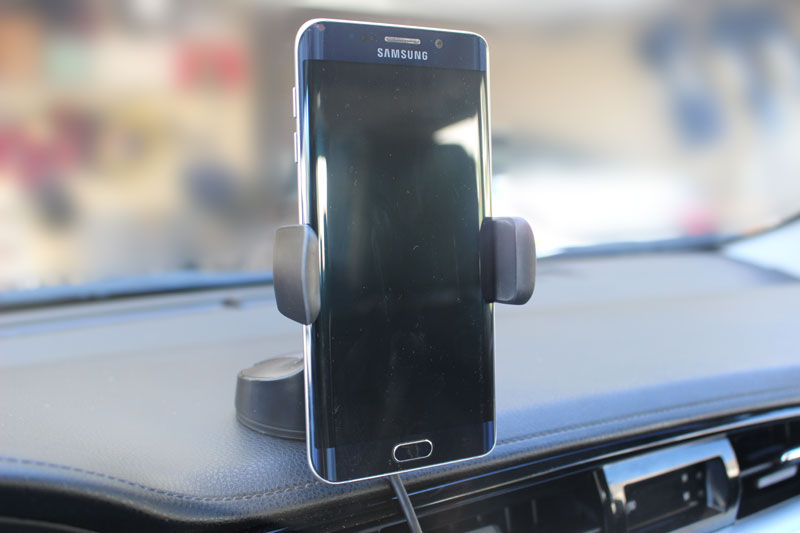
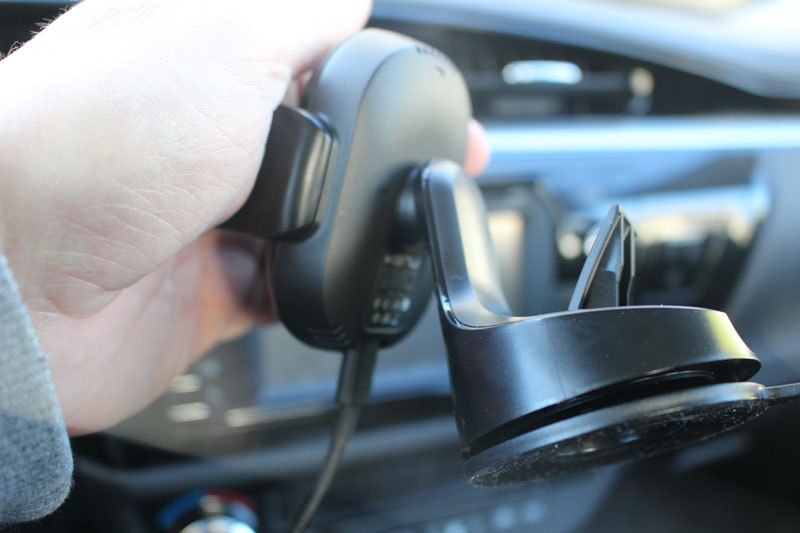
The Airbase Wireless attaches to the dash/windshield via a suction cup that is quite effective.  After attaching it to my dashboard I couldn’t remove it at all without releasing the suction latch on the back and pealing it off the dash.  So again, I never had any issue with the Airbase Wireless falling off my dashboard.  In both cases, sliding my phone into these Wireless mounts was as effortless and fluid as all the other Kenu products I have.  True Kenu functionality!

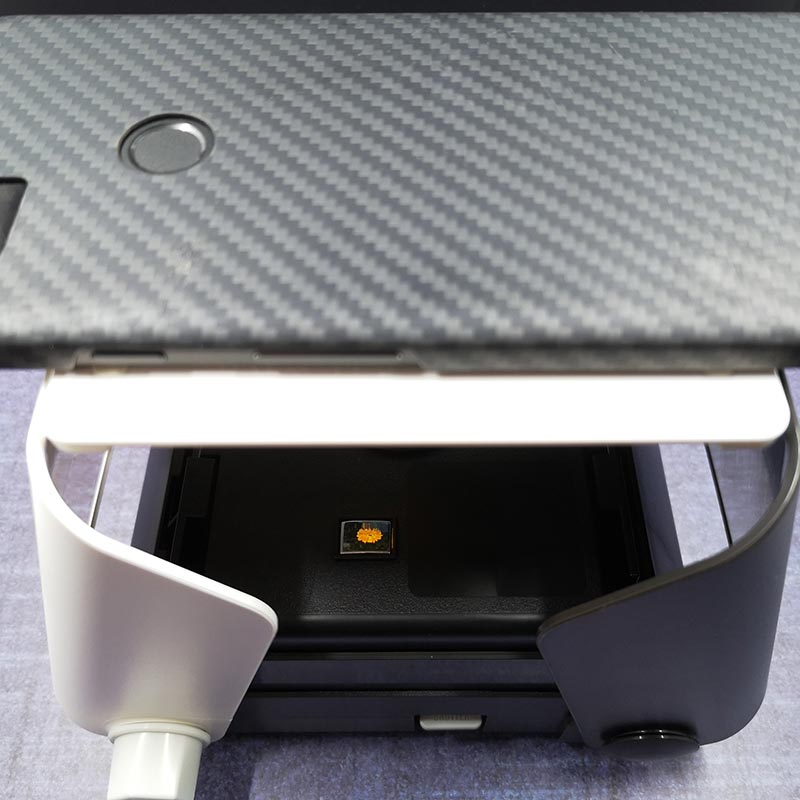
Also built into both of the mounts are specially placed fan-less vents that help keep the mounts cool while charging.   And like most wireless chargers, you can use your phone with a cover as long as the cover is less than 3 mm thick.

Admittedly, I despise mounts that attach to my dashboard or windshield, but I wanted to give the Airbase Wireless a chance.  I used it daily and exclusively for several weeks in my car, and it functioned as an excellent Qi wireless charger.  But I couldn’t get over it sitting up on my dash, in my view looking out the windshield, which is the main reason I don’t like these kinds of mounts.  So when I switched over to use the Airframe Wireless mount, I decided to not go back to the Airbase mount.

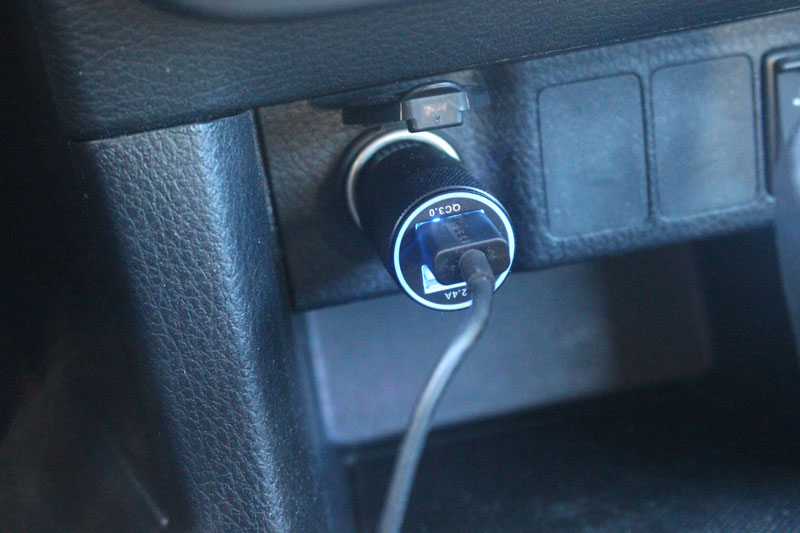
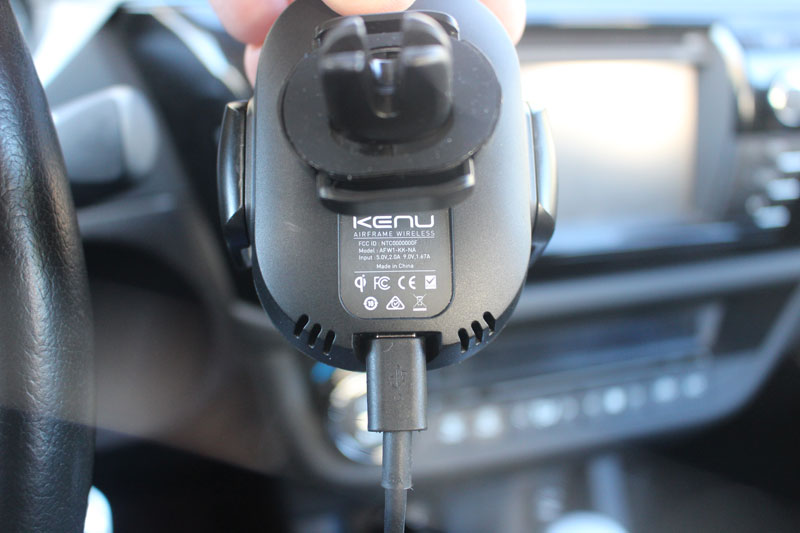
As mentioned, both mounts do not have a battery inside, so you have to plug them up to the power in your car via the USB-C cable that attaches to the back of the mounts and then you plug up the cable to the 12V DC charger that plugs into the DC outlet in your car.  As an added feature, the 12 DC charger has 2 ports… a regular 2.4V USB port and a Qi 3.0 Quick-charge USB port.  So you can charge another device at the same time as using these mounts.

As an aside, in my car I have used a 15,600 mAh Choetech power bank for over 3 years now.  It has 3 ports and it has a Qi quick-charge capability, which is why I love it because I can get a big charge quickly even on short trips across town.  And multiple people can use it at once.  I have used it in conjunction with my old Kenu Airframe pretty much daily.  So I decided to test the charging speed with that setup compared with these Wireless mounts.

Here are the results:

  • My phone was at 60% full and I used my old setup of the Kenu Airframe and the Choetech power bank (using the quick charge port). It showed 52 min until a full charge.
  • Then I used the Kenu Airframe Wireless mount plugged up to the Quick Charge 3.0 USB port in the 12V DC charger plug. It showed 1 hr 16 min until a full charge.
  • Then I left the phone in the Airframe Wireless mount but moved the USB cable to the 2.4V USB port in the 12V DC charger and it showed 1 hr 19 min until a full charge.
  • Then I left the phone in the Airframe Wireless mount and but move the USB cable to the USB port built into my car dash. It showed 1 hr 18 min to a full charge.
  • I got the exact same results using the Kenu Airbase Wireless dashboard mount when I repeated the steps outlined above.

The bottom line:  as expected, using a wireless charger will always provide slower charging than using a wired USB connection.  But I was surprised to learn that there was no significant difference between using the Quick Charge 3.0 port and the 2.4V port in the 12V DC charger, or using the USB port in my car dash.

Final thoughts

I am torn about this product.  I have been so enamored with the products from Kenu that I find it hard to say this, but I don’t think this product is for everyone.  For those folks who simply don’t like the kind of car mounts that hang off the windshield or the dash, there isn’t enough reason here in my opinion to overcome that.  If, like me, you love the car vent functionality of the Kenu Airframe products, or you don’t mind a dashboard mount, then this might be a product for you.  Maybe.  For me, my daily life in the car is a series of short drives around town every day… 10 min here, 20 min there, 8 min over to there.  So because I don’t get that true high-speed charging with the Airframe mounts like I do with my Choetech power bank, I found myself taking the time to plug up the Choetech to my phone.  I would rather go through the hassle of doing that to get a quick charge to fill my phone up than utilize the more convenient Airframe Wireless charging mount.  Now, if I was in my car every day for an hour or two, then yeah, I would probably use the Airframe Wireless car mount because I would have time to fill my phone back up.  And for a long trip in the car I probably will use the Airframe Wireless mount.  But for my daily use now I am going back to my trusty old Kenu Airframe and will use my Choetech as-needed.

Price: $59.95
Where to buy: Buy on Amazon or buy from Kenu.
Source: The sample of this product was provided by Kenu.

Filed in categories: Reviews

Tagged: ,

Kenu Airframe and Airbase Wireless car mounts review originally appeared on The Gadgeteer on October 28, 2018 at 11:00 am.

Note: If you are subscribed to this feed through FeedBurner, please switch to our native feed URL http://the-gadgeteer.com/feed/ in order to ensure continuous delivery.

iRoad X9 front and rear dashcam review

REVIEW – I have been very hesitant about getting a dash-cam that adheres directly to my windshield. The idea that it may be a pain to remove if I don’t like it has kept me from looking into getting one. Well, after watching countless dashcam videos and hearing horror stories from my sister who worked in insurance claims, I finally decided to dive fully into a quality dashcam and hoped the iRoad X9 dashcam, which includes both a front and rear camera, would be all I needed.

What is it?

The iRoad X9 dashcam is a front and rear camera that can continuously record while you are driving.

Hardware specs

  • Front Camera:
    -Full HD 1920 x 1080P resolution
    -150 degree wide angle lens
    -30 frames per second
  • Rear Camera:
    -Full HD 1920 x 1080P resolution
    -145 degree wide angle lens
    -30 frames per second
  • ARM Cortex-A7 MP Core Processor V3
  • Lane Departure Warning System
  • Forward Collision Warning System
  • Front Vehicle Departure Warning System
  • GPS Sensor (optional, included in my review)

What’s in the box?

Inside of the box, you’ll find: A front camera, rear camera, Wifi dongle, 32 GB MicroSD card, Uninterrupted fuse cable, rear camera cable, user manual, and extra double sided tape. Mine also came with a power cable that plugs into the lighter as well, but the website says it is optional. I also was sent the optional external GPS antenna, which is sold separately.

Design and features

I really liked the look of both the front and rear cameras. They have a sleek, stylish look to them while seeming quite minimalist. Both can be twisted to adjust to the best angle for your car, which was very convenient and made the setup very easy since I could focus on properly adhering the camera rather than making sure the lens was in the proper location the whole time. When attached, I cannot see the front camera at all, since it hides behind my rearview mirror.

When the car is turned on, the camera will tell you when it starts recording, if the MicroSD card is missing, and when the GPS is connected. It sometimes took 1-5 minutes for the GPS to connect to the camera, and most the time I would be driving down the road and hear “GPS connected” from the camera. The GPS unit has to establish contact with the satellites, so I suppose that is why. If you forget to put the MicroSD card in, it will constantly remind you it is missing to the point that I unplugged the camera from the power because it did not stop. A few times to warn me is fine, but the entire time I am driving was quite annoying!

Other than recording video, one thing the iRoad X9 camera boasts is the ability to give lane departure, forward collision, and front vehicle departure warnings. I had the perfect car to test this with since my own comes with all three via the Eyesight camera system. I tried different sensitivity levels, and all three were far too sensitive for me to use on a daily basis. The camera would be beeping constantly that either someone in front of me has moved (while driving down the highway) or that a collision was imminent when the person in front of me does not even have the brakes on. The lane departure warning, however, did a fairly decent job and if I did not have it already in my car, I would have kept that mode activated.

Setup

I had two ways to choose from when setting the camera up. I could hard-wire it, or I could use the lighter port. Since I am not someone who is car savvy, and Subaru would not hard-wire it, I decided to use the lighter port.

First, I cleaned off a nice spot on my window, figured out where I wanted the front camera placed, and carefully applied it to my window. It stuck firmly right away. I threaded the power cable behind my glove box, up inside of my window panel, and, until I figure out a way to adhere it around my Eyesight cameras, up behind my visor. It actually turned out very well. The GPS unit was threaded up and through the visor, and placed around the handle above the passenger’s seat door. I used only the front camera for a week to make sure it was worthy enough to apply the rear camera.


The rear camera was applied in the same way, by centering it at the top of my back windshield and sticking it on firmly. I threaded the power cable up and above the two doors on the passenger side, and then through the visor and into the front camera. One thing I noticed right away when closing the back hatch was that it stretches out some when the hatch is open, so when it is closed, you can see the cord bow outward. This wouldn’t be a problem with a regular sedan. Aesthetically, it looks a little messy, but it isn’t terrible and doesn’t bother me that much.


After inserting the included MicroSD card and Wifi dongle, I followed the instructions on setting up the iRoad app on my iPhone. This was very easy and straightforward.

Performance

After having the rear camera installed for only a few days, I encountered my first tailgater, which gave me my first reason to download video from the camera on to my phone. When I arrived at my destination I opened up the iRoad app, scrolled through and found the video, (which is arranged from most recent to least recent recorded video) and downloaded it onto my phone, which took maybe two minutes at the most in total. I liked doing it this way because I did not have to worry about remembering to bring the MicroSD card in and out of the car.

As you can see, the quality is pretty good. The semi-visible line you see on the top is my window defroster, which is not visible anymore now that I angled the camera slightly more downward.


The video quality during the day was very good. Cars and landmarks are easily visible and are quite clear. I have no complaints about the video quality during the day. When I had my music volume turned up, the bass was definitely overpowering on the recordings, but if I had the volume set at a normal level, it sounded just fine.


In the dark, the video quality is not as good as indicated on the website, but still decent as long as there is light from headlights or streetlights. The rear camera was not as useful on dark rural roads since there was no light coming from the headlights. I can’t really fault the camera for that though since the camera has low light vision, not dark/night vision. It worked better in the city where there was lighting all around.


The performance and quality of the cameras were good, and the app is very useful. iRoad also has a PC viewer application that allows for multiple views at once, GPS tracking, and more. The ability to view the front and rear camera at the same time is a huge plus. Instead of writing a long and boring paragraph about the iRoad viewer application, I simply made a video demonstrating the abilities so you can see how easy it is to use. Enjoy!

I have one last tidbit about the iRoad phone app. If you mount your phone on your dash and connect to the camera while backing up, you can use it as a backup camera, which could be useful if you don’t have one installed in your car. It might be useful for a tight spot if you are in a bind.

What I like

  • The cameras are sleek and look nice from outside of the car.
  • Able to download videos directly onto my phone with relative ease.
  • Good video quality.

What needs to be improved

  • Wifi will sometimes connect while the car is on, which disconnects the data on the phone.
  • Manual could be a little better.

Final thoughts

Overall, I think I really liked the iRoad X9 camera. It is reliable and has excellent video quality, has good software, and it looks nice in my car. The price tag is quite hefty though, and since I would not use any of the added features and will use it solely as a camera to protect myself in case of an accident or incident, this would not fit into my price/value range. However, if you have the money to spend and want a very nice camera, the iRoad X9 is a nice one to look into.

Price: $449.00 – $625.00 (depending on what size MicroSD card you want with it)
Where to buy: BlackboxMyCar.com
Source: The sample of this product was provided by BlackboxMyCar.com.

Filed in categories: Reviews

Tagged: ,

iRoad X9 front and rear dashcam review originally appeared on The Gadgeteer on October 28, 2018 at 9:00 am.

Note: If you are subscribed to this feed through FeedBurner, please switch to our native feed URL http://the-gadgeteer.com/feed/ in order to ensure continuous delivery.

Saddleback iPad case, KiiPix pic printer, Shure event, and more – Weekly round up

NEWS – Happy weekend Gadgeteers! It’s that time of the week where you can sit down and chill with some gadget news, reviews and articles. Here’s a listing of everything that we’ve posted this past week. Enjoy!

Articles

Reviews

News

Filed in categories: Reviews

Tagged:

Saddleback iPad case, KiiPix pic printer, Shure event, and more – Weekly round up originally appeared on The Gadgeteer on October 27, 2018 at 5:16 pm.

Note: If you are subscribed to this feed through FeedBurner, please switch to our native feed URL http://the-gadgeteer.com/feed/ in order to ensure continuous delivery.

Kensington SD 1600P USB-C Mobile Dock review


REVIEW – As technology evolves, newer and better connectivity options are continuously emerging. One of the relatively recent additions is the USB-C connection, with many devices like the MacBook pioneering this option. As a result, I have been testing a few USB-C docks for performance, flexibility, and connectivity. The Kensington SD 1600P USB-C Mobile Dock is another addition to the USB-C dock/expansion devices. Here is my experience with it.

What is it?

The Kensington SD 1600P USB-C Mobile Dock is an expansion dock that provides multiple and various ports and connectivity via one USB-C connection. It is USB port powered and also includes a USB-C pass-through power delivery port.

What’s in the box


1 x USB-C Dock
1 x Instruction Manual

Design and features

This USB-C hub is compact in size measuring just 5″ x 3″ x 1/2″. It has a built-in USB-C cable that tucks into the side. On one side of the hub, as shown in the picture below, from left to right, there is a VGA port, an HDMI port, and an ethernet port.


On the opposite side from left to right, there are 2 USB 3.1 ports and a USB-C pass-through power delivery port. As you can see below, I have a USB mouse dongle connected to one of the USB ports. The second picture below shows the USB dongle and the USB-C charger connected.


Below is a picture of the HDMI cable for the external monitor connected to the USB.


The next picture below shows the hub connected to my MacBook and the connection to the external monitor via the HDMI cable. It also shows the wireless mouse that I use. The second picture below shows the same with the USB-C adapter connected.


Next, you can see the MacBook Pro and an external monitor attached to the USB-C hub.

Performance

This Kensington USB-C hub performs exactly as it is supposed to without any hiccups. There is not a whole lot to say about performance once the ports operate as designed, which they do. There is no lag with the attached external monitor nor with the mouse. All USB drives that I connected performed well. Unlike other similar hubs that I have tested, this one gets just slightly warm after hours of use, and not in any way that I deem to be significant.

What I like

  • Compact size and lightweight
  • Ports and versatility
  • Pass-through charging port

What can be improved

  • A design that does not restrict the width of the USB device that can be connected
  • The lack of a card reader/s.

Final thoughts

This Kensington SD 1600P USB-C Mobile Dock performs very well and fulfills the exact function it is designed for. For the price, I wish that it had some additional functionality like a multi-port card reader. Otherwise, it is a very lightweight, compact and portable dock that provides good expansion for my MacBook Pro that only has one type of built-in port which is the 2 USB-C  ports.

Price: $89.99
Where to buy: Amazon
Source: The sample for this review was provided by Kensington.

Filed in categories: Reviews

Tagged:

Kensington SD 1600P USB-C Mobile Dock review originally appeared on The Gadgeteer on October 27, 2018 at 10:00 am.

Note: If you are subscribed to this feed through FeedBurner, please switch to our native feed URL http://the-gadgeteer.com/feed/ in order to ensure continuous delivery.

KiiPix Smartphone Picture Printer review

REVIEW – I take a LOT of pictures with my smartphone and I like to print some of them to put in my journal to help me remember things that have happened. Small photo printers are cool, but they require an app and have batteries that have to be charged. Is there an easier way to print your favorite pics? Tomy things so with their KiiPix Smartphone Picture Printer. Let’s check it out.

What is it?

The Tomy KiiPix Smartphone Picture Printer is actually a modern take on the iconic Polaroid cameras of the 70’s and 80’s.

What’s in the box?

KiiPix Smartphone Picture Printer
Instructions
*Fujifilm Instax mini film cartridge is NOT included

Design and features

The KiiPix device is made of white and black plastic and features a film ejection dial on one side that is used to advance and eject each print.

The prints eject from the side of the unit.

On the bottom of the KiiPix, you’ll find the printer paper compartment and the print count indicator.

The paper compartment opens to reveal the camera lens. That’s right, this isn’t really a photo printer, it’s actually an instant camera.

To use it, you’ll have to load a cartridge of Fujifilm Instax mini film into the bottom of the KiiPix.

Each Fujifilm cartridge has 10 films inside.

The film cartridge easily snaps in place and the door secures shut with a click.

The next step is to unfold/open the KiiPix by lifting the two “wings”. You will then see a white plastic frame.

The frame lifts out of the camera and is placed over the two wings to create a platform.

The frame is designed so that your iPhone or Android phone’s display rests over the opening so that the camera below it can take a photo of the phone’s screen.

To line up the photo, you need to have it displayed on the phone and then stick the frame (it has sticky strips on the edges to the display.

There’s also a tiny mirror that you can use to line up the image.

I tested the KiiPix with my Pixel 2 XL. Note that you don’t have to pair the KiiPix with your phone or load a special app. All you have to do is display the image on the phone’s screen that you want to print. The KiiPix will then take a picture of the image on the phone’s display when you press the shutter button on the side of KiiPix.

The first time you use the KiiPix, you have to rotate the film ejection dial until the first sheet is ejected.

Then you can take an actual picture and it will eject from the KiiPix when you turn the dial.


The 3.4 inch x 2.1 inch print comes out black, but the image will become visible within a few seconds.

Within about 90 seconds – 2 minutes, the 2.4 inch x 1.8 inch image will be fully visible. Check out the video below that shows the film developing over time.

The resulting photo quality was a mixed bag. My first image can be seen above and in the video had strange black arcs on the side and the whole print got much darker as time went by. Here are some more prints that I made.

My first two images were really dark, and then I read that you’re supposed to turn the phone’s brightness to the max. But even then, I still felt like the images were darker than I would like. I also ran into issues where I accidentally pressed the shutter button twice. Can you see which image that was? Yes, it’s the one with double flowers. That’s actually a cool “feature” that can allow you to make some creative photos by having double exposures. Then there’s the issue of the screen rotating when you don’t want it too like the selfie at 9 o’clock where you can see black bars on the side. That image is supposed to be oriented the other way…

What I like

  • No cables, no Bluetooth, no batteries
  • Doesn’t require an app

What needs to be improved

  • Doesn’t come with a Fujifilm Instax Mini print pack
  • Print quality isn’t very impressive

Final thoughts

The KiiPix has a few things going for it when compared to the more expensive small photo printers like my favorite HP Sprocket. First of all, the KiiPix costs about $90 less than the HP Sprocket. The KiiPix also doesn’t need to be charged, paired, or used with an app. But both printers require that you buy film/photo packs. I like the Zink prints from photo printers like the HP Sprocket better than the Fujifilm Instax Mini prints because the Zink prints have peel and stick backs which make it much easier to put the photos in a journal. The Fujifilm prints are also thicker and have a large white frame around them instead of the image being edge to edge like the Zink prints.

But when it comes right down to it. I prefer the smaller HP Sprocket style printer because I don’t have to line up the camera on top of the printer itself and the print results are much better and don’t depend on how bright the screen. In my opinion, the Tomy KiiPix Smartphone Picture Printer is more of a toy than a photo printer. Yes, it prints photos, but the results won’t impress.

Price: $39.99
Where to buy: Amazon
Source: The sample for this review was provided by Tomy.

Filed in categories: Reviews

Tagged: , ,

KiiPix Smartphone Picture Printer review originally appeared on The Gadgeteer on October 26, 2018 at 10:00 am.

Note: If you are subscribed to this feed through FeedBurner, please switch to our native feed URL http://the-gadgeteer.com/feed/ in order to ensure continuous delivery.