WellDesk XenStand laptop stand review

REVIEW – Your mother was always telling you to sit up straight, but how do you do that when you’re slumped over a laptop all day long? One way to improve the ergonomics is to raise the display to eye level with a laptop stand like the XenStand from WellDesk. Let’s take a look.

What is it?

The WellDesk XenStand is an adjustable laptop stand that is made in the USA of Baltic Birch Plywood and has the same DIY type of style as their dual monitor standing desk which reviewed a few months ago.

What’s in the box?

The XenStand has 2 support stands and 2 feet that are used to elevate the stand into higher positions.

Design and features

The WellDesk XenStand is made of nicely finished wood that has sanded, smooth edges with no splinters to worry about. It has a simple interlocking design where the two main pieces fit together to form an X. The stand is solid and stable while still being able to quickly disassemble it if needed.

The back of the stand props up the display of the laptop while the hooks in the front of the stand prevent the laptop from sliding off the stand. I did all my testing of the WellDesk with my 12-inch MacBook, which is the smallest sized laptop that you would want to use with this stand. With the MacBook in place, the back of the laptop is raised approximately 4.25 inches.

In this position, the display is raised for more comfortable viewing. Of course, you will also need to use an external keyboard and mouse for correct ergonomics.


If the first configuration doesn’t raise the display high enough for you, there are two other configurations that you can try. By adding the included feet to the inner notches, the back of the display is raised even higher.


In this position, the back of the computer is raised 5.75 inches off the table.

Last but not least, you can add the feet to the rear notches and position the front edge of the laptop in the larger hooks. As you can see, this configuration will not work for my 12-inch MacBook because the display does not open far enough.

What I like

  • Made in the USA of sustainable products
  • Easy to assemble
  • Three configurations

What needs to be improved

  • Almost too wide for 12-inch laptops

Final thoughts

The WellDesk XenStand is a simple laptop stand lifts the display to eye level so that you can use a keyboard and mouse with your laptop to allow you to sit up straight to improve your posture and ergonomics. This stand is easy to assemble and disassemble and isn’t too bulky to take with you in the included drawstring canvas bag.

Price: $37.95 MSRP
Where to buy: Amazon
Source: The sample for this review was provided by Well Desk.

Filed in categories: Reviews

Tagged:

WellDesk XenStand laptop stand review originally appeared on The Gadgeteer on October 23, 2018 at 11:00 am.

Note: If you are subscribed to this feed through FeedBurner, please switch to our native feed URL http://the-gadgeteer.com/feed/ in order to ensure continuous delivery.

Tronsmart Trim 10,000 mAh power bank review

REVIEW – By now, everyone in the world who uses technology daily has at least one power bank. Those little portable chargers that can top up your phone or iPad while away from the grid have saved everyone’s bacon at some point, I’m sure. Now, the move to USB3 is taking hold, and phones, laptops, and all manner of devices are starting to be powered by this new spec. Tronsmart has answered the call with a 10,000 mAh slimline power bank they named the Trim, for obvious reasons) that not only includes the new port for both input and output, but also preserves the output for good ole USB-2. I was sent one to test and am ready, as ever, to report my findings.

Note: Photos may be tapped or clicked for a larger image.

What is it?

The Tronsmart Trim 10,000 mAh power bank is smaller than most modern smartphones. It is about the same weight, at 6.8 ounces, and can easily hide in a pocket, purse, or backpack and you’ll never know it’s there – until you need it.

Hardware specs

(from Tronsmart website)

Model – Trim PBD01
Technology – PD (Power Delivery 3.0), VoltiQ, Quick Charge 3.0, compatible with Huawei FCP technology
Capacity – 10000mAh
Material – Anodized aluminum + plastic frame
Ports – 3 Ports: USB Type-C, USB-A, MicroUSB
Power – 18W Total Output
Input – Micro USB: 5V/2A, 9V/2A; USB-C (PD): 5V/2A, 9V/2A
Output – (USB) USB-C (PD3.0): 5V/3A, 9V/2A, 12V/1.5A; USB-A: 5-6V/3.0A, 6-9V/2.0A, 9-12V/1.5A
Certifications – FCC, CE, RoHS
Dimension – 5.62 x 2.75 x 0.46 in (143 x 70 x 11.8 mm)
Net Weight – 194.3g / 6.85oz

What’s in the box?

  • Power Bank
  • 8” USB-A to microUSB cord/lanyard
  • Instruction sheet

Design and features

The thin, sleek Tronsmart Trim is a departure from most 10,000 mAh battery packs. Most are much thicker, heavier, and clunkier. This svelte unit rivals most phones or other handheld devices for style and build quality. The subtle 4-LED gas gauge tells you how much juice remains. There’s a place to add a tethered leash, if you like. (The included short USB-A to microUSB cable doubles as such a leash. I like these short minimal cables that have started appearing. If I’m not having to plug into a wall outlet 4 seats way at an airport gate, I really don’t want a 10 meter cable to deal with. I just need a few inches to connect to the phone or iPad I’m holding in my hand while it charges.)
In addition to the USB3 input and output, there is a microUSB input port and a USB2 output. The matte black rubberized case has a copper/rose gold band around all edges, as well as a full metal front where the ports are.
The Trim is very easy to take along, and simple to deploy. It charged both my iPads (12.9 and 10.5 pros) as well as my iPhone 8 Plus without issues. I didn’t run any long-term tests of trying to run anything down and seeing how quickly it came back using just this powerbank, but I did find that the power bank will hold a full charge for a good while (weeks) without losing any stored power, and this can bring up anything from your drone batteries, your watch, or your phone quickly. If you’re going to be away from grid power, or just moving around from place-to-place, you’re going to find it will serve you well, and with the USB3 I/O, will be useful for a good while to come.

What I Like

  • Small footprint
  • Multiple output options
  • Good capacity/size ratio

What needs to be improved

  • I can’t think of anything.

Final thoughts

Battery packs are a fact of life for Gadgeteers. We constantly have something that needs charging or at least topping off, since we use portable gadgets all the time. This slim, yet large capacity charger adds to the mix by having a USB-C option, both for charging and to connect to your devices. Adding in the slim form factor and modern styling, and it’s an easy must-have for anyone looking for a power bank for personal use or as a gift.

Price: $25.99
Where to buy: Amazon
Source: The sample of this product was provided by Tronsmart.

Filed in categories: Reviews

Tagged:

Tronsmart Trim 10,000 mAh power bank review originally appeared on The Gadgeteer on October 23, 2018 at 9:00 am.

Note: If you are subscribed to this feed through FeedBurner, please switch to our native feed URL http://the-gadgeteer.com/feed/ in order to ensure continuous delivery.

Deenkee I7 robotic vacuum cleaner review

There are literally a plethora of robotic type vacuum cleaners out on the market.   The price ranges from a couple hundred to right at a thousand dollars for one.  We have all heard that quote ‘You get what you pay for’, and that has usually been my experience.  However, I was recently offered the opportunity to try out one of the lower priced vacuums by Deenkee.  I have never had a robotic vacuum and figured out I would give it a try.  Let’s see if the low price still gave good results.

What is it?

The Deenkee Intelligent Vacuum Cleaner is exactly what you think it is.  It is an automatic vacuum cleaner that roams around your house vacuuming carpets and hard floors.  This vacuum has the additional special feature of having a wet mop option along with the regular vacuum functionality.

What’s in the box?

Deenkee included a lot of extra items in their budget-friendly vacuum.  Working our way around the picture from the top left to the right the following items were in the box.

  • User Manual
  • Two extra sweeper brushes to replace the 2 that are already mounted underneath the vacuum for when they wear out.
  • The wet mop pad and water holder underneath it.
  • Charging base station
  • Blue warranty card
  • Power adapter for the charging station
  • The vacuum itself with 2 brushes and filter system already installed.
  • An extra packet of HEPA filter and thinner foam filter
  • Remote control
  • Philips head screwdriver
  • A strip of heavy magnetized rubber
  • Small brush used to clean out the filters

Design and features

First off let me apologize.  The rest of the pictures in this review were taken after the vacuum had already gone around the first floor of my house a couple of times.  I was so excited to use the thing I totally forgot to take pictures until after it ran!  The picture above shows the bottom of the unit.  The first thing that caught my eye was the fact that the unit has two horizontal rotating brushes with one on either side of the front wheel.  This is one more than will see on other vacuum cleaners like the Roomba brand.  At the top of the picture, you can see the front wheel which is a freewheeling in any direction ball-type wheel.  Right below the front wheel is the battery compartment where the rechargeable battery sits.  This is replaceable so I assume in the future I can order another battery if and when the one I have now wears out.  Let me say that this battery is AWESOME.  The machine ran vacuuming the whole time for a solid 120 minutes.  The manual says it will run 90 – 120 minutes and I have had it run a full 120 minutes consistently.  It has then run an additional 30 minutes winding its way from one side of my house to the other finding its charging station.  That last 30 minutes the vacuum part was turned off and it just freewheeled around looking for the charging base.

Behind the battery, you will see the 2 rear wheels and the main middle brush.  Note the 4 tiny Philips screw heads below the brush.  You can use the included screwdriver to remove those screws and the brush will pop right out for easier cleaning.  We own a Shetland sheepdog and he sheds quite a bit of long hair.  I find I have to clean that brush about once a month to keep it effective.

Also, notice the two vertical oblong holes on either side of the middle brush?  That is where the water reservoir and mop pad would install.

The picture above shows how it mounts to the vacuum cleaner.  I personally never used the feature myself because I felt my downstairs area was just too large for the amount of water in the reservoir.  I am sure if you had just a small area to use this in it would work just fine.

The next picture shows the top of the vacuum with the dirt canister pulled out.  There is a small button in the middle just to the left of the blue strip that is easy to press that releases the canister from the vacuum.

The next two pictures show the dirt canister opened and then with all of the filter material out.  This vacuum has quite an intensive filter system.  I never saw any dust coming out of the vacuum while it was working.  It even had the ultimate test at my house.  We had our stair railing replaced.  This meant that the entire first floor was coated in a fine layer of sawdust.  I ran my big Dyson vacuum over the entire floor and then manually dusted the house.  Then I kicked off the Deenkee to see if it would pick up any additional dirt.  That canister area was filled with very fine sawdust.  It did an awesome job of picking up additional sawdust.  The white screen filter in the left picture can be pried out using the two tabs on either side.  Below that was a black foam strip followed by a heaver HEPA media filter.  So you essentially get 3 layers of filter.  As noted earlier they give you an additional foam filter and HEPA filter in the box.

It should be noted that Deenkee sells a replacement packet including 2 filter sets, 2 mop pads, 4 horizontal brushes and 1 rotating middle brush for $25.99 at Amazon.

Overall, I was really happy with the Deenkee.  It did an excellent job of vacuuming.  I have a pretty large downstairs area that includes the kitchen, breakfast area, main living space, entryway and formal dining room.  There are tons of obstacles and of course, there was my dog.  I only encountered a few issues with the vacuum.  The picture above shows it stuck under my refrigerator.  That has only happened twice in about the 10 times it has run in my home.  I know more expensive robot vacuums have an actual camera on top to prevent this.  The other issue I had was it ignoring the magnetic strip I placed in front of my bedroom door.  I don’t like closing the door and wanted to try to keep it out of the room with the included magnetic strip.  I put it on top of the threshold, in front of the threshold and even a few feet in front of it and the vacuum still rolled right over it.  We have a bunch of power cables under our bed from the Sleep Number mattress and the vacuum would get stuck on those.   The nice thing, however, is when it did get stuck, it would stop vacuuming and start beeping loudly.  Eventually, it would just shut itself off if we were not home to get to it in time.

It’s not advanced as some others in that I don’t think it makes a map of your rooms.  It seemed to learn over time where some stuff was as it stopped bumping into some things and just turning around right before it would hit some things.  I often saw it sweeping over the same areas multiple times during the full 120 minutes.  Like I said our room is really complicated.

This last picture shows the ‘stuff’ it picked up on its first run around the floor.  Here I thought the floor was pretty clean.  YUCK!

What I like

This vacuum gives some really good bang for the buck.  Even in my complicated first-floor layout, the vacuum seemed to get every area clean.  It may not have been as efficient about it as some of the more expensive ones, but it did get the job done.  I love that it came with extra media filters, and as a bonus, I noticed they now seem to be shipping with 4 extra brushes and 2 extra media filters.  There is even a newer version of this vacuum out that costs an extra $20 that is supposed to be a bit quieter and have even more suction power.  It rolled over and vacuumed an extremely thick and fluffy doormat I have by my back door with no problems at all.

What can be improved

If some kind of mapping technology could be built in for just a bit more cost I think that would make the device a winner.  Then I would not have to remember to close doors to rooms I don’t want it to go to.  The magnetic strips just did not seem to work like they should.  Also making it quieter would be beneficial (which they did with a slightly more expensive version now available).  Putting some kind of sensor on the top of the front would also be great to keep it from getting stuck under objects.

Price: $209.99 – Get $70 off with code HRJD3G3F which expires on 10/30/18
Where to buy: Amazon
Source: The sample for this review was provided by Deeknee.

Filed in categories: Reviews

Tagged:

Deenkee I7 robotic vacuum cleaner review originally appeared on The Gadgeteer on October 22, 2018 at 11:00 am.

Note: If you are subscribed to this feed through FeedBurner, please switch to our native feed URL http://the-gadgeteer.com/feed/ in order to ensure continuous delivery.

Rowkin Ascent Micro Bluetooth headphones review

REVIEW – Julian Perry and I have been on a quest to find a great pair of Bluetooth earbuds and I’m not sure which one of us will finish our quest first or even there’s even an end in sight since new earbuds are coming out every day and it’s too tempting to try yet another pair. The latest pair that I’ve been testing is the Ascent Micro true wireless headphones from Rowkin. Let’s check them out.

What is it?

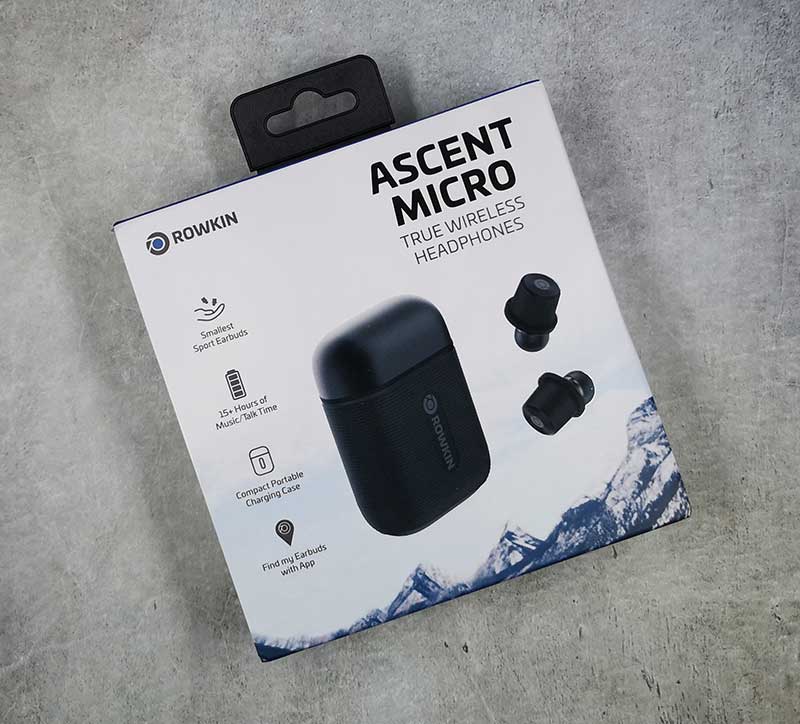
The Rowkin Ascent Micro is the latest Bluetooth headphones from Rowkin and the 4th pair of wireless headphones that I’ve tested from this particular company. From their Bit Charge earbuds that I reviewed back in 2016, I have been interested in this form factor but wasn’t impressed with the way they performed. Then more recently I reviewed their Micro Touch earbuds and again, I wasn’t impressed… But now I have their latest Ascent Micros and… well… you’ll see as you read on.

What’s in the box?

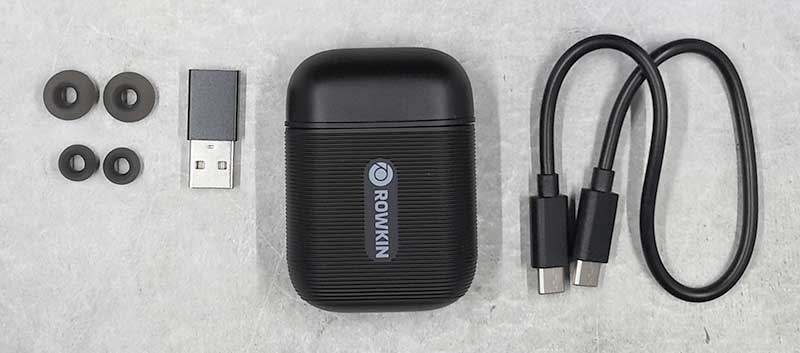
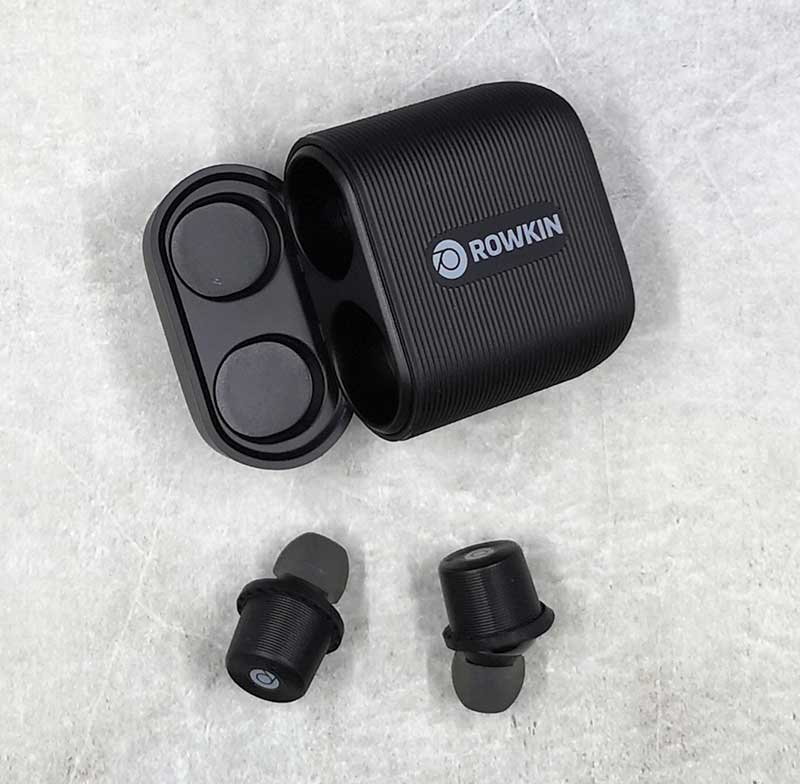
Rowkin Ascent Micro charging case with 2 Bluetooth earbuds inside
USB-C charging cable
USB-C to USB adapter
2 extra sets of eartips

Hardware specs

Charging time:
• Earbud: ≤70 minutes
• Portable charging case: ≤120 minutes
Number of recharges: 4
Standby time (power on): Up to 70 hours, (power off): about 120 days
Music / Talk time: up to 3.5+ hours
Frequency response: 20Hz-20kHz
Bluetooth version: 5.0
Bluetooth profiles: HFP, HSP, AVRCP, A2DP and SPP
Audio enhancements: Noise reduction and echo cancellation

Design and features

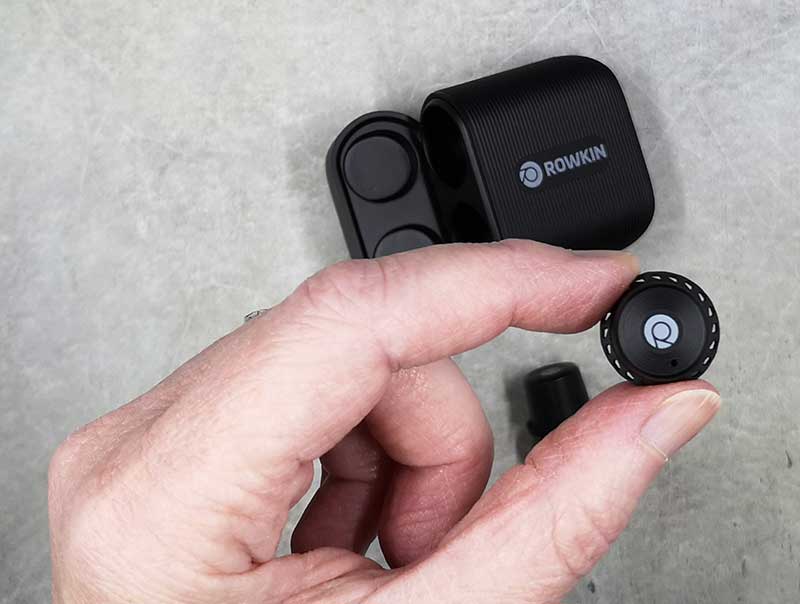
The Rowkin Ascent Bluetooth earbuds are available in 2 versions. There is the Micro version that was sent to me and shown above, and the Charge version. What’s the difference? The style of the storage container. The Ascent Charge has a long storage case that doubles as a power bank and charges wireless on a Qi wireless charger. The Ascent Micro which I have has a storage case with a built-in battery that charges the earbuds using a USB-C cable.

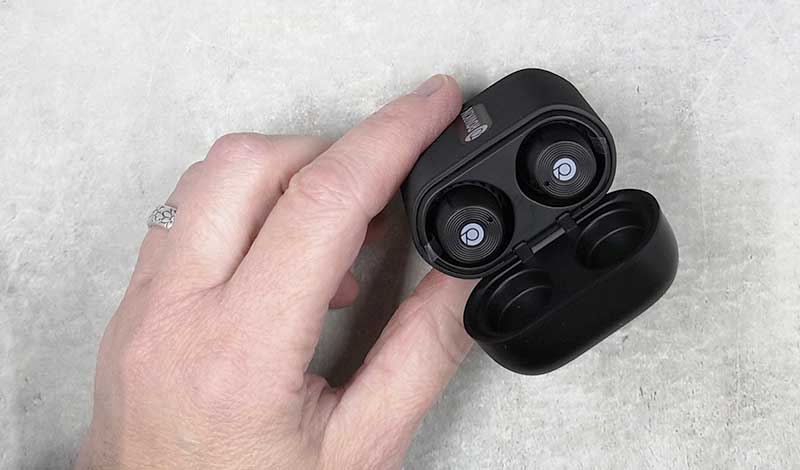
Available in black, slate, or cobalt blue, the Ascent case has 2 slots that the earbuds snap into via a magnet that holds them in place.

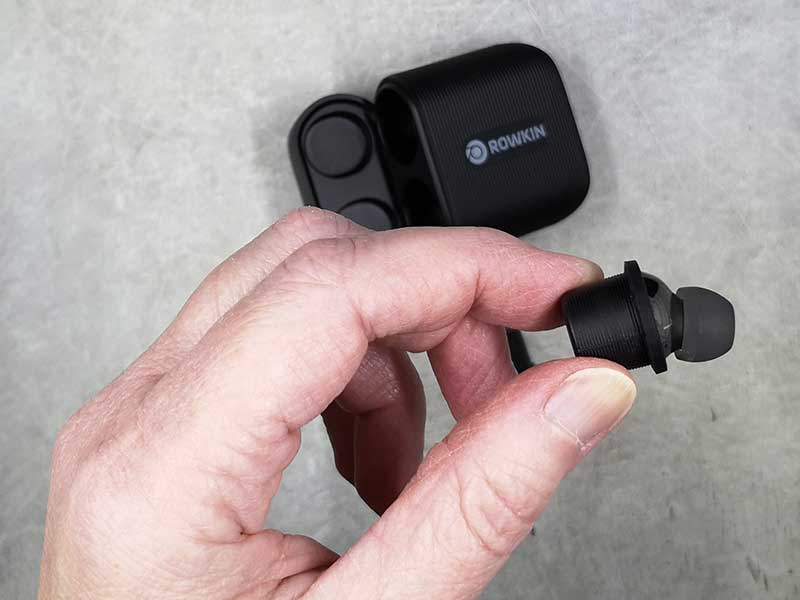
The earbuds have a bullet shape like previous Rowkin earbuds that I’ve reviewed, but the eartip is angled to better fit in your ear canal.

Compared to the other three Rowkin buds that I’ve tested over the years, I think the Ascent earbuds have a more premium feel.

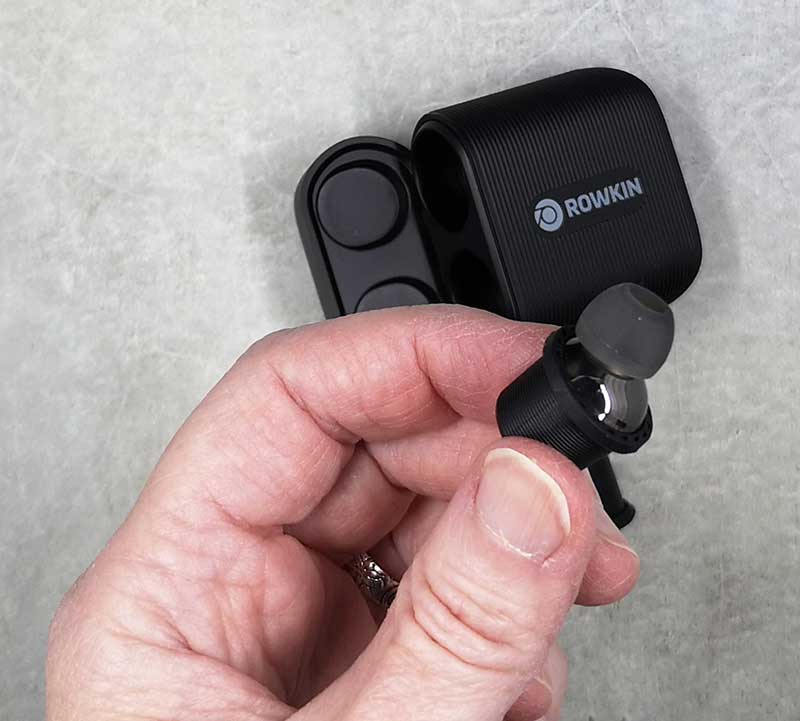
The Ascent buds also have a silicone ring which Rowkin has named the Retention Wheel. This wheel is supposed to provide a more ergonomic fit and to aid in keeping the earbuds in your ears.

The Retention Wheel can be removed if desired. I haven’t noticed much of a difference with the fit and the wheel installed or removed. The earbuds fit me fine either way. But of course, everyone’s ears have a unique shape.

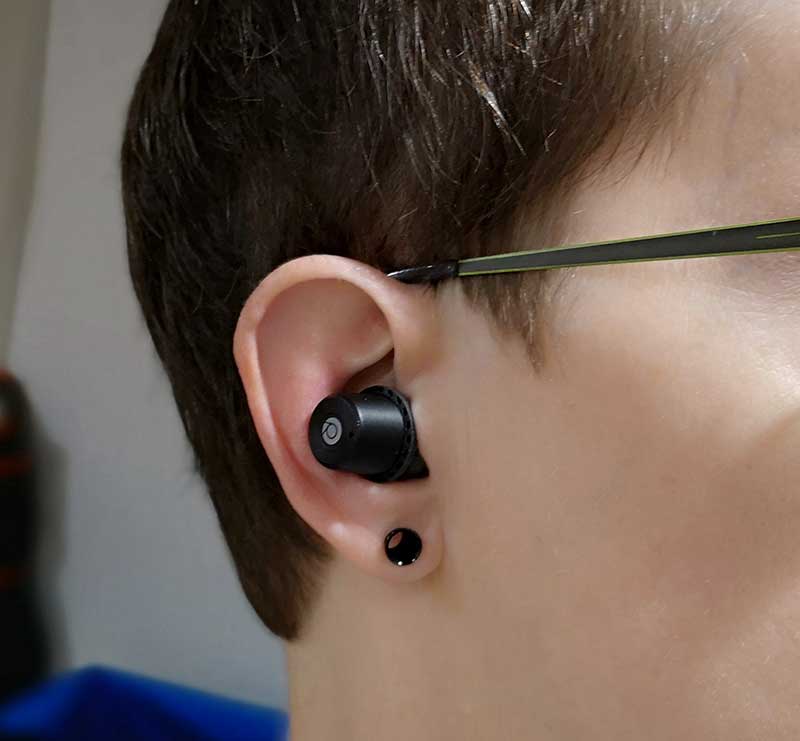
I will say that the Rowkin Ascent earbuds are the most comfortable truly wireless earbuds that I’ve tested so far. I have no problem leaving them in my ears for an hour or two at a time and have experienced zero discomfort with them. The fit for me isn’t perfect though. I’ve had the earbuds fall out of my ears during workouts where I was moving around a lot. But wearing them while sitting at a desk has been perfect.

The Ascent earbuds charge in the included flip-top case. There’s a pin in each slot that plugs into the earbud when they are seated in the slot.

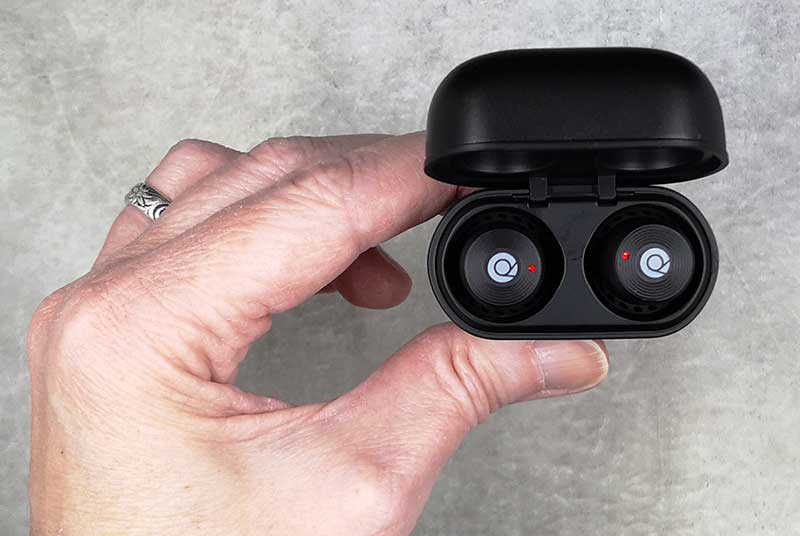
You will know that charging has begun when you see the two tiny LEDs on the earbuds throb red. When the LEDs turn off, that means the earbuds are fully charged.

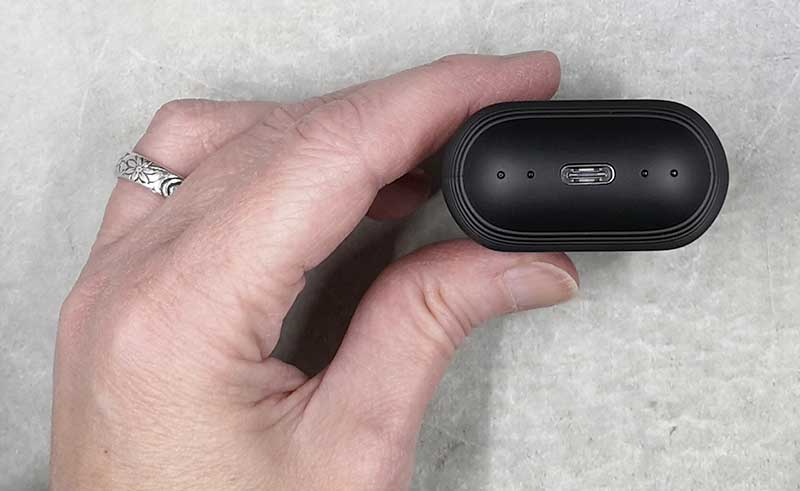
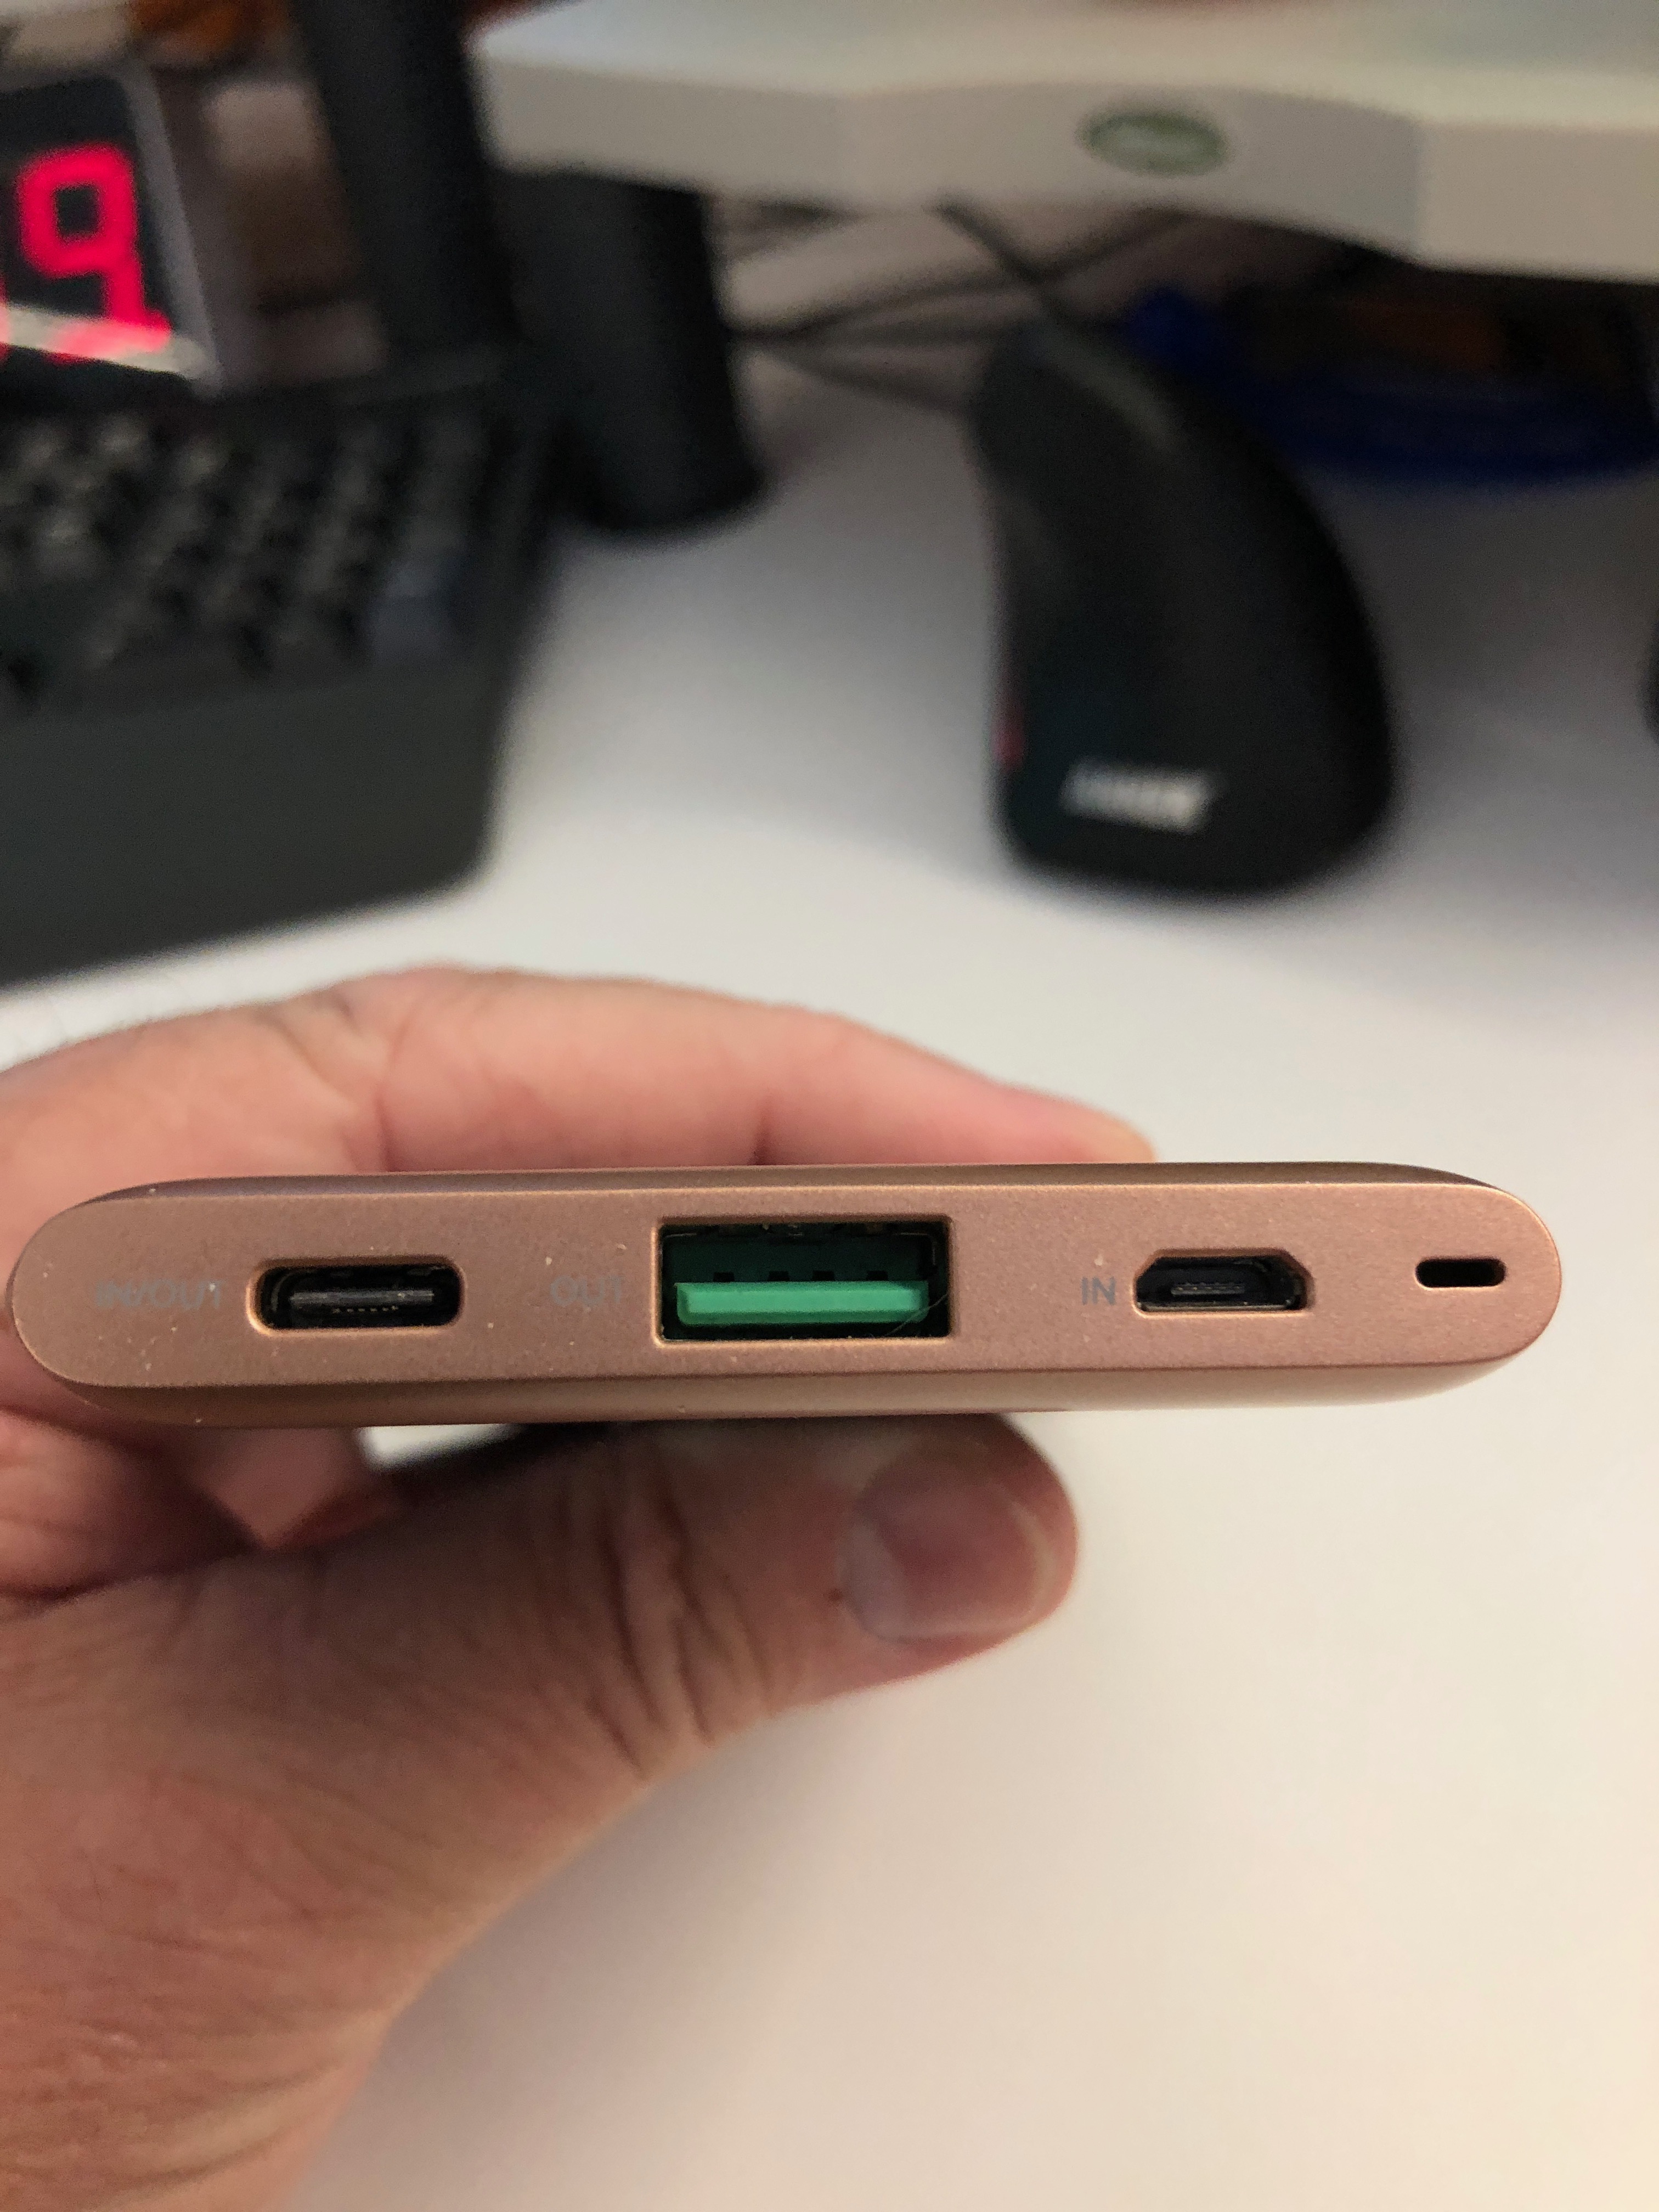
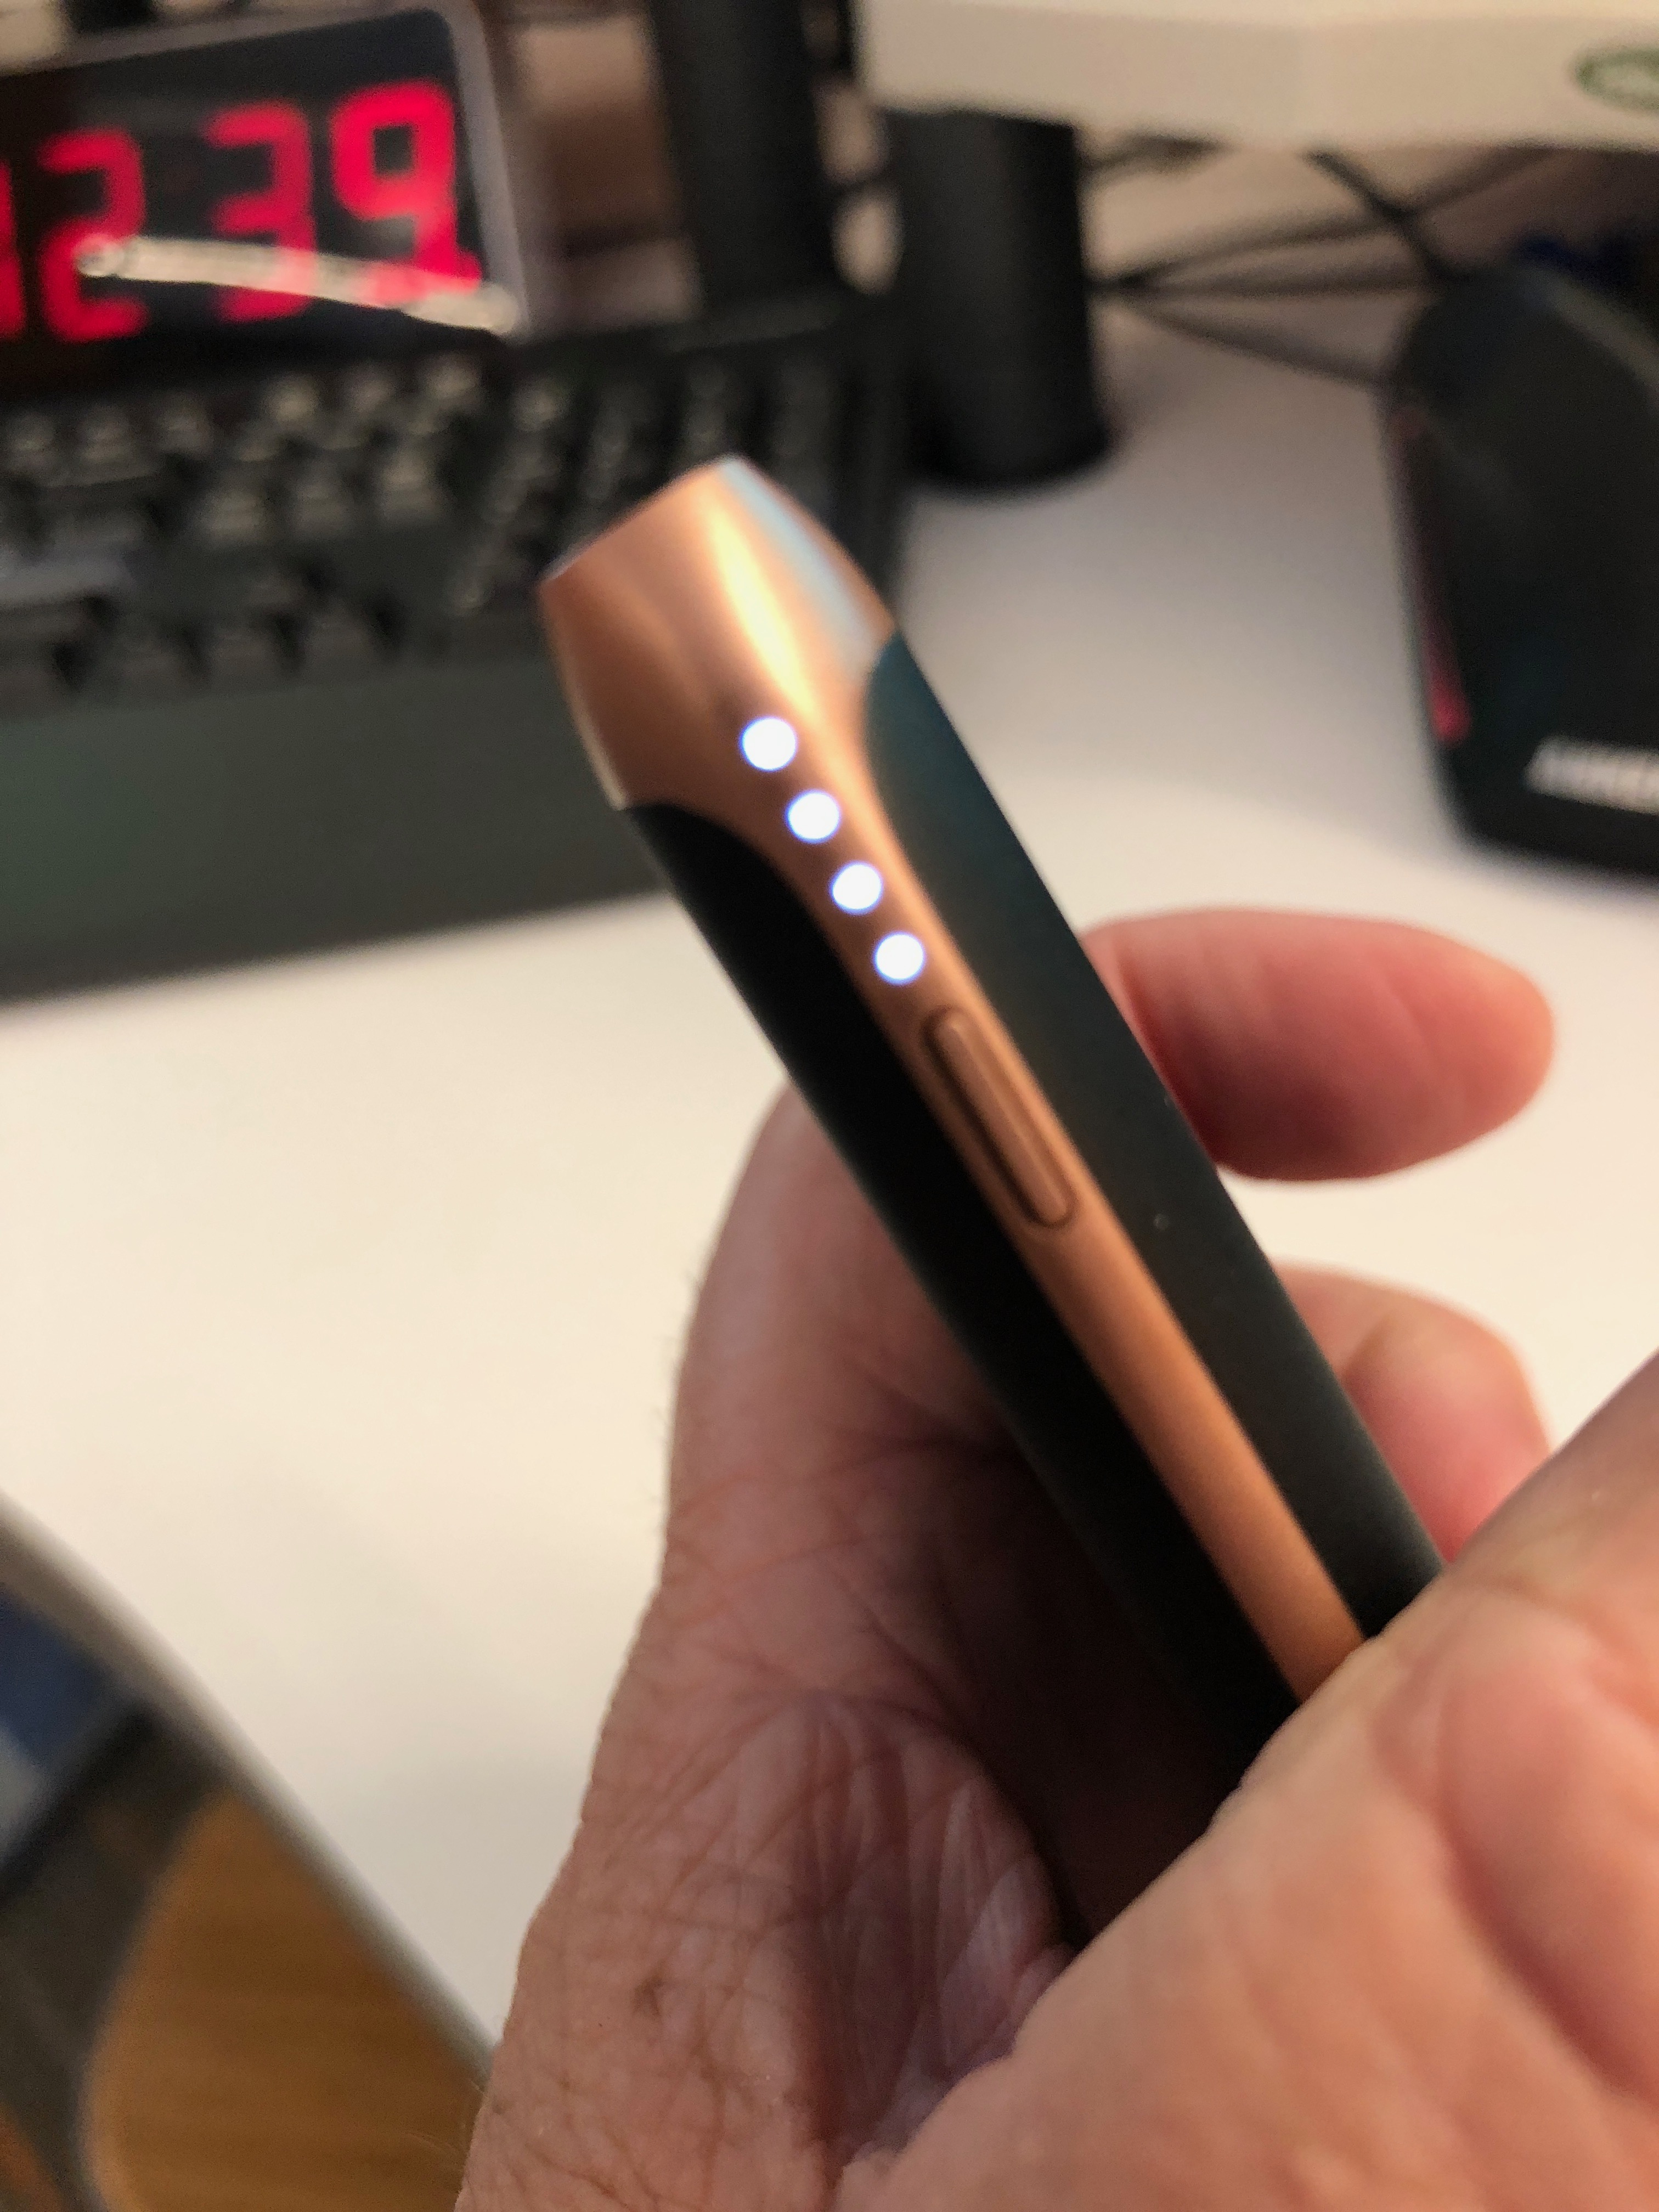
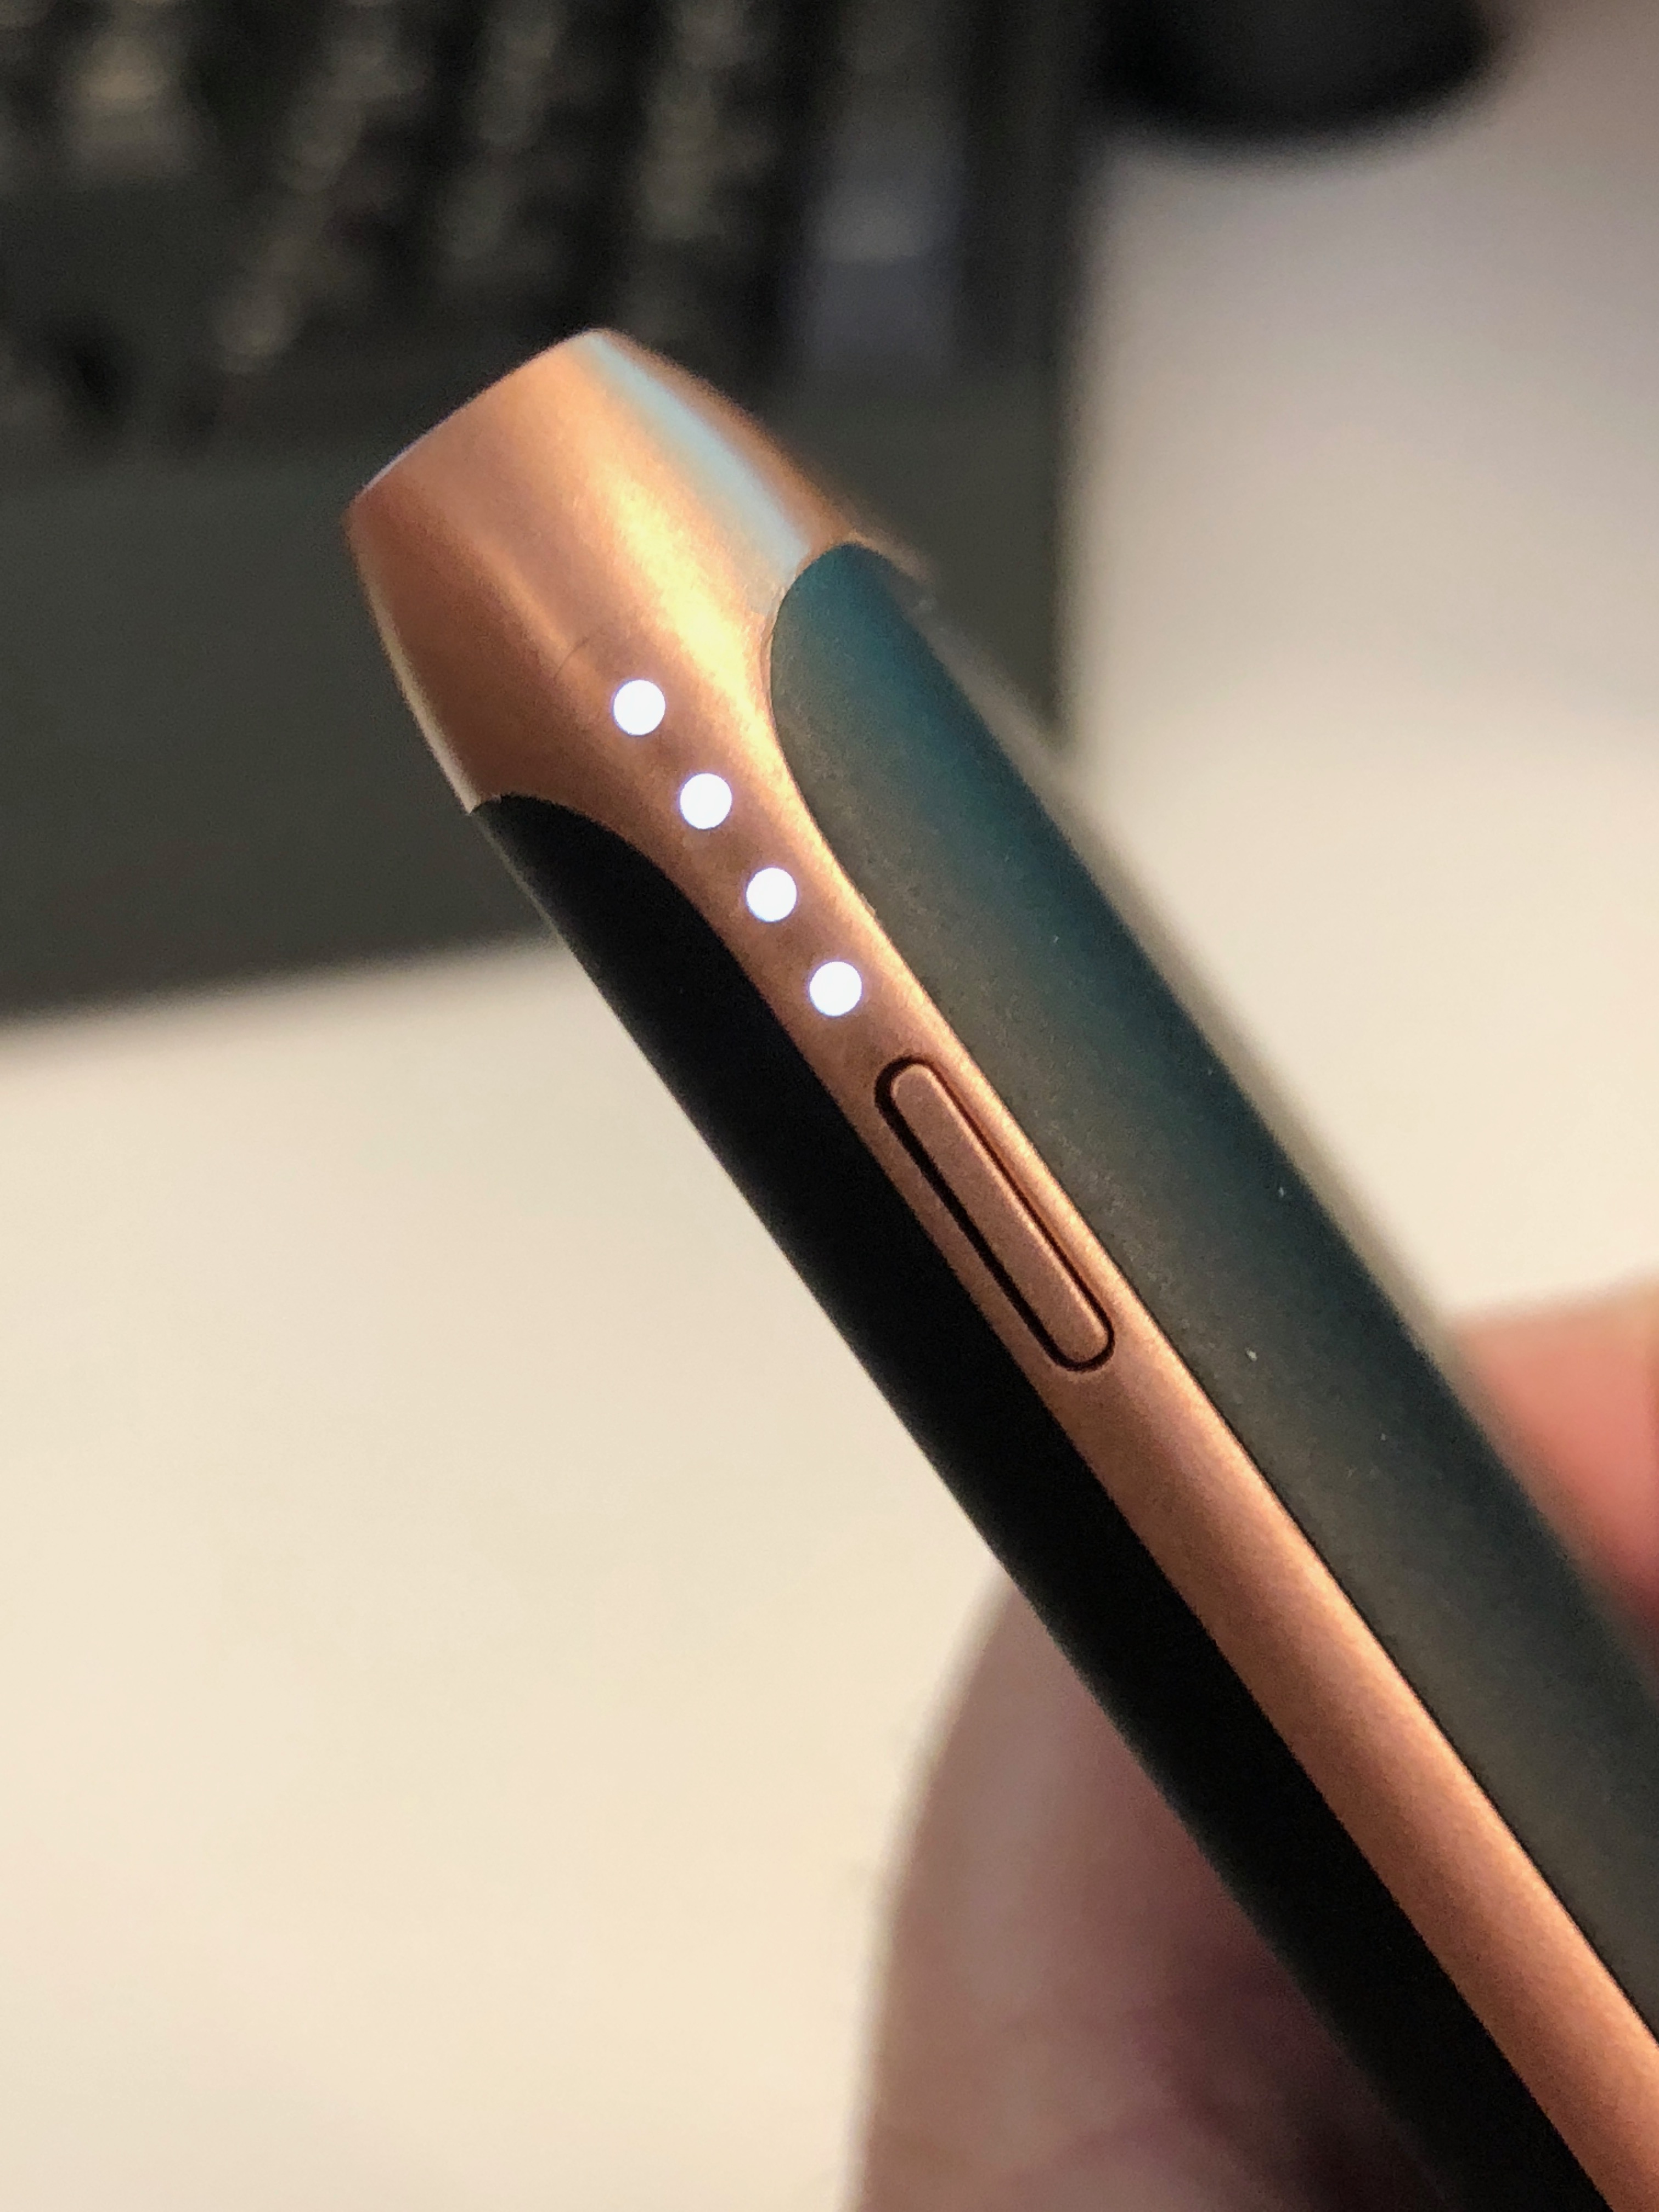
On the bottom of the charging case are two LEDs on either side of the USB-C port. These LEDs provide a battery capacity status for the case. The instructions tell you to gently shake the case so the LEDs will light up but that didn’t work for me. To see the status, I would set the case on a flat surface and lift the end up slightly and let it fall back down.

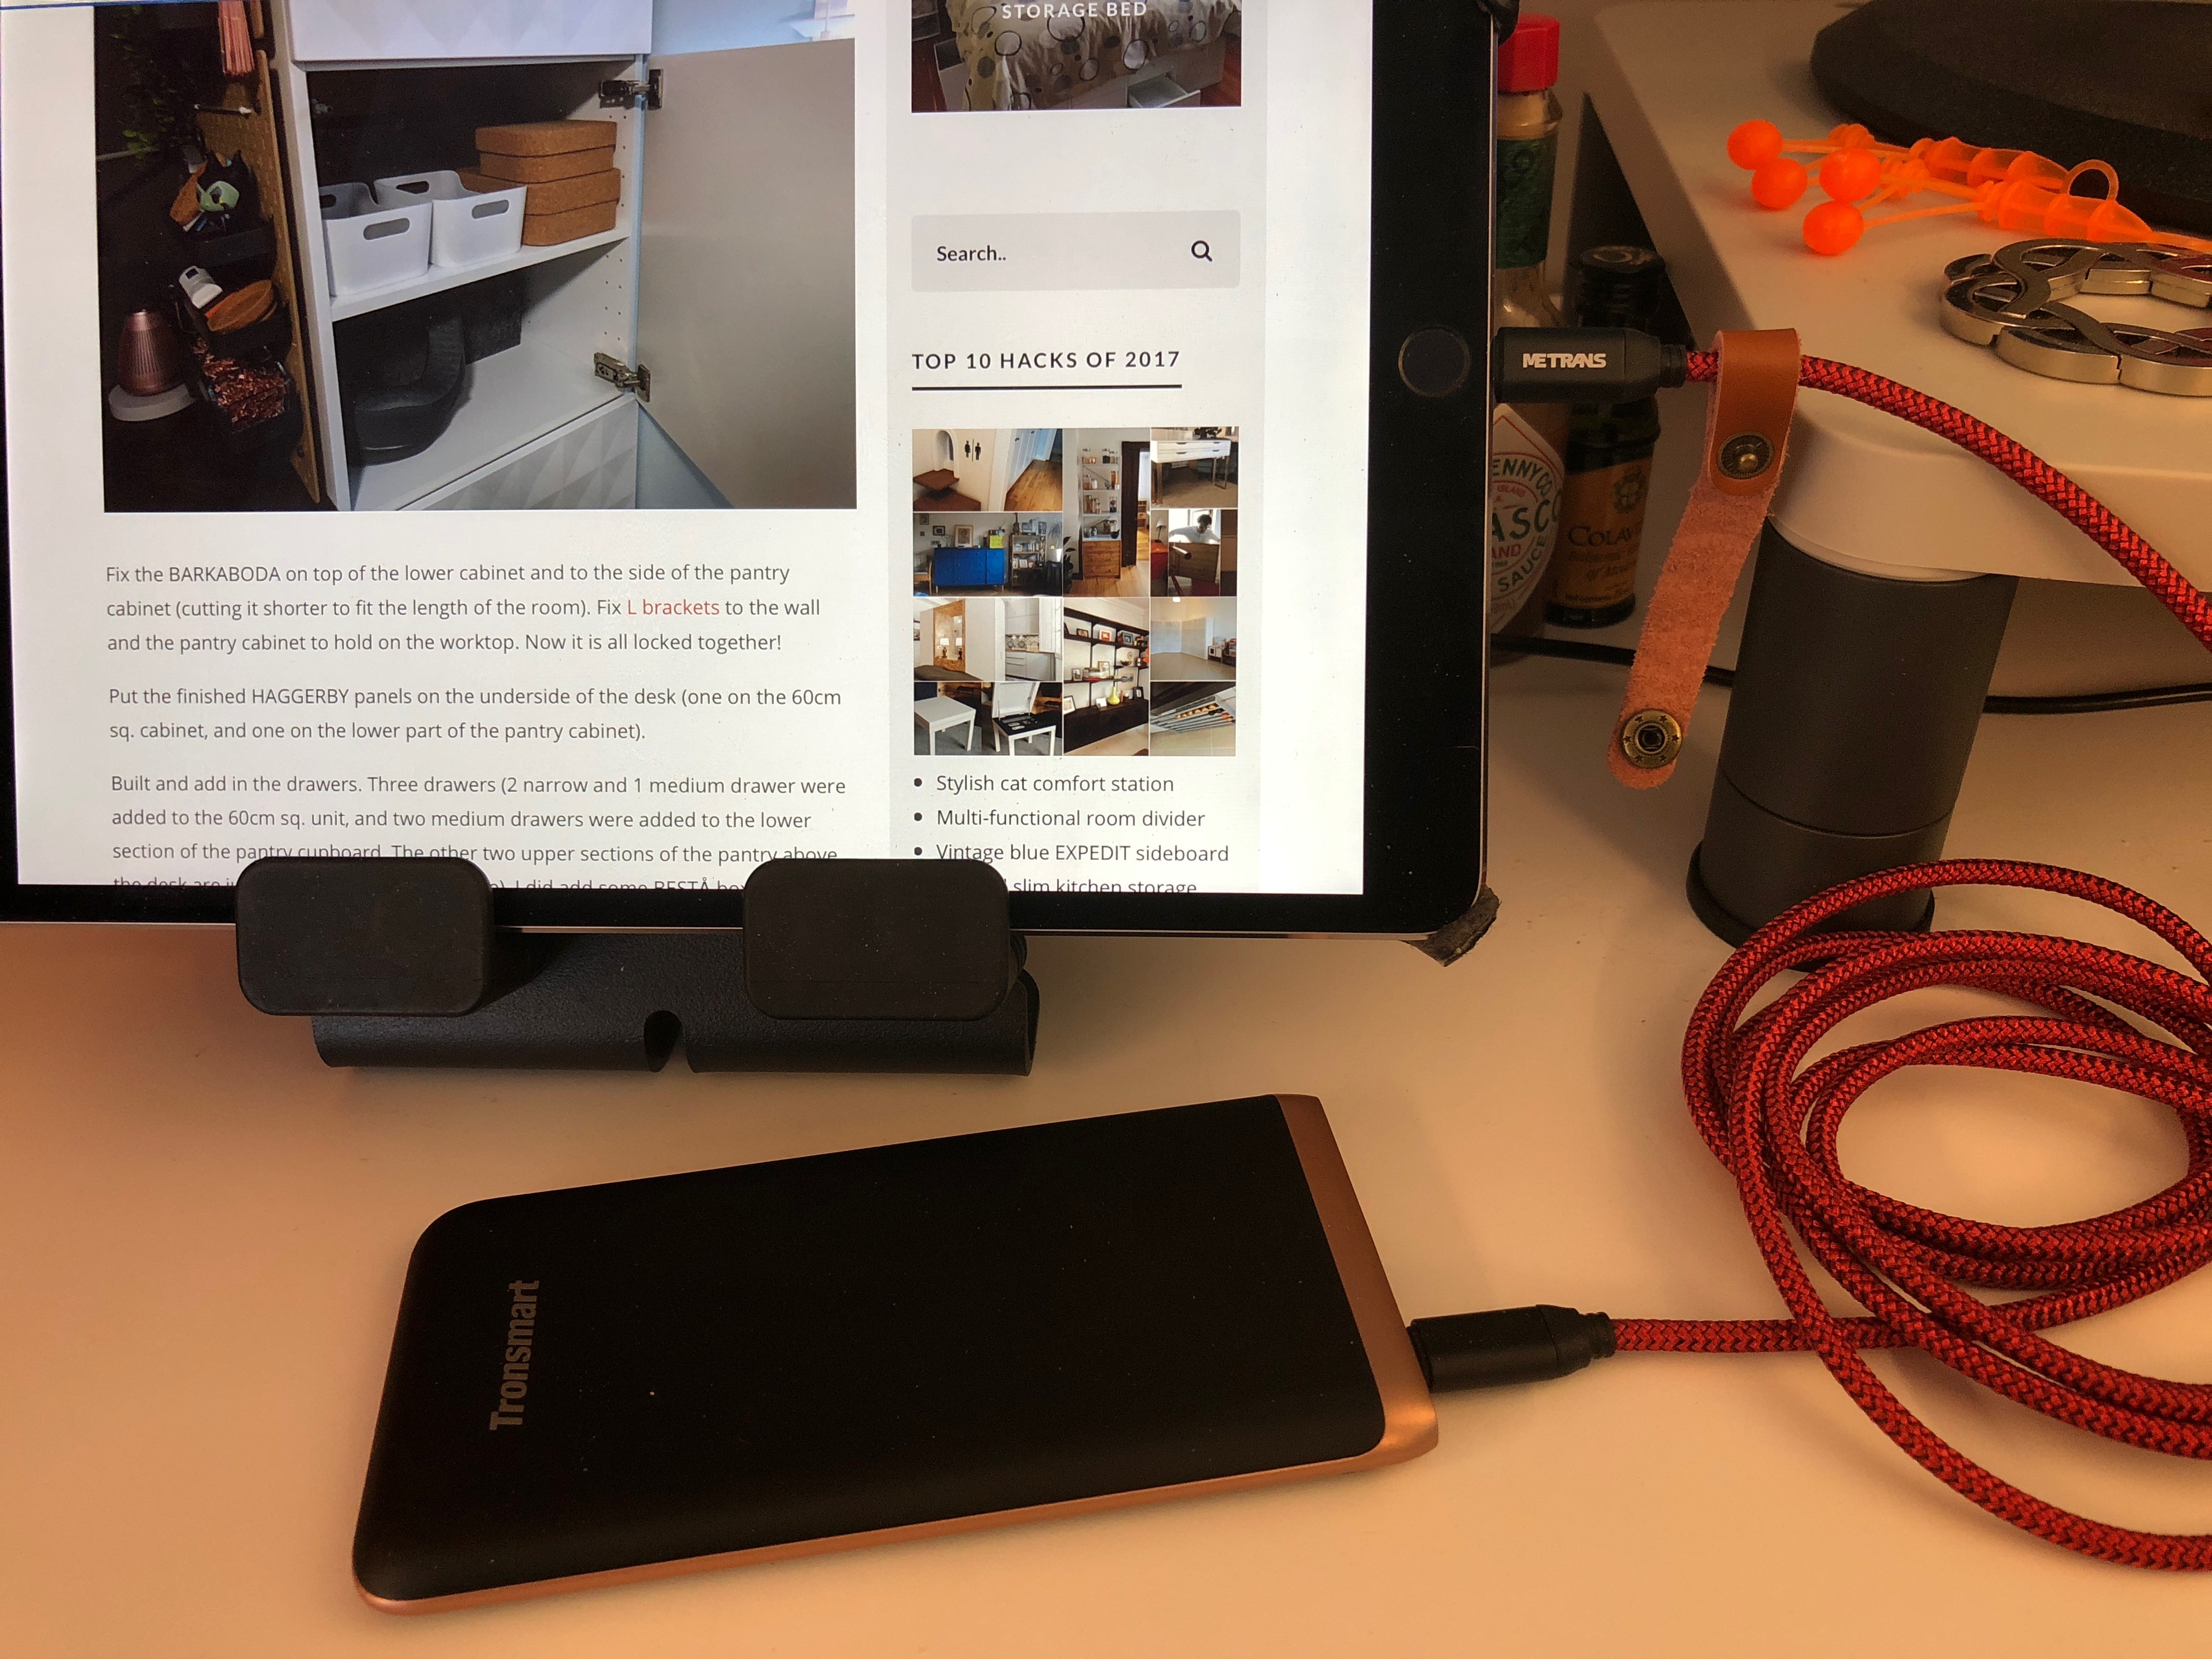
I love the charging case because the buds are always charged and ready for me to use, which makes the battery life feel like it’s infinite. It’s actually pretty close at about 17+ hours per recharge of the case itself. The earbuds can be used for about 3.5hrs for music, but recharging them only takes about an hour.

How do they sound for music and video?

I used my Pixel 2 XL to do my testing of the Rowkin Ascent Micro earbuds along with streaming music services like Pandora, Spotify, and Amazon music. Music sounded good. I won’t say that these buds are fantastic and that autophiles should run out and buy a pair asap, but I enjoyed using them to listen to my favorite tunes.

I also tested them while watching video on Netflix and noticed no problems with the audio syncing with the video. Again, audio sounded good.

I’m very happy to report that I’ve yet to experience the issue I’ve had with other Rowkin earbuds in the past where the audio in one earbud will cut out for a second. This was always an annoying issue that would happen a couple times an hour, but after testing these earbuds over several days for hours at time, it hasn’t happened even once so it appears that using Bluetooth 5.0 and an LDS antenna has solved the problem.

Touch controls

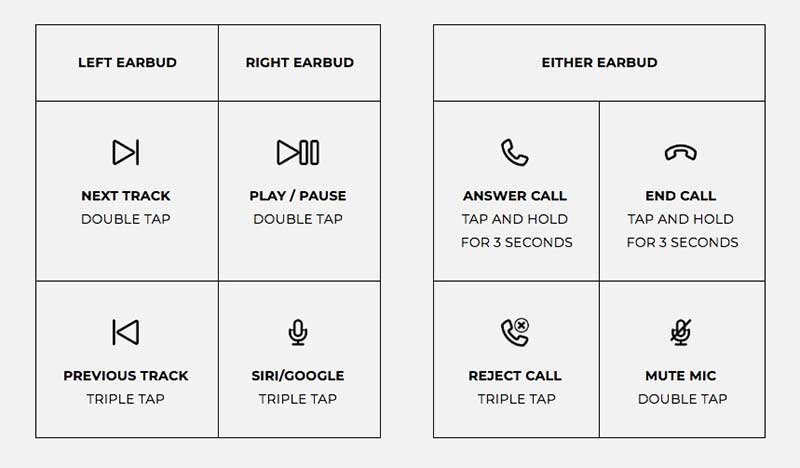
Touch controls appear to be a popular feature for earbuds these days and I have to say that I’m not loving the trend so far. I much prefer physical buttons over capacitive buttons as 9 times out of 10, I’ll have to repeat the command before the earbuds decide to pay attention to my taps which I find annoying.

How do the sound for calls?

For calls, my side (the Rowkin) side of the conversations sounded great. But on more than one occasion as soon as I would answer a call and start talking, the person on the other end would ask me where I was why I sounded so bad. Apparently, I sounded like I’d fallen down a well, or as Jeanne so eloquently put it, I sounded like crap.

What I like

  • Comfortable
  • Good sound
  • Charging case provides up to 17hrs total playback time

What needs to be improved

  • Mediocre call audio quality on the side opposite the Rowkin side

Final thoughts

I’m happy to report that as of today, the Rowkin Ascent Micro earbuds are my favorite truly wireless earbuds. They power on almost instantly, pair quickly, sound good, fit comfortably, and conveniently charge in their storage case. The only slight knock that I’ll give them is that they are a bit on the pricey side compared to the 100’s of other wireless earbuds that are flooding the market but with that said, I’ve tried a few of them and so far the Rowkin Ascents are beating the others in all other aspects.

Price: $99.99
Where to buy: Amazon
Source: The sample for this review was provided by Rowkin.

Filed in categories: Reviews

Tagged:

Rowkin Ascent Micro Bluetooth headphones review originally appeared on The Gadgeteer on October 22, 2018 at 9:00 am.

Note: If you are subscribed to this feed through FeedBurner, please switch to our native feed URL http://the-gadgeteer.com/feed/ in order to ensure continuous delivery.

Saddleback Leather Simple iPad case review

REVIEW – Many moons ago I owned an original Saddleback Leather iPad case. It was a beautiful, beefy piece of leather. The new Simple iPad Case is a completely different animal. Simple and streamlined, it’s made for portability and optimal day-to-day usability. Fear not, however: you still get that gorgeous full-grain leather. To the review!

What is it?

It’s a leather iPad case for your iPad, iPad Air, or iPad Air 2.

Hardware specs

  • 10″ by 7″ by 0.5″
  • 0.55 pounds
  • Full-grain leather with pigskin suede lining

Design and features

The Saddleback Leather “Simple” designs offer lighter products with simplified designs as an alternative to their beefier, full-featured gear. The new Simple iPad Case is great example of this. You get all the benefits and style associated with quality leather, in a streamlined and extremely functional package.

While it is a simple shell-style design, Saddleback fans have no need to fret about the quality and construction on this item. a 7″ by 10″ piece of full-grain leather forms the back panel, while two 1” by 7” strips of leather on the front face form a pocket into which you slip your iPad.

My tester is the newer black leather, backed by pigskin suede to protect the iPad. It’s a beautiful, thick leather that measures roughly 1/8″ including the suede backing. It is thinner than some of the older leather pieces I’ve had from Saddleback, but I think it’s just as tough. It’s also got a great pliant feel. I like it quite a bit.

You’ll also see some subtle embossed logo work on the back face in the Saddleback logo and the tribute to Blue, founder Dave Munson’s dog. They’re nice touches that are tastefully handled, adding some character to the piece.

Black has always been my favorite color in Saddleback products, and they do a quality job with the dye work here. The leather is dyed through the whole piece, so scratches don’t pull up an underlying color. I haven’t seen any dye rub-off on clothes or other gear. It’s marvelous and speaks to my artistic side.

Saddleback Leather deserves a lot of credit here for their commitment to leather as a medium. There are three materials used in the build of this case: leather, pigskin suede, and marine-grade thread to keep it all together. That’s it. Even the spacers/bumpers between the layers are made wholly from leather dyed to match the case:

It would be easier (and probably cheaper) to solve design problems in a case like this with additions like plastic tabs, foam padding, or elastic webbing. Not that those solutions are inherently bad, but I appreciate that Saddleback doesn’t go that route. It’s a truly unique leather-focused design solution that’s *just* a bit more special as a result.

This case is designed for the 9.7″ iPads, specifically the 2017 iPad and multiple 2018 models (the iPad 9.7, Air, Air 2, and 9.7 Pro). You’ll find an assortment of cuts to accommodate the whole range of speakers, ports, and buttons on these models. As we walk through the slots, note that mine is an iPad Air 2. Here’s the audio-in port and sleep/wake button port. It looks tight, but the leather is flexible enough to get your fingers in there for obstruction-free operation:

The same goes for the bottom ports for the lightning cable and speakers:

The right-panel rocker buttons  have an additional slot cutout for easy access:

You’ll also find two cutouts for the rear camera to accommodate multiple model iterations:

When I first received the Simple iPad Case I was concerned by the fact that the front face and sides are completely exposed. After kicking it around a bit, however, I’m becoming more and more impressed with the design. There’s 1/4” of extra leather around all edges, so that thick leather absorbs side impacts to protect your tablet. It absolutely brings more protection than silicone shells like the Apple iPad cover, and only adds 8 ounces of weight to your kit if you’re including this in your daily carry.

Overall usability is excellent. There’s front flap or cover to mess with here. The entire screen edge-to-edge is accessible, with generous slots cut for the home button and front camera. Everything is easy to get to, and you don’t find yourself fumbling to get to the ports. It’s also wonderfully easy to handle, working perfectly with the iPad’s form factor. Nothing interferes with regular operation, and it feels solid in your hands. It slips easily in and out of your bag, with no protrusions or extra bits that could get caught on zippers. If you like your iPad covers lean & mean, this cover gets you there with the added protection and style of excellent leather.

The simple design does lack some capabilities found in more feature-rich cases. There’s no front cover for additional protection. It’s not compatible with the Apple keyboard. There’s also no integrated stand. If these are capabilities you are looking for, you’ll need to look elsewhere. If you’re looking for a great leather case that works well with the iPad’s natural form factor, however, the Simple iPad Case is worth putting on your shopping list.

What I like

  • Excellent leather quality and construction
  • Streamlined form that is easy to handle without adding significant bulk
  • Well-designed access to all the ports, controls, and speakers

What needs to be improved

  • No inherent flaws that I see

Final thoughts

If you’re looking for a well-built, straightforward iPad case with great looks, the Saddleback Leather Simple iPad Case is a great choice. The leather is fantastic, usability is excellent, and the simple form factor makes for easy handling and day-to-day use. You’ll also get Saddleback Leather’s famous 100-year warranty. This one is now in my EDC lineup, and I expect it to stay there for quite some time. Maybe not 100 years. We’ll see.

Price: $59.00
Where to buy: Saddleback
Source: The sample of this product was provided by Saddleback Leather.

Filed in categories: Reviews

Tagged: ,

Saddleback Leather Simple iPad case review originally appeared on The Gadgeteer on October 21, 2018 at 9:42 am.

Note: If you are subscribed to this feed through FeedBurner, please switch to our native feed URL http://the-gadgeteer.com/feed/ in order to ensure continuous delivery.