Nitecore NU25 Headlamp review

REVIEW – Sometimes a product is so universal that it’s hard to imagine it needs a manual. Headlamps fall into that category for me. They have batteries, LEDs and buttons to turn them on and off. What more is there to know? In the case of Nitecore and their NU25 headlamp… Quite a bit, and I’m impressed. Join me after the jump to find out more.

What is it?

Nitecore’s NU25 is a best-of-breed headlamp designed specifically for outdoor use. It’s slim, fits well and does what it’s designed to do very well. Read on.

Hardware specs

– Size: ~2.2″ x 1.4″ x 0.9″ including holder
– Weight: ~1 oz
– Lamp: CREE XP-G2 S3 LED
– Max Output: 360 lumens
– White Light: CRI ≥90
– Color Temp: 4500K
– Max Beam Intensity: 1650cd
– Max Beam Distance: 81m
– Battery: 610mAh Li-ion polymer battery
– Charging: Via micro-USB port

What’s in the box?

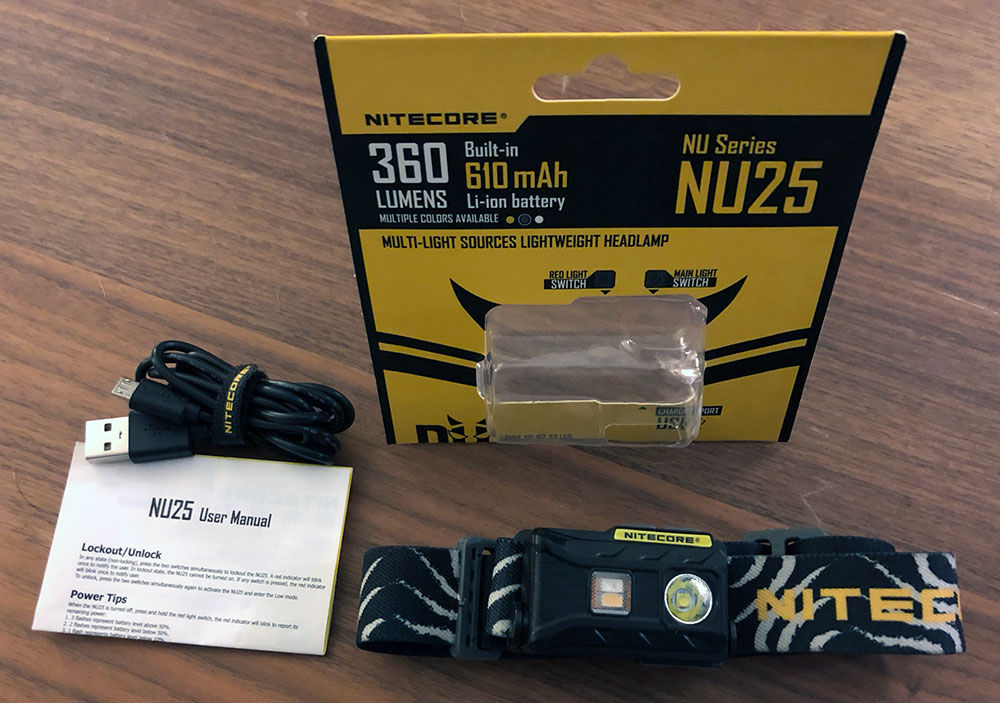
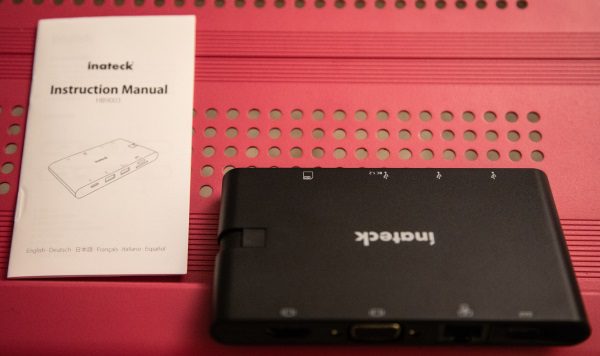
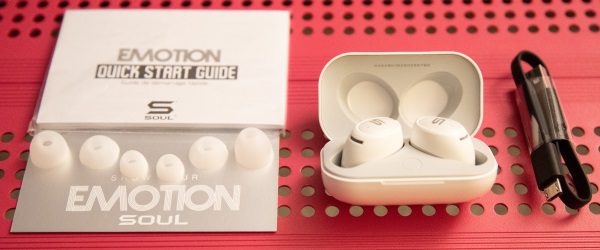
  • Inside the refreshingly simple packaging are the following items.
  • NU25 headlamp
  • Elastic headband
  • Micro-USB charging cable
  • Instruction manual

Design and features

The NU25 is a very slim, rectangular headlamp. The low profile is a welcome feature as is the lightweight.

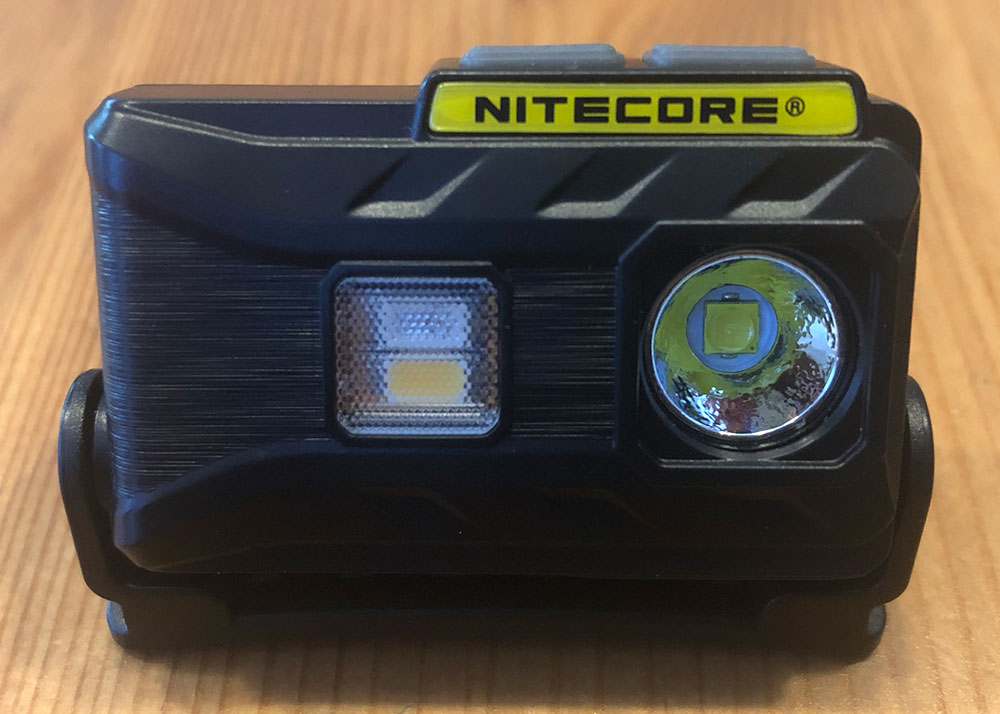
On the front, you can see the main light on the right and the auxiliary light on the left which provides both red and white lights independently.

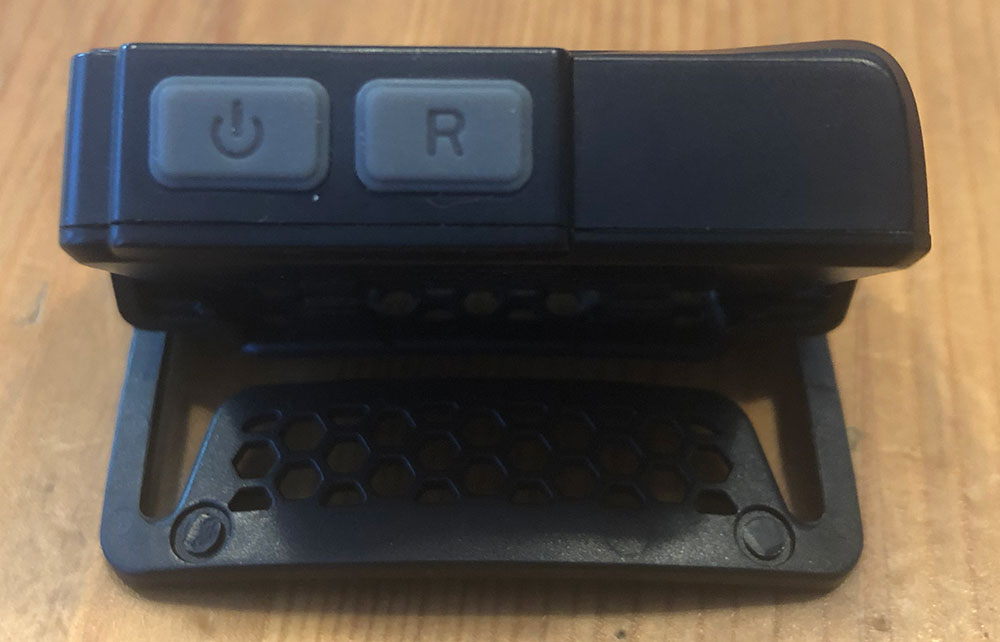
Two buttons. White on the left and red on the right.

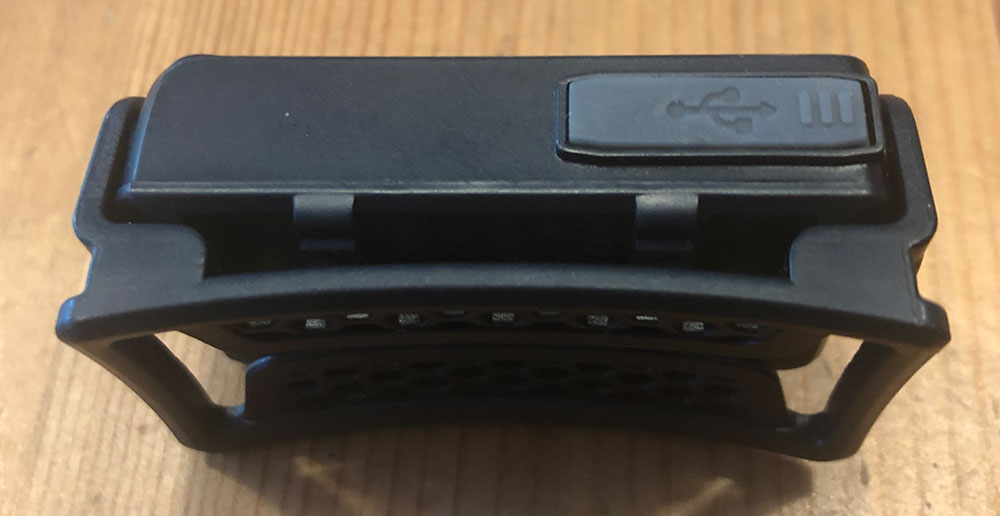
On the bottom is the Micro-USB port underneath the silicon tab

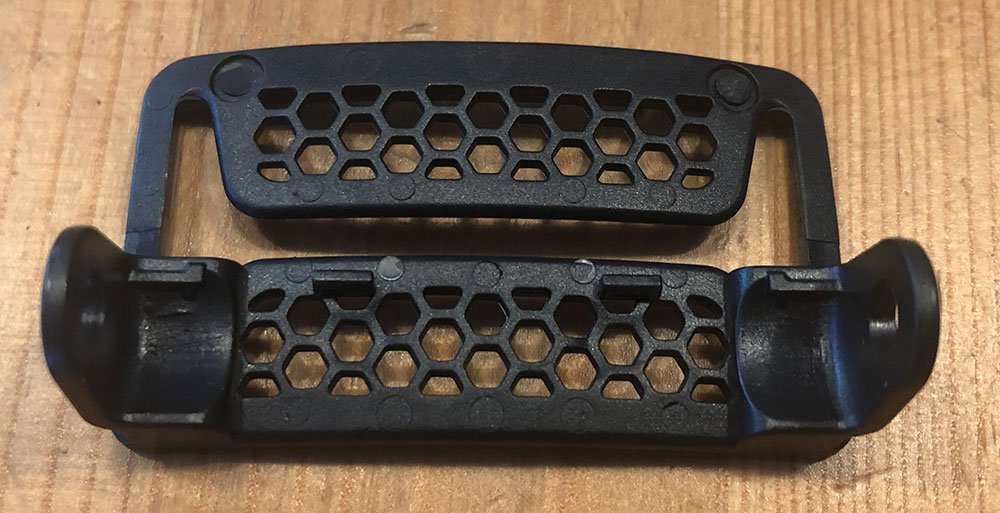
The holder pops off easily (but not too easily) for you to attach the headband.

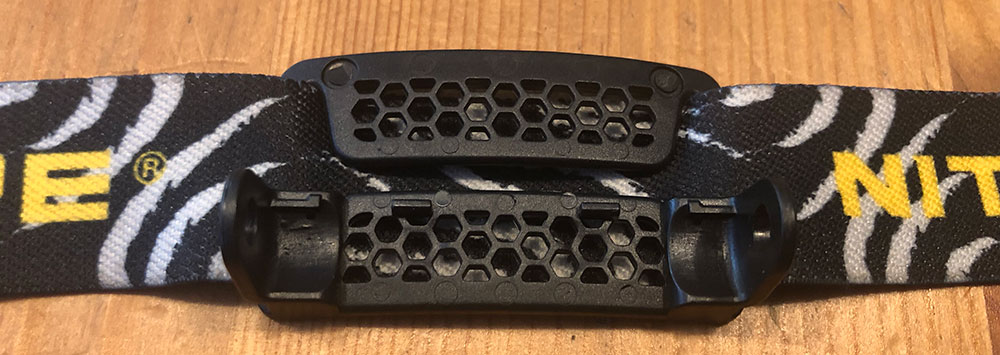
Tuck it behind the lower section and then again under the top like so.

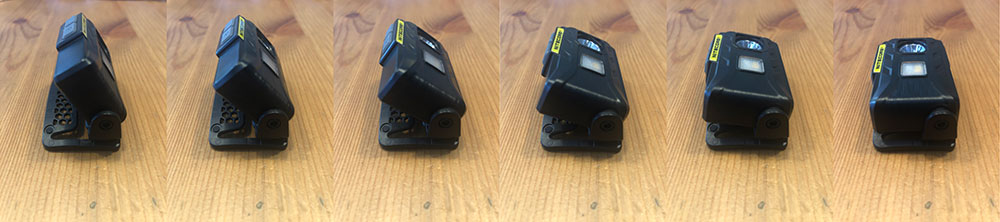
Here’s a look at the different angle indexes within the 60º range of motion that the interface between the holder and the module provides.

Feature list:
– Lightweight design specific to outdoor activities
– Built-in rechargeable battery
– White (4 levels) and Red (2 levels) light options
– 1 SOS flashing mode
– Button lock mode
– IP66 rating against water and dust ingress
– 60º of angle adjustment

Setup

Out of the box, setup is as simple two-step operation.
1. Connect the USB cable to the micro USB charging port to make sure the battery is topped off
2. Slide the headband into the guides of the pivoting holder and adjust to fit

Performance

This review has taken me longer to get to than any other one that I’ve worked on for a simple reason. It works so well that I pretty much forgot that I was testing it. Let me explain a bit more.

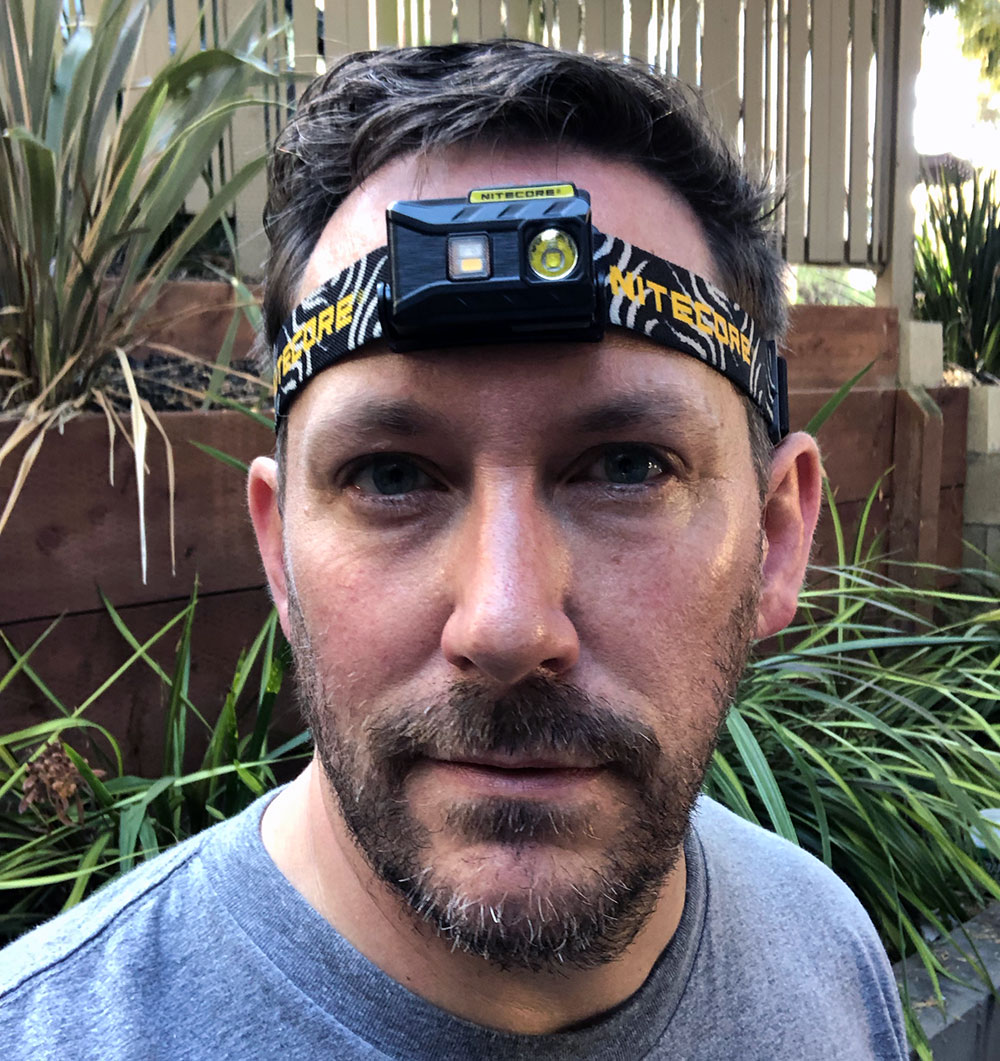
Our family includes two dogs. A big sweetheart great pyrenees/shepherd and a very loud beagle. They get wound up pretty quickly on walks and are very vocal with other dogs to the extent that we now do the extended walks at 6am and after 9pm. For the last couple months that means that it’s been really dark when we’re out for our stroll, and headlamps are the solution for us to see and be seen. We’ve got 3 or 4 headlamps that are pretty typical examples of what you might expect. They have a bright LED and take 3 AAA batteries each. The odd number of batteries makes for interesting charging as we like to use rechargeable batteries and a lot of chargers require charging in pairs. But I digress.

The NU25 is… easy to size adjust, plenty bright, very comfortable, lightweight and its battery lasts. As a result, it’s been going on my head every morning and every night and has become such a reliable part of our daily outings that it really slipped my mind that I needed to write a review. The second part of that is that it works so well that there aren’t any negatives that were gnawing at my brain to talk about. And lastly, I finally got around to reading the manual (something I didn’t think I needed to do) and learned about three new features that I didn’t even know it had.

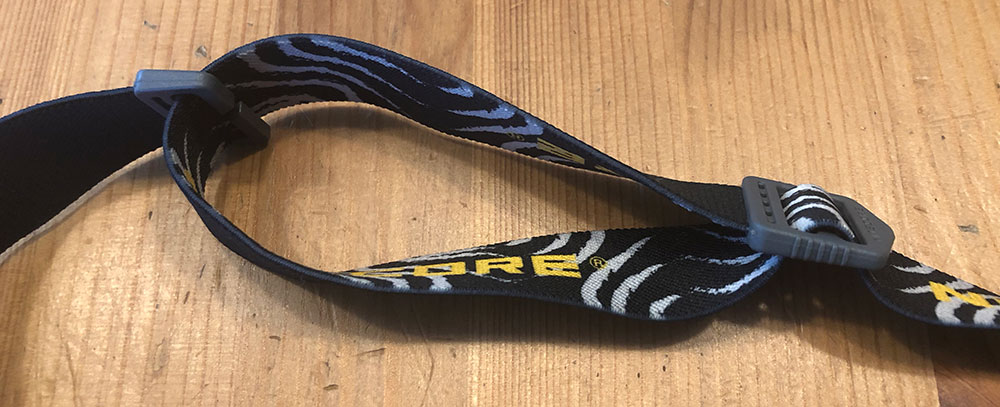
When I first put the NU25 on I noticed that the band was threaded differently than most headbands I’ve used. It’s deceptively simple in that the adjustment slides effortlessly and then stays in place when on your head. This means that when not on your head the setting is likely to change. At first I was a little annoyed, but then I quickly realized how frequently I adjust the tension and it became one of my favorite features. The headband also has a thin strip of silicon printed on the inside of the band which helps to keep it right where you place it without being too tacky.

Next is the buttons. Really easy to press, and know you’ve pressed them. There are two buttons. One for the white light and one for the red. Each cycle through the different levels of each light. For white (off, level 1, level 2, level 3), for red (off, level 1, level 2). A cool intuitive feature you discover while using is that if you are idle on a setting for a bit (I generally use level 2), the next press will now turn it off. It’s a quick learning curve that you adapt to pretty much right away.

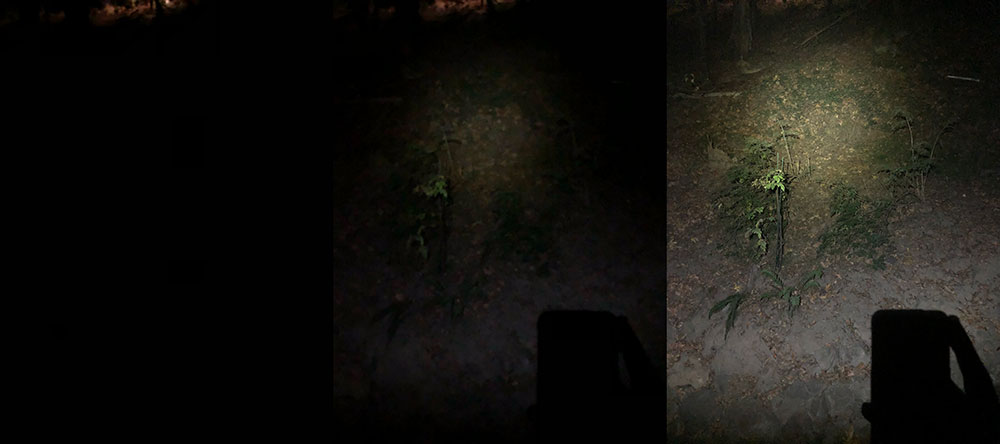
You may have noticed that the features bullets listed 4 levels for the white light. Here’s the first extra I learned reading the manual. A 1 second hold on the white light engages Turbo mode. This is full 360 lumens and will only run for 30 seconds to avoid overheating. The handy chart in the manual then explains the lumens for each level.  1 = 3 lumens, 2 = 38 lumens, 3 = 190 lumens. Here are photos to show what each of those looks like. I’ll update this post with a Turbo photo just as soon as I’m back from traveling, as again as I wasn’t even aware that it had a Turbo mode. I had just assumed the level 3 was 380 lumens.

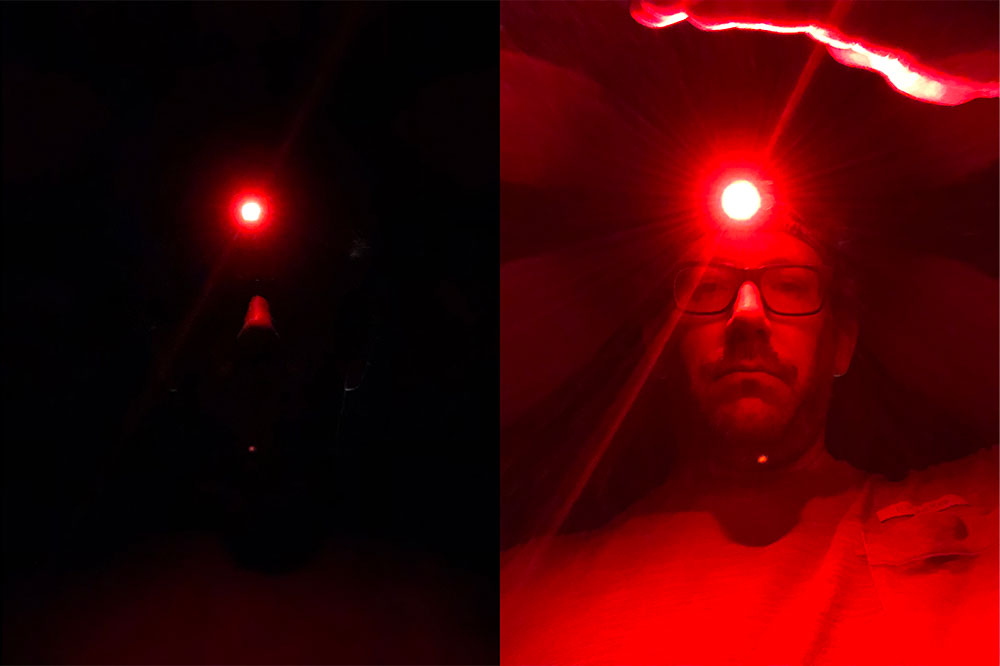
The red light is a really useful feature for visibility without the harshness of a white light. Best use example is probably camping and needing to find something in your gear without waking up your tent mates. It’s also just very cool looking. Here are those two levels.

The next thing I learned from the manual (aside from remembering that I should always read manuals), is that there’s a button lock. To engage this, just press both buttons simultaneously. This is a great way to keep the headlamp from turning on while in your bag. Instead of turning on, it’ll just flash its status light once. Repeat the process to unlock the buttons again.

My last manual discovery was the SOS feature. A three second press of the white light sets off the well known ••• – – – ••• Morse code sequence. A very cool and potentially life-saving feature to have access to.

As for the battery, it just works. I was pretty used to charging batteries once a week and frequently finding a dead headlight when I needed it. With the NU25, it seemed very hard to kill the battery, and when it was running low, it would restrict access to the highest output white light first and then dim the 2nd level. It was pretty easy to tell that it was time to charge again which is a quick 2 hours to get back to full. Let’s wrap this review up.

What I like

  • The ease of size adjustment
  • The many lighting options
  • Lightweight and comfort
  • Great battery life

What needs to be improved

  • Nothing that I could find

Final thoughts

It’s really uncommon to find products that work this well and this thoroughly thought through. As I mentioned earlier, this is now in the daily kit as a product I can 100% rely on without surprises. I’ll be picking up a second one for our daily dog rounds and probably a third to keep in my bike commuter bag.

Price: $36.95
Where to buy: Amazon
Source: The sample of this product was provided by Nitecore.

Filed in categories: Reviews

Tagged:

Nitecore NU25 Headlamp review originally appeared on The Gadgeteer on October 20, 2018 at 11:30 am.

Note: If you are subscribed to this feed through FeedBurner, please switch to our native feed URL http://the-gadgeteer.com/feed/ in order to ensure continuous delivery.

Inateck 9 in 1 USB-C Hub review


REVIEW – Just recently, I acquired access to a MacBook and I immediately saw the need to have a USB-C hub to be able to use all of my desired accessories and peripherals. This was especially true since the only ports on my MacBook Pro are 2 USB-C ports. A couple of weeks ago, I got the chance to test and review the Inateck 9 in 1 USB-C Hub. Here is a review of my experience.

What is it?

The Inateck 9 in 1 USB-C Hub is a compact and lightweight hub that allows you to use one USB-C port on your MacBook/Laptop and expand it to accommodate just about every commonly used accessory/peripheral.

What’s in the box


1 x Inateck 9 in 1 USB-C Hub
1 x Instruction manual

Design and features

On the side of the hub shown below, from left to right, there is a USB Type C port, 2 USB 3.0 ports, a lower SD card reader and an upper micro SD card reader.

On the opposite side as shown below, from left to right there is a HDMI port, a VGA port, a gigabit ethernet port, and a 100W PD USB type C charging port.

At the bottom of the hub, there is a built-in USB-C cable that can be tucked away until you are ready to use it.

Performance

This hub performed well in every way. In the first picture below, I am showing the MacBook Pro USB-C AC power adapter connected to the pass-through USB-C power port on the hub. This allows you to charge/power the MacBook Pro while using the hub and also provides the USB charging port with power.

Below, I have a USB-C male to USB A female adapter connected to the USB-C data port on the hub. I then have a USB 2.4Ghz wireless dongle connected to the adapter that allows me to use my wireless mouse.


Here I have both my MacBook Pro and a monitor connected to the hub. I am mirroring the screen. The monitor is connected to the hub via the HDMI connection, and I also successfully connected the monitor via the VGA connection.

The hub performed without any access or operational issues for everything I tested. The only thing that I notice is that after each period of use, approximately 8 hours, the body of the hub is quite warm. I am not sure how the heat will affect the performance of the hub over time and after repetitive and continuous use.

What I like

  • The size, weight, and portability
  • The number of accessories/peripherals it accommodates
  • The built-in USB-C cable
  • The pass-through power port
  • The powered charging port

What can be improved

  • Better heat dissipation so that the heat does not shorten the life of the device

Final thoughts

I really like the 9 in 1 USB-C hub. It allows me to add just about every accessory that I need to my MacBook, and to use just about every data drive that I commonly use whether directly or via a USB card reader. While I have not tried it as yet, I feel confident that I can use this hub on my PC laptop via a USB-C female to USB A male adapter. This simple but effective device gets two thumbs from me!!

Price: $59.99
Where to buy: Amazon or Inateck Website
Source: The sample for this review was provided by Inateck.

Filed in categories: Reviews

Tagged: ,

Inateck 9 in 1 USB-C Hub review originally appeared on The Gadgeteer on October 20, 2018 at 9:30 am.

Note: If you are subscribed to this feed through FeedBurner, please switch to our native feed URL http://the-gadgeteer.com/feed/ in order to ensure continuous delivery.

SOUL Emotion Wireless Earbuds review


REVIEW – As my quest for the best earbuds for me continues, there seems to be a constant battle among the earbuds that I test, with all challenging for supremacy and the number one position. The Soul Emotion Wireless Earbuds from Soul Electronics are the next to take on the challenge. So, here we go!!

What is it?

The Soul Emotion earbuds are wireless Bluetooth earbuds that provide the functionality for audio listening and phone functions. Their functions are similar to the standard earbuds.

What’s in the box?


1 x Soul Emotion Earbuds
1 x Charging Case
3 x Pairs of Ear Tips
1 x Micro USB Cable
1 x Quick Start Guide
1 x Communication card

Design and features

Specifications
Bluetooth Version: V4.2
Profile: A2DP, AVRCP, and HFP.
Range: 10 meters (33 feet)
Charging time (Full charge): Approx. 1 hour
Playtime: Up to 6 hours
Standby time: up to 40 hours
Charging Box: 300mAh
Recharge Earphones: 2 Times for each fully charged charging box
Weight: 27g Charging Box, 5g Each Earphone

Music Functions:
On either the left or right earbud:
1 press – play/pause
2 presses – track forward
3 presses – track backward

Call Functions:
On left earbud:
1 press – answer call
1 press – end call
1 long press – reject call

The charging case is small measuring just 2″ x 1″ x 1″, and the earbuds are also small and lightweight. They are offered in both white and black.

Inside of the charging case is a simple layout with a place for each small earbud and with charging pins on each side. In the center of the case between the two earbuds, there is a small circular LED that flashes during charging. (Check out the video below)

Performance

These earbuds are very lightweight and very comfortable in the ears, I was able to find a set of the included ear tips that fit me perfectly. When you first use them, you have to look carefully at the contacts, and remove the thin plastic film that covers them. The thin film is almost invisible to the naked eye, and I have to be honest and say that I only figured it out after I could not get the earbuds to charge even after plugging them in overnight. Pairing the earbuds is very easy and straightforward, and after the initial pairing, they automatically power on and pair with that device each time you remove them from the case. Their function includes the standard voice commands that confirm power status and connectivity. They also properly disconnect the Bluetooth connection when placed into the case. They produce a well-balanced sound, but for my taste, they do fall short a bit in the lower frequency.  I tested them with Jazz, Reggae, Gospel, Easy Listening, R&B, Soul and the Classics, and overall they performed quite well. The Bluetooth connection remained solid throughout testing with no disruptions even when in the high interference areas that I usually travel through each workday. It is important to note that they do employ a volume limiter, so they never get really, really loud. They fit well in your ears and do not attempt to fall out even during vigorous movements. When I tested them for phone calls, I could hear the other party clearly, but the other party kept saying that I sounded like I was in a basement and I did have to raise my voice quite a bit for them to hear me. Since I am convinced that somehow this is an issue that is specific to me regardless of the earbuds, these earbuds might handle phone calls better for others. One downside is that since the charging case battery is only 300mAh, so you only get just about 2 charges from the case per case charge.


On a sided note, they provide quite a nice light show when charging. (I shot the following video in my dark truck while it was raining heavily outside)

What I like

  • The compact size of the case and earbuds including how lightweight they are
  • The instant connection and disconnection when placed into or taken out of the charging case
  • The solid Bluetooth connection

What can be improved

  • The overall frequency range to provide deeper bass
  • A bit more volume range

Final thoughts

The Soul Emotion earbuds are a great balance of sound, size, weight, and functionality. They work very well in each category and are very pleasing to use. In this challenging battle to “wow” me and to reign supreme as the best earbuds for me, they do not earn the top spot, but they certainly earn a Good Performance rating. However, if rated in a class of earbuds in a similar price range, they could possibly earn top honors. They get a job well done and a thumbs up!!

Price: $49.99
Where to buy: Amazon
Source: The sample for this review was provided by Soul Electronics.

Filed in categories: Reviews

Tagged:

SOUL Emotion Wireless Earbuds review originally appeared on The Gadgeteer on October 19, 2018 at 11:00 am.

Note: If you are subscribed to this feed through FeedBurner, please switch to our native feed URL http://the-gadgeteer.com/feed/ in order to ensure continuous delivery.

Jackery Explorer 240 Portable Power Station review

REVIEW – Every gadget I have reviewed has one important thing in common: They all use power. It doesn’t matter if it’s a smartphone, Bluetooth speaker or wireless headphones—the batteries eventually need charging. To charge my various devices, I use outlets, hubs, my car and when I’m not around a power source—a battery backup. Let’s now take this a step further—the electricity is out and won’t return for a few days (when you live in Florida this isn’t far-fetched), your devices are dying and that trusty battery backup is drained also. Now what? Consider a large backup for your backups—a portable power station. One such mini-monster is the Jackery Explorer 240Wh Emergency Backup Lithium Battery.

What is it?

The Jackery Explorer 240 is a portable power station. Among its many ports are a 12V auto, two USB and one 110V AC. It’s made for outdoor and indoor use and is capable of charging multiple devices at the same time. It is a sine wave inverter. This means that the power output is clean power—like utility-supplied electricity. Inverter power is safer for delicate electronics.

Specs

  • Capacity: 240Wh
  • Battery Type: Lithium-ion
  • Weight: 6.6 lbs
  • Dimensions: 9.0’’ x 7.8” x 5.2”
  • Input: 8mm DC, 12V~30V / 40W max.
  • AC Output: 110V, 200W (300W max.)
  • Car Port: DC 13.3V, 10A
  • USB Outputs (2): 5V, 2.4A (each)

Design and features

The Jackery Explorer 240 is a power station that can power almost anything for a decent amount of time—depending on the device. For example, its 240Wh will recharge a tablet 7+ times, smartphone 20+ times, laptop 3+ times, a GoPro 40+ times or even power a car cooler for 6+ hours or a 32” TV for 3+ hours. If you’re camping, the Explorer 240 will power a 5W light for 40+ hours. In other words, it should easily power a weekend camping trip. 

If you’re a serious camper, optional solar panels will recharge the Explorer 240 in 10 hours (depending on sunlight). Jackery’s 50W solar panel will cost an extra $200. Otherwise, the Explorer 240 will recharge in 7 hours via house outlet or 12V car charger (both cables included). 

Note that you cannot take the Explorer 240 on an aircraft. It is not waterproof, so if used on camping trips, it should be kept out of the elements. All of the Explorer 240’s power comes from lithium ion batteries, so it’s completely silent with no vibration and zero emissions. 

Many safety features are built in using what Jackery calls its Battery Management System (BMS). BMS offers protection from short circuits, over current, over charging, over voltage and is temperature resistant. It comes with a 24 month warranty.

The Explorer 240 weighs less than 7 lbs. and is easy to carry with its conveniently oversized handle. It’s constructed of high impact plastic with all the ports placed on one side, so there’s no guessing when searching for the correct port. Each of the ports has its own power button that lights up when on. Note that plugging in a device does not automatically charge the device. The corresponding button for that port must be pressed.

Also on the port side is a light-up LCD window that shows total power consumption in watts (if it goes over 200W, it will automatically shut off). For example, charging a smartphone takes a whopping 1-2W! The LCD also shows the percentage of how much battery life remains on the Explorer.

Using the Explorer 240 couldn’t be easier. Just carry and plug-in devices as needed. All ports are well made, so any connection feels solid and secure. The small size makes it easy to store without taking up much room in either a car or tent. Plus its rugged exterior feels like it will last for years while enduring rough handling.

What I like

  • Lightweight and easy to carry
  • Powerful
  • Totally quiet
  • No fumes
  • All ports on one side

What needs to be improved

  • Not water resistant
  • Expensive

Final Thoughts

You might say that the Jackery Explorer 240 is a one-trick pony and technically you would be correct. But what a pony it is! It’s comforting to know that you can have hours of quiet, safe and reliable power instantly available during extended blackouts, camping trips or even as part of a winter emergency kit for your car.

Note: If you are unfamiliar with the Jackery name, They’ve recently teamed with Honda, who will market identical power stations (with slightly different battery capacities)  under the “Honda by Jackery” label. If Honda is confident enough to put their name and reputation on Jackery’s power stations, then that should count for something.

Price: $299.99 US
Where to buy: Amazon
Source: The sample for this product was provided by Jackery.

Filed in categories: Reviews

Tagged:

Jackery Explorer 240 Portable Power Station review originally appeared on The Gadgeteer on October 19, 2018 at 9:00 am.

Note: If you are subscribed to this feed through FeedBurner, please switch to our native feed URL http://the-gadgeteer.com/feed/ in order to ensure continuous delivery.

ZAGG InvisibleShield Glass+ VisionGuard iPhone Xs Max screen protector review

REVIEW – The new iPhone Xs Max costs a trillion dollars so you better protect it, especially the display. One solution is a ZAGG InvisibleShield glass screen protector, but the one I’m going to tell you about isn’t just any ordinary screen protector. This one also blocks blue light. Let’s check it out.

What is it?

The ZAGG InvisibleShield Glass+ VisionGuard is a glass screen protector for the iPhone Xs Max and other phones.

What’s in the box?

InvisibleShield Glass+ VisionGuard screen protector
Instructions
EZ Apply tray
Microfiber cloth
Cleaning wipe
Dust removal sticker

Installation

I went into this review expecting to be disappointed because every screen protector that I’ve either installed or had someone install for me has resulted in at least a few specs of dust or bubbles under the glass. But ZAGG sent me this protector without even asking if I was interested in reviewing it. And as fortune would have it, a few days later my iPhone Xs Max arrived just begging for protection. So I thought what do I have to lose?

I followed the instructions which tell you to clean the screen with the included wipe. I then used the bright lights of my SHOTBOX to make sure the screen was completely free of dust specs.

For the next step, I placed the EZ Apply Tray over the iPhone like you see above. That yellow cloth under the iPhone does not come with the screen protector, that’s just a glass cleaning cloth that I use to keep things clean.

The next step instructions you to peel the #1 protective liner off the InvisibleShield.

This protective liner is as thick or thicker than the actual screen protector and I felt like I was going to snap the glass protector in half trying to remove the line because pulling the two pieces apart caused both pieces to flex. But the glass didn’t snap, so on to step four.

Here’s the InvisibleShield with the protective liner removed. The trick is to place it quickly before any dust can fall on it or the phone’s display.

Luckily the EZ Apply Tray makes positioning the screen protector pretty much fail proof. One the protector is placed, you just touch the center of the protector and it applies itself. Seriously. It was that easy.

My first EVER perfectly applied screen protector. No dust, no bubbles, no ugly halo around the edges that won’t stick. It was perfect and has turned me into a screen protection advocate when I have been a dissenter in the past.

In addition to the easy application, the InvisibleShield screen protector offers a feature that I’ve not seen offered with other screen protectors. It has a special EyeSafe layer that filters out blue light which is known to cause eye irritation, sleep disruption, blurred vision, and more.

The image above shows the iPhone’s display before the screen protector was installed and the picture below is with the screen protector installed.

I thought it might make the screen look dimmer or even amber colored, but nope, the built-in blue light filter layer does the job without affecting the way the screen looks at all. True colors are preserved, even blues. Color me impressed.

To my eyes, the iPhone Xs Max display with or without the screen protector looks the same which is all I can ask of a screen protector. This protector doesn’t hinder touch sensitivity either. It provides 3x the shatter protection vs. an unprotected screen and it resists smudges too.

What I like

  • Simple to install
  • Filters blue light without affecting True Color
  • Lifetime warranty

What needs to be improved

  • Expensive

Final thoughts

I didn’t think I’d ever sing the praises of a screen protector but after my experience with the ZAGG InvisibleShield Glass+ VisionGuardscreen protector for the iPhone Xs Max, I think I’ve become a convert. Now if they can just get the price down a bit. $45 is a lot to pay, but if that’s the cost for peace of mind, I suppose it isn’t completely out of line.

I ended up returning the iPhone Xs Max to Apple, but I look forward to trying another ZAGG screen protector for my next phone so that I can provide a long-term review update.

Price: $44.99
Where to buy: Amazon
Source: The sample for this review was provided by ZAGG.

Filed in categories: Reviews

Tagged:

ZAGG InvisibleShield Glass+ VisionGuard iPhone Xs Max screen protector review originally appeared on The Gadgeteer on October 18, 2018 at 12:00 pm.

Note: If you are subscribed to this feed through FeedBurner, please switch to our native feed URL http://the-gadgeteer.com/feed/ in order to ensure continuous delivery.