Creative Stage 2.1 Channel Under-Monitor Soundbar with Subwoofer review


REVIEW – Over the past year or so, I have tested and reviewed a few soundbars, and so far I have been very satisfied with each one. Most of them have been reasonably priced and have included features that make them quite versatile. I now have the opportunity to test and review the Creative Stage Air Soundbar. Hopefully, it lives up to the standard set by the previous models.

What is it?

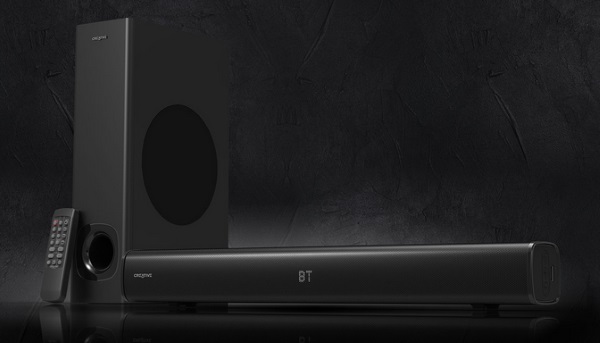
The Creative Stage Air Soundbar is described by the manufacturer as a High-Performance Under-monitor Soundbar with Subwoofer. It is versatile with several connectivity options including Bluetooth. It also works in many other scenarios including as a stand-alone speaker system.

What’s in the box
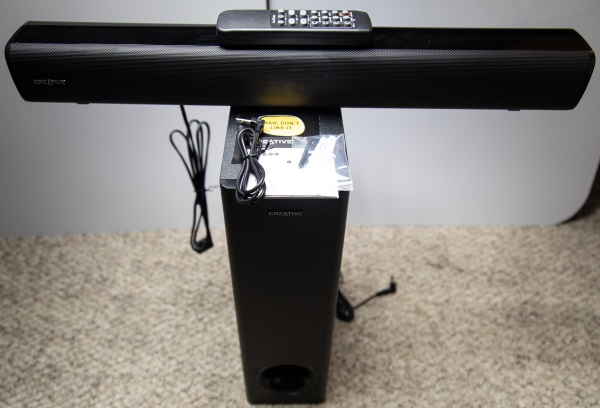

1 x Creative Stage Air Soundbar
1 x Subwoofer
1 x User Manual
1 x 0.5 Meter 3.5mm Stereo to Stereo Audio cable
1 x Set of Wall Anchors and Screws
1 x Remote Control
1 x Customer Satisfaction Leaflet

Design and features

Specifications

Product Type: Under-monitor, soundbar speaker with a subwoofer for computer, TV, and ultra-wide monitors
Power Output: 2 x 20 W (Soundbar), 1 x 40 W (Subwoofer), Total System Peak power: 160 W
Frequency Response: 55 Hz – 20 kHz
Signal-to-Noise Ratio (SNR): ≥ 72 dB
Operating Range for Bluetooth Devices: Up to 10 meters / 33 ft., (Measured in open space. Walls and structures may affect the range of the device.)
Bluetooth® Version: Bluetooth 2.1 with EDR
Bluetooth Profile: AVRCP (Bluetooth Remote Control), A2DP (Wireless Stereo Bluetooth)
Supported Codecs: SBC
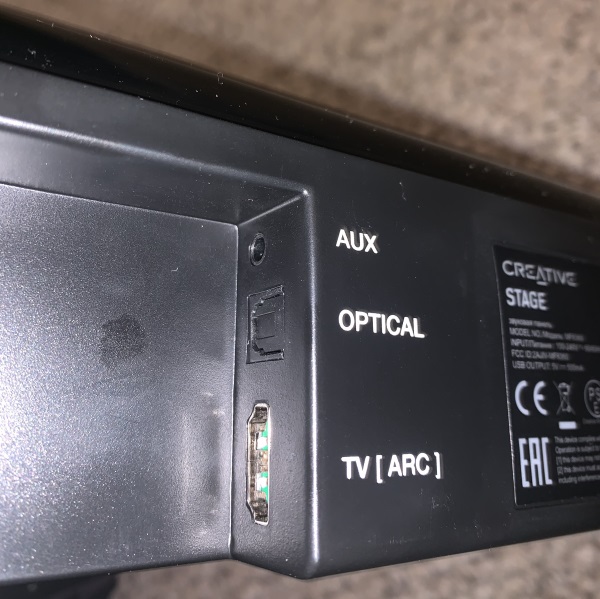
Connectivity: Bluetooth, AUX-in, Optical, TV (ARC)
Soundbar Dimensions: (L x W x H): 550 x 78 x 70 mm / 21.6 x 3 x 2.75 inches
Weight:
1.2 kg / 2.64 lb
Subwoofer Dimensions:
(L x W x H): 115 x 250 x 420 mm / 4.5 x 9.8 x 16.5 inches
Weight:3.07 kg / 6.8 lb

System Requirements

Windows: 3.5mm stereo jack; Bluetooth with A2DP stereo support
Macintosh: 3.5mm stereo jack, Bluetooth with A2DP stereo support
IOS: 3.5mm stereo jack, iPhones/iPads running iOS 7 or higher for Bluetooth, Bluetooth with A2DP stereo support
Android: 3.5mm stereo jack, Phones/Tablets running Android 4.0 or higher for Bluetooth, Bluetooth with A2DP stereo support
TV: 3.5mm stereo jack, Bluetooth with A2DP stereo support, TV (ARC) input port, Optical output

Features

  • Audio modes (Movie, Concert, Gaming, Music)
  • Plays MP3 files from a USB Hard Drive
  • Compatible with USB mass storage devices of up to 32GB, FAT32 format, Plays MP3 audio formats on mass storage devices, Supports Optical input and TV (ARC) input, 3.5mm integrated AUX-in for other audio devices


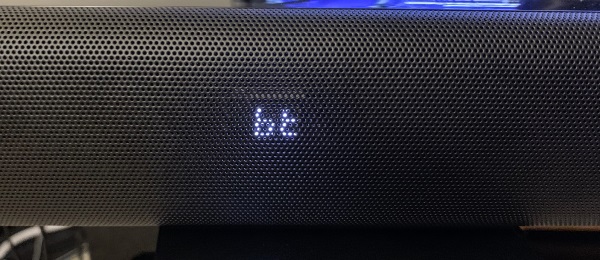
When you power on the soundbar, you are able to see the selected input on the LED display behind the speaker grille. In the picture below, you can see the “bt” selection for Bluetooth mode which you select to pair to your phone or other mobile device and to play from that device once paired.
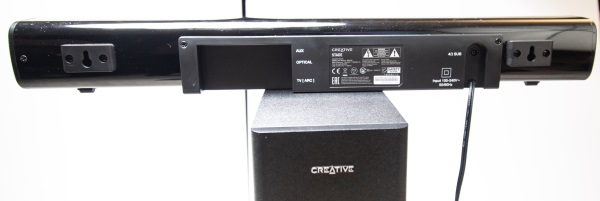
On the back of the soundbar at each end, there is a bracket for wall mounting as well as the built-in power cord.
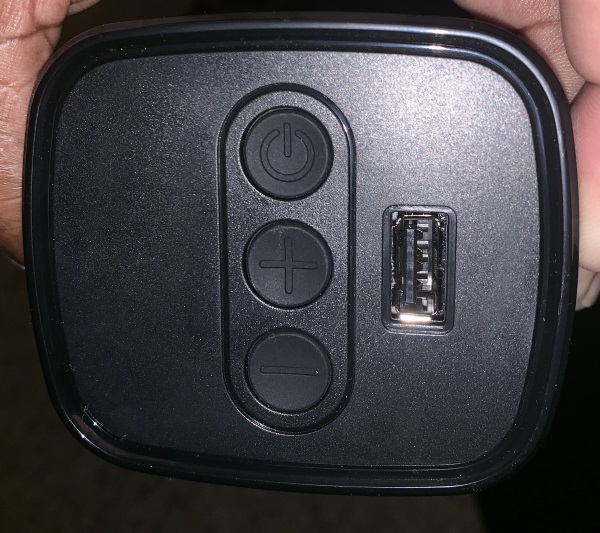
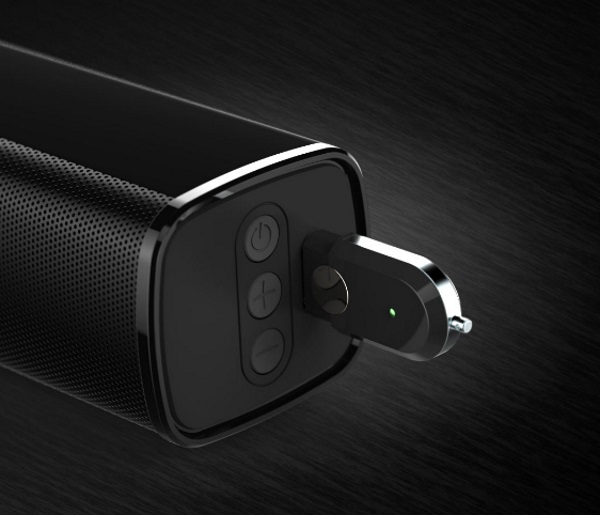
On the right side of the soundbar (if facing the front), there are 3 control buttons that control the power and volume up and down. There is also a USB port for playing MP3 audio files via an external USB. It is compatible with USB mass storage devices of up to 32GB and formatted as FAT32.
On one side of the back of the soundbar, there is an indented section with the 3 audio input ports.

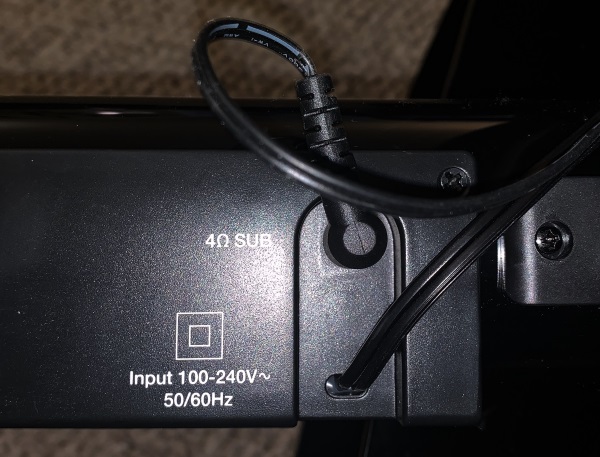
On the opposite side of the back, there is the subwoofer port to plug in the accompanying Subwoofer.
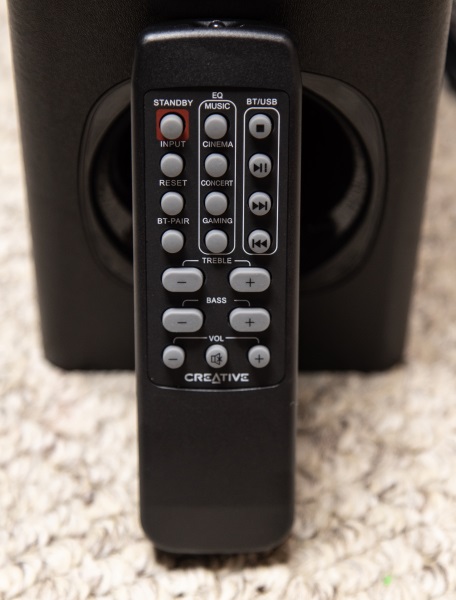
The remote control is well laid out with control buttons for each function/feature.
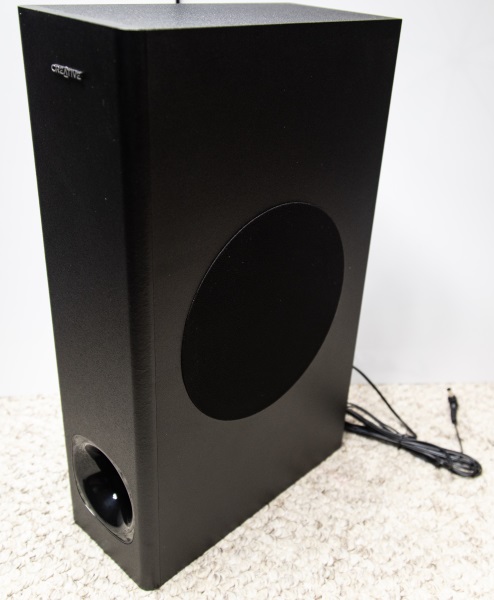
The picture below shows the included side-firing subwoofer. There is a port on the front. The built-in connection cable comes out of the back of the subwoofer.
Performance

Right out of the box, it was extremely easy to set up this soundbar and subwoofer. One wire connects the subwoofer to the soundbar, and there is one AC power cable from the soundbar. Once I plugged it in, I moved on to the process of connecting to my cell phone via Bluetooth. The Creative Stage appeared immediately in the list of available Bluetooth devices on my phone once I pressed the Bluetooth button on the remote. While this soundbar and subwoofer are touted as easy to connect and use with your computer, and it is quite obvious that is true, I was more enthusiastic about playing it as a stand-alone system as well as an audio system for my TV and for my BenQ HD projector.

I started with the Bluetooth connection and was very surprised by the sound that comes out of this system. It is loud, clear and definitely has enough bass. My only critique is that I wish it had more highs/treble.

Next, I connected it to my TV via the optical cable and it was good to go. There it was again with really enjoyable sound. While I will admit that it does not reproduce the perfect separation of surround sound, and while it is at times a bit difficult to discern the left/right separation, it is very acceptable given its size, cost, footprint, and overall sound reproduction. My next test was on my BenQ projector via the 3.5mm cable. I can tell you that it made Mission Impossible-Fallout a pleasure to watch.

This soundbar is lightweight but seems well built.

What I like

  • The lightweight but durable build quality
  • The versatility and options
  • The overall sound
  • The connectivity options

What can be improved

  • Batteries should be included with the remote
  • A bit more range for the high frequency

Final thoughts

Many years ago, I purchased a Yamaha soundbar for almost $2000, and I still have it to this day. While I thoroughly enjoy it, I do not find it practical to purchase such a large soundbar for every TV, nor do I find it cost effective. These days, there are many brands and models of soundbars that do an acceptable to amazing job of sound reproduction, and they do so and a very attractive price. This soundbar while not perfect is definitely a good example and balance of Price vs Features vs Sound vs Size vs Versatility. Well done Creative!!

Price: $79.99
Where to buy: Amazon
Sample: The sample for this review was provided by Creative

Filed in categories: Reviews

Tagged:

Creative Stage 2.1 Channel Under-Monitor Soundbar with Subwoofer review originally appeared on The Gadgeteer on March 26, 2019 at 8:00 am.

Note: If you are subscribed to this feed through FeedBurner, please switch to our native feed URL http://the-gadgeteer.com/feed/ in order to ensure continuous delivery.

Thyrm PyroVault Lighter Armor review

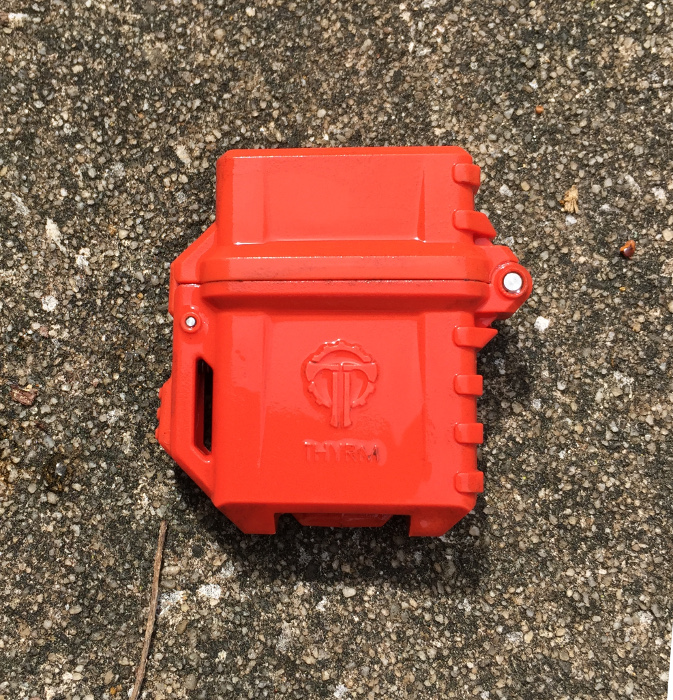
REVIEW – The Thyrm PyroVault Lighter Armor does what it says on the tin. The PyroVault is a rugged housing that accepts most Zippo-style inserts (either liquid fuel or butane).

What is it?

The Thyrm PryoVault is a ruggedized weather-resistant case for liquid and butane fueled Zippo®-compatible lighter inserts.

What’s in the box?

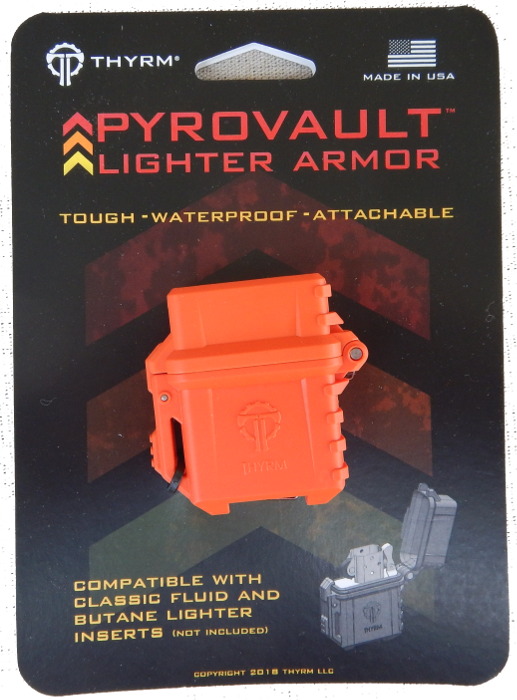
The PyroVault comes attached to a thick paper hang card which describes the features of the PyroVault. The PyroVault’s clip is slipped through two cutouts in the card and is secured with a small plastic zip tie. Cutting the tie and sliding the clip out of the card frees the PyroVault. Thank you, Thyrm, for simple, but effective packaging. The PyroVault is sold as just a shell to which you add your favorite Zippo-compatible lighter insert.

The Thyrm PyroVault is available in rescue (orange), urban gray, black, olive drab (green), and flat dark earth (dark tan). I received the rescue (orange) versions of the PyroVault to test.

Hardware specs

  • Height:   2.9″
  • Width:    2.2″
  • Thickness:  0.9″
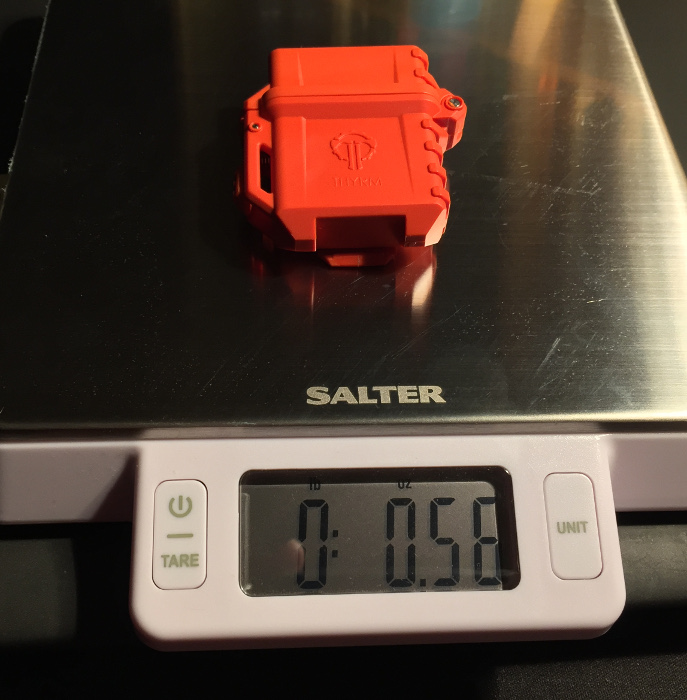
  • Weight:  0.56 oz

Design and features

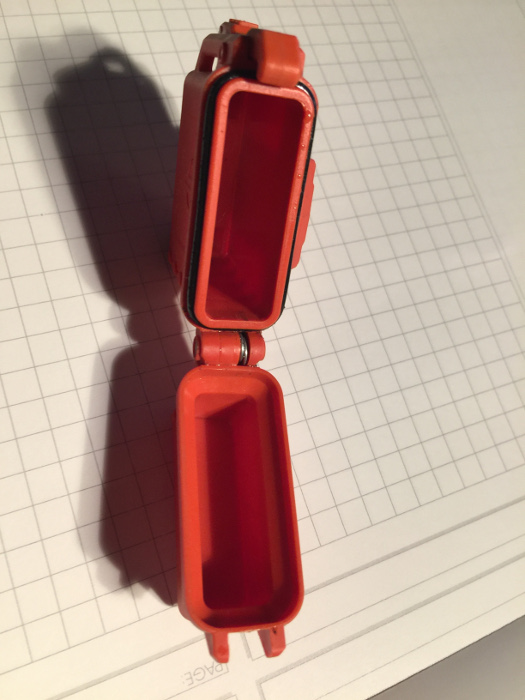
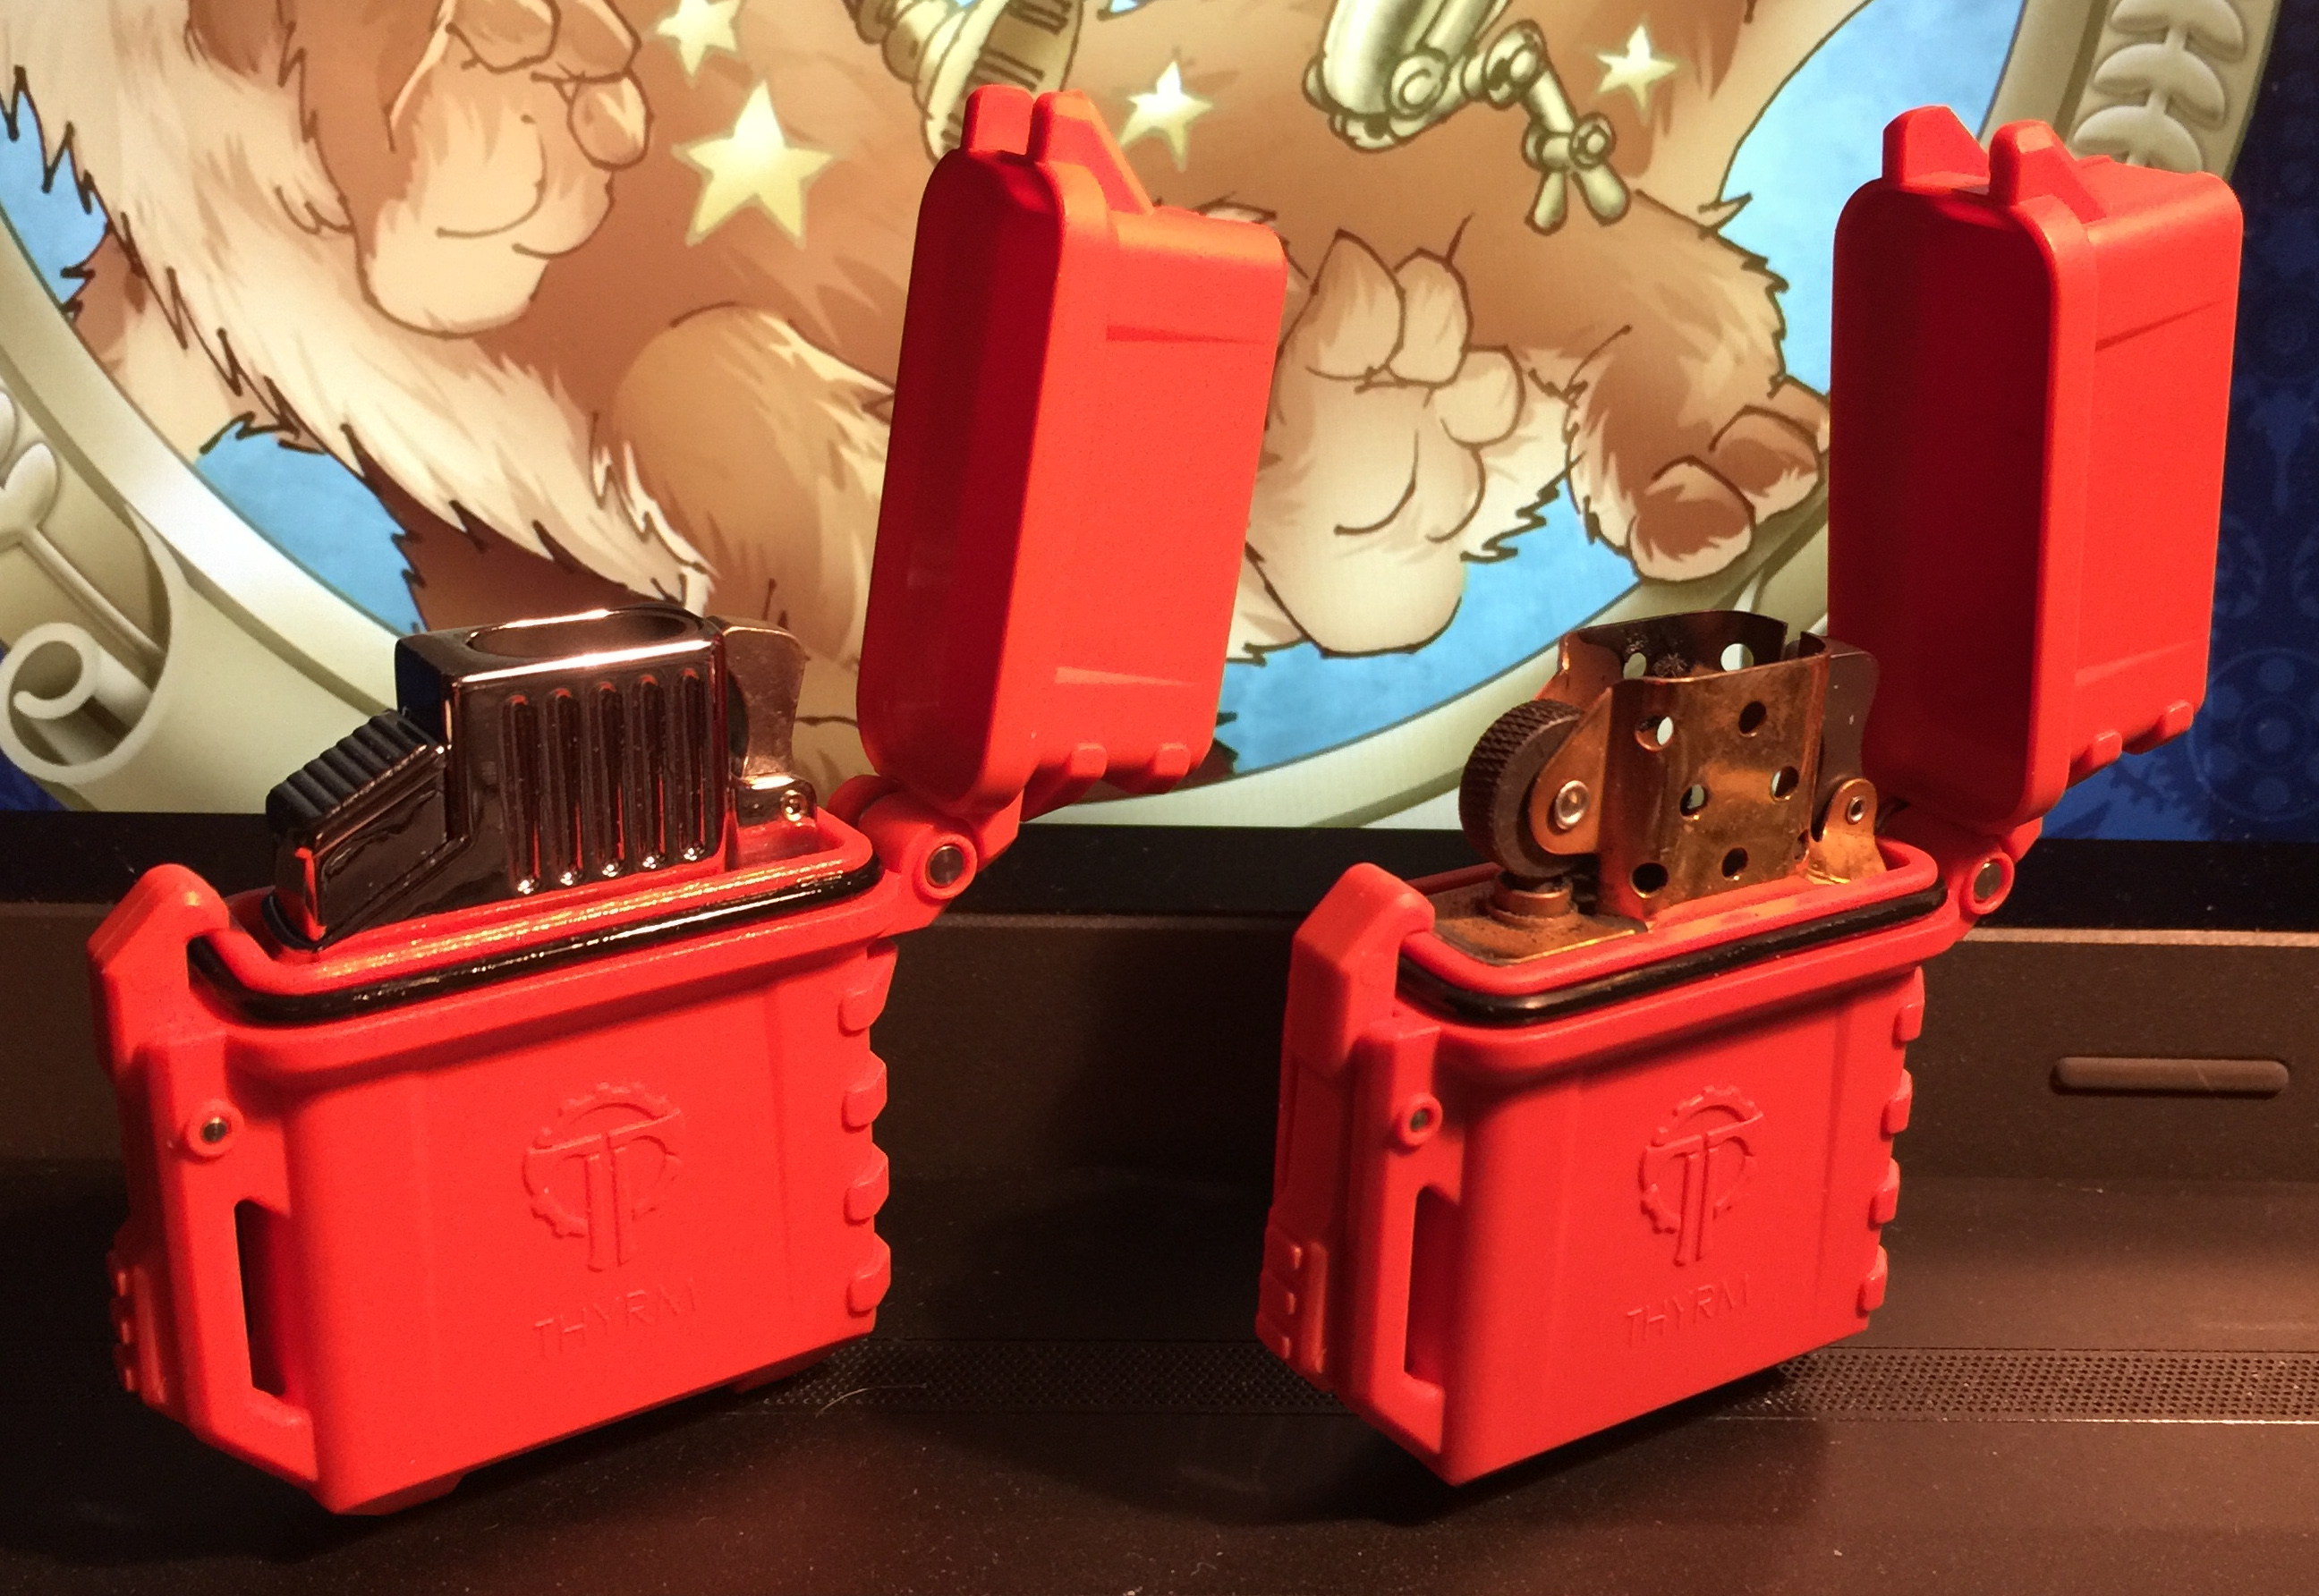
The PyroVault is constructed from rugged, heat-resistant, reinforced polymer with a rubberized gasket seal. The seal works to keep dirt and moisture out of the lighter mechanism, while simultaneously reducing the evaporation of liquid fuel from the lighter. The design includes a spring-loaded cap which is secured with an easy open latch. To help you keep track of your lighter, the Pyrovault includes both a lanyard loop in the latch housing and a MOLLE-compatible clip on the back side of the housing. While the housing does have a gasket to help seal the case, the PyroVault is not rated for prolonged submersion.

I tested the PyroVault with two different lighter inserts. A Zippo brand insert from my 30-year old brass Zippo lighter which uses standard lighter fluid and a new Z plus! 2.0 twin torch flame lighter insert from The LOTUS Group which is butane powered. I will not be reviewing the Z plus! as part of this review, it is merely being used an example of a compatible butane-fueled insert.


The PyroVault is about half the weight of an empty Zippo-brand case, but is slightly larger in all physical dimensions.

Elements resistance test

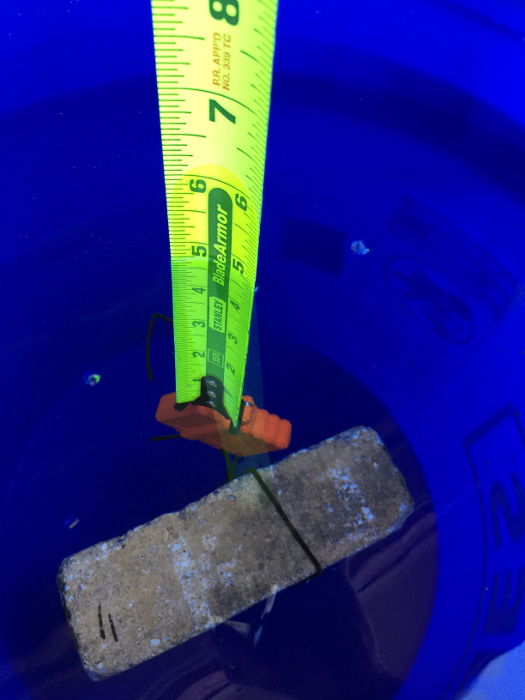
As the PyroVault is advertised as a weather and dirt resistant lighter case, I decided to test the PyroVault in submersion and “shake and bake” particulate tests. Although it is not rated for submersion, I decided to use a submersion test, rather than showering with the lighter (believe me, no one wants to see those test photos), as a worst-case-scenario test modeling falling out of a canoe or being caught in a rainstorm (both of which have happened to me causing my lighter to fail to work when needed). In the submersion test, a PyroVault was tied to a paving brick using the lanyard hole–for those who track such thing, the line was attached to the lighter with a bowline and secured to the brick with a two half-hitch–and suspended in a water bath at a depth of 4.75 inches to the top of the case for 30 minutes. I decided to use the lanyard hole to secure the PyroVault, so no mechanical stress other than water pressure would be placed on the gasket and case / lid joint. Ignore the bubbles in the photograph, those are from the paving brick.

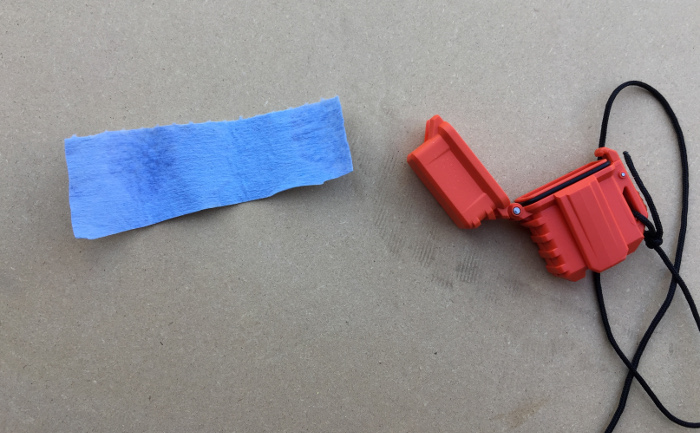
Before dunking the case, I placed a small piece of absorbent material inside the case and made sure that the material was pressed up against the inside of the case. After 30 minutes, there was a small amount of moisture on the absorbent material. Although the PyroVault isn’t rated for submersion, it performed well, and the amount of moisture on the test material would not be enough to stop either of the inserts from functioning.


In the “shake and bake” test, I filled a plastic bag (an actual bag from a oven-fried chicken coating kit) with slightly moist sandy loam (and a few weeds) from my yard and dropped a PyroVault into the bag–I was spared having find a shovel by one of our neighborhood armadillos, who had been rooting for a meal the night before and had left a decent sized pile of loam piled up next to his dining spot.

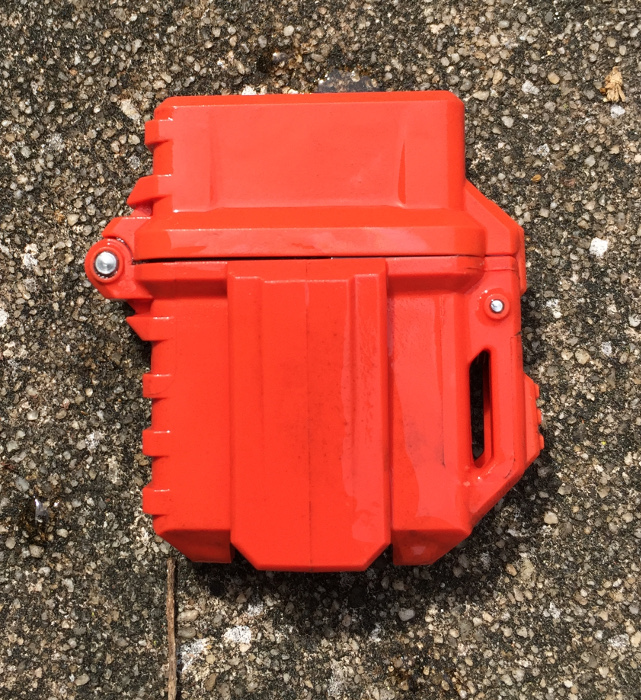
I shook the bag for 2 minutes and then massaged the loam around the PyroVault for a further 2 minutes. At the end of this abuse, the  case was quite dirty.


I rinsed the PyroVault off with low-pressure running water from a garden hose.

The results of this test were that no particulates entered the interior of the case, but grinding could be heard in the hinge when opening and closing the case. This was remedied by a generous dose of Tuf-Glide dry lubricant and cycling the hinge 20 or 30 times.

Lighter fluid evaporation test

Another of the Thyrm’s claims about the PyroVault is that it reduces evaporation of lighter fluid from the insert. My informal testing showed that my lighter still had sufficient lighter fluid after 12 days to function reliably. Historically, my old-school Zippo needs to be refilled after seven or eight days. Both of these tests were done using exactly the same lighter insert.

Performance

The PyroVault has survived two weeks of daily carry in either my trousers, shirt, or jacket pocket and a weekend of outdoor carry hooked to the MOLLE webbing on the outside of my backpack. I never had a problem with getting either of the inserts to light during this time. However, after about 6 or 7 uses of the traditional fuel insert in the PyroVault, I found that the case became slow to open when I released the latch, and the lid was not swinging open as far as it first did. I do not know if this was due to the insert pressing on the sides of the case (my Zippo insert is slightly wider than the butane insert and takes some effort to insert into the PyroVault), some sort of deformation due to the lid experiencing heating and cooling cycles when extinguishing the flame, or just wear-and-tear. The case always opened, but it was just delayed. I attempted to ameliorate this by re-lubricating the hinge and applying some o-ring lubricant (from a scuba shop) to the gasket. This did help but did not eliminate the problem.

A persistent annoyance was that after a week or so of routine use with the butane insert, the lid on the case stopped opening to its fullest extent with just the hinge spring driving the movement. The use of Tuf-Glide as in the two aforementioned scenarios helped with this problem.  The next generation of the PyroVault may benefit from a stronger hinge spring.

What I like

  • Water and dirt / dust resistance
  • Ease of use
  • Light weight
  • MOLLE clip
  • Helps keep lighter fluid in the lighter

What needs to be improved

  • Not so much an improvement as something that I miss: the trademark “click” of a Zippo lighter opening and closing
  • It would be nice if the spring opened the lid a bit further. I noticed that when the butane insert is on maximum flame that the ends of the flames are precariously close the the lip of the lid if I haven’t manually pushed the lid open all the way. Perhaps a stronger spring would solve this problem.
  • The latch is slightly in the way of operating the striker wheel when using the liquid fuel insert.
  • The rubber gasket that seals the PyroVault sometimes causes the lid to stick. This seems to happen with the official Zippo lighter insert after sitting closed overnight

Final thoughts

I found that I liked using the PyroVault with a butane insert more than using a traditional insert. Several factors influenced this opinion. First the overhang of the latch which requires you to raise your thumb up and over before using the striker wheel. This interferes with my muscle memory from 30 years of using a traditional Zippo lighter. Second, the flame seems to heat up the lid a bit more than I would like when extinguishing the flame from the traditional insert. I also notice this heating with my metal Zippo lighter, but I don’t worry about it as much with the metal. Third,  I miss the classic Zippo lighter sound (this is something for which I have great nostalgia as my grandfather’s lighter of choice was a Zippo, and a Zippo has been my utility lighter of choice for 3 decades). When I know that I’m carrying a butane lighter, I don’t seem to mind the silent operation, but my brain just expects the case spring click when using a liquid fuel lighter.

I have added a PyroVault to my EDC kit and my camping gear. I will also be purchasing additional PyroVaults and inserts as gifts this holiday season for friends and family.

Price: $ 19.99
Where to buy: Thyrm online store and Amazon
Source: The samples of this product were provided by Thyrm LLC.

Filed in categories: Reviews

Tagged: ,

Thyrm PyroVault Lighter Armor review originally appeared on The Gadgeteer on March 25, 2019 at 10:05 am.

Note: If you are subscribed to this feed through FeedBurner, please switch to our native feed URL http://the-gadgeteer.com/feed/ in order to ensure continuous delivery.
iKlip 3 Deluxe tablet mount review

REVIEW – Tablets are great portable devices, but occasionally you need to use them in places that don’t always have a good place to put them. The iKlip 3 from IK Multimedia aims to provide a solution for that, at least in a couple of key usage scenarios.

What is it?

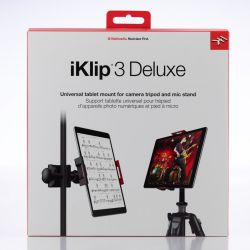
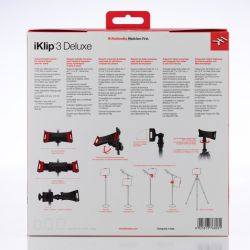
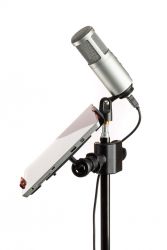
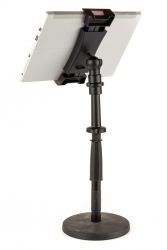
The iKlip 3 is a tablet mounting solution that provides multiple ways to mount your device. There are three versions: iKlip 3 for Universal mic stand support, the iKlip 3 Video for tripod mounting, and the iKlip 3 Deluxe that has both mounting solutions. This review covers the iKlip 3 Deluxe.

What’s in the box?

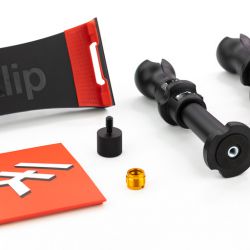
  • iKlip 3 holding bracket
  • Universal mic stand mount – Fits any mic stand or pole with a diameter of up to 1.2″ (30mm)
  • Universal tripod mount (1/4″-20 UNC)
  • UNC 1/4″-20 male to 5/8″-27 female thread adapter
  • 5/8″-27 male to 3/8″-16 female thread adapter
  • Quick start guide


Hardware specs

  • Holds any iPad, iPad mini, iPad Air, iPad Pro and tablet model with screens ranging in size from 7″ to 12.9″ with case on
  • Holding Bracket Width: 160mm (min) – 230mm (max) / 6.29″ (min) – 9″ (max)
  • Total Weight: 340gr / 12oz
  • Material: Thermoplastic

Design and features

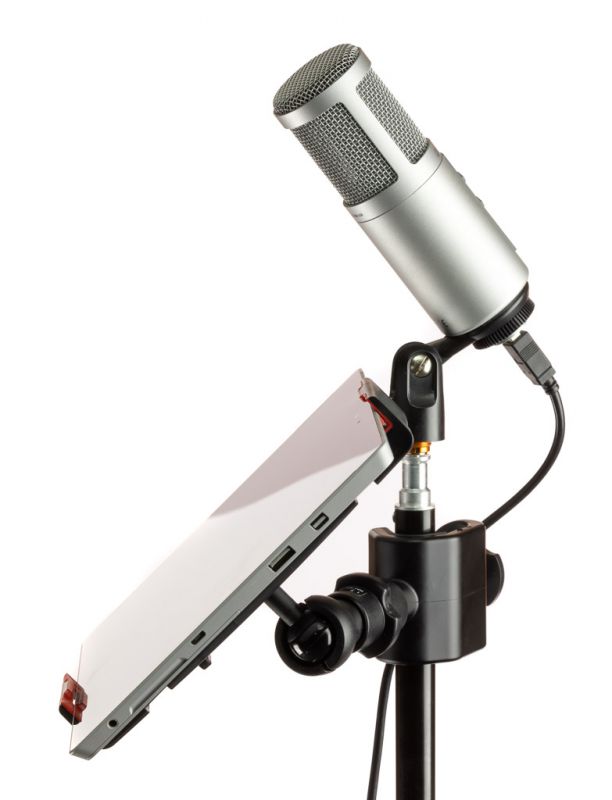
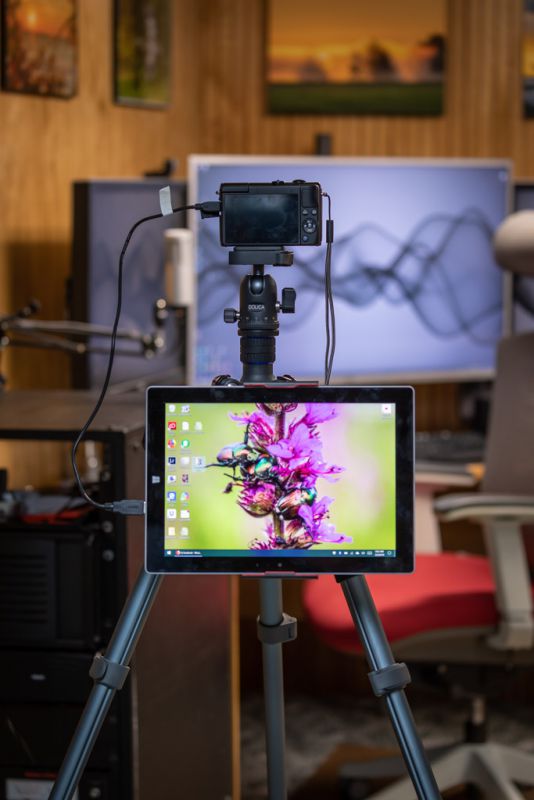
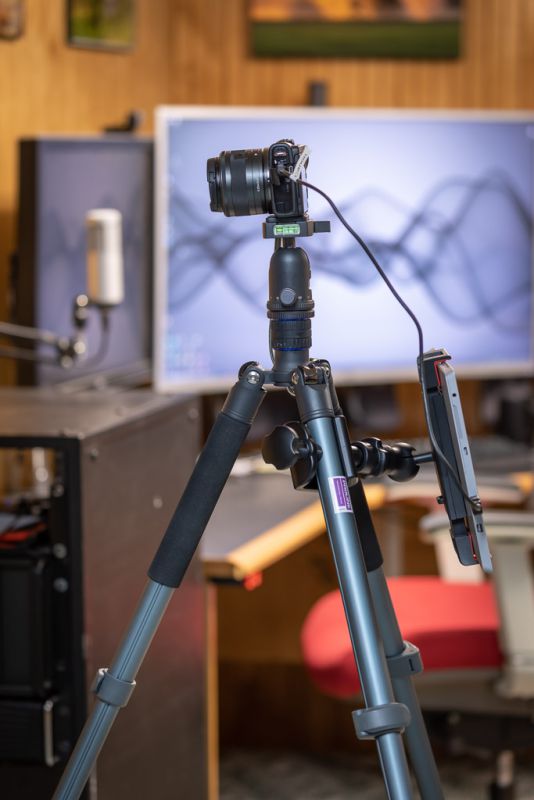
I volunteered for the iKlip 3 review because I had a specific need that I hoped the iKlip 3 could solve. I wanted to mount my Surface 3 tablet to my tripod so I could use it as a monitor for my camera while taking photos.

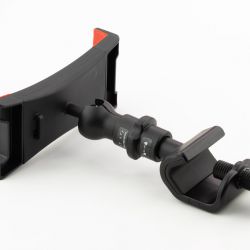
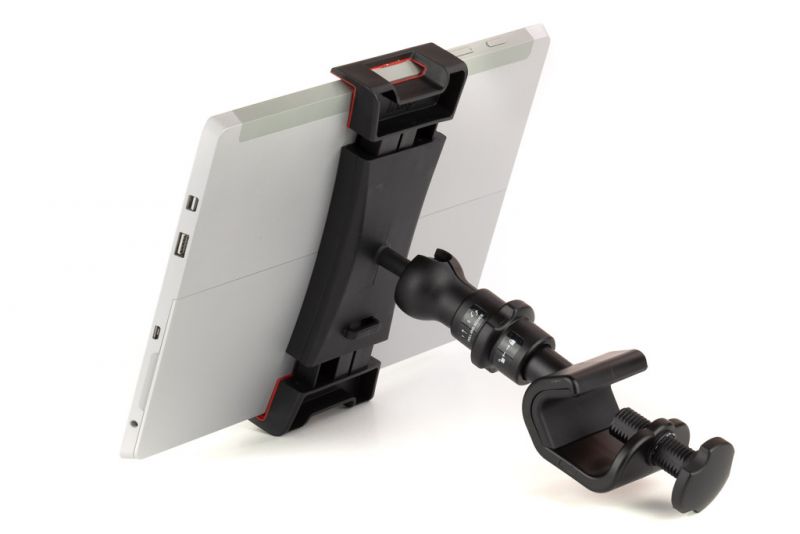
The mic stand clamp mount turned out to be a little too small for my larger-than-normal tripod leg, so I mounted it on one of my smaller tripods for testing. The tripod mount included does feature a standard 1/4-20 threaded mount so I’ll be able to use that once I get a little larger clamp for it.


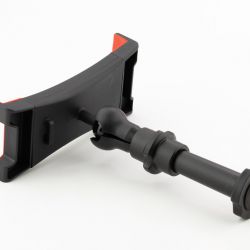
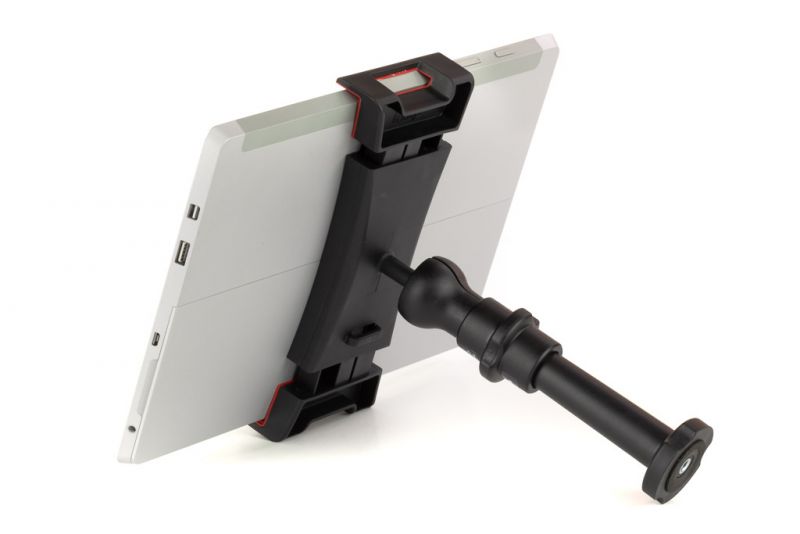
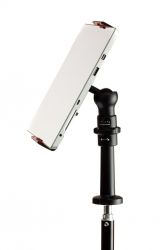
The iKlip 3 certainly feels very rugged. The thermoplastic has a slightly flat finish that helps keep glare and fingerprints to a minimum. The holding bracket attaches to the mounts with a ball & socket connection. The ball portion has a rubberized surface where it contacts the socket. This provides for smooth movement while adjusting your viewing angle without having to loosen the clamp, but also makes it a little more difficult to position precisely.

The holding bracket has recessed areas for your fingers to aid in placing a tablet in the bracket. The bracket also has rubber grips to hold the tablet without marring its finish.

At first, I found it a little difficult to put the device in the holding bracket, but once you figure out exactly how to hold your particular device and how to pull open the bracket, it was pretty easy. It is quite a bit easier to put the device into the clamp when the clamp is actually attached to something.


I did find that I pinched my fingers when placing my phone in the bracket. This was mainly because I was holding it on the side and not from the ends as it’s designed to be operated.

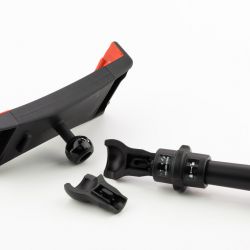
The ball & socket mounting area is perhaps the trickiest part to figure out. At first, I unscrewed it too far and half the socket fell out. I would prefer to see this part be captive so that there was no chance of dropping this part. However, once you figure out that you don’t have to unscrew it that far and you can just pop the ball in with a little pressure it’s not too bad to use. Once the ball & socket is tightened down, you can still position it with mild pressure.


Each of the mounting solutions features a spring mechanism that allows you to rotate the bracket in 12 steps by simply pulling outward and rotating it. I found this to be a little unnecessary because you can always just rotate the ball & socket joint with a little pressure since it never fully locks down.

The include thread adapters are a nice touch, allowing you to adapt from a standard 3/8″-16 tripod thread or 5/8″-27 male mic stand thread to the 1/4″-20 thread used for the tripod mount.


The iKlip 3 comes with free apps from IK Multimedia that can be used for various things, mostly in the area of music recording.

There’s also a slot in the back that can be used to secure interfaces, cables or other accessories.

What I like

  • Strong device clamping mechanism
  • Multiple mounts

What needs to be improved

  • Ball design doesn’t lock down all the way, but is still pretty solid for stationary use
  • Ball socket too easy to come apart
  • Clamping mechanism has pinch points

Final thoughts

Although I list some things that could be improved, they are minor things that either won’t bother most people or don’t impact the normal operation of the iKlip once you figure them out. They are more like “things that could be better” and definitely not deal breakers. Overall the iKlip 3 is a sturdy and versatile clamp that will hold almost all tablets. The mounting options allow you to use it in a multitude of configurations.

Price: $49.99 – $69.99 ($69.99 as tested)
Where to buy: IK Multimedia and Amazon
Source: The sample of this product was provided by IK Multimedia.

Filed in categories: Reviews

Tagged: ,

iKlip 3 Deluxe tablet mount review originally appeared on The Gadgeteer on March 25, 2019 at 9:00 am.

Note: If you are subscribed to this feed through FeedBurner, please switch to our native feed URL http://the-gadgeteer.com/feed/ in order to ensure continuous delivery.

Hitcase Splash and TrueLUX iPhone lens bundle review

REVIEW –  Advances in technology and increased memory capacity means more people carry iPhones that are expensive to replace and that contain invaluable content. The Hitcase is a low-profile case that is compatible with magnetically mounted TrueLUX lenses, and provides protection from water and drops. Read on to see what I think!

What is it?

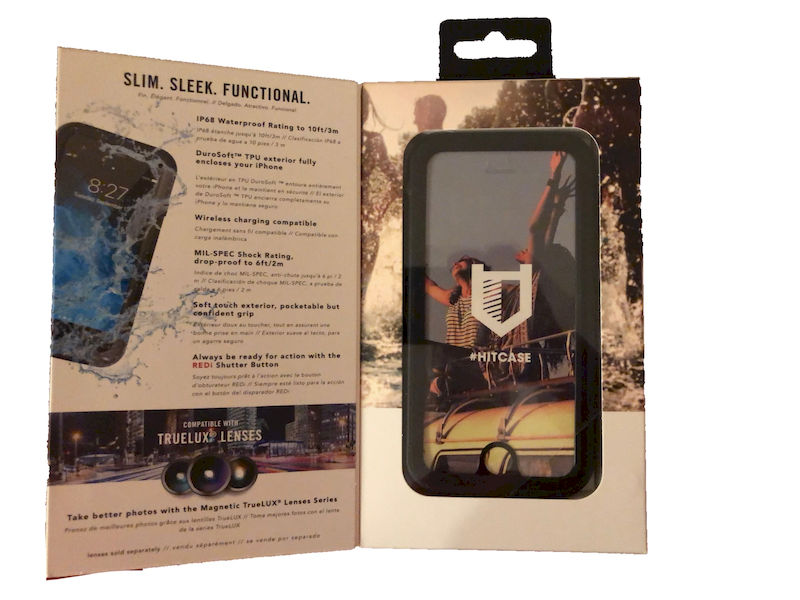
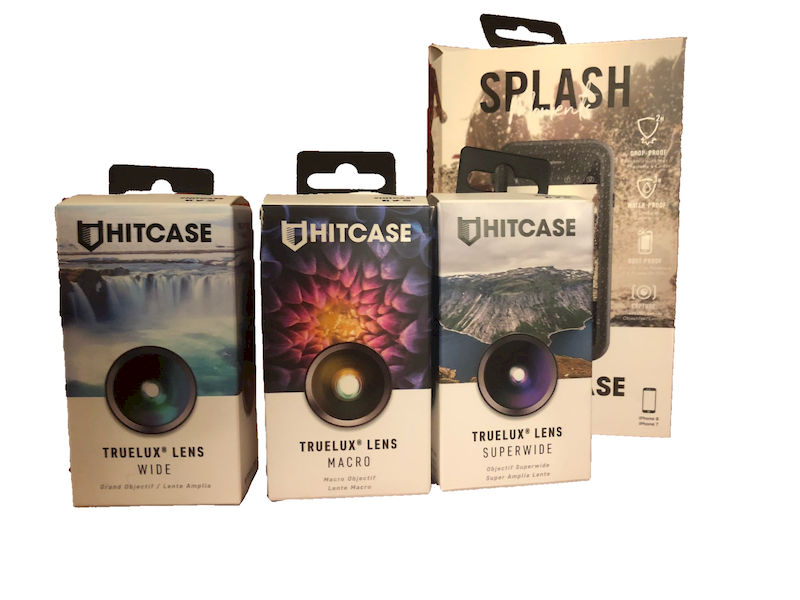
The Hitcase Splash is an iPhone case for iPhone XS, iPhone XS Max, iPhone XR, iPhone X, iPhone 8, iPhone 8 Plus, iPhone 7, and iPhone 7 Plus phones. It has IP68 waterproof rating to 10ft/3m, a MIL-SPEC Shock rating, drop-proof to 6ft/2m. The case is easy to install and remove but doesn’t add excessive bulk or weight to the phone. The polymer front and rear surfaces provides a protective shell that minimally impacts tactile, visual and audible stimuli and also permits wireless charging. The case is compatible with TrueLUX lenses – interchangeable waterproof lenses with precision-grade optical glass that are waterproof to 10 m and drop proof to 2 m. The lenses come in macro, wide and superwide fields of view.

What’s in the box?

The Hitcase Splash comes with the following:

  • case
  • installation instructions
  • cleaning cloth

The box for the Hitcase has a front flap that opens to reveal the case packaged inside. There is a cut out in the box to allow the TPU material to be touched. The cleaning cloth is mounted behind the cardboard frame supporting the case. It is likely that the box will be thrown out without removing the cleaning cloth unless it is looked for.

Each TrueLUX Lens comes with the following:

  • lens
  • lens caps
  • storage pouch with integral cleaning cloth

Hardware specs

Hitcase Splash

  • IP68 waterproof rating to 10ft/3m
  • MIL-SPEC Shock rating, drop-proof to 6ft/2m
  • Wireless charging compatible
  • DuroSoft™ TPU exterior

TrueLUX Lenses. Each Lens Features

TrueLUX SuperWide Lens Specifications:

  • Size: Ø29mm x 17.8mm long / Weight: 22g
  • Triple element glass lens
  • 148° diagonal FOV in photo mode
  • 121° diagonal FOV in video mode

TrueLUX Wide Lens Specifications:

  • Size: Ø29mm x 19mm long / Weight: 22g
  • Triple element glass lens
  • 120° diagonal FOV in photo mode
  • 98.6 degrees (Diagonal), 86.1 (Horizontal) FOV in video mode
  • Magnification: 0.55X
  • Minimum focus distance: 27mm

Design and features

The Hitcase Splash is a two piece case that has a snap-together seam along the side of the phone. The soft rubber rear of the case flexibly fits over and locks on to a hard plastic ridge on the front of the case. This mechanism is similar to the operation of a Tupperware container. Assembling the case only requires that you press to seal around the rim. The directions request that you test the case without a phone inside to verify the construction of the case before inserting the phone. I did this and determined that the case could be assembled correctly without water leaking inside.

The rear of the case has a metallic ring that surrounds the rear camera and a plastic lens cover for the camera. A TPU ring surrounds the camera and the flash and provides extra rigidity so that the rear of the case will not flex in front of the flash or camera.

On the inside of the case, a foam gasket surrounds the flash and camera to prevent internal reflection. The foam gasket also seals against the rear microphone. The microphone seems to work fine when recording video from the rear but picks up less if the rear of the phone is pressed with my finger while recording. Assuming that most of the time recording is performed while holding the edge this should not be a problem. The picture below is the foam on the inside of the case.

The rear of the case doesn’t seal directly against the phone; there is about a 1 mm gap between the phone and the rear of the case. That allows enough room to install a metal plate for a magnetic mount. I have a MOZEEDA Qi Fast Charge Wireless Charger Car Mount with a 0.8 mm insert that fits perfectly. The rear of the case also serves as a speaker membrane for the bottom speaker. A hard rubber surface acoustically couples that case to the bottom speaker. The rear of the case resonates when the bottom phone speaker is active.

The front if the case completely seals the face of the phone. For the iPhone 7 and iPhone 8, there is a membrane above the home button to permit fingerprint reading. I could not detect that the membrane slowed the registration of a fingerprint at all. The rest of the screen is a more rigid polymer film. The film sits directly against the screen of the phone so that the tactile response is very close to the feeling of the glass. A small window above the front speaker helps sound transmission. I cannot tell the difference in speaker volume with our without the front of the case attached. The serial number of the unit is printed above a barcode on a sticker along the inside wall.

The buttons on the side work very well. It takes somewhat more force to push them than the phone’s buttons, but there is still a discernable tactile click when they are depressed. Hitcase has appropriated the most underappreciated feature of the iPhone. When the camera app is running the volume buttons can be used to take a picture. Hitcase has painted one of the buttons red to make it more obvious that this is a shutter release. The mute switch is operated by way of a dial. The video below shows how the dial operates with the back of the case removed.

Turning the dial about an eighth of the way will flip the switch back and forth. I found the best results occur when one of the teeth on the inside of the case is at 12 o’clock and the phone is inserted into the case with the switch in mute. If the dial were a bit bigger it would be easier to turn.

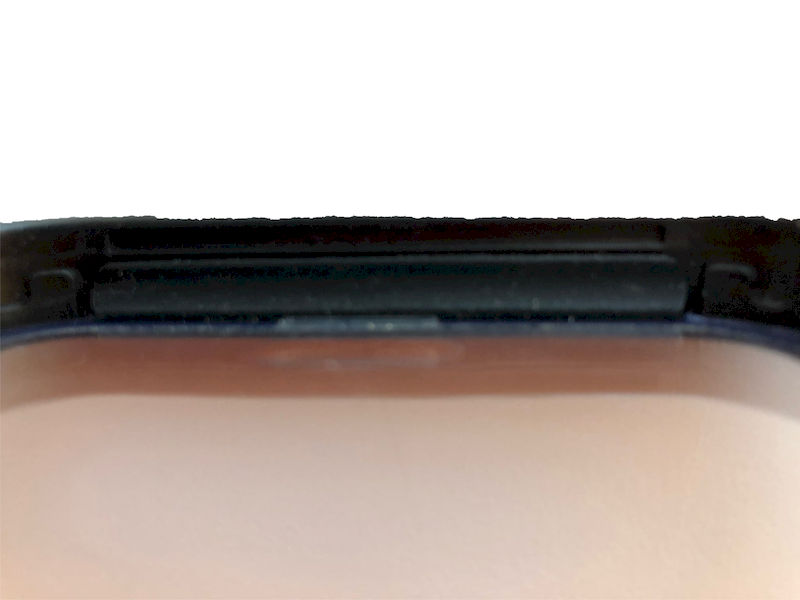
The picture above is the inside of the case and the bottom ports. The white box is in front of the microphone.

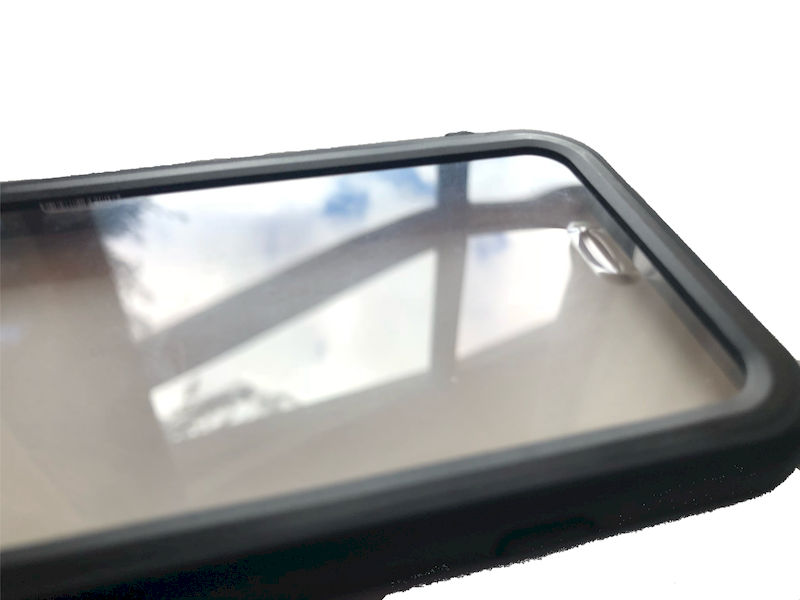
The picture above is the top inside of the front of the case.

The charger port is usually closed with an o-ring fitted cover. When open it will accept a rounded rectangle plug that is less than 1/4″ tall and about 7/16″ wide. A membrane-enclosed grill next to the charge port permits access to the bottom microphone. Only one bottom microphone is exposed in this way, however, there was no difference detected with or without the case installed by people I had a conversation with. The TPU case around the side provides a secure way to hold the phone and protects the front and back surfaces from getting scratched when the phone is placed on a flat surface.

The TrueLUX lenses attach to the magnetic ring and self align along a ridge on the inside of the magnet base. The one detriment is that they are easily knocked off by sudden movement. Even though the super wide lens will shoot pictures like a Go-Pro it is definitely not as durable as one.

Performance

I used the case exclusively for about 6 weeks. I generally keep the phone in my pockets. In this time the front of the case picked up a couple of scratches. Also, there is an array of “dots” that keep the plastic from adhering to the glass below. They show up on the phone in bright light, but not while the screen has an image on it. The screen doesn’t look completely flat because it is a plastic film. Perhaps at the dawn of the age of the folding phone, we should get used to a plastic film screen. (How are cases going to work on these folding phones anyhow?)

The shots below are of the native camera, the wide lens, and the super wide lens from the same vantage point. Notice how the trees bow towards the edge of the field of view.

When using the macro lens the only thing I could tell is that my windows need cleaning.

The shots below are of the native camera, the wide lens, and the super wide lens all taken with my phone mounted to a tripod.

I couldn’t use the Macro to record from the same location because it was out of focus. However, I was able to verify that the graph paper was printed with an inkjet printer.


What I like

  • a thin and lightweight case that’s easy to install
  • Works with TrueLUX lenses

What needs to be improved

  • TrueLUX lenses can fall off
  • Mute dial could be bigger

Final thoughts

The Hitcase and TrueLUX lenses protect your phone and enhance your camera with rugged yet functional accessories. Be happy you bought the Hitcase before your sad over losing your vacation photos in the hotel hot tub.

Price: Hitcase, $69.99 for any size;  TrueLUX, $39.99 for each or $99.99 for all three and a lens case.
Where to buy: Hitcase
Source: The sample of this product was provided by Hitcase.

Filed in categories: Reviews

Tagged:

Hitcase Splash and TrueLUX iPhone lens bundle review originally appeared on The Gadgeteer on March 25, 2019 at 8:00 am.

Note: If you are subscribed to this feed through FeedBurner, please switch to our native feed URL http://the-gadgeteer.com/feed/ in order to ensure continuous delivery.
iLive Tailgate Speaker review

REVIEW – Portable speakers are usually limited to personal or small-group listening. Those that move beyond that size are a much smaller group. I was recently sent the iLive Tailgate Speaker, and have been testing it. Read on for how it performed, and how it may fit into your life.

What is it?

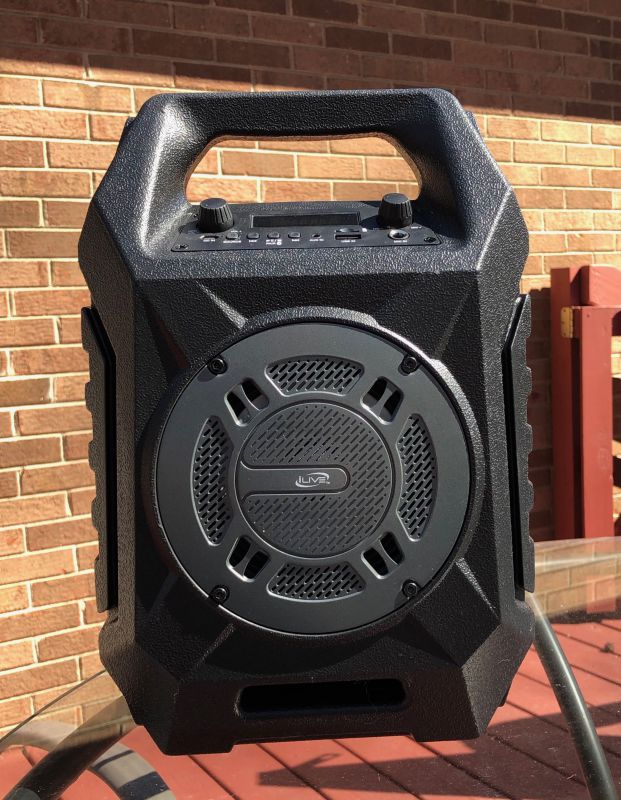
The iLive Wireless Tailgate speaker is a 14″ x 9″ x 6″ box with a rigid outer shell and an integrated handle on the top. Under the handle (and easily accessible) are all controls and inputs. On the face is a 5.25″ woofer speaker with LED light effects behind the grille.

What’s in the box?

  • main Speaker unit
  • AUX audio cable (nearly 60″)
  • USB-A to miniUSB recharging cable

Hardware specs

  • Bluetooth wireless speaker with built-in 5.25 inch woofer
  • Digital FM radio with 30 station memory presets
  • Includes micro-USB to USB cable and 3.5mm audio cable
  • SD memory card reader
  • USB port
  • LED light effects
  • Microphone input and gain control
  • Built-in carry handle
  • Built-in rechargeable battery with battery life ~3 hours
  • Wireless range of 60 feet

Design and features

The iLive Tailgate is encased in a semi-flexible molded plastic case all around. There are no openings, save the speaker grille holes and the input ports. When it’s powered on, a multi-colored LED flickers randomly and is reflected by the metallic cone to light up the entire speaker area. (This isn’t bad in the daylight, but if you’re trying to use this at a political rally or anyplace where the integrity of the message is at stake, be aware. There’s no way I could find to turn this disco lighting off.) The grille is a slotted matte metal with a silk-screened logo in the center.
When powered on, there is a LED clock-type panel that lights up between the volume knob and the microphone gain knob to show information like current input mode, FM frequency, etc. Below the two knobs and this display, there are inputs from left-to-right for DC power in (microUSB), Source select button, Rewind, Play/Pause/BT pairing, Fast Forward, USB in (which also charges), MicroSD card slot, and .25″ mic jack. The whole unit weighs right at 4 pounds, so it’s easy to move about during setup and use.

Setup

There is no extensive setup. Charge it, and turn it on. Pair or connect your source, and you’re off to the races.

Performance

The amount of sound the iLive produces is really impressive for such a small box. You can get quite loud without getting even a third of the way into the volume knob’s range. The sound is a bit bassy/boomy, but carries well, so long as the speaker is not blocked. The FM radio would allow you to listen to a pre-game show while still tailgating or keep you informed during a power outage. USB or micro SD card input will allow you to play from your own collection of audio. Plugging in your portable devices will share those sounds as well.


Perhaps the most interesting capability, however, is the microphone jack. Using a standard high-impedance mic (like one that plugs into a guitar amp), you can not only speak and sing through the device, but also sing along with the radio! This opens up possibilities for use at pool parties, political rallies, company outings, or kid’s sports events and parties. Not having to have directly connected power means the mic and speaker can be carried around easily, for, say, leading a tour through a park with a group, or organizing activities at a Scouting Camporee.

At first, I dismissed the FM radio as hooey. No one listens to the radio anymore, there are too many stations. (apologies to Ty Cobb) There are so many used FM frequencies in most cities that locking in on a single station is often difficult. And, indeed, trying to pick up stations while scanning with the arrows is a bit delicate. If you move the unit, or sometimes touch anything on the control panel, you’ll introduce static interference. But if you move away, you’ll find you are right on the station, and you will get good sound. I was able to lock onto our local classical station, and let it play for a while. I was surprised at the beautiful, full-bodied reproduction of Hee-Young Lim’s cello from Saint-Saëns’ Concerto Number 1 in A minor. The rest of the instruments came through clearly as well, but the cello was just so full and captivating, even over FM radio. I forgot I was listening to the radio until the announcer came in after the piece was finished.

I have a cheap hi-Z microphone. When I plugged it in, the gain was superb and the tone accurate. There is a little reverb added, but it still sounds accurate. I couldn’t get it over 40% or so and stay in the room with it. Jack was very confused by my voice coming out of the box, rather than my mouth when I would whisper.

What I like

  • USB charging – available everywhere
  • All manner of inputs covered
  • Decent battery life
  • Can charge USB devices

What needs to be improved

  • The LED speaker light needs an on/off switch. Mostly an off switch.

Final thoughts

This is a great portable sound unit for many uses. Our local bike advocacy group could use it for announcements before and after group rides. (Or even during rides!) We have a local non-profit that does trail maintenance in a park along a natural scenic river, and I could see having something like this to communicate during clean-ups or festivals. The portability, USB charging, and rugged outer shell recommend it for many places a regular speaker would fall short, and a PA system would be overkill.

Price: $59.99
Where to buy: iLive and Amazon
Source: The sample of this product was provided by iLive.

Filed in categories: Reviews

Tagged:

iLive Tailgate Speaker review originally appeared on The Gadgeteer on March 24, 2019 at 10:38 am.

Note: If you are subscribed to this feed through FeedBurner, please switch to our native feed URL http://the-gadgeteer.com/feed/ in order to ensure continuous delivery.