Solo Altitude backpack review

Why another backpack review from me you ask? I may ask myself the same question. I do have several excellent backpacks that I have reviewed in the past such as the Razer Tactical Gaming backpack and the Altego 17″ Polygon Sunfire backpack to name a few. While these two backpacks are great for carrying a lot of items including a laptop and iPad, I have found myself in need of something a little less extreme, with a smaller footprint, something like a day pack. The Solo Altitude backpack looks like it could be just the right pack for my new needs.

Note: Images can be clicked to view a larger size.

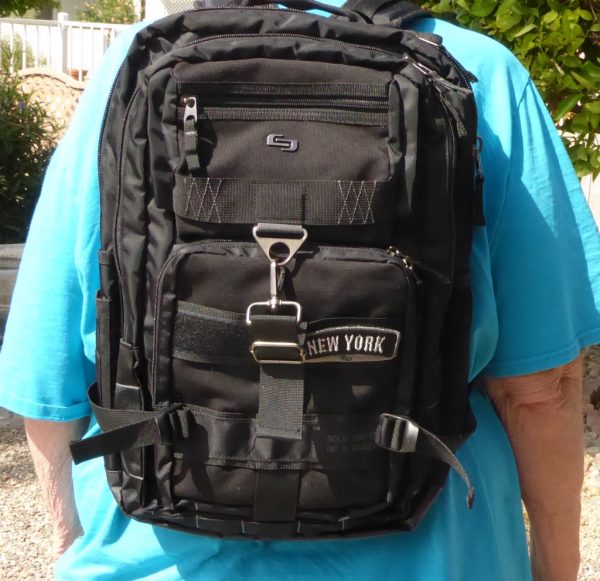
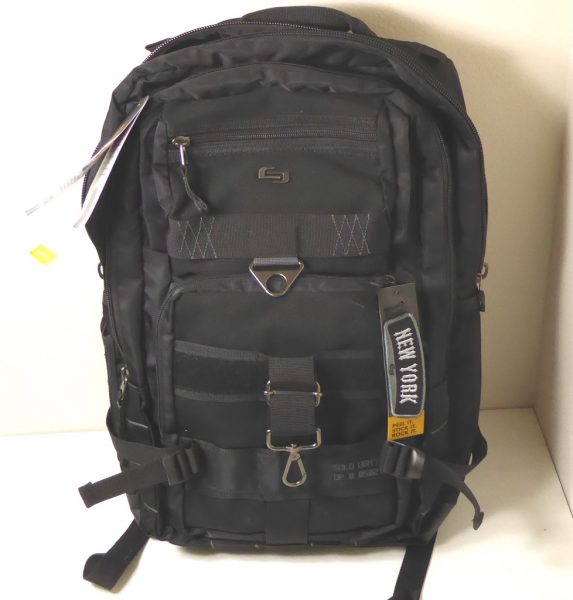
The Solo Altitude is part of Solos Black OPS collection, designed to be lightweight and ultra durable. The Solo is made of lightweight parachute nylon, with aviator-inspired hardware and military grade velcro. The Solo dimensions are 18.50″ x 12.6″ x 4.92″ and the weight is 2.2 pounds. The Solo features a 17.3″ padded laptop compartment, an internal iPad/tablet compartment, a front zippered organizer section and side pockets.

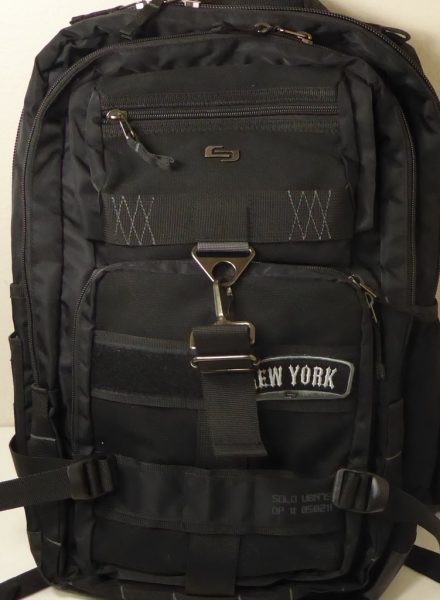
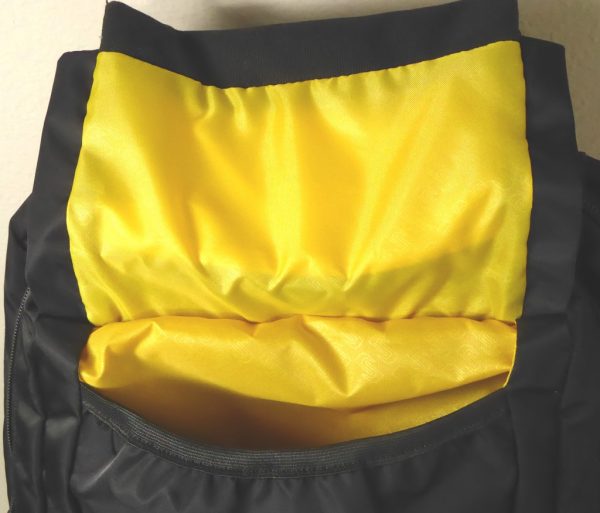
The front of the Altitude has a lower zippered compartment with a large velcro strip gong across it and a vertical strap with a buckle designed to attach to a top flap that covers a cargo area. The flap also has a zippered compartment good for holding keys and phones. The front has a set of buckles on the right and left sides to compress the Altitude making as compact as possible. The interior of the lower zippered compartment has a yellow lining and is designed to hold pen, pencils and other supplies. At the top of the front section is yet another zippered compartment good for carrying file folders or magazines.

The compartment under the upper flap runs the width and depth of the front section making it a great place to store a light jacket or sweatshirt. The top of the opening has elastic in it to help keep items inside.

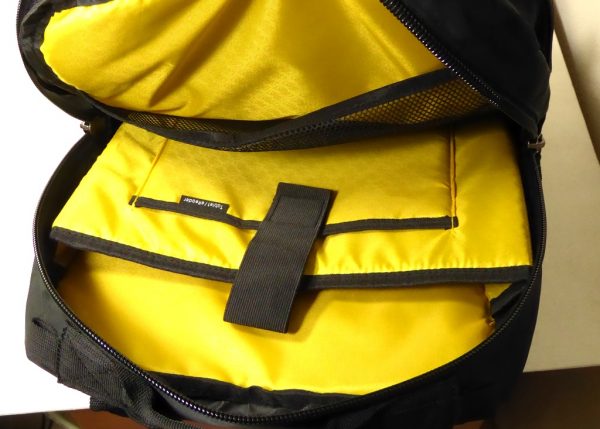
The inside of the Altitude backpack’s main compartment is designed to hold up to a 17″ laptop and a tablet device. It also has a cargo net section that can be used to hold cables and other accessories. Like the other interior sections of the Altitude, it is lined with a yellow colored material. The laptop pocket also has a strap with Velcro on the end to keep your laptop and tablet from sliding out of the pocket.

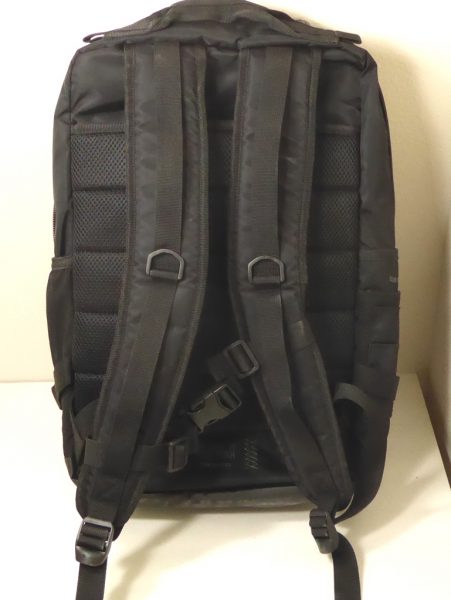
The back of the Altitude backpack has adequate padded straps with a plastic D-ring on each strap. The straps also have a chest strap to keep the shoulder straps on your chest area. The back section is nicely padded and has an opening to allow the Altitude to slip over the handle of a rolling suitcase or similar item. All of the buckles and D-rings are made from sturdy plastic and should hold up to normal use and then some. At the bottom, sewn to the back of the backpack, is a manufacturers tag.


The right side of the Altitude has a mesh water bottle holder that has some stretch to it allowing for the use of different size water bottles.

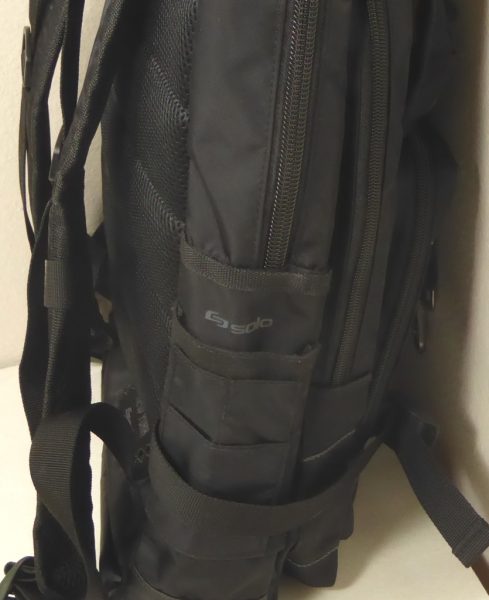
On the left side, the Altitude backpack has what I would describe as pen and pencil pockets with Solo printed on one of them. On both, the left and right side of the backpack are cinching straps designed to compress the sides of the backpack making it a tight package so it is not flopping around on your back.

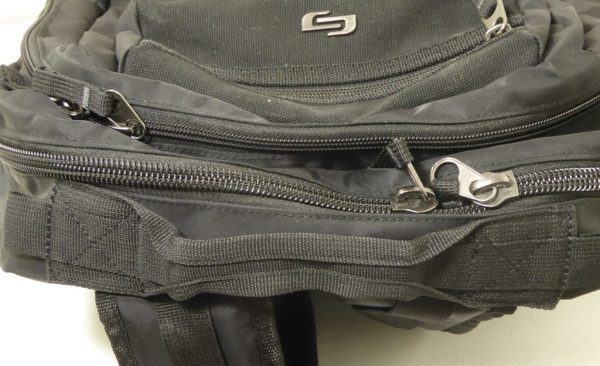
The top of the Altitude has a nylon handle for easy carrying while the bottom has a nonporous type material to allow you to set the pack down and not get the contents wet if the ground is wet.
So, what’s my bottom line here? First, let me say that you should not think of the Solo Altitude as a traditional backpack, it is more like a briefcase backpack. The design is great for a person on the go who is not interested in lugging a traditional computer back or messenger bag to work. The metal zippers are a great feature and are sturdy. With a mix of metal aviation inspired hardware and the lightweight plastic buckles, the backpack is both stylish and practical. There are enough pockets, nooks, and crannies to hold almost any kind of doodads you could think of. For a pack this small there is a lot of storage space for your computer and other larger objects. The included Velcro “New York” patch is a nice styling touch along with all the printed nomenclature info placed around the backpack. At a price of $79.99 on the Solo website, the Solo Altitude is on the moderate to high side of pricing in my opinion, but I do think it is worth the price. If you’re looking for a laptop bag for work, travel or just recreation you should check out the Solo Altitude.

Source: The sample for this review was provided by Solo. Please visit their site for more info.


Product Information

Price: $79.99
Manufacturer: Solo
Requirements:
  • None
Pros:
  • Plenty of pockets and storage
  • Great size for a laptop backpack
Cons:
  • None

Filed in categories: Bags, Laptops and Gear, Reviews

Tagged:

Solo Altitude backpack review originally appeared on on April 10, 2017 at 11:31 am.

Note: If you are subscribed to this feed through FeedBurner, please switch to our native feed URL http://the-gadgeteer.com/feed/ in order to ensure continuous delivery.

Logitech ZeroTouch air vent car mount review

When I find a gadget that can make my life easier in some way, that gadget tends to stay in my life.  And the gadgets that just look pretty usually don’t end up finding a place in my day-to-day routine.  So when I ran across the Logitech ZeroTouch car mount (air vent model), with its plethora of features, I was willing to give it a try.  I love my Kenu Airframe+ for its simplicity and ease of use, but I was willing to try another car mount if it could make my life easier somehow.  So how did the Android-only Logitech ZeroTouch measure up?  Let’s discuss.

First things first, let’s see the specs from Logitech:

Dimensions (Height x Width x Depth):

  • ZeroTouch Air Vent: 1.50 in x 1.50 in x 1.22 in
  • ZeroTouch Dashboard: 2.83 in x 2.56 in x 2.40 in
  • Inner case adapter: 1.50 in x 0.02 in
  • Outer phone adapter: 1.50 in x 0.78 in x 0.02 in

Package Contents:

  • ZeroTouch Air Vent or ZeroTouch Dashboard
  • 2 metal adapters
  • Documentation

System Requirements:

  • Android™ device OS 5.0 or later
  • Bluetooth® Smart technology
  • For full functionality, an active mobile data and text message plan are required.
  • Carrier charges may apply.
  • For full music functionality, an active account with Spotify™, Pandora, Google Play™ Music, or SoundCloud® is required.

Setting it up

Setting up the ZeroTouch was a breeze.  You download the free app and follow the instructions on the screen to connect the Zerotouch to the phone.  You’ll need Bluetooth of course, and I was able to use both the ZeroTouch and my Plantronics Bluetooth headset at the same time with my Samsung Galaxy S6 Edge+, which is good because that would have been a deal-breaker for me.  The Zerotouch enables you to control many apps and services on your phone (more on that later), but I found that one minor hassle with the setup is that you’ll have to log into each one in the ZeroTouch app settings.  So I had to add my login credentials and email settings for all my email addresses, Spotify, my home and work address, and Amazon Alexa.  All of those things are already setup/specified on my phone, so I was hoping that ZeroTouch would recognize those automatically, but it did not.

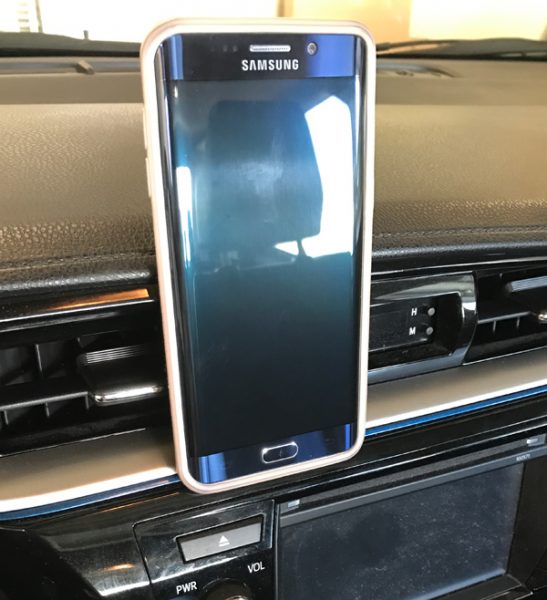
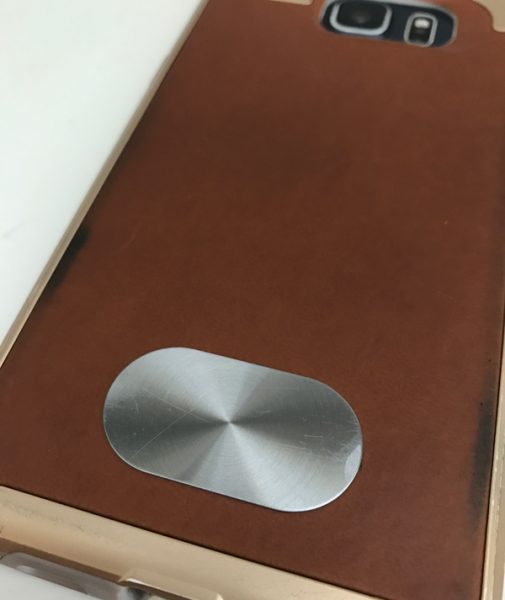
The ZeroTouch comes with 2 adhesive metal pads to attach either to your phone or your phone case.  I have a case, so I choose to attach the oval pad to the outside of my case.  I should also mention that once you attach the pad, it ain’t coming off!  You should also pay close attention to where you attach it because you can’t attach it in the same area where the wireless charging part is.  So for me, I had to attach the pad to the bottom on the back of the phone.  That means that my phone is somewhat top-heavy when I connect it to the ZeroTouch in my car, and attaching it in landscape orientation isn’t an option for me.

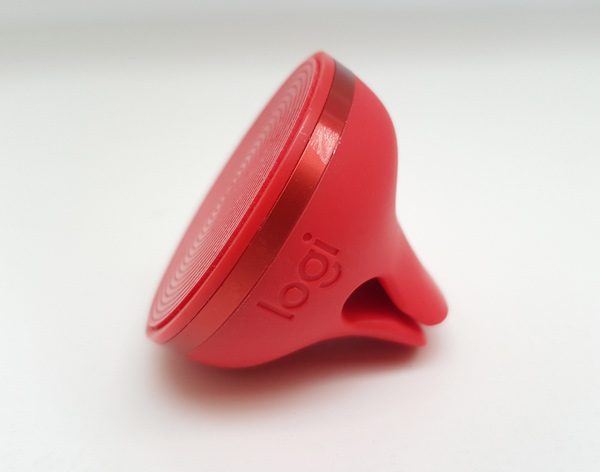
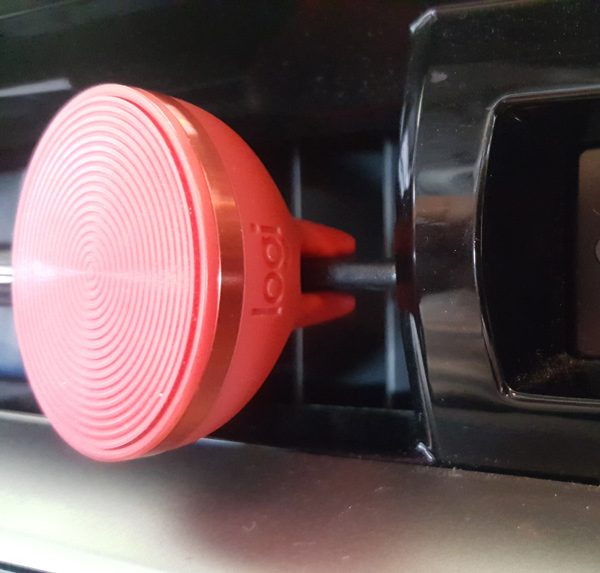
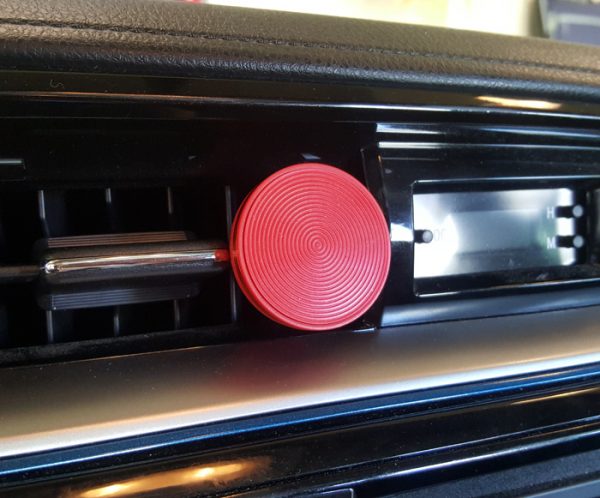
Finally, you have to attach the ZeroTouch to either your dashboard or the car vent in your car.  I got the car vent model, and I can tell you that the gap between the rubberized fingers on the back of the ZeroTouch is very small, and it took quite a bit of force to get it attached to my car vent.  I had to use both hands, but that isn’t a negative to me because that means there is no way it will ever just fall off the vent.

What I liked

As mentioned, the ZeroTouch only works with Android phones which is good for me, but not so good for iPhone users.  I feel sure a ZeroTouch for you is in the works though.  Connecting your phone to the ZeroTouch requires almost zero effort. (See what I did there?)  The magnet inside the ZeroTouch snaps quickly and easily to the metal pad adhered to the back of my phone.  And removing it is just as easy.

The app has big letters and drop-down menus, and lots of white space.  It is pretty intuitive and easy to setup.  There are options for setting the speed of the voice, the gesture that you use to activate the app, and how long the prompts are that are used to interact with you while using the app.

I liked how Amazon Alexa worked.  I will admit up front that I don’t have any smart devices in my home, so I wasn’t able to control any lights or security systems.  But I still used Alexa to give me weather updates, read my news, order Starbucks, and more.  Basically, anything that Alexa can do for you at home, you can do in the car.  Which is pretty nice.  I can see the power of controlling things in the house before you get home or if you forget to set something.  The ZeroTouch car mount can do those things for you, so if you are an Amazon Alexa user, this car mount will be pretty sweet for you.

I liked how the app read my text messages to me and allowed me to send a response simply by speaking.  The vast majority of the time it worked just great.  It took me a little time to learn how to make myself understood, but I had to do that with Google’s voice service as well.  The ZeroTouch shines in this area of reading and handling text messages and emails.  It provides a truly hands-free experience in this regard, which is great if you want to use your phone while you are driving.  I would often turn this off if I had other people in the car though because I didn’t want the phone reading texts and emails to everyone in the car.  And you also have the option in the settings to automatically respond to texts and emails with a message to tell folks you are driving and will contact them soon.  That’s pretty neat too.

What I didn’t like

Some folks have complained that the ZeroTouch doesn’t charge your phone like some other car mounts, but that doesn’t bother me.  I am not crazy about the fact that the adhesive metal pad is pretty much a one and done setup.  It isn’t coming off your phone/case, which isn’t going to bode well for resale value.

I experienced some spotty performance with the app voice prompts.  For example, there were random times when I would ask it to play Pandora and the app would respond that Pandora wasn’t supported when clearly it is.  I would reboot my phone and it would start working again.  Same thing with Spotify, so maybe it has something to do with just music apps, I don’t know.  I will also say that as an Android user, it is pretty easy to become spoiled with the various ways that Google is integrated with the phone, including their voice search.  The voice recognition with the ZeroTouch just isn’t as robust or easy to use as Google’s.

In my daily use of the ZeroTouch for over a month, it has been my experience that my battery performance suffered greatly when I started using ZeroTouch.  The Bluetooth inside the ZeroTouch as a low-energy Bluetooth 4.2 radio, and yet it is killing my battery all day.  I found myself having to charge my phone multiple times a day.  When I uninstalled the ZeroTouch to test out my theory, my battery life no longer suffered like it had been.  I have always left my Bluetooth on 24-hrs a day because I use a Bluetooth headset all day, but I saw a noticeable performance hit to the battery after I started using the ZeroTouch.  Maybe because my phone was constantly searching for the ZeroTouch all day, I am not sure.

Probably the main thing that I don’t like about the ZeroTouch has to do with how you activate the voice recognition.  You can’t just speak out loud “Ok Alexa” and then Alexa responds.  You have to wake the app first by waving/holding your hand in front of the proximity sensor in the upper left corner of the screen.  Nothing happens until you do that.  Then the app prompts you and you tell it what to do.  The waving my hand in front of the screen is a little awkward when you are driving, but that isn’t really why I dislike it.  The reason is that for Android users we spend a great deal of time swiping down from the top of the screen to pull down the window shade to interact with notifications.  When you use your right hand to do that while driving, you invariably swipe your finger near the proximity sensor, activating the ZeroTouch app.  I have lost track, literally, of the number of times that I have had to say “cancel” to the ZeroTouch voice prompt because I didn’t mean to activate it.  It is driving me bananas.  And before you comment, yes, I have tried to train myself to not do that.  Trust me, I’ve tried.

The bottom line

I love the low profile and ease of use of the ZeroTouch.  The app is easy to use and has many features.  I also love the Amazon Alexa integration.  That’s where the strength of this product really shines.  Folks who are already Amazon Alexa converts will get some immediate benefit from this car mount even though it is $60, which is expensive for a car mount.

But for those of us who haven’t gone all-in with Amazon Alexa, I don’t think there is enough here to compel you to need the expensive ZeroTouch.  The voice control, while you are driving, is robust, and for some folks that may be enough to justify the cost and the learning curve.  But for me, the battery performance hit and the false-positives I get every time I try to use the pull-down notification tray will probably cause me to go back to my Kenu Airframe.  If/when I get my Amazon Alexa device at home, and I start automating my home, I could see myself changing my mind.  Amazon Alexa is pretty awesome.

Source: The sample for this review was provided by Logitech. Please visit their site for more info and Amazon to order.


Product Information

Price: $59.99
Manufacturer: Logitech
Retailer: Amazon
Requirements:
  • An Android phone with a cellphone data plan, and Bluetooth.
Pros:
  • Ease of use/setup
  • Outstanding Amazon Alexa integration
  • Robust hands-free voice integration and features
Cons:
  • Proximity sensor false-positives
  • Expensive
  • Battery performance suffered

Filed in categories: Car Gear, Reviews

Tagged: ,

Logitech ZeroTouch air vent car mount review originally appeared on on April 10, 2017 at 7:23 am.

Note: If you are subscribed to this feed through FeedBurner, please switch to our native feed URL http://the-gadgeteer.com/feed/ in order to ensure continuous delivery.
Valkee HumanCharger light therapy LED headset review

I don’t travel across time zones that often and I don’t have Seasonal Affective Disorder (SAD) issues that some people get during the dreary winter months. But what I do deal with is a slight sleep deficit because I get a little less than 7 hours of sleep on weeknights.  Unfortunately, I can’t do caffeine, so any gadget that might help me feel a little more energetic is something I want to try. The HumanCharger from Valkee claims to help with jetlag, the winter blues and help shift works be more focused and energetic. Let’s see if it works for me.

What is it?

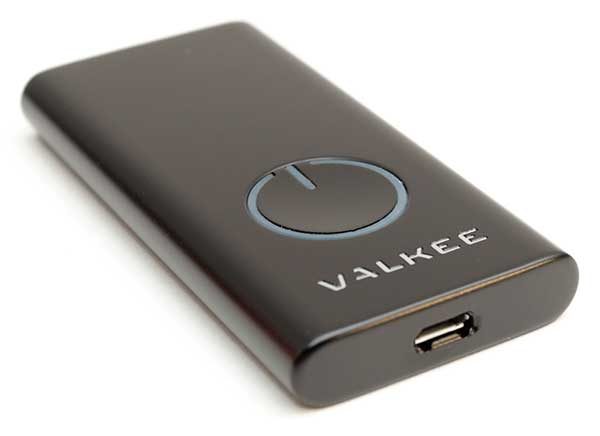
What is the HumanCharger? It’s a small iPod Nano shaped light therapy device with earbuds that pump UV free blue-enriched white light instead of music into your ear canals. Wait, what? You read that correctly, there are little LEDs built into the tips of earbuds that shine light into your ears to increase energy levels, improve mood, increase mental alertness, help with SAD (Seasonal Affective Disorder. AKA the winter blues), reduce the effects of jet lag, and even help with food cravings.

HumanCharger has a unique and patented mechanism of action which stimulates the photosensitive proteins on the surface of the brain using a calibrated white light that passes through the ear canals. When these photosensitive areas of the brain are activated by HumanCharger, chemical compounds (Serotonin, Dopamine, and Noradrenaline) are released. The outcome: boosted energy levels, uplifted mood, and enhanced performance.

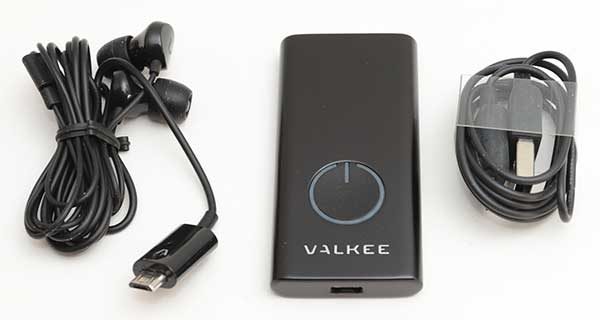
What’s in the box?

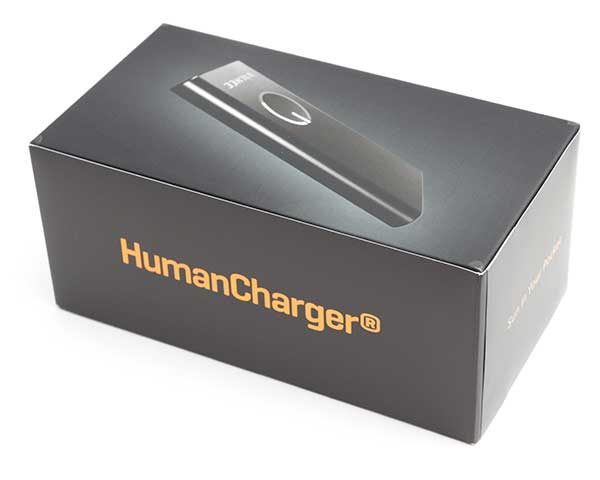
The HumanCharger main unit
LEDset Earplugs
Multiple ear tips in various sizes
micro USB charging cable
Quick start guide

Design and features

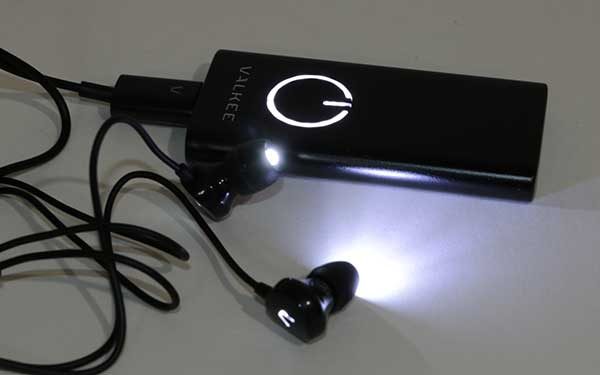
As mentioned above, the main unit reminds me of an old school MP3 player. But the HumanCharger does NOT play music. It has a micro USB connection on the end and a power button with a LED status ring around the button. That’s it, there are no other buttons, dials, switches, or ports.

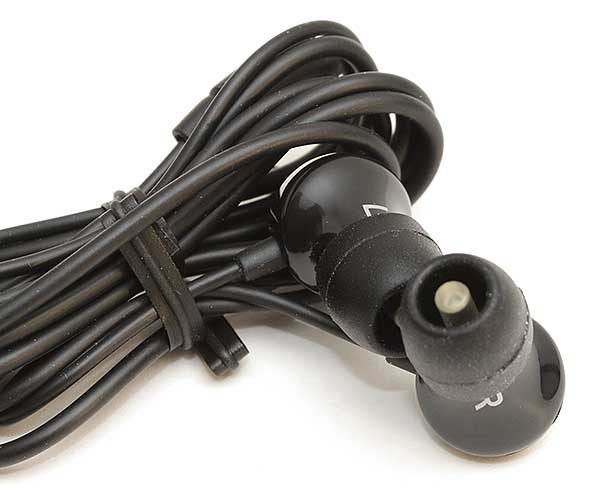
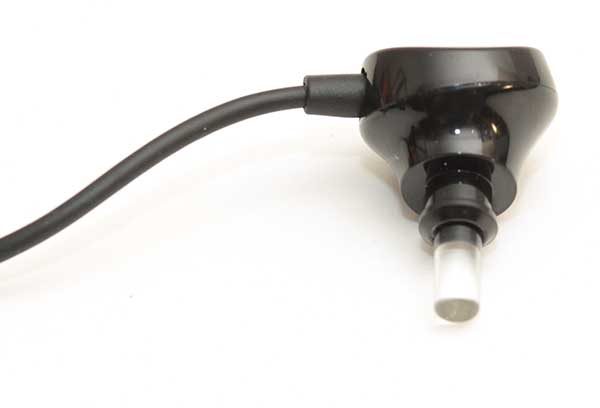
The LEDset that come with the device look like a standard set of earbuds until you look at the ear tips where you’ll find a LED.

You can get a better look by removing the ear tip.

Let’s get lit up!

Before you use the HumanCharger for the first time, you have to charge the main unit by using the micro USB cable that was included in the package. A fully charged main unit will provide up to 10 light therapy sessions before needing to be recharged.

With the LEDset plugged into the micro USB connector on the main unit, all that’s left to do is to insert them in your ears and press the power button on the unit. The LEDs will turn on and remain on for 12 minutes, which is the length of the light therapy session. The LED around the power button fills in as the 12 minutes countdown.

I used the HumanCharger light therapy device each morning at about the same time each day for a full week. Although the LEDset earplugs are not the most comfortable earbuds I’ve ever worn, they stayed in my ears long enough to complete the short 12-minute sessions.

But does it actually work?

After using the device for 7 days, I can’t say that I noticed any extra energy, focus or fewer cravings for sweets. I’m actually eating some Thin Mint Girl Scout cookies while I’m typing this 🙂

The only small thing I noticed was that on 2 of the 7 days that I used the device, I was able to convince myself to get out of bed within 10 minutes of my alarm going off instead of my usual 3 snooze bar presses and 20 minutes. I’m not going to say that this device was responsibile for giving me 20 minutes of extra time on 2 days out of 7, but I won’t say that it didn’t either.

Final thoughts

I know that light therapy isn’t a scam because I’ve seen and read about larger therapy devices for years. Having a pocket-sized light therapy device is a great alternative to the devices that have to sit on a table.

I’m on the fence about the HumanCharger device because it didn’t’ seem to help me in a very noticeable way. That said, there are quite a few people who have left positive reviews on Amazon who really like this device.  If you’ve benefited from larger light therapy devices in the past, chances are that you’ll benefit from this one too.

Source: The sample for this review was provided by Valkee. Please visit their site for more info. You can order through the HumanCharger site and Amazon.


Product Information

Price: $219.00 MSRP
Manufacturer: Valkee
Retailer: Amazon
Pros:
  • Easy to use
  • 12 minute session
Cons:
  • Earbuds fall out of my ears regardless of earbud tip used
  • Not sure it's really helpful

Filed in categories: Health, Fitness, Sports, Reviews

Tagged:

Valkee HumanCharger light therapy LED headset review originally appeared on on April 8, 2017 at 9:58 am.

Note: If you are subscribed to this feed through FeedBurner, please switch to our native feed URL http://the-gadgeteer.com/feed/ in order to ensure continuous delivery.
KDC Laser Beam Pro C200 projector review

Introduced at the 2017 Consumer Electronic Show in Las Vegas, Korean company Cremotech’s flagship Pico projector, the Laser Beam Pro C200 earned an Honoree Innovation Award. The C200 touts 780P resolution, a quad-core Android-based operating system, Bluetooth, and WiFi. I purchased one of these units as a portable alternative to my bulkier projector.

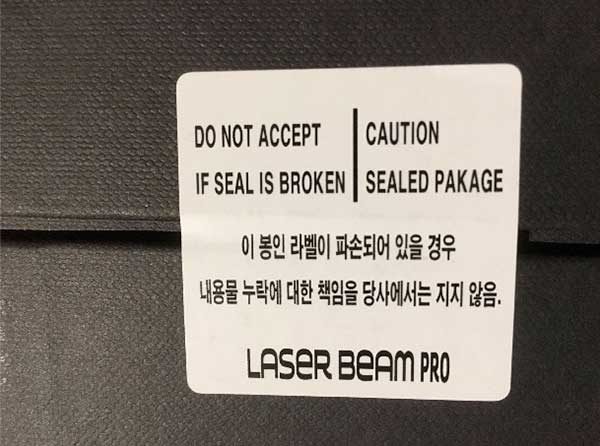
The C200 arrived in a 7”x 4” x 3.25” box akin to Apple’s iPhone – sturdy, with the lower portion fitting snugly into the upper portion. Breaking the two safety seals reveals the C200 projector suspended and protected by a plastic tray. Below, the trays are the user manual and power supply.

C200 LaserbeamPro “safety seal”

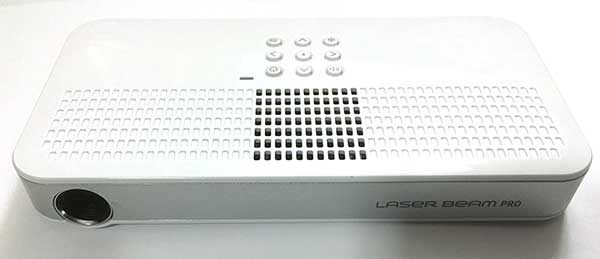
The projector measures approximately 6” x 3-1/8” x 3/4” and feels sturdy. To protect the finish, the upper surface is coated with that clingy plastic wrap stuff that’s fun to peel off. How I love that Velcro-like peeling sound and the smell of new plastic. It’s just like Christmas!

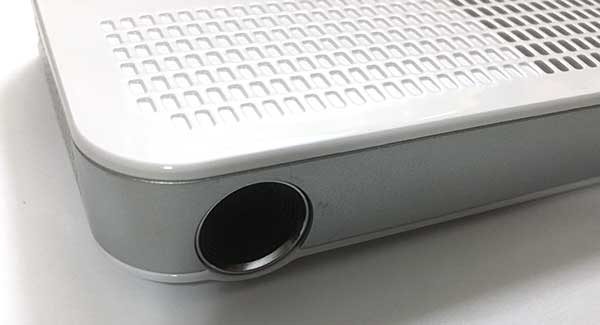
C200 Laserbeam Pro projector – The business end

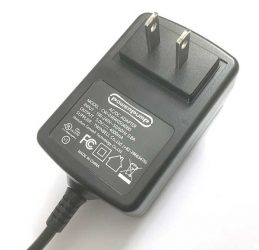
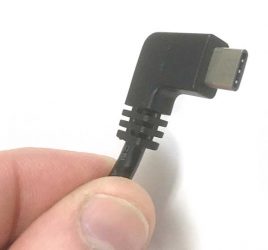
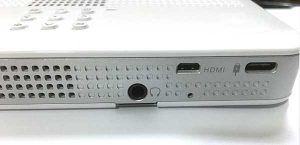
Admittedly, I was a little disappointed that the power supply plug is USB C. I had hopes of using a standard wall-wart micro USB power block, but I can see why this isn’t going to happen. The power supply is rated at a whopping 4000mAh – a full 4 amps. Clearly, this little beastie needs more power than a typical mobile phone power supply can muster.


Beefy 4000mAh power supply and USB Type C power connector

Charging the projector took about three hours, indicated when the power LED changes from red to green. While waiting, I took the opportunity to read the user guide. It’s a tiny 3” X 3” manual and contains VERY basic instructions, warranty information, and specifications. For most, it won’t be needed.

The Android OS takes about 30 seconds to boot and begins at the mode selection screen. I was rather surprised that a software update was ready as soon as I powered up the projector. I elected to update which took about 30 minutes.

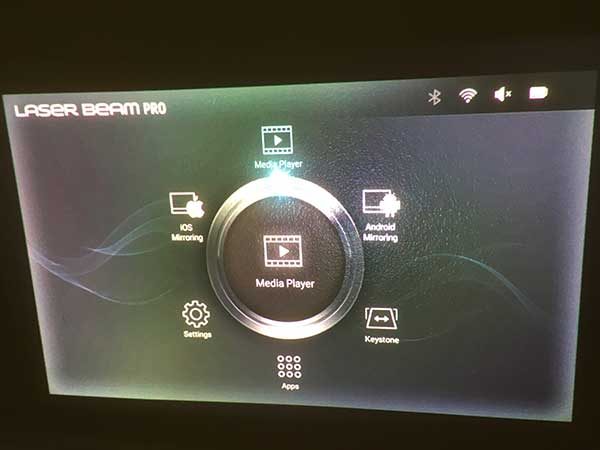
C200 Android skin user interface

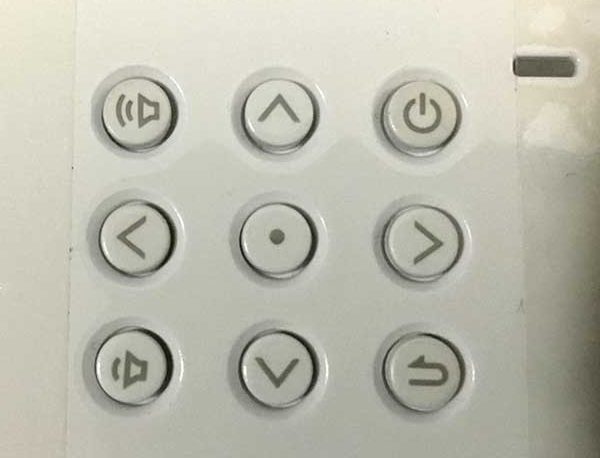
The user interface is simple consisting of nine buttons on the top of the projector, comprised of four cursors, two volume, one “back,” one “enter,” and one for power. Tactile feedback is good with a satisfying click sensation. After booting, the operator is presented with selections for playing onboard (Micro SD) media, Applications including Netflix, Settings, Android Miracast and iOS Airplay. I tried AirPlay first and found the connection agile, with little lag. However, when attempting to Airplay streaming media from the web, the C200 display would go blank. While trying to get this to work, on several occasions, the projector spontaneously rebooted. Not an encouraging start. Moving on to play videos already stored on my iPhone 6S was seamless and smooth. Now that’s a little better.

Nine button controls on the top of the projector below the cooling fan. The rectangle adjacent to the power button is the power indicator, red for charging, green for fully charged.

Several movies were loaded to an SD card which was inserted into the player. Interestingly, the projector doesn’t seem to like having the card inserted with power applied as it responded with another spontaneous reboot. Restarting, the C200 was able to read the SD card and located the files I intentionally placed in a sub-folder called “movies,” albeit a little slowly, taking about 40 seconds to populate. Interestingly, the files were populated in the order they had been copied to the SD card. I would have preferred for them to be alphabetized.


I tried several different video files of different formats which played without difficulty. The 200-lumen image is surprisingly bright for a pico projector, but in no way could compete with a full-sized 1000+ projector. Contrast is…. Well, okay. The image is watchable, with a kind of sparkly hue, due to the laser light source. It’s been stated that the human eye perceives reflected laser light as brighter than competing illumination sources. I can’t verify this, but I can say the image is the brightest I’ve observed in any comparable pico projector.

Thumbs up for a crisp, clear, bright image (approximately 40 inches diagonal)

Unlike DLP projectors which contain a system of tiny mirrors for each pixel, this unit “draws” each line of video similar to CRT tubes of years gone by. The 780P image is clear and colors are brilliant and appealing. I found the color to be somewhat warm, I would estimate 5000K, but I have no mechanism for formal testing. I tend to favor a cooler color temperature but wasn’t put-off with out-of-the-box tint. I’m sure I’ll be tweaking the settings as time goes by and I get to know this projector more.

The C200 is equipped with a cooling fan which is not oppressively loud but is noticeable particularly in close quarters. The housing adjacent to the lens became warm, but never uncomfortably so.

I found the audio output somewhat shrill, but I didn’t expect much from such a small speaker. It’s certainly adequate for small-group presentations, but I don’t think a home theater user would appreciate the lack of fidelity. To complement the audio, I coupled the projector to a Bluetooth sound bar. The connection was easy to access through the “setting” menu, found the sound bar and paired without difficulty. I could see no discernable audio lag and was pleased with the performance.

Moving on to the built-in apps, I started Netflix and logged into my account which was cumbersome. Using only the cursor keys and the on-screen keyboard was tedious but can be done. To expedite the process, I plugged in a Logitech USB wireless mouse which worked instantly. Netflix loaded with a comparable delay from other streaming devices such as Roku 2, Stick or smart TV.

I used the projector to play the first half of a movie for a small group. Image size was approximately 120 inches. The image at that size is not extraordinarily bright but is quite watchable. Images of 40-60” are much brighter with pleasingly vivid colors. Despite being “focus free,” images under about 20 inches appeared muddy. The optimal distance was about 60 inches, not bad for a projector that fits in your pocket. After about 1 hour with no issues, the image turned off and the Bluetooth speaker disconnected. Initially, thinking that I had reached the end of the battery life, the projector did another spontaneous reboot. Interesting.

Day two opened with yet another software update. I hoped it would eliminate the spontaneous restarts and Airplay issues, but I found no improvement with AirPlay streaming web browser content. Loading and playing a different movie from SD yielded the same result. This prompted me to contact KDC USA, the manufacturer’s representatives in The United States. They were quick to respond shipped a replacement unit. Shipping of the defective unit back to KDC was at my cost.

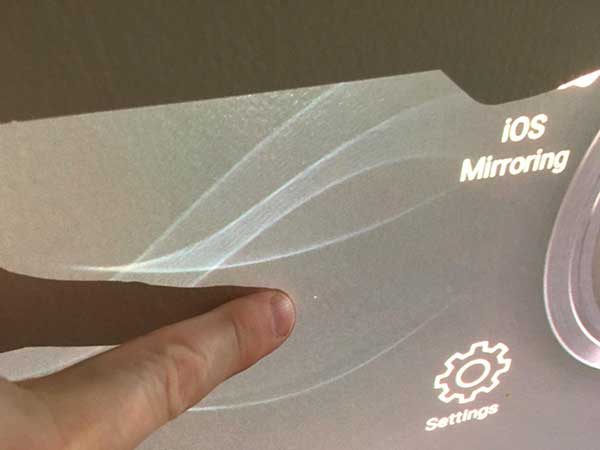
The replacement unit arrived a few days later and this eliminated the reboot and AirPlay issues. I watched several hours of Netflix both using the built-in app and AirPlay with excellent results. However, I noticed a pesky “spot” on the screen reminiscent of a bad pixel or DLP element which I found to be very surprising since this projector has been touted as being 100% laser so missing “pixels” should never be an issue. Another RMA was processed back to KDC and a second unit was sent. I suspect most people would find this to be insignificant, but having a background in digital imaging, I found it distracting, particularly for a nearly five-hundred dollar projector straight out of the box. In the spirit of fair play, if this projector was going to be used for largely static presentations (spreadsheets and the like), I doubt it would be noticed.

What looks like a defective pixel, but can’t be – this is a laser…

The second replacement unit arrived and, to my surprise, this unit also had what appeared to be a defective “pixel.” Since this projector does not use DLPs mirrors, LED or LCD technology, it does not have “pixels,” so the presence of these screen anomalies is a bit enigmatic. Emails to KDC prompted a polite and pleasant call from KDC’s Service Department and I was told these projectors are quality inspected in Korea and again when arriving in The USA, but such a minor anomaly might be missed. I was politely told that this issue would be brought to
KDC’s engineering team in Korea for investigation.

In the month I’ve owned the C200, I’ve had issue after issue, but KDC’s service department continues to be responsive, offering another replacement or refund. I’m hoping the current issues can be resolved.

Conclusion: The output from KDC’s C200 Laser Beam Pro projector is crisp, bright and vibrant and a good choice for anyone looking for a pocketable projector with good resolution. While in its infancy, laser projection is clearly viable and I look forward to KDC’s future offerings.

Source: The sample for this review was purchased with my own funds. Please visit KDC for more info and Amazon to order.


Product Information

Price: $485.00
Manufacturer: KDC
Retailer: Amazon
Pros:
  • Intuitive user interface
  • 720P resolution
  • Bright, even in situations with some ambient light
  • Focus-free projection
  • Vibrant color
  • Good battery Life
  • Excellent connectivity choices
Cons:
  • Expensive
  • Feeble speaker output
  • Manufacturer quality control issues

Filed in categories: Audio, Video, TV, Reviews

Tagged:

KDC Laser Beam Pro C200 projector review originally appeared on on April 6, 2017 at 7:00 am.

Note: If you are subscribed to this feed through FeedBurner, please switch to our native feed URL http://the-gadgeteer.com/feed/ in order to ensure continuous delivery.
Fellowes Powershred 12Cs Cross-Cut Shredder review

Spring is here! The flowers are budding and the birds are singing. Unfortunately its also tax season, and time to clean out that mountain of forms, papers and receipts you have been hoarding all winter long! We like to have a paper shredder here in the House of Bob, but our last shredder met a horrible end due to overexertion. Fortunately, Fellowes was kind enough to send me their Powershred 12Cs Cross-Cut Shredder to evaluate as part of the annual office Spring cleanup. How does it handle the job? Let’s shred! 

First Impressions

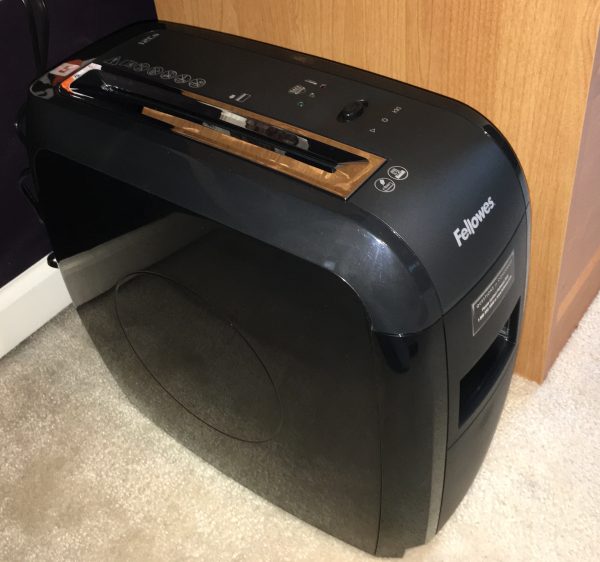
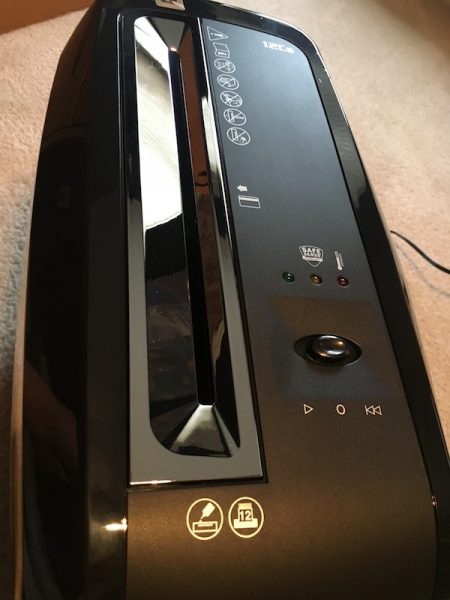
The Powershred 12Cs Cross-Cut Shredder is a heavy-duty shredder designed for household use. Measuring in at 15″ tall by 9″ wide by 17″ deep and nearly 16 pounds, it’s a small beast. But it’s a nice looking beast! The form factor is streamlined and professional looking. The unit is all black with a combination of shiny and matte surfaces. You’ll want to find a permanent spot in the office for this one, but it will look good occupying that floor space or nested under a table or desk.

Construction is solid. It’s a heavy-duty plastic two-piece assembly, with a massive 4-gallon catch bin that slides out of the front of the unit. The bin also has a small window so you can see when you’re hitting maximum capacity, which is a nice touch. There’s a single beefy control slider on the top of the unit, and the power switch is on the back. The feeder is silver and beveled to guide the materials into the shredder. I’ve killed shredders before that don’t feel like their built to handle the weight of the shredding motor & mechanism; that’s not the case here.

Operation and Use

Preparation for battle is simple. You plug the unit in and turn on the power switch on in the back. The control slide has three positions: center is the off position (when not in use), left is the on position (for munching), and right is a reverse mode (for “I shouldn’t have tried to fit that in there…”). There are three LED lights above the slider to indicate operation (green), overheating (red), and activation of the SafeSense safety feature (yellow). The shredder is motion activated, and starts grinding when it senses that material has been inserted in the feeder.

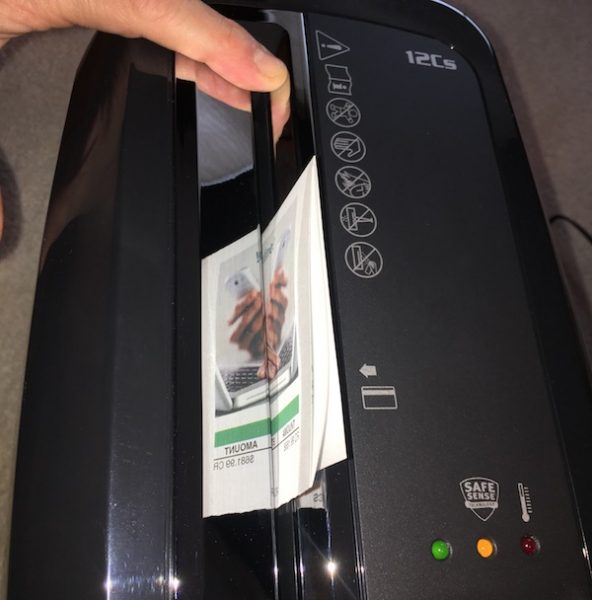
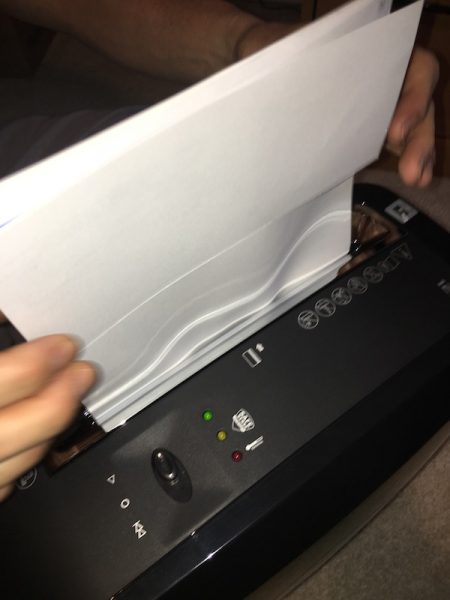
As far as shredding goes, the feeder can take a stack of up to 12 sheets at a time as well as paper clips, staples, plastic credit cards, and the assorted extras you might find in junk mail. All material is shredded into 5/32″ by 2″ cross-cut particles. The shredder can run continuously for about 5 minutes before overheating, at which point it requires 15-20 minutes to cool down before continuing. 

Another feature is what Fellowes calls its SafeSense technology. It’s activated by your hand or finger touching the feeder, at which point the shredder stops running. It’s a nice safety feature, especially if you forget that you have left the shredder in the on position.
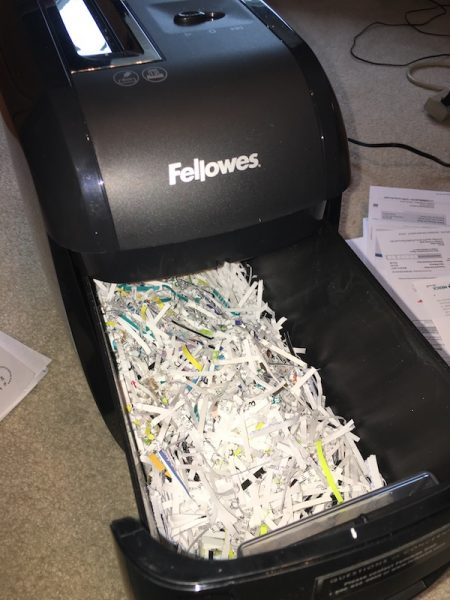
The Test Case(s) 

Enough with the specifications; it’s time to see if the Powershred lives up to its name. Here in Bob’s house, we keep the paperwork flotsam and jetsam in a box (or two) in the closet until Spring cleaning time arrives. You’re looking at 25 pounds of receipts, papers, junk mail and assorted plastic credit cards that have been waiting for this moment to meet their shredding demise.

Let the Destruction Commence!

As we worked our way through the collection, I found that thePowershred 12Cs Cross-Cut Shredder did an excellent job with most tasks. Papers (alone or in stacks) flew through the beastie as it chuckled and begged for a real challenge. I had a stack of expired credit cards and used gift cards that it chewed up with equal zeal. Staples and paper clips didn’t even phase it. The feeder is 9 inches long, but even when I fed 8-1/2 by 11 sheets in lengthwise, the shredder sucked it all in.

Junk mail, however, did pose some challenges. You know those thicker mailings you get with brochures or little sticker books in the package? I’m happy to report that, while operation slowed a bit with these heftier feedings, the shredder chugged through them without too much trouble. There was one extra-thick mailer, however, that did slow it to a stop. We had to use the reverse switch a couple of times to back the envelope out and refeed it to chew it through. It got there eventually, but I admit that I was pushing the max capacity of the device. You’d probably want to break down bigger items like this (or old checkbooks, for example) to make sure they go through.

The SafeSense technology works well. If you even brush it with your finger anywhere on the metal feeder, the unit will stop and alert you that the safety feature has been triggered. I tested this a couple of different ways, and it works consistently once contact is made.

The collection bin does a nice job of trapping all the shredded bits, including paper dust. I did notice that it was easy to overload the bin unless you are paying attention to the window, however. Sliding the bin out is easy, and it locks firmly in place when you put it back in.

As far as negatives go: removal of the bin can get messy if you overload it before removal. There are also stray shredded bits that get knocked loose from the shredding mechanism when you remove the bin that requires cleanup. This unit is a lot cleaner than others I have owned. The good news is that the bin area is spacious and clear of obstructions, so it’s easy to run a vacuum nozzle through occasionally for quick cleanup. It should also be noted that the bin is flush with the bottom of the unit. I had it set up on a carpet, so the bin would catch occasionally when sliding it out. I believe that this would work better on a smooth surface, but I consider this a minor issue in practice.

In our test of the Spring cleanout boxes, we found that the 5 minute continuous run time is pretty accurate before it overheats, and we were able to go farther with brief breaks. We ran it as fast and far as it would go, and it took about 90 minutes total to get through the 25 pounds of test material. For an occasional-use home shredder, I think this a pretty good expectation for that amount of material all at once. If I were keeping up on my regular cleanup, I would expect that I would not see it overheat very often.

Conclusions and Pricing

Not everyone needs (or wants) a home shredder. We like to have one handy because we seem to collect a lot of printed material with personal information on it. If you decide you need one for your house, it should really do three things well:

  • Shred your papers, documents, and cards into consistently small and unrecognizable bits;
  • Minimize the mess from paper dust and flying particles in regular use; and
  • Show enough durability that you don’t need to buy a new one every couple of years.

Retailing at about $125, the Fellowes Powershred 12Cs Cross-Cut Shredder meets all of these requirements and meets them well. It performs better than the cheaper models I have killed over the years, and it looks nice in the office. I’d recommend it as a solution if you are looking for a new paper shredder in your home office. 

Source: The sample for this review was provided by Fellowes, and is available at Amazon and other retailers. For more info visit their site.


Product Information

Price: $125.00
Manufacturer: Fellowes
Retailer: Amazon
Pros:
  • Handles up to 12 sheets of paper, paper clips, plastic cards, and staples easily.
  • Sleek profile for the office (despite the size and weight).
  • Large collection bin for easy cleanup.
Cons:
  • Bin can get stuck on thicker carpeted floors.

Filed in categories: Home and Kitchen, Reviews

Tagged: ,

Fellowes Powershred 12Cs Cross-Cut Shredder review originally appeared on on April 5, 2017 at 7:11 am.

Note: If you are subscribed to this feed through FeedBurner, please switch to our native feed URL http://the-gadgeteer.com/feed/ in order to ensure continuous delivery.