Rock Jaw Resonate hybrid earphones review

The Resonate earphones are the third pair I’ve reviewed from the UK based Rock Jaw audio company. For the last few years, Rock Jaw has made quite good, yet inexpensive earphones almost anyone can afford. The Genus and Clarito earphones have veered towards a warmer, more forgiving sound anyone but extreme bass heads could really like. Since Rock Jaw hasn’t yet released what could be termed a bass head earphone, you might think that their newest model would be geared for that market, but you would be wrong—completely wrong.

I can’t think of Rock Jaw without thinking of another Brit earphones maker—RHA. The reason is that both make very affordable and well-made earphones. Lately, however, RHA has begun to move up the price and quality ladder into a less affordable, but much better sounding area with their T10 and T20 models. These dual coil speaker earphones are about as good as it gets but you pay a price for that luxury. Now Rock Jaw seems to be following suit with their take on a dual-speaker hybrid earphone, the Resonate.

The Resonate hybrid earphone is not as expensive as RHA’s T-Series, but Rock Jaw has managed to make a genuine hybrid earphone selling for less than many available today. And that ain’t no small thing.

First, let me explain what a hybrid earphone is. Most earphones fall into two camps: dynamic drivers or armature. Dynamic earphones look like tiny versions of regular cone speakers that you might have in your living room. Dynamic speaker sound quality can range anywhere from okay to quite nice. They are known to generally have more bass, resulting in a warmer sound. They are also (but not always) cheaper to produce.

Armature earphones get their tech from the hearing aid market. Armature speakers use magnetic vibrations to produce sound (this is very simplified) and are quite small taking up much less room inside an earphone. They are also (again, usually) more expensive to produce. Armatures are usually more accurate sounding than dynamic speakers. However, the downside of armatures is the perception of less bass.

A hybrid is—you guessed it—a combination of a dynamic speaker paired with an armature speaker. The goal is to reap the benefits of both technologies and their sound qualities. The reality is that this approach issometimese more successful on paper than in the real world. Rock Jaw’s Resonate earphone is a fairly successful hybrid design. However, those who like their sound with a bit more bass heavy will be disappointed—but that would be their loss.

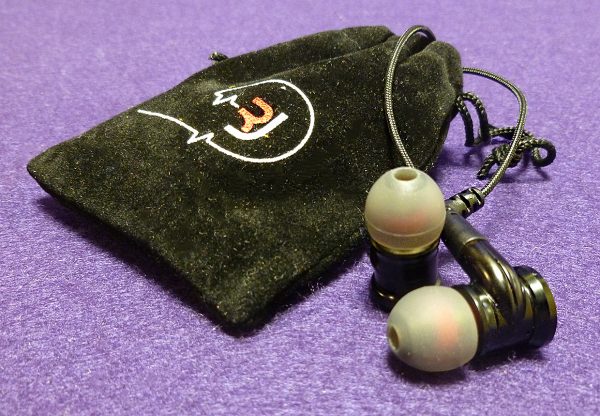
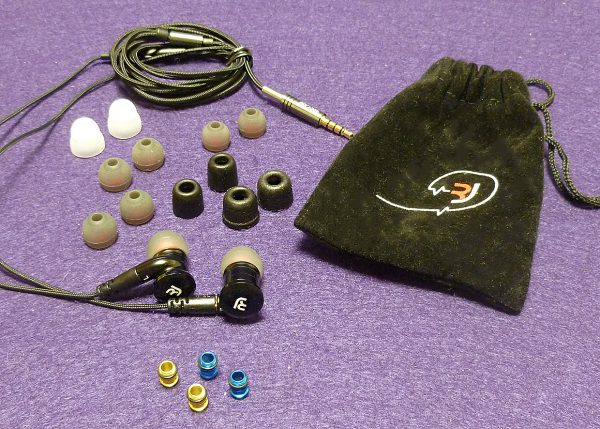
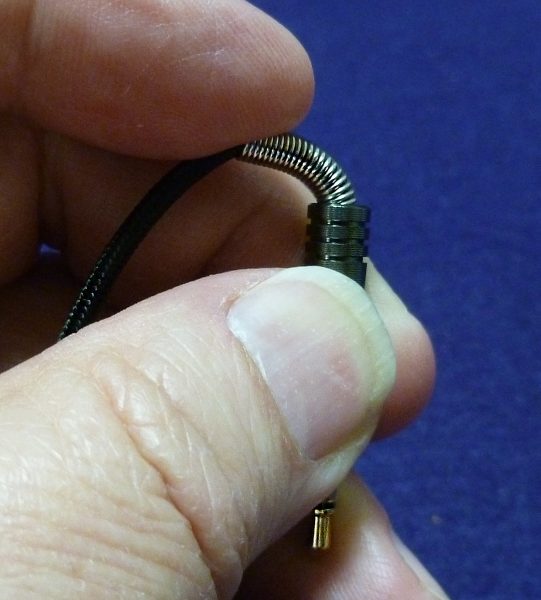
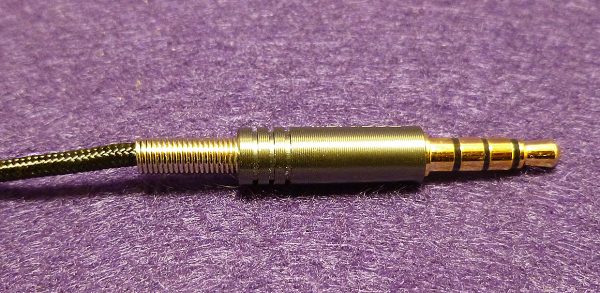
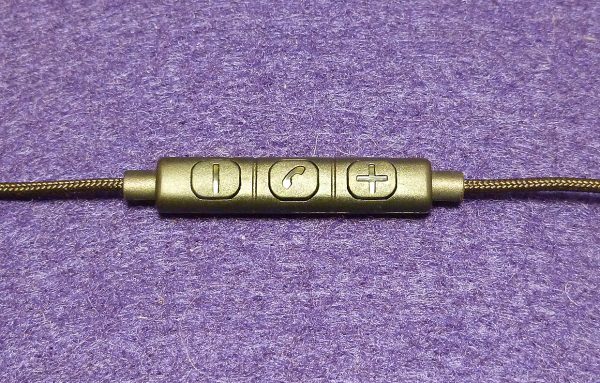
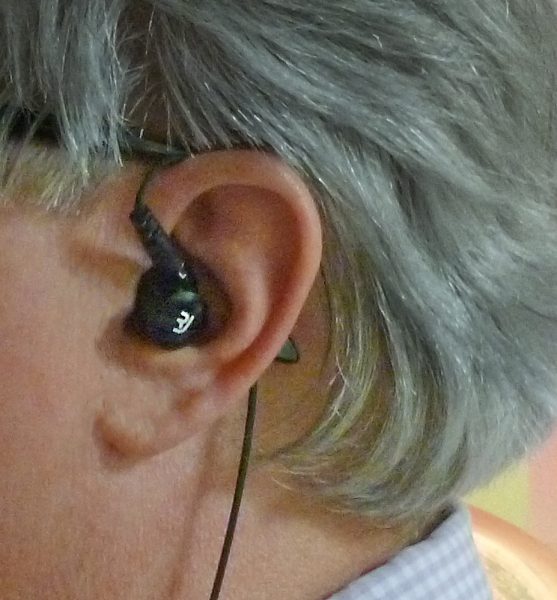
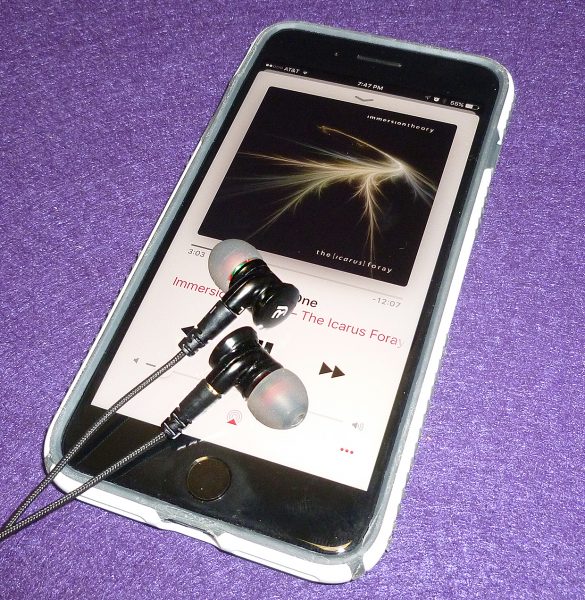
The Resonate’s shell is all aluminum, which gives the earphone a solid and well-made feel, as well as being light in weight. At the mini plug end, there’s a tension coil that wraps around the cable, giving it an added layer f protection from bending during use. Too few earphones come with this valuable feature. There are seven pairs of tips including flanged and foam for more secure fits. The largest round tips  fit my ears the best, but it’s not perfect. I have weird ears, I guess. The earphones are designed to be worn over and behind the ear. I prefer this method mainly because it prevents microphonics—that rustling or thumping sound when earphones cables rub on clothing or bump on something. There are people who do not like cables behind the ear, so the Resonate can also be worn cable down. I like this choice.

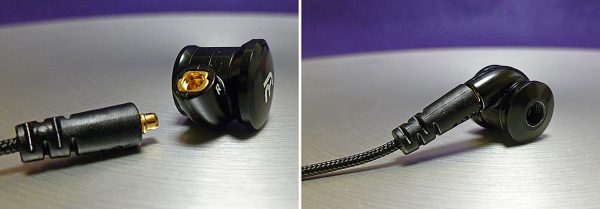
The Resonate earphones are not just a hybrid design, they also have a couple of other tricks. First is a removable cable. Rock Jaw has used a standard micro-miniature coaxial connector (MMCX) which means if something happens to one of the cables, replacements will be easier to get. Smart move. These cables just snap into place and snap apart quite securely. The cables are cloth covered, but tangle easily. It can be frustrating untangling them, but the cables don’t develop bending memory, so that’s a plus.

Secondly, Rock jaw has incorporated their filter system into the Resonate earphones. Filters are no longer unique—many other companies offer them. Filters allow the listener to customize the earphone to have more treble (Emotion—blue filter) which adds detail to music, more bass (Energy—green) for a more rounded, friendly sound and neutral (Fusion—gold) which allows the music to be heard as the artist intended. You might think that everyone would want to hear an album as the artist intended, but no, most people prefer bass above all else. FYI, Rock Jaw also make filters for their Genus earphones, but the color scheme for the Genus does not match the color scheme of the Resonate earphones. This mismatched coloring scheme is as weird as the non-descriptive names they gave the filters.

The Resonate’s three filters work as advertised, but the differences between them is subtle at best. The Genus earphone filter’s differences are greater. This is not surprising, because Rock Jaw’s Resonate earphone is designed for a more sophisticated, audiophile crowd on a budget and audiophiles can supposedly detect audio subtleties—or so they say. My preferred filter surprised me. I usually go for a more balanced, un-colored sound which should be the Fusion (gold) filter. But I much prefer the Energy (green) or bass filter. It’s probably because of the filter’s differences being so subtle, the green filter had just the right amount of bass for my tastes. Again, bass heads will be disappointed, mainly because each filter seems to have an emphasis on treble. It’s not harsh, but it’s most definitely there.

Who won’t be disappointed are people who prefer accuracy over artificial or colored audio. The added bass of the green filter is perfect for higher resolutions recordings and more modern rock, giving it just the kick it needs. I have some hi-res AC/DC recordings with plenty of detail that holds up in the mix. What doesn’t fare so well is classic rock. Classic rock is usually weaker on bass than modern rock so you want that added “oomph”. Sadly, the Resonate earphones fall short here. It’s as if the armatures are given more emphasis than the dynamic speakers.

And there’s the rub. If you have an aversion to treble and like you music to be a kick in the gut, look elsewhere. However, if you prefer accuracy above all else, don’t assume that the Rock Jaw Resonate will disappoint because of their low price. You might get the sound signature you prefer and manage to save a bit in the process.

Source: The sample for this review was provided by Rock Jaw. The Resonate sells for $155.73 US. Please visit www.rockjawaudio.com for more info.


Product Information

Price: $155.73 US
Manufacturer: Rock Jaw Audio
Pros:
  • Accurate sound
  • Affordable (for hybrid earphones)
  • Comfortable
  • Stress relief on mini plug
Cons:
  • Not for bass heads
  • Filter names and colors are confusing

Filed in categories: Audio, Video, TV, Reviews

Tagged:

Rock Jaw Resonate hybrid earphones review originally appeared on on April 15, 2017 at 8:38 am.

Note: If you are subscribed to this feed through FeedBurner, please switch to our native feed URL http://the-gadgeteer.com/feed/ in order to ensure continuous delivery.

Alxum 10-Port USB Smart Charging Station & Organizer review

I really love products that help me to organize my house and thus when the Gadgeteer was offered the Alxum 10-Port USB Smart Charging Station & Organizer, I jumped at the chance to review it. I have a side table in the living room that has been functioning as my kids’ gadget depository (four iPad Mini’s, two phones, and three over-ear headphones) that sorely needed some organization and the gadgets needed charging. The Alxum 10-port charging station worked like a charm.

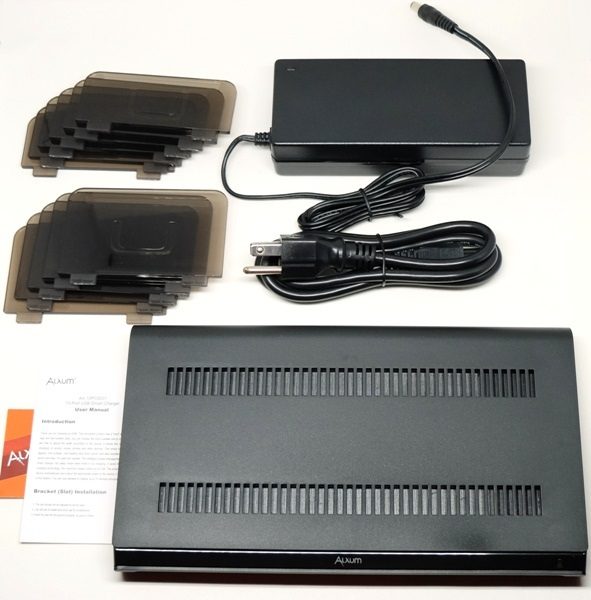
Package Contents

  • Alxum 10-Port USB Smart Charging Station & Organizer (AX-10 PCS031)
  • 5 large brackets
  • 6 small brackets
  • AC adapter and power cord
  • User Manual

Design & Build Quality

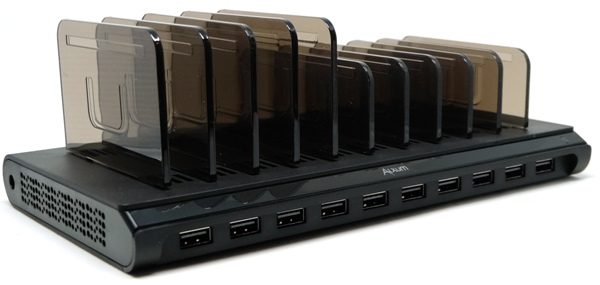
The Alxum 10-port charging station is made of matte black hard plastic and the brackets are made of a hard transparent gray plastic.

There are 10 USB-A ports in this smart charger which will detect your devices automatically and will provide up to 5V/2.4A each based on the demands of your devices (there are no Qualcomm Quick Charge ports). This charger provides a maximum of 108 W of power total and will charge up to eight iPads at their full rate simultaneously (and up to 10 less-demanding devices simultaneously)

The charger is equipped with intelligent power management technology that will place the charger in sleep mode when not charging. It also provides protection against over-voltage, overloading and short circuiting, and over-heating.

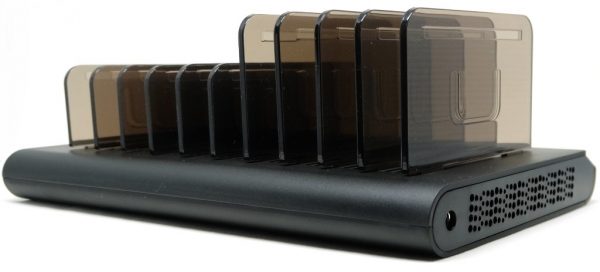
Each bracket has two tabs located along the lower edge that fit perfectly into slots on the top of the charger. The brackets are easily adjustable and at the same time stay in place such that when removing your device from the charger, they don’t come out.

The charger is about 9.375″ L x 5.25″ W x 3.25″ H with the large brackets installed (24 cm L x 13.5 cm W x 8 cm H).

Each side of the charger has vents to disperse heat and one side has a DC port to connect the power cord.

The bottom of the charger also has vents to disperse heat. In addition, it contains six rubber pads to help prevent the charger from moving around on furniture and from scratching the furniture as well.

Use

Here is the current setup of all the gadgets connected to the charger. We have two iPad Mini 4s, two iPad Minis, two Motorola Moto E (2nd gen) phones, and three sets of over-ear headphones – nine devices total. This setup is so much tidier and organized and now all of the devices can be charged at once (I did have to purchase the short 8″ cables separately).

When this iPad Mini 4 was connected to the Alxum 10-port charger via an OEM Apple Lightning cable, it was able to charge at 5.07V/2.02A/10.24W.

You’ll also notice that the charger has a blue LED light that is illuminated when the charger has been plugged in (illuminated LED does not mean that it is charging a device).

This is the same iPad Mini 4 as the previous one, only this time it was connected to the charger using an off brand Lightning cable. As you can see, the tablet was still able to charge at approximately the same high rate (5.07V/2.18A/11.05W) using this cable and charger.

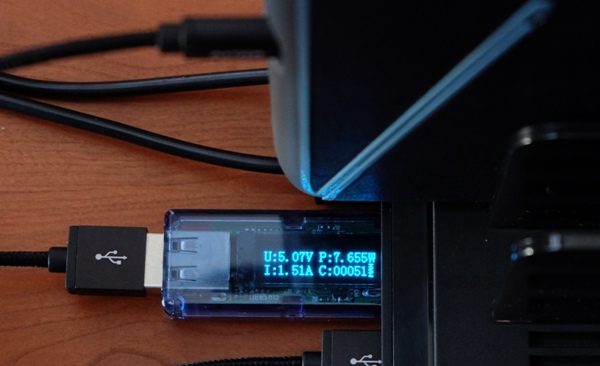
This is another iPad Mini 4 that was connected to the charger. The charger was able to provide 5.07V/1.51A/7.655W. The difference between this iPad Mini 4 and the previous one already mentioned is the fact that this one’s battery started with a higher battery level than the previous one and thus charged at a lower rate than the other. NOTE: the smart charger alters (decreases) the amount of power to devices as the batteries of each approach full charge; this is typical when charging any device using their OEM chargers or smart chargers.

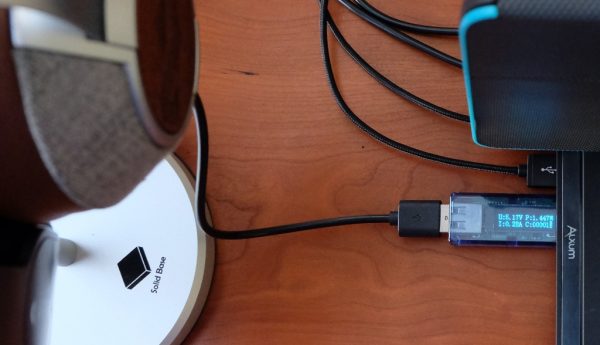
The charger was able to charge our Phiaton BT 460 headphones at 5.18V/0.19A/0.984W…

…and our House of Marley Liberate XLBT Bluetooth headphones at 5.17V/0.28A/1.447W.

When several devices were plugged into the charger and charging at the same time, the charger was still able to provide the maximum power to the device that it needed (above photo: iPad Mini charging at 5.04V/2.28A/11.49W; iPod Touch 6G charging at 5.13V/0.65A/3.334W).

There were a couple of potential drawbacks that we noticed about the Alxum 10-port smart charger. The charger has a large transformer in line with the power cord to convert AC power to DC before being connected to the charger. This may be cumbersome to some people. Also, my kids noticed a faint high-frequency sound being emitted from the charger at various times (not all the time). This appeared to occur when the devices were fully charged but still plugged into the charger. I did not notice the sound because of my high-frequency hearing loss so it must be over 15,500 Hz.

Final Thoughts

The Alxum 10-Port USB Smart Charging Station & Organizer did what I expected it to do. It organized my kids’ nine devices and allowed all of them to charge simultaneously at the rate that each device needed to charge. The power cord does have a transformer that may be considered cumbersome to some people and there is a faint high-frequency sound that the charger emits periodically when devices are fully charged but still plugged into the charger. Overall, we found the 10-port charger to be a wonderfully useful addition to our gadget accessories.

Source: The sample used in this review was provided by Alxum. Unfortunately, I cannot find this product on their webpage and it is no longer available on Amazon. I have contacted Alxum about when it will become available and if I hear back, I will let you know. At this time, the 96 W white version of this 10-port charger is available from Amazon.


Product Information

Price: $64.99
Manufacturer: Alxum
Retailer: Amazon
Pros:
  • Organizes up to 10 devices
  • Charges up to 8 iPads simultaneously (and up to 10 less-demanding devices)
Cons:
  • Emits high-frequency sound when devices are fully charged but still plugged in
  • Has large transformer in line with the power cord

Filed in categories: Cables, Batteries and Chargers, Reviews

Tagged: ,

Alxum 10-Port USB Smart Charging Station & Organizer review originally appeared on on April 14, 2017 at 9:00 am.

Note: If you are subscribed to this feed through FeedBurner, please switch to our native feed URL http://the-gadgeteer.com/feed/ in order to ensure continuous delivery.

North St. Bags Flanders Backpack review

After what seemed like an endless winter, including a late-season snowstorm that dumped a foot and a half of snow, we’re finally starting to see some decent weather. And all that sun and warmth has put one thing on my mind… long hikes on one of the many trails in the area. One of the necessities for a day on the trail is a sturdy, comfortable backpack.

Enter the Flanders backpack. This handmade rucksack from Portland-based North St. Bags is a fitting companion for your both your most rugged hike or a daily work commute.

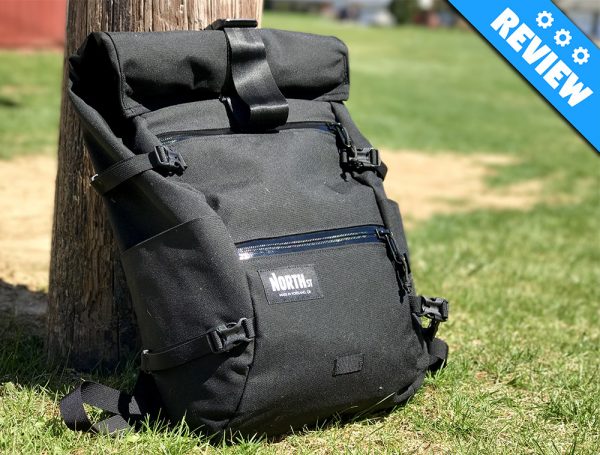
The Flanders backpack is roll-top, weatherproof and ready for action.

The backpack’s construction and quality is top-notch. All of the hardware felt like it could withstand a small explosion. The zippers are easy to open, the buckles snap together easily and stay closed, and the straps stayed in place. And due to the fact that it’s handmade, the shoulder straps and side compression straps are extremely tough. I used to own a Chrome messenger bag and would say that it matches that epic build quality and waterproofing while remaining very much lighter.

You can see the roll-top length from this angle. Closing it is like rolling a large lunch bag.

According to North St.’s website, the Flanders Backpack is made from “1000 denier CORDURA® nylon” with a waterproof liner made from “lightweight and durable VX-21 X-Pac™ sailcloth.” It also features:

  • Handmade, built to last a lifetime
  • Easy access external pockets and internal Velcro rows enable adding or swapping out pockets as needed
  • Bright lining makes finding items fast and easy
  • Side-sleeve for u-lock or bottle
  • Internal laptop sleeve
  • 1000 denier CORDURA® nylon
  • Waterproof X-Pac™ sailcloth liner
  • 2” buckle and strap

This inner X-Pac material is indeed very thin and durable. The tradeoff is that it’s also very noisy. Digging around for something inside the large compartment or the front pockets creates a crisp rustling that wouldn’t matter so much while hiking but might be really loud fetching something from a pocket in the middle of the night.

The chest strap keeps the backpack from moving around too much and further balances the weight distribution.

As far as features go, the Flanders is fairly minimal. There are two zippered front pockets, two side pockets that could easily fit a large water bottle, and an internal laptop sleeve. The main compartment opening is a roll-top and held shut with a large buckle. I noticed that when the buckle is undone, it hangs down over the first zippered pocket and gets in the way, but that’s a minor quibble. One could probably fit a 15″ laptop inside the laptop sleeve.

The large main compartment is cavernous.

The main compartment is quite large and could hold plenty of stuff. There isn’t much division for this area, and even though it’s large, there isn’t a lot of room for maneuverability, so I’d pack the things that you need to access frequently near the top. Four expansion straps along the side of the bag allow it to hold its shape very well no matter how full it is.

All of these features would be useless if the backpack itself was a pain to wear. Fortunately, the Flanders is super comfortable. Thick padding on the shoulder straps coupled with the chest strap allows the bag to hug close to your back and distributes the weight very well across both shoulders. I almost forgot I was wearing it during the review time.

I didn’t get a chance to test the weatherproofing in a downpour, but it did stand up well to some splashes from my water bottle. I imagine it would be just fine sitting on a wet ground or during a steady rain.

There wasn’t a lot I’d change about the Flanders backpack. That crew up on Portland sure knows how to put together a quality product. If you’re looking for a virtually indestructible, medium-sized backpack for hiking, commuting or travel, this bag could be the last one you’ll ever have to buy.

The Flanders Backpack is available now for $199 from North St. Bags.

Source: The sample for this review was provided by North St. Bags. Please visit their site for more information and to order.


Product Information

Price: $199.00
Manufacturer: North St. Bags
Pros:
  • Comfortable padding on shoulder straps
  • Good weight distribution and compression
  • Holds its shape well when full
  • Weatherproof and very durable
Cons:
  • Average number of default dividers/pockets
  • Buckle/strap obscures front pockets when undone
  • Liner material is very noisy

Filed in categories: Bags, Outdoor Gear, Reviews

Tagged:

North St. Bags Flanders Backpack review originally appeared on on April 13, 2017 at 6:48 am.

Note: If you are subscribed to this feed through FeedBurner, please switch to our native feed URL http://the-gadgeteer.com/feed/ in order to ensure continuous delivery.

Netatmo Welcome Indoor Security Camera review

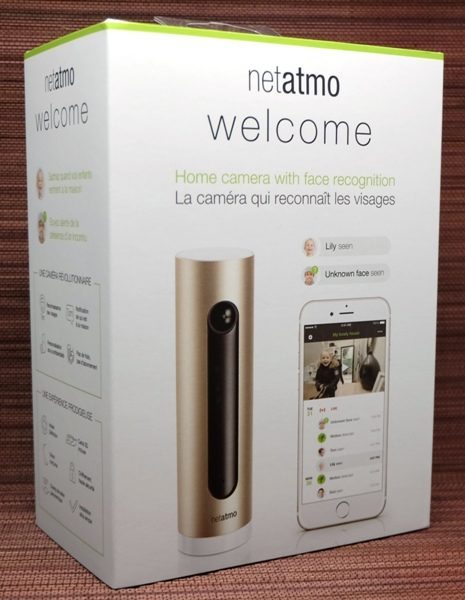
I reviewed the Netatmo Presence Outdoor Security camera a few months ago and really, REALLY enjoy using it because it uses deep learning to tell the differences between people, animals, cars, and other motions thus virtually eliminating unnecessary motion detection alerts. In addition, there are no subscription fees because all the video is stored locally and copied to Dropbox or your personal FTP server (if you set these up). Now I have the opportunity to review the Netatmo Welcome Indoor Security camera which has the ability to tell the difference between individual people with facial recognition. After having used it for a few weeks, I find that I like this camera too. It is able to tell the difference between individuals in our household and will alert you to an unfamiliar face or tell you that motion was detected if it can’t see the face of the individual. Like the Presence, the Welcome camera also records videos locally and will save them in your Dropbox account or personal FTP server thus eliminating subscription fees.
Package Contents

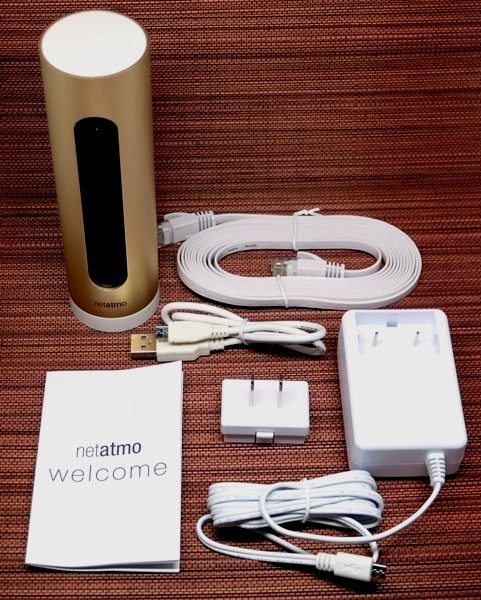
  • Netatmo Welcome Indoor Security camera with 8 GB micro-SD card
  • Ethernet cable
  • Micro-USB cable
  • AC power adapter
  • Welcome guide

Technical Specifications

  • SIZE: 45 x 45 x 155 mm / 1.8 x 1.8 x 6 inches
  • MECHANICS & DESIGN: Single piece durable anodized aluminum shell
  • CAMERA:
    • Video sensor: 4MP
    • Resolution: Up to 1920×1080
    • 130° field of view
  • CONNECTIVITY SPECIFICATIONS:
    • Ethernet RJ-45 port: 10/100 Mbits
    • Wireless: Wi-Fi 802.11 b/g/n (2.4G)
  • DATA STORAGE: MicroSD card up to 32GB (8GB class 10 MicroSD card included)
  • IPHONE AND IPAD COMPATIBILITY: iOS 9 minimum required
  • ANDROID COMPATIBILITY: Android 4.3 minimum required
  • BROWSER SUPPORT: Webapp available for the two latest versions of Chrome, Safari, Firefox, Internet Explorer
  • No subscription fees

Design & Build Quality
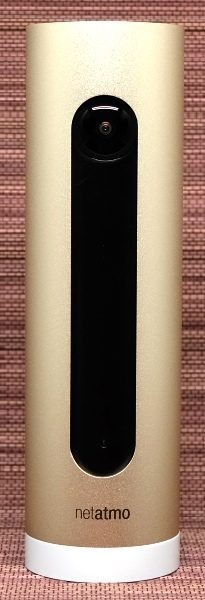


The Netatmo Welcome camera is actually a small camera measuring 6″ tall (15.3 cm) and 1.75″ in diameter (4.5 cm). It is encased in a very nice gold-colored aluminum cylinder housing and the camera, nighttime infrared LED, and motion sensor are contained behind black plastic. The back of the camera contains a micro-SD card slot (the camera comes with an 8 GB card), a micro-USB port, and an Ethernet port.

Setup

When setting up the Welcome camera, I decided to connect it to my network via WiFi rather than Ethernet cable, thus I only needed to plug the camera into an outlet for power. I placed the camera on a table facing the front door.
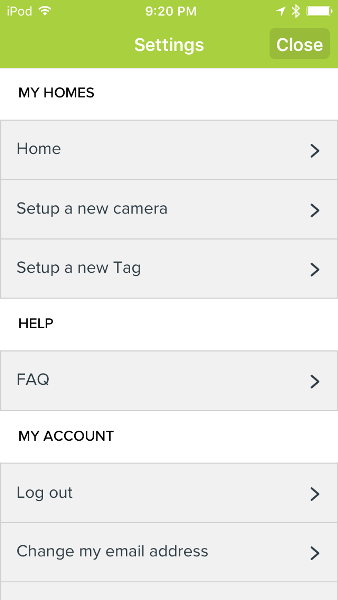
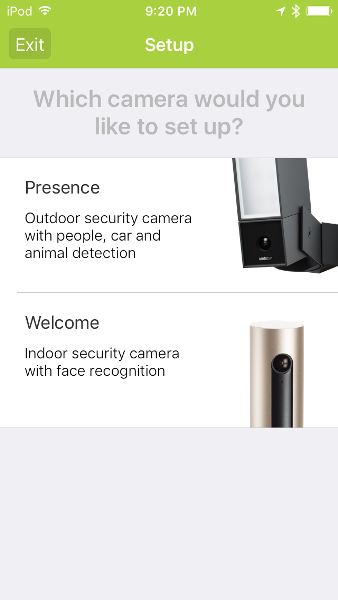

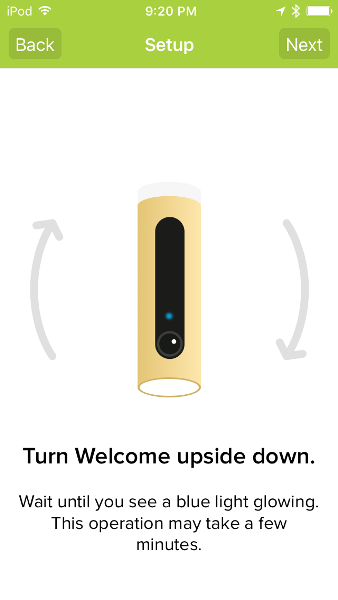
My camera did not come with a user guide, but the Netatmo Security app instructs you how to setup your camera. The above screenshots are taken from my iPod Touch 6G. If you do not have the Security app, you’d have to download it and create an account. Since I already use the app on my iPod and my Nexus 6 phone with the Netatmo Presence Outdoor Security camera, I needed to tap on the Menu icon located in the upper left of the Security app home screen, select “Setup a new camera”, then tap on the image of the Welcome camera in the app settings. I plugged the camera in, then turned it upside down. I needed to keep the camera oriented upside down during the setup process (I made the mistake the first couple of times of not keeping it that way and thus the app had trouble detecting the camera).
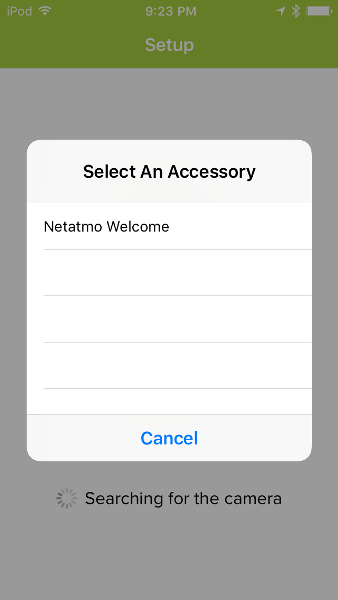
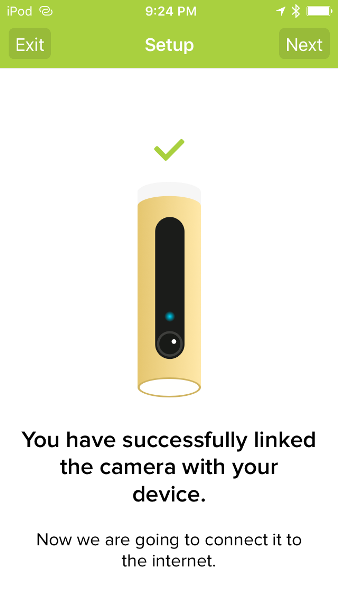
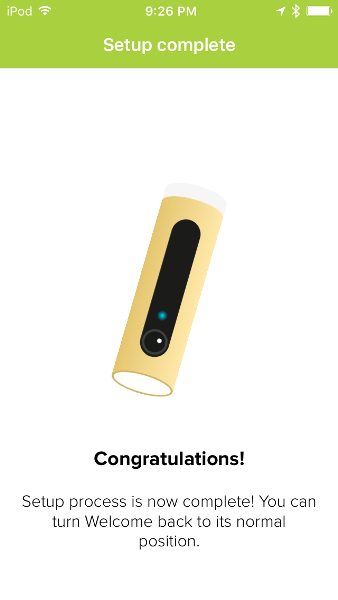
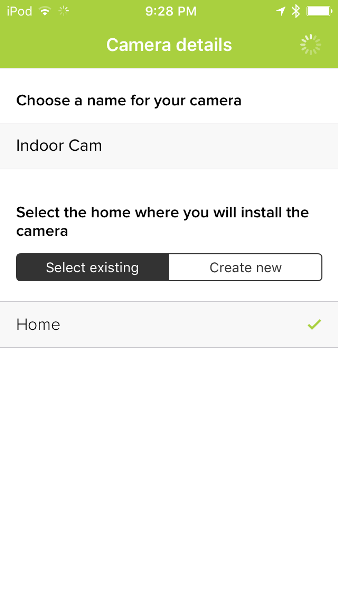
Once the app detected the camera, I selected it from a list (first screenshot) and was then connected. After that, I needed to name the camera (I named my Welcome camera “Indoor Cam” as shown in the last screenshot) and select the geographic location where the camera was installed (e.g. home, vacation home, business, etc.) – in my case, I selected my home (aptly named “Home”) which is the same place my outdoor security camera is installed.

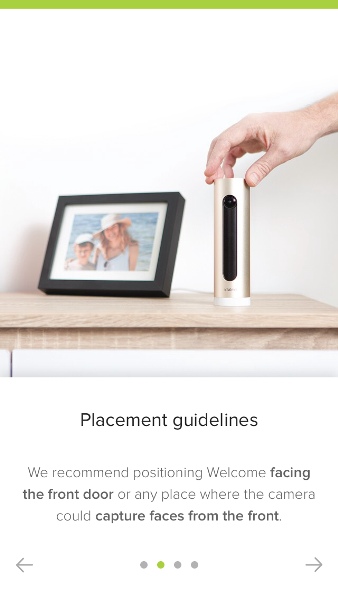
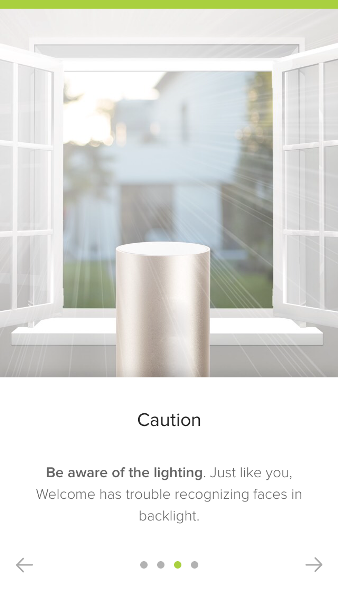

At this point, the app informs you that the Welcome camera can recognize your loved ones from each other and from strangers after training the camera to recognize all the different faces captured of each of the residents. The app also suggests where to place the camera while warning you to be aware of backlighting.
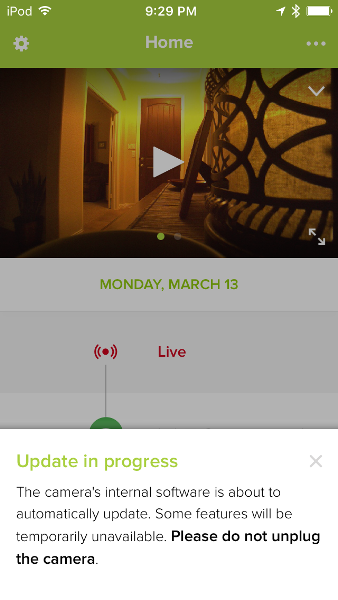
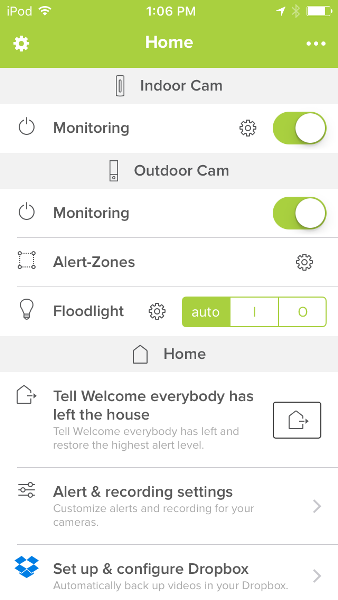
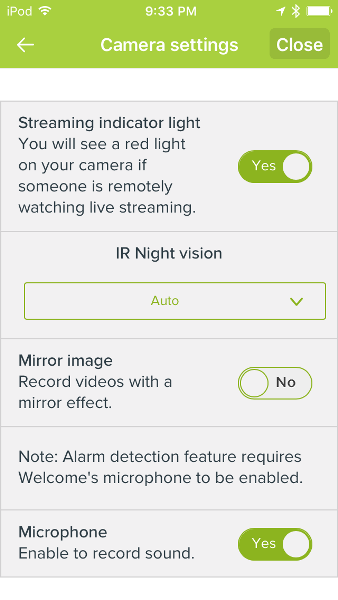
You can adjust the camera settings by tapping on the ellipsis (three dots in the upper right of the Security app home screen) then tapping on the gear icon located under the name of your Welcome camera (“Indoor Cam”).
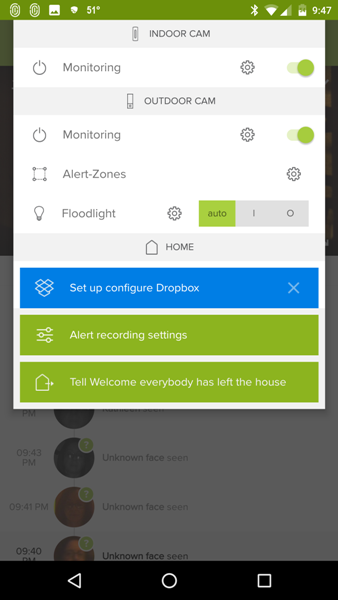
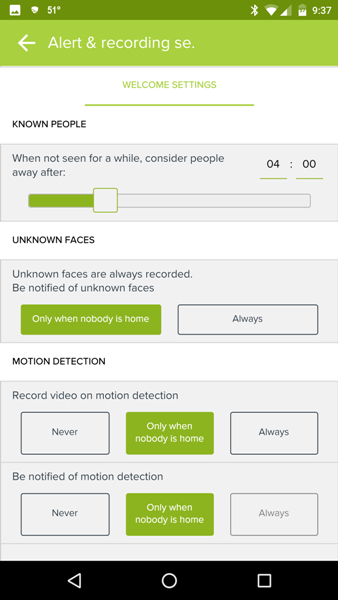
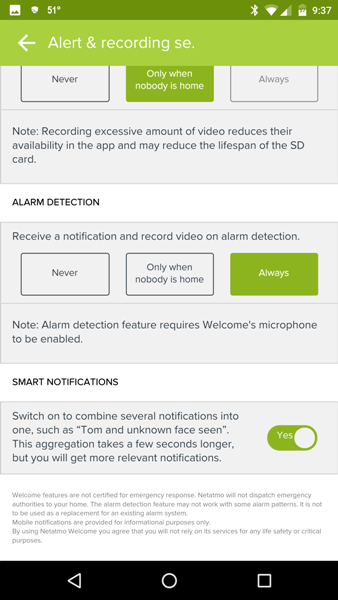
Welcome Camera Settings: The above screenshots were taken from my Nexus 6 phone. By tapping on the vertical ellipsis, you can also access the Alert Recording Settings on the Welcome camera or you can tap on “Tell Welcome everybody has left the house” (left screenshot). In the middle screenshot, there is a setting that allows you to set a time that if the identified individuals are not detected for that amount of time, they will be considered “Away” instead of at “Home”. The middle screenshot also shows how you may also set up whether or not the camera should record video and send a notification when it detects motion (“Never”, “Only when nobody is home”, or “Always”). The last screenshot shows additional camera settings.
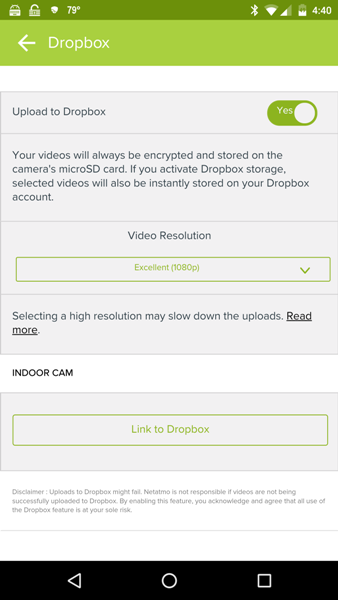


Linking Dropbox to the Welcome Camera: The Welcome camera records all videos locally on a micro-SD card (the camera comes with an 8 GB card) and does not require any ongoing subscription fees like other security cameras. You can also set up your Welcome camera to upload a video of the events it detects to your Dropbox account or your personal FTP server. I chose to link the Welcome camera to my Dropbox account. After doing so, I was able to select things like whether or not to “Save videos of unknown faces on Dropbox” or “Save videos of motion on Dropbox”. I personally really like the fact that there are no subscription fees.

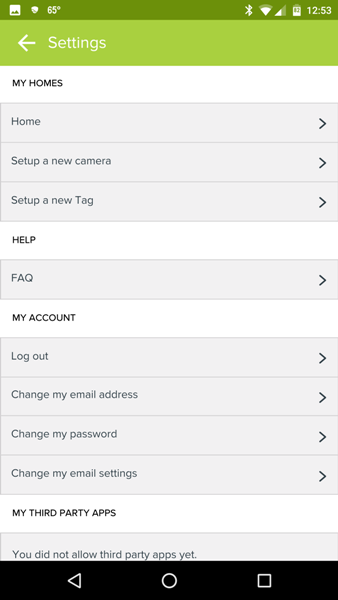
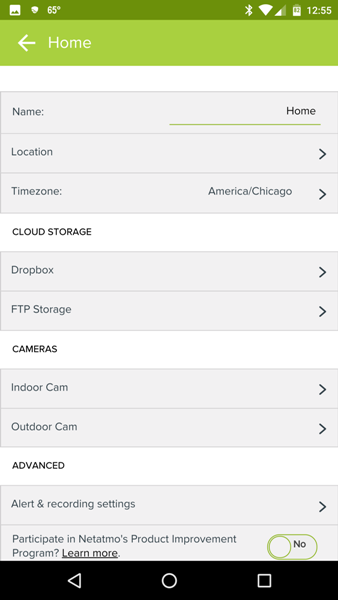
Security App Settings: By tapping on the Menu icon located in the upper left corner of the home screen, you can access other settings. From here you can add a new camera, change your email address or password, or tap on Home (or Vacation Home, Business, etc. – wherever you installed your camera) to view all of your connected cameras. After tapping on Home, you will be able to set up your camera(s) to upload to Dropbox or your private FTP server (middle screenshot). When you tap on each of your connected cameras (last screenshot), the app will show you the strength of the WiFi signal, it’s MAC address and the current firmware being used.

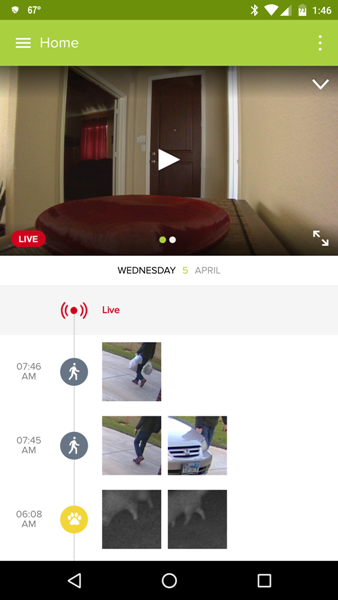
Use


Security App Home Screen: When you launch the Security app, the home screen will display whether or not any faces have been detected by the Welcome camera. Once the camera has been trained to recognize each of the residents of your home, it will show you if it has detected them. If it has not detected anyone in a certain amount of time, it will flag them as being “Away” from home. Swiping up (or tapping on the “Up” arrow located in the upper right of the video display) will hide the “faces detected” screen.

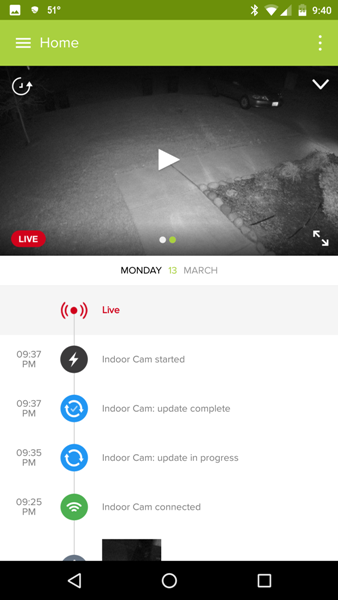
Viewing Live Video: By tapping on the Live icon just below the video, you can swipe left or right on the video display to view the view from your different cameras. The third screenshot shows the view from the indoor Welcome camera and the last screenshot shows the view from our outdoor Presence camera. To view the live video streaming of the indoor camera, you must tap on the Play button in the middle of the video display.

When viewing any live activity going on in front of the camera, there is a few second delay in the live feed and also when a motion is detected. This happens with the Netatmo Presence Outdoor Security Camera as well which according to the Netatmo website, “Presence uses http Live Streaming protocol. Experiencing a slight lag time of a few seconds is normal, as live stream is sent through an encrypted connection from Presence to your device.” This may also be the case with the Welcome camera.



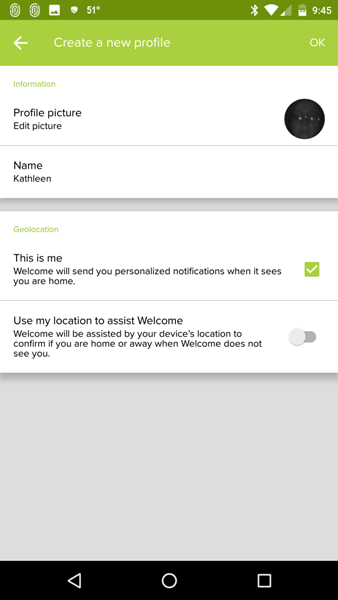
Setting Up Facial Recognition Profiles: When the Welcome camera captures the face of someone it doesn’t recognize, it will display that face on the home screen of the app above the video display. Long pressing on the image in this “faces detected” screen will allow you to identify the person, forget the person, or tell the app that the image is not a face. When you are identifying the person for the first time, you will set up a profile for that person by giving them a name, uploading a profile picture if desired, and flagging the image as yourself or someone else and using your phone’s location to assist Welcome in determining whether or not you are home.
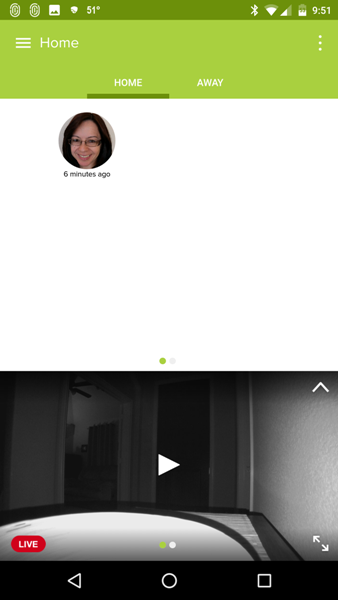


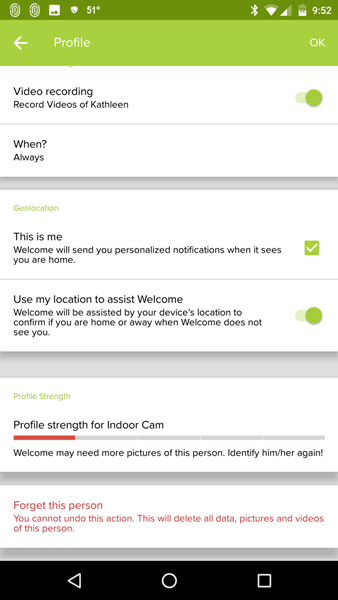
When the Welcome camera detects my face, it identifies that I am at “Home” versus “Away”. Long pressing on my image in the “faces detected” area, allows me access to my profile to change the settings. I can tell the camera to record videos of myself or not during the time that I designate.

I would have preferred to see the setting that allows me to set a time interval to tell the Welcome camera whether I am “Away” or at “Home” here in the Profile settings right under the “Use my location to assist Welcome”. As it is, that setting is located under the “Alert recording settings” for the Welcome camera.
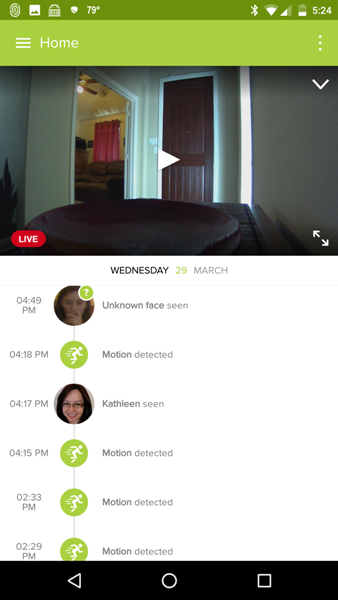
If the Welcome camera can see your face, it will flag it as an identified person or unidentified person. If it cannot see your face, it will notify you that a motion has been detected.

Alarm Detection: If the camera detects an alarm of any kind (smoke alarm, CO alarm, etc.) it will also notify you of this alarm if you set the camera up to do so in the “Alert recording settings”. The Welcome camera did give me a couple of alarm notifications but none of our alarms went off (I was home at the time and did not hear anything). Curious.
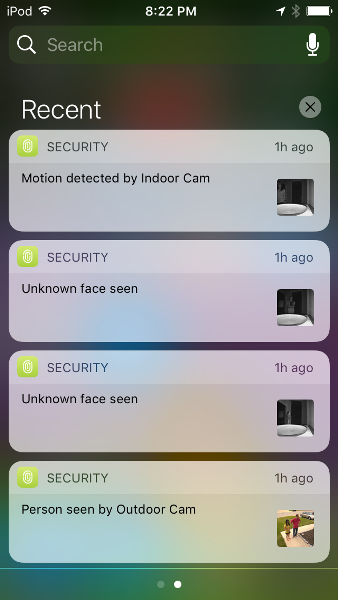
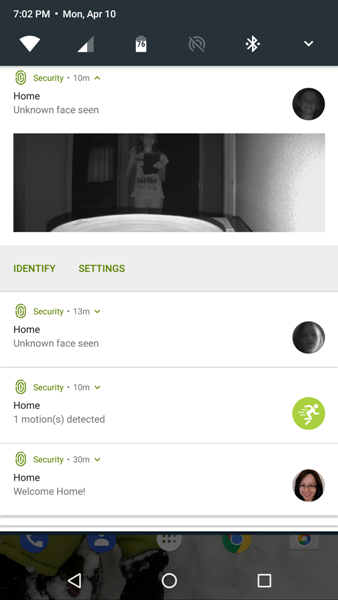
Notifications: Whenever you receive a notification about a motion, if a face is detected, it will identify the person as a known or unknown individual, otherwise it will identify it as a motion. The screenshot on the above left illustrates the iOS notifications and the right screenshot is that from my Android device (Nexus 6 phone).

Facial Recognition Accuracy and Sensitivity: I found that Welcome camera detected almost all motions or faces that passed by the camera. It was fairly accurate in discerning the faces of the individuals in our house. However, it did not always send a notification that one of us had passed in front of the camera even though I set up the camera to always send notifications when motion is detected.

Resolution: The clarity of the videos was a high-quality 1080p resolution with clear sound (when sound was detected). However, in a few instances when viewing the videos, the resolution was lower. I think this is a function of the strength and quality of my WiFi. Here is a video captured of motion that was detected by the camera during the day.

One-Way Audio: The camera also picks up sound very well but it is only one-way audio. It is not possible to speak to your invited and uninvited guests when they approach the camera.

Here is another video of motion that was detected at night. I was pleased with the quality.

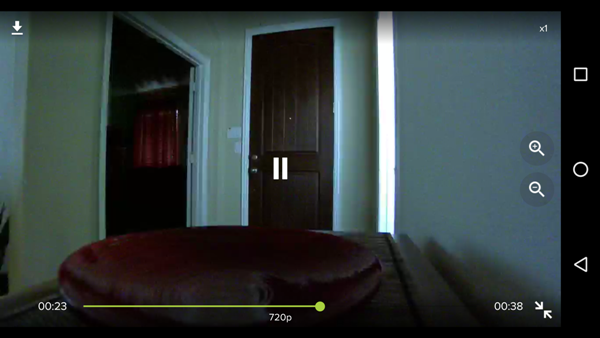
Android vs. iOS App (Zoom features): Just like the Presence Outdoor Security camera allows you to zoom in and out of live or recorded video (when playing them), you can do the same for the Welcome Indoor Security camera videos. There were only a couple of differences between the Android app and the iOS app that I have noticed. The iOS app (top screenshot) allows you to zoom into a specific area of the video using the pinching gesture, while the Android app (bottom screenshot) requires you to tap on the magnifying glass zoom icons located along the right side of the video screen. I found that after tapping on the zoom icons, I then needed to reposition the video thus I really appreciate the “pinch” zoom feature of the iOS app – with it, I could zoom in on the specific area that I was curious about quickly and efficiently.

Resolution Information: I also noticed that when you tap on any area of the live video feed within the Android app, the information displayed included the resolution of the video which isn’t included in the iOS app.

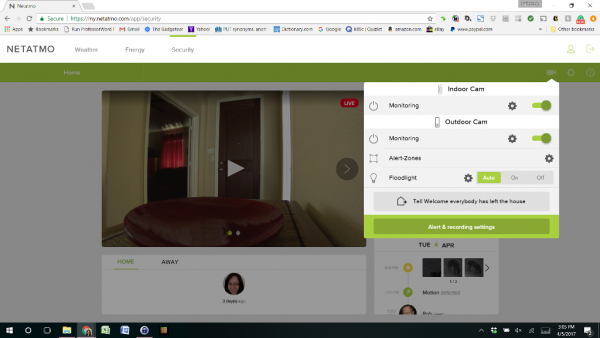
Web Access: Netatmo also allows you web access to your Netatmo energy, weather, or security products. I have both the Welcome Indoor Security camera and the Presence Outdoor Security camera. The web interface does not appear to provide any additional features than that provided by the iOS or Android apps, which I appreciate because then I can see and alter any settings that I want to from any device, not just my computer.

Final Thoughts

I liked using the Netatmo Welcome Indoor Security camera. Setup was straightforward, it recorded identified faces, unidentified faces, and motion in 1080p (most of the time) whether it was daytime or nighttime. It has a 130° viewing angle and it records videos locally and to your Dropbox account or personal FTP server thus avoiding subscription fees. It is important to consider backlighting issues when placing your camera in a spot in the house.  Just the fact that it can tell the differences between the inhabitants of the house and unidentified faces is a wonderful feature, thus allowing us to ignore those individuals that are known and to tell us when someone else is in the house.

There are a couple of things to consider before you purchase. The camera did miss us a few times when we passed in front of it (perhaps because we had passed in front of it a little earlier?), I received a couple of alarm notifications when no alarms had gone off (smoke alarms, security system alarms, etc.), and the camera has only one-way audio. However, for the most part, the camera worked well for me.

Source: The sample used in this review was provided by Netatmo. Please visit their website for more information or visit Amazon to purchase.


Product Information

Price: $159.90
Manufacturer: Netatmo
Retailer: Amazon
Requirements:
  • High-speed Internet connection needed
  • Public hotspots not supported
  • iOS 9 minimum required
  • Android 4.3 minimum required
Pros:
  • Recordings are 1080p
  • Facial recognition fairly accurate
  • Records only videos we deem important
  • No subscription fees – records videos locally and to my Dropbox account (or personal FTP server if I had one)
Cons:
  • Did not always send notifications when one of us passed in front of the camera
  • One-way audio

Filed in categories: Home and Kitchen, Reviews

Tagged:

Netatmo Welcome Indoor Security Camera review originally appeared on on April 12, 2017 at 7:38 am.

Note: If you are subscribed to this feed through FeedBurner, please switch to our native feed URL http://the-gadgeteer.com/feed/ in order to ensure continuous delivery.
SoundMagic BT100 Bluetooth over-ear handphones review

We all know the logic: the larger the speaker, the better the bass. With headphones, this means that over-the-ear units are going to sound better than similar quality on-ear or earbud units. So I was really excited when I was offered the SoundMagic BT100s to test.

Note: Photos may be tapped or clicked for a larger image.


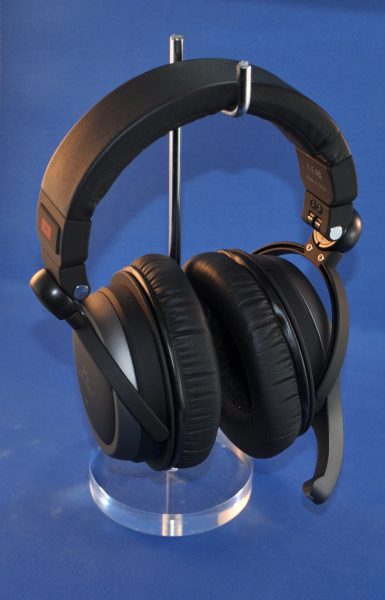
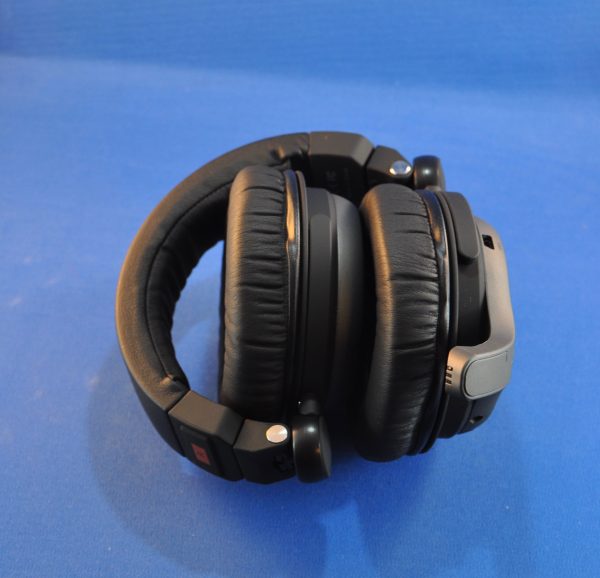
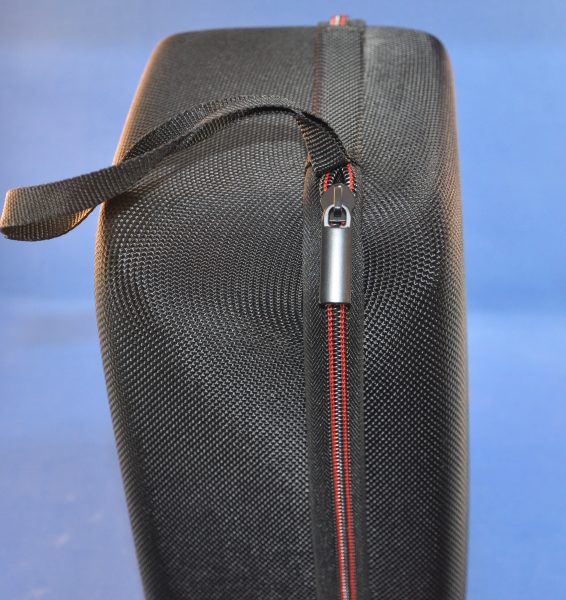
The Soundmagic BT100s arrived in a semi-rigid case, along with a microUSB and .125″ AUX cable and a sheet of instructions. The earcups fold up into the cushioned headband for travel, and the whole unit is very compact.

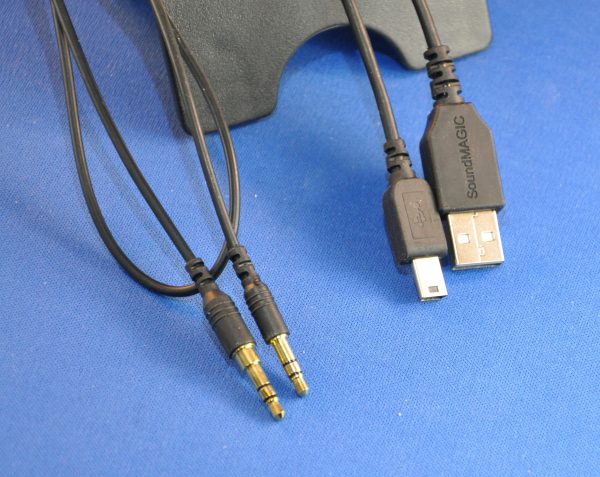
If you use the case, it’s a little larger, but you can carry along the cables and some other small things in the net pocket in the lid. This may be important because I found that the cables are not standard. Both jacks are extra long, in order to connect to the recessed ports on the earcup. This was the most infuriating part of the whole unit. I’m not sure why they would build something that can’t use a standard cable, either for audio or for charging. It’s the single reason I can’t recommend the headphones, no matter how good they sound. Who cares if they sound great, if you can’t connect or charge the batteries because you lost or broke or forgot the cables?


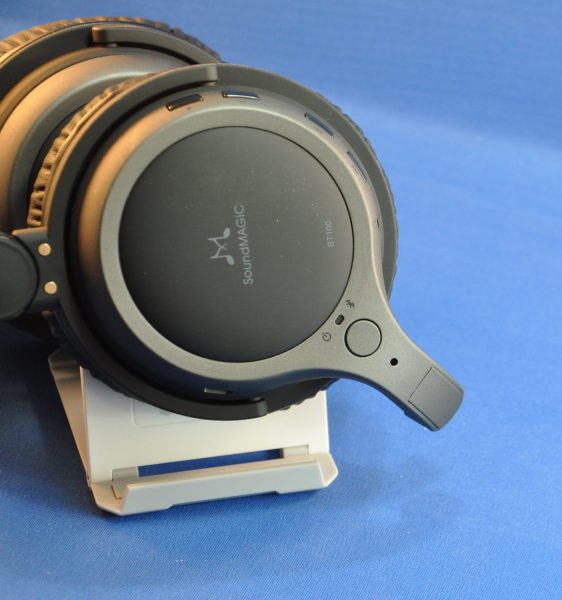
All of the features are controlled from the left earcup. One of the most interesting features of the BT100s is the built in mic.

It is a short, solid arm that extends 1.5″ from the left earcup, and is a great point of reference when you’re reaching for the multifunction button to stop/start sound, change pairing, or turn the headset on/off. I found the system produced clear sound using the phone or Siri or taking voice memos. Across the back of the left earcup are the track change buttons, and, up on the upper rear side, are the volume control buttons. The AUX cable plugs into the lower side of the same earcup, and the power/charge cable plugs into the front side of it.

The large earcups house great speakers but are also very comfortable.

I was able to easily sync the BT100s with my iPhone 6s Plus, with my iPads, and with the Hammo TV headphones I reviewed a while back. I did have an issue with the first unit I was shipped, where the Bluetooth connection stopped working in the right channel. Wired connections were fine, and I thought for a while that I had somehow changed a setting, and checked out the online support for information. I sent in a ticket and waited a week or more with no reply. We finally contacted the PR company and got a second set, but as far as the SoundMagic support desk is concerned, I’m still out here with a busted headset. I’ll let you know if I ever hear back from them.

As fine as the sound is for the cans, I can’t recommend them, due to nonexistent support and proprietary cables. But if you’re willing to take a chance, they are comfortable and deliver full, rich, deeply textured sounds from movies, games, and music on both wired and wireless connections.

Source: The sample for this review was provided by SoundMagic. Please visit for more info and Amazon to order.


Product Information

Price: $149.99
Manufacturer: SoundMagic
Retailer: Amazon
Requirements:
  • Sound source with Bluetooth or AUX output
Pros:
  • Large, comfortable ear cups
  • Big, lush sound for a mid-price set of headphones
  • Collapse for packing
  • Semi-rigid storage case
Cons:
  • Cables are not standard – both have longer metal jacks. Nothing on their website mentions replacement cables
  • Support never responded to my request for assistance after a brand-new unit failed

Filed in categories: Audio, Video, TV, Reviews

Tagged:

SoundMagic BT100 Bluetooth over-ear handphones review originally appeared on on April 11, 2017 at 7:23 am.

Note: If you are subscribed to this feed through FeedBurner, please switch to our native feed URL http://the-gadgeteer.com/feed/ in order to ensure continuous delivery.