Tacklife HD60 laser distance measurer review


Normally, picking up a laser measure for the first time is accompanied by the thought or statement, “how far away is that [object]?” Then after a quick press of a button and flash of red light, a result is displayed that is usually accompanied by the thought or statement, “Cool!” The novelty and simplicity of these devices is underscored by two very cool operating principles: the speed of light and laser frequency is measured in order to calculate the measured distance, and accurate measurements require the optics and circuitry to function at MHz frequencies. The Gadgeteer was presented a Tacklife HD-60 to review. Beyond providing an accurate distance, the Tacklife has some neat features to simplify taking measurements without tape or an assistant. Read on to see what I think! 

The Tacklife HD-60 comes in an easy to open, environmentally friendly and lightweight cardboard box. Inside is the laser distance measure, two AAA batteries, a nylon belt case, a lanyard an instruction booklet and a 24 month warranty.

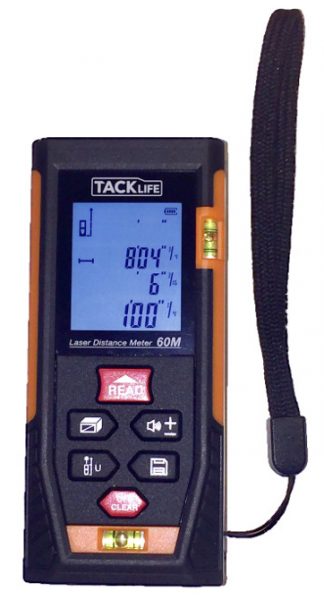
The unit is about 2.4” wide, 1” tall, and 4.3” long and weighs 4 oz with batteries installed. The exterior of the unit is a composite bi-injection rubber and plastic. The rubber will absorb hits more than a completely plastic case and provides a better gripping surface to prevent drops in the first place. The fact that this is bi-injection molded should provide enhanced durability over a plastic case with a rubber boot. One thing that would potentially make this more usable is a tripod mount. The buttons are soft silicone and laid out in a hexagon on the bottom half of the topside. In fact, the entire bottom half of the unit is uniform rubber membrane which will prevent dirt and liquid from getting inside to the circuit board better than individually seated buttons. Most of the buttons are multi-functional, but after a short amount of practice using the unit, pressing the correct button for each feature is easy to remember or easily determined by a quick glance at the icons on the button face. The topside of the unit also includes a horizontal and vertical spirit bubble to help ensure that the measurements between the measurer and the target are not at an angle. (A deviation of little more than 5° will change the measured distance by a foot at 196 ft.)

The unit is powered by 2 AAA batteries which were easy to install and, when the time comes, should be easy to replace because they are readily available. If the unit is not operated for more than 150 seconds it shuts off automatically to conserve the battery power. A fresh set of batteries can take 8000 single measurements.

The unit is powered on by a quick press of the read button. The display is back-lit in a cool white hue that makes the LCD numbers and icons on the screen easy to read in low light conditions. All of the LCD display segments are displayed on startup to enable the user to verify the display is fully functional. At its most basic level the display shows an icon depicting if the point of reference for the measurement is the front or rear face of the unit, battery strength, 3 memory registers of the previous three readings, the current reading, units for each of the readings, and an icon to show if the mode of operation is linear distance, area, volume, or distance determined by one of three Pythagorean constructions. The keypad is not back-lit, but it makes sense that the keys will be easy enough to see in the conditions that allow you to see where you are measuring from and to.

The manual is well written and is available here.  But just to summarize on the mail features, I’ll describe how to take a measurement. To take a reading the read button is pressed. The laser is lit to allow the user to target the measurement. Once the measurement is aligned the read button is pressed again. The laser flashes twice and then the result is displayed. A long press of the read button will cause the laser to remain illuminated and the measured result to be updated 80 times a second until the read button is pressed again, locking the result onto the screen. In the constant read mode, the maximum and minimum results obtained are also updated, and these are also saved once the constant read mode is exited. Depending on the situation, the operation of the measurer may be improved by using the audio function. Holding the button marked with a speaker will toggle the beeps associated with a keypress and with the conclusion of a measurement. Results may be saved by holding the save button until a number is displayed at the top of the screen. Saving has a 30 result memory, which may be accessed by hitting the save button and scrolling through with the Pythagorean button (forward) and the audio/+- button (backward).

The Pythagorean constructions can be quite useful, especially for measuring halfway up a tall wall, or a segment of a long corridor, where a laser target would be required to demarcate the extents of the desired measurement. Before getting to the Pythagorean modes there are two other calculators built into the unit: area and volume. Pressing the calculator button once brings you to the area calculator. to perform a calculation ensure that you read the measure of the length that is blinking on the picture on the display. Pressing the calculator button again allows you to calculate volume. Note that for area the shape must be a parallelogram, rectangle or square and for volume, the floor and ceiling must be parallel. Pressing the calculator button a third time brings you this calculation:

Enter the distance a and then b by pushing the read button (the user manual says to push off/clear, but this is incorrect). Make sure that the base of the measurer doesn’t move so that the measurements are all taken from the same location. I measured my wall and later confirmed the length by measuring from the floor the ceiling and the measurements were within an 1/8 inch.  This won’t work if x is not perpendicular to b, but will work even if the measurement is not vertical. Pressing the calculator button a fourth time brings you this calculation:

Enter the distance a and then b by pushing the read button (the user manual says to push off/clear, but this is incorrect). Make sure that the base of the measurer doesn’t move so that the measurements are all taken from the same location and that the measurement a and b are perpendicular to each other. Pressing the calculator button a fifth time brings you this calculation:

This mode is great if want to measure a section of wall but don’t have access to an area perpendicular to the area you want to measure. For instance, this is useful to measure the height of a flag at the top of a flagpole. In order for this calculation to produce correct results, the measurement of C must be perpendicular to the length measured. Again, the manual states to use the off/clear button to take measurements but the read button is the correct one to press. The final press of the calculator mode will calculate this construction:

In this construction, b should be perpendicular to x, and the length measured will be most accurate if the targets of a, b, and c are linear.

I had the opportunity to compare the results of the Tacklife with the results obtained by a Jetery laser distance measurer and a Bosch Laser Distance measurer. Both comparisons yielded excellent agreement of the measured distances.


I also verified the result of the distance meter with a tape measure and found that the laser distance results agree with the distance indicated by the tape over 24 feet. On short lengths of a foot or shorter there is some disagreement, so measuring with these distances are best accomplished with a ruler.

In conclusion, the laser distance measure should be one of the basic tools that every gadget lover has in their arsenal. The price of these units has absolutely crashed from a few years ago and is now low enough that most people can afford to have it around the house for those jobs where a tape measure is too short or unwieldy. Yet, the construction of the HD60 is top-notch and is very similar to the Bosch unit that I tested it against. I recommend you pick one up today.

Source: The sample for this review was provided by Tacklife. Please visit their site for more info and Amazon to order.


Product Information

Price: $75.99 (on sale for $36.97)
Manufacturer: Tacklife
Retailer: Amazon
Requirements:
  • 2 x AAA batteries
Pros:
  • easy to use
  • accurate
  • inexpensive
Cons:
  • no tripod mount

Filed in categories: Reviews

Tagged:

Tacklife HD60 laser distance measurer review originally appeared on on May 7, 2017 at 10:00 am.

Note: If you are subscribed to this feed through FeedBurner, please switch to our native feed URL http://the-gadgeteer.com/feed/ in order to ensure continuous delivery.

iClever F56 Bluetooth transmitter and receiver review


Most of us listen to some form of audio to get us through part of our day; maybe you enjoy listening to podcasts while working or streaming a specific playlist to pump you up at the gym.

I personally enjoy listening to music while driving in my patrol car at work. Unfortunately, the vehicle isn’t equipped with Bluetooth so I can’t stream audio from my phone. I imagine I’m not the only person who has run into this issue.

Fortunately, there are plenty of gadgets that can act as a bridge between your phone and your vehicle. I’ve recently reviewed one such device, the iClever F56 Bluetooth receiver, and transmitter.

In the box

  • 1 x IC-F56 Bluetooth Transmitter/Receiver
  • 1 x 3.5mm Audio Cable
  • 1 x Micro USB Cable
  • 1 x User Manual

Specifications

  • Bluetooth Version: 4.1
  • Bluetooth Profile: HFP/HSP/A2DP/AVRCP
  • Bluetooth Range: up to 30ft
  • Power Supply : Li-Poly 180mAh
  • Working Current: 22mA (Max)
  • Charging Voltage: DC 5V

Design

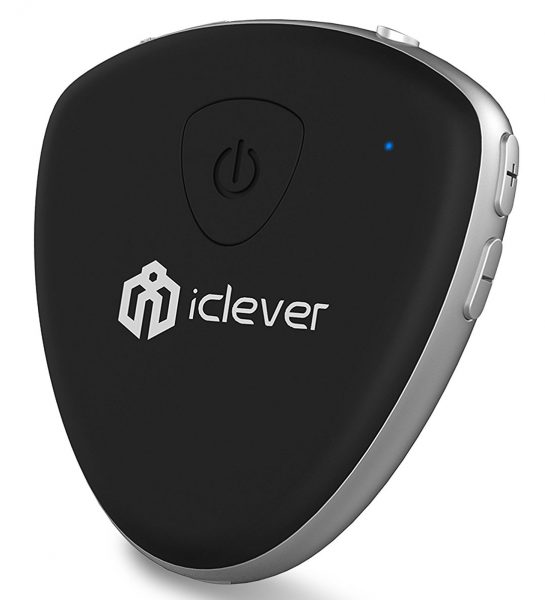
The F56 is a rather small device; at its widest points it measures approximately 2 inches and is about 1/4 inch thick. It actually looks like an over-sized guitar pick.

The front of the device has the power button and an indicator light. The power button also doubles as the play/pause and answer/hang-up button.


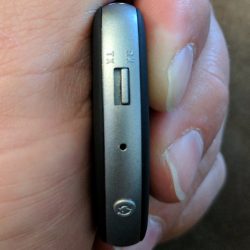
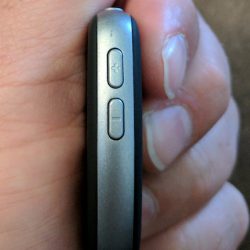
The edge of the device contains the charging port, the 3.5mm port, the receiver/transmitter switch, pairing button, microphone, and track/volume controls.

That’s all there is to the design of the F56. It’s a compact device that is travel friendly.

Performance

The F56 is extremely easy to use.

First, you have to decide whether you want to use the device to transmit or receive Bluetooth audio. I elected to use it to receive audio and placed the selector switch to “RX”. 

The first time you use the device it enters into pairing mode; I only had to open my phone’s Bluetooth menu and select “IC-F56” from the available devices.


Next I placed one end of the 3.5mm audio cable into the device’s jack and the other end into my vehicle’s aux port.

I turned on the radio and began streaming music.

The sound quality was great; I didn’t hear any background static or any distortion.

I was able to pause, skip tracks, and adjust volume directly from the F56. My only complaint is the buttons are very tiny and I can’t imagine being able to use them without taking my eyes off the road.

I also made a phone call while using the F56. The audio from the caller played through my car speakers; it was clear, although the volume was lower than the music that was earlier playing.

The person I was speaking with didn’t appear to have any idea I was speaking through the F56 and didn’t make any complaints about the audio quality.

I next decided to test the F56 in transmit mode.

I switched the selector from “RX” to “TX” and paired the device with one of my Bluetooth speakers. I inserted the audio cable into my phone and the F56 and began streaming audio.

As with my car stereo, the sound quality was great and free of any issues.

Conclusion

The F56 is a pretty nifty gadget and easy to use.

You can stream music to a non-Bluetooth device, or you can transmit music from any device with an auxiliary port to a Bluetooth device. It’s a very versatile device.

At only $29.99 the device is relatively inexpensive. If you’re in the market for a multi-faceted Bluetooth device, consider the F56.

Source: The sample for this review was provided by iClever. Please visit their site for more information and Amazon to order.


Product Information

Price: $29.99
Manufacturer: iClever
Retailer: Amazon
Requirements:
  • Bluetooth capable device
Pros:
  • Small
  • Easy to use
Cons:
  • Buttons very tiny

Filed in categories: Reviews

Tagged:

iClever F56 Bluetooth transmitter and receiver review originally appeared on on May 6, 2017 at 8:51 am.

Note: If you are subscribed to this feed through FeedBurner, please switch to our native feed URL http://the-gadgeteer.com/feed/ in order to ensure continuous delivery.
Miccus Home TX Pro long range wireless audio Transmitter and SR-71 Stealth low latency headphones review


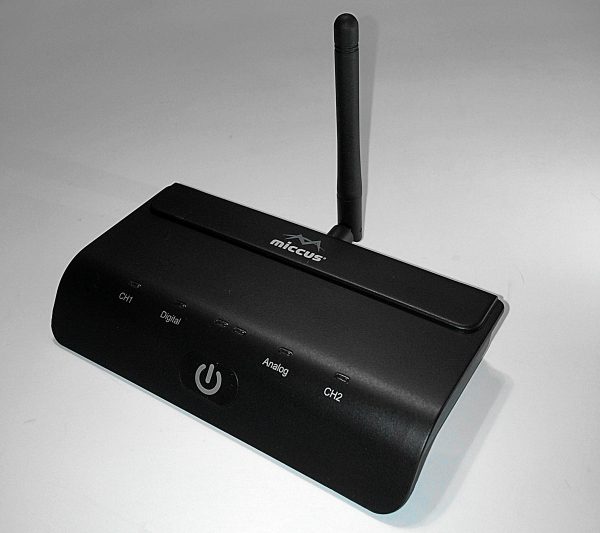
I’m a self-admitted night owl and most of my television viewing is done after 8:00 pm. This wouldn’t be a problem if I were living alone but unfortunately for me, that’s not the case. My roommate is not a night owl and usually goes to bed around 10 o’clock. This is where me watching TV well into the wee hours of the morning becomes a problem. I’m a very contentious person and turn the volume way down once my roommate turns in for the night but this makes my viewing experience less than optimal. I was then given an opportunity to review the Miccus Home TX pro audio transmitter along with a pair of their SR-71 Stealth headphones. Needless to say, I jumped at the chance. Do these two devices solve my late night viewing problems? Let’s take a look.

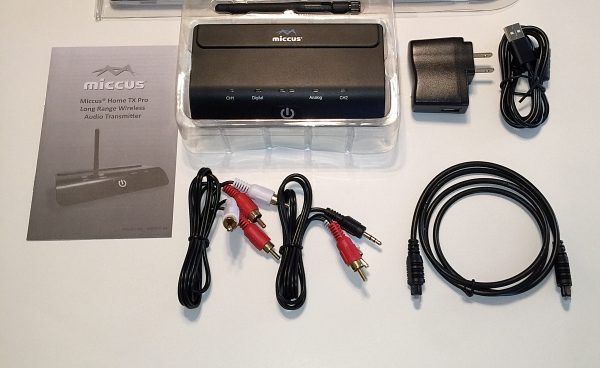
       What’s in the box?

  • Miccus Home TX Pro
  • RCA to 3.5mm audio cable
  • RCA to RCA audio cable
  • Toshlink audio cable
  • Micro USB charging cable
  • USB power supply
  • Antenna
  • User manual

Specifications:

  • Bluetooth 4.2 (compatible with all available Bluetooth versions)
  • Bluetooth profile: A2DP; Audio Codecs: APT-X LL, APT-X, SBC
  • Operating Range: up to 150ft (50m), Operating Frequency: 2.402 GHz to 2.480 GHz
  • Digital: Toshlink optical; Analog: 3.5mm stereo input
  • USB Power: DC 5V @ 500mA or higher
  • Size: 3″ x 51/2″ x 1″ Weight 5oz
  • One Year Limited Warranty

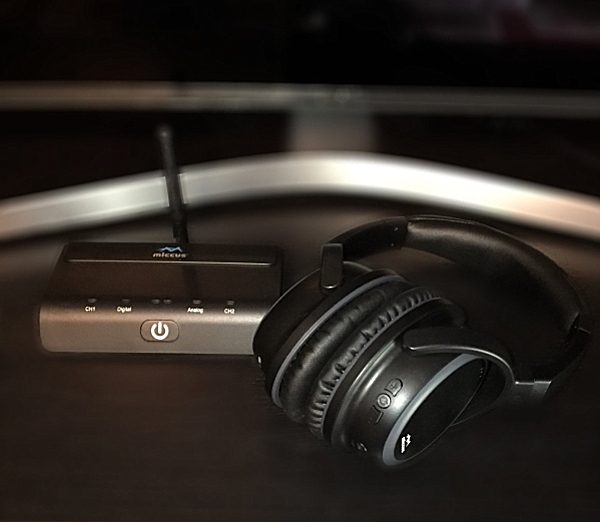
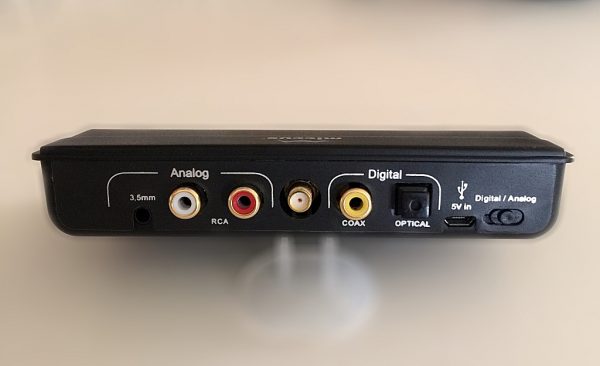
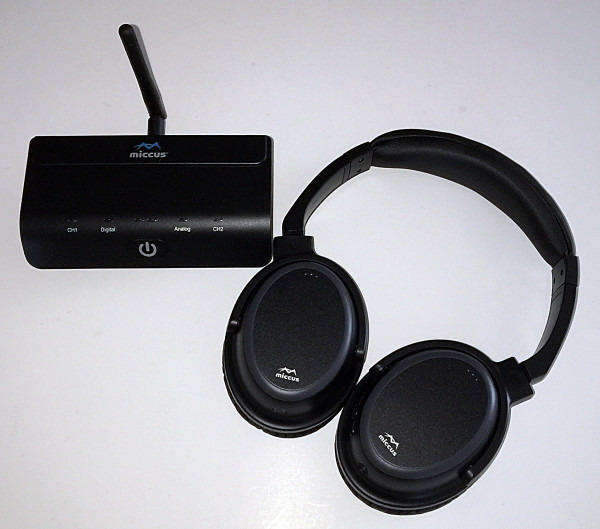
The Home TX Pro transmitter is small in size and very light weight, perfect for sitting next to your TV. Setup is pretty simple. First, you must attach the supplied small antenna to the antenna terminal. Before powering the unit on you must decide the audio source. They’re two choices: digital or analog. Select the source by sliding the slider switch (located on the back right of the TX Pro) left for digital and right for analog. Then connect the appropriately included cable (optical, RCA to 3.5mm or RCA to RCA) to the appropriate audio input on the back of the unit. I connected the unit to my TV using the provided Toshlink digital audio cable.

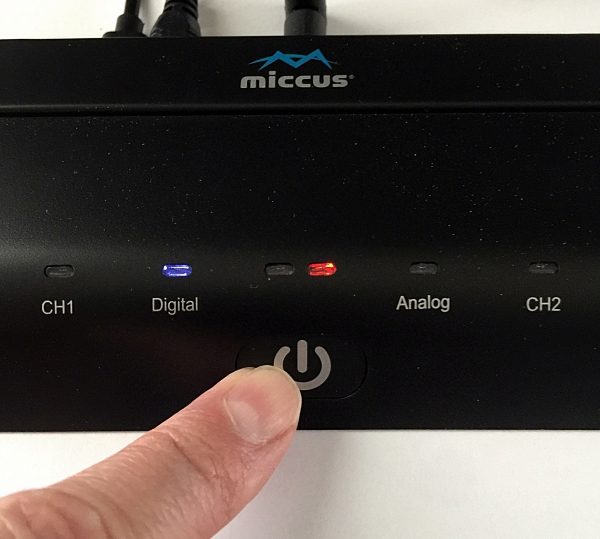
The unit can be powered two ways either by connecting the provided Micro USB charging cable to the provided USB power supply or by plugging it into any USB port. For me the USB port option was convenient, I just plugged the unit into one of my TV’s USB ports. Powering the unit on is done by holding down the Multi – function/power button for 3.5 seconds. Turning it off is done the same way.

Pairing:

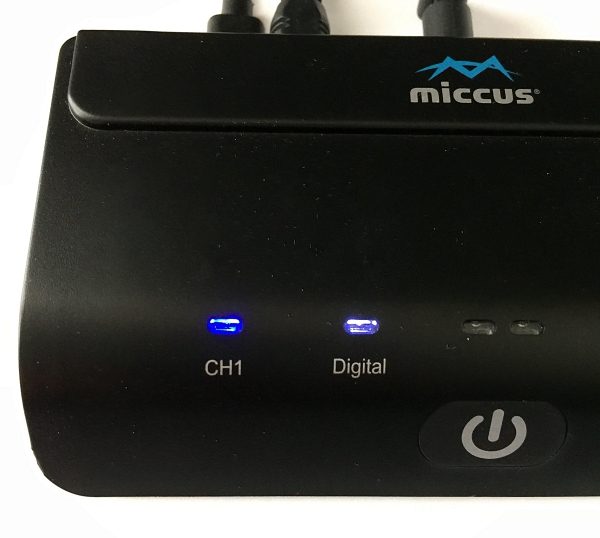
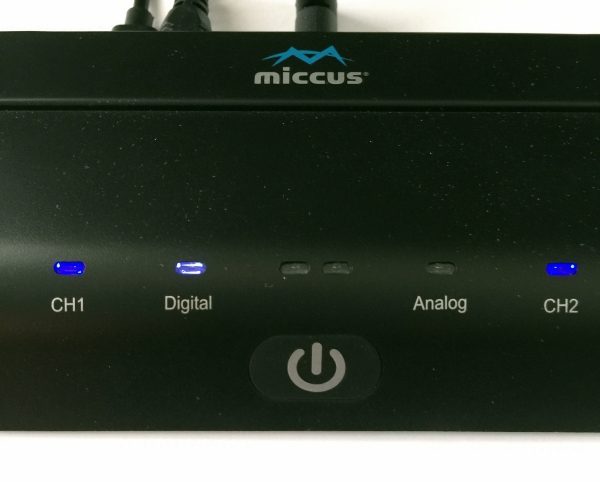
To pair the Home TX Pro with your Bluetooth device place the selected device into pairing mode. Then press and hold the units Multi – function/power button for 8.5 seconds until the indicator light changes from a slow flashing red to a fast flashing red and blue. When pairing is successful the far LEFT (channel 1) indicator light will turn a solid blue. The unit can be used with any Bluetooth headphones that support A2DP profile.

The Home TX Pro also offers Dual – Link pairing which allows you to connect two separate Bluetooth devices at the same time. Once you’ve paired your first set of headphones to the Home TX Pro power it and the headphones down. Repeat the pairing process for the second pair of headphones, once they’re connected to the unit the far LEFT (Channel 1) blue indicator light will turn solid blue. Turn on the first pair of headphones and they will automatically connect to the Home TX Pro, and the far RIGHT(channel 2) indicator will turn solid blue. Both headphones are now connected to the Home TX Pro. Personally, I don’t have much use for this feature but tried it out for the purpose of this review and it worked flawlessly. I was able to quickly pair 2 separate pairs of headphones and both sounded crystal clear with no audio delay or lip sync issues.

I also received a pair of Miccus SR-71 Stealth low latency headphones to review. They use the aptX Low Latency codec which means they clock in at 32ms of latency so there is no noticeable lip sync or audio delay when watching TV, movies or playing video games. I was very excited to try these headphones in conjunction with the Home TX Pro transmitter for my late night TV viewing.

Package Contents:

  • Headphones
  • USB charging cable
  • 3.5mm Detachable Aux cable
  • Hard Shell Case
  • User Manual

Specifications:

  • Bluetooth 4.2 (compatible with all available Bluetooth versions)
  • Bluetooth profile: HFP (hands-free) A2DP, AVRCP
  • Audio Codecs: aptX LL, aptX, SBC
  • Operating Range: up to 33ft (10m), Operating Frequency: 2.4GHz
  • 3.5 mm stereo input for wired operation
  • Audio Impedance: 32 Ohm
  • Frequency Response 20Hz-20KHz
  • Normal charging time: 3 hours
  • Music Play Time: Up to 15 hours
  • Standby time: up to 180 hours

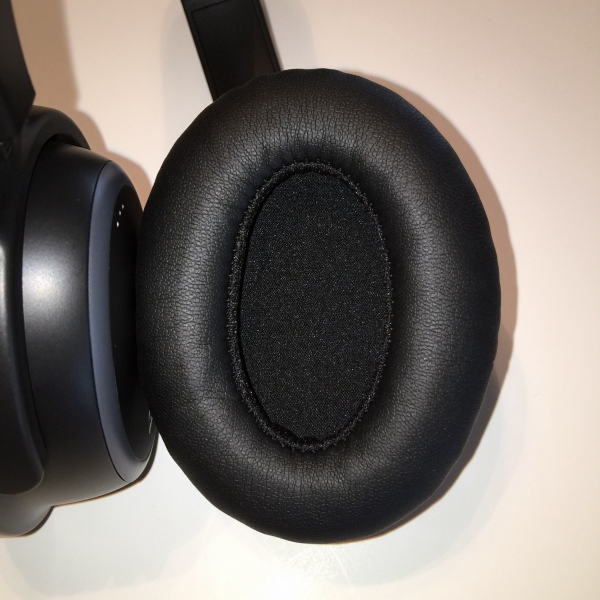
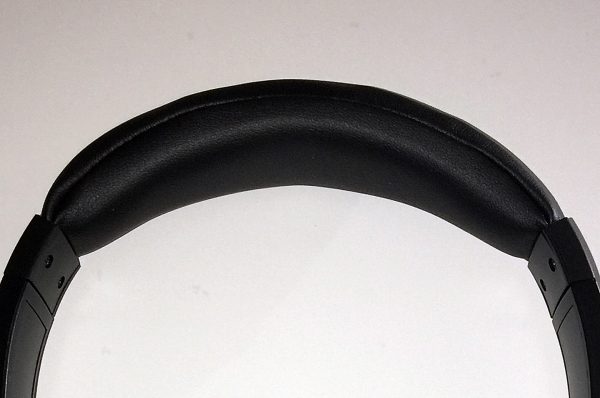
The SR-71 Stealth headphones feature a comfortable, lightweight design and ergonomic construction. They’re very well padded with a soft leather covering, both on the ear cups and on the easily adjustable headband.

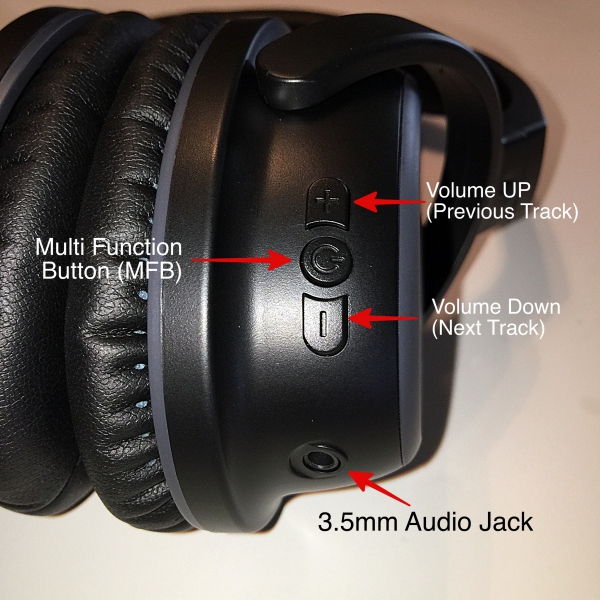
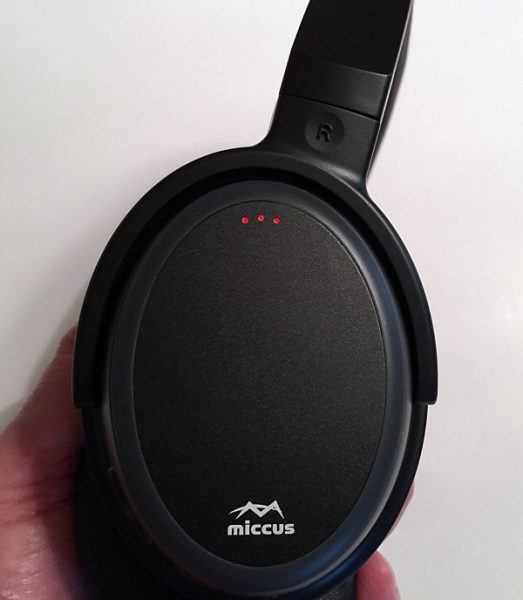
The function buttons are located on the right earpiece. There are 3 buttons the Multi – Function button or (MFB) and a volume up (+) and volume down (-) buttons. The MFB is used to perform several functions, power on and off, make/answer/end/reject calls/play & pause music and voice dialing. Besides raising and lowering volume the (+) button is used for the previous track when listening to music and the (-) button is used for next track. There is also a LED indicator light located on the side of the right earpiece. And there is a 3.5mm audio jack so you can connect the provided detachable 3.5mm Aux cable and use the headphones with a none Bluetooth device. The headphones can be used with the 3.5mm Aux cable even when the battery is not charged.

Pairing:

Pairing the SR-71’s is done by holding the MFB down until the LED indicator light flashes red and blue. Select the headphones from your device’s Bluetooth settings menu, when the headphones are connected the LED indicator light will turn solid blue.

The SR-71’s connect using Bluetooth 4.1. The manual states that the operating range is up to 33ft. I was able to walk around my entire house and even did some laundry without once losing connection to the Home TX Pro. I was even able to listen to my TV while out on my front porch while letting my dog out.

The SR-71’s Dual – Link Pairing feature allows for them to connect to two devices at the same time. I paired them with my phone and the Home TX Pro transmitter. This allowed me to answer an incoming phone call while listening to my TV. A single press of the MFB answered the call and when I finished another press of the MFB returned me to the TV audio.

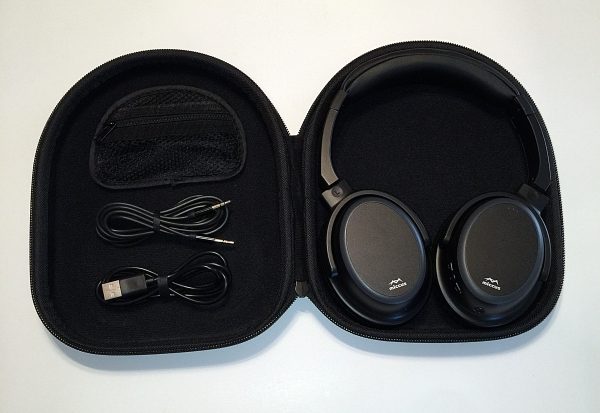
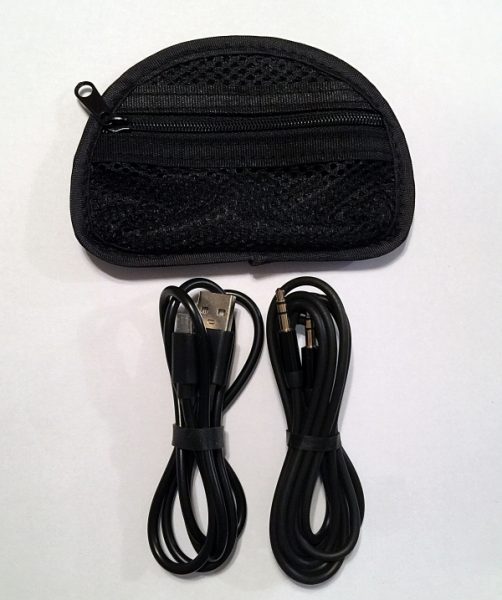
I really like that Miccus provides a nice hard shell case for these headphones. It just makes it so much easier to store them inside my TV stand. Each earpiece on the headphones pivots which allows for them to lay flat inside the case. There is also a small mesh zipper pocket that holds the Micro USB charging cable and 3.5mm Aux cable that attaches to the inside of the case using velcro. So you can detach it to easily access the cables. A small thing but I like it.

One of the most impressive features of these headphones is the battery. They fully charge in 3 hours and have a listening time of a whopping 15 hours. This is awesome especially if you’re going to use them on a daily basis. The SR-71’s are charged using a Micro USB cable that plugs into the port located on the bottom left earpiece. When charging the LED indicator light glows red and turns off when fully charged.

For my review, I paired the headphones to the Home TX Pro Transmitter so that I could use them to listen to my TV. However, I did pair them with my iPhone to see how they sounded while listening to some tunes. I wasn’t disappointed. The headphones handled music very well and it was a pleasant listening experience. I also tried out the calling feature and again the SR-71’s performed solidly. My call was clean and clear on both ends and making and receiving the calls using the MFB button and Hands-Free Calling was easy and worked flawlessly. To activate Hands-Free Calling you simply press and hold the MFB button for 3 seconds, once you hear a “beep” release the button and use voice command to dial a number.

Time to find out how SR-71’s handled watching movies and sporting events through my TV using the Home TX Pro transmitter. Pairing the headphones with the Home TX Pro Transmitter was simple following the instructions I detailed earlier. Once paired in order to get the TV’s audio through the headphones I had to go into my TV’s audio settings and select PCM as the Digital Audio Out Source. The sound was great, there was absolutely no delay or lip sync problems with the audio what so ever. Even pausing, rewinding and fast-forwarding using my DVR caused no lip sync issues. The audio synced up perfectly each time. I watched a baseball game and I was very impressed by the sound quality. The announcers’ voices were very clear and were separate from the crowd noise. Almost a virtual surround sound. A definite ambiance I didn’t get while listening through my 5.1 sound bar at a very low volume. I really enjoyed watching the game using the SR-71’s, and the best thing was I didn’t have to worry about how loud the volume was.

So watching sporting events on these headphones was great, now the only question that remained is how well these bad boys performed while watching a movie. I chose to watch Mad Max Fury Road because I wanted a movie that had a lot of action and explosions. All the dialogue was very clear, the explosions and movies soundtrack sounded great, with no lip sync issues, or audio delays. I didn’t get the room rumbling bass (something my roommate and dog really love BTW) with the headphones that I get from my 5.1 sound bar but I was very happy with the overall listening experience. I did get some intermittent static or chirping during some of the action scenes, not sure what the cause was, however, it’s something I can live with. Mad Max is just over 2 hours long and I didn’t have to constantly fuss with the headphones as they remained comfortable the whole time. And I really like that they fit over my ears, this helps block outside noise and the sound feels more immersive.

I even had my 72-year-old mother, who pretty much hates technology try these headphones. She often has trouble understanding dialogue while watching TV. I thought that the headphones would help with that and she agreed to be my guinea pig for the experiment. She wore them for about an hour and I asked her how she liked them. She liked that she could clearly understand the dialogue and really liked the overall sound. Her only complaint was that she felt she could only stand to wear them for about an hour, after that they began to hurt her ears, which she attributed more to her age then the headphones being uncomfortable.

Together the Miccus Home TX Pro long range wireless audio transmitter and the SR-71 Stealth low latency headphones are a powerful duo. They definitely solved my late night TV listening problems. If you already own a nice pair of Bluetooth headphones you can purchase the Home TX Pro on its own for $79.99. The SR-71 Stealth Headphones sell for $59.99.  So if you’re looking for a way to listen to movies, sporting events or TV shows without bothering others in your house, live in an apartment or have hearing problems, the Home TX Pro transmitter and SR-71 Stealth headphones from Miccus are definitely a worthwhile investment.

Source: The samples for this review provided by Miccus. Please visit their website for more info and Amazon to purchase.


Product Information

Price: $79.99 & $59.99
Manufacturer: Miccus
Retailer: Amazon
Pros:
  • Easy to use
  • Headphones are comfortable
  • Very good sound
Cons:
  • Cables to connect transmitter could be longer

Filed in categories: Reviews

Tagged: , ,

Miccus Home TX Pro long range wireless audio Transmitter and SR-71 Stealth low latency headphones review originally appeared on on May 5, 2017 at 8:30 am.

Note: If you are subscribed to this feed through FeedBurner, please switch to our native feed URL http://the-gadgeteer.com/feed/ in order to ensure continuous delivery.
Martian mVoice PTL 02 Smartwatch review


If you think that smartwatches only come from companies that have a fruit or a green robot as their logo, then let me introduce you to Martian smartwatches. While they may not be a true smartwatch with a color touch screen and the ability to run apps, Martian watches offer a basic set of functions and some fun extras too. It’s time to take a look at the Martian mVoice PTL 02 Smartwatch and all it has to offer.

What is it?

The Martian mVoice PTL 02 is a “smart” watch disguised as a retro airman’s analog watch. It features a small OLED display that shows SMS text messages, emails, incoming calls, and other info. Other features include making and receiving calls directly through the watch, a notification LED that can be used as a flashlight, a remote camera shutter button, stopwatch, phone finder, and a leash feature that alerts if you accidentally walk away leaving your phone.

What’s in the box?

Martian mVoice PTL 02 Smartwatch
micro USB charging cable

Design and features

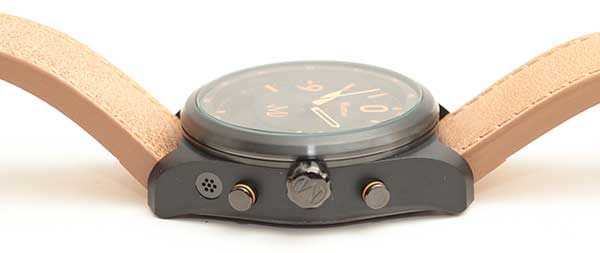
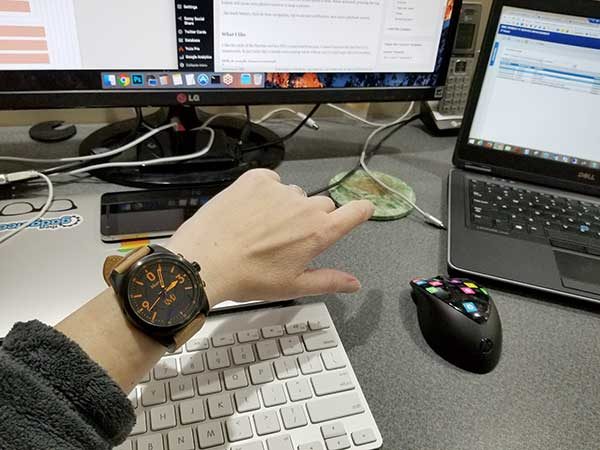
At first glance, the Martian mVoice PTL 02 Smartwatch does not look like your typical smartwatch. You might not even realize that this watch has smart features by just looking at it because it looks like a traditional analog watch with an anti-scratch glass crystal and a 42mm black resin case.

The Martian mVoice watch is IPX4 splash resistant and features a Miyota quartz movement, a stainless steel back cover, and a 22mm Italian leather wristband that’s thick and sturdy while remaining comfortable on your wrist.

The watch has a crown that is used to set the time (yes, the old-fashioned way) and two function buttons. The top button (the one on the right) initiates the voice control feature and the bottom (left) button cycles through info and options on the OLED display.

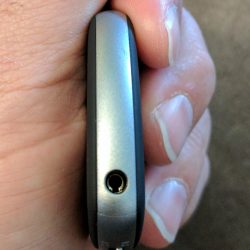
There’s a small noise canceling microphone next to the function buttons.

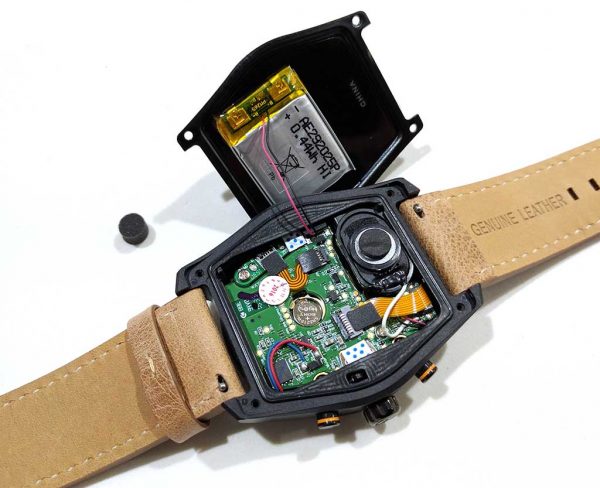
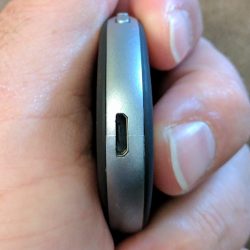
On the opposite side is a covered micro USB charging port and a directional speaker. The mVoice has two batteries. There’s one battery that powers the timekeeping function of the watch and another battery that powers the smart features. The battery for the smart features is a lithium polymer battery that is charged through the micro USB port. This battery will last for about 5 days on a charge. The battery that powers the analog watch will last for about 2 years.


I took the back cover off the watch to see if the analog battery was user replaceable and I’m happy to report that it is. Under a little foam cushion is a Sony SR521SW coin cell battery which are inexpensive to replace.

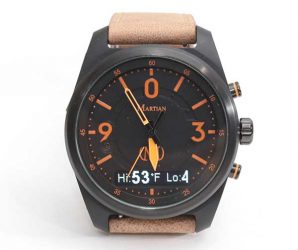
The watch face features a bright orange dial and hands that include a sweep second hand. Unfortunately, the hands and numbers do not glow in the dark.

There’s a status LED located directly below the 9 o’clock location on the watch dial. This LED glows red while the watch is charging and turns green when charging is complete. The LED can also double as a (weak) flashlight and a notification LED.


Along the bottom edge of the watch face is a bright 96 x 16 pixel white on black OLED display that is used to display scrolling notifications and other info.

Tip: The Martian’s watch face and hands don’t glow in the dark, but if you want to see the time in the dark, you can enable the world time feature and set it to your current location. You would typically use the world time feature to keep track of time in a different location, but it’s handy for viewing the current time in the dark when you press the bottom button.

Setup

The Martian mVoice PTL 02 watch doesn’t come with any instructions on how to set it up other than a sheet of paper that points you to visit a web page where the setup instructions can be viewed.

Setup isn’t difficult. The first step is to install the mVoice app for iOS or Android.

You will be asked to allow permissions for push notifications, microphone access, Bluetooth access, and calendar access. It then guides you through the pairing process with your mobile device which is initiated by long pressing the top button on the watch.


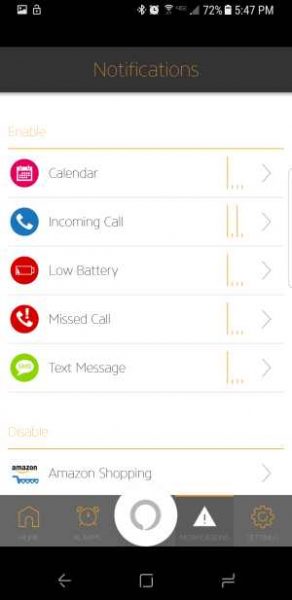
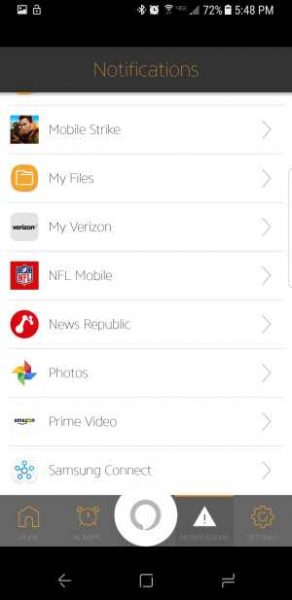
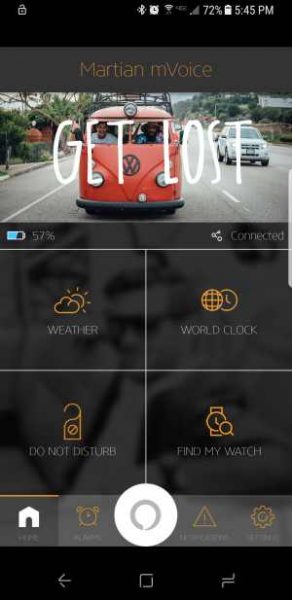
After the watch is paired with the phone and the app, you can customize some features like deciding which apps are allowed to show notifications on the OLED display on the face of the watch. By default, calendar, incoming calls, missed calls, low battery, and text message notifications are enabled. You can add other notifications like Gmail, and some games.

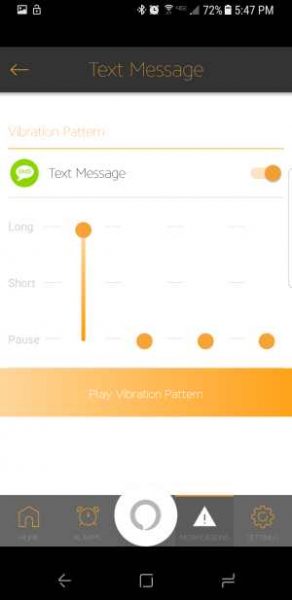
Each notification’s vibration pattern can also be customized so that you will know the type of notification before even looking at your watch.

Voice control with Alexa and others

Using the Martian mVoice PTL 02 like a miniature Amazon Echo Dot is one of the main selling points of this watch.


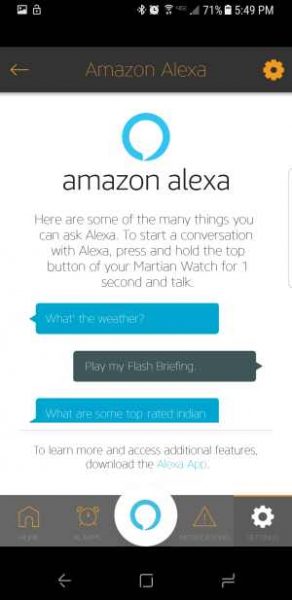
You don’t need to already own an Amazon Echo or Echo Dot to use this feature. You just have to link the mVoice app with your Amazon account. After you do that, you can ask Alexa questions by pressing the button in Alexa button in the mVoice app, or by holding the top button on the mVoice watch.

There are a couple things to keep in mind with this feature. First of all, you have to hold down the top button on the phone to launch Alexa. If you just press the button and let go quickly, the Siri or Google Now voice assistant will launch instead. This might be annoying, but it’s really important to have both voice control options.

Alexa voice control is useful for controlling IoT items in your home and Siri or Google Now is useful for making your phone do what you want like making calls, navigating to locations, etc.

It’s also important to know that at the time of this writing, the Alexa voice control feature is only supported in the US and UK.

If you don’t have an Amazon Echo device in your home, having Alexa on your wrist is cool. But, having to press and hold a button, listen for a beep to ask a question, and then wait for the reply takes too long for my liking. You also must have your phone within Bluetooth range of the watch for this to even work.

Taking and making calls with the Martian mVoice PTL 02 Smartwatch

Although I’d never make or take a call using this watch while in public, using it in the car while driving is like using a Bluetooth headset that’s on your wrist.

The Martian mVoice PTL-02 has four volume levels including Low (1), Medium (2), High (3) and Clear Voice (C) which is recommended for conversations. I found volume level to be pretty good, but it will depend on the noise level where ever you might be when trying to make or take a call with the watch. People on the other end of my test calls could tell that I was not talking directly through the phone itself, but they thought the audio quality was acceptable.

When a call comes in, the watch will vibrate, the LED will flash, and caller ID info will scroll across the display. To answer a call, you press the top button and to end or reject a call, you press the bottom button.

It should be obvious that the paired phone is doing all the work of receiving and placing calls. The watch is just a microphone and speaker.

Using other features

In addition to making and taking calls through the watch and seeing notifications, there are other features like a flashlight, stopwatch, remote camera shutter, find my phone, and weather features that are activated by continuously pressing the bottom button till you see the feature you like. You then press the top button to activate that feature.

The flashlight function turns on the built-in LED to shine like a flashlight. It isn’t bright enough for any real work, but it’s fine in a pinch.

The stopwatch feature shows a stopwatch in the OLED screen. Pressing the top button starts the stopwatch and pressing it a second time stops it.

The remote camera shutter feature does what you would guess it does. When activated, pressing the top button will launch a very basic camera app (it’s not the phone’s default camera app) that defaults to the front facing camera. Pressing the button a second time will snap the pic. If you hold down the top button, it will count down 3 seconds and then snap the image.

The find my phone feature will play a short tune through your phone’s speaker so you can find it.

The weather feature can be enabled through the mVoice app. It’s supposed to show the high and low temps at your location. This worked for me a few times but now it doesn’t even though it’s enabled in the app…

Other watch features include the leash feature, tap to see last notification, turn by turn navigation, and music playback control.

The leash feature will cause the watch to continuously vibrate and show a message that the phone is out of range when you put too much distance between the Martian watch and the paired phone. This is a safety feature to prevent you from accidentally leaving your phone when you leave a location.

The tap to see last notification will display the notification on the OLED display if you tap the watch face within 5 minutes of receiving the notification. If the notification was sent more than 5 minutes ago, you can press both the top and bottom button to see the last few notifications.

I wasn’t able to test the music feature because it is only available for iOS and I use Android. My test of the turn by turn feature wasn’t the correct way to test it. I plan to update this review with more info on the navigation feature in the next day or two.

What I like

I like the style of the Martian mVoice PTL 02 smartwatch because it doesn’t scream the fact that it’s a smartwatch. It just looks like a chunky retro analog watch with an easy to read large dial and numbers.

What needs improvement

I first set up the watch with an LG G6 Android smartphone and it worked flawlessly for a few weeks. But after I had to return that phone to Verizon, I then set it up on a Samsung Galaxy S8 and it’s not nearly as reliable. The watch frequently loses connection to the Galaxy S8 or vice versa. And even when it is connected, it doesn’t always show incoming text message notifications, calls, etc.

When notifications are working, the entire message is not displayed. I haven’t counted the number of characters that are displayed, but almost all my messages are truncated if they have more than a couple of words. But, the messages are preceded by the name or number where they came from so you can check your phone to read the full message when an important text is received.

I added Gmail and Words with Friends to the notification list, but have yet to see one notification come through the watch.

The voice control feature is temperamental.  You have to hold down the top button on the watch to activate Alexa. But if you hold it down too long or don’t immediately say your command, you’ll miss the listening window and will have to try again.

If you don’t hold down the button long enough, the Siri or Google voice control feature will activate instead. But that’s not a bad thing because I’ve found that Google actually works faster / better than Alexa. I did not test Siri.

Final thoughts

I hoped that the Martian mVoice PTL 02 smartwatch would make me want to wear a watch again, but I just ended up being disappointed due to connectivity issues and the reliability of some of the notifications.

The watch works great as an analog watch, but I think Martian needs to go back to school to improve its smarts.

Source: The sample for this review was provided by Martian. Please visit their site for more info and Amazon to order.


Product Information

Price: $215 MSRP
Manufacturer: Martian
Retailer: Amazon
Pros:
  • Analog watch with basic smartwatch features
  • Text, email and other notifications
  • Google, Siri, and Alexa voice control
  • Can make and receive calls directly through the watch
  • iOS music control
Cons:
  • Watch frequently disconnects from phone
  • Notifications stop even when watch is connected to the phone
  • Music control not available with Android

Filed in categories: Reviews

Tagged: , ,

Martian mVoice PTL 02 Smartwatch review originally appeared on on May 4, 2017 at 4:24 pm.

Note: If you are subscribed to this feed through FeedBurner, please switch to our native feed URL http://the-gadgeteer.com/feed/ in order to ensure continuous delivery.
Audeze iSINE 10 planar magnetic in-ear headphones review


While planar magnetic speakers have been around for a while, the tech can mostly be seen in larger speakers. And although planar magnetic headphones have been around since the 70s, they’ve only escaped cult status within the last few years. Now, many companies produce these kinds of headphones. Audeze is one of the more popular planar magnetic headphones makers who offer many models at many prices—all expensive. They’ve now shrunk this speaker technology into an earphone with the introduction of the iSINE 10—and it is amazing!

Audeze makes only planar magnetic headphones such as the LCD-4 which sells for an eye-watering $4,000. Obviously, the LCD-4 headphones are not for everyone—they’re big, bulky, expensive and need a really good amplifier to sound their best. With the iSINE 10, Audeze has not only shrunk the planar magnetic down to earphone size but also shrunk the price—a lot.

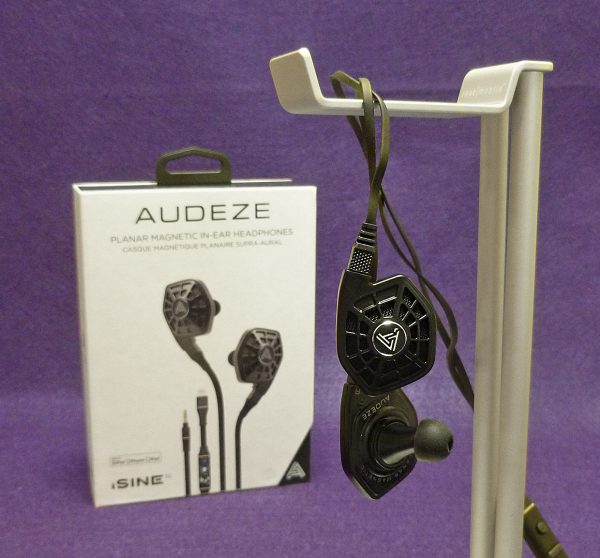
The Audeze iSINE 10 is unlike any other earphone you’ve ever seen. Since it uses magnetic planar technology, it wouldn’t fit into a standard earphone shell. Instead, the speaker sits outside your ear, held in place by the ear plug itself, or with the help of supplied ear hooks. While they might look like tiny headphones, their sound is bigger than many regular headphones.

Here are the specs and features:

• Planar magnetic drivers

• Neodymium diaphragm 

• 30mm Transducer

• 3W max power

• Frequency response 10Hz – 50kHz

• THD <0.1% @ 100dB

• Impedance 16 ohms

• Weight 20g

• Design by DesignWorksUSA a BMW group company

• Ear hooks and Earlocks

• Certificate of authenticity

• User guide and warranty

• 59 in. audio cable, 1/8” stereo plug input to 2-pin plug output

59 in. Cipher cable, Lightning plug input to 2-pin plug output

Despite its unusual looks, the iSINE 10 headphone’s Spiderman looking web design of the outer shell serves a purpose. This allows the shell to be open-backed—very unusual in in-ear headphones. Open-backed simply means that when wearing the iSINE 10 in-ear headphones, you can still hear your surroundings—and to a lesser extent, people can hear what you’re listening to. In other words, sound leaks in and out of an open backed design. The big advantage to this approach is that music sounds more open and spacious. The audio sounds like it surrounds you rather than just in your head, which is how a closed-back headphone or regular earphone sounds.

Even though the iSINE 10 look larger than normal earphones, they are light in weight, which is not what I expected. This makes them more comfortable to wear over longer periods. Heavier earphones always feel like they’re about to fall out as you move your head. Not these. Helped by around-the-ear snap-on clips (ear hooks) or small silicone ear locks, the iSINE 10s stay in place. I’m not a fan of the ear hooks because they interfere with my eyeglasses.

After much trial and error, I finally figured out how the ear locks work—the manual was no help. Combining the ear locks with the largest tips Audeze offers, the iSINE 10 in-ear headphones stay put as long as I don’t shake my head too much. After all, the iSINE 10’s are designed to be used on the go. Note that Comply makes foam tips which may be a better fit overall but it’s an extra cost hassle. In this price range, there should be a wider array of ear tip choices offered. Incluared is a softly lined mesh and protein leather carrying case for protecting the earphones. It has plenty of room for the earphones as well as both the lightning and regular mini plug cables.

One downside of planar magnetic speaker technology is that they require more power than most earphones, and a smartphone amp isn’t sufficient enough for the iSINE 10s to sound as good as they should. Audeze has solved this dilemma with an iPhone lightning cable that bypasses the headphone jack completely. For iPhone 7 users, this is welcome news since there is no headphone jack. However, there is more to this lightning cable than you might think.

The Cipher lightning cable (as Audeze calls it) is a 59″ cord with an in-line remote/mic that has 2-pin connectors at one end and an Apple Lightning connector at the other (Apple only—sorry, Android). But wait, there’s more. The Cipher cable contains an in-line headphone amplifier, a 24-bit digital-to-analog upsampling converter (DAC) and digital signal processing (DSP). This combination is a major reason the iSINE 10 in-ear headphones sound as good as they do. By including an amp and DAC with the cable, the iSINE 10 receives a direct digital signal—bypassing the iPhone’s weaker amp and DAC—then translates that signal into analog sound waves. Keep in mind that analog is what you actually hear (you can’t hear digital). The Audeze amp and DAC are more powerful than the iPhone’s, so your music will sound clearer, louder and more alive that without this in-line amp. The Cipher cable also does not exhibit any annoying microphonics, so the cable can be tapped or bumped without any noise leaking into the audio.

Then there’s a free and simple app that’s basically a real-time 10-band graphic equalizer with a couple of presets. It may be simple but it works. The app also provides a quick way to upgrade iSINE firmware should it be needed. The iSINE 10 in-ear headphones did need a firmware upgrade which took about 2 minutes with no issues.

Note: Audeze spells Cipher with an “i” on their web site and Cypher with a “y” on their app. I decided to go with Cipher.

Earlier I marveled about how good the iSINE 10 in-ear headphones sound. Let me explain. When I’ve previously reviewed planar magnetic headphones, I wrote about the transparent nature of the audio. The same holds true here, but even more so because of one difference—the open backed design I mentioned earlier in this review. Listening to music is always more fun when you are surrounded by it.

I decided to try the Onkyo music player app on my iPhone 7 Plus. This app allows me to download and play high-resolution files in their native format—something iTunes does not allow. I listened to uber hi-res versions of Pink Floyd’s “Dark Side of the Moon” and its follow-up, “Wish You Were Here”. Both albums have become a cliché in any headphone testing, but their high-quality sonics make them an obvious choice. The iSine 10 earphones provide details that are both subtle and interesting. There is a lot of stuff going on in these albums—much of it buried under layer upon layer of sound effects. Having earphones that can extract these hidden aural gems is half the fun and the iSINE 10 earphones certainly provide that fun.

Because of the built-in DAC, the iSINE 10 can upsample songs from lower res files. Even though upsampling can make an okay song sound better, it’s not a magic ingredient that can make a bad recording sound good. It simply improves what’s already there in the music file. I’m a sucker for old Height-Ashbury hippie music from the mid to late 60s. The San Francisco group, It’s a Beautiful Day, made a couple of “flower power” albums (the self-titled debut and its follow-up, “Marrying Maiden”) that sound a bit dated today, but I still love them. Their cover version of Tim Buckley’s “The Dolphins” from “Marrying Maiden” sounds like soft rock with a touch of country thrown in. Even though this song (or their albums) were never audiophile quality, the iSINE 10 brings out details that can easily be missed, from their wonderful harmonizing to David LaFlamme’s expert violin playing. Other good examples to listen to are “Waiting for the Song” and “White Bird.”

The iSine 10 earphones are not cheap, but not outrageously priced either. There is a much more expensive iSiINE 20 available, but it requires more power and is not as mobile friendly. The iSINE 10 is more appropriate for those music fans who are looking to upgrade their earphones or are just curious about how planar magnetic speakers sound. Audeze has elevated the art of planar magnetic technology with the iSINE 10 in-ear headphones. They’re stellar sound quality and ease of use make them a game-changer that could help Audeze become not just an audiophile brand but a household name in audio.

Source: The sample for this review was provided by Audeze. The iSINE 10 in-ear headphones with lightning cable have an MSRP of $399.99 US.  Please visit Audeze for more info and Amazon to order the lightning cable version of the standard 3.5mm cable version.


Product Information

Price: $399.99 US
Manufacturer: Audeze
Retailer: Amazon
Pros:
  • Steller sound quality
  • Comfortable
  • Light weight
  • Built-in amp and DAC
  • One of the best earphones for the money
Cons:
  • Unusual design could put off some people
  • Expensive—but not outrageously so
  • Needs better ear tip selection
  • Can fall out without ear hooks or ear locks

Filed in categories: Reviews

Tagged:

Audeze iSINE 10 planar magnetic in-ear headphones review originally appeared on on May 3, 2017 at 10:00 am.

Note: If you are subscribed to this feed through FeedBurner, please switch to our native feed URL http://the-gadgeteer.com/feed/ in order to ensure continuous delivery.