OLALA S75 7500 mAh power bank review


Carrying around enough potential energy to fuel our increasing appetite for connectivity is a never ending balancing act. Hardware engineers make energy-efficient phones and tablets, and Developers respond with ever-increasingly sticky apps and websites. Engineers make better, lighter, more efficient batteries, and we leave them on longer and whine that the device is larger. Into this mix walks the arbiter of fairness, the humble battery pack maker. “Here. If you need power, use one of these. When you don’t, leave it home, or in your bag.” Olala has even going a step further with their latest power bank by including cables and a sliding cover to hide them. They sent me a sample just before we left the country for two weeks.

Note: Photos may be tapped or clicked for a larger image.


The Olala Power Bank will work for any USB powered device but is specially designed to look inconspicuous with recent Apple devices. It has a Gold case, which would perfectly match the Gold iPhone, but it looked fine, even though I have a Space Grey iPhone 6s, and my Lovely Bride has a silver iPhone 6 (shown below).

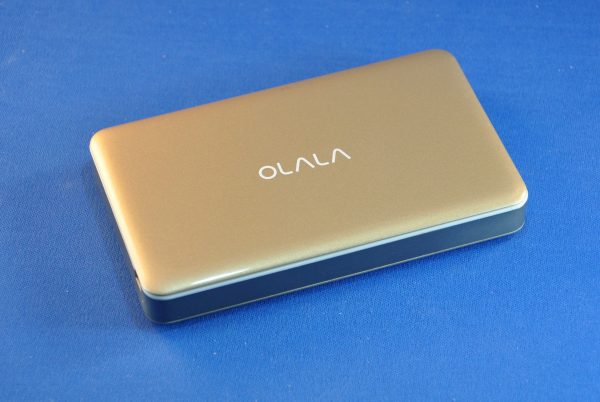
Overall, it’s a 125 mm x 75 mm x 15mm (~5″x~3″x~.75″) rounded rectangle with smooth sparkly gold plastic panels on the larger sides and a metalized band around the narrow edges. The top has a white silk-screened Olala logo centered on it and hides the secret chamber with the hidden cables.

Sliding the top panel with the logo up reveals a cord on one side with a Lightning connector and one on the other with a standard USB connector. There is a slight click to hold it open or closed fully, as well as notches on each side to allow the cables to be extended while the cover is closed. The bottom has silk-screened legal registration info. The other surfaces are free of printing.

One short side has a standard USB jack for output to any device, and a microUSB port for charging. There are 4 battery level LEDs between the two.

On one long edge, there is a button which activates charging or lets you see the battery level if there is no load on the outputs. While a hassle, the button is a nice protection from the device powering on due to a short across the connectors. And, being on the edge, it’s not going to be easily pressed by something on top of the unit.
On our trip, this became our best tool for “topping up” our phones and iPads while out-and-about. Using the car’s USB port meant audio only going through the car stereo, which caused us to miss a few turns. (We weren’t listening to anything on the car stereo, and there was no “just play the GPS” setting on it.) Then, we decided to use this Olala pack between the car and the phone. Our phone got topped up, and so did the power bank, and we could hear the turn-by-turn directions of our phone’s speaker.
When we left the car, we’d sometimes walk for a good long time, taking photos, doing walking tours, or exploring museums together. The Olala rescued us by letting us sit at a cafe for a cuppa and reorient our thoughts while charging. But it wasn’t too much trouble to plug it in and have it charge our phones while we were taking photos, reading about various points of interest while walking, or writing Yelp reviews. The sleek profile and short cable made it an easy solution to the power battle we all face, and the 7500 mAh battery meant it could provide a full charge to both my Lovely Bride’s iPhone 6 and my 6s, with enough left to make sure each of us got a little extra as well.

Source: The sample for this review was provided by Olala. Please visit their site for more info and Amazon to order.


Product Information

Price: $32.99
Manufacturer: Olala
Retailer: Amazon
Requirements:
  • USB source for charging battery
Pros:
  • Integrated cables that hide away
  • Can be charged while charging a device
  • Holds 2+ full iPhone charges
Cons:
  • 7500 mAh is not a multi-day multi-device capacity
  • Cords for non-Apple devices must be taken along
  • USB-to-microUSB cord for charging

Filed in categories: Reviews

Tagged:

OLALA S75 7500 mAh power bank review originally appeared on on May 23, 2017 at 9:00 am.

Note: If you are subscribed to this feed through FeedBurner, please switch to our native feed URL http://the-gadgeteer.com/feed/ in order to ensure continuous delivery.

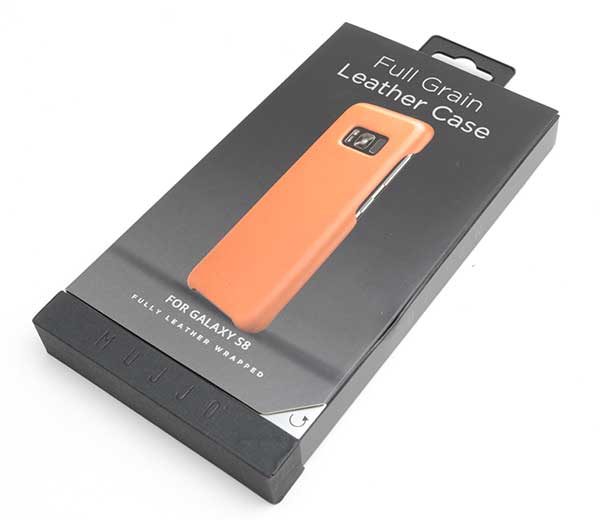
Mujjo Samsung Galaxy S8 full grain leather case review


The new Samsung Galaxy S8 is one of the nicest looking smartphones ever to be created. So why would you want to cover it up with a generic plastic case that adds bulk, and takes away from the aesthetic of the phone? One case that protects the phone without detracting from its beauty is the Full Grain Leather Case from Mujjo.

What is it?

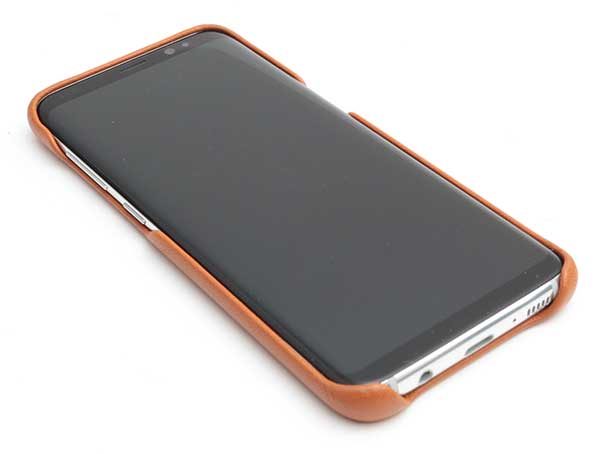
The Full Grain Leather Case from Mujjo is a premium quality full-rain leather case that snaps over the back of the Samsung Galaxy S8.

Design and features


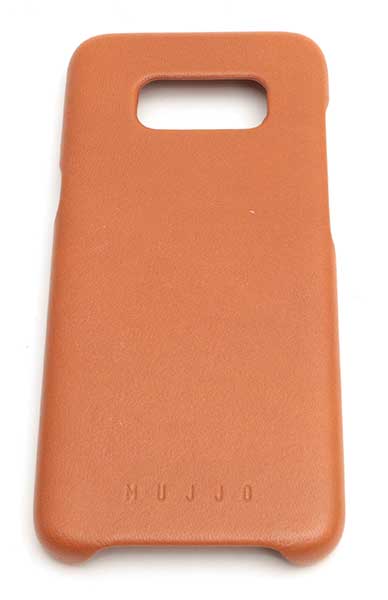
Available in saddle tan or black, I was sent the saddle tan version of the Mujjo Full Grain Leather case. The images in this review do not really do justice to how nice this case is. Also, my images make the case look a little more orange than the case is in real life.

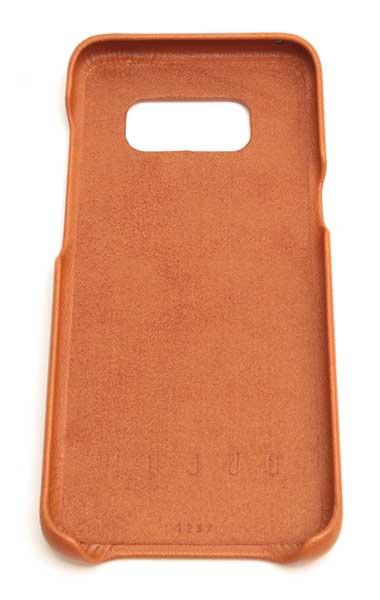
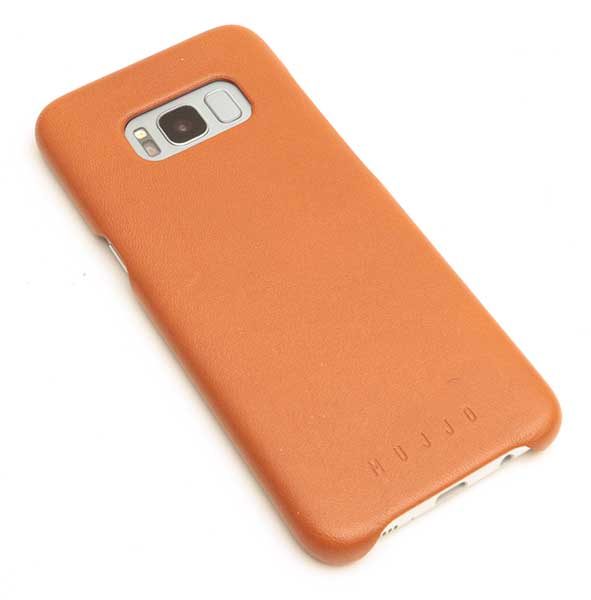
The case is wrapped in leather on all sides, with a soft microfiber suede interior.

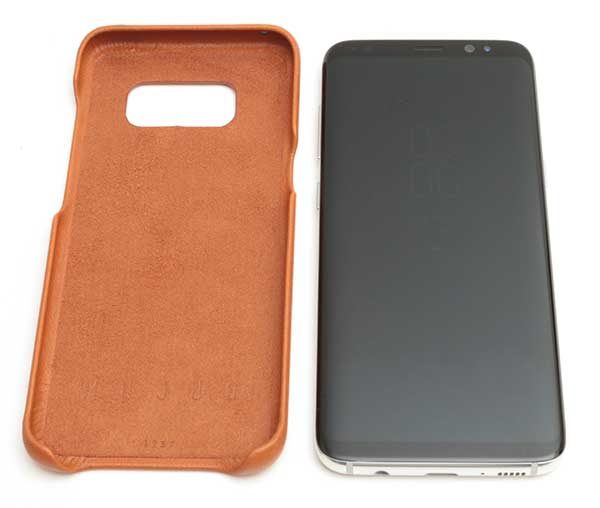
Installing the Galaxy S8 in the case and removing the phone from the case takes little to no effort.

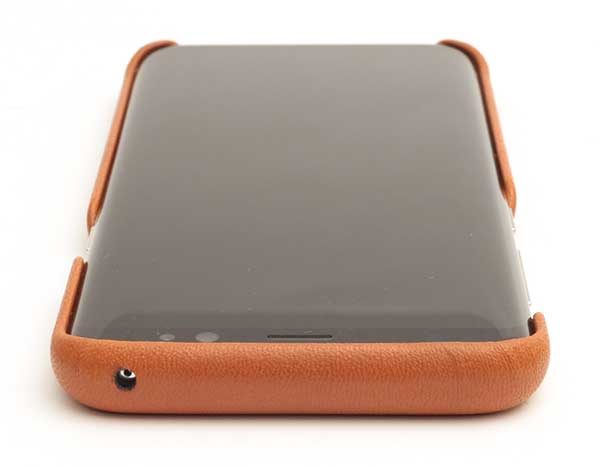
The case has expertly aligned cutouts for the microphone at on the top edge of the phone.

On the right side is a cutout for the power button.

The opposite side of the case has a long cutout that provides access to the volume button and Bixby button.

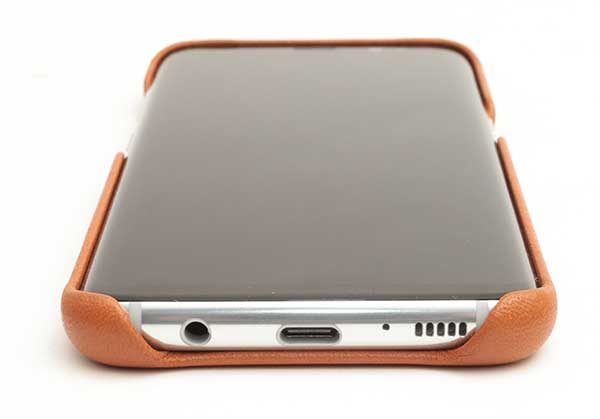
The cutout at the bottom of the phone allows access to the earphone jack, Type-C charging port, 2nd microphone, and the speaker.

You’ll also notice that the top edges of the case rise slightly higher than the surface of the display to project the screen from scratches and scuffs when it’s positioned face down.

A large opening on the back of the Mujjo case provides clearance for the LED flash, camera, and fingerprint scanner.

Final thoughts

The Samsung Galaxy S8 Full Grain Leather Case from Mujjo is gorgeous. It is made very well and fits perfectly. There is nothing about this case that I don’t like. It feels great in my hand and adds just the right about of grip to the phone while not being overly bulky.

Source: The sample for this review was provided by Mujjo. Please visit their site for more info.


Product Information

Price: $41.93
Manufacturer: Mujjo
Pros:
  • Lightweight
  • Beautiful
  • Perfect fit
Cons:
  • None

Filed in categories: Reviews

Tagged: , ,

Mujjo Samsung Galaxy S8 full grain leather case review originally appeared on on May 22, 2017 at 9:00 am.

Note: If you are subscribed to this feed through FeedBurner, please switch to our native feed URL http://the-gadgeteer.com/feed/ in order to ensure continuous delivery.

Cherry MX Silent Keyboard Review


Cherry, a German company known mainly for its high-end mechanical keyboard switches, also sells a line of keyboards. The Cherry MX Board Silent is the first to feature Cherry’s noise-optimized silent MX key switches for a mechanical keyboard feel minus the traditional click-clacking that might be disruptive in some office environments. For the high price though, the Cherry MX Silent Board is surprisingly lacking in both features and design.

The Cherry MX Silent comes in a rather large nondescript box adorned with the Cherry logo.

Open the box and you’ll find the massive, old-school looking Cherry MX Silent wrapped in a plastic bag. The only contents of the box are the keyboard and an already attached USB to PS/2 adaptor.

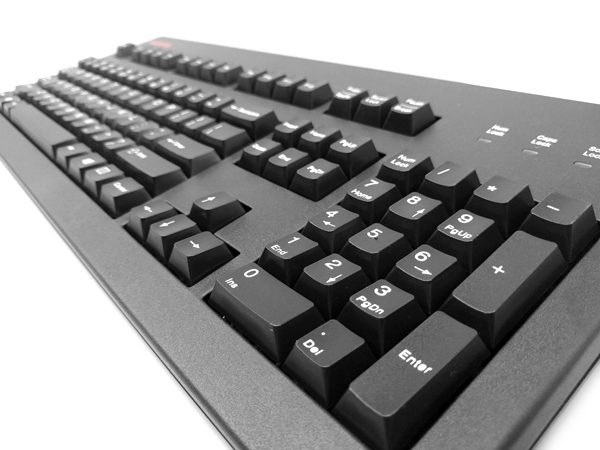
The first thing that struck me about the Cherry MX was its large size. In this time of mini and micro-accessories and peripherals, it’s surprising to see a company go the complete opposite route. I’d say it was a refreshing and unique approach to keyboard design, but after the frustration of having to make room on my desk for this 7.7 inch by 18.5-inch long behemoth, I’d be lying.

With so much empty real estate on the keyboard body, you’d think the addition of a few media keys or some LED controls would be standard practice. An extra USB port or two would be nice as well. But, for such a large, high priced keyboard, the Cherry MX has no functions or indicators beyond that of a standard PC keyboard. Except, of course, for the silent mechanical switches the manufacturer is known for.

The main appeal of this keyboard is the feel, function and silence of the famed Cherry MX switches. Here, the Cherry MX Silent Board does not disappoint. There are two switch versions of the Cherry MX Silent that differ in the required release force of the switches. The MX Red Silent is rated at 45 centinewtons and the MX Black Silent is 60 centinewtons. The color denotations refer to the key switches themselves, not the keyboard color. I tested the MX Black Silent.

I wrote this entire review using the Cherry MX Silent. The keys have a great feel to them when typing. To me, they felt a tiny bit soft, but if you’re used to working on mechanical keyboards, you’ll feel right at home with the Cherry MX.

According to Cherry, “The MX Silent switches have a uniquely shaped rubber pad compared to conventional switches. The integrated 2-component stem reduces audible clicks at the bottom-out and top-out.”  I, for one, enjoy the sound of a mechanical keyboard, but I can see how it may be distracting for others in a co-working space. While not totally silent, the keys are significantly quieter than traditional mechanical key switches without sacrificing the mechanical keyboard feel.

The keys and keyboard body have a textured matte finish that is pleasant to the touch.

On the back of the Cherry MX you’ll find two height adjusting legs that pop up and lock into place.

There is only one height level and you’ll have to push hard to get the legs to lock into the open position.

If you don’t lock the legs into place they will close if you push the keyboard forward at all while typing.

An included USB to PS/2 adapter is included for use on PCs that require PS/2.

The adaptor fits over the USB-A end of the keyboard cord.

Overall, I enjoyed using the Cherry MX Silent Board. The joy of typing on a mechanical keyboard without worrying about annoying my co-workers was great. But, the lack of media keys or LED functions found on any number of comparable mechanical keyboards was disappointing considering the high price point. The Cherry MX Silent Board is offered in black or white.

Specifications

  • Model tested: 
G80-3494LTCEU-2
  • Hardware Platforms: 
PC, MAC
  • Weight:
2.1 pounds
  • Dimensions: 
7.7 x 18.5 x 1.7 inches
  • Number of Keys: 104

Source: The sample for this review was provided by Cherry. Please visit their website or Amazon to order.


Product Information

Price: $149.00
Manufacturer: Cherry
Retailer: Amazon
Requirements:
  • USB or PS/2 connection
Pros:
  • Solidly-built
  • Silent mechanical keys
  • Mac and PC compatible
Cons:
  • High priced
  • Lack of features
  • Too large

Filed in categories: Reviews

Tagged:

Cherry MX Silent Keyboard Review originally appeared on on May 21, 2017 at 10:00 am.

Note: If you are subscribed to this feed through FeedBurner, please switch to our native feed URL http://the-gadgeteer.com/feed/ in order to ensure continuous delivery.

Loftek 15W Portable Floodlight review


I’ve got quite a few flashlights, but I don’t really have a portable “floodlight” when I need to light up a large area.  This time I got to try out something different. It’s not quite a flashlight, and it’s not really a camping lantern.  It’s the Loftek 15W Portable Floodlight.

Specification

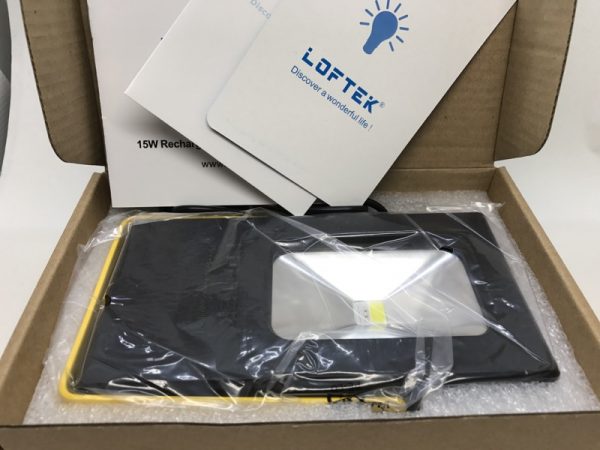
Includes: 1xUSB cable, 1x 15W floodlight, 1xuser guide
Power: 11 watts (white light); 2 watts (blue light); 2 watts (red light)
Input: 5V DC (0.5-2A)
Output: 5V DC (2.1A)
Lumen value: 650lm (maximum brightness mode); 380lm (power saving mode)
Shoot Distance: 20m
Beam Angle: >120 degree
CCT (Correlated Color Temperature): 5500K-6000K
CRI (Color Rendering Index): Ra>70
Battery capacity: 6600mAh
Working time: More than 4 hours; Charging time: 6 hours
IEC rating: IP65—Dust tight and Protected against low-pressure water jets (do not submerge in water)
Warranty: 12 months, unlimited when purchased from LOFTEK. Contact us for additional support if needed

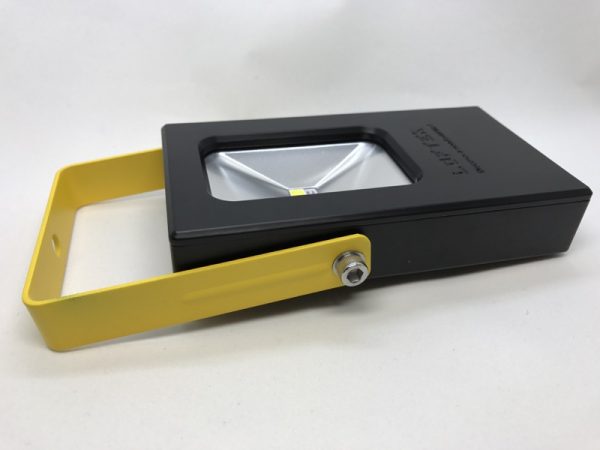
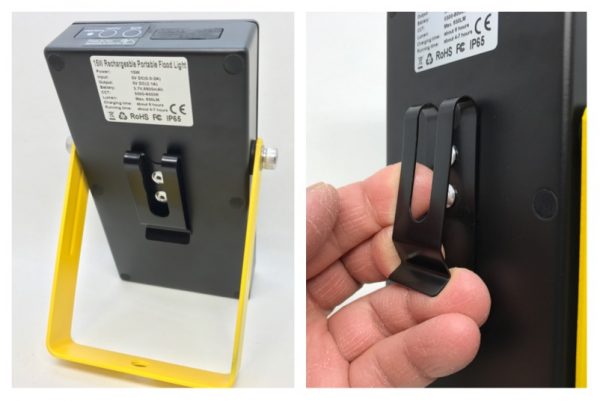
The very first thing I realized was that the handle is attached by two screws that would require a hex key to adjust.  I didn’t see one in the package.  If you’re not careful, the stand won’t keep the light upright.

On the back is a fairly sturdy metal clip.  That could come in handy.

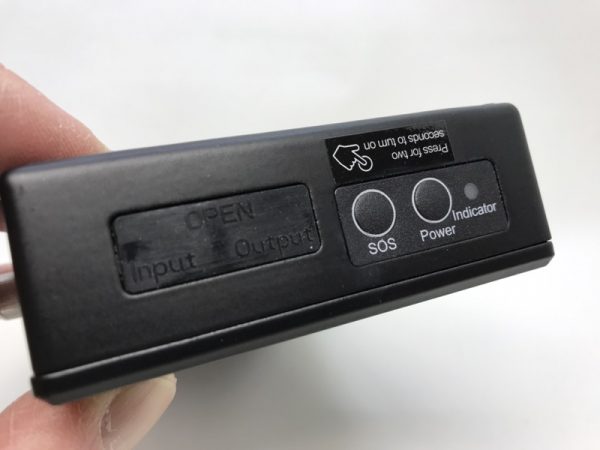
Here you can see the SOS and Power buttons.  The SOS button makes the light flash red and blue.  The power button select from a high and a low light setting.  In practice, I found these two buttons very difficult to tell apart in the dark.  That “indicator” is a LED that glows red when recharging, and green when fully charged.

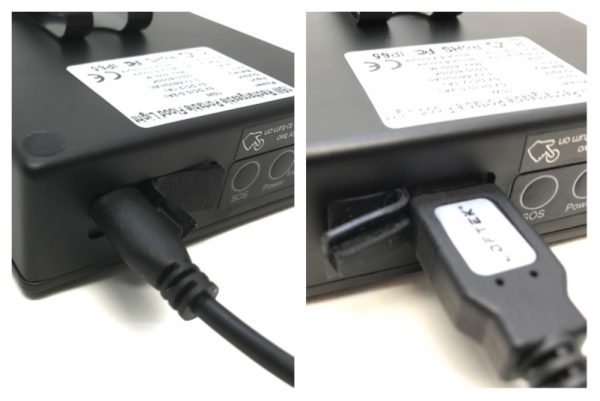
There’s also a rubber flap covering the microUSB charging port, and a “normal” USB port to turn the lamp into a 6600mAh battery pack to charge your accessories (5V, 2A).

Speaking of SOS, the light alternates between red and blue.  While it would get your attention, the color pattern is somewhat similar to what emergency vehicles might use.  I also noticed in the specifications that the colored lights are rated at 2W each, and the white light at 11W, totaling 15W.  I was led to believe that the main white light was rated at 15W, but I’m not so sure.

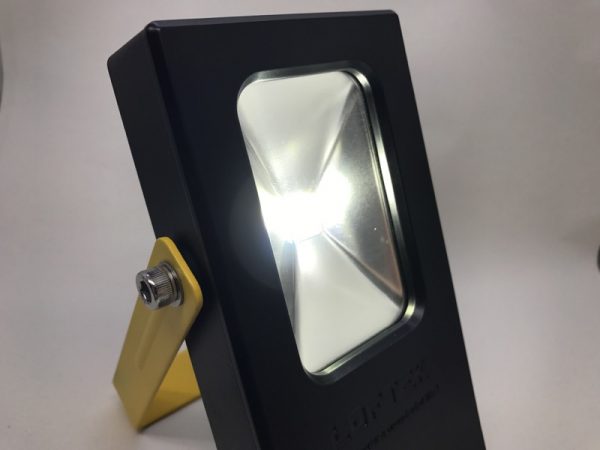
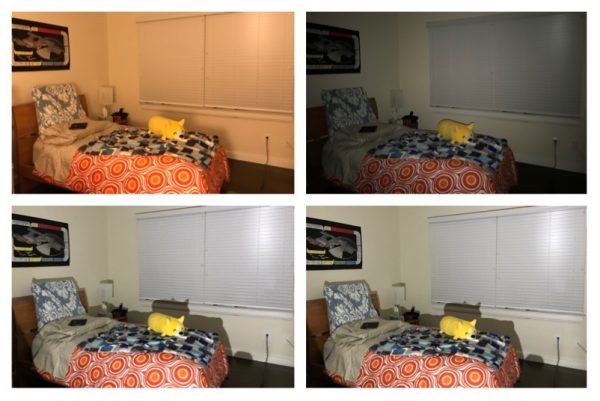
The light really produces a very wide flood beam.  In this example, the photo in the upper left is of my son’s room with a regular table lamp.

The upper right was taken with just the iPhone LED.

The two bottom photos were taken with the flood lamp at the high and low settings (left, right).  The difference is a little hard to photograph.  Note the “whiteness” of the flood light is a much cooler white.  It’s rated at 5500K-6000K.

How long does the battery last?  The listed working time is stated at “more than 4 hours.  Here’s what I found:

High setting:  5.5 hours
Low setting:  9 hours

I noticed that after a while, the LED brightness does seem to taper down quite a bit, so it doesn’t maintain even light output throughout the burn time.

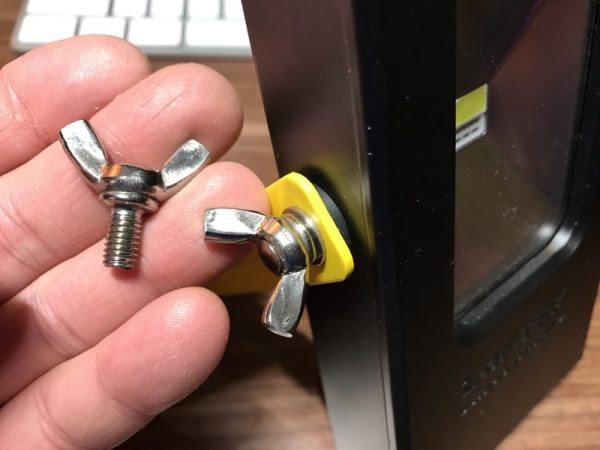
I do like the light, but it’s missing a few things.  First of all, I replaced the screws with matching ones with wings to make it easier to adjust.  The difference is night and day.  In case you want to try this yourself (or if Loftek wants to start including these), I used an M6 x 10mm, 1mm pitch stainless steel wing bolt.

Next, I’m thinking about adding a hook or a magnet to the yellow handle to make the Loftek 15W portable floodlight even more useful.  Now if they could only make the buttons a little easier to use.

Source: The sample for this review was provided by Loftek. Please visit their site for more info and Amazon to order.


Product Information

Price: $59.99 MSRP
Manufacturer: Loftek
Retailer: Amazon
Requirements:
  • MicroUSB to charge (cable included), charger not included
Pros:
  • Bright, wide flood light with even coverage.
  • Lasts up to 9 hours on the low setting.
Cons:
  • Stand adjustment needs work to be useful.
  • Controls can be tricky to use in the dark or by touch.

Filed in categories: Reviews

Tagged: ,

Loftek 15W Portable Floodlight review originally appeared on on May 20, 2017 at 10:00 am.

Note: If you are subscribed to this feed through FeedBurner, please switch to our native feed URL http://the-gadgeteer.com/feed/ in order to ensure continuous delivery.

Bitplay SNAP! 7 camera case and lenses for iPhone 7 Plus review


There is no question that I, and probably many of you readers, take a lot of photographs on a cell phone. It is always on you, and the cameras on them are getting better and better. I purchased the iPhone 7 Plus because of the camera, and I was intrigued to find out that there are cases and lenses to try to make that camera better. One of them is the Bitplay Snap! 7 and their differing lenses, and I was given an opportunity to try a few out.


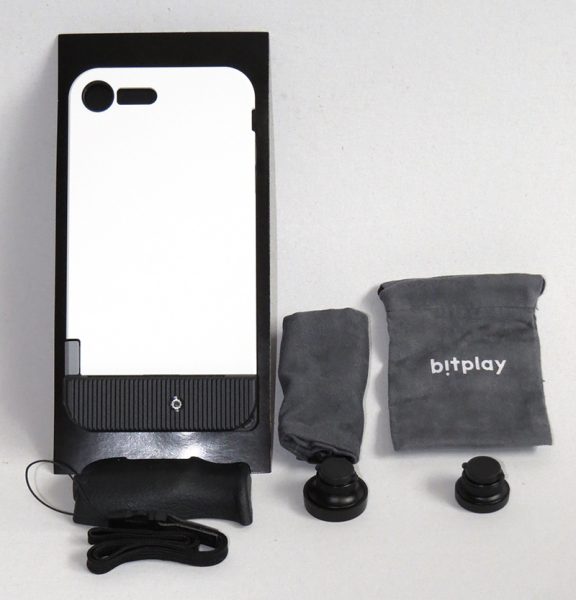
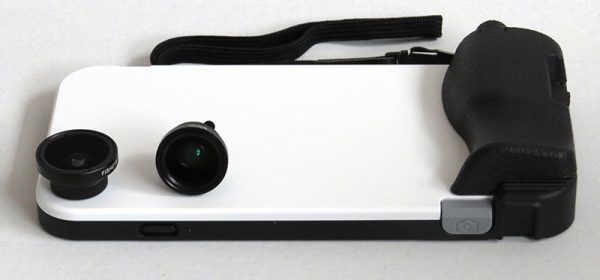
I was sent the Bitplay Snap! 7 case which includes the case, a hand grip, thumb rest, wrist strap, and user manual. Along with the case, I was sent two different lens sets to try out. Each lens had a macro lens included, as well as a cinch top bag to store them in. I ended up using one bag to store the accessories in the case and the other to store the lenses.


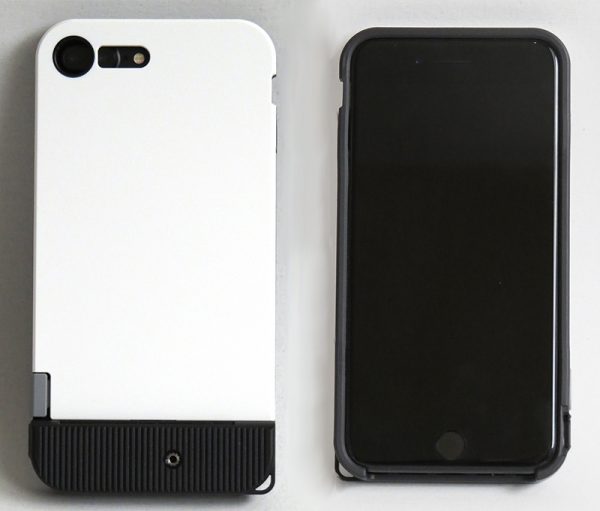
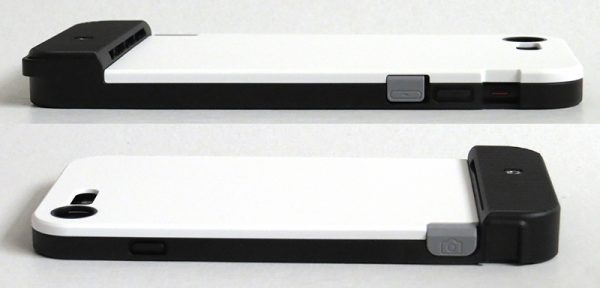
The case slips on like most standard cases, and it fit snugly on my phone. There is a lip on the front of the case to protect your screen, which is a must in my opinion, and the case itself is sturdy and I felt comfortable that it would protect my phone if dropped. The cutout for the camera does not interfere at all with taking pictures.


One of the things that make this a camera case is the extra button on the bottom right side to be used as a shutter button. Basically, it is a volume down switch moved to a new position. I used this when taking pictures, but after a few weeks of use, I still hit it accidentally when I am holding my phone and turn the volume down. It did work very well for taking pictures, however.


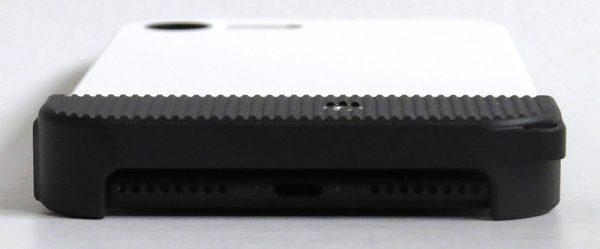
The bottom is left open, and I was able to plug in different sizes of Lightning cables without any problem at all. I prefer it this way, since my previous case only allowed for the official Apple cable to fit.


With the cutouts and holes for the camera accessories, the case itself is not the most aesthetically pleasing, but it performs its function well. It also is a little bulky, and I had a hard time fitting the already big phone into a few of my jacket pockets with the case on. Due to this, I don’t think I would use this daily, but instead, have it for vacations where I am going to use the camera features frequently.


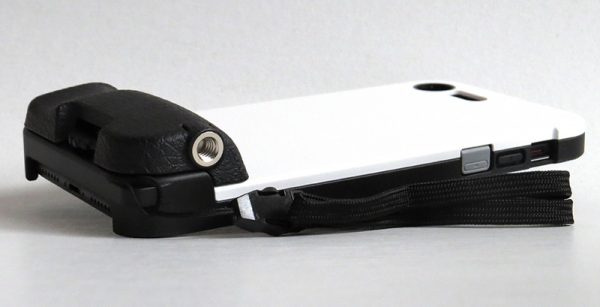
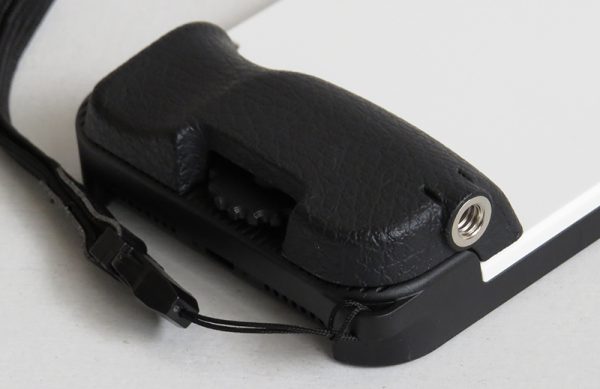
Now let’s move on to the included accessories. A thumb rest and hand grip are included with the case, and they are definitely not for daily use. However, taking pictures using both of these with the case was very comfortable. The hand grip can easily be screwed and unscrewed with a built-in dial. Not once did it unscrew on its own, which was one thing I worried about.

I was sent two lens kits; a wide angle with a 1.5x macro lens, and a fisheye with a 5x macro lens. Both included a carry bag. These lenses are sold separately, and there are also other variations of lenses available on their website.


The macro lenses were similar, so I will lump them in together. Both took good pictures, but it was very hard to keep the phone in focus when taking such close-up photos. Also, you had to be VERY close to the object to get a good picture, which meant I could only photograph tiny flowers, rather than a tulip or daisy. I can’t see myself using the macro lenses terribly often.


It was both fun and interesting to use the fisheye lens. When testing it out, my cat took a closer look at the lens and I shot a perfect picture of her nose. I would include it here, but it is just barely out of focus, so I took another of a flower bush to better show off the fisheye effect. Keep reading if you want to take a look at the fisheye picture of my cat. The iPhone camera adapted very well to the lens, focusing like it wasn’t there and also providing clear pictures. The lens quality seems pretty good. It’s not cheapo plastic feeling, and the included covers protected both sides of the lens to keep scratches from appearing on the glass.


The lens that I would use most out of all that I tried, however, is the wide-angle lens. I was floored when I saw the difference between a wide-angle and regular iPhone picture, so much that I did my best to take a picture at the same place with and without the lens to show it off. The above picture is just a regular iPhone picture, no lens attached. The below picture is the field of view when I added the lens on. I was able to see the entire bush, and not only that, there isn’t much in the way of distortion around the edges of the picture. I would have loved to have this in Yellowstone, to get an even greater view of the grand prismatic spring. The quality is just as good as I mentioned with the fisheye lens as well. If you picked up one lens for this case, this would be the one I would recommend.


Fisheye, macro, wide-angle, they all have their uses depending on their situation. If you are someone who loves an extreme fisheye look like my cat above, then the fisheye may work for you. They also have another style of fisheye on their website that doesn’t seem so extreme as well. I’d have loved to get a look at that one, but the standard fisheye was fun to use nonetheless.


Overall, I really liked the case and wide-angle lens, and will definitely include them on my next trip. For daily use, I reverted back to my previous case, since it is just too bulky to use all the time. The case and lenses may be a little pricey if you are used to cheap cases, but the quality is definitely there. If you are looking for a daily use case, I would probably not even look at a camera case, but if you are looking specifically for a case and lenses, take a look at the Bitplay Snap! 7.

Source: The sample for this review was provided by Bitplay. Please visit their site for more information and visit Amazon to order.


Product Information

Price: $49.99 (Case) – $34.99 (Fisheye + 5X macro lenses) – $24.99 (Wide angle + 1.5X macro lenses)
Manufacturer: Bitplay
Retailer: Amazon
Pros:
  • – Good photo quality with the lenses
  • – Easy to put on and take off
  • – Comfortable to take pictures with
Cons:
  • – Adds some bulk to the phone
  • – Have to remember to keep the lenses with you

Filed in categories: Reviews

Tagged: ,

Bitplay SNAP! 7 camera case and lenses for iPhone 7 Plus review originally appeared on on May 19, 2017 at 7:30 am.

Note: If you are subscribed to this feed through FeedBurner, please switch to our native feed URL http://the-gadgeteer.com/feed/ in order to ensure continuous delivery.