SCOTTeVest (SeV) Enforcer Jacket review


Since 2000, the SCOTTeVEST (SeV) designers have been producing their patented TEC (Technology Enabled Clothing) for those tech-heads who want to inconspicuously transport their EDC gear without the need for a bag, backpack, or briefcase. For this review, SeV has sent me their new 30-pocketed Enforcer jacket designed specifically with law enforcement, military, and gun enthusiasts in mind. While I am none of those things (at least anymore), I do like the sleek, stealthy look of the jacket…it’s all blacked-out style is definitely me. It will be interesting to see how well it fairs against a wet and damp spring here in the Pacific Northwest. 

Note: Click the images to see a larger view.

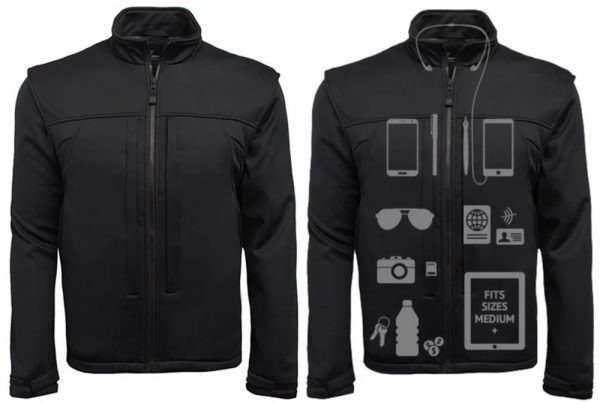
According to their website, the SeV Enforcer jacket is a new, improved version of the popular Alpha jacket. As I mentioned above, it is designed with law enforcement, military, and gun enthusiasts in mind. That said, the Enforcer still has all of the functional engineering of other SCOTTeVEST garments, including a wide assortment of pockets of all different shapes and sizes to securely store/transport all your gear. 

Features:

  • 30 Pockets are perfect for transporting your EDC gear
  • Insulation quilted to the lining
  • Removable sleeves
  • Water-resistant and breathable material
  • 100% polyester shell and lining
  • Patented Personal Area Network (PAN) for wire management
  • Ergonomic zippers
  • Includes the Travel Smart System™, Weight Management System™, NoBulge™, clear touch pockets, etc.
  • Can hold iPad/small laptop/firearm
  • Machine Washable

The SeV Enforcer jacket is very well made with high-quality materials, excellent construction/workmanship, and capacity to carry a ton of stuff.  The zippers, seams, and stitching are all precise and nicely done. The 100% polyester exterior is finely woven and looks like a stylish softshell jacket on the outside. Functionally, the shell does a good job of beading off water though I have not had the opportunity to use it in the dumping Seattle rain yet. Even though it’s black, the shell does not pick up/show dirt much at all. The jacket is machine washable.

Many of the 30 pockets are sized and engineered for a specific type of function like a sidearm, holding keys, sunglasses, tablet, pens or even small laptop (as shown below).

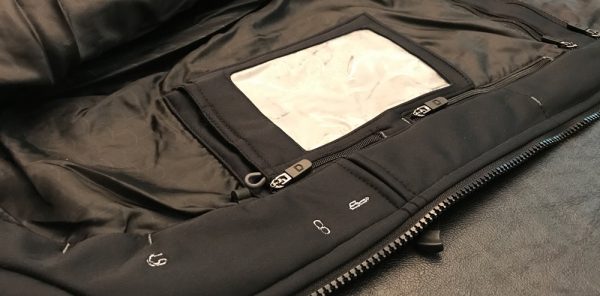
There are also other niceties hidden within the jacket like bungee clip for keys, soft cleaning cloth for cleaning your sunglasses, and RFID blocking pocket (red zippered pocket, inner lining shown above) to protect your electronic footprint from snoopers. As I have mentioned in other SeV reviews, the most challenging part of owning a TEC garment is remembering/finding where you stashed a particular item.

Though SeV helps you keep track of everything by embroidering icons that tell you what each of the pockets has been designed to hold.

The two front-positioned “Rapid Access panels”  are huge and contain built-in sub-pockets for extra magazine clips or anything really. The main front pockets are so big they easily accommodate my 12″ MacBook or full sized tablet. When fully loaded down with all my gear the jacket does get relatively heavy. I doubt in a real-world scenario I would carry my laptop in the jacket…maybe an iPad but that is about as heavy/bulky as I’d go.

Since I got the iPhone 7+, I use wireless earbuds 99% of the time. But thought it worth mentioning that the Enforcer has SCOTTeVEST’s patented Personal Area Network (PAN) for wire management. Here you can see my pair of JHAudio JH|5 Pro earphones I reviewed years ago installed in the Revolution Plus jacket (for illustration). As I mentioned in that review: “It took me just a few minutes to figure out the system and string the wires throughout the interior of the jacket. I would suggest to those who have a spare pair of earbuds laying around, to dedicate a pair to the jacket so you do not have to take the time installing and removing them”. The SeV wire management system is excellent for keeping your earbuds in order and always dialed in.

I’m 6’1″ and 180 lbs — the large Enforcer SCOTTeVEST sent me fits well and even when fully loaded the jacket rides nicely on my shoulders/frame.

Like many of their other jackets, SeV designers engineer removable, zip-off sleeves to transform the Enforcer into a vest. The Gadgeteer Kid said it reminded him of Marty McFly in Back to the Future.

The SeV Enforcer Jacket is available in 8 sizes: S, M, L, XL, XXL, XXXL, XXL-tall, XXXL-tall. And any color you want as long as that color is black…

I have been wearing the SCOTTeVEST Enforcer jacket for nearly two months. During that time, we have had all types of weather conditions transitioning from late winter to early summer. I really like the jacket both in terms of looks/style and TEC functionality. The Enforcer is a very well made tech-enabled jacket, designed specifically for law enforcement, military, and gun enthusiasts. Like all their garments, SeV has invested much thought and excellent engineering into its design. With 30 pockets of all shapes and sizes, the Enforcer is able to carry your firearm, tech, and misc gear from your smartphone to laptop, potentially eliminating the near to bring an EDC gear bag.

Source: The sample for this review was provided by SCOTTeVEST. Please visit their site for more info and you can find them on Amazon too.


Product Information

Price: $200
Manufacturer: SCOTTeVest
Retailer: Amazon
Pros:
  • Well made
  • Quality materials
  • Stylish
  • Comfortable
  • 30 pockets to carry your gear
  • Excellent design
  • PAN system works well
  • Conceal carry
Cons:
  • No removable hood option

Filed in categories: Reviews

Tagged:

SCOTTeVest (SeV) Enforcer Jacket review originally appeared on on June 18, 2017 at 10:00 am.

Note: If you are subscribed to this feed through FeedBurner, please switch to our native feed URL http://the-gadgeteer.com/feed/ in order to ensure continuous delivery.

Archeer 2 in 1 Apple Watch Stand and iPhone Charging Dock Station review


If you own an iPhone and an Apple Watch, you may find this beautiful aluminum dock station to be something you’re not sure how you’ve lived without.  I used to charge my phone by my bed, then charge my Apple Watch near my computer and I didn’t really have a system as to when I’d connect them. With the Archeer 2, I never have to part with my beloveds and somehow my life feels more organized and complete. There was some simple set up involved, that I detailed with pics.  Let take a look. 

Above is the bottom of the charging station and you can see that there are 4 screws that need to be taken out.  There is a lightning cable already installed in the station which you will see in detail in the pic below.  There is nothing you need to do with that half of the device. It’s ready for you to plug into a USB port or outlet and connect your iPhone, right from the get go. What we will be doing is installing the standard Apple Watch charger (not included) into the charging station.

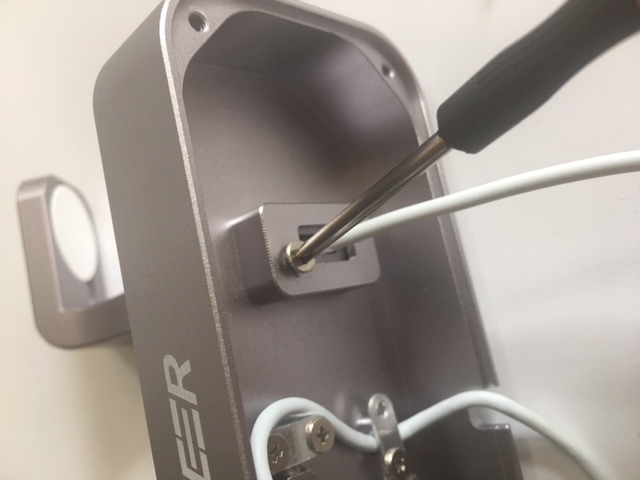
After the four screws are removed, there are an additional two screws that need to be removed to free the bracket that holds the watch.  In the pic above you can see the lightning cable threaded through the device, and the two screws to the right of those are the ones to take out.

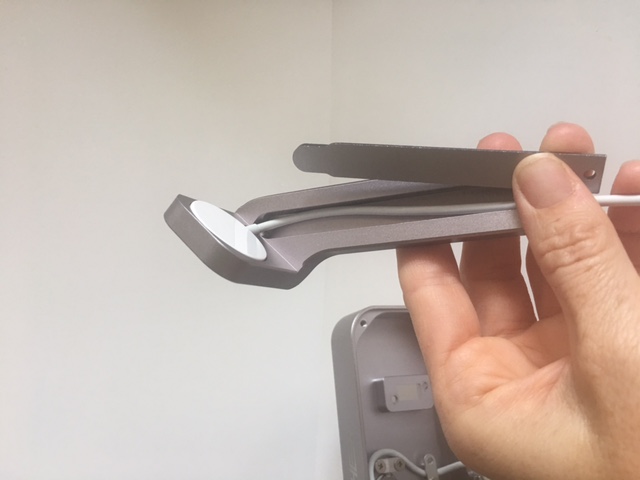
Now that all the screws are removed, slide the long metal piece out of the bracket and pop the round head of the standard Apple Watch charger that came with your watch into the bracket.

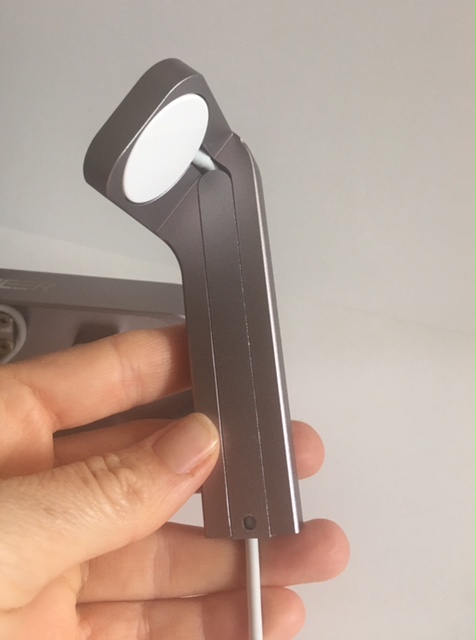
Make sure that the cord is tucked nicely inside the groove in the bracket and slide the metal cover back on.

Now all that’s left is to slide the bracket back into the charging station and reaffix it to the base with the two screws that were removed. Then put the back cover on with the four screws that were taken out in the first step and you are ready to charge. Note: a small screw driver came with the device, but I was unable to unscrew two of the screws with it because it was very thin and I could not get a good grip on it, so I just used my own.

I have a case that I normally have on my phone that would not allow me to charge it while it was on, so I need to remove it when charging.  It seems to work for me though because I do it just once a day and it’s right on my desk so when it’s done charging I can put the case back on for the rest of the day.  However, if I had the Utomic Edge case I would have the perfect setup as only the corners of the phone are covered. Ahhh….a girl can dream…

Now all that’s left is to find two USB ports (a dual USB wall plug would work great) or wall adapters to plug the two cords into and you can let the charging begin!

I found a great place in the corner of my desk to use as a new home for the charging station and my two favorite mobile devices.  I can sit and work all day and even use the phone while it’s on the charger. I think the station looks great on my desk and would look good on my night stand too if I decide to move it into my bedroom.

All in all, I think this is a great charging station. It does the job and looks good doing it!  The only downside is that I have to remove the case that I use in order to charge my iPhone, and if this was my only watch charger, I would have to disassemble the unit to remove the charger or take the whole thing with me when I travel.

Source: The sample for this review was provided by Archeer. Visit their site for more information or find them on Amazon.


Product Information

Price: $32.99
Manufacturer: Archeer
Retailer: Amazon
Requirements:
  • Minor assembly
  • Apple Watch charger
  • 2 USB ports
Pros:
  • Sleek simple design
  • All aluminum and durable
  • Convenient place to charge devices together
Cons:
  • May need to remove iPhone case (depending on case) to charge
  • If traveling, you'd have to disassemble to remove Watch charger, or take the whole thing with you

Filed in categories: Reviews

Tagged: ,

Archeer 2 in 1 Apple Watch Stand and iPhone Charging Dock Station review originally appeared on on June 17, 2017 at 9:00 am.

Note: If you are subscribed to this feed through FeedBurner, please switch to our native feed URL http://the-gadgeteer.com/feed/ in order to ensure continuous delivery.
Ventev Chargestand backup battery and device stand review


So, external batteries are something that everyone who uses a smartphone is aware of needing. Ventev has released a new take on the battery pack, the ChargeStand. What makes it different? Take a look.

Note: Photos may be tapped or clicked for a larger image.

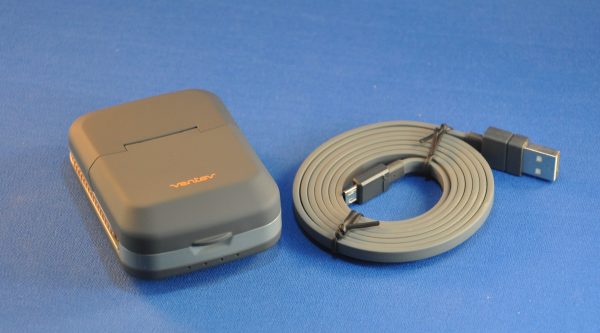
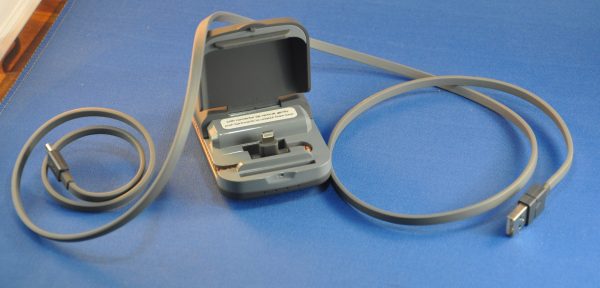
The ChargeStand comes with a flat USB to microUSB cable that is about 4′ long. You’ll have to supply your own power source (which shouldn’t be hard these days!), and remember to carry the cord with you when you travel. It doesn’t charge with a USB to Lightning cable.

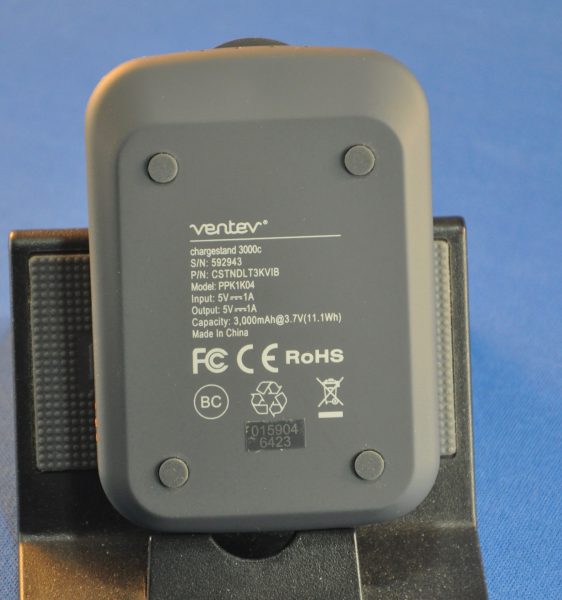
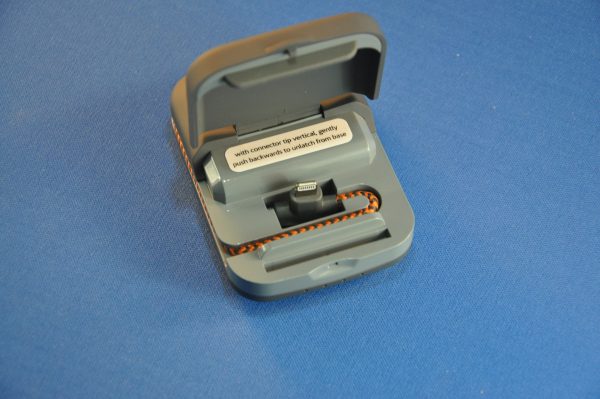
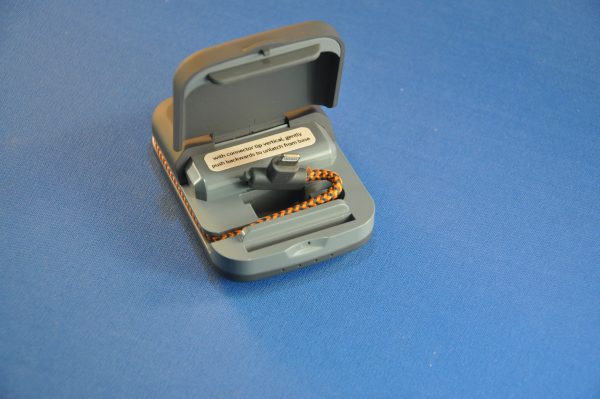
The unit itself is 3.5″ x 2.25″ and tapers on the narrow edge from 0.875″ to 1.125″. It opens on the large end to reveal a hard plastic stand holding a moveable lightning adapter and a soft, flexible fusion on the lid to rest your device against.

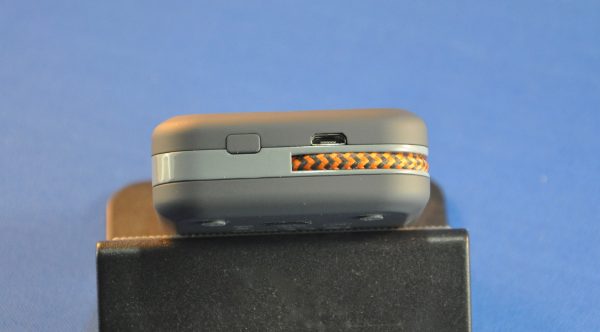
On the rear side (away from the opening) is the charging port and a button to activate the charger when something is plugged in. (I used to not like this, but there have been more than a few times that I’ve found batteries drained because they didn’t have that type function.)

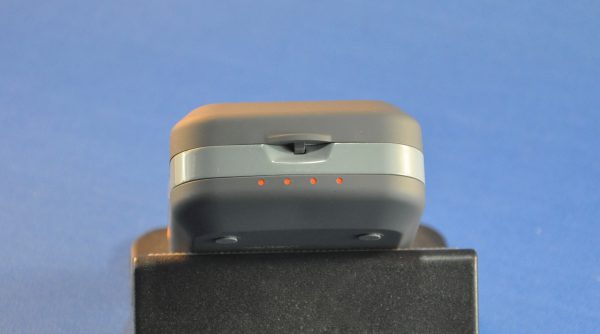
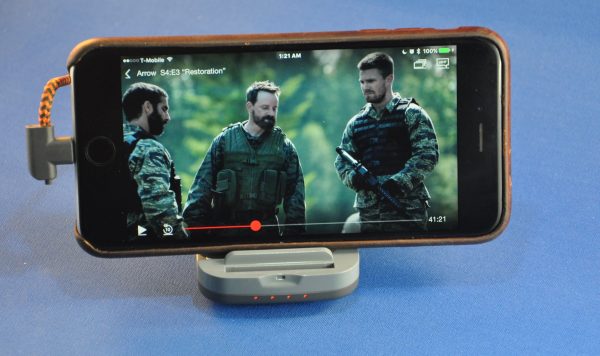
The lip that you raise to open the stand has a slight indent to get your finger under, as well as 4 orange LEDs to let you know charge level when you press the button. These do go out after a few seconds, but I tripped them on in order to show them as well as the battery connection (top right of the frame from “Arrow” below.)

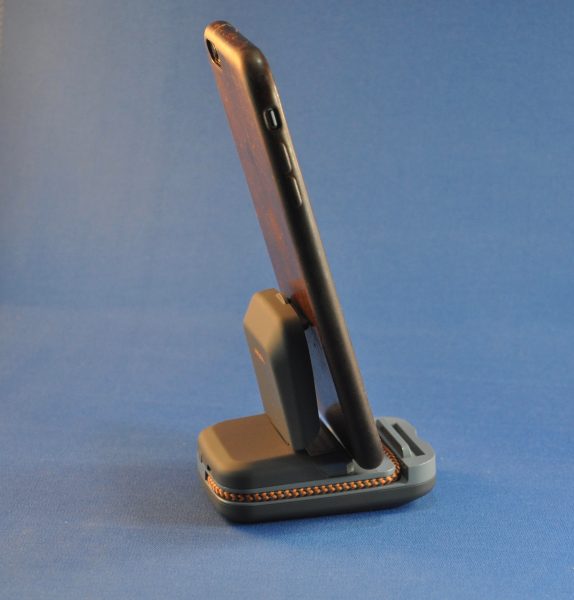
The Ventev can be a stand for devices in portrait or landscape mode. For Portrait mode, the lightning connector is slotted into the base, and hinges back and forth, depending on the angle of your device.

For landscape orientation, the charging tip can be released from the base and attached to your iOS device on either side via a flexible, braided cable. This works for all sizes of iPhones and iPods touch, but iPads are too large and tend to topple over.

At 3.5 oz, it’s not weighty enough to hold down a full-sized iPad. The iPad mini works OK, but I would make sure and have plenty of room on the table around the stand, in case it falls over. In landscape mode, the iPad mini doesn’t quite connect. At 3000 mAh, it s not going to keep your phone charged during a weekend camping trip, but it is good for one full charge to my iPhone 6s Plus, which has a 2750 mAh battery. (Interesting discussion of power banks and their charging abilities here.)


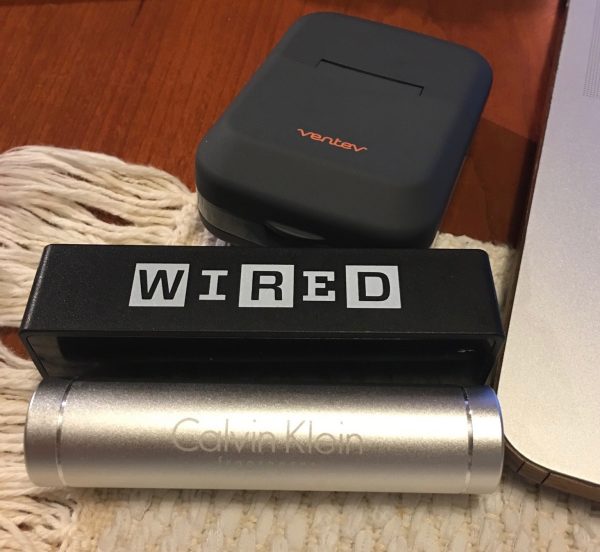
I’ve got a drawer full of batteries that will give me an “iPhoneful” of charge, but none of them have the flexibility of a stand with a cable attached. Many of those other batteries have been give-aways from everything from Wired Magazine to Calvin Klein Fragrances. (What can I say, I worked retail last holiday season!). Of course, more than a few of those don’t give a full charge, even though they are rated for it. For the $43.88 price, even with the stand and captive cable, though, I’m not sure I would buy the Ventev Chargestand. I don’t consider 3000 mAh enough to be table stakes in 2017. Better to pay a little more and get a lot more potential energy in my pocket.

Source: The sample for this review was provided by Ventev. Please visit their site for more info and Amazon to order.


Product Information

Price: $43.88
Manufacturer: Ventev
Retailer: Amazon
Requirements:
  • USB power supply to charge battery
Pros:
  • Small, light, and a decent stand.
  • Innovative design with captive cable and stand.
Cons:
  • Too light for many iOS devices.
  • Battery far to small for the price.

Filed in categories: Reviews

Tagged: ,

Ventev Chargestand backup battery and device stand review originally appeared on on June 16, 2017 at 10:00 am.

Note: If you are subscribed to this feed through FeedBurner, please switch to our native feed URL http://the-gadgeteer.com/feed/ in order to ensure continuous delivery.

Who knew diamonds could be so loud?


They used to say, “Diamonds are a girl’s best friend.” I doubt that’s still true in our more enlightened times, but it could be true now to say, “Diamonds are an audio geek’s best friend”—as in DiamondBoxx. DiamondBoxx makes speakers that will blow away every other speaker in its class. Since I reviewed the Braven XXL and Monster Blaster Bluetooth speakers, I came to appreciate the convenience of powerful speakers that can drive a backyard or camping get together. Then I thought, “Is this all there is?”

As it turns out, not by a long shot.

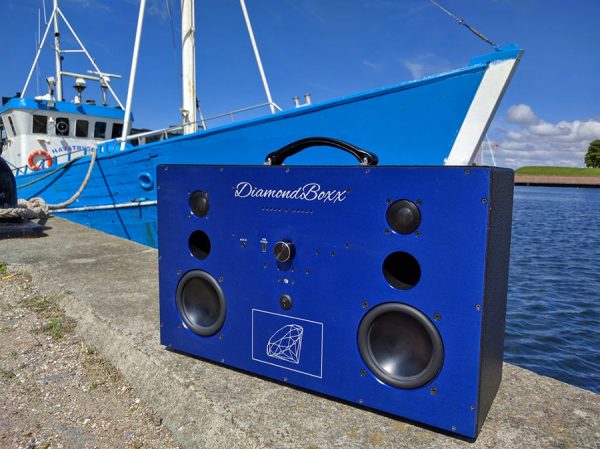
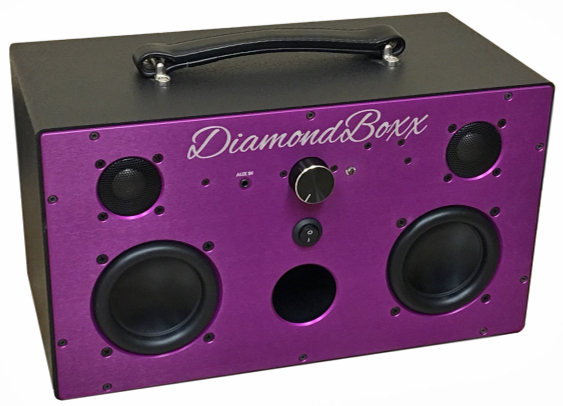
DiamondBoxx makes BIG speakers. How big? DiamondBoxx speakers come in three sizes. The DiamondBoxx M will turn the volume up to 109 decibels—comparable to a live rock concert. The M is water resistant and will play up to 60 hours on a single charge from its optional 231Wh battery (77Wh is standard). The M weighs 10 lbs. and its dimensions are 15 in. X 9 in. X 7.6 in. A 320 Watt HiFi Class A/B bi-amplified amp drives two 1 inch titanium dome tweeters and two 4 inch active woofers. Despite all that power, the M is the smallest DiamondBoxx speaker!

Then there’s the DiamondBoxx L. This 19 lb. speaker measures a slightly larger 22.2 in. X 13.5 in. X 7.6 in. It features 5.3 in. woofers for a bigger bass impact. It sports the same amp and tweeters as the (not much) smaller M. The L can go up to 111 decibels. Think of the L as a bigger and badder M.

Finally, there’s the XL which is just insane. 960 total watts of power (that’s 960!) divided among 12 separate amplifiers. All that ridiculous power drives two 10 in. woofers and eight tweeters that will crank up to 120 decibels—ear damaging loudness that’s just shy of standing next to a jet engine. The XL is not a backyard speaker as much as it’s a stadium speaker. Oh, and if that’s not loud enough, you can link two of them for double insanity.

All DiamondBoxx speakers are hand-made in California. Materials consist of Duratex-sealed MDF wood, leather and titanium with anodized aluminum front and back panels. Each speaker comes with 50 ft. range A2DP Bluetooth, AUX input, analog audio limiters to prevent distortion at any volume, battery-life meters and other goodies. DiamondBoxx speakers are available now: $549-$649 for the M; $799-$899 for the L; $1,699 for the XL. Visit DiamondBoxx for more information and check Amazon for pricing.

Filed in categories: Reviews

Tagged:

Who knew diamonds could be so loud? originally appeared on on June 16, 2017 at 8:00 am.

Note: If you are subscribed to this feed through FeedBurner, please switch to our native feed URL http://the-gadgeteer.com/feed/ in order to ensure continuous delivery.

Turtle Beach Elite Pro Tournament Gaming Headset and Elite Pro Tactical Audio Controller review


I’ve been lucky enough to review several gaming items recently, but one thing I have never upgraded since I purchased them years ago is my gaming headphones. Turtle Beach must have heard this, and quickly offered their Elite Pro Tournament Gaming Headset and Elite Pro Tactical Audio Controller. I was eager to try out what the professionals use and see if it would help up my game any.

In the boxes you’ll find:

Headset:

– Elite Pro Headset
– Elite Pro Microphone
– Elite Pro 1.3m Audio Cable


Audio Controller:

– Tactical Audio Controller (TAC)
– Mini-USB Power Cable
– Digital Optical Cable
– AUX cable
– Micro-USB Programming Cable

So I had this brilliant idea; let’s try the headset without the TAC first, then add in the TAC later. Well, this was quickly defeated by the fact that you need an adapter cable in order to use the microphone part of the headset with the PC. Since I could not find the cable at my local Fry’s store, I decided to just use the TAC instead. With the PS4, however, I could just plug the headset into my controller and go.

I’ll start with the PS4 first. Setting it up was simple and the included instructions worked great. I plugged the headset in to the controller, went to my settings in the PS4 and changed the output to the headset (which was recognized immediately), and I was ready to go. The microphone sounded great when testing it, and I heard no background noise.

I also tried the PS4 using the TAC, and to do so, I had to plug in the headset to the TAC, plug the TAC in via USB on the PS4, and also use the included Optical cable. The TAC worked great, just as good as the PC, but I had cords strung from the PS4 to a shelf near me, and then into the headphones. It was so much easier to just plug in the headset via the PS4 controller. Unless you are a very hardcore gamer, if you are only using the PS4, I would recommend just getting the headset to start out with.

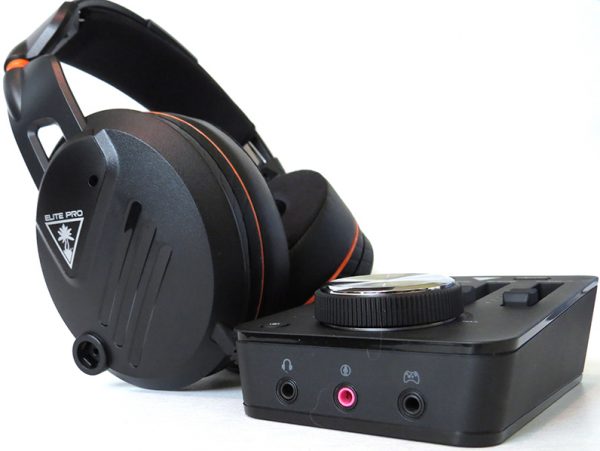
Now, on to using the headset and TAC with the PC. Like I mentioned above, I was unable to test just the headset with the PC due to not having an adapter for the headset. The TAC was very easy to set up; you just plug in the USB to the computer, plug in the headset on the front, and you are set.

The difference between my old Turtle Beach headset and this one was night and day. The sound came in clear and explosions boomed nicely in my ears. On team chat, everyone’s voice came in great, and with the TAC, I was able to customize my own microphone levels based off of what voice chat client I was using. Overwatch voice chat picked up the microphone very well and everyone said my quality was great, but when on Teamspeak 3, I had to turn up the mic boost so they could hear me as well as in Overwatch.


Surround mode on the TAC was my favorite part of these headphones. Being able to tell exactly what direction sounds were coming from made me so much more aware of my surroundings in the game. When I turned off the surround mode, it was just terrible. I don’t think I can go back to playing with a standard headset after using the headset and TAC for a few weeks. Gaming with these headphones and the TAC has been an incredible experience.

The TAC has 12 different presets grouped into four categories: Game mode, movie mode, music mode, and surround off. Each mode has Turtle Beach’s “Signature Sound” as the first option, but there are other options as well as you go through the presets. The user guide tells about every option available. I generally stuck with “Surround Off/Bass & Treble Booster” for my everyday music and YouTube video watching. For my gaming, it really depended on the situation. In the Game Mode preset, “Footstep Focus” really did let you hear footsteps coming, but the Signature Sound was best for an overall, rounded experience. Of course, with the push of a button, you could change from hearing those footsteps and back to the overall sound easily.

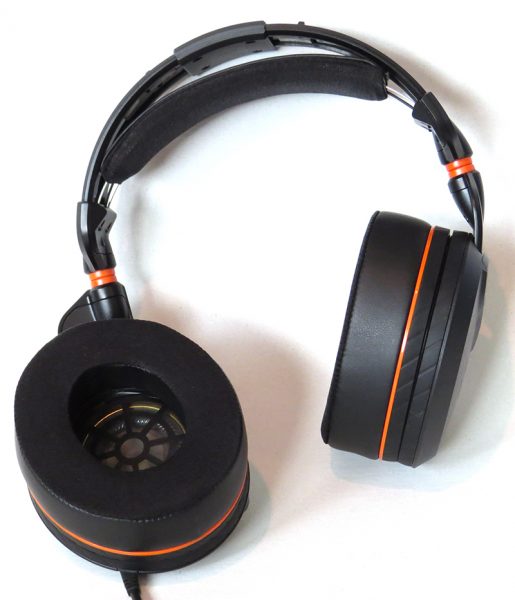
So, the sound is great, gaming is incredible, but what about comfort? Well, these headphones are super comfortable, with not only the ability to adjust the height of the ear cuffs but also how tight they fit on your head. I have easily worn these for hours at a time and my ears did not sweat, nor did they feel fatigued or uncomfortable. For those of you with glasses; they also have the option to modify the ear pads to keep them from pressing against your glasses.


Overall, this has been one of the most enjoyable reviews I have written for well over a year. The sound and build quality of the Turtle Beach Elite Pro gaming headset is top notch, while the Elite Pro Tactical Audio Controller added another dimension to gaming that I had never experienced before. If you want to improve your gaming experience, take a look at the Turtle Beach Elite Pro gaming headset, and if you want to take it further, check out the Tactical Audio Controller. They may be pricey, but they are worth looking into.

Source: The sample for this review was provided by Turtle Beach. Please visit their site for more information and Amazon to order.


Product Information

Price: Headset: $199.95 – TAC: $149.95
Manufacturer: Turtle Beach
Retailer: Amazon
Pros:
  • – Incredible comfortable headphones
  • – Great all around sound quality
  • – Able to be used on most gaming platforms (PC/PS4/XB1)
  • – Solidly built
Cons:
  • – Pricey
  • – Needs adapter for PC if you have separate mic/speaker ports

Filed in categories: Reviews

Tagged: ,

Turtle Beach Elite Pro Tournament Gaming Headset and Elite Pro Tactical Audio Controller review originally appeared on on June 15, 2017 at 1:46 pm.

Note: If you are subscribed to this feed through FeedBurner, please switch to our native feed URL http://the-gadgeteer.com/feed/ in order to ensure continuous delivery.