Tronsmart Presto 10,000mAh power bank review

Aside from my phone, power banks may be the most important tool in my gadget arsenal. I use my phone for everything and have the ability to drain the battery in a few short hours. If it weren’t for power banks, I would find myself lost in tech wilderness more often than I care to admit.

I recently reviewed the Tronsmart Presto 10,000mAh power bank. How will it compare to those I’ve reviewed in the past?

Measuring 5.5″ (L) x 2.67″ (W) x .62″ (H), the Presto is definitely something that can fit in your pocket; yet, it still packs an impressive 10,000mAh capacity.

The Presto has three ports on the end of the device.

The two USB A ports use Tronsmart’s VoltiQ technology to determine the maximum current a device can use. The green USB A port to the right also utilizes Qualcomm’s Quick Charge 3.0 technology. The middle port is a micro USB port used to charge the power bank.

The front of the device has four LED indicators. Each LED represents approximately 25% of battery life.

The back of the device contains branding and technical information.

The body of the Presto is smooth and feels a bit rubbery. Whatever the body is made of, it’s a dust magnet.

Perhaps the most important aspect of the Presto is it takes advantage of Qualcomm’s Quick Charge 3.0 technology.

Quick Charge 3.0 allows phones to recharge at much greater speeds than normal. The most recent version automatically optimizes the power transfer rate and works with any voltage between 3.6V to 20V, while remaining backward compatible with Quick Charge 1.0 and 2.0.

Although no iPhone is Quick Charge compatible, most major Android devices are compatible with some form of Quick Charge. Unfortunately for me, the Pixel XL is one of the Android devices that doesn’t benefit from Quick Charge.

I was hoping the combination of VoltiQ and Quick Charge would allow my Pixel XL to fast charge; alas, I was forced to watch my phone recharge at standard speeds.

Even without being able to take advantage of Quick Charge, the Presto still allowed for heavy use of my phone; I could use it to text, surf the net, and use it as a hotspot without any impairment.

Although not related to performance, the Presto also comes with a travel bag.

It’s a simple nylon bag, but it could be handy if you’re going to toss the power bank in a backpack or purse.

Overall, I really liked the Presto. It’s small but packs a powerful punch. It’s become my go-to power bank since I began reviewing it.

At $19.99, you’re getting great performance for a great price. I would definitely recommend it to anyone in the market for a power bank.

Source: The sample for this review was provided by Tronsmart. Please visit their site for more information and Amazon to order.


Product Information

Price: $19.99
Manufacturer: Tronsmart
Retailer: Amazon
Requirements:
  • Quick Charge compatible device for enhanced charging speeds
Pros:
  • Fast Charging with Quick Charge
  • Affordable
Cons:
  • None

Filed in categories: Reviews

Tagged:

Tronsmart Presto 10,000mAh power bank review originally appeared on on July 6, 2017 at 7:03 am.

Note: If you are subscribed to this feed through FeedBurner, please switch to our native feed URL http://the-gadgeteer.com/feed/ in order to ensure continuous delivery.

Wemo Wi-Fi Smart Dimmer Light Switch review


As I slowly add parts to automate my home, I’m always interested in the gadgets that are being released to make life easier or… just cooler.  The WemMo Dimmer is one of those devices that just makes sense. 

The dimmer arrived in, okay, I’m man enough to admit, sexy packaging. Outside, the box is your run-of-the-mill cardboard color with some white graphics showing the WeMo logo, a line drawing of the dimmer, and a diagram of “suggested†dimmer settings with such settings as “3 am  bathroom run.†  It made me smile. Inside, the box is an almost shocking shade of green. A green that could wake up a sleepy Gadgeteer! Lots more with graphics adorn the tri-fold enclosure.  Opening the package reveals the elegantly designed dimmer switch and a slot marked “get set.â€

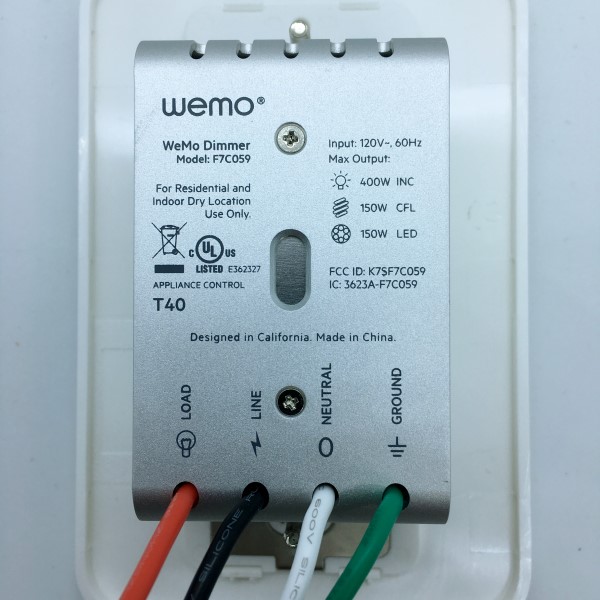
Wemo’s “Let’s go†manual is a comprehensive instruction manual for installing the dimmer. Graphics and text are easy to understand, waking an installer, even a novice, through the sometimes frightening aspects of home wiring this installation requires. The kit even includes the wire nuts and labels to make sure (no pun intended) wired don’t get crossed.

I had no trouble identifying the wiring and what needed to be done to replace a hallway ceiling lamp switch, probably the most often used switch in my home. Turning off the circuit breaker, I removed the old-style switch and wired the WeMo. One note of caution: the Wemo Dimmer is considerably more bulky that the switch it’s replacing. If there are additional wires in the back of your electrical switch box, you might have a challenge fitting everything back in. Tucking the wires back as far as they will go helps. Make sure you don’t pop the wire nuts off when you do this or you will likely get a surprise when you turn the breaker back on. Of course, if you’re uncomfortable doing this wiring yourself, ask a handy friend or hire a professional. Above all, please be careful.

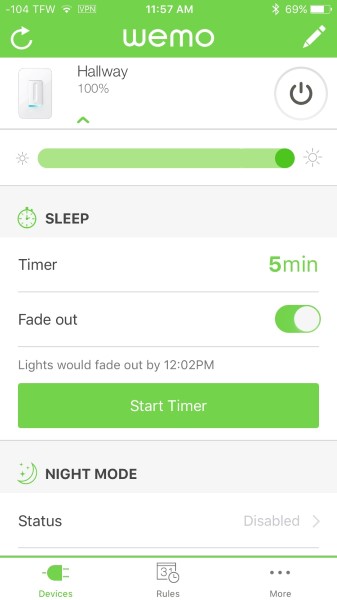
Once the switch was in and the juice turned back on, the Dimmer flashes some funky disco lights and settles into a flashing blue. I downloaded the app and followed the instructions from the manual. Similar to many typical smart devices, my phone connected to the Wemo Dimmer’s Wi-Fi and walked me through setting my bulb type, pairing with Alexa and connecting to my home network. At no point did I feel lost and the entire process progressed very smoothly.

Now the fun part… Now that the dimmer was paired with Alexa, I could issue voice commands to turn on, off or even set a brightness percentage. Pretty slick! I fiddled around with the app and found I could access any lamp function I desired on my home network and through cellular 4G with very little lag. I even connected through a VPN in Thailand and found the same, fast, results.

Moving on, I was able to set timers, set the app to turn off the light after a specific time, and put the dimmer into “Away†mode to randomize turning the light on and off for home security. The app also connects to IFTTT, but I have yet to see what goodies I can find. It seems Wemo really thought things out. Well done.

So far, I am thrilled with the ease of use, functionality, and reliability of the Wemo Wi-Fi Smart Dimmer Light Switch. Given the opportunity, I would gladly replace every switch I have with them.

Source: The sample for this review was provided by Wemo. Please visit their site for more info and Amazon to order.


Product Information

Price: $79.99
Manufacturer: Wemo
Retailer: Amazon
Pros:
  • Well written directions
  • Simple setup
  • Great connectivity
  • Lots of functionality options
Cons:
  • Expensive

Filed in categories: Reviews

Tagged: ,

Wemo Wi-Fi Smart Dimmer Light Switch review originally appeared on on July 5, 2017 at 8:46 am.

Note: If you are subscribed to this feed through FeedBurner, please switch to our native feed URL http://the-gadgeteer.com/feed/ in order to ensure continuous delivery.

Mychanic Blade Multi Light rechargeable work light review


I may have a flashlight problem.  No, I definitely have a flashlight problem!  Why can’t someone make the perfect light? I believe there is no such thing because every situation calls for something different. This time, I get to try out the Mychanic Blade Multi Light, a rechargeable light that flexes to your needs.

  • Weight: 1.4 lbs
  • Blade: x 7″ tall 1 1/2″ across x 5/8″ deep
  • Extended: 17.5″ tall x 2″ across x 2″ deep
  • Folded:  10″ tall x 2″ across x 2 1/4 deep
  • LI-Ion rechargeable battery with micro USB AC charging adapter
  • Durable ABS housing
  • Low heat output
  • Patent pending

My sample didn’t come in retail packaging.  I received a sheet of instructions, wall charger, and microUSB cable for charging.

You can use any microUSB cable (as I did here).  Note the red LED that indicates charging.  It turns green when full. Why can’t all manufacturers do it this way?

There’s a hook that at first, I could not figure out.  To extend the hook, you push IN to the light. I naturally tried to gorilla-pull the hook out, to no avail.

There’s also a magnet along the green rubbery strip where the microUSB is.  The problem?  Once you’ve stuck it on a surface, you’ve just covered up the power button.

There are four different lighting modes:  Full bright (250 lumens), Low (difficult to photograph!), red flashing, and directional.  The direction pattern consists of one red LED flashing in one direction, sequentially.

Here’s the light attached to the underside of a hood using the magnets.

And, here’s the light again, this time hung by the hook.

How long does the battery last?  On the brightest setting, I got 4 hours.  It’s likely longer on the low setting.

My only complaint about the Mychanic Blade Multi Light is that there’s no obvious way to have it sit upright on a desk or flat surface.  It may take you a moment of twisting and flexing to figure it out.  The magnet isn’t the strongest, so a bump could dislodge the lamp.  I’m still slightly embarrassed about the hook thing, too.

What I do like is the light weight (1.4 lbs), and the USB charging. The red/green LED indicator is simple genius that I wish was more commonplace.

Source: The sample for this review was provided by Mychanic. Please visit their site for more info.


Product Information

Price: $34.99
Manufacturer: Mychanic
Requirements:
  • Charges via microUSB
Pros:
  • Light weight, four light modes, magnet and hook mounts. MicroUSB rechargeable.
Cons:
  • Not totally obvious how to get the light to stand on a flat surface without some trial and error.

Filed in categories: Reviews

Tagged: ,

Mychanic Blade Multi Light rechargeable work light review originally appeared on on July 4, 2017 at 8:22 am.

Note: If you are subscribed to this feed through FeedBurner, please switch to our native feed URL http://the-gadgeteer.com/feed/ in order to ensure continuous delivery.

Luminoodle LED Light Rope review


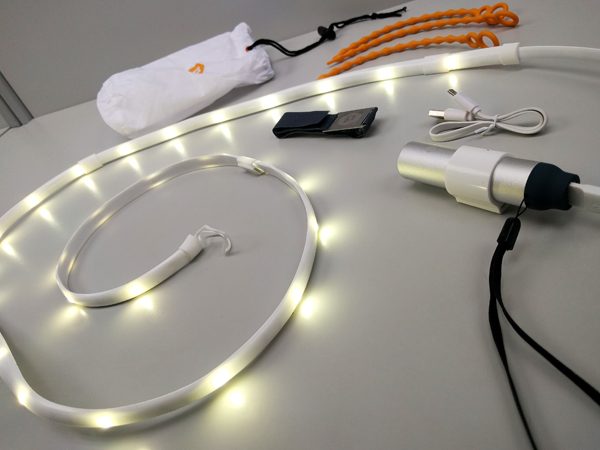
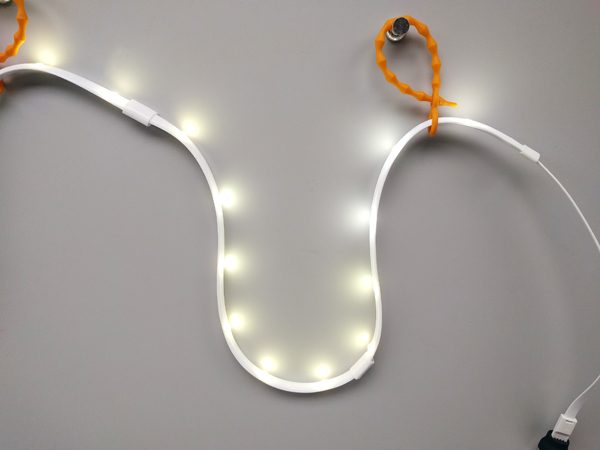
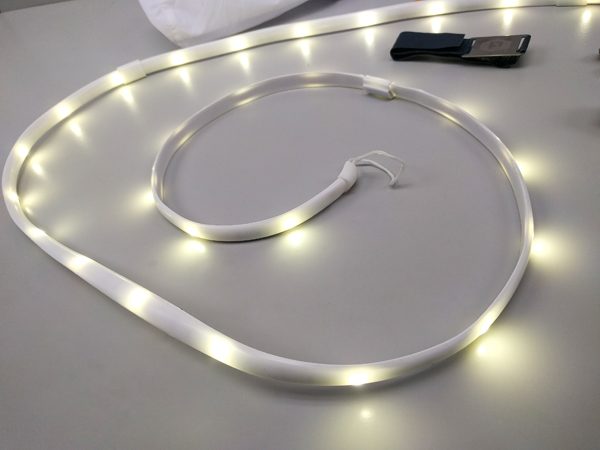
The Luminoodle Light Rope is a versatile, interesting approach to multi-use outdoor lighting. With bright output, long battery life, a number of mounting options and waterproof housing, the Luminoodle works well in most situations. Some design elements, like the lack of an on/off switch, do cause it to fall a bit short in the field. But, at $19.99 for the Light Rope alone, it makes for a fun purchase.

The Luminoodle LED Light Rope comes sealed in a brightly colored foil bag.

I tested the 5 ft. Luminoodle, it also comes in a longer 10 ft. version. I was provided a Power Practical Lithium 3400 battery pack for my tests. It’s important to note that the Luminoodle doesn’t come with a battery pack unless you order them together. The unit does work with any USB port or universal battery pack. As far as I can tell, Power Practical no longer sells the Lithium 3400 battery pack separately but does offer the Lithium 4400 battery pack, which I did not test, on their website for $29.99.

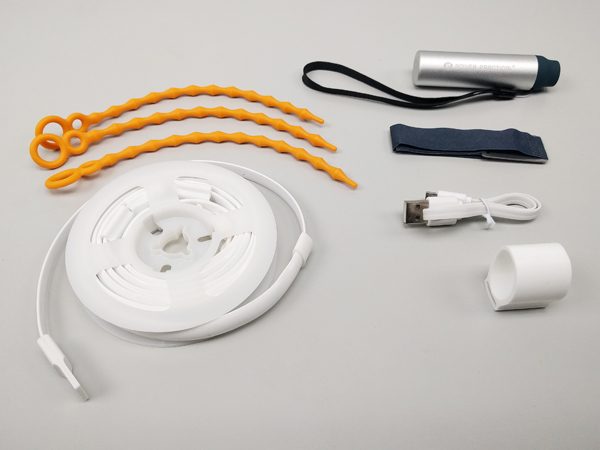
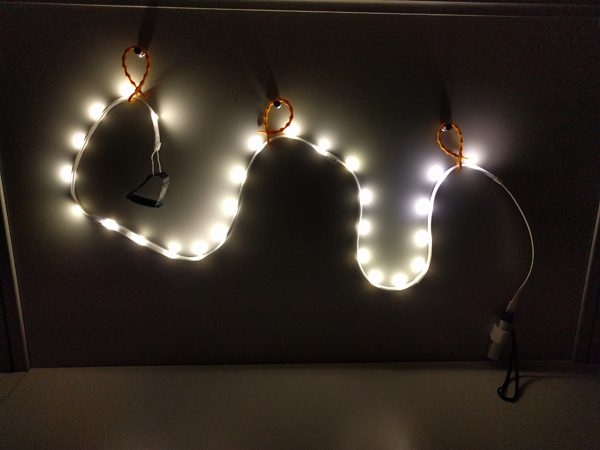
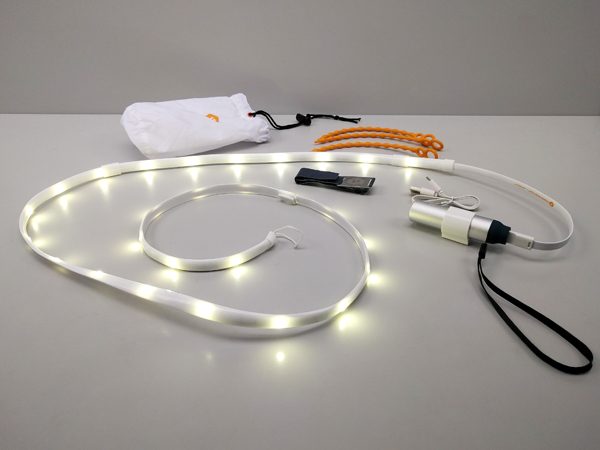
The included nylon ripstop bag is incredibly useful, not only for holding the Light Rope, mounting ties, utility loop and battery pack but also for acting as a lantern when the Light Rope is powered and stuffed inside. The strong, thin fabric of the bag diffuses the light allowing it to cast a powerful lantern-like glow.

The Light Rope itself comes with few accessories, just a reel to roll it up with and three mounting ties. There are magnetic sliders built on to the unit that helps in some mounting situations, but the ties are the primary mounting option.

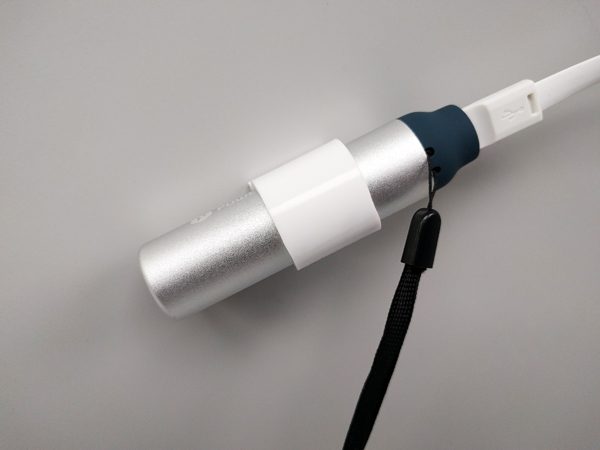
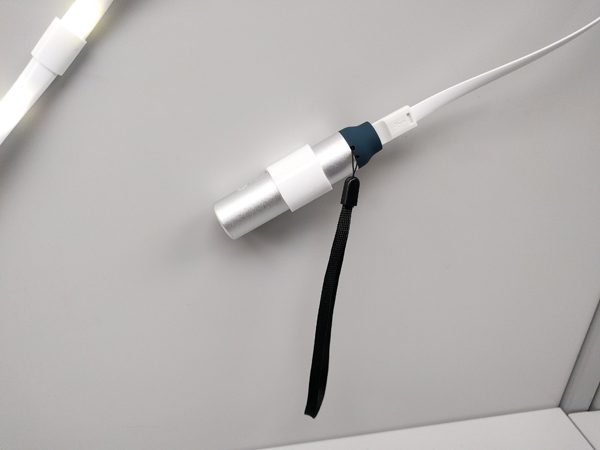
The Lithium 3400 Battery Pack comes with a micro-USB charging cable, a magnetic sleeve and a utility loop. The battery pack has an attached lanyard as well.

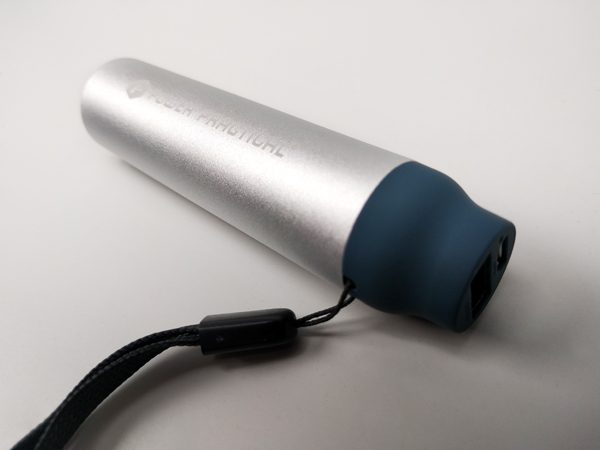
The battery pack has a textured aluminum housing and a rubberized tip.

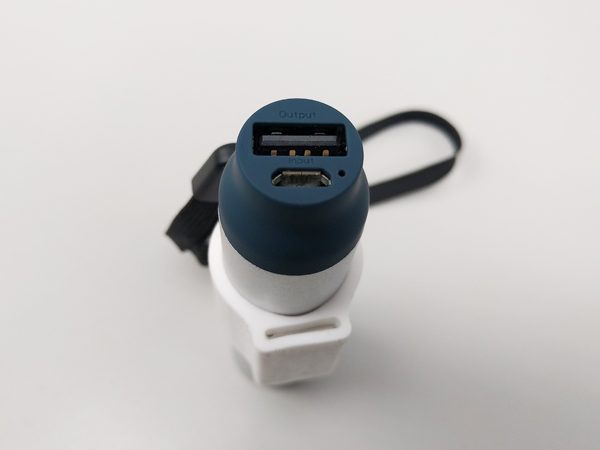
There are two ports on the battery pack, a standard USB output port and a micro-USB input port for charging. There is a small indicator light next to the input port. A blinking red light indicates the battery is charging, a solid red light means the battery is fully charged, and a solid blue light shows that the unit is powering something else.

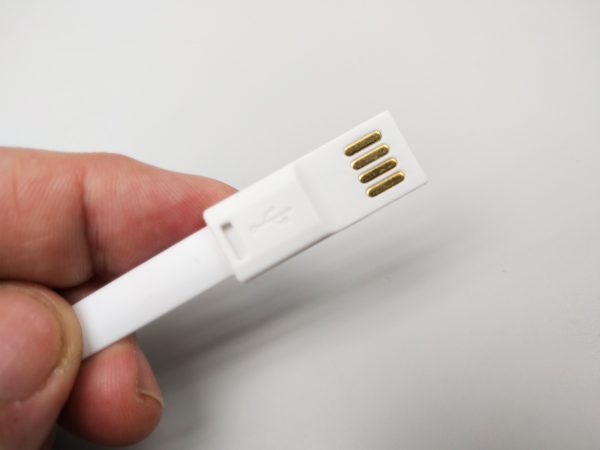
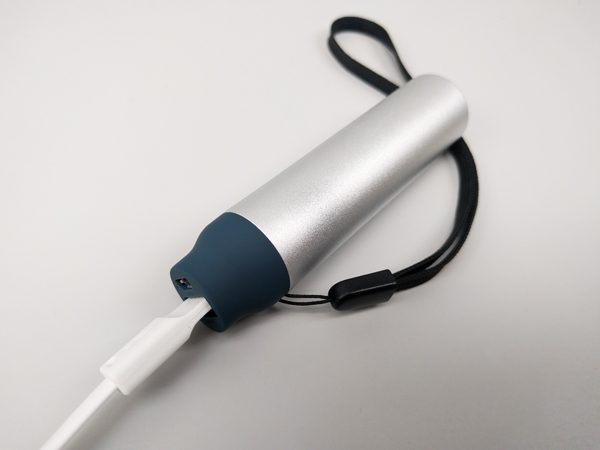
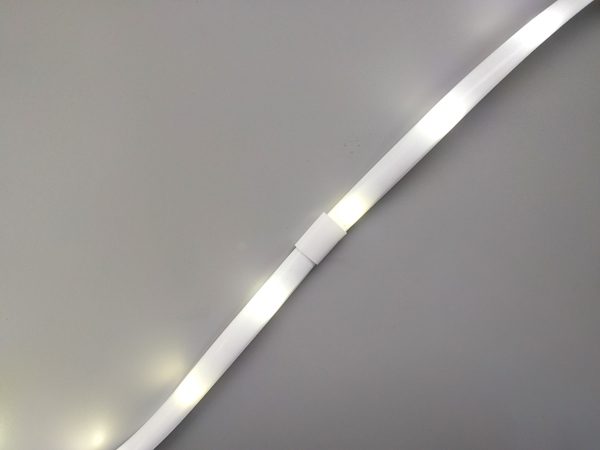
The Luminoodle Light Rope has a reversible USB plug which was a handy addition and was really appreciated when I needed to connect it to the power source in the dark.

As soon as the Luminoodle is connected to a USB power source, it turns on. This made using the unit a bit problematic at times, which I will get to shortly.

The battery pack’s magnetic sleeve allows you to attach the pack to any metallic surface along with the Light Rope.

This magnetic sleeve is similar to the ones on the Light Rope itself. The magnets were not as strong as I would’ve liked. I can’t see using this attached the inside of a car’s hood as is suggested on the website.

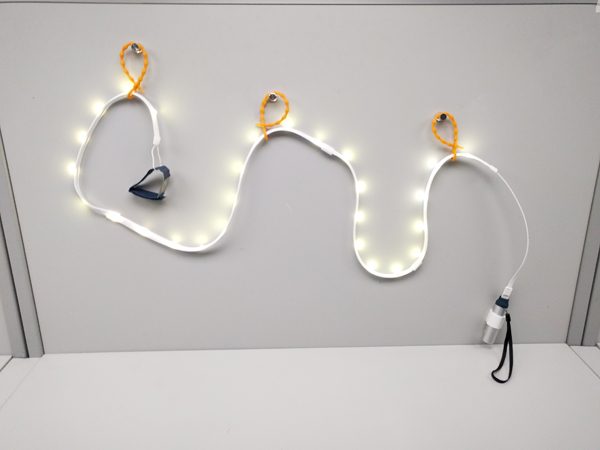
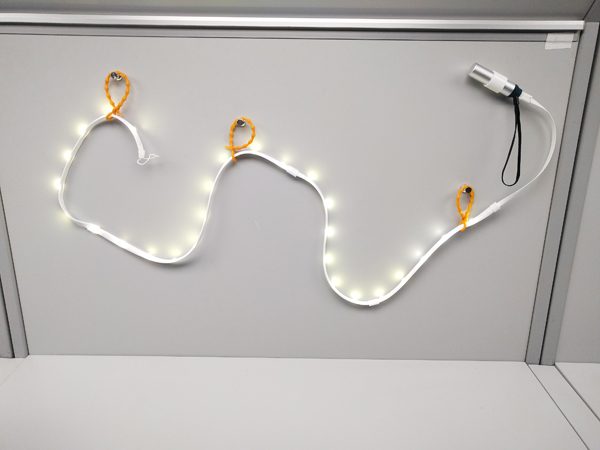
A more effective way to attach the Light Rope to anything is with the unique mounting ties. Although, this mounting option has its own challenges.

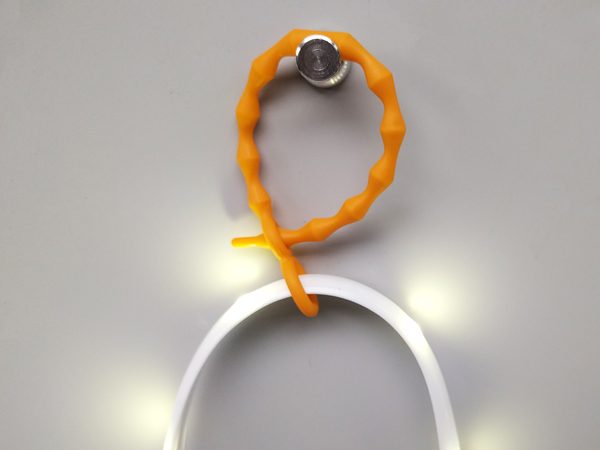
The ties are bright orange with nubs that allow you to adjust the length by pulling them through a small loop at the end of the tie. There is a larger loop to pull the Light Rope through.

The silicone casing of the Light Rope makes it a little difficult to handle and pulling the unit through the ties and then spacing the ties properly with the magnetic sleeves on the rope was frustrating, especially in the confines of a backpacking tent in the middle of the woods.

As I mentioned, the unit powers on as soon as it is connected to a power source. The Light Rope is very bright, which is great for some uses, but not all. On the unit I tested, there is no dimmer or on/off switch.

The only way to turn off the unit is to disconnect it from the power source.

So after much difficulty hanging the Light Rope exactly how I wanted it, I realized that once I turned it off by unplugging it, the USB end of the rope and battery pack would just be dangling there, difficult to find in the dark.

I found myself reaching for my trusty EDC flashlight a lot while trying to use the Luminoodle, which kind of defeats the purpose, but it may just be that I need a few more field tests or I have yet to have a problem that the Light Rope will solve.

The Luminoodle Light Rope is definitely fun to use and I’m sure there are more effective uses for it, I just didn’t find it incredibly useful on this particular outing. The fact that it’s waterproof is great, up to 1 meter for 30 minutes, although that doesn’t apply to the battery pack, so the usage there is again limited to just being weatherproof, which is still a great feature. At $19.99 for the Light Rope without a power source, it is definitely worth picking up.

Light Rope Specifications

  • Length: 5 ft. (1.5 m)
  • Light Output 180 Lumens
  • USB Input 2.5W (5V,0.5A)
  • Weight 133 g (4.7 oz)

Lithium 3400 Battery Pack Specifications

  • Capacity: 12.5Wh (3350 mAh @ 3.7V)
  • Input: Micro-USB 5W (5V,1A)
  • Output: 6W (5V,1.2A)
  • Weight: 4.2 oz
  • Dimensions: 3.25 in x 0.9 in

Source: The sample for this review was provided by Power Practical. Please visit their website for more info and Amazon.


Product Information

Price: $19.99 for 5 ft. Luminoodle Light Rope Only, $34.99 for 5 ft. Luminoodle Light Rope and 4400 Battery Pack
Manufacturer: Power Practical
Retailer: Amazon
Requirements:
  • USB Battery Pack or Power Source
Pros:
  • Long battery life
  • Many uses
  • Waterproof/Weatherproof
Cons:
  • No On/Off switch
  • Weak magnets
  • Unwieldy

Filed in categories: Reviews

Tagged:

Luminoodle LED Light Rope review originally appeared on on July 3, 2017 at 8:29 am.

Note: If you are subscribed to this feed through FeedBurner, please switch to our native feed URL http://the-gadgeteer.com/feed/ in order to ensure continuous delivery.

Off Grid Tools Survival Axe Elite review


Survival tools run the gamut from a pocket knife to axes and even beyond. I don’t know if there is any real definition of what a survival tool is, so I guess it comes down to what an individual would consider to be a survival tool. With that in mind Off Grid Tools has offered up for review their version of a survival tool, the Survival Axe Elite.

Note: Images can be clicked to view a larger size.

Although not all survival tools will have multiple useful features, to me the most effective ones will. The Survival Axe Elite delivers on the multiple use aspect being advertised as having 30 features. Now, just for clarification, features may not mean tools or uses depending on your definition. As you can see by the picture below from the Off Grid Tools website all the features are shown and listed.

Again, you would need to decide and define what you consider a feature.

I will break this review down by the axe head section and the handle section. Before I go too far into this review I want to address the “hatchet” in the room. I know some of you may look at the Survival Axe Elite and say, “isn’t that a hatchet?” And by many definitions, the tool could be considered a hatchet, but hatchets are also known as hand axes so by accepted terms the Survival Axe Elite is an axe.

The head of the axe contains the majority of the Survival Axe Elites tools the main two to me being the hatchet edge and the hammer head. Although the other tools can be useful, those two are the workhorses of this section of the tool. I don’t want to discount the other features here like the pry bar and gas valve shut off, or even the built-in sockets, but I consider those to be ancillary items.

The handle of the Survival Axe Elite covers the full tang of the axe. The rubberized 33% glass filled nylon handle has some interesting feature including a six-inch reciprocating saw blade and a hardened glass breaker.

There is a locking mechanism at the bottom of the axe that keeps the reciprocating blade lock in place when in and outside of the handle. I will say that when the blade is deployed the locking mechanism does not hold the blade locked in place on my Survival Axe Elite. The blade lock is low enough on the handle that it should not interfere with your use of the Survival Axe Elite.

I mentioned the glass breaker before, but the handle also has a seatbelt cutter built into it. Both would seem to function well, but I must admit I did not try out the glass breaker. As with the blade lock both of these items are low enough on the handle so they should not interfere with normal use.

I mainly tested the Survival Axe Elite by using the hatchet, hammer and saw blade. The hatchet blade is good for chopping, I wish that the blade was sharpened a little better, I believe this would make chopping wood easier. The hammer was also good at what it does, hammer. The grip was comfortable for both chopping and hammering. I did try out the nail puller and it also performed well. That brings me to the saw feature. First, let me say I love the fact that the saw feature is included on this tool, that being said I think the tool would benefit from a redesign of the locking mechanism. I am just scared that I will hit the back of the blade making it close on my fingers. The blade did cut well and the way the system is designed makes it a little more ergonomic when cutting.

So, what’s my bottom line here? The Off Grid Tools Survival Axe Elite is good. From what I did it functions well. The features have been well thought out but, I would honestly only use some of the features in an emergency (mainly the hex sockets). The build is solid and the materials seem to be first rate. The oxide coating has held up so far and will help protect the Survival Axe Elite while it waits to be used. Even with the minor issues I have had with this tool, I would still recommend it to someone that was looking for a tool of this type. The Survival Axe Elite is available on the Off Grid Tools website for $89.99.

Source: The sample for this review was provided by Off Grid Tools. Please visit their site for more info and Amazon to order one.


Product Information

Price: $89.99
Manufacturer: Off Grid Tools
Retailer: Amazon
Pros:
  • Well built
  • Built in tools
Cons:
  • No axe head cover or case

Filed in categories: Reviews

Tagged: , ,

Off Grid Tools Survival Axe Elite review originally appeared on on July 2, 2017 at 9:45 am.

Note: If you are subscribed to this feed through FeedBurner, please switch to our native feed URL http://the-gadgeteer.com/feed/ in order to ensure continuous delivery.