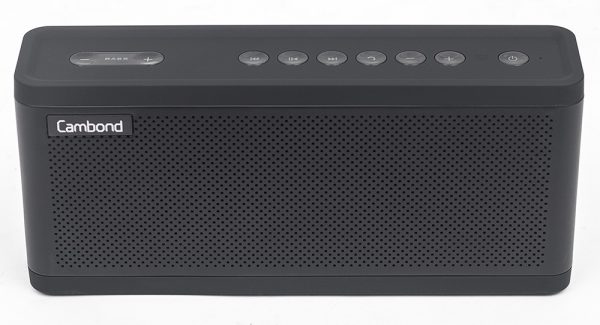
Cambond X-Bass Adjustable Bass Bluetooth speaker review

When it comes to speakers, the saying goes: the louder the better. But sometimes loud isn’t good enough. Sometimes you want that bass to hit, or better yet, feel the rumbling lows that we don’t typically get from ordinary speakers. Of course, our typical everyday speakers can achieve the high tones in the music but most Bluetooth speakers can’t produce those punchy mids or thumping low bass. With the Cambond X-Bass Adjustable Bass Bluetooth speaker, getting that hard hitting and rumbling bass might be easier than you think.

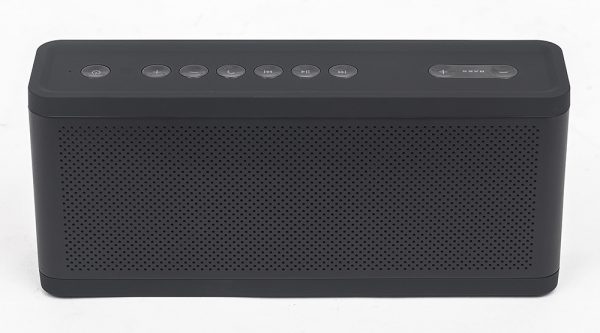
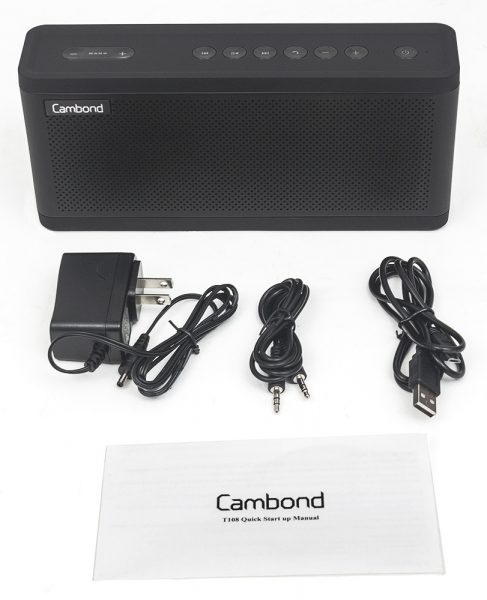
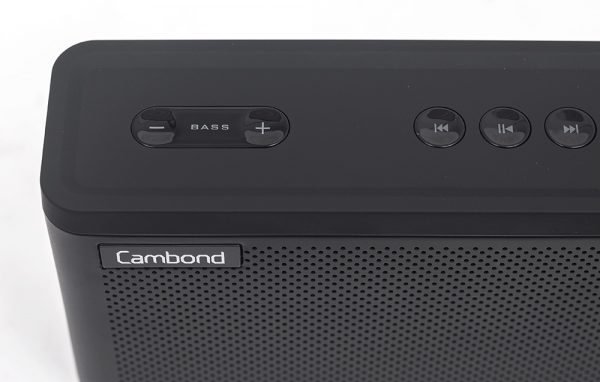
The Cambond X-Bass Adjustable Bass speaker is a portable Bluetooth 4.0 stereo speaker that boasts a 15-watt subwoofer combined with dual 5-watt drivers which equal to 25 watts of powerful driving sound for your ears. This speaker has 4 bass levels that you can adjust accordingly. The Bass button is located on the left top side of the speaker. On the same top portion of this speaker unit are the buttons for the Previous/Next Track, Play/Pause, Talk button, Volume Up/Down, and Power.

Phone calls on these speakers are what you would expect. It sounds like a hands-free conversation. If you had the bass up prior to the phone call, the person’s voice will sound deep and bassy. If that bothers you then you will just have to turn down the bass level to bring their voice to a more normal tone. On the other end of the line, calls sounded like you were talking from a speaker. There was a slight delay but nothing bad and definitely not a deal breaker. 9 times out of 10, when talking on a speaker, you will sound like you are on a speaker anyways and this is no different. But this speaker really isn’t for phone calls, it’s for listening to music.

The X-Bass feels solid in its construction all around. It has a metal grill on the front and back, plastic top, rubber base, and the top buttons felt tight and responsive. These rectangular speakers have a dimension of 3.94″ x 9.06″ x 3.1″ inches.  The X-Bass weighs in at 2.32 lbs. so this speaker has some weight to it as compared to other similar sized Bluetooth speakers. Don’t get me wrong, it’s not super heavy but once you pick it up you will notice its weight. However, the X-Bass is still light enough and portable to throw in your backpack, messenger bag, beach bag, purse, or any other bag you want to stuff the speaker in. I like that it has small rubber feet on the bottom of the speaker to help protect the speaker from sliding around and scratching any surface you put it on.

The Cambond X-Bass speaker is powered by 6700mAh Lithium-ion batteries and according to Cambond’s website, the batteries can last 8 hours at 50% volume. I have to confess, I never really kept the volume halfway. I had the volume high.  I listened to these speakers with the volume cranked up. When you use these speakers, you will be inclined to use them the way they were intended to be; and that’s to be loud. At least that’s the way I used these speakers.

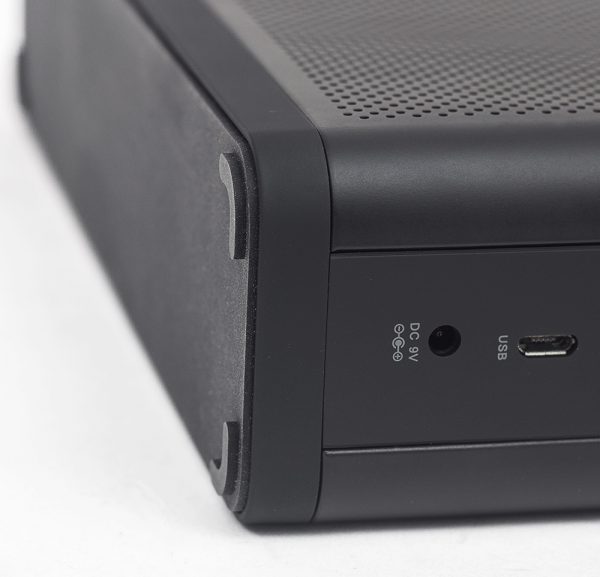
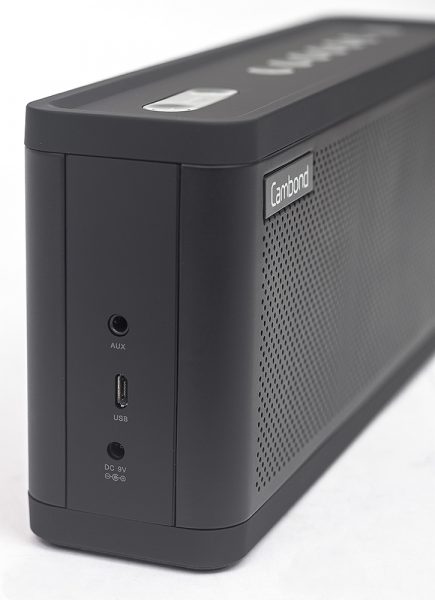
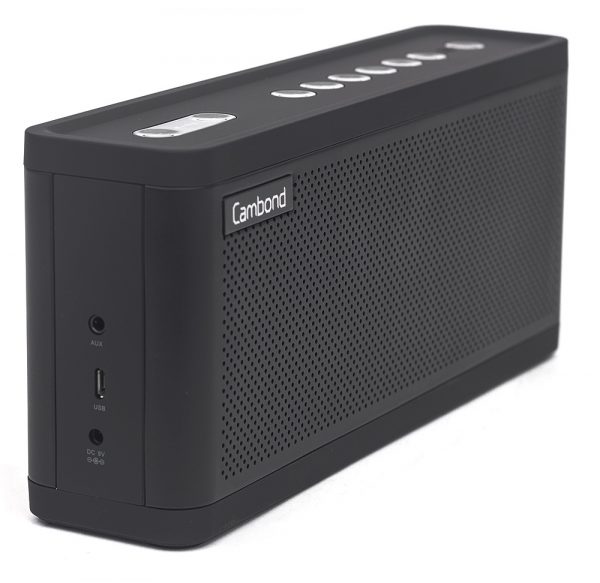
There is a 9V DC port on the bottom left side of the speaker to charge the battery or and can provide constant power to the speaker while in use. Above the DC port is a MicroUSB port which you can use as well to charge the speaker’s batteries so you have a couple of options on charging the batteries which is nice. Just in case you don’t have the 9V plug adapter with you at the time, you would be able to charge the battery via the MicroUSB port. A great thing about having the MicroUSB port is that you can plug in a portable charger just in case you are somewhere that doesn’t have a wall outlet such as at a beach, at a picnic, or sitting poolside.

When the Cambond X-Bass runs out of battery, the X-Bass will constantly beep twice every 5 minutes to remind you that the batteries need recharging. And once the battery is full, the red charging light will turn off to let you know that charging is done. It takes up to 3 hours for the battery to reach full capacity.

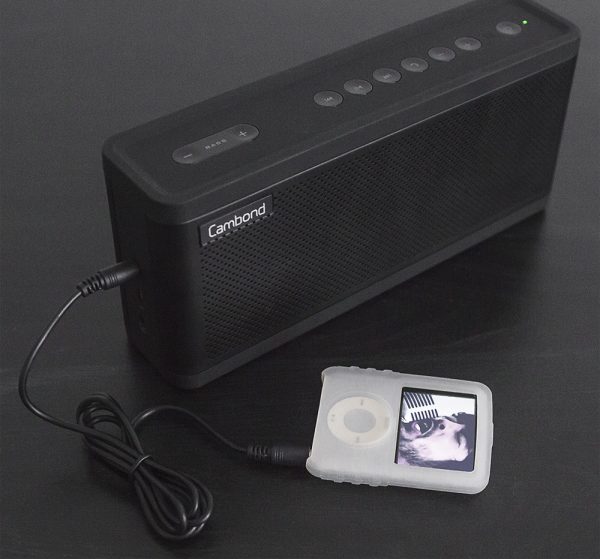
Although this is a Bluetooth speaker, there is an AUX IN port available. This is useful for when your music device is non-Bluetooth or isn’t Bluetooth enabled. Just connect the included 3.5 audio cable into the device’s headphone jack and the other end of the audio cable into the AUX In port on the Cambond speaker. NFC, or Near Field Communication, is also available as another form of connection to the Cambond X-Bass. Along with the 3.5 audio cable, the X-Bass comes with a MicroUSB cable, a 1A/9V adapter plug, a warranty card, and a manual.

I found the sound of X-Bass Bluetooth speakers to be loud and produced great overall sound. I really enjoyed the bass that it pumped through its speakers. Trust me, I cranked these speakers up and they really hit for the size that they are. Keep in mind that to get the best sound out of these speakers, or any other speaker, the music you are playing is the best quality recording so that the frequencies are right in order to get the full effect of hearing and feeling the bass from the speakers.

I played several type and styles of music and had different recordings from many of the songs, and they each sounded full thanks to the punchy mids and rumbling low bass. What a difference it makes listening to the full range of music coming out of portable speakers. It makes you really enjoy a song a whole lot more when the music is boosted up. And since these are portable speakers, you can enjoy the X-Bass speakers from Cambond anywhere you can bring them.

Source: The sample for this review was provided by Cambond. Please visit their site for more info and Amazon to order.


Product Information

Price: $69.99
Manufacturer: Cambond
Retailer: Amazon
Pros:
  • Loud adjustable bass.
  • Solid construction.
  • NFC capable.
  • Has a 3.5mm audio AUX IN port.
  • MicroUSB and 9V DC charging ports.
Cons:
  • Slightly heavier than most speakers its size.
  • Average handsfree call quality.
  • Slight delay in speaker phone response.

Filed in categories: Reviews

Tagged:

Cambond X-Bass Adjustable Bass Bluetooth speaker review originally appeared on The Gadgeteer on August 15, 2017 at 8:03 am.

Note: If you are subscribed to this feed through FeedBurner, please switch to our native feed URL http://the-gadgeteer.com/feed/ in order to ensure continuous delivery.

biēm butter sprayer review

How often have you tried to spread butter on toast, a baked potato, bread, etc, only to find out that it’s just too cold and hard to spread? Yeah, I know, first world problems. But it is a real problem that could use a solution. One company invented the biēm butter sprayer to solve this issue. Let’s see if it works and if it’s worth it’s $129 price tag.

What is it?

The biēm butter sprayer (pronounced as “beam”) is battery powered butter heating and spraying device that uses no chemicals or propellants.

How does it work?

As butter is loaded into the biēm, it travels down from the product’s middle carriage into a reservoir. There, the biēm has layers of ultra-thin heaters that melt the butter. Once melted, butter moves up from the reservoir to spray.

What’s in the box?

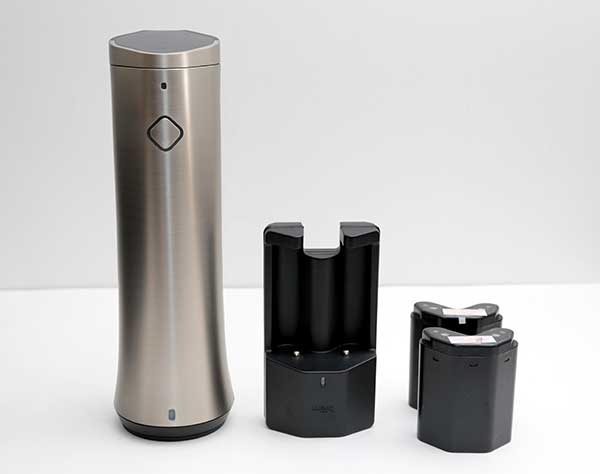
biēm butter sprayer
Battery charger
Battery pack
Quick start guide

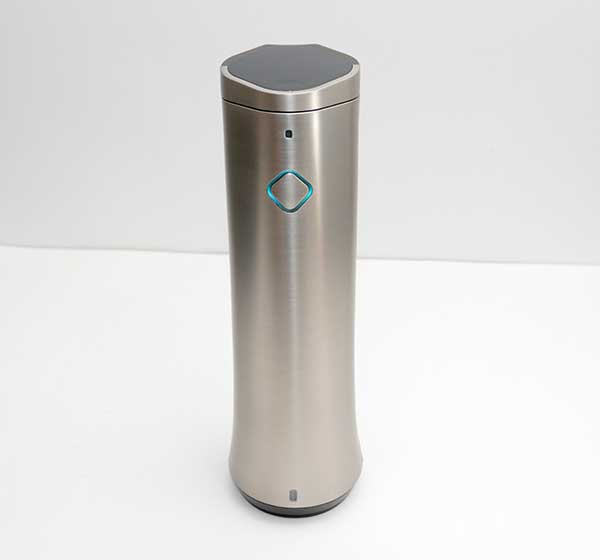
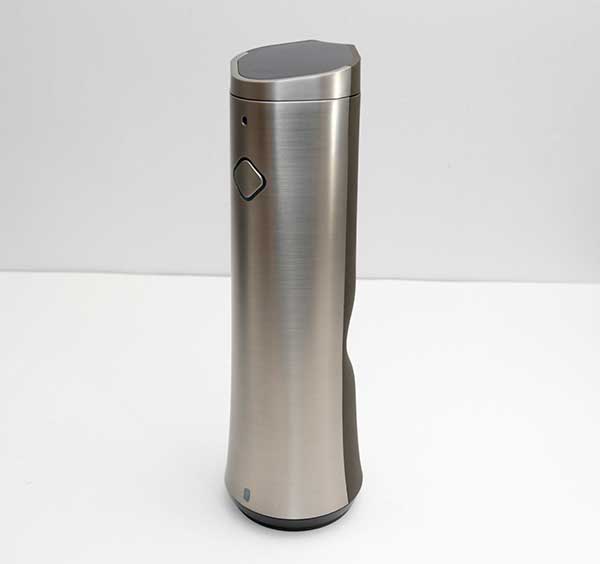
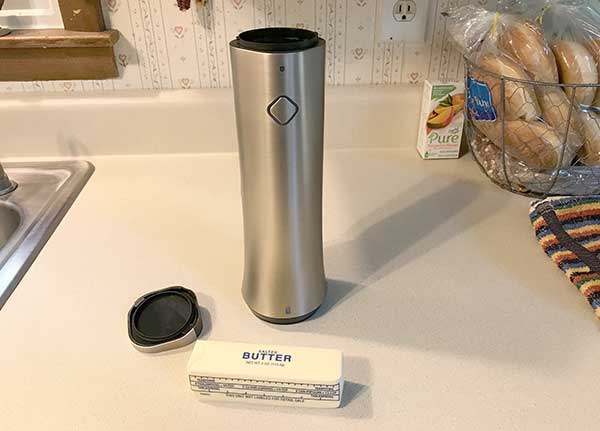
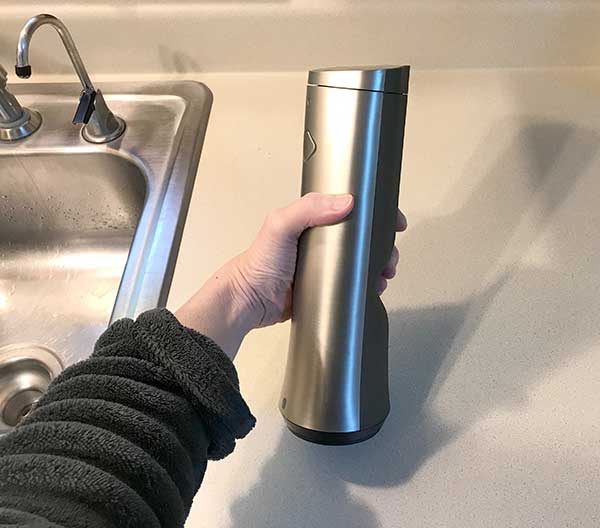
At first glance, you might mistake the biēm butter sprayer for a stainless steel water bottle or a fancy electric pepper mill. The biēm butter sprayer stands about 10.75 inches tall and has a stainless steel

The biēm butter sprayer stands about 10.75 inches tall and the back side has a brushed stainless steel cover with a diamond shaped power button and an LED above it.

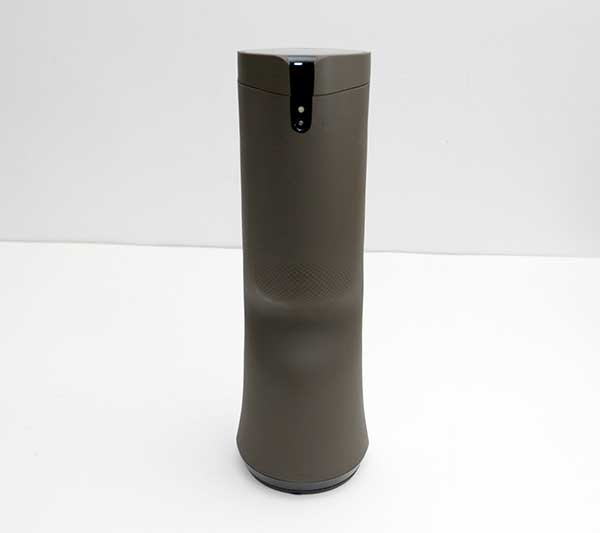
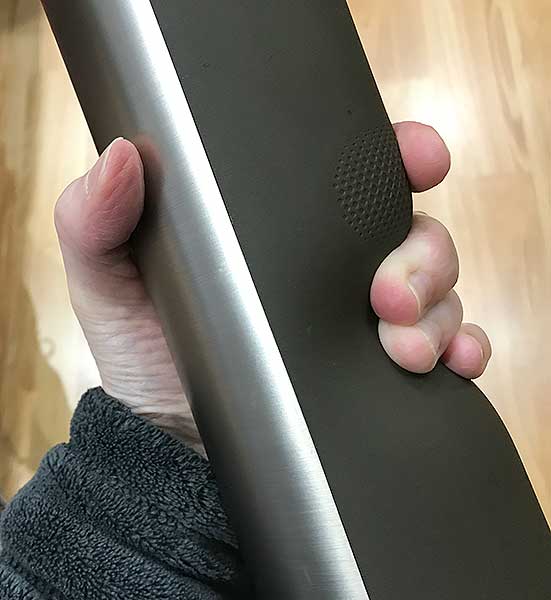
The sprayer side has a soft touch plastic covering with a hand grip and a knurled trigger in the center of the sprayer. At the top is the nozzle with an LED light above it.

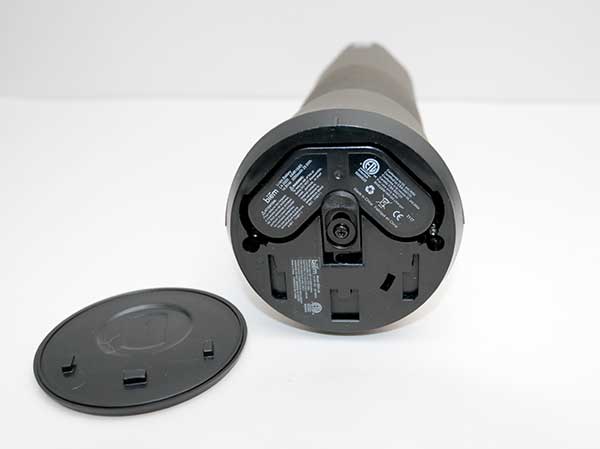
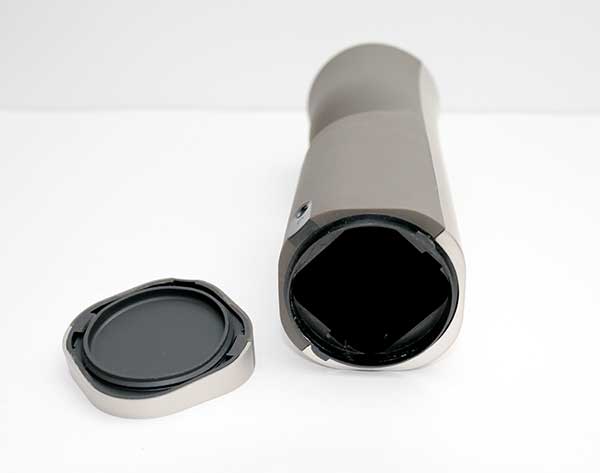
The bottom of the biēm butter sprayer slides off to reveal the battery compartment where the V shaped rechargeable battery is stored.

The top of the sprayer twists off to access the butter reservoir.

Before you use the biēm butter sprayer for the first time, you need to load a charged battery and clean the butter reservoir. To clean the sprayer, you remove the top of the sprayer, fill it with warm water and a drop of dishwashing liquid. Then you put the cap back on, press the diamond shaped power button to turn it on. Then you hold down the button for 5 seconds to enter cleaning mode. You can then press the trigger to spray out the warm water for 10 seconds. Then you remove the lid, dump out the remaining water and repeat the sequence without adding soap this time.

Let’s melt some butter!

After you’ve cleaned the sprayer, it’s time to load a stick of butter. The biēm butter sprayer holds US sized sticks of butter like the one shown above.

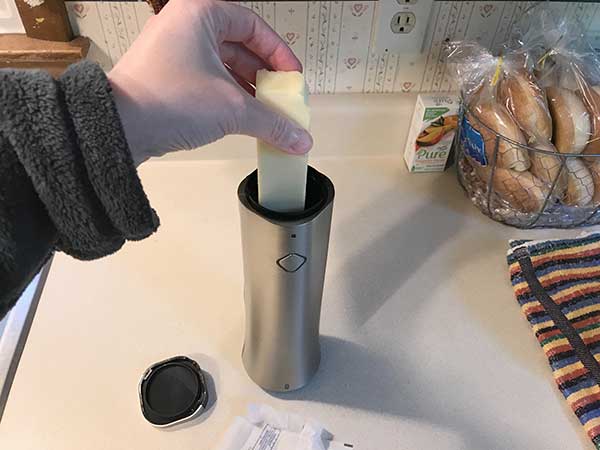
Loading the stick into the sprayer is as easy as removing the wrapper and dropping it in the chamber.

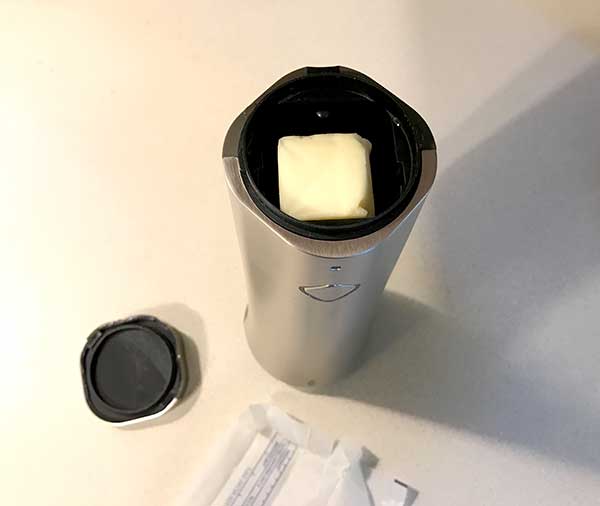
There’s the butter, all cozy and ready to be melted.

The next step is to press the power button which has an LED around it that pulses in blue. When the light stops pulsing and is solid blue, you know that the butter is ready to spray.

To spray the butter, you grab the biēm butter sprayer in either hand and press the trigger above the curved grip.

Finding the trigger isn’t easy and I think a more obvious button would be a welcome change.

Once you figure where the trigger is, you aim and spray.

See it in action

What isn’t shown in the quick video demo is that a little bit of butter continues spray from the nozzle after you let go of the button. So if you let go and lift the sprayer to set it back down on the counter, the butter will spray on whatever is near by. You kind of have to train yourself not to move the sprayer until it stops spraying.

As you saw in the video, it took awhile to melt the butter that first time I put a brand new stick of cold butter in the chamber. I hoped that this was just a one time wait and that subsequent wait times would be significantly less. Unfortunately, even after leaving the biēm on the counter in a 73-74 degree house, each time I would use the sprayer, I’d have to wait 30-50 seconds before it was ready to spray.

I also didn’t like that I had no idea how much butter I was putting on my foods. According to the info on the biēm website, each second of spray time = .4g of butter. Yeah, that doesn’t mean anything to me either…

Final thoughts

When it’s all said and done, the biēm butter sprayer is a cool idea, but in my opinion, it’s just not worth the $129 price tag. If it instantly sprayed melted butter with no wait time and was priced around $50, I’d be more likely to want to buy one. But as it is, I think I’ll stick to sitting the cold dish of butter out on the cabinet an hour or so before I plan to use it and save the cash for another gadget.

I also read a lot of negative comments on the biēm butter sprayer Kickstarter campaign page, which also makes me leery of buying one.

Source: The sample for this review was provided by Brevda inc. Please visit their site for more info.


Product Information

Price: $129.00
Manufacturer: Brevda inc.
Pros:
  • Sprays melted button in about a minute
  • Has a light to help you see where you're spraying
Cons:
  • Have to wait up to a minute even when the sprayer has been sitting out on the counter for days
  • Continues to spray after you let go of the button
  • Expensive

Filed in categories: Reviews

Tagged: ,

biēm butter sprayer review originally appeared on The Gadgeteer on August 14, 2017 at 5:50 pm.

Note: If you are subscribed to this feed through FeedBurner, please switch to our native feed URL http://the-gadgeteer.com/feed/ in order to ensure continuous delivery.

DxO ONE camera attachment for iPhone and iPad review

I have been a digital photographer for over 15 years now. I started with the equivalent of an Instamatic, and moved up to a prosumer, then full DSLR cameras. I have bought and sold lenses, filters, and other equipment. While I don’t pretend to know how to adjust f-stops and ISO for challenging conditions, I have made some nice photos, been paid for some and awarded prizes for others. I’m rarely ashamed or embarrassed by my work. I’ve also bought into the iOS ecosystem hook, line, and sinker. So it was only a matter of time before I subsumed to the Siren call of the DxO ONE iOS camera. I pre-ordered this about three years ago, and my Lovely Bride kept asking “What is this charge on our credit card?” to which I would reply “It’s a new camera. It’ll be here any day now.” She’s sweet to believe in me. And she’s seen much more funneled into my photography habit. And it only took nine months to ship!

Note: Photos may be tapped or clicked for a larger image.

DxO has a long history in Photographic software. Their measurement software for photo accuracy is an industry standard for many. The DxO ONE, however, is the first piece of hardware they have produced. It doesn’t look much like a standard camera. For one, it doesn’t have a viewfinder of any kind. Second, there is no way to see what your settings are. The first version, before the first firmware update, could only shoot from within an app on a connected iOS device.

A physical release pops out a lightning connector, and attaching it to your iPad, iPod touch or iPhone launches the software that controls the camera and turns your device’s screen into a viewfinder.

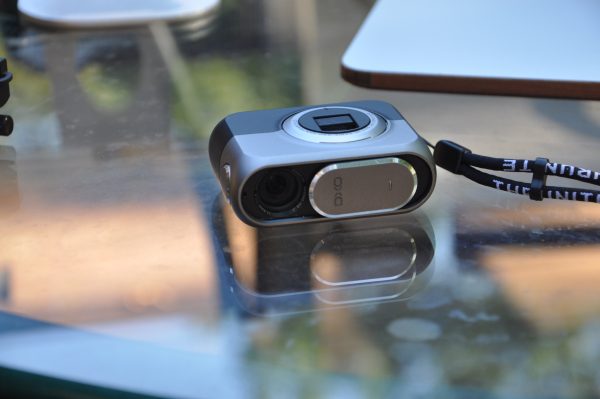
While that was cool enough (and the DxO ONE’s 25-megapixel sensor easily bested the resolution of the 8 megapixel iPhone 5s I was using at the time), the first firmware update added the ability of the unit to take pictures independently of the iPhone using the black-and-white screen as a rough viewfinder. (Yes, black-and-white. Zero shades of gray. Think original Macintosh. See picture below – loads of dithering. Those are the boards of my deck, through a glass table.)

Crazy as it sounds, this is a James Bond/Man from U.N.C.L.E-type spy camera. I can pull something out of a cigarette pack that doesn’t look like a camera and grab a really, really good photo in dim light. In full color. My 10-year-old self would be screaming for joy about now. I regularly use it for concerts and candid shots, but just this weekend, I discovered what the newest firmware update added: remote control. As in, I can turn this camera on, set it up, and walk away, and snap photos from it at will from anywhere on the same wifi network. (Pictures below are of me snapping hummingbird photos. The first pic is focused on my phone, the second photo is focused on the DxO ONE on the tripod. Since the devices are both on wifi, I could have been anywhere on my network monitoring the camera.)

And the camera is so quiet and unassuming, it’s more stealthy than some nanny-cams. And, as I was researching further, I found it can also be controlled from an Apple Watch! Sure, you don’t get the nice preview with the watch like you do with the iPhone, but you can hit the shutter release without touching it, or looking at your camera screen.

Another advantage of using the Lightning Port is that you can easily pull the camera off and turn it 180° to make a selfie camera of amazing quality. (It doesn’t help the subject matter, sadly, but you get more details to edit out.)

Sometimes, you find a case that doesn’t give good access to the flat area around your Lightning port, but there are many on the market that do. I recently spent some credit card points on a tripod mount and lens mounting adapters, in hopes of finding a decent telephoto lens to fit.

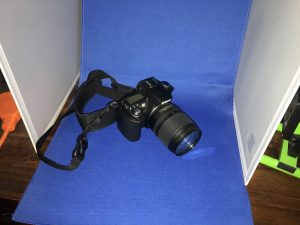
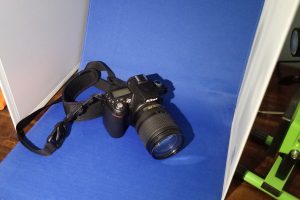
Since this is a camera review, I guess I should have some comparison shots from a known camera. I shot three scenes on full auto indoors with no flash, outdoors with full sun, and indoors in a dimly lit area with flash. The ones on the left were taken with the onboard iPhone 6s Plus camera. The ones on the right were taken with the DxO ONE attached to the same phone. (The DxO is attached to the lightning port, so it’s on the opposite end from the built-in phone. This is what accounts for the slight shift in point-of-view.) The only changes to the basic auto setting I made was to force flash to fire in the indoor flash shot. There are no lights turned on in the room, or in my mini-studio, only the camera flash. The images are full-frame with no cropping or enhancement added.


In the first shot, it’s easy to see the increase in light the ONE’s sensor makes. There is some fuzziness, but that’s to be expected with handheld shots. The shutter button on top of the ONE makes you have to pay much more attention to camera shake since it’s a physical button, rather than the virtual button on the iPhone app.

In the outdoor shot, things look equal in the well-lit areas, but the details under the shade, like the bark on the tree left of center, fall apart on the iPhone. If you’re wanting to get all CSI on the background, like my neighbor’s garage or porch area, the DxO has way more data to play with.

In the final flash set, the body of the camera is about the same, with a little fuzziness on both shots. The texture of the strap in the DxO shot is far more clear when you blow it up, however. Given the distance from the light source, the lighting is better, too.

So, is the difference worth the price? Hard to say. Three years ago and two generations of camera phones, it was to me. On our last vacation, most of my travel photos were taken with just the iPhone 6s Plus. While I always wish for more glass for zoomed shots, I was very happy with the outcome. Adding a clip-on polarizing filter (which is not easily doable with the DxO) made a lot of difference in sunny outside shots.

Computational photography is making the size of the sensor obsolete much faster than the “camera guys” are improving the optics of camera hardware. Given Cupertino’s income from sales, they have far more resources to spend in this area than companies like Canon and Nikon, let alone poor little DxO. But, still, it’s a neat gadget, and I don’t regret purchasing it. Meanwhile, the price is down $100 from what I paid, but with the software updates, I’m still up to date. I love living in the future.

Source: The item for this review was purchased with personal funds. Please visit DxO for more info and Amazon to order.


Product Information

Price: $469.99 (retail is $499)
Manufacturer: DxO, Inc.
Retailer: Amazon
Requirements:
  • iOS device
Pros:
  • Small and light.
  • Tight build quality.
  • Software under active development.
  • Easy to connect to iOS device.
Cons:
  • It's so small, attaching lenses is difficult, and finding quality lenses is difficult.
  • Some cases don't let it fit device fully.

Filed in categories: Reviews

Tagged: , ,

DxO ONE camera attachment for iPhone and iPad review originally appeared on The Gadgeteer on August 14, 2017 at 8:30 am.

Note: If you are subscribed to this feed through FeedBurner, please switch to our native feed URL http://the-gadgeteer.com/feed/ in order to ensure continuous delivery.

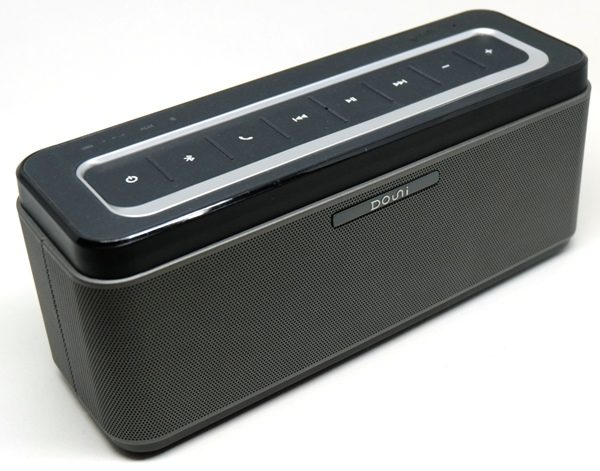
Douni A5 Bluetooth speaker review

After reviewing a handful of portable Bluetooth speakers, I’ve found that some really appeal to me like the UE Megaboom because of its great sound quality (it has some bass!) and long battery life among other things, but others like the Logitech x300 do not. The Logitech x300 tends to dampen mid and upper frequencies when bass frequencies are playing. When the Gadgeteer was offered the Douni A5 Bluetooth speaker, I volunteered to review it to see how it compares to other portable speakers I’ve tried. After testing it, I’d say it competes rather well in the audio quality department, but not so much in the Bluetooth range department.

Contents

  • Bluetooth speaker
  • Power adapter
  • 3.5 mm Aux audio cable
  • Owners Manual

Technical Specifications

  • Battery Voltage: 11.1V
  • Charging Voltage: 15V
  • Output Power: 2*12.5W
  • Speaker Spec: 58mm, 12.5W (and has two passive radiators)
  • Frequency Response: 50HZ~18KHZ
  • Lithium Battery Capacity: 6600mAh
  • THD<0.5%
  • SNR:>90dB
  • Dimensions: 8.6″ long x 2.9″ wide x 3.5″ high (218 mm long x 74 mm wide x 88 mm high)

Design & Build Quality

The Douni A5 Bluetooth speaker feels like a durable speaker. It is a rectangular speaker that is black on the top and bottom and has a gray metal grill. It is the size of many other portable speakers (not the super small ones…). Its dimensions are 8.6″ long x 2.9″ wide x 3.5″ high and it weighs 2 lbs. 9 oz.All of the controls are located at the top of the speaker. The entire top of the speaker is covered in a rubbery material except for the plastic silver ring around the buttons.
The back of the speaker contains the ports. The ports are (from left to right): Aux Audio In (to physically connect a mobile device to the speaker), Aux Audio Out, 15V DC In (to charge the speaker), 5V Out (to charge your devices), and a Reset button (resets the speaker to its factory default settings).The bottom of the speaker is also covered in rubbery material to prevent the speaker from moving around while on furniture.

Use

Powering On/Off: When turning on the speaker, you must press the Power button for two full seconds. To turn it off, you must press it for one full second. If you have a device plugged in via the Aux audio cable, the speaker will not turn off.

Auto shut-off: After about 40 minutes of inactivity, the speaker is supposed to automatically shut off according to the Douni A5 product description on the Amazon. However, I was not able to replicate that – the speaker remained on until I turned it off.

Bluetooth Pairing: After powering the speaker on for the first time, it immediately went into pairing mode in which the Bluetooth symbol on the speaker flashed alternately blue and red. At this time, I needed to go into my device’s Bluetooth settings (first I made sure Bluetooth was turned on) and look for the newly discovered device listed as A5. After tapping on the A5, my speaker was connected and a voice prompt on the speaker said, “Connected”. It is possible to pair up to eight devices to the speaker (which means that the speaker will remember that it has been paired to eight of your devices). When the speaker is powered up the next time, it will connect to the device it was connected to last. To change to one of the other seven paired devices, you can press the Bluetooth button on the speaker for one full second to disconnect the speaker from the current device (a voice prompt will say, “Disconnected”) which will then put the speaker into pairing mode (the voice prompt then says, “Pairing”), after which you can go into your other mobile device’s Bluetooth settings to tap on the A5 in the list of paired devices to connect it to the speaker. Even though the speaker remembers up to eight devices that it has been paired with, this speaker apparently cannot be connected to more than one device at a time, unlike the UE Megaboom which can be connected to two devices at the same time and thus can play music from both devices without having to stop and disconnect from one device to connect to another.

This speaker is also NFC capable which means that you can pair it with an NFC equipped device. When NFC is turned on on your mobile device, you’ll only need to pass it over the NFC area on the speaker which is located just above the Volume Down/Up controls as shown in the photo above (Note: you may have to search for the NFC area on your phone). Pairing the speaker to my Nexus 6 phone was very easy using NFC. When passing the lower right quadrant of my phone (where the NFC hardware location is) over the NFC area of the speaker, my phone displayed this message, “Are you sure you want to pair the Bluetooth device A5? Yes or No”. After tapping on “Yes”, I was paired. When paired and connected, the speaker and device volume controls are in sync.

In the photo above, you’ll also notice the microphone next to the NFC area on the speaker that picks up your voice when using the calling features of the speaker.

The above photo also illustrates how the rubber top really attracts dust and lint. This is difficult to keep clean and this was as clean as I could get it!

When powered on, the speaker has LEDs to indicate its status. In addition, when the speaker is moved or it thermally senses your hand near the control panel, the control panel buttons light up for a few seconds so that you can find the correct controls when the speaker is in a low light setting.

LEDs (from left to right): There is an LED battery symbol, three LED dots, an “AUX” LED (not lit up in the above photo), a Bluetooth LED, and control panel backlights.

The three red LED dots indicate the level of battery charge: one dot = 30%, two dots = 60%, and three dots = 100%. When the battery is low on charge the Battery LED symbol will flash red (you will also hear a series of tones indicating low battery charge); otherwise, it will shine green.

When you physically connect your device to the speaker using an audio cable, the “AUX” LED shines green.

When your speaker is paired and connected to a device via Bluetooth, the Bluetooth LED symbol slowly flashes blue (and a voice prompt says, ”Connected”). When the speaker is in pairing mode, the Bluetooth symbol alternately flashes blue and red (and a voice prompt says, ”Pairing”).

As stated earlier, the control panel uses backlighting to illuminate the buttons for a few seconds when the speaker is moved or if it thermally senses your hand near the control panel. Thermal sensors – that’s pretty cool. You don’t have to turn the lights on to control the speaker.

Bluetooth Connectivity and Range: After pairing and connecting the speaker to my devices (Nexus 6 phone and iPod Touch 6G), just after turning it on, periodically I found that the connection would drop for a fraction of a second several times (within about a 15 second timeframe) and my device was only about one to two feet away from the speaker. This happened enough times to make this distracting and frustrating. I also noticed that with only one wall separating my device from the speaker, I frequently lost connectivity. When testing the line-of-sight distance from my Nexus 6 phone, I was only able to go 10 feet away from the speaker when the connection started to drop. When doing the same test with my iPod Touch 6G, I was only able to go 20 feet before the connection started to drop. Oy! This is exceedingly disappointing especially when the Bluetooth range is supposed to go up to 66 feet according to the A5 product description on Amazon.

Charging Time: The User Manual states that the recommended charging time is four hours. When charging it with the provided power cord, the LED dots would flash in sequence until a certain level of charge was attained (upon reaching 30% charge, the first LED dot remained on, and when reaching 60% charge the second LED dot also remained on, then when reaching 100% charge, the third dot also remained on). Even though the manual says the speaker should charge for four hours, I noticed that it took only about 1.5 hours to fully charge the speaker. When I charged beyond the 1.5 hours, there were no differences in the status lights.

Using the A5 as a Charger: If you should need to charge your mobile device in a pinch, you can do so using this speaker. However, it only provides 5V/1A so the charging will be slow.

Playback Time: When the speaker is set at a moderate volume level, my test revealed that the speaker would run for about nine hours. The User Manual states that the speaker should run about 12 hours. Of course, the playback time depends on the volume you play it at, but I expected that when the speaker is set at a moderate level, it would last nearly 12 hours.

Controls: I noticed that when using any of the control panel buttons, I needed to press each for one full second (except for the Power button which needed two full seconds when turning the speaker on). A simple split-second tap was insufficient to get the buttons to work properly. Once I learned the proper way to operate the controls, all of them worked well. I could play/pause, skip forward/back a track, or increase/decrease the volume levels. Holding the volume buttons down would increase or decrease the levels more quickly.

Calling Features: When you are connected to the speaker via Bluetooth and you receive a phone call, you must press the Call button for a full second to answer the call and press again for one full second to hang up. Call clarity on both sides was adequate. When I answered the call on the speaker and spoke within about eight inches from the microphone on the speaker, there were no issues. If I was a foot away or more, the caller indicated that my voice started to echo and was less clear.

Aux audio-in: When you connect your device using a 3.5 mm audio cable, this device supersedes Bluetooth devices. I also noticed that the volume on the speaker and device are not in sync when connected this way, thus, you’ll need to find your preferred volume level by adjusting it on both devices.

Frequency Range: Using my Audio Test Tone Generator Android app, I was able to comfortably hear 50-17,000 Hz frequencies (well, my kids heard them) when the speaker was set at moderate volume.

Audio Quality: This speaker can truly fill a room with music – it’s loud – at least it is to me. This speaker’s audio quality was quite impressive. It sounds just about the same as our UE Megaboom and it didn’t dampen the upper/mid frequencies like the Logitech x300 when playing bass-heavy music like Silent Shout by The Knife. Other music genres like classic rock (the Famous Final Scene by Bob Seger & The Silver Bullet Band), Celtic/new age (The Highwayman by Loreena McKennitt), and classical music (Clair de Lune) sounded crisp and clear. The vocals and the guitar on The Highwayman were beautiful to listen to. It is my perception that the speaker tends to slightly favor the mid to upper frequencies but I am not an audiophile so take that with a grain of salt – or several grains of salt.

Final thoughts

The Douni A5 Bluetooth speaker is quite wonderful to listen to until you get more than 10 feet away from it at which t_me th_ ___nection _tarts to _rop (“…time the connection starts to drop”). Yep. My studies have shown conclusively that this speaker suffers from separation anxiety. In addition, the controls need to be pressed one full second to work properly. The call features work well and the speaker does charge quickly (1.5 hours) but a full charge will only give you about nine hours of playback time when the speaker is set at a moderate volume level (as opposed to the 12 hours that the User Manual states). Even though the speaker sounds great, the Bluetooth range problems drive me crazy, thus I would personally pass on this speaker.

Source: The sample used in this review was provided by Douni. Please visit their website for more information or Amazon to purchase one.


Product Information

Price: $69.99
Manufacturer: Douni
Retailer: Amazon
Pros:
  • -Wonderful audio quality
  • -Charges quickly
  • -Has thermal sensors to detect when your hand is near the control buttons to illuminate the buttons
Cons:
  • -Bluetooth range is awful
  • -Control buttons need to be pressed one full second to get them to work properly
  • -Speaker plays for about nine hours on a full charge when it is set on a moderate volume level instead of 12 hours like the manual says

Filed in categories: Reviews

Tagged:

Douni A5 Bluetooth speaker review originally appeared on The Gadgeteer on August 13, 2017 at 9:27 am.

Note: If you are subscribed to this feed through FeedBurner, please switch to our native feed URL http://the-gadgeteer.com/feed/ in order to ensure continuous delivery.

ŌURA Ring review

The majority of fitness trackers on the market have been designed to be worn on the wrist like a watch or worn at the waist clipped to a belt. But today, I am going to show you the ŌURA fitness tracker that is worn on your finger like a ring. 

What is it?

ŌURA is a ring with sensors inside the band that tracks activity like steps, sleep, respirations, and heart rate info.

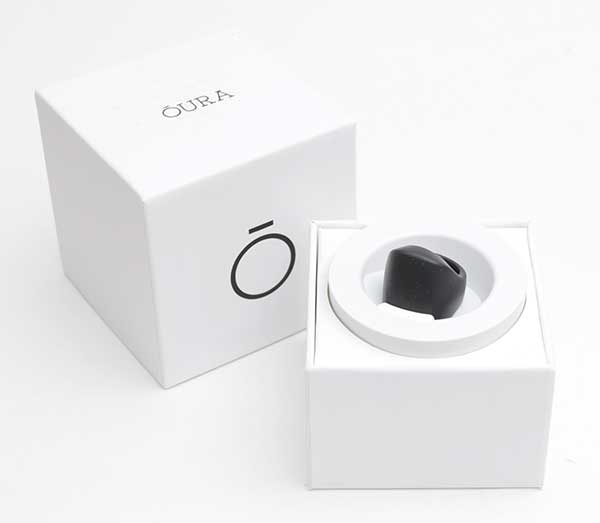
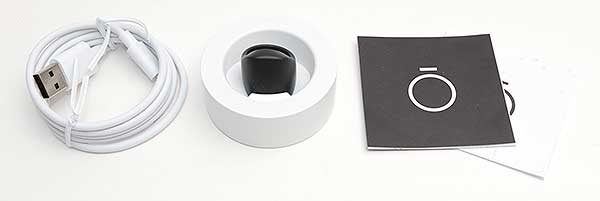
What’s in the box?

ŌURA ring
Charging dock
micro USB cable
Quick start guide

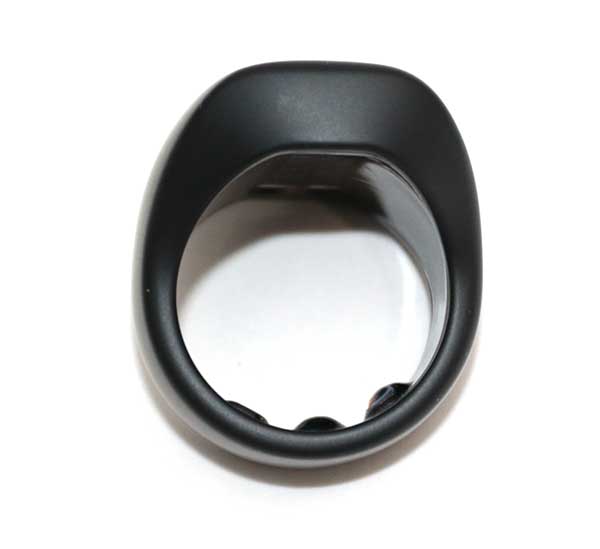
The ŌURA ring is made of scratch resistant ceramic zirconia that is 100% non-allergenic. While it might look like a plastic ring in the images, it feels very hard and smooth like something made of ceramic. It’s also waterproof to 50m /164 ft, so you can wear it while showering and swimming.

The ring is available in stealth black like the one sent to me, arctic white, and mirror black.

The shape and size of the ring remind me of a guy’s high school class ring. The ring does have some weight to it, but not enough to be bothersome.

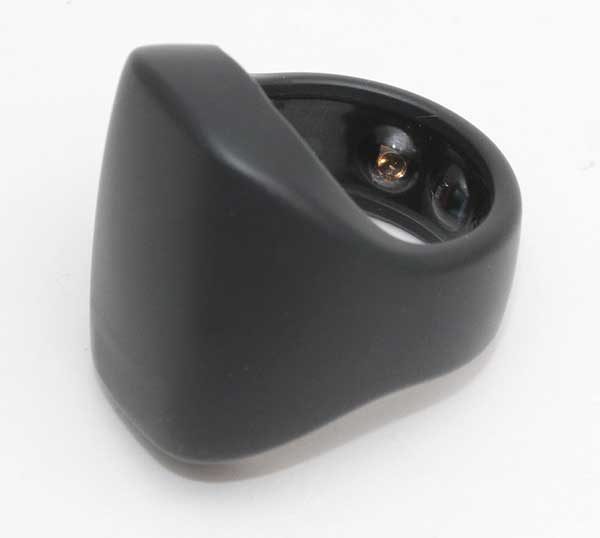
As you will notice in the image above, the part of the ring that touches the underside of your finger, has three raised sensors. According to ŌURA, these sensors:

  • Senses the arteries in your finger, just like the hospital pulse oximeter
  • Captures 250 samples per second for a constant flow of reliable data
    Detects blood volume pulse, body temperature and activity level with advanced sensors
  • Determines sleep stages with precision comparable to clinical sleep labs

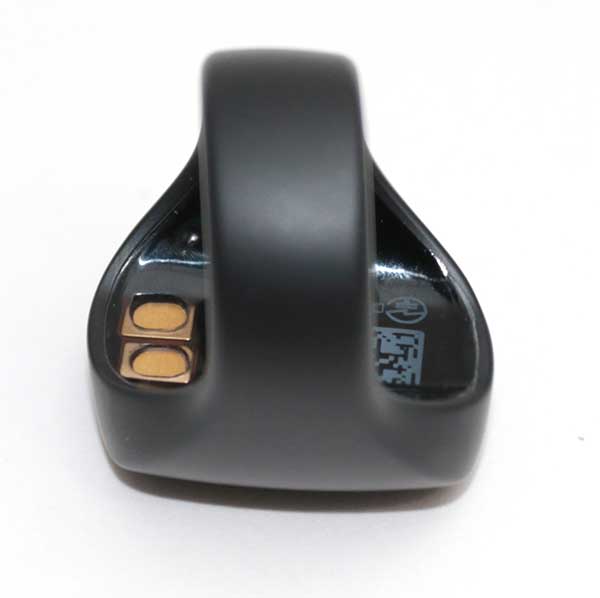
There are also two flat contacts inside of the top of the ring that are used to charge the ring’s internal battery.

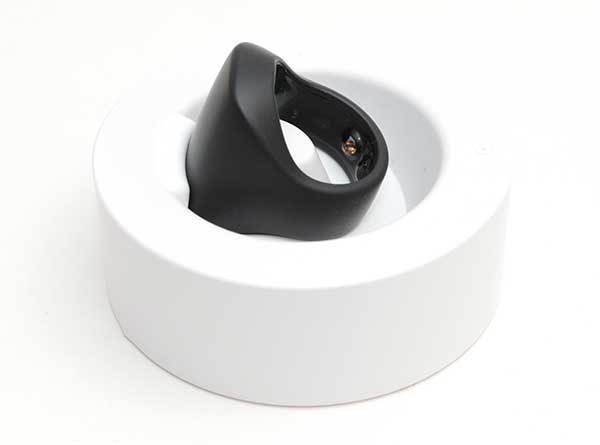
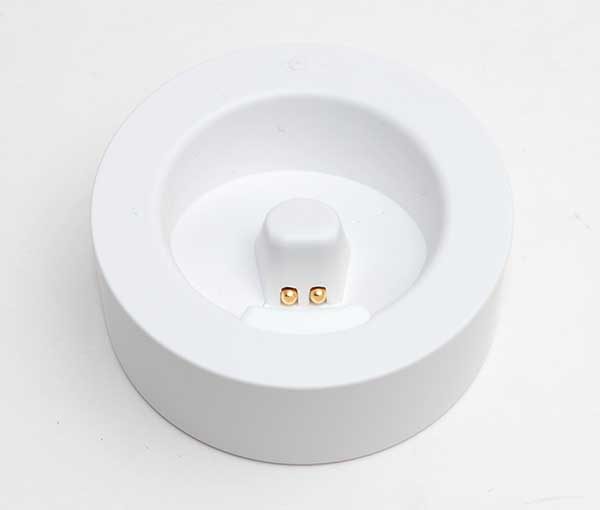
Included with the ring is a small white charging dock that has two spring loaded electrical contacts.

As you probably have already guessed, the ring is pressed down on the post in the center of the dock. When it’s seated properly, a yellow LED on the dock will pulse to let you know that the ring is charging. When charging is done, the LED remains steady.

How do you know what size ŌURA Ring to buy?

With most fitness tracking devices, you don’t need to know your exact wrist size to order one. But with ŌURA, even if you do know your ring size, you might not want to buy the ŌURA in that size due to the sensors that stick up from the bottom of the band.

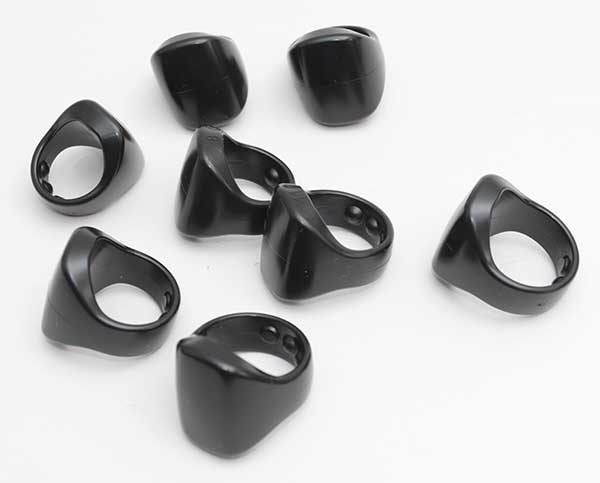
How do you know which size to order? ŌURA will send you a free ring sizing kit which includes a set of dummy rings of the sizes that they offer. They suggest that you wear the size you think you want to buy for 24hrs to make sure it’s the right size for you. Everyone’s hands and fingers can swell during the day or night and you don’t want to buy an ŌURA ring that is so large that the sensors don’t make good contact with your finger or too small that the ring gets stuck on your finger.
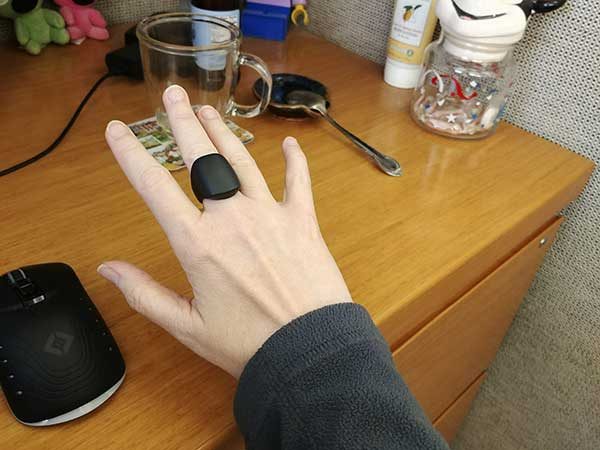
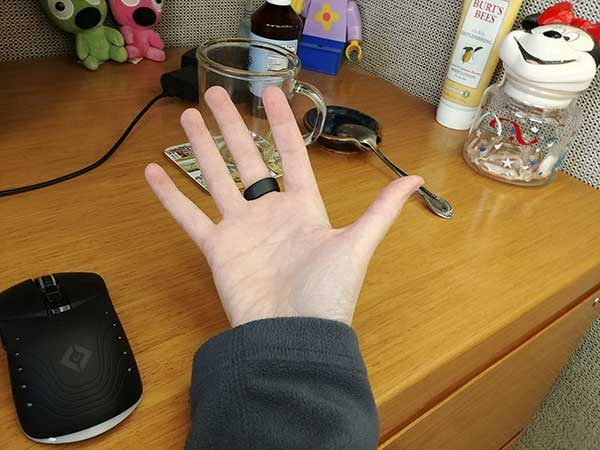
The only ring I wear is a silver wedding band. The ŌURA ring is definitely on the large side for a ring that I would want to wear 24 hours a day, 7 days a week.
It took me a little while to get used to wearing the ŌURA because the band is wider than what I’m used to. But if you already like to wear larger rings, it probably won’t be a problem for you.

If I’m going to wear a fitness tracking device, I’d rather it be on my finger than my wrist. I can understand that this is a personal preference, but the ŌURA ring felt less in the way of my everyday activities than wrist worn trackers which tend to rub my wrist when I’m typing which is what I do all day long.

It’s also less annoying to wear at night compared to a wrist worn tracker for sleep tracking.

The only time I took off the ŌURA ring was when I was working out on a TotalGym because the skin on my finger would get pinched between the ring’s band and the TotalGym handle.  If you don’t know what a TotalGym is, it’s a cable style exercise machine that has handles that you pull to do various exercises.

Tracking your stats with the ŌURA ring

First of all, what stats can ŌURA track?

During the day when you’re awake, the ring tracks the timing and intensity of your daily activity (and inactivity) and at night while you sleep, it tracks your pulse waveform, heart rate dynamics, body temperature, and movement to identify the different stages of your sleep.

You can read about the accuracy and how it works here: https://ouraring.com/the-science/

Since the ring does not have any type of display to show you how you’re progressing towards your goals, you have to install the iOS or Android ŌURA app on your mobile device. The ring uses Bluetooth to sync the data with your phone or tablet.

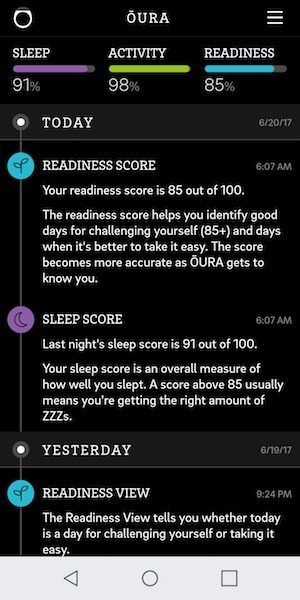
The app has an easy to read interface that is arranged into a dashboard, sleep, activity, and readiness screens.


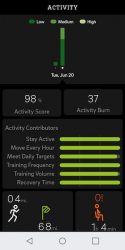
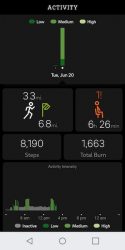
The activity tracking screen shows info like the number of steps you walked, distance traveled, active time, and how long you were inactive each day. All of this data is used to determine your daily activity score. You can use this information to improve your health by consciously getting up and moving more.

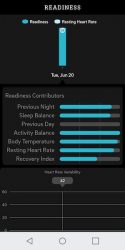
The readiness tracking screen uses info about your sleep from the night before, your resting heart rate, body temperature, and more to create a score that lets you know if your body is ready for your next epic workout or if you should take a nap instead.


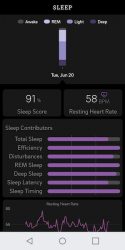
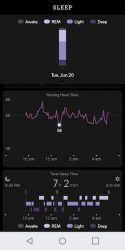
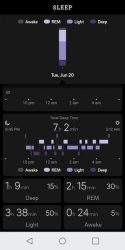
The sleep tracking data captured by the ŌURA ring provides a lot of good info on how restful your sleep is (or isn’t) by showing how long you were in each sleep level, how long you were awake each night and your resting heart rate. Just like with activity, ŌURA gives each night a sleep score.


A dashboard view shows your overall scores on one screen.

The app is pretty good, but it is missing one obvious feature, which is a live view of your stats. Although the ring tracks your heart rate, your body temp, and respiratory rate, you can’t check to see your current reading for any of those stats.

There’s also no way that I’ve found to export the data, but it does sync with Apple Health.

Battery life

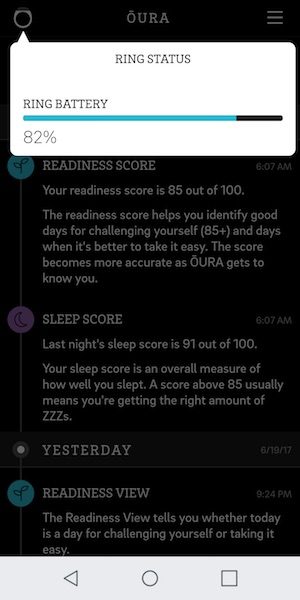
Since the ring is small and it’s collecting data 24/7, it shouldn’t be a surprise that you’ll need to charge the ŌURA ring more often than other wearable trackers. During my review period, I was charging it every 2-3 days. The good news is that the ring charges pretty quickly, so you can put it on the charger when you get home from work and it will be ready to wear and track again in about an hour.

Final thoughts

There are 100’s of fitness trackers on the market, but I’ve only seen two fitness trackers that are rings and the ŌURA ring is one of them. Maybe that’s why fitness tracker rings are so expensive. That’s the biggest issue that I have with the ŌURA… the price. Most people don’t have an extra $299 – $499 to spend on a wearable fitness tracker. If you don’t mind the price, this is a really cool activity tracker and makes me hope that it will spark a trend for more smaller wearables like this one.

Source: The sample for this review was provided by ŌURA. Please visit their site for more info and Amazon to order.


Product Information

Price: $299 – $499
Manufacturer: ŌURA
Pros:
  • Truly wearable
  • Waterproof
Cons:
  • Expensive
  • Large ring for smaller hands
  • No display on the ring

Filed in categories: Reviews

Tagged: , ,

ŌURA Ring review originally appeared on The Gadgeteer on August 11, 2017 at 10:54 am.

Note: If you are subscribed to this feed through FeedBurner, please switch to our native feed URL http://the-gadgeteer.com/feed/ in order to ensure continuous delivery.