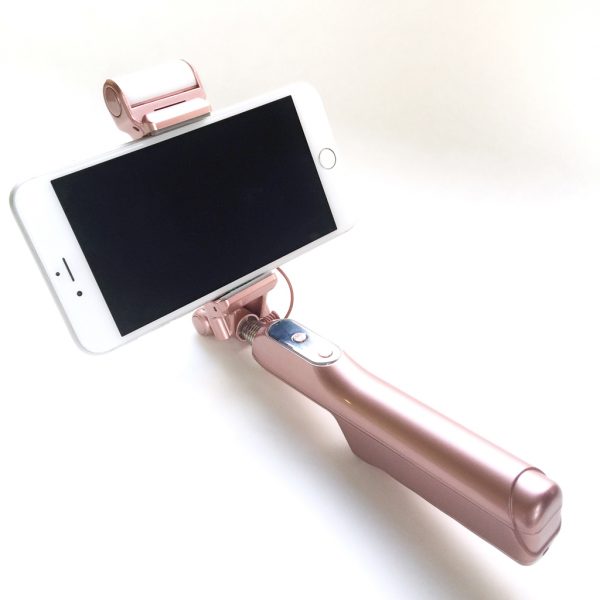
 “Selfie Sticks” were all the rage a few years back. And although the craze has dwindled a bit, they are still in use and can definitely still be useful, especially in certain situations. Our family had tried a selfie stick a few years back, but we were very unimpressed with it—it had a cable that connected to the phone to control the phone’s shutter, which was a bit cumbersome, and its quality was low for the cost. When Julie provided the chance to try out the MPow Bluetooth Selfie Stick, its Bluetooth connectivity and some of its other features looked appealing. Let’s check it out! Gadget on!
Options
The Mpow Bluetooth Selfie Stick is available in the following colors. Note that the pricing on Amazon fluctuates a bit, so the prices listed below are as of the writing of this review:
- Rose Pink (reviewed here) – $22.49
- Gold – $21.94
Specs
Below are listed the technical specs of the MPow Bluetooth Selfie Stick:
- Built-in Bluetooth remote shutter control
- 270-degree pivoting adjustable head
- 360-degree fill light with 3 levels
- Mirror
- 1500 mAh battery for 72 hours of fill light time, 30 hours of Bluetooth time or 3 years standby with full charging time of 2.5 hours
- Weight 181 grams
- Telescoping length is 7.3 inches at shortest position and 34.3 inches at longest position
- Holder accommodates phones 1.8-3.3 inches wide
Packaging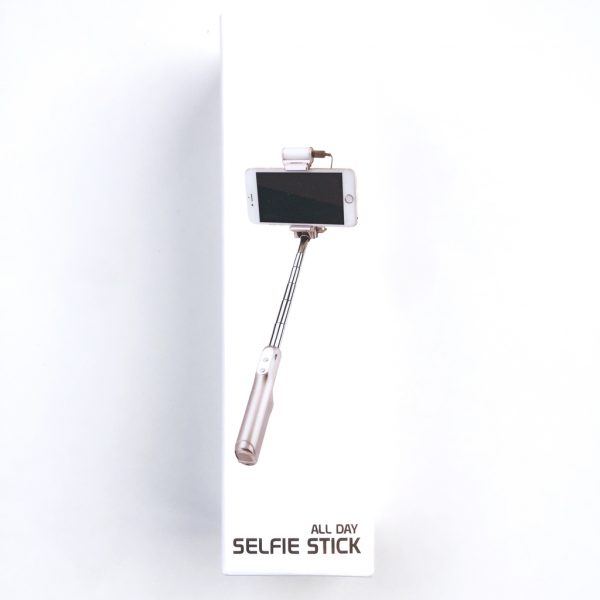
The MPow Bluetooth Selfie Stick arrived in some fairly standard packaging, which consisted of a white cardboard box with a few photographs showing the product. Inside, the Selfie Stick was inside its storage pouch, which was enclosed in a bubble-wrap bag for protection.
Contents

- Mpow Bluetooth Selfie Stick
- Drawstring carrying bag
- USB to micro USB charging cable
- Lanyard
- Instruction sheet
Features & Functions

Let’s dive in, starting with the included drawstring pouch, which the Selfie Stick had been placed in for shipping. The pouch is made of a quality mate al, and feels like it may be fairly water-resistant. The pouch will accommodate the Selfie Stick itself, with room to spare for the USB charging cable.

After removing the Selfie Stick from its pouch, the first thing I notice about it was that it certainly appeared to be feature-rich. In fact, I was a bit intimidated by it at first. How the heck was I going to figure out how to use this thing? The reality is that it is a fairly easy-to-use device, which you will see below.

The Selfie Stick fit into my hand quite nicely, and overall it is not excessively large to handle and operate.
Additionally, the handgrip has some minor contouring, as see above, to fit your fingers and help prevent you from dropping it during use. The Selife Stick has a polycarbonate plastic body with an appealing metallic appearance.
  Despite its impressive feature set, it’s fairly compact. It folds down to just 7.3 inches in overall length. It’s a bit large to fit in your pants or shorts pocket (unless you are wearing ones with seriously deep cargo pockets), but will fairly easily fit into most purses or just about any backpack.
 In the photo above, I’ve started to “unfold” the Selfie Stick into operating position by pivoting the head away from the main body.
The telescoping stainless steel rod, shown above, extends out to over 34 inches, so you can get your whole family (and maybe event some photo-bombers) in the photo.
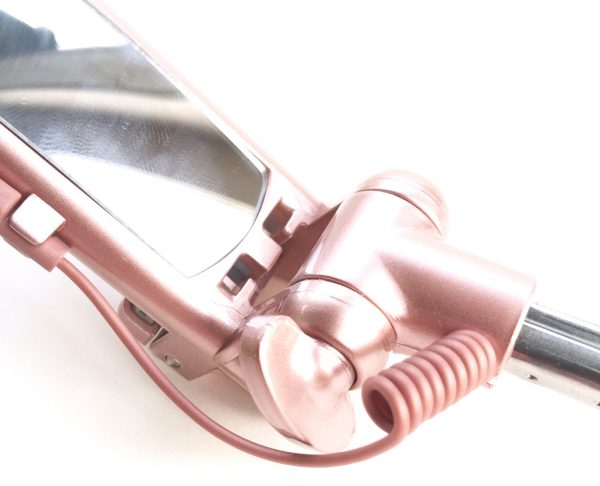
Another handy feature is a “wing-nut” that can be tightened down to fix the Selfie Stick’s head in place. However, I found that I didn’t have to use this much, since the head would actually stay in place quite well on its own without using this.

This Selfie Stick also includes a small mirror on the “back” side of the clamp mechanism. This could be used to check your hair or your makeup, or the angle of your shot, before shooting the perfect selfie.
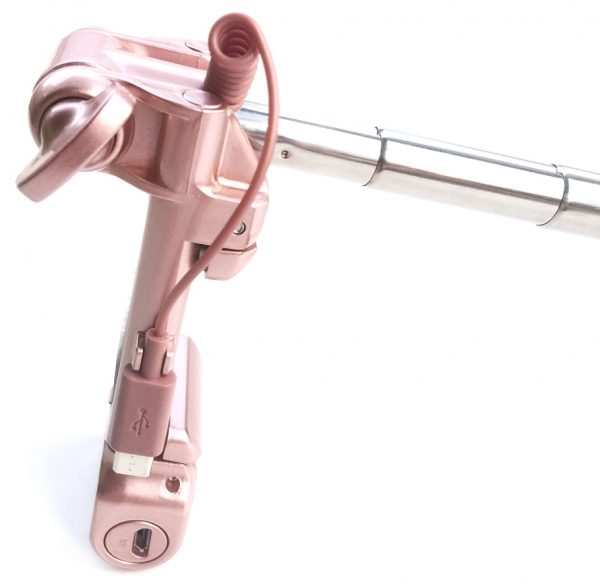
The Selfie Stick has a small, coiled Micro-USB cable attached to its side. This cable is NOT for charging the device. Instead, it provides power to the fill light. In order for the fill light to work, the micro-USB cable must be plugged into the micro-USB port on the side of the bracket that holds the light. I found this a bit strange; I’m not sure why the power to the Fill Light couldn’t have been directly incorporated into the body of the Selfie Stick. It means an extra setup step. Still, it’s not all that difficult to do.
 Another interesting feature of the Mpow Bluetooth Selfie Stick is the fill light, which sits atop the clamp mechanism, as seen in the image above. The Fill Light has a build-in diffuser, to soften the light’s intensity and reduce the “harshness” or glare from it. The light level can be fine-tuned by rotating its barrel shape from fully open, as seen above…
 …to partially closed, as seen above…
 …to fully closed, as seen seen above. The fill light can spin 360 degrees for the ultimate in fine-tuning.
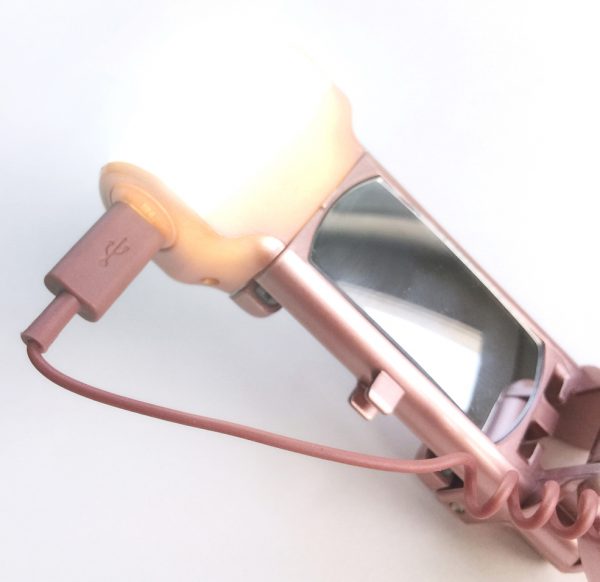
The fill light has three levels that can be used, the brightest of which is shown illuminated above.
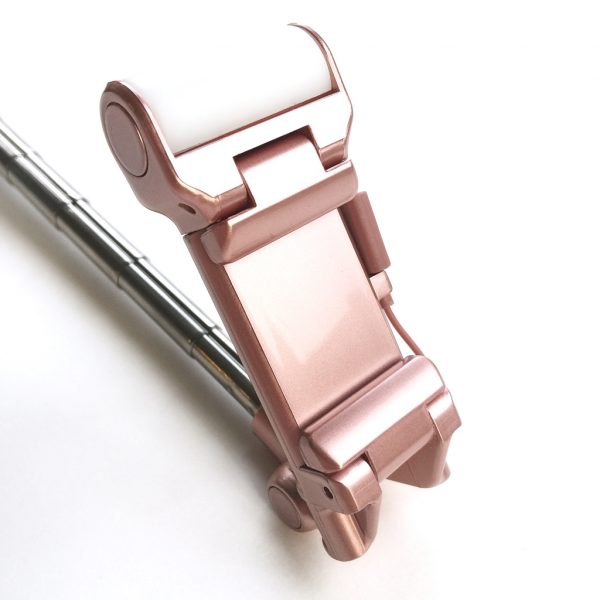
Above you can see the clamping mechanism that holds your phone. The clamp consists of two pivoting jaws with soft silicone grips that hold your phone securely. The jaws can be folded down, as shown above, when not in use.
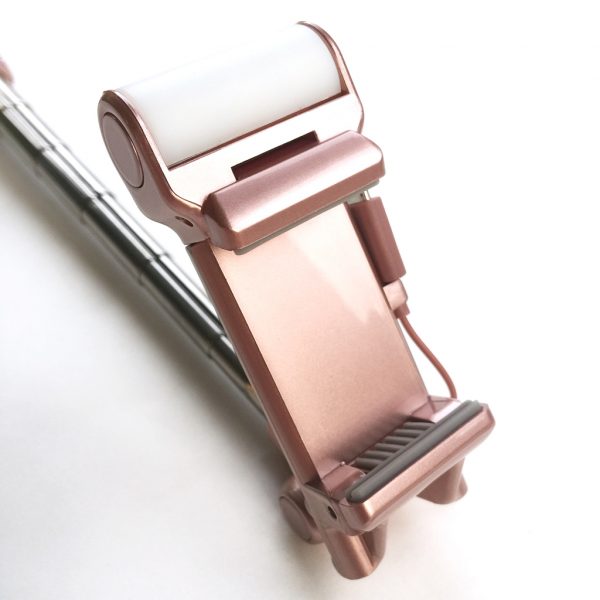
When in use, the clamp’s jaws are folded outward, as shown above. The gray silicone grips on the insides of the clamps are visible in the photo above as well.
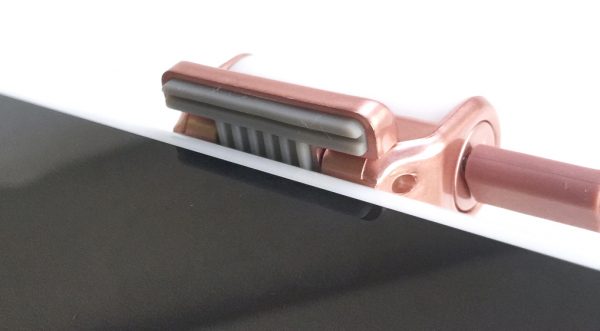
Above, a closeup of the top clamp jaw’s gray silicone grip.
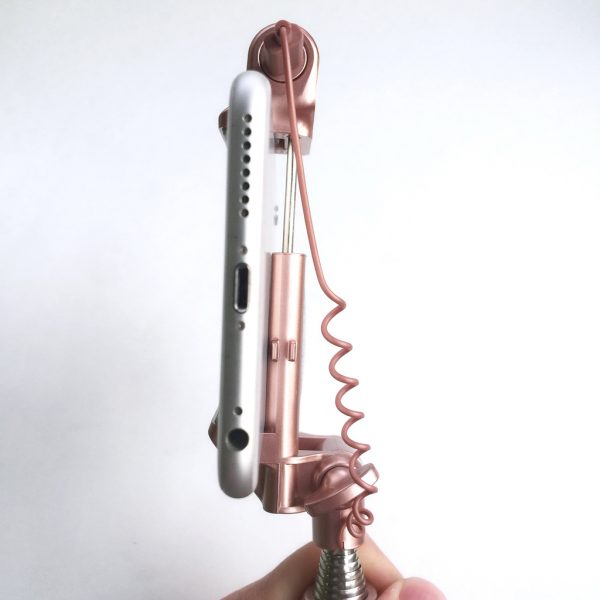
An iPhone 6 Plus will fit into the clamp mechanism, but it is a tight fit, and I had to pry the jaws apart a bit to get the iPhone to fit, but not excessively so. However, if this iPhone 6 Plus has been in a case, it would have been questionable whether it would have fit. Phones smaller than an iPhone 6 Plus should fit with no issues (my daughter used her iPhone 6 with it and the fit was perfect, even with the iPhone 6 in a case).
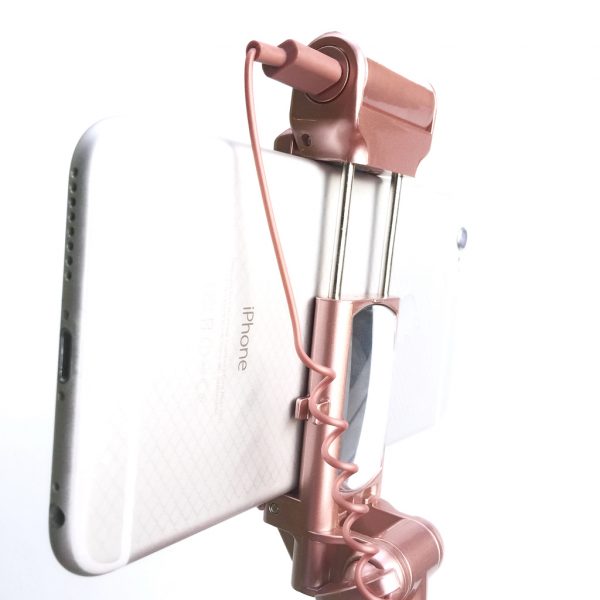 Above you can see how far apart the clamp mechanism’s jaws will stretch to accommodate a phone. The clamp is spring-loaded, so it will firmly grip your phone. It can accommodate phones from 1.8 to 3.3 inches in width.
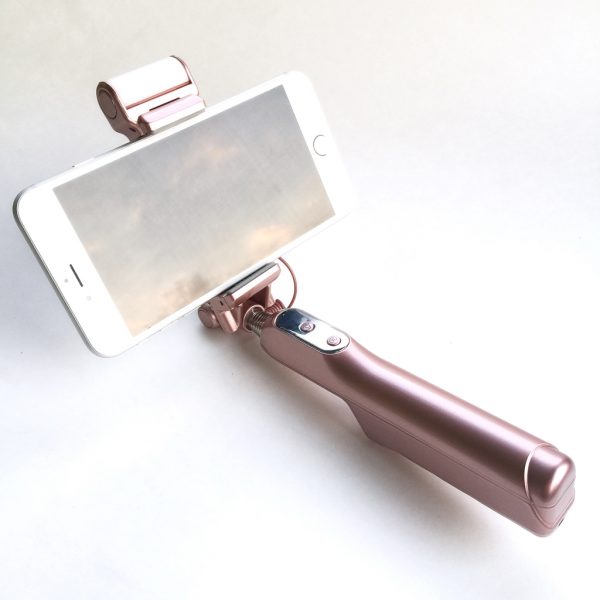
Above, the Selfie Stick with my wife’s iPhone 6 Plus loaded into its clamp mechanism. The spring-loaded clamp with its silicone grips helps provide a stable platform for your phone, and I didn’t worry about it accidentally falling out on its own.
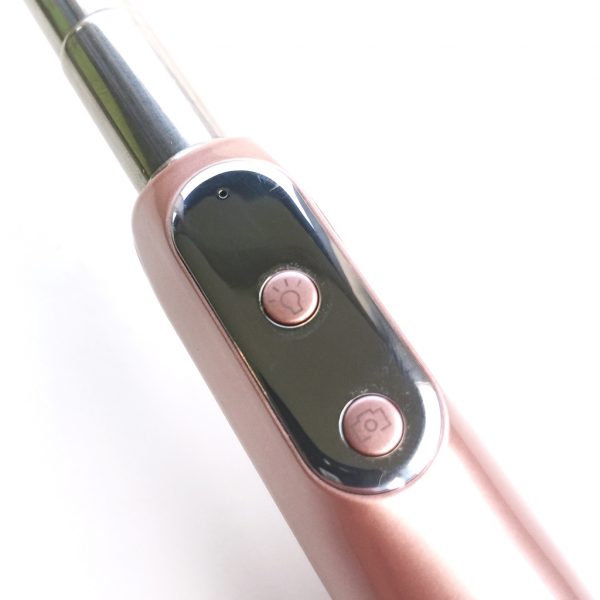
The Selfie Stick has two buttons on the handle: Light (top) and Camera (bottom). To pair the Selfie Stick with your phone, press and hold the Camera button for 3 seconds.
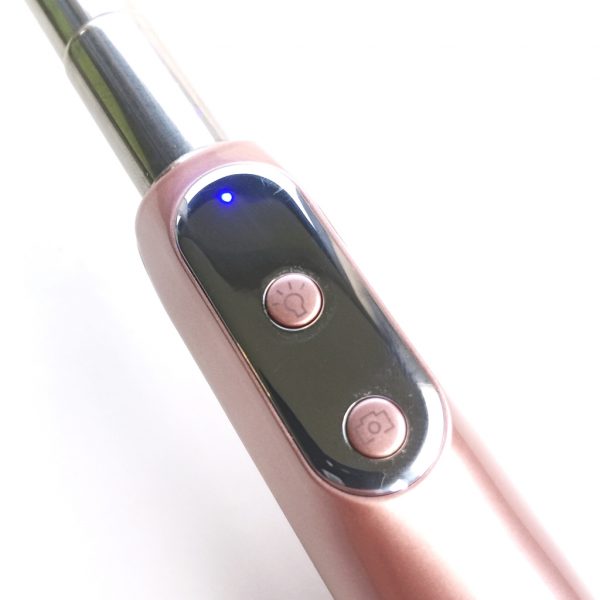
Once in Pairing Mode, a tiny blue LED light begins to blink off and on.
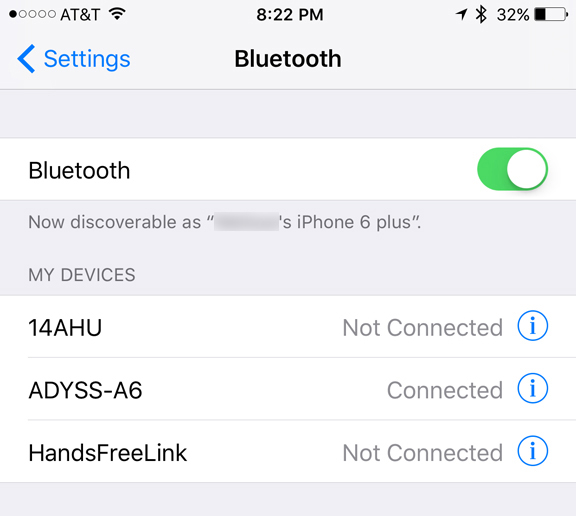
Next, activate Bluetooth on your phone and search for devices (Full Disclosure: I used my wife’s iPhone 6 Plus for this). In the device list, you should see “ADYSS-A6.” Select this and Boom! You’re done. Once fully paired, the blue LED on the handle will stop blinking and you are cleared to start shooting. Pics, that is. To turn off the Selfie Stick, press and hold the Camera button again for 3 seconds.
 Above, a shot of me pushing the Light button and as you can see, the Fill Light is illuminated atop the phone.
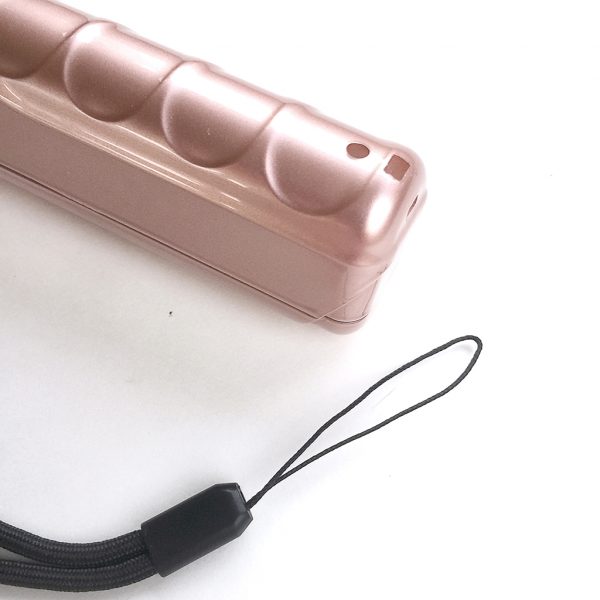
An optional accessory included with the Selfie Stick was a wrist lanyard, as shown above. In theory, this should be easy to install, but in practice, I found it very difficult—I couldn’t get that thin cord down into the hole and out the other side! I ended up not using the lanyard, but it would probably be a good idea to use it, especially if you trying to take pics in a crowded area, and so forth.
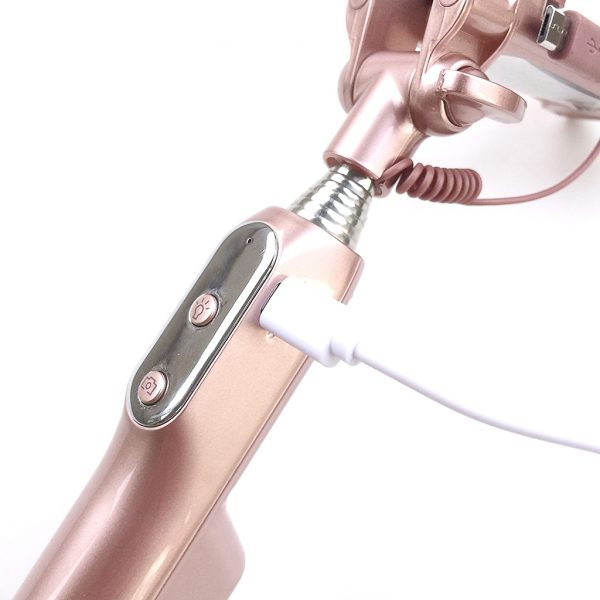
The Mpow Bluetooth Selfie Stick runs on battery power, but not standard AA or AAA cells, it has its own internal, rechargable battery that can be charged using the included USB to micro USB cable, shown above plugged into the side of the Selfie Stick. The battery powers the Bluetooth connection as well as the Fill Light.
 To use the Selfie stick, press the Camera button once to activate the shutter on your phone’s camera. It’s just that easy. Above, a pic of me taking a selfie. I know, mind-blowing, right?
 Above, a selfie I took of…well…myself…with the Mpow Bluetooth Selfie Stick. Of course, using the iPhone’s front-facing camera, the quality of the pic will be a bit lower than if it had been taking with the rear-facing camera, but the Selfie Stick allows easy orientation and quick pic snapping.
  Above, another selfie at a bit further range, where I’ve extended the telescoping stick out a bit further.
 Lastly, I wanted to check out the Fill Light. Above and below, I took a couple of selfies inside my house, where the lighting was not as good as the outdoor selfies I took above. The pic above was taken without the Fill Light.
  The pic above was taken with the Fill Light at full illumination. It does look a bit brighter, and its built-in diffuser prevented glare, but admittedly indoor photos in lower light with the iPhone’s front-facing camera do look a bit rough.

We took the Mpow Bluetooth Selfie Stick on our most recent family vacation to the East Coast this summer. It came in handy when we wanted to get some family pics in front of several landmarks and other touristy sites, including the Bunker Hill Monument in Boston (above).  I delegated control of the Selfie Stick to my teenage daughter, who has an iPhone 6, and it worked very well; however, it did drop the Bluetooth connection once unexpectedly, it for some reason it was difficult to get it reconnected, but that was a rare occurrence. (The above pic was taken from the Statue of Liberty Island; New Jersey can be seen on the left and lower Manhattan, NYC on the right. Please ignore the dude in the blue shirt—he wouldn’t get out of way.)
Conclusion
I like the Mpow Bluetooth Selfie Stick. It has a lot of nice features, and it was easy to use. For starters, it was very easy to Bluetooth pair with my Phone 6 Plus, and easy to use once paired. The adjustable Fill Light with built-in diffuser feature is handy, but probably most useful for indoor or nighttime outdoor selfies. Still, it’s a nice feature to have handy. The 34-inch telescoping shaft extends quite far, which helped with getting lots of peeps into the pics for group selfies. Additionally, it can be charged with a micro USB cable, which means you don’t have to lug batteries around (but you do have to remember to charge it). Overall, I think the MPow Bluetooth Selfie Stick is a great value for its price.
Source: The sample for this review was provided by Mpow. For more info or to order, visit Amazon.
Product Information
| Price: |
$21.94 (Gold), $22.49 (Rose Pink) |
| Manufacturer: |
Mpow |
| Retailer: |
Amazon |
| Requirements: |
- Fits phones from 1.8 to 3.3 inches wide.
- Bluetooth connection needed.
|
| Pros: |
- + Easy Bluetooth pairing and use
- + Compacts down to 7.3 inches for easy storage
- + Lots of features for the price
- + USB charing
|
| Cons: |
|
Filed in categories: Reviews
Tagged: Photography
Mpow Bluetooth Selfie Stick review originally appeared on The Gadgeteer on August 16, 2017 at 9:00 am.
Note: If you are subscribed to this feed through FeedBurner, please switch to our native feed URL http://the-gadgeteer.com/feed/ in order to ensure continuous delivery.



 “Selfie Sticks” were all the rage a few years back. And although the craze has dwindled a bit, they are still in use and can definitely still be useful, especially in certain situations. Our family had tried a selfie stick a few years back, but we were very unimpressed with it—it had a cable that connected to the phone to control the phone’s shutter, which was a bit cumbersome, and its quality was low for the cost. When Julie provided the chance to try out the MPow Bluetooth Selfie Stick, its Bluetooth connectivity and some of its other features looked appealing. Let’s check it out! Gadget on!


 The Selife Stick has a polycarbonate plastic body with an appealing metallic appearance.


 …to partially closed, as seen above…
 …to fully closed, as seen seen above. The fill light can spin 360 degrees for the ultimate in fine-tuning.


 Above you can see how far apart the clamp mechanism’s jaws will stretch to accommodate a phone. The clamp is spring-loaded, so it will firmly grip your phone. It can accommodate phones from 1.8 to 3.3 inches in width.


 To use the Selfie stick, press the Camera button once to activate the shutter on your phone’s camera. It’s just that easy. Above, a pic of me taking a selfie. I know, mind-blowing, right?
 Above, a selfie I took of…well…myself…with the Mpow Bluetooth Selfie Stick. Of course, using the iPhone’s front-facing camera, the quality of the pic will be a bit lower than if it had been taking with the rear-facing camera, but the Selfie Stick allows easy orientation and quick pic snapping.
  Above, another selfie at a bit further range, where I’ve extended the telescoping stick out a bit further.
 Lastly, I wanted to check out the Fill Light. Above and below, I took a couple of selfies inside my house, where the lighting was not as good as the outdoor selfies I took above. The pic above was taken without the Fill Light.
  The pic above was taken with the Fill Light at full illumination. It does look a bit brighter, and its built-in diffuser prevented glare, but admittedly indoor photos in lower light with the iPhone’s front-facing camera do look a bit rough.

