Patchworks PureCover 2017 iPad Pro 10.5 Smart Stand Case review

I seem to have jumped head first into a vat of Apple kool-aid. First I bought an iPhone 7 Plus and then I bought an iPad Pro 10.5. New Apple devices mean new device accessories so I’ve been trying out cases for the iPhone and now I want to show you the Patchworks PureCover 2017 Smart Stand Case that MobileFun sent me to try with my new iPad Pro 10.5. 

What is it?

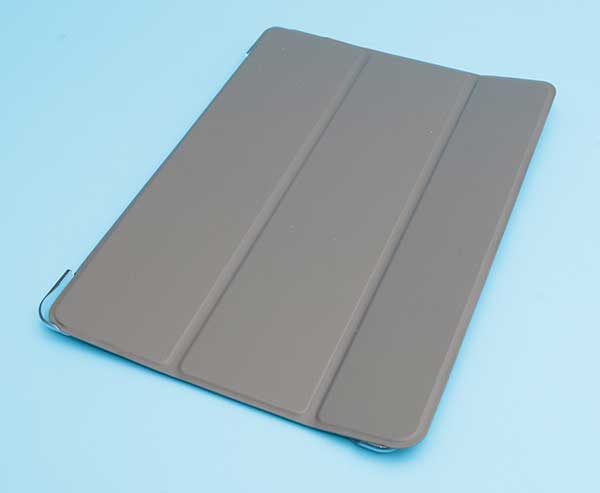
The Patchworks PureCover 2017 Smart Stand Case is a simple book-style case for the iPad Pro 10.5.

PureCover

This Smart Stand Case looks similar to Apple’s own Smart Cover and features magnets embedded in the cover that wake the iPad when you lift the cover and put it back to sleep when you close it.

The case comes in grey or black. I was sent the black version of the cover.

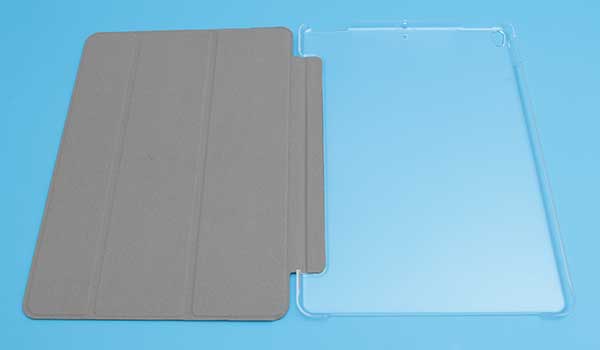
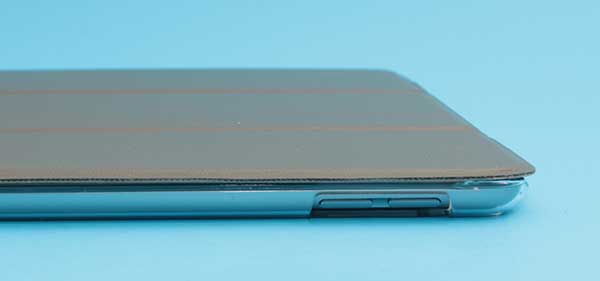
But unlike Apple’s Smart Cover, the PureCover offers protection for the back of the iPad Pro 10.5 with a tough polycarbonate snap on shell.

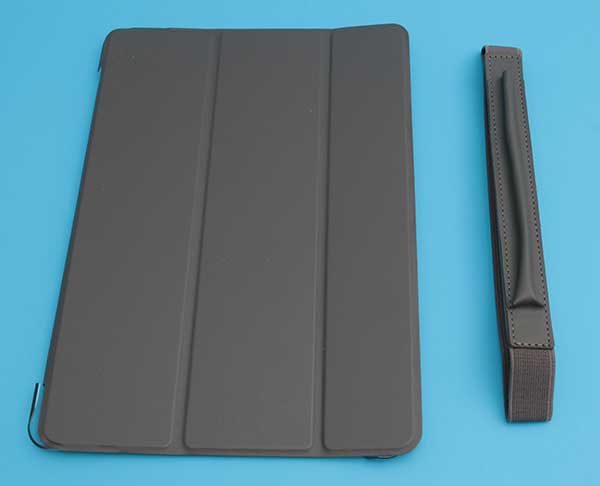
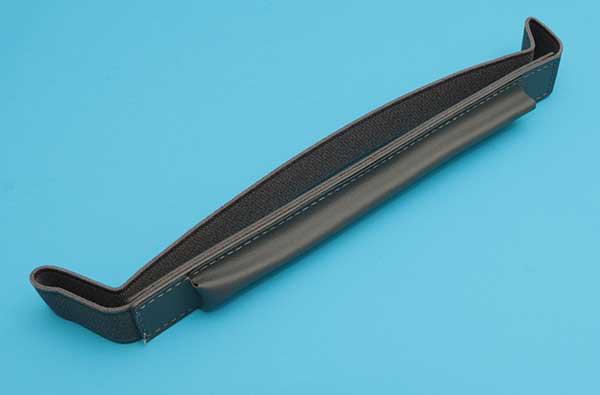
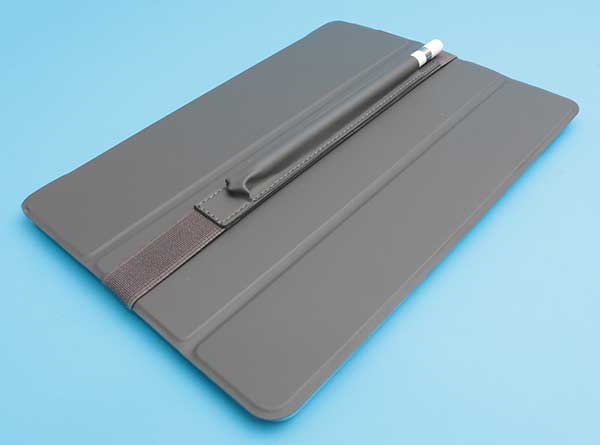
The PureCover Smart Stand Case also comes with a removable Pencil sleeve.

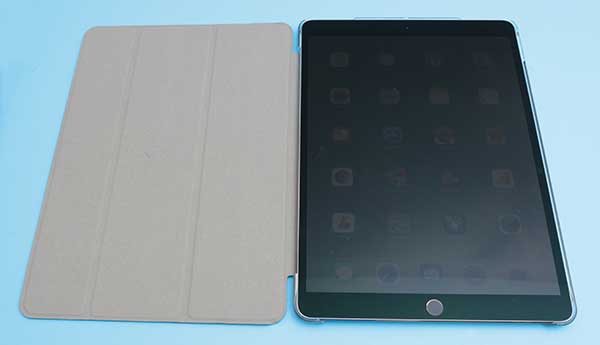
The iPad Pro easily snaps into the polycarbonate shell. The inside surface of the cover has a soft suede-like feel that protects the iPad’s display from dust, and scratches.

The back cover is clear so that you can see the Apple logo and any personalization that you might have added to the back of the iPad.

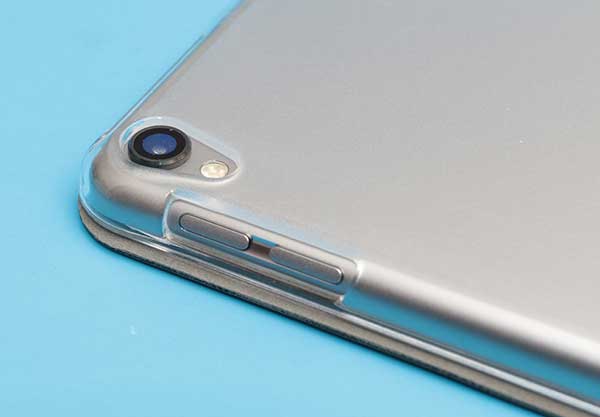
The are cutouts for the camera, flash and volume buttons.

And on the top edge, there are openings for the speakers, earphone jack, and microphone.

The bottom of the case has one large cutout for the other speakers and lightning port.

I like the fact that the back cover has a matte finish that prevents it from becoming a smudge and fingerprint magnet.

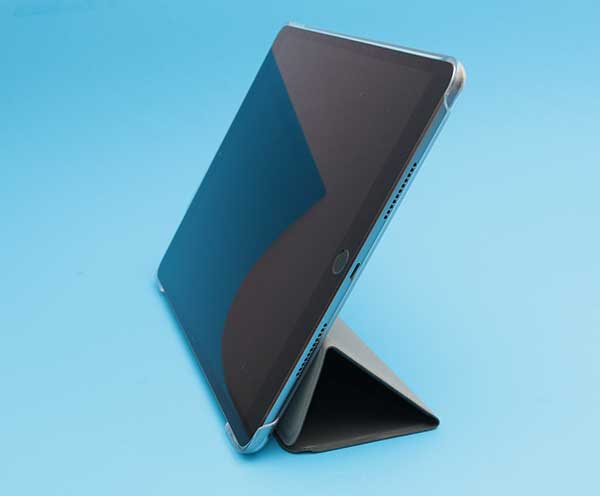
In addition to opening the cover and folding it to the back of the iPad, the cover can also fold to create a stand like you see above.

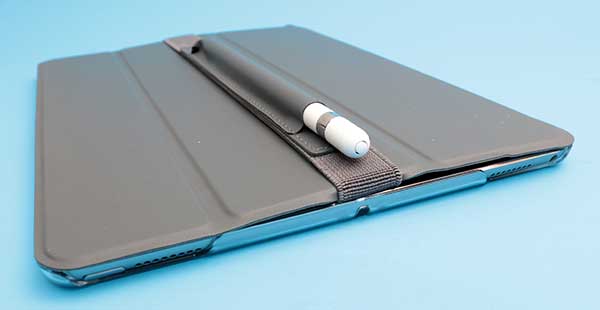
The removable sleeve that is included with the Patchworks PureCover 2017 Smart Stand Case has been designed to hold the Apple Pencil stylus.

The sleeve has an elastic loop that stretches to fit over the cover. If you look closely, you will notice that the elastic folds the edge of the cover over where the elastic presses against it. This shouldn’t be an issue unless you remove and reattach the Pencil sleeve over and over. Then that could cause the top edge of the case to crack over time.

Final thoughts

I’ve been using the Patchworks PureCover Smart Stand Case for the iPad Pro 10.5 for several weeks and have had no issues. It is a well-made case with a simple design. Every time I open the case, my iPad wakes up and every time I close the cover, it goes back to sleep. It protects my expensive tablet and looks nice while doing so. I guess you can say that it’s my favorite iPad Pro 10.5 case. It’s also the only 10.5 case I’ve tried so far, so we’ll see how long it remains a favorite. 🙂

Source: The sample for this review was provided by MobileFun. Please visit their site for more info


Product Information

Price: $45.39
Retailer: MobileFun
Pros:
  • Simple design that protects the cover and back of iPad
  • Automatic wake and sleep function
Cons:
  • Pencil sleeve elastic deforms top and bottom edges of the cover

Filed in categories: Reviews

Tagged:

Patchworks PureCover 2017 iPad Pro 10.5 Smart Stand Case review originally appeared on The Gadgeteer on August 21, 2017 at 11:00 am.

Note: If you are subscribed to this feed through FeedBurner, please switch to our native feed URL http://the-gadgeteer.com/feed/ in order to ensure continuous delivery.

Color Doctor Blood Pressure Monitor Review


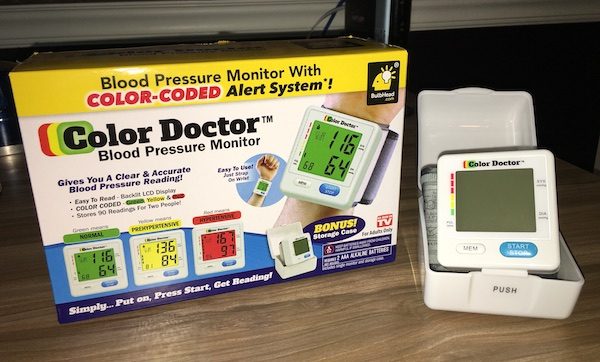
The Color Doctor is an “As Seen On TV” product that promises a better solution for quick, easy home monitoring of your heart rate and blood pressure. It’s certainly as easy to use (and read) as advertised. But is it worth purchasing? Let’s go find out!

A Caution about Wrist-Based Blood Pressure Monitors

Before we begin, we should talk a little bit about monitoring your blood pressure. High blood pressure runs in my family, so I’ve done a bit of research on this subject.

The Color Doctor is designed to wrap around your wrist, as opposed to your upper arm. For an accurate reading, you should sit with your elbow resting on a table and the unit held parallel to the level of your heart. Organizations like the Mayo Clinic and the American Heart Association do not consider wrist monitors to be as accurate as traditional upper-arm cuffs. They are much more sensitive to body position and tend to show a higher reading than an upper-arm monitor (because the arteries in your wrist are closer to the skin, affecting the measurement).

Does this mean that wrist monitors are bad? No. Some of us can’t use upper-arm monitors for a variety of reasons. You just need to be aware that the readings may be different than what you’ll see on professional equipment at the doctor’s office. As with anything health-related, be sure to check with your doctor if you’re going to do home blood pressure monitoring. Take your monitor with you on your next visit, and have your doctor show you the best way to use it. He or she can also calibrate the readings against the office equipment so that you understand how to properly interpret the readings at home. Knowledge is power, folks. Be smart and be safe.

Got it? Cool. Now back to the review!

Construction and Design

The Color Doctor is a compact, lightweight piece of equipment. The unit and cuff weigh about 4 ounces and fit nicely into the included 3″ by 3″ by 3″ plastic storage case. The size and weight make it very easy to stash in your dresser drawer or medicine cabinet, and it takes up very little room if you’re packing it for travel. 

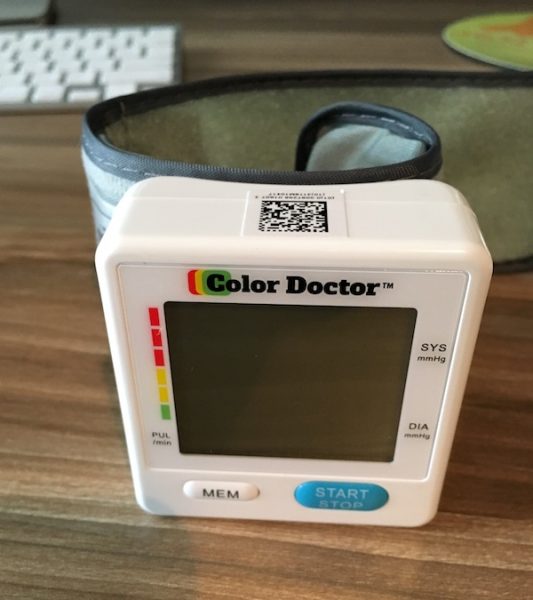
You’ll find a big digital screen on the face, below which are positioned a large blue start/stop button, and a smaller white memory button. There are some tiny labels on the sides of the screen to indicate the digital readings; while they are hard to read, you won’t need them once you start using the unit (as we’ll see below). The buttons themselves are big and friendly with a little raised surface, so they are easy to operate.

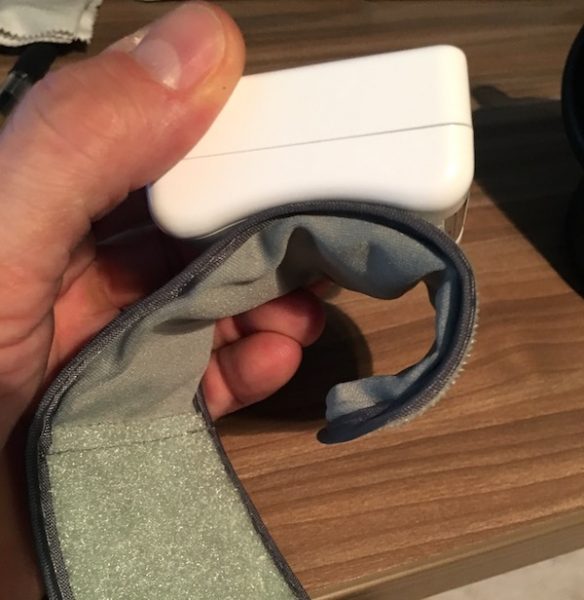
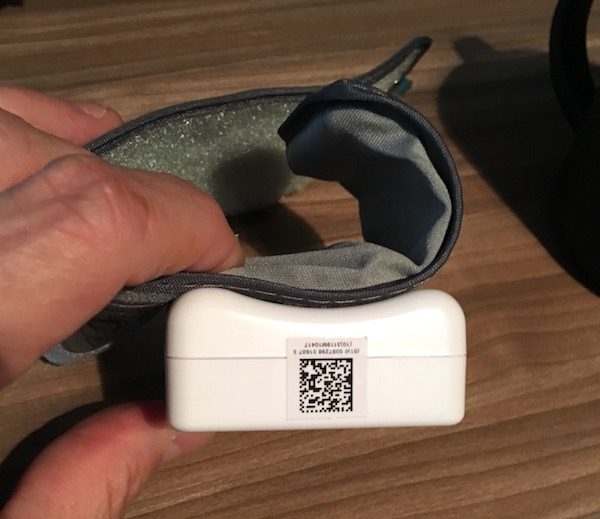
One-handed attachment is easy and drama-free. The back of the unit is contoured to fit the shape of your wrist. The short side of the cuff (to the right of the unit) is rigid and curved so that it “hooks” into the proper position on to your wrist, after which you wrap the loose side of the cuff around to the desired tightness and secure it with the velcro on the strap. This is a nice design feature, especially for those that may have issues with manual dexterity: it’s pretty much foolproof for one-handed operation.

While the Color Doctor is certainly easy to operate, the construction is pretty average. Assembly looks pretty good, with no obvious faults in seams or stitching. Materials feel like budget-grade plastics and fabrics. Given that this a light-use kind of device, this may not be a big deal… but you’ll want to keep it in its protective storage case when not in use.

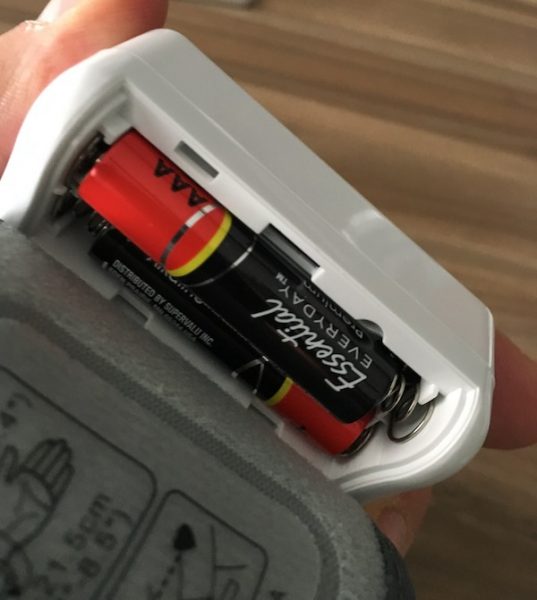
The Color Doctor uses two “AAA” alkaline batteries, which are not included in the purchase. They’re installed via a snap panel on the back of the unit.

The Color Doctor is really simple to use. Get yourself in the proper position, wrap the unit around your wrist, and press the blue start/stop button. The unit will buzz while the cuff inflates, and the readings are displayed in about a minute or so.

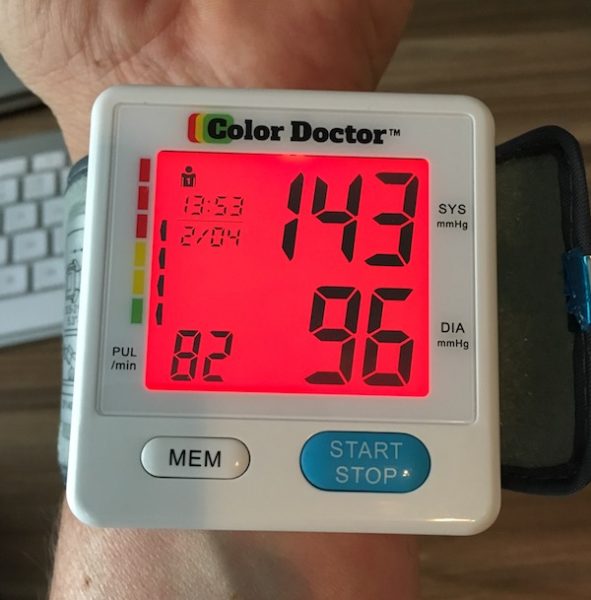
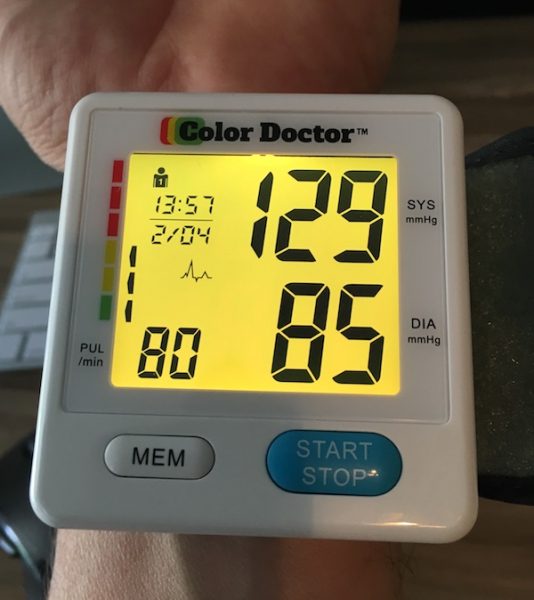
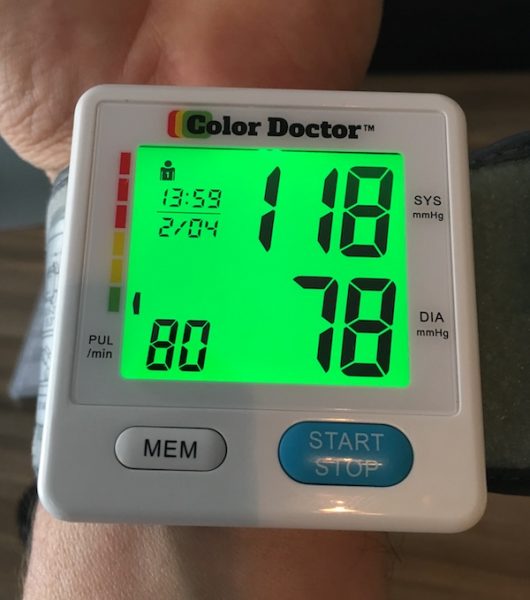
The biggest strength of the Color Doctor is its easy-to-read display. Systolic pressure is found on the upper-right quadrant of the screen, diastolic pressure on the lower right, and current heart rate on the lower left. The screen changes color based on the results: green for “normal” levels (120/80 systolic/diastolic pressures), yellow for “prehypertensive” (up to 139/89), and red for “hypertensive” (over 140/90). The screen is bright, and and the numbers are large with good contrast against the screen. After a recent workout, I took readings during my cool down period to show how the color indicator changes based on the results. You can see how easy it is to read in pictures below:

As you can see, the display is really impressive. Even in low-light conditions or for those who may have issues with their vision, the combination of color reinforcement and big numbers makes it easy to see what your reading looks like. Combined with the ease of attachment and simple button design, it’s a great tool for getting a fast blood pressure reading.

Additional Features

The Color Doctor has several additional features. You can set the date and time, and toggle between two different users. When you take a new reading, the results are automatically saved for the last user selected. It will save the last 90 readings and has a memory recall feature that allows you to review the average of the last three readings or cycle through the history of readings for the last user.

Access to these settings and features gets really clunky because there are only two buttons to work with. Do you remember those old-school two-button digital watches, with all the features that were activated by some combination of pressing or holding the buttons? It’s a lot like that. Honestly, I tried to document all of the variations for the review and gave up due to the complexity if it all. You’ll need the manual to sort it all out.

Conclusions and Pricing

In a lot of ways, the Color Doctor Blood Pressure Monitor delivers on its “As Seen on TV” promotional messaging. It’s easy to use and operate. The screen is bright, and the results are clear. The color-changing display adds a nice level of visual reinforcement that will be especially valuable for those that may have vision issues. On the down side, the additional features are difficult to work with and, in some cases, downright frustrating.

In my mind, the bigger issue with the Color Doctor is the $39.99 retail price. There are a lot of competitive products in this space; a quick search on Amazon yields a bunch of wrist monitors that range in price from $15 to $50. After spending some time looking at customer reviews for these products, I’m not sure that the Color Doctor distinguishes itself significantly against these products. If the ease of use and bold color display are important to you, you won’t be unhappy with this purchase… you may want to shop around a bit first, though.

The Color Doctor retails for $39.99 and is available for direct purchase at their web site.

Source: The sample for this review was provided by BulbHead. For more information, visit their web site.


Product Information

Price: $39.99
Manufacturer: Color Doctor
Retailer: BulbHead
Pros:
  • Blood pressure reading are quick and easy
  • Bright, easy-to-read display
  • Color indicator provides nice visual reinforcement
  • Nice compact package for storage or travel (includes storage case)
Cons:
  • Materials and construction are average
  • Additional features are difficult to use

Filed in categories: Reviews

Tagged:

Color Doctor Blood Pressure Monitor Review originally appeared on The Gadgeteer on August 21, 2017 at 9:00 am.

Note: If you are subscribed to this feed through FeedBurner, please switch to our native feed URL http://the-gadgeteer.com/feed/ in order to ensure continuous delivery.

Furbo Dog Camera review

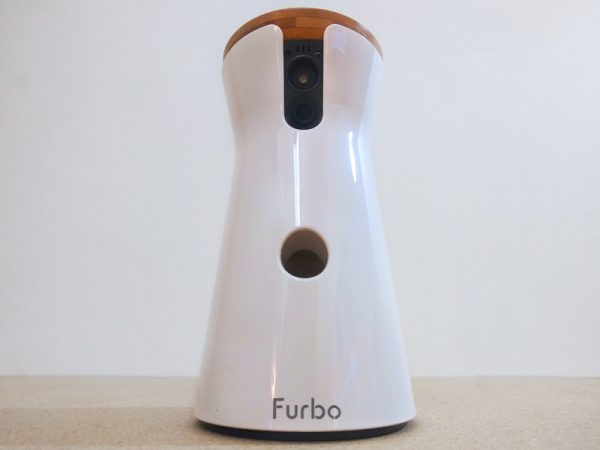
The Furbo Dog Camera is a fun way to monitor and interact with your pet remotely. At $249, it’s a little more expensive than most similar remote pet feeders, but it does have some extra features like bark detection, night vision, and a stylish design.

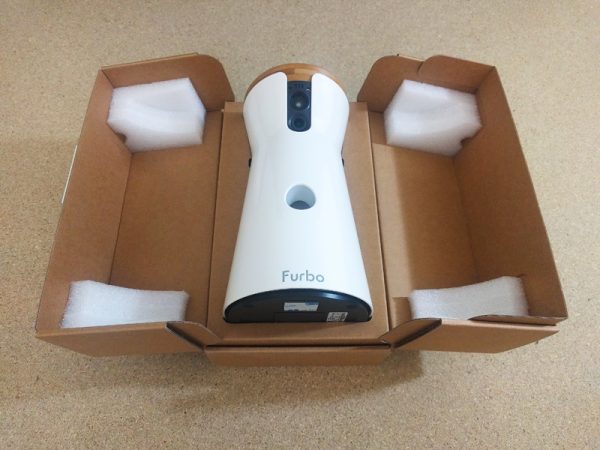
The Furbo arrives in a nicely design box which displays the unit on the front and basic feature list on the back.

The designers of Furbo paid close attention to the overall aesthetic of the product and this is also represented well in the packaging design.

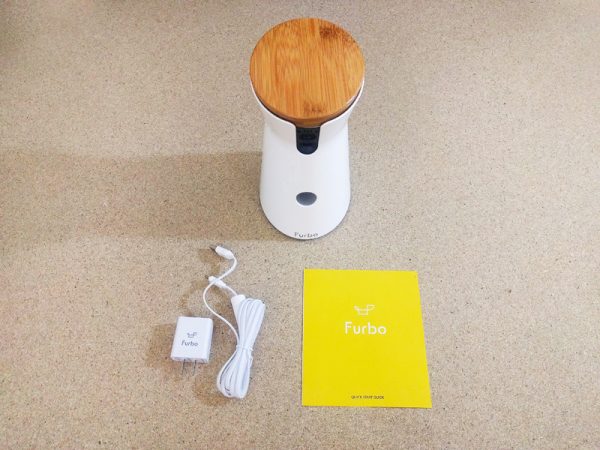
Package Contents

  • Furbo Dog Camera
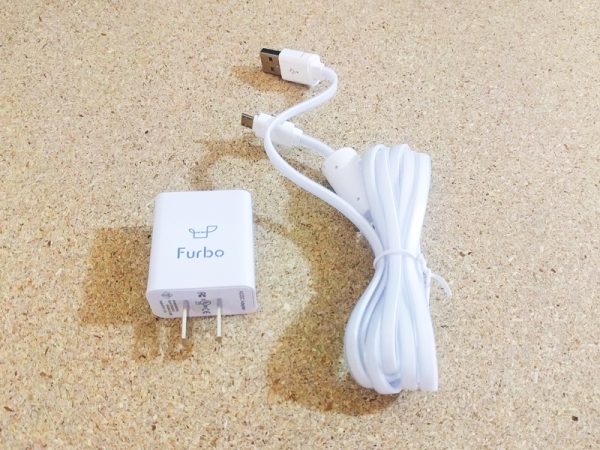
  • Micro USB power cable
  • Furbo power adapter
  • Quick start guide

The Furbo is powered by an included Micro-USB cable and a power adapter.

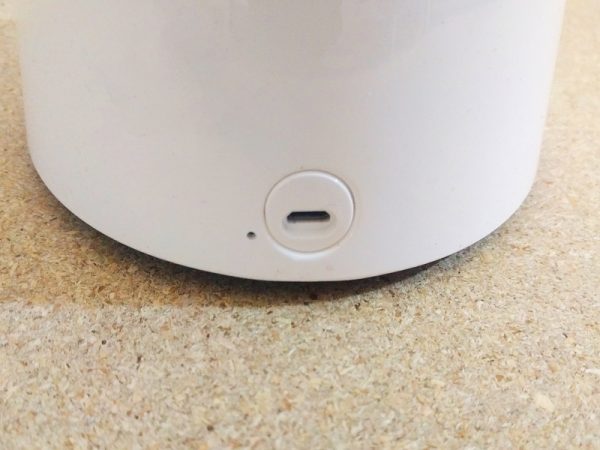
The only port on the Furbo is the Micro-USB power port on the back of the unit.

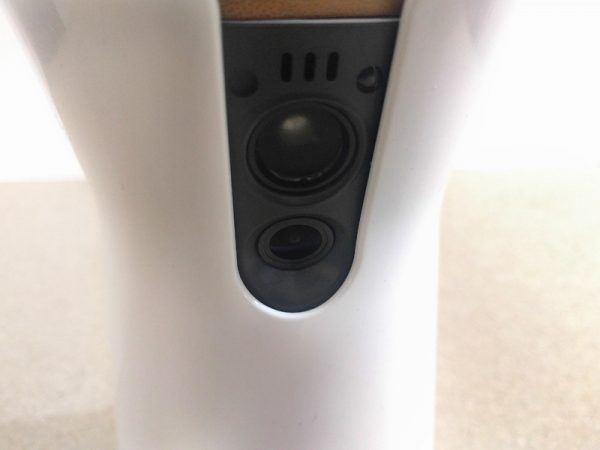
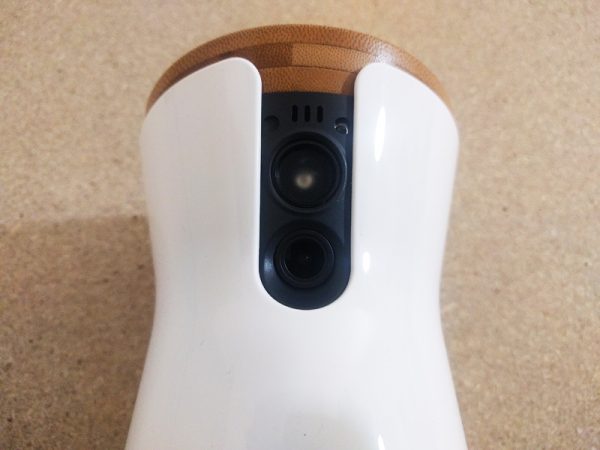
Setup for the Furbo is pretty straightforward. The first step is to download the Furbo app and create a new account. Once the app is ready, plug in the Furbo and wait for it to start up. The Furbo has a colored LED status indicator on the front of the unit. When the LED lights up green, you’re ready to begin. The LED will turn white for starting up, blue when in use, purple for no WiFi connection, yellow for standby mode and green for ready to set up.

After setting up your Furbo to connect to your WiFi, the Furbo app will walk you through the steps of acclimating your dog to the Furbo and how to operate it. The next step is to make sure your Furbo is filled with delicious treats for your furry friend.

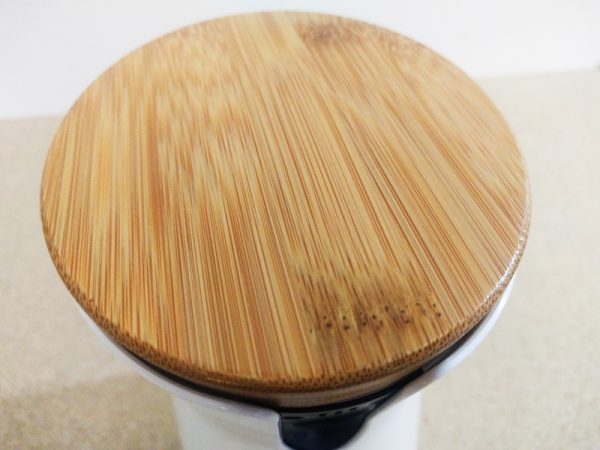
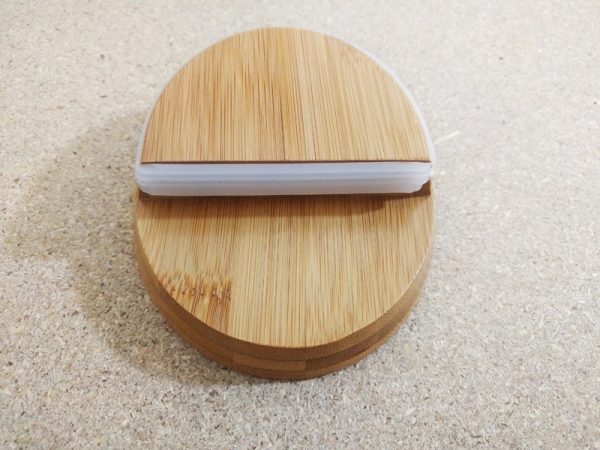
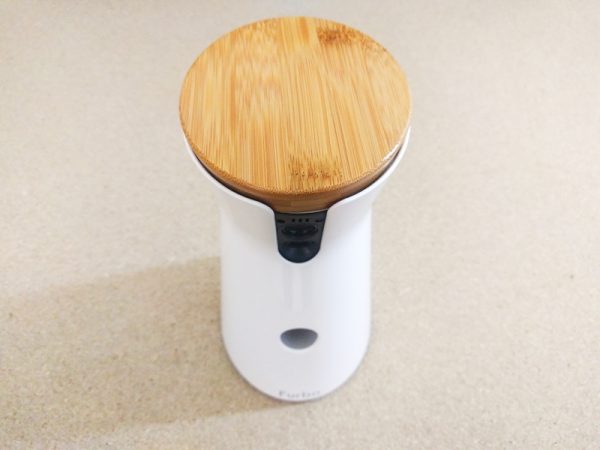
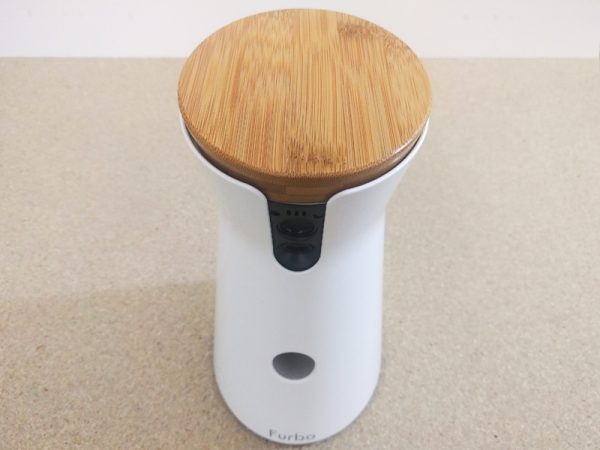
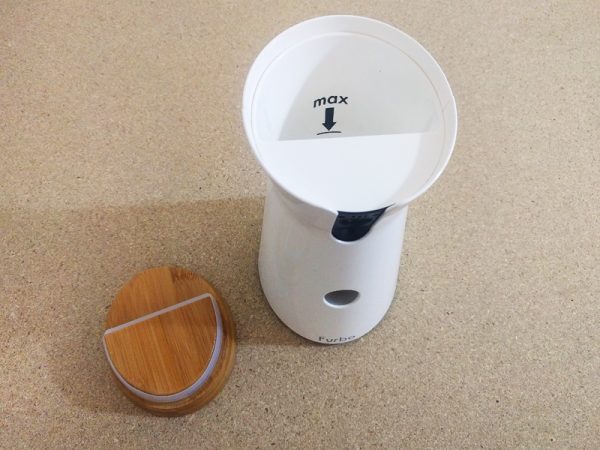
To fill the Furbo, you need to remove the lid. One stylish design element of the Furbo that I really like is that the lid is made from natural bamboo. It’s a nice flourish and, more importantly, the lid has a rubber seal to keep the treats fresh for your pup.

In my testing, the setup was flawless up to this point. The manufacturer has very clear instructions on what size treat should be used with the Furbo, specifically “round shaped treats with a diameter around 0.4 inches”. I first chose to go with some small training treats that my dog, Addy, loves. I broke them up a bit more to make sure they would fit in the unit.

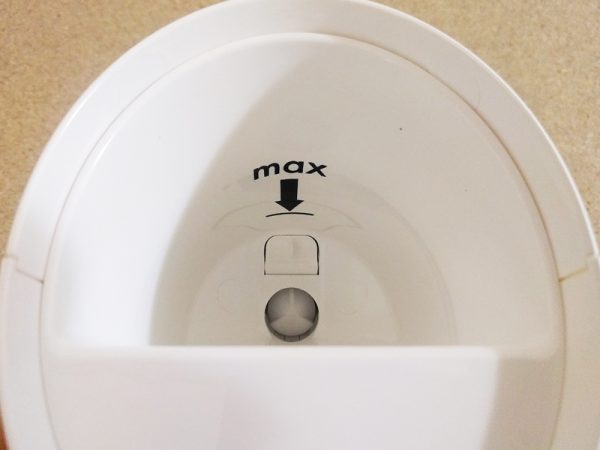
There’s a “max fill” indicator inside the unit that’s pretty hard to miss to help avoid overfilling. The Furbo doesn’t hold a lot of treats, but there’s enough room to hold about 20-30 pieces of kibble.

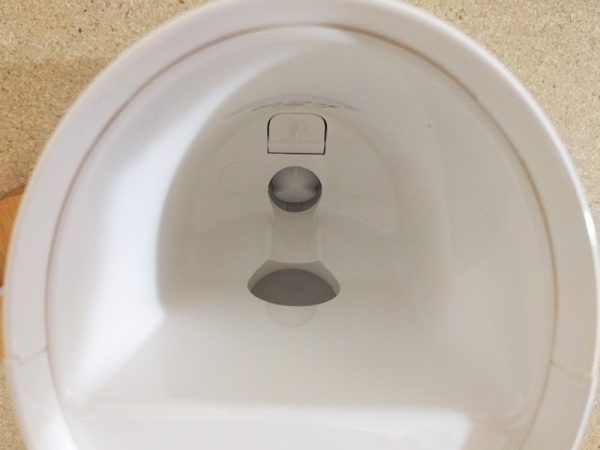
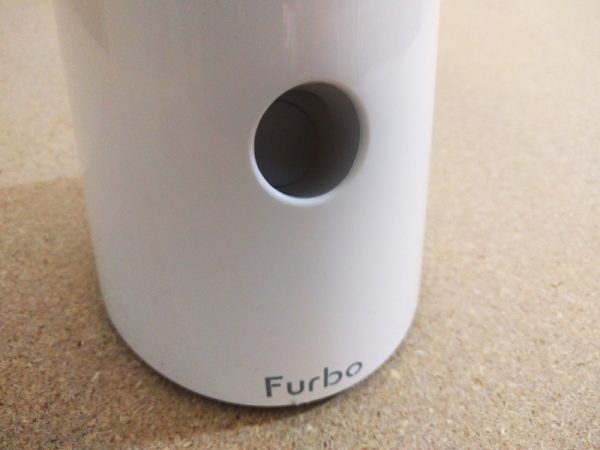
The Furbo works by activating a small plunger that pops up and knocks a few treats at a time through the dispenser hole and out the front of the unit.

My first treat dispensing test went fine, but on the second run the unit promptly jammed. I’ve read several other reviews that mentioned jamming issues, but I was surprised it happened this quickly.

The jam was a lot worse than I first realized and while trying to free the offending treat, a piece of the internal plunger came loose.

After about 30 minutes spent disassembling the unit under the hungry stares of Addy, I was able to remove the jammed treat and reset all of the pieces of the unit properly.

Moving forward, I played it safe by using Addy’s kibble as treats. She already loves it and they met the size specifications indicated by Furbo.

The following tests of the unit went very well and aside from some small jams that were easily fixed, we haven’t had any other dispensing problems.

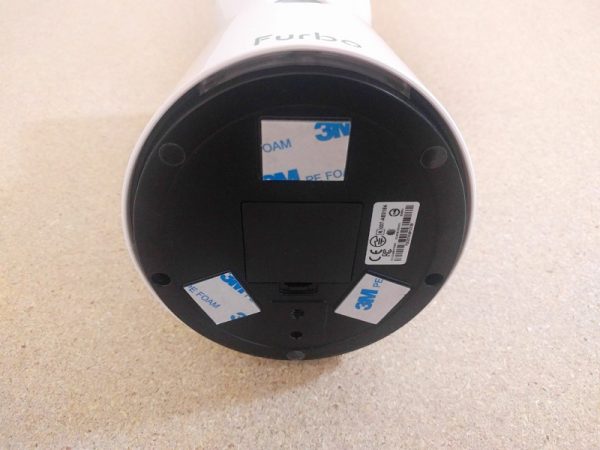
The Furbo can be placed anywhere in your living area and there is 3M double-sided tape on the bottom to help keep inquisitive noses and paws from knocking the unit over in search of treats.

The camera on the Furbo is great for monitoring your pet during the day and making sure all treats are received, but its video quality leaves a bit to be desired. The camera is 720p with a 120° wide-angle lens and automatic night vision. There’s also a built-in microphone and speaker so you can speak to and soothe your pet. Like the camera, the quality of the mic and speaker are a bit subpar, but they do the job.

The speaker plays a short sound before each treat is dispensed, which helps to prepare your pet for the yummy arrival. A great option is the ability to record your own treat sound to personalize the experience a bit. The mic can also be set to monitor continually for barking. When the Furbo senses barking, it will alert you via the app so you can calm your pup or assess the situation. I didn’t have much luck with this feature. Even after adjusting the sound sensitivity via the app, the alert was still easily triggered by ambient Brooklyn noises.

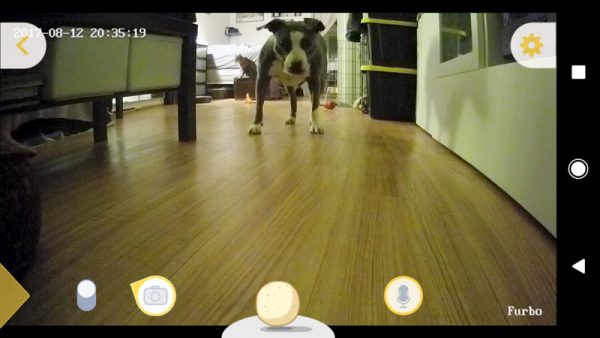
The Furbo app can take stills and videos of your pet while you’re using the app. There are no cloud services or timeline recording options like on devices such as the DropCam.

You get the live-view only when you have the app open, there isn’t a web version, so all treat dispensing has to happen via the app.

The screenshots and videos are of good enough quality for sharing via social media, but that’s about it.

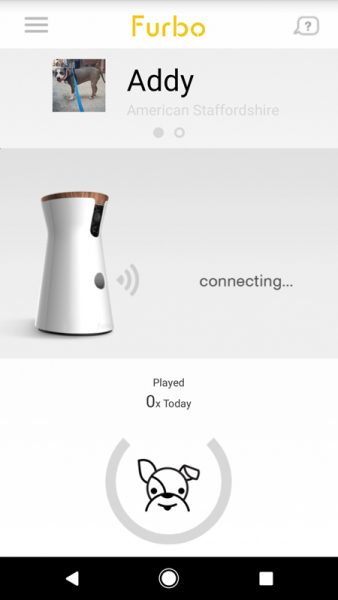
The app itself is well done, but a bit cartoony for my tastes. You activate the treat dispensing by clicking on the treat symbol. The small size of the treats I used meant that three or four treats were dispensed at a time, but Addy didn’t seem to mind at all. There are clear icons for adjusting settings, switching between stills and video, and for activating the mic.

One problem I did have was that once Addy realized the little white thing on the floor was a source of treats, she spent a lot of time watching it, waiting for it to deliver something yummy. But, that’s more of an issue with my particular furry friend than with Furbo.

Overall, I liked the Furbo and found it was a fun way to interact with my dog while I’m away at work during the day. There are some shortcomings when it comes to the technology, especially at the higher price point of $249, but if you’re willing to spend the money and make sure you don’t use treats that may jam it, the Furbo is a great way to have some fun with your furries.

Specifications

  • Size: 5.91×4.72×8.86 inches (15x12x22.5cm)
  • Weight: 1.76 pounds (800g)
  • Camera: 720p HD, 120° wide-angle lens, 4x digital zoom, automatic night vision
  • Audio: Built-in speaker, high-quality microphone
  • Treat capacity: 30 pieces Recommend round shaped treats with a diameter around 0.4 inches; (1cm) .
  • Power: 100-240V, 5V2A
  • Connectivity: 2.4GHz Wi-Fi (802.11 b/g/n), Bluetooth Low Energy (BLE)

Source: The sample for this review was provided by Furbo. Please visit their website or and use this link to save $15 of the purchase price.


Product Information

Price: $249.00
Manufacturer: Furbo
Retailer: Amazon
Requirements:
  • Broadband internet connection
  • Wi-Fi
  • Available power outlet
  • iOS 8 or newer
  • Android 4.3 or newer
Pros:
  • Fun to use
  • Easy way to monitor pet and home
Cons:
  • Prone to jamming
  • Mic/Speaker inconsistent
  • Expensive

Filed in categories: Reviews

Tagged:

Furbo Dog Camera review originally appeared on The Gadgeteer on August 20, 2017 at 9:19 am.

Note: If you are subscribed to this feed through FeedBurner, please switch to our native feed URL http://the-gadgeteer.com/feed/ in order to ensure continuous delivery.

Turtle Beach XO THREE gaming headset review

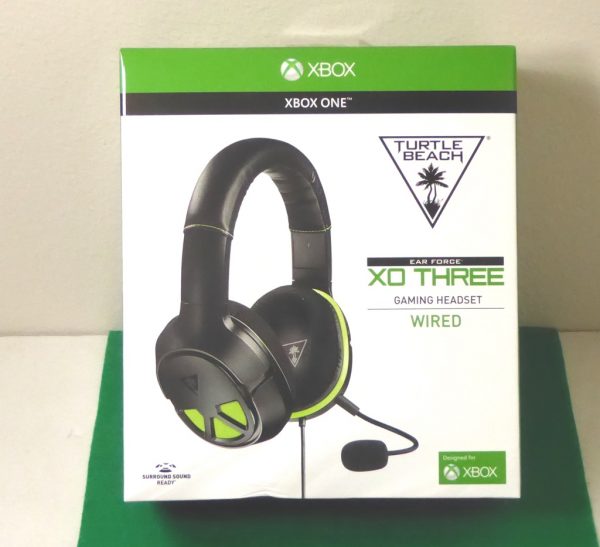
If you are a serious console gamer you have probably heard of Turtle Beach. Turtle Beach has been one of best-known gaming headset makers around. If you’re not a gamer you may not understand the importance of having a good headset, especially when playing PVP (Player VS Player) type games. I will admit that I have always been a little envious of Turtle Beach users, but I could never justify buying some of their earlier offerings because of prices. Not that they were the most expensive, but more for my lack of PVP gaming, so I just used some get by headsets. Now Turtle Beach has launched the XO THREE headset for the XBOX One and RECON 150 for the PlayStation 4 a good functional gaming headset at a good price.

Note: Images can be clicked to view a larger size.

If I were to say what price category the XO THREE headset fell into for Turtle Beach I would say they were a mid price range offering, but that’s not saying that the features are midrange.

The XO THREE headset has the following specifications as listed on the Turtle Beach website:

  • Audio Connection: 3.5mm 90-Degree Angle Connector
  • Speaker Frequency Response: 20Hz – 20kHz
  • Speaker Size: 50mm Neodymium Magnets
  • Microphone: Removable Omni-Directional Microphone
  • Headband/Earpad material: Leather-Wrapped Headband / Black Fabric Ear Pads with Foam Cushioning
  • Ear Cushion: Over-Ear (Open)

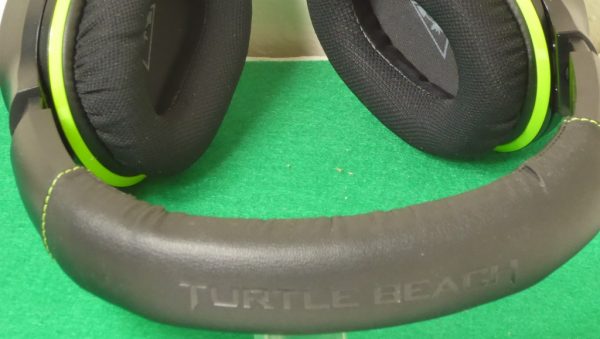
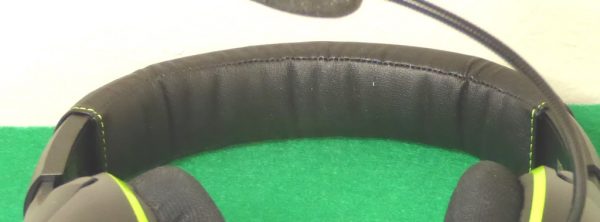
The top of the XO THREE headset is padded and leather wrapped and has “TURTLE BEACH” stamped into it. The padding is above and below the headset frame. The green stitching is a nice touch.

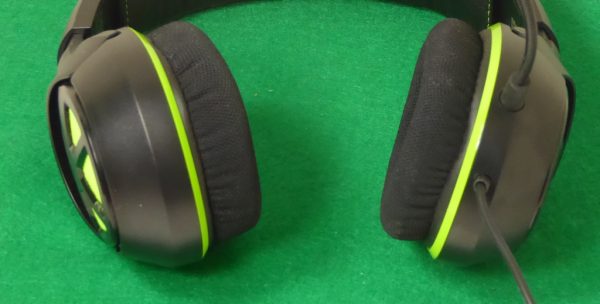
On the bottom of the headset, you can see the leather band on the headband and the microphone and cord on the left side ear cup.

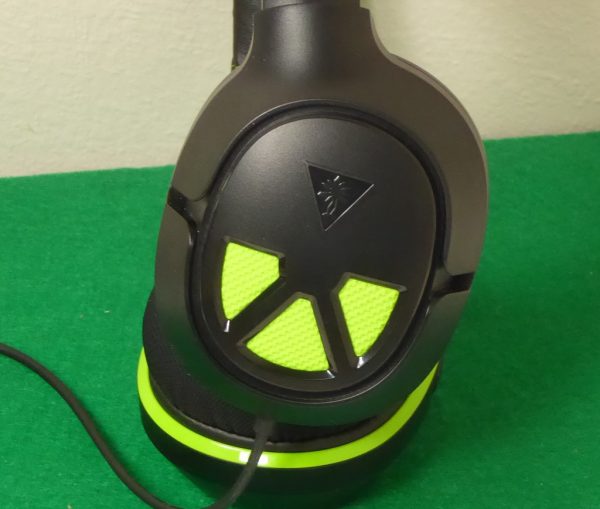
The outside of both of the ear cups for the XO THREE headset are basically the same with the Turtle Beach logo and the green material.

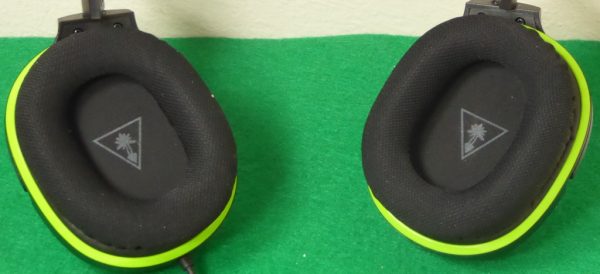
The inside of the XO THREE ear cups have nice padding for a comfortable fit. The inner speaker is covered by a mesh material. Speaking of ear cups now would be a good time to talk about the speakers. The XO THREE headset has a 50mm speaker and is designed for surround sound. The 50mm speaker is the same size Turtle Beach uses in its higher end offerings.

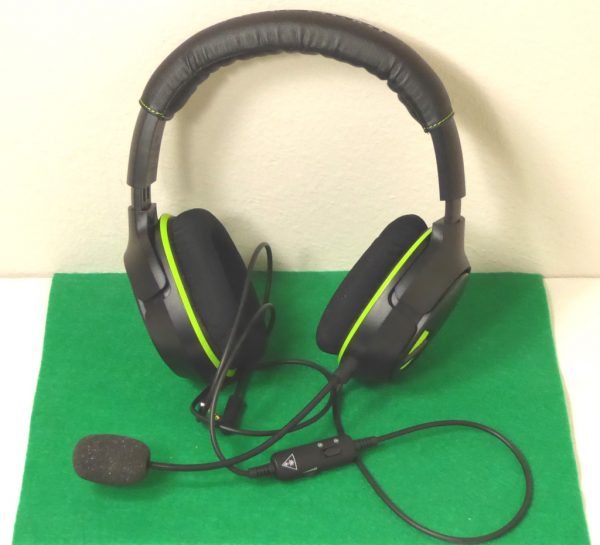
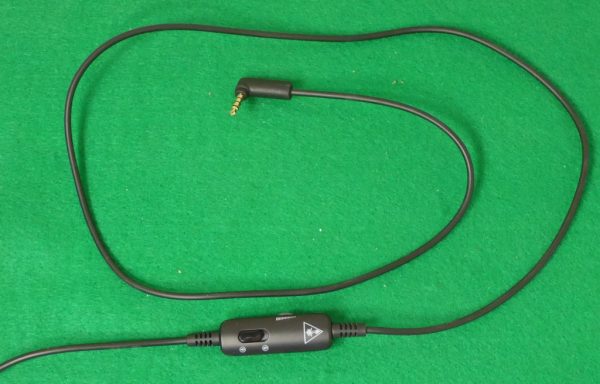
As I mentioned before, the bottom of the left ear cup has a cord (this plugs into your game controller or directly into a 3.5 mm headphone jack) and a removable boom microphone.

The removable microphone has a solid base with a flexible boom and a foam covered mic. The flexibility of the microphone allows you to place it exactly where you want it for the best sound being transmitted to your gaming friends.

The headphone cord has an inline volume controller for the headset volume and a mute slider to mute your microphone.

So, what is my bottom line here? I have been fortunate enough to review another gaming headset, the Polk Striker Pro Zx so I do have a reference to compare the Turtle Beach XO THREE headset too. First, let me say that the XO THREE headset, to me anyway is a good bang for the buck buy. The sound is great (may be as good or slightly better than my Striker Pro Zx) the build quality is good and the features are nice. From a comfort standpoint, I think my Pro Zx is a little bit more comfortable, I believe that is more to do with the ear cup shape than anything else. That being said, the only real negative I could find about the XO THREE headset is a lack of a removable cord. If you ask gamers what their biggest issue with gaming headsets is they will probably say the cord. Cords wear, crack, get eaten by pets/kids and when that happens it makes the headset unusable. It is a shame that Turtle Beach did not make the cord removable and changeable. The Turtle Beach XO THREE gaming headset can be purchased on the Turtle Beach website for $69.95. If you’re looking for a good gaming headset for a good price the XO THREE headset is worth a look.

Source: The sample for this review was provided by Turtle Beach. Visit their site for more information and Amazon to order.


Product Information

Price: $69.95
Manufacturer: Turtle Beach
Retailer: Amazon
Requirements:
  • XBOX One or compatible PC
Pros:
  • Decent price
  • Great sound
Cons:
  • No removable cord

Filed in categories: Reviews

Tagged: ,

Turtle Beach XO THREE gaming headset review originally appeared on The Gadgeteer on August 19, 2017 at 8:32 am.

Note: If you are subscribed to this feed through FeedBurner, please switch to our native feed URL http://the-gadgeteer.com/feed/ in order to ensure continuous delivery.

Nima Portable Gluten Sensor review

I have celiac disease, an inherited autoimmune condition that affects about one in every 100 people. When I eat gluten – think pizza, pasta, bread, cake and cookies – my body revolts against the enemy intruder and starts attacking itself, resulting in a number of seemingly unrelated and ugly reactions from which I’ll spare you a description. But let’s just say some involve the gut.

People will sometimes offer me food they insist is safe for me (which, according to the FDA, is less than 20 parts per million), and sometimes I end up experiencing a variety of effects – some immediate, some less so, but all unpleasant and potentially contributing to premature mortality. This can happen at a get-together or at a restaurant.

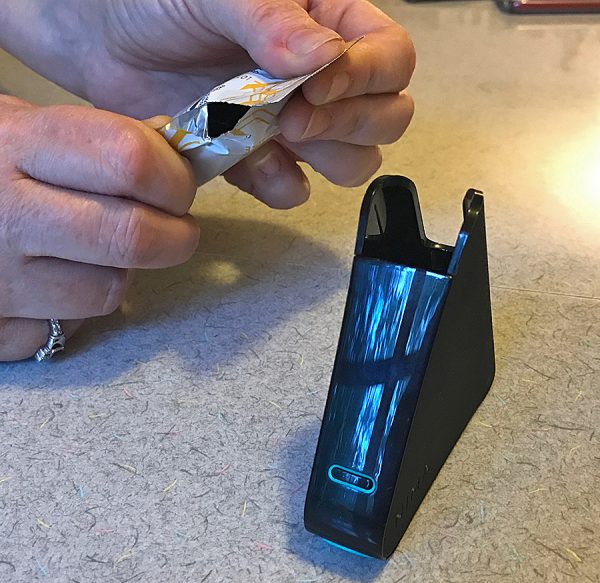
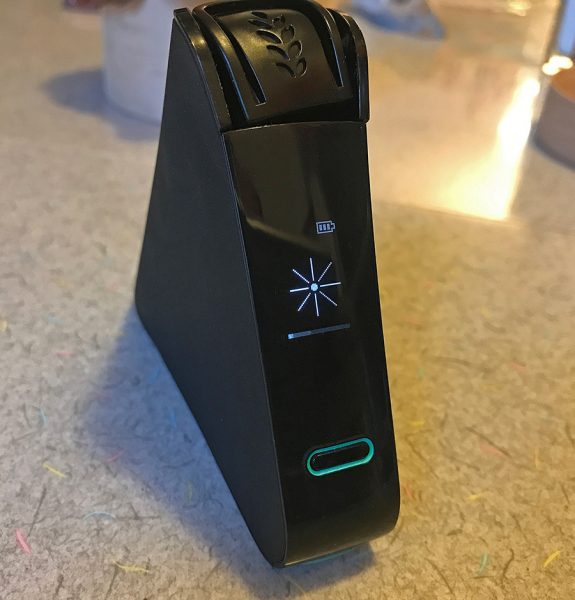
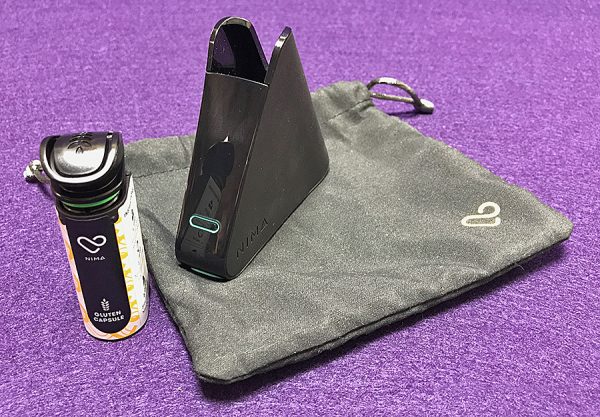
So I was thrilled to be able to review the Nima Portable Gluten Sensor, a compact device that allows you to test for gluten. The unit, which retails for $279, comes with three test vials, a micro-USB recharging cable and a carrying pouch, which fits in a purse or pocket. I was given an extra 12 vials for review purposes.

The unit measures 3.5 inches wide and 3.1 inches high and has Bluetooth connectivity so it can sync to your smartphone. Users can contribute their test results to the Nima community using a free Nima app, which also provides a list of Nima-tested restaurants. That all was great when I paired my Nima with the phone I had initially, but the unit would not pair with my replacement phone a couple of weeks later, greatly limiting my ability to be part of the online Nima community where test results are shared.
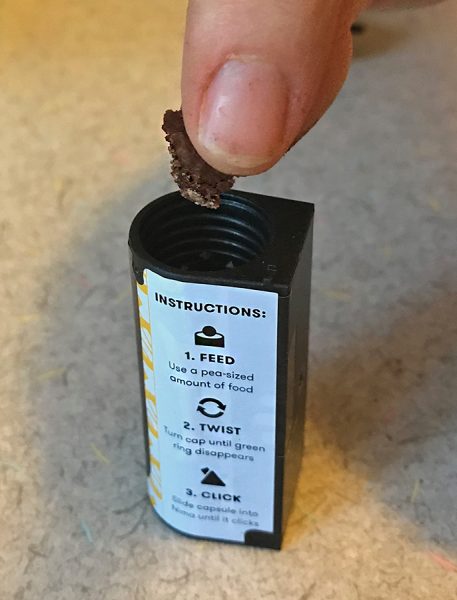
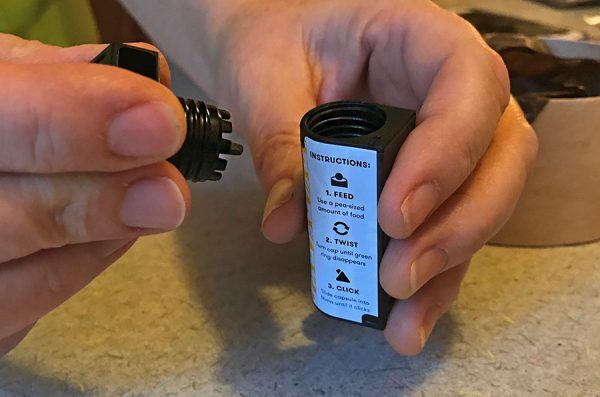
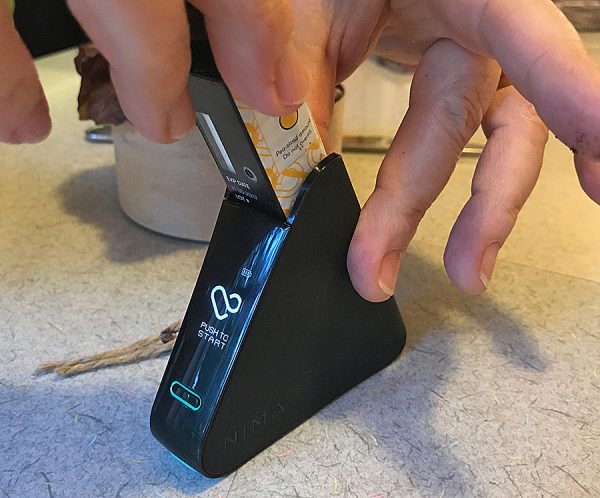
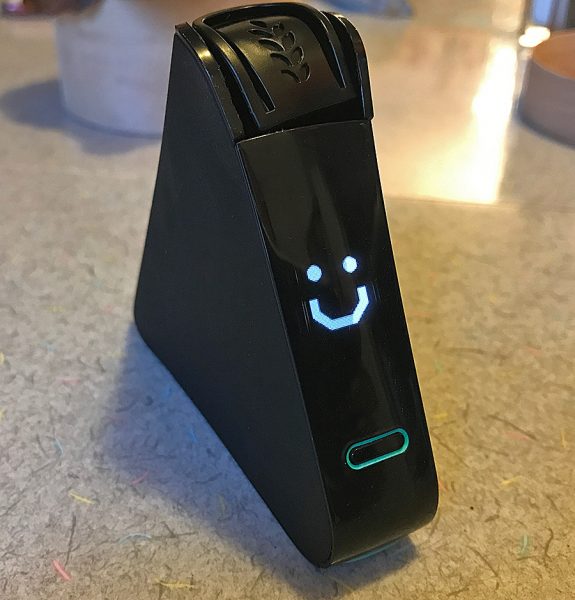
To test for the presence of gluten, users put a tiny sample of food – liquid or solid – into a vial and insert the vial into the device. In three minutes – a theoretical estimation because my test times amounted to more like five minutes – a wheat icon and a “gluten detected” warning will warn users if their food is not safe to consume; a smile icon gives diners the go-ahead.
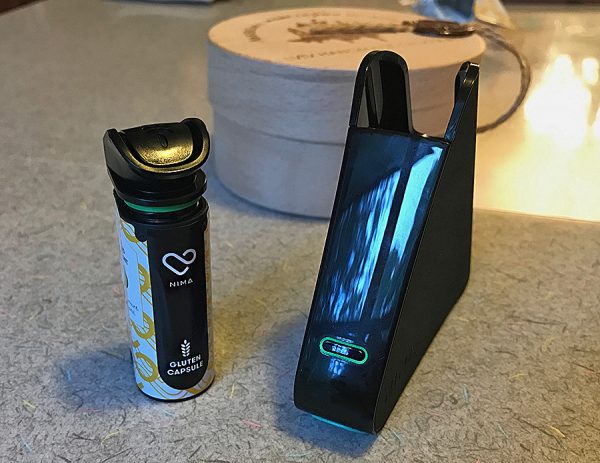
The unit and single-use vials use a combination of chemistry and sensors. Subscriptions are available for $59.95 per month for 12 capsules or $61.95 for 12 vials every other month. Those who eat restaurant or processed food often can opt for the $116.94, 24-capsule plan per month, trusting if they can afford to eat out all the time, they can afford the subscription cost. Some foods – soy sauce, pure vinegar, beer, or alcohol – cannot be tested, leaving diners to make educated judgment calls before consumption. The unit also is glitchy with frozen foods such as ice cream, but we’ll get to that in a bit.
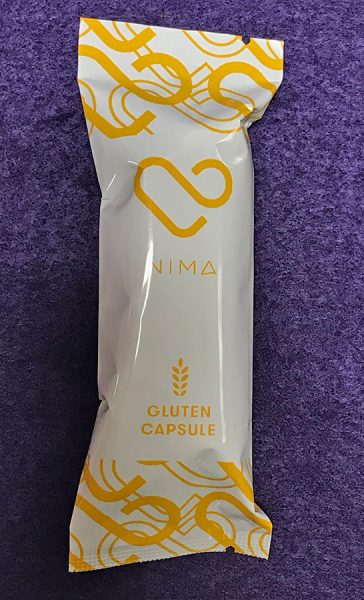
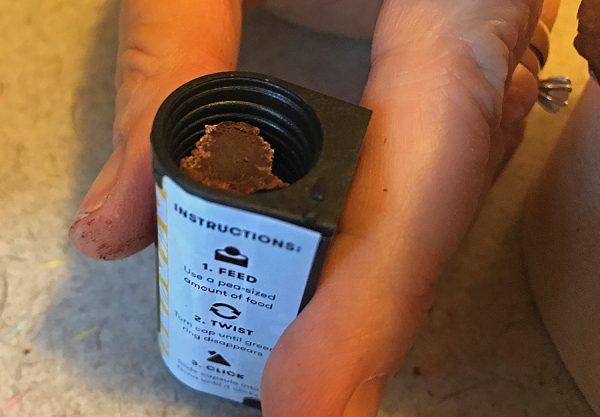
For those who are pretty good at math, the ongoing cost comes out to roughly $5 a vial. That $5 vial allows you to test a sample about half the size of a pea. So forget the notion of trying to test a mixture of your entrée and sides. You’ll do well to fit a whole grain of rice in the vial, which means you could go through three vials to test an entire plate of food at a restaurant. Don’t even consider testing your way through a buffet line unless you have very deep pockets and a whole lot of time.

I also discovered the device is very sensitive and prone to capsule errors. My first test was a gluten-free roll at Cooper’s Hawk Winery, one of my favorite restaurants for its extensive and delicious gluten-free menu. I have never reacted to anything I’ve eaten there, but I decided to test the roll as an academic exercise. I only had one capsule with me, and I got a “capsule error” warning. I ate the roll anyway and didn’t get sick.

A couple of days later, I made my homemade cornbread using Quaker yellow cornmeal. (The only other ingredients are oil, salt, baking powder, baking soda, buttermilk and egg.) I successfully tested the finished product and got a smiley face icon. And I happily ate.

However, I received another capsule error when I tried to test my steak salad at Longhorn Steakhouse. This might have been a result of the difficulty in reducing my salad to a half-pea-sized test sample. Fortunately, I had better luck at Bonefish Grill, where my Chilean sea bass with mango salsa tested safe. My birthday dinner at PF Changs – the gluten-free Hokkien Street Noodles – also earned a smiley face from my Nima unit and my belly, as did my mushroom truffle pizza at Uncle Maddio’s Pizza during the continuation of my birthday celebration.

My husband had bought me a strawberry birthday cake made by Inspired by Happiness. Though that was marked gluten-free, I tested it anyway and was happy to learn it was safe. I also tested the Talenti double dark chocolate gelato he bought for me, only to receive a capsule error after waiting five minutes for results – longer than it actually took me to eat the gelato.

However, a few days later – or a few days too late, depending on your perspective – an email from Nima addressed the capsule errors that were occurring when testing ice cream. The company suggested a smaller sample size with a drop of water. I realized it would have to be a very small sample and a very small drop.
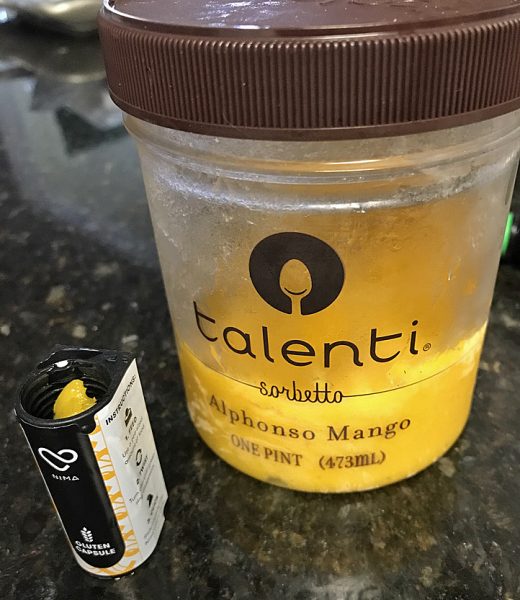
So I decided to test Talenti’s mango gelato (because the chocolate had inexplicably disappeared) using the updated testing parameters. I even waited a couple of minutes to begin the test while I photographed what the sample looked like. But this time I got no results whatsoever. Crickets. And when I pushed the start button a second time, I, of course, got a capsule error.

Here’s a case in which my Nima saved the day. One of my husband’s coworkers sent him home with a box of dark chocolate truffles from a Ukrainian company called LVIV Handmade Chocolates. I’m all about dark chocolate all day long (and this may incriminate me regarding the chocolate gelato), but I don’t speak or read Ukrainian and couldn’t decipher the ingredients list. I cut a sliver of truffle and put it into my Nima. Five minutes later, the smiley face icon told me my pig-out session was about to begin. Sometimes it’s the little things.
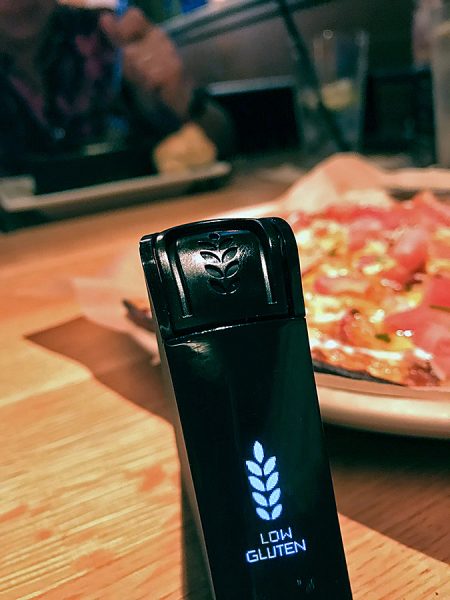
 

But let’s talk about a case in which my Nima truly saved the day. I met some ladies at a local BJ’s Restaurant & Brewhouse to celebrate a friend’s birthday. My friends had me choose the restaurant so I could be ensured a wide variety of selections. I ordered a gluten-free chicken-bacon-ranch pizza, which looked and tasted amazing. But I began to notice my mouth, which is prone to blisters when exposed to gluten, began feeling weird, so I pulled out my Nima and tested a piece of the cheese-covered crust. A few minutes later, I got a new icon: low gluten with a wheat stalk. In my hunger and impatience, I had already eaten one piece of the pizza. The rest went back to the kitchen and was replaced with salad.
The technology has tremendous applications and promise, but it’s still glitchy, and the cost is burdensome. It also can be difficult to get food into the capsule. Including tiny disposable tweezers or a sample-sized scoop would help, but that, no doubt, would only add to the cost.

As one who cooks from scratch and typically doesn’t eat out a ton, I will not become a monthly subscriber just yet, but I will pack my Nima with me when I travel, particularly in unfamiliar areas or overseas. I commend the company’s efforts, and I anxiously await improvements to the technology and reductions in the cost. Nima is a great beginning to addressing a serious health and quality-of-life issue for people like me for whom gluten-free isn’t a fad but a necessity. For the time being, it’s a valuable, somewhat fickle and costly ally for celiacs.

Source: The sample for this review was provided by Nima. Please visit their site for more info.


Product Information

Price: $199 US (was $279); 12 capsules $72.95 US (subscriptions available)
Manufacturer: Nima
Pros:
  • Works as advertised
  • Can save you from much unpleasantness
  • Simple to use
Cons:
  • Prone to errors
  • Unit expensive
  • One-time use capsules expensive

Filed in categories: Reviews

Tagged:

Nima Portable Gluten Sensor review originally appeared on The Gadgeteer on August 18, 2017 at 9:01 am.

Note: If you are subscribed to this feed through FeedBurner, please switch to our native feed URL http://the-gadgeteer.com/feed/ in order to ensure continuous delivery.