RhinoShield iPhone 7 Plus cases review

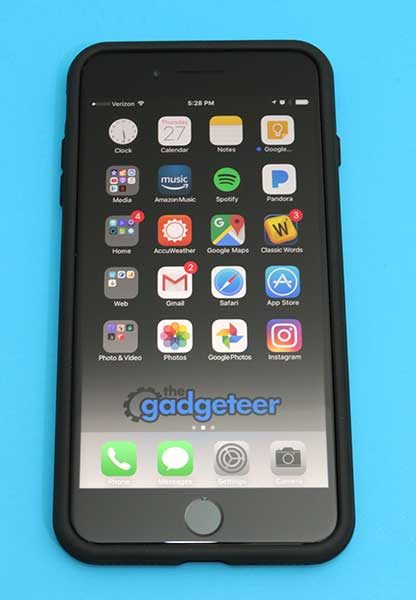
I recently switched to an iPhone 7 Plus which means I’ve been on the hunt for cases that will protect my expensive phone from scratches and falls, but aren’t overly bulky. I asked the folks at RhinoShield if they could send me one of their Crashguard Bumper cases because I am a minimal kinda girl. They sent the Crashguard along with the PlayProof and SolidSuit iPhone cases, so let’s take a look.

RhinoShield SolidSuit Brushed Steel Finish Case for iPhone 7 Plus

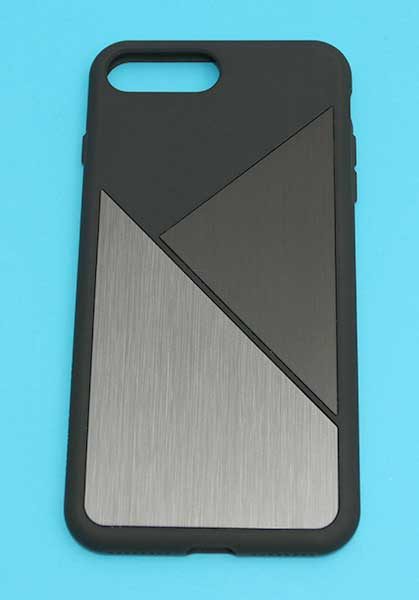
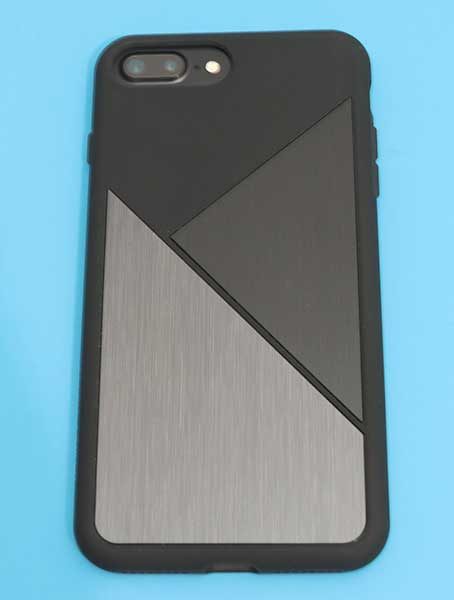
This case comes in white or black. I was sent the black version of this polymer blend case. The back of the case has a modern geometric design with two panels that look like brushed steel, but the panels are not real steel because that would play havoc with the iPhone’s antenna/signal. From what I can tell they are plastic.

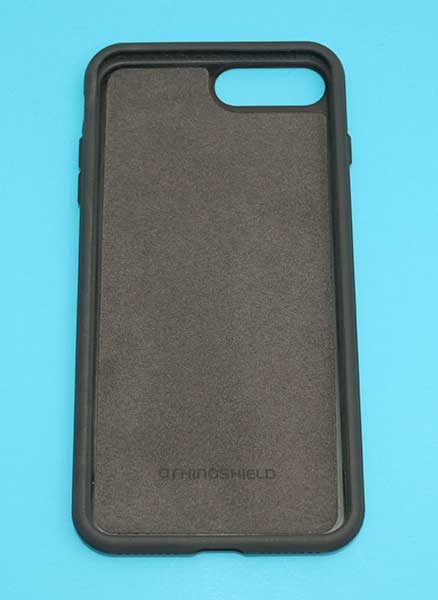
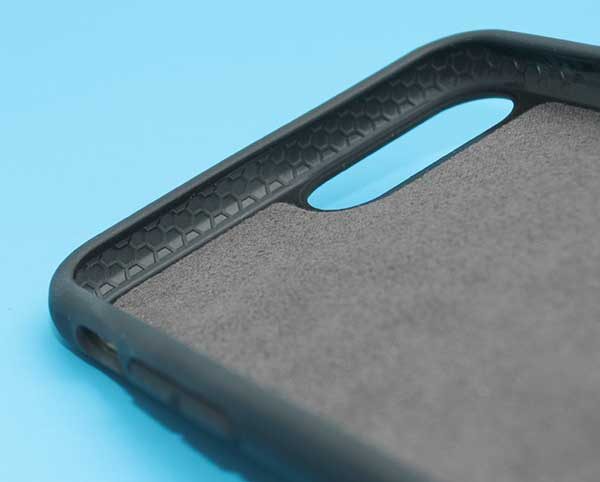
The interior of the case has a layer of soft suede to protect the back of the iPhone.

The sides of the case have a honeycomb pattern that is designed to add impact absorbing properties to the case which can protect the iPhone from up to an 11ft drop.

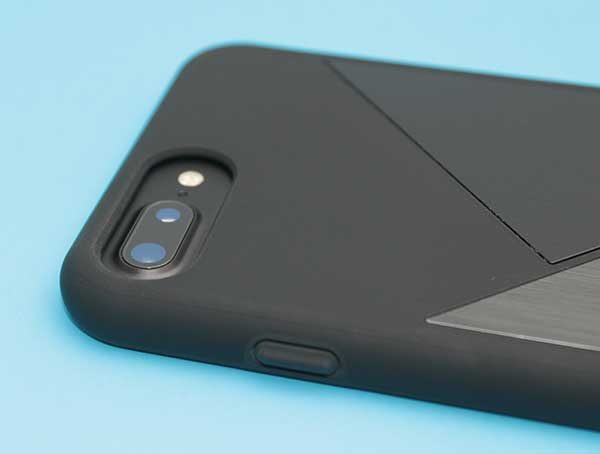
The SolidSuit case has an oval cutout on the back of the case for the iPhone’s dual camera and flash.

On the right side is a built-in button over the iPhone’s power button.

And on the opposite side, you’ll find buttons over the phone’s volume buttons and a cutout for the mute switch. The buttons all work fine, but it is a little hard to flip the mute switch because it’s recessed due to the sides of the case.

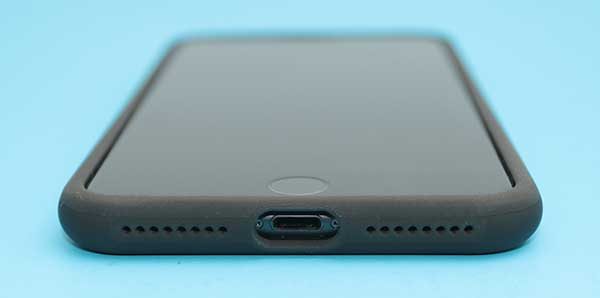
On the bottom of the SolidSuit case, there are holes for the speakers and a cutout for the lightning connector.

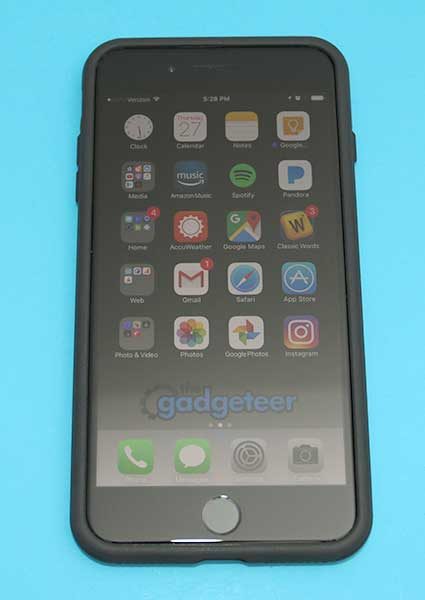
You’ll also notice from the picture above that the sides of the case are raised higher than the display, which helps protect the display from scratches when it is face down.

I have no doubt that my iPhone 7 Plus is well protected in the SolidSuit. The case feels substantial and does add some extra bulk, but not too much.

I like that the case feels sturdy and that I know my phone is protected, but the biggest problem that I have with the SolidSuit is that it’s really hard to remove your phone from the case once it’s snapped in place. I got a little panicked when I tried to extract my iPhone because it felt like I was going to break the phone or my thumbs trying to remove it. After a lot of swearing and some perspiration, I was finally successful, but it made me reconsider of putting my phone back in the case.

Price: $34.99
From RhinoShield
From Amazon

Pros: Rugged, 11ft drop protection
Cons: Tough to remove phone from the case

Clear PlayProof iPhone 7 Plus case

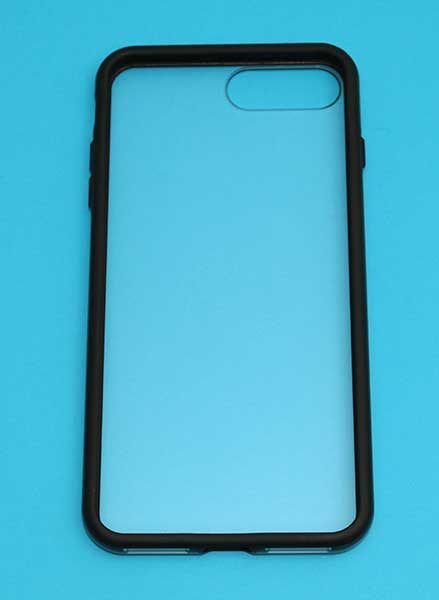
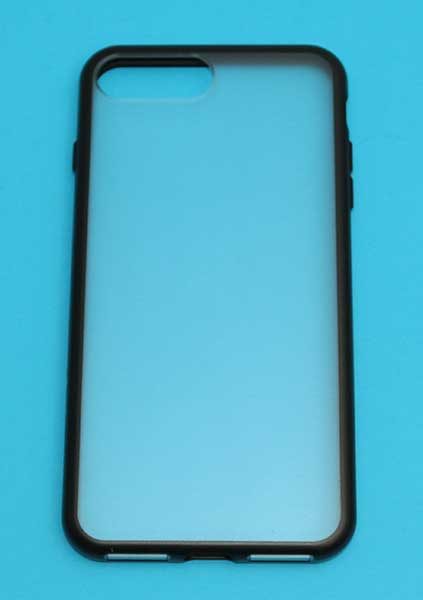
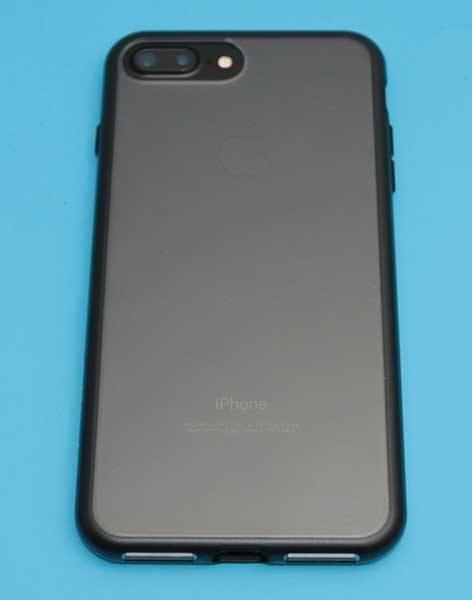
This case is similar to the SolidSuit except that the back of the case is see through so everyone can still see the Apple logo.

The back of the case has a matte finish that gives it a nice grip.

The PlayProof case is available with a black, clear, or pink bumper. As you can see, I was sent the black version.

The case has a cutout for the dual camera, mute switch, speaker grills, and lightning connector. It has covered buttons for power and volume.

The PlayProof case has the same honeycomb pattern design inside the bumpers to absorb impact and like the SolidSuit, your iPhone will be protected from falls up to 11ft. and the lip around the screen protects the display too.

I liked this case best of the three cases that RhinoShield sent me to review mainly because it wasn’t nearly as hard to remove my phone. Don’t get me wrong, it still takes some effort to remove the iPhone from the PlayProof case, but it won’t make you sweat and fearful that you’re going to snap the phone in half.

Price: $24.99
From RhinoShield
From Amazon

Pros: Rugged, 11ft drop protection
Cons: None

CrashGuard Bumper Case for the iPhone 7 Plus

As I mentioned in the first paragraph of this review, the CrashGuard Bumper case was the RhinoShield case that I really wanted to try.

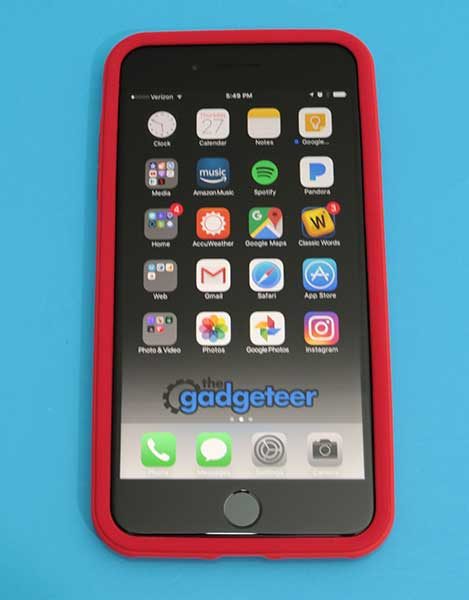
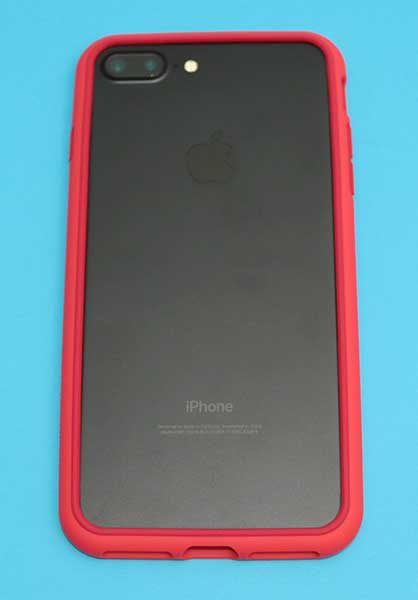
The “case” is available in a large selection of colors, but I chose the red one because I thought it would look pretty cool with my black iPhone.

The bumper case has a large cutout for the mute switch and covered power and volume buttons.

The case is basically an open frame that only covers the iPhone’s edges. But like the other RhinoShield cases that I’ve talked about in this review, the CrashGuard Bumper case also has reinforced corners and a special shock absorbing honeycomb structure that will protect your phone from up to an 11ft drop.

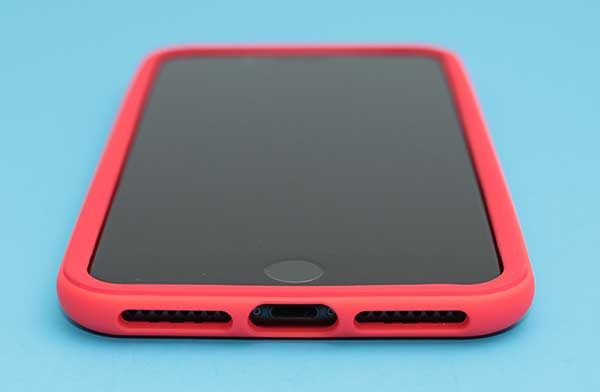
There are also large openings for the speakers and lightning connector.

Installing the iPhone 7 Plus in the CrashGuard Bumper case takes some thumb strength to snap it in place, but once it’s seated, it looks really nice.

The sides of the bumper wrap around the iPhone’s edges to protect the top and bottom surfaces.


I was really happy with this case until I needed to remove my iPhone to test one of the other RhinoShield cases. At that point, I was even more panicked than when I tried to remove the Solidsuit case because the CrashGuard Bumper didn’t want to budge at all.

I tried and tried so many times that I thought my thumbs were bruised. I had Jeanne try it too and she didn’t have any luck either.


I finally gave up and took drastic measures to remove the bumper case by cutting it off with some snips. Luckily the area around the mute switch opening was perfect for this task and one tiny snip was all that was needed for the bumper to spring open.

Afterwards, I wondered if I was the only one with this problem, so I checked some reviews on Amazon for the CrashGuard Bumper case and found that others had resorted to the same solution that I had.

Price: $24.99
From RhinoShield
From Amazon

Pros: Rugged, 11ft drop protection
Cons: Almost impossible to remove the iPhone from the case

Final thoughts

RhinoShield makes some nice looking cases for the iPhone that provide above a military level grade of drop protection while not adding tons of bulk. The only problem is that some of their cases (Solidsuit and CrashGuard) are really tough to remove once the phone is in the case. I guess this isn’t a problem if you never need to remove your phone. But for someone like me who enjoys testing new cases, the non-ability to easily switch cases make the Solidsuit and the CrashGuard Bumper cases a bad choice for me. The PlayProof case, on the other hand, worked out fine and I’m happy to recommend that one.

Source: The sample for this review was provided by Rhinoshield. Please visit their site for more info and Amazon to order.


Product Information

Price: $24.99 – $34.99
Manufacturer: Rhinoshield
Retailer: Amazon
Pros:
  • See each review above
Cons:
  • See each review above

Filed in categories: Reviews

Tagged: ,

RhinoShield iPhone 7 Plus cases review originally appeared on The Gadgeteer on September 6, 2017 at 3:50 pm.

Note: If you are subscribed to this feed through FeedBurner, please switch to our native feed URL http://the-gadgeteer.com/feed/ in order to ensure continuous delivery.

Igloohome Deadbolt 02 Digital smart Lock review

My home is located at the very end of the power company’s circuit. As a result, if anything anomalous happens upstream, our power goes out. Frustratingly, the houses across the street are on another substation circuit and we can see their lights and flickering television screens while we sit by flashlight or candle light, hoping our smartphone batteries outlast the blackout.  If the power isn’t out for long, I generally don’t feel the need to fire up the generator, but nonetheless, it’s almost always inconvenient. 

I arrived home during the last power outage. I usually enter my home through my garage door, but that wasn’t going to happen this time. I pulled the keys from my ignition and… realized I had given my house key to a friend who was watching our cat during an extended overseas vacation.  Naturally, I had neglected to collect it after returning. Rats! I have other keys, attached to my other keychains… of course, all locked in the house or the garage… crap! I had to go to a friendly neighbor and get the key we leave with him in case of emergencies.

Then I had a sickening thought: What if my neighbor wasn’t home? What if my kids had been dropped off in the same situation and the neighbor wasn’t home? What would they do? Sure, they could call for help, if they haven’t exhausted their phone battery during a day of fun, but it’s certainly an uneasy feeling.

I’ve never been a big fan of “hiding a key under the welcome mat,” because it’s just too obvious. How about under a rock or in a planter? Nope, rusty keys mess up locks. I thought about one of those combination key lockers, but I always thought they were kind of unsightly and I don’t really have a convenient place to locate one.

Over the past few years, various manufacturers have marketed electronic door locks, allowing occupants to access their homes. Long-life batteries mean access to one’s abode would be possible even during power outages and without keys. To make things more convenient, these locks can be programmed to allow temporary access for cat-sitters, AirBNB renters, the meter reader, or even someone coming in to perform repairs, all with the peace of mind that no one would be tempted to make a copy of that precious key.  After all, my dad always said, “Locks keep honest people honest.”  I think he’s right.

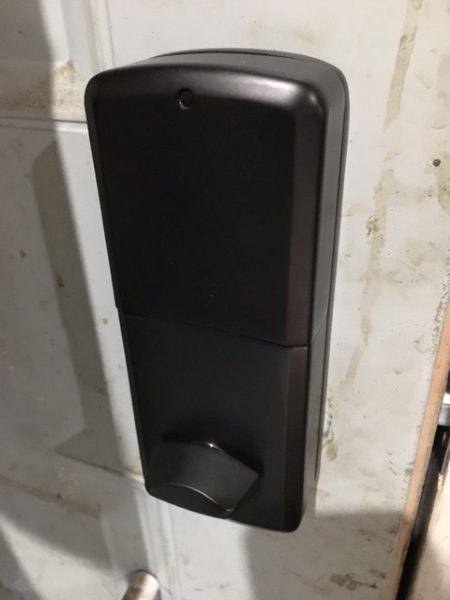
Igloohome’s Smart Deadbolt 02 such a beast. It’s a Bluetooth lock that can be programmed with up to 285 entry codes to allow single entry, duration or permanent access with different codes for each.  It operates for up to 5000 cycles on four AA batteries has a low-battery warning and can even be “jump started” from outside using a 9-volt battery if the batteries die and the key isn’t available. In a pinch, I would be able to borrow the 9-volt battery from one of the garage door openers and be back in business… um,… in-side in a jiffy.

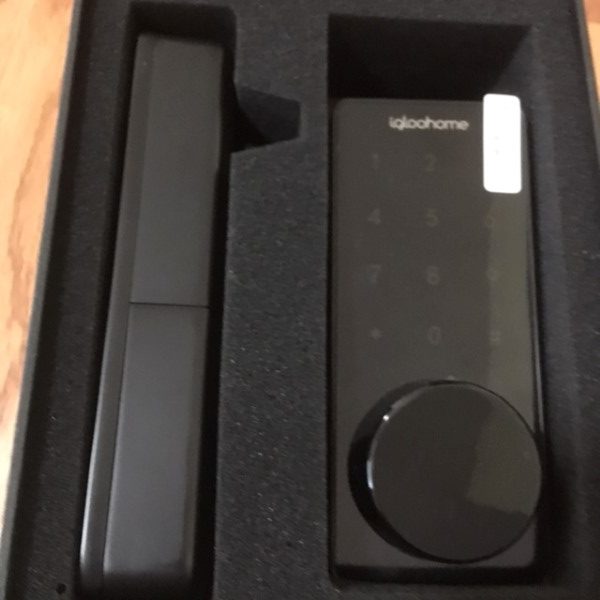
The smart deadbolt arrived securely packaged in a sturdy box. All the parts needed for installation, including a template to cut holes in the door, were included. Interestingly, the included manual provides the specifications, parts descriptions, features, pairing instructions, and app instructions, but do not have instructions for installation. For these, you’ll need to install the app and access the FAQs from Igloohome’s on-line database. Once there, the instructions are comprehensive with lots of illustrations. I decided to install the deadbolt on a rear garage entry door – one I almost never carry a key for, meaning I have to walk around to the front of the house, open the main door, and unlock it from inside, which is sometimes a frustrating stroll.

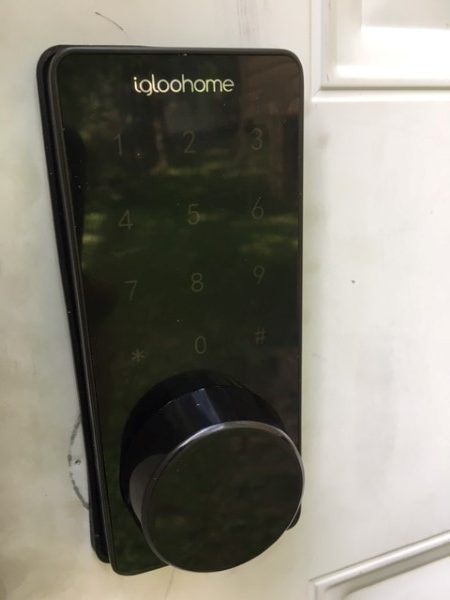
The body of the deadbolt is made of a zinc alloy and should resist the elements well.  Installation is very similar to a conventional deadbolt, but with an additional mounting plate and wire joining the inside and outside panels. All the parts fit properly, with no fit or finish issues.

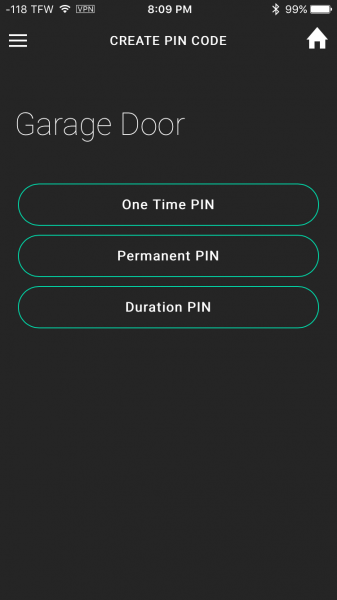
I installed the app and was able to easily pair the deadbolt and add a master password. The app isn’t the most elegant but gets the job done.  Access codes can be added to allow someone to enter on once, over a preset duration based on date and time, or permanently. I think this could be really useful to allow a repair person or meter reader into the house once, or an AirBNB resident access only during their rental period.  The app even keeps a record of when the deadbolt has been used.  One-time lock codes can be set to expire within a specific time, meaning if the repair person is late, they’re not getting in. The app permits removal of individual unlock codes from the list of created codes, but they are retained until the entire list is deleted using the “Clear PIN List” function.

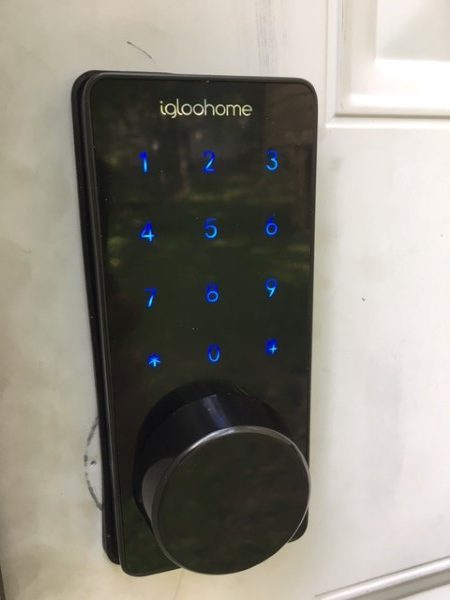
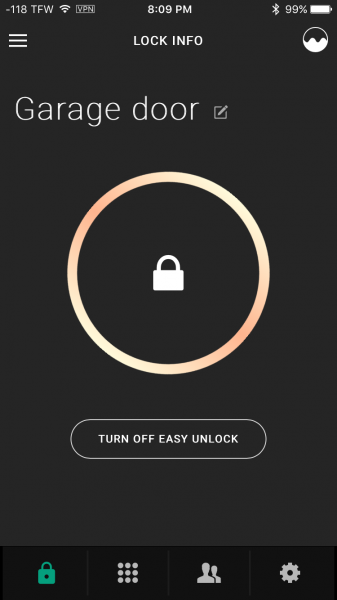
Opening the deadbolt from the keypad is simple. Touch the keypad to “wake up” the lock. The keypad illuminates a pleasant blue, enter the code, and press the # key. From the apps main screen, touching the padlock icon does the same thing. There is a feature called “”Easy Unlock,” that will unlock the deadbolt touching any single key, but only if the app is open and paired with the lock. Multiple Bluetooth “keys” can be made to the lock, allowing other family members to use this feature by scanning a QR code or via text message invitation and installing the app.  Of course, a pair of conventional keys are included but requires removal of the outside dust cover with a pointed object. I doubt I’ll ever use them.

Locking the deadbolt from the inside is by manually turning the latch. From the outside, press and hold the # button for two seconds. It should be noted that the app cannot be used to lock the deadbolt – only unlock. This is unfortunate because checking the status of an entry door without having to go directly to the door would be a great feature.  It would have been welcomed if the lock also had IP connectivity to remotely open, close or check status, but only Bluetooth is supported.

Overall, I’m pleased with this innovative product, but would welcome the ability to lock the deadbolt via the app. Internet IP connectivity would also have been a plus.  Installing the Igloohome Smart Deadbolt has given me a little additional peace of mind. I don’t have to worry about my family being locked out of our home should the power go out. I don’t have to worry if my friendly neighbor is home or bother him. I can let people in (if I know they are coming in advance) and I can get into my garage without tromping around the house.

Source: The sample for this review was provided by Igloohome. Please visit their site for more info and Amazon to order.

Filed in categories: Reviews

Tagged:

Igloohome Deadbolt 02 Digital smart Lock review originally appeared on The Gadgeteer on September 6, 2017 at 8:59 am.

Note: If you are subscribed to this feed through FeedBurner, please switch to our native feed URL http://the-gadgeteer.com/feed/ in order to ensure continuous delivery.

V-MODA Forza Metallo Wireless Bluetooth headphone review

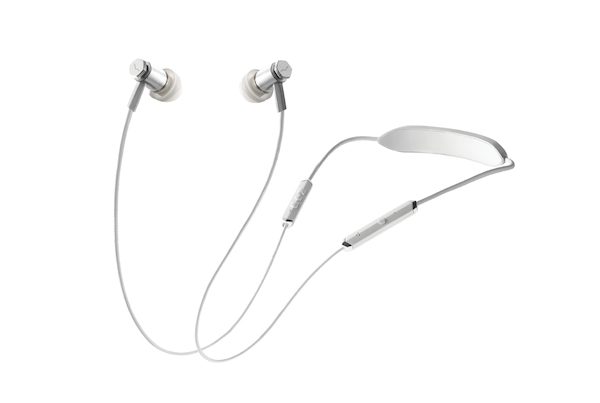
Consumers’ personal preference and manufacturers’ desire to offer differentiated products has lead to an assortment of earphone styles: earbuds, in-ear headphones, in-ear-canal headphones, etc. If the different ways earphones are connected to the audio source or supported by the body are considered then the list stacks multiplicatively. So when V-MODA recently announced the Forza Metallo Wireless as the world’s first ergonomic neckband headphones I was intrigued.  Val Kolton, V‑MODA CEO and I have similar opinions about other in-ear wireless headphone designs; he says, “They either look like unsightly massive ‘plastic space ring around the collars’, Frankenstein bolts that will not stay in your ears or separate earbuds that are quickly lost, have reception issues and need a dongle or case.” So what makes the Forza Metallo Wireless different? Read on to see what I think!

Unboxing

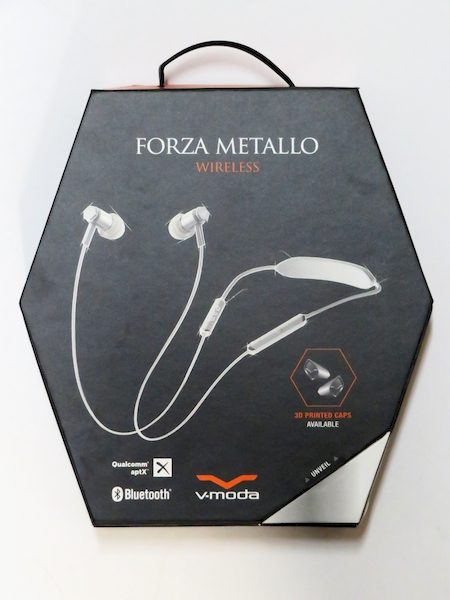
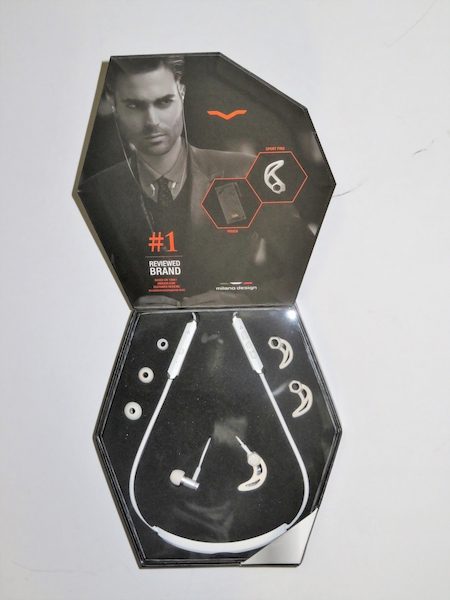
The V-MODA Forza Metallo Wireless comes in a clam-shell display box with a see-through compartment so that the actual product can be seen while still in a retail environment. The box shows the unique features of the Forza Metallo neatly presented in the protective foam insert:

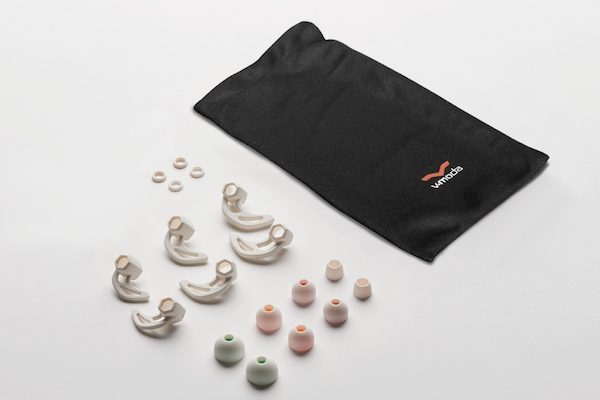
  • The titanium wire spring ergonomic neckband
  • The two microphones located on the left and right of the neckband’s ends
  • Three sizes of ActiveFlex Sport Fins (Similar to Jaybird Secure-fit ear fins)
  • four sizes of silicone ear tips (4 of each size, just in case you lose one)


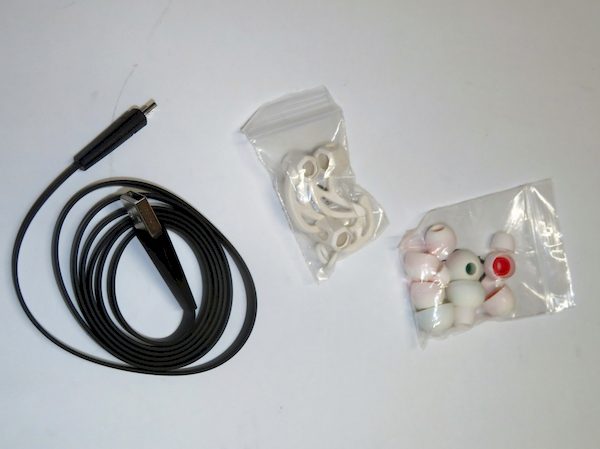
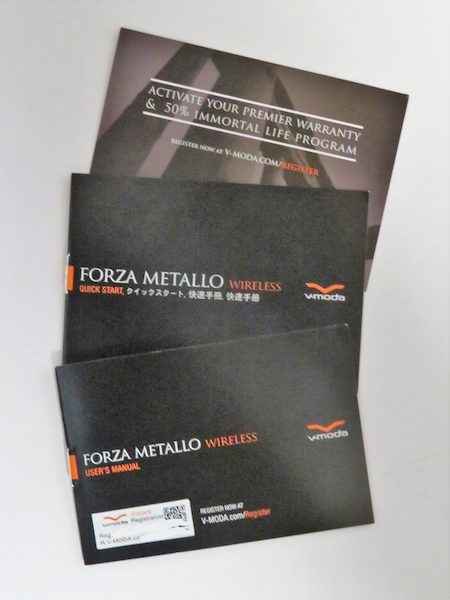
Underneath the foam packaging is a quick start guide, the additional supply of sport fins and silicone ear tips, a user’s manual, a warranty card, a nylon cinch case and a lay flat USB charging cable.

Design

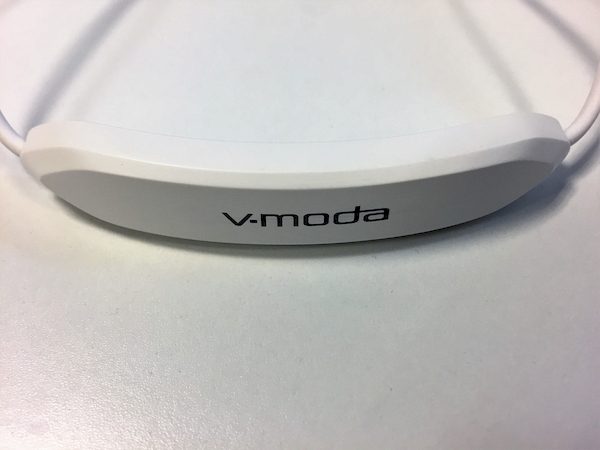
The earphones are a good example of how to tastefully combine style, design, and functionality. For instance, the rear of the earphones contains the battery, antenna and charging port. The grouping of the larger battery and antenna in the largest part of the unit allows the largest capacity and antenna range possible while including the company logo on the back allows the manufacturer to promote their brand, but not at the expense of being obtrusive when facing another individual.

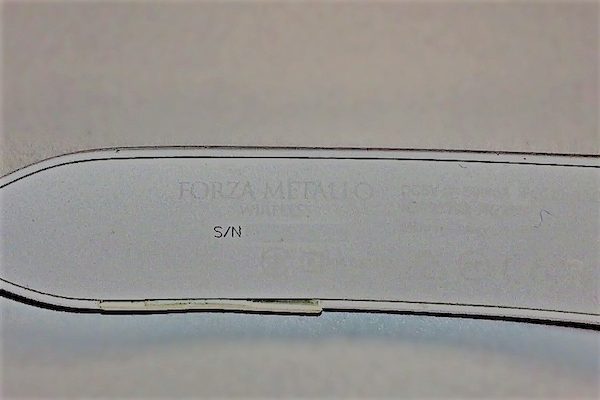
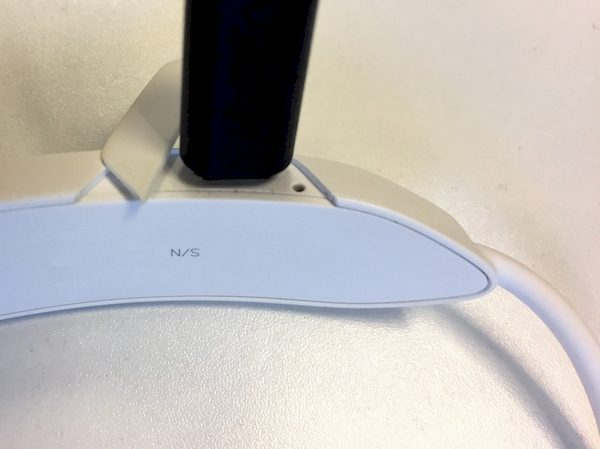
The style-crushing manufacturing info, CE marking, and other information is white ink on white plastic on the inside of the rear to make it less obtrusive (only the serial number is in black ink).

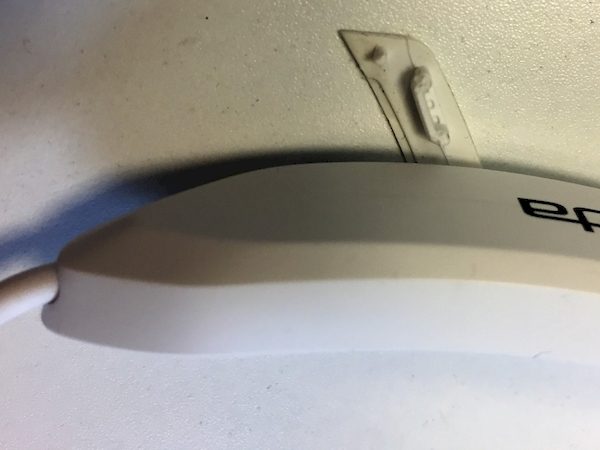
One criticism is that the door to the micro USB charging port on the base of the rear is hinged. it would be useful if the unit showed which side the hinge was on or how the cover is supposed to open.

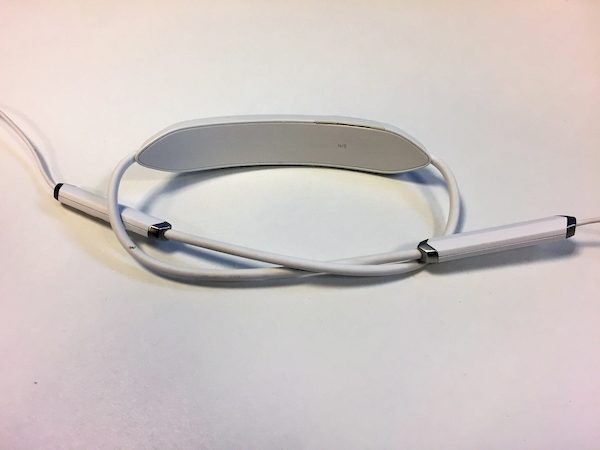
Perhaps the earphone’s most distinguishing feature, the Titanium TrapLock Ergonomics, allows the front controls to flex, to the point of being able to tie them in a knot, and still maintain the original ergonomic form. These titanium springs combine the functionality of providing power and signal wiring, the design of a freely positional collar and the style of a thin and elegant form. The connection point of the TrapLock to the rear is designed for freedom of movement, while the ferrules on the control and microphone sections are metal and securely fasten the controls to the wire.

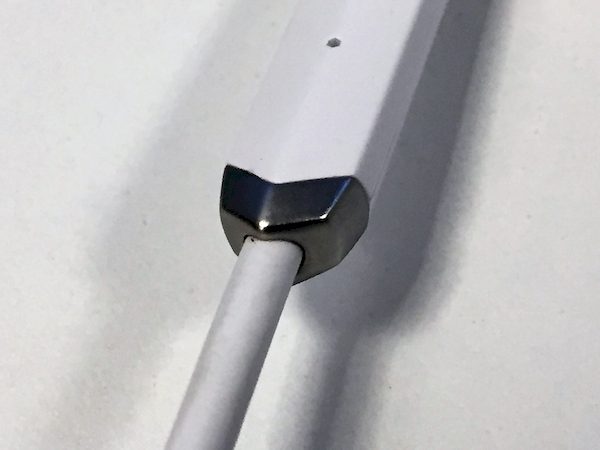
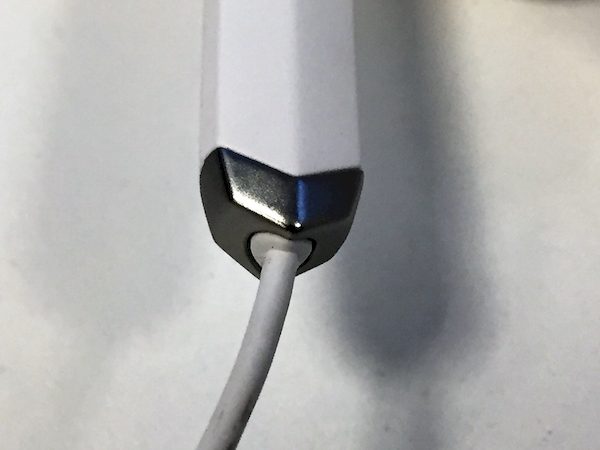
The metal ferrules are in the style of the V-Moda chevron and provide stiffness, durability, and style to the control points.

The left side control houses the power button and the status light. The status light is two color (orange and white) and indicates the charging status (a slow on/off pulse), operation (steady white), pairing mode (blinking white – entered by holding power for 5 seconds), and low battery operation (orange). When the unit is powered on the light blinks orange to indicate the approximate battery charge (once for 0 – 40%, twice for 41% – 60%, three times for 61% – 80% and four times for 81% -100%). Even the LED gets a touch of style by the fact that the port through the control casing is hexagonal. The front of each control has another metal ferrule to hold the audio wire in place. The top front of each control also has a microphone. Having two microphones allows for better audio and noise rejection during calls because the hardware can reject noise that is unbalanced and out of phase (coming from the surroundings) while accentuating the audio that is balanced and reaches the microphones at about the same time (the user’s voice). The right side control has dedicated buttons for the volume up and down and a central multifunctional button for start/pause, answer/refuse/end call, next song (two presses), previous song (three presses), and voice assist (hold for 3 seconds).

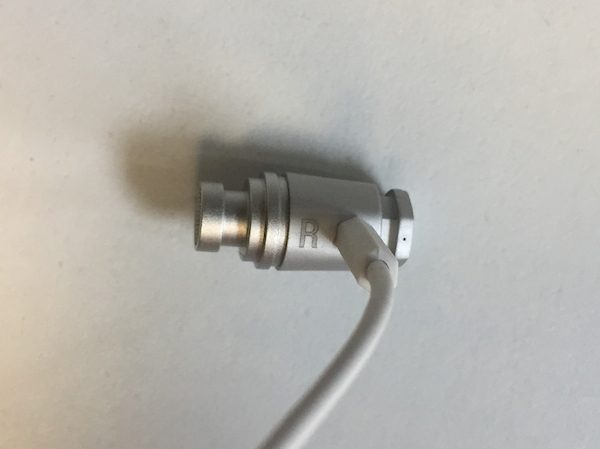
The wire to the earphone speakers looks and feels like the wire used by the Apple EarPods, although it is a true white vs a light gray color like the EarPods. Some have remarked that the wires are too long, but I think that they are just right to permit unrestricted turning of the head; any shorter and they would lift the neck collar any longer would be unnecessary.  The earphone speaker housings are quite small and lightweight and fabricated from aluminum. The tight machining tolerances on these eliminates any resonance while also looking attractive. The rear of each is a hexagonal shape which gracefully transitions into a circular form toward the speaker. This design is not only stylish but also functional in that it holds the sport fins in alignment.

The earphones are labeled “L” and “R” on the base, but my guess is that this is just an artifact from the Forza Metallo wired design. The precision used in manufacturing these is demonstrated by the minuscule port on the rear of the earphone can.

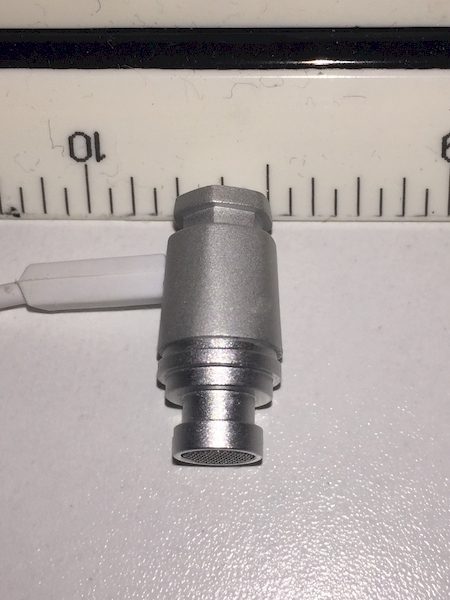
The post for the silicone ear tips is about 3/16″ if you want to get a set of compatible Compli tips.

One accessory that is not included are decorative tips that may be installed on the ends of the earphone speaker housings. They are available in a variety of designs and materials, including precious metals. Prices vary depending on the design and material used. Cap materials include platinum starting at $7,500, 14k gold at $2,500, gold plated at $250 and HD acrylic for $40 or $20 when purchased with the headphones. I think a great additional feature would be a magnetic clasp or a way to keep the earphones from rocking when they are not in your ears.

Operation

As mentioned earlier the first thing you may notice is that the power lamp indicates the remaining charge. If you discover that there is relatively little charge left, don’t despair; the earphones will provide over two hours of audio playback with only a 15 minute charge. The second thing you may notice is that the Forza does not announce the power, pairing, and connection status in one or any number of languages. Instead, it broadcasts a set of tones. While this design preserves the international appeal of the unit it also feels like at times you’re communicating with R2-D2. The earphones will also play several short beeps if the signal is lost and several longer beeps if the battery is low.

The Bluetooth paring is quick, easy, and no pass code was required (if it is requested the pass code is “0000”. The earphones will pair and connect to two devices at the same time. In order to switch devices just pause the audio stream on one device and start it on the other. If this doesn’t work then connecting/disconnecting the device may be necessary.

I noticed that my initial guess as to which ear tip I should use was a size too small and resulted in sub-optimal bass. The next size up fixed the problem but this is a good warning that you should try a couple of sizes of tips to ensure the best fit and bass response.

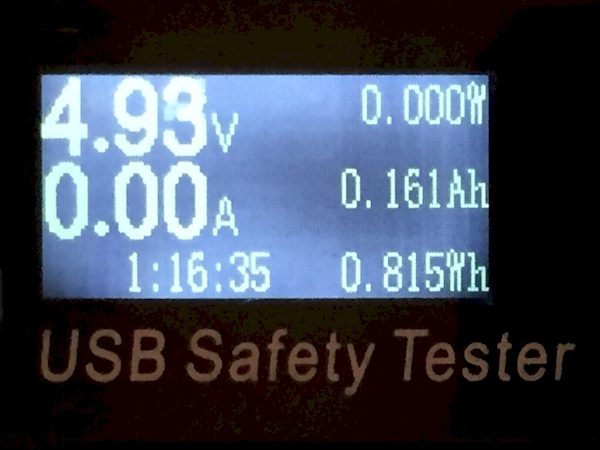
A full charge took 1:16 and lasted for more than a day of use.

One unique feature of the Forza is that incoming calls to the connected audio device will cause the neckband to vibrate. The vibration feature is useful if you wearing the Forza and connected to a phone but do not the earphones in your ears. The vibration also works when the headphones turn on and when they go to standby.

Performance

Before getting into the audio I need to explain how comfortable these earphones are. They are very lightweight and are barely noticeable when being worn. In my experience, the wires to the earphones don’t quite hang as freely as they do on the model below but maybe over time, the cord will straighten out.

I’ve gone on several runs with this and have never had a problem with the neckband slipping off or the earphones becoming sweat-logged.

I have noticed one or twice that the neckband will slip off my shirt, but this only happened if I was rocking in my chair or if the neckband got pushed back by my shirt collar.

The audio out of these is just stunning. I’m surprised such small drivers can deliver such amazing sound. From a purely technical standpoint, my 40+ year old ears could hear from about 19Hz to 1,4260Hz using http://onlinetonegenerator.com/. I have very little doubt about the technical capabilities of these drivers since they are the same ones used in the certified Hi-Res Forza Metallo wired earphones. Also, once the correct ear tips are installed there is a significant level of passive noise reduction.

I wanted to test the sound using a variety of genres and soundscapes. My first test track is Fantasy by The xx. The pure base tones (in the high 40Hz range) come through strong and without distortion. I also listened to How Low by Ludacris which has some 32Hz tones that come through well amplified. Listening to each of these songs is enjoyable and the bass is delivered just fine on each. However, these headphones are Hi-Res (even if they aren’t certified as such) so they have a relatively flat response profile. Adjusting the bass on the playing device can bring these close to Powerbeats but they are not the same type of headphone. If you really like overpowering bass then Powerbeats are for you but if you want to hear the bass and everything else in a song then the Forza is a great selection.

I wanted to hear how the subtly of an upright bass is delivered by the speakers so I listened to Bahia by John Coltrane. The earphones captured the tone of all the instruments beautifully. This song is also good to test the soundstage of the earphones. It is easy to imagine yourself surrounded by a piano, a sax, a bass and a drum from left to right. Another great song to appreciate the soundstage is There’s No Underwear in Space by The Claypool Lennon Delirium. In this song, you can hear the eechoesof drum and bass against the other sounds in this ominous sounding recording. It sounds like Les is using a bow on his bass on this and he gets some amazing sounds out of it; thanks to these earphones you can hear it all in amazing clarity.

The song La femme d’argent by Air is full of lush and vibrant sounds and the earphones do a great job at reproducing the swirling electronic sounds and hypnotizing melody. If you close your eyes you can really loose yourself to the music and not know where you are!

The recently recorded French Suites by Bach played by Murry Perahia is an excellent recording and shows how versatile the earphones are. It’s easy to enjoy the classical piano of this recording right after playing the above song by Ludacris, and they both sound great.

One more recording is the one I made myself.

I recorded this audio on my computer. Compared to the audio made by the Dell Realtek Audio, which was not set up for adaptive noise reduction, the recording by the Forza Metallo sounds a bit more muffled, but clear and free of the background noise that was being (purposely) made by one of my children. The incoming call quality is as good as I’ve heard on any wireless earphone set.

Conclusion

The Forza Metallo Wireless earphones are a great sounding set of wireless earphones that rival the sound produced by many wired earphones. They are comfortable to wear and quick to charge. They are a little expensive at $170, but not out of the range that competitive devices are priced at. They also come with a 1 year warranty and a lifetime 50% discount on comparative products from the V-MODA product line if your own Forza Metallo Wireless is damaged beyond repair. The style, design, and features make these great earphones and I fully endorse them.

Source: The sample for this review was provided by V-MODA. Please visit their site for more information and Amazon to check prices / order.


Product Information

Price: $169.99
Manufacturer: V-MODA
Retailer: Amazon
Requirements:
  • Bluetooth
  • USB charger
Pros:
  • Excellent Sound
  • Great ergonomics
  • Robust design
  • Style
Cons:
  • A bit Pricey
  • Charging door
  • No voice prompts on power/connection/etc.

Filed in categories: Reviews

Tagged:

V-MODA Forza Metallo Wireless Bluetooth headphone review originally appeared on The Gadgeteer on September 5, 2017 at 4:44 pm.

Note: If you are subscribed to this feed through FeedBurner, please switch to our native feed URL http://the-gadgeteer.com/feed/ in order to ensure continuous delivery.

Hisense 65″ H8 series 4K smart TV review

Do you want to upgrade your home theater to a 4K TV, but don’t want to pay the price for all those extra pixels? The Hisense 65″ H8 series 4K smart TV is priced less than $900 which may cause some people to not take it seriously. Take it from me, it’s a really nice alternative to Samsung and other brands.

What is it?

The Hisense 65″ TV is a 4K LED 2160p smart TV with 4 HDMI inputs and 3 USB ports.

Hardware specs

Resolution type: 4K (3840 x 2160p)
Panel type: 64.5″ Full Array LED Backlight
High dynamic range (HDR)
Backlight type: Edge lit
4K upscaling: Yes
Motion rate 120 technology
Display aspect ratio: 16:9
Connectivity: Wireless built-in, 2×2 Dual-Band, 802.11ac, Ethernet
Ports: VGA (1), HDMI (MHL, ARC, CEC I up to 60fps) (2x HDMI v2.0 / HDCP 2.2 | 2x HDMI v1.4 / HDCP 1.4), USB (3), RF antenna (1), RCA composite, Digital audio output (1 Optical), Earphone/audio output (1)
Audio: Two 15W main channel speakers
Apps: Netflix, YouTube, Pandora, Vudu, Amazon Instant Video, and more
Wall mountable: VESA 400 x 400
Product dimension (without stand): 57.4”W x 33.7”H x 2.4”D
Product dimension (with stand): 57.4”W x 35.4”H x 12.7”D
Weight (without stand): 66.1 pounds
Weight (with stand): 68.3 pounds

When I was offered the chance to test drive a 65 inch 4K TV, I didn’t have to think very long to give my answer which was something like “heck yeah!”.

I waited several weeks for the Hisense TV to arrive because it had to be delivered by a special freight truck. It came in a huge box that was way too heavy for me to move by myself. But I lucked out and was able to talk the two delivery guys into walking the box around the house to bring it into my walkout basement where I planned to mount it on the wall where I already had an existing 55 inch TV mounted.

I thought I’d be able to use the same VESA mounting hardware that was on the TV currently on the wall, but unfortunately, it wouldn’t work, so I had to order a new wall mount bracket kit.

What’s in the box?

Hisense 65″ H8 series 4K smart TV
Power cable
Remote control
2 AAA batteries for the remote
4 screws (M4 x 12)
Quick start guide
2 legs

Design and features

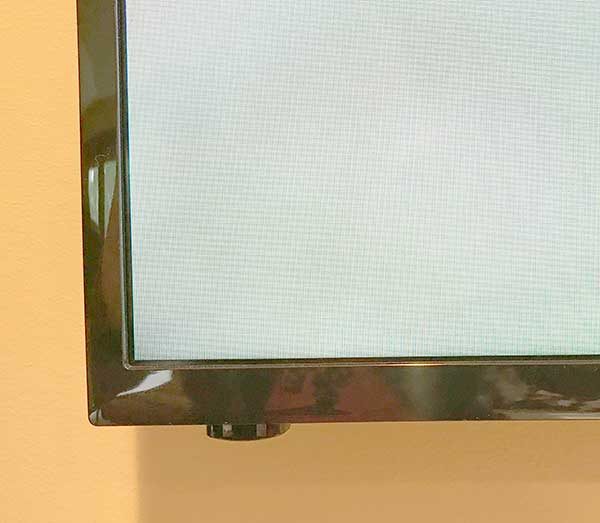
The Hisense TV has a glossy black plastic housing with thin bezels and the Hisense logo printed on the bottom center bezel of the display.

Other than the logo, and the power status LED (which glows bright red when the TV is off) in the lower left corner of the display, the Hisense TV looks like a large framed picture. I like the basic look of this TV because it will blend in with any room.

FYI: I don’t have a table or entertainment cabinet to put a TV on, I prefer to mount my TVs to the wall to give the room more of a home theater feel. So I don’t have a picture of the TV with the legs installed.

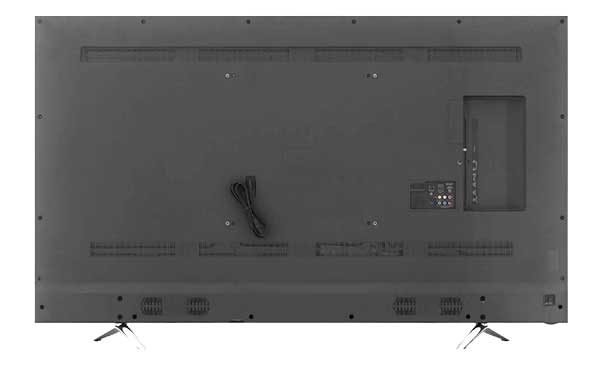
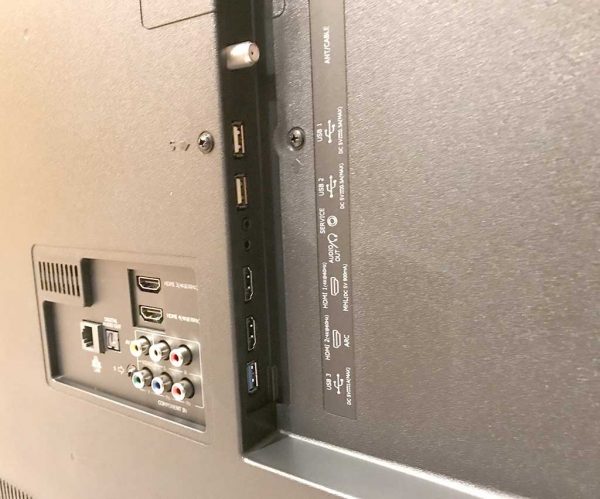
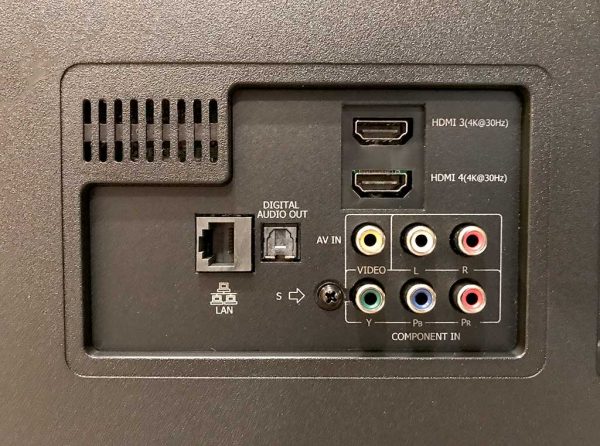
All of the ports and video connections are located on the back of the Hisense.

The three USB and two HDMI ports are located in a recessed area. This design is fine if you set the TV on a table, but if you prefer to mount the TV flush to a wall, it makes it almost impossible to access those ports once the TV is mounted.

The Hisense has WiFi and an Ethernet port on the back of the TV to connect to the internet for the smart apps like Netflix, Hulu, Amazon, and more.

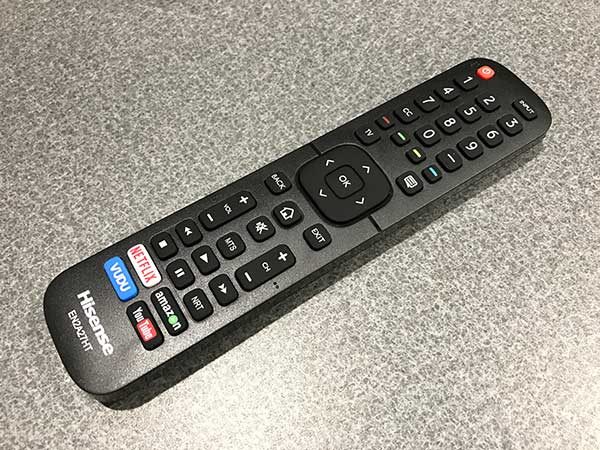
The remote is pretty standard as far as remotes go. This one does have dedicated buttons for Netflix, Amazon, Vudu, and YouTube. I didn’t use the remote very often as I connected the Hisense to my AV receiver and a DirecTV DVR box, which is my main video source.

Picture quality

Out of the box, the Hisense 65″ H8 series 4K smart TV has a very “hot” picture. By that, I mean that the colors are too saturated. I noticed this right away but didn’t make any tweaks and soon grew used to it.

Only after I had been using the TV for a few weeks and started writing this review, did I stumble upon someone’s video where he also talked about how the default picture is too saturated. He suggested some settings changes, which I immediately implemented and was blown away by how much better the picture looked. It was like night and day. What I already thought was a nice TV turned out to have the best picture of any TV I’ve had so far.

The Hisense has 176° horizontal and vertical viewing angles that let people sitting off to the sides still enjoy a crisp clear picture.

Audio quality

I run my TVs through an Onkyo AV receiver so I didn’t do a lot of testing on the built-in audio. What I did sounded fine, but a 5 speaker setup like I have obviously sounds much better.

See it in action

Final thoughts

I have had zero issues with the Hisense 65″ H8 series 4K smart TV. It powers up fast, offers built in versions of the most popular streaming apps, and most importantly, it has a wonderful crisp clear picture with bright, vivid colors. For the price, you can’t go wrong.

Source: The sample for this review was provided by Hisense. Please visit their site for more info and Best Buy to order.


Product Information

Price: $899.99
Manufacturer: Hisense
Retailer: Best Buy
Pros:
  • Affordable
  • Wide viewing angles
  • Great picture
  • Smart features
Cons:
  • Inputs hard to access if TV is mounted on a wall

Filed in categories: Reviews

Tagged: ,

Hisense 65″ H8 series 4K smart TV review originally appeared on The Gadgeteer on September 5, 2017 at 9:00 am.

Note: If you are subscribed to this feed through FeedBurner, please switch to our native feed URL http://the-gadgeteer.com/feed/ in order to ensure continuous delivery.

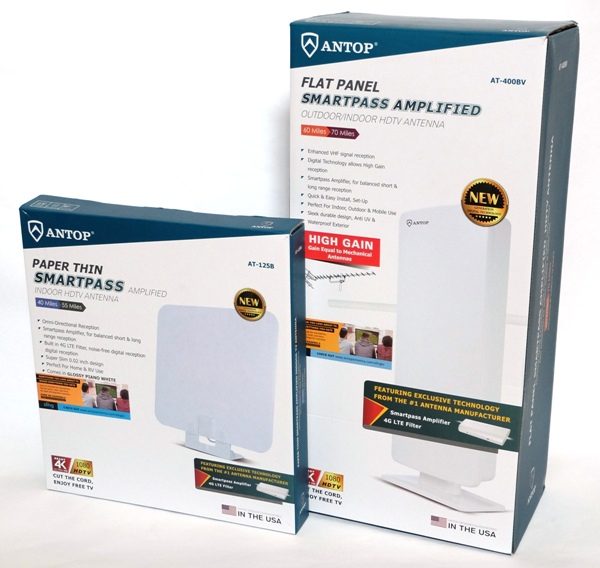
ANTOP AT-125B Indoor Antenna and AT-400BV Indoor/Outdoor Antenna review

Our family has been a part of the cord cutting trend for about 15 years now. I’ve tried a handful of flat indoor HDTV antennas in the past and have struggled to find just the right position to try to receive all of the channels that we like to watch. Once that hurdle had been leaped, they worked well for the most part, yet whenever a car drove by or there were any storms in the area, the reception on some channels would start to drop out. Are there others that work better? ANTOP offered the Gadgeteer indoor and outdoor antennas for review and I was eager to try them out to see how they would perform. I was sent the ANTOP Paper Thin Smartpass Amplified AT-125B Indoor HDTV antenna and the Flat Panel Smartpass Amplified AT-400BV Outdoor/Indoor HDTV antenna to test. In my testing, I found that it was difficult to find the optimal placement for the AT-125B Indoor antenna (just like my other indoor antennas) and found that it performed better in one room over another but not quite as well as our Clearstream Eclipse HDTV Amplified Indoor Antenna. On the other hand, when the AT-400BV Outdoor antenna (which can function as an antenna for all your TVs) was installed in our attic, it performed flawlessly. It was able to receive ALL my favorite channels without ANY issues and I even received a few stations that I could not tune in with indoor antennas.

ANTOP PAPER THIN SMARTPASS AMPLIFIED AT-125B INDOOR HDTV ANTENNA
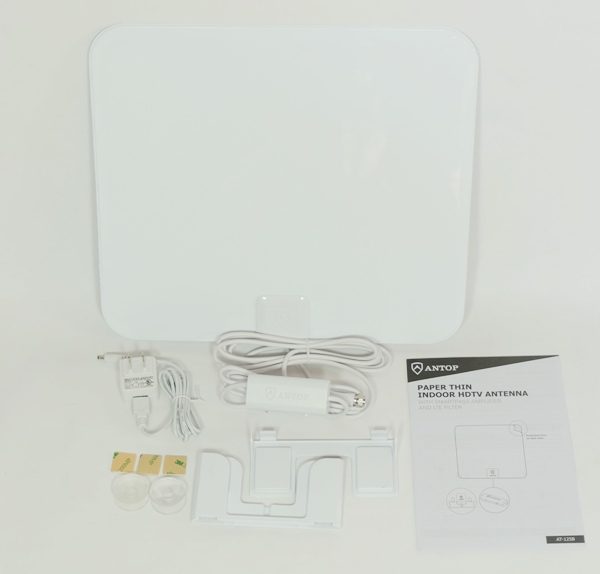
Package Contents

  • Omni-directional ANTOP Paper Thin SmartPass Amplified HDTV antenna (AT-125B)
  • AC/DC power adapter for amplifier (amplifier’s power cord connects to power adapter via USB)
  • Three double-sided application stickers
  • Two double-sided application suction cups (for window mounting)
  • Table stand
  • User Manual

Technical Specifications

  • Application: Indoor
  • Amplification: Smartpass Amplified, balanced reception range
  • Reception Pattern: 360-degrees omnidirectional
  • Distance to transmitter: 40/55 mile
  • Frequency Range: 47-230MHz, 470-700MHz
  • Gain: 26dB Max
  • Output Level: 100dBuV Max
  • Noise Figure: ≤3dB
  • Impedance: 75Ω
  • Power Supply: DC 5V/50mA via USB cable
  • Cable Length: 10ft integrated coaxial cable
  • Color: Piano White
  • Size: 13.7″ x 12.48″ x 0.02″
  • 4G LTE Filter: Blocks unwanted 3G and 4G signals
  • Suitable for home and RV use
  • Online customer support, installation assistance
  • 12-month warranty

Design & Build Quality
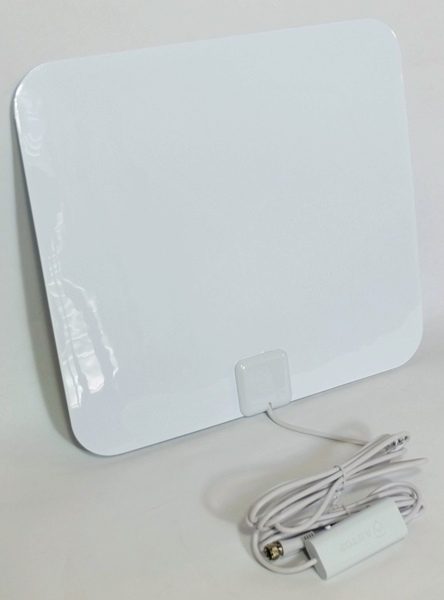
Both sides of the ANTOP Paper Thin SmartPass Amplified Indoor HDTV antenna were made out of shiny white plastic which shows fingerprints easily. The antenna has the Smartpass Amplifier already attached to it which, according to ANTOP, “uses an all-in-one design to allow an easier connection and deliver the correct balance between short and long range reception.” This omnidirectional antenna also has a built in filter to block 3G and 4G signals to prevent interference. It is very thin and about 13.7″ x 12.5″ x 0.02″ and has a 9’11” integrated coaxial cable (total length between antenna and TV).

The amplifier has a switch that allows you to turn the amplifier “On” (green light) or “Off” (yellow light). 
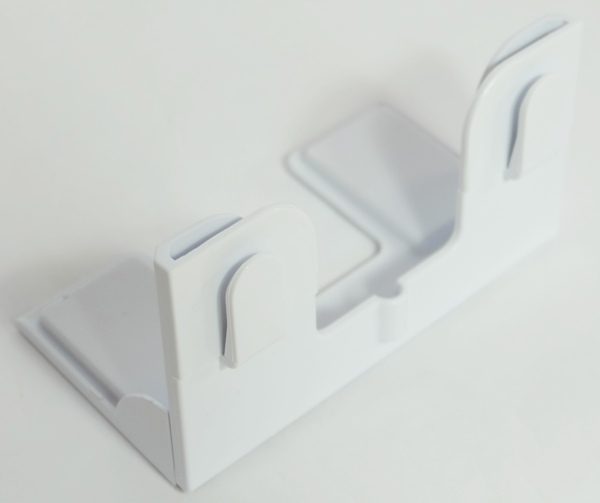
The antenna came with a tabletop stand.
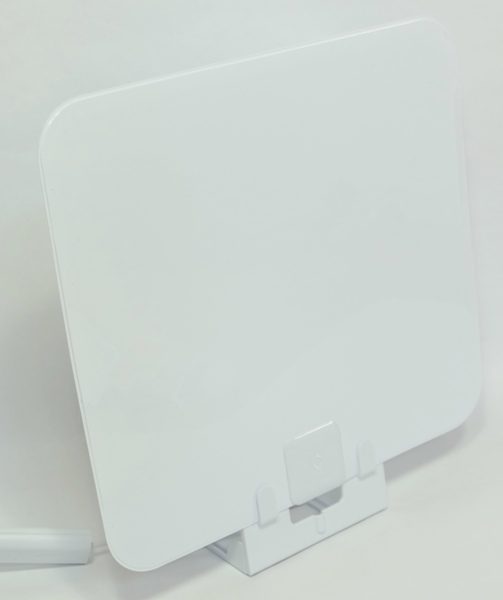
This stand is nice just in case you find an optimal position on top of a desk, table, or bookshelf.

AT-125B Indoor Antenna Use

TV stations in the Fort Worth area:
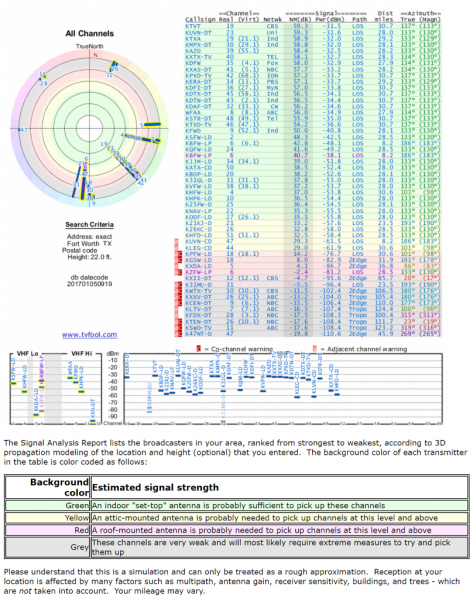
When I performed an internet search for TV stations available near me using TVFool.com, I input an antenna height of 22 ft. because I knew that I was installing the ANTOP outdoor antenna in the attic of our home and I wanted to find all of the towers that the outdoor, as well as indoor, antennas, might be able to detect. The above data shows where our TV towers are located in relation to where we live. The stations are color coded to indicate what type of antenna you would need to receive these channels (the image may be clicked on to view a larger image).  The channels highlighted in green can be received with an indoor antenna and those highlighted in yellow can be received with an attic antenna. Those in red require a roof mounted antenna. This is a useful tool to figure out which type of antenna to choose.

This is the tower information that I found from another website, Over-the-Air Digital Television (otadtv.com). Each of the green rings represents 10 miles each, so you can see that most of the towers are about 30 miles away from us.  In fact, the cluster of stations located in the southeast portion of the map are the only stations we receive. The other individual towers are the low powered towers of independent stations that we don’t pick up. This graphic also shows the terrain (the graph just below the map) between the channel 11 tower and our antenna (and would show the terrain between us and the other towers if the towers were selected).
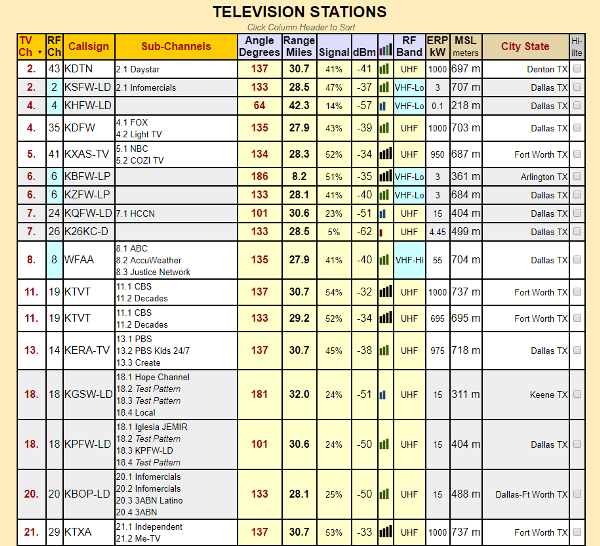
The above list of stations is a small sample of the list of possible stations located near us. The nice thing about otadtv.com is that they provide the following list of information:

  • a list of all the possible virtual channels we might receive (e.g. we receive the Daystar channel 2.1 and not the infomercial channel 2.1)
  • radio frequency (RF) broadcast channel
  • call sign
  • subchannels
  • the angle of the tower in relation to us (degrees off of true North)
  • the range of the broadcast tower (miles)
  • the signal (%) “… based on receiver dynamic range of -5dBm (maximum) to -65 dBm (minimum discernable signal)”
  • the estimated signal power (dBm with respect to 1 milliwatt) – based on a receiving antenna 30 feet above ground level
  • signal bars telling you how well you might be able to tune in that station
  • RF Band
  • Effective Radiated Power in kilowatts (ERP in kW)
  • broadcast tower antenna elevation above Mean Sea Level (MSL).
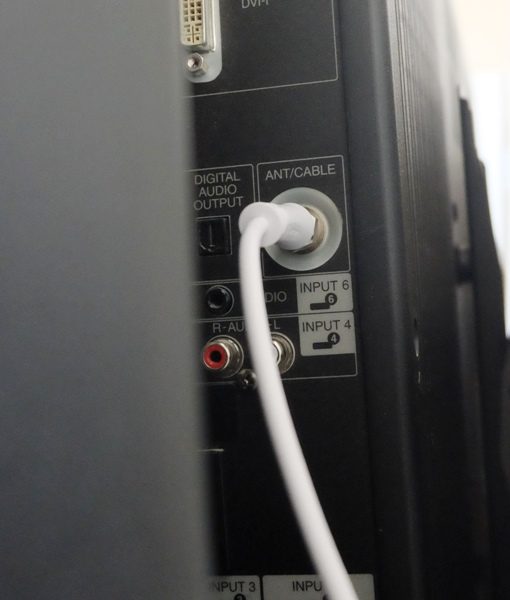
Guest Room Reception: I first tried placing the ANTOP indoor antenna in the guest room. Indoor antenna setups are easy – you simply connect the end of the coax cable attached to the amplifier (which is attached to the antenna) to the TV, …
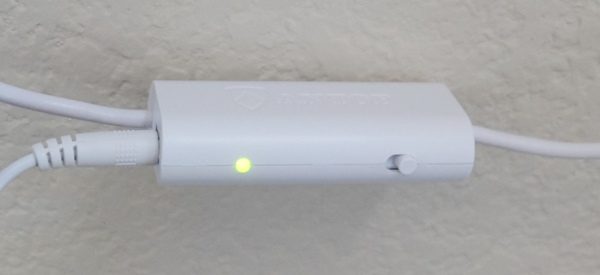
… plug in the amplifier and slide the switch over to turn on amplification (we need amplification here where I live but you may not), …
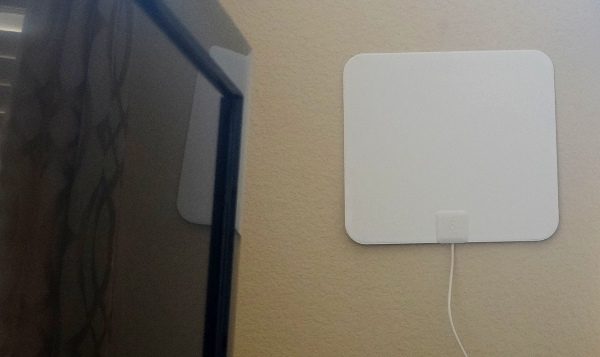
… then pray that you find the best position to receive all your favorite stations within the limited cable length provided by the ANTOP indoor antenna (9′ 11″ from the antenna to the TV). This was the position that tended to receive most channels in our guest room. 

Just after connecting the ANTOP indoor antenna to my TV, I went into the TV settings to scan for all the possible stations that came in using that placement. I then checked to see if all the major networks tune in and if my other favorite channels come in. It never works on the first try so I move the antenna and try it again. And again, And again. And again … (I’ve performed this repetitive process with every indoor antenna that I have tested; it’s something that I’ve come to expect with HDTV indoor antennas perhaps because of issues with the terrain, buildings, and distance between us and the towers). The antenna does have a 40/55 mile range and thus it should receive the channels from our TV towers located approximately 30 miles away. I found that in the guest room I received about 50 channels after the finding the best position.
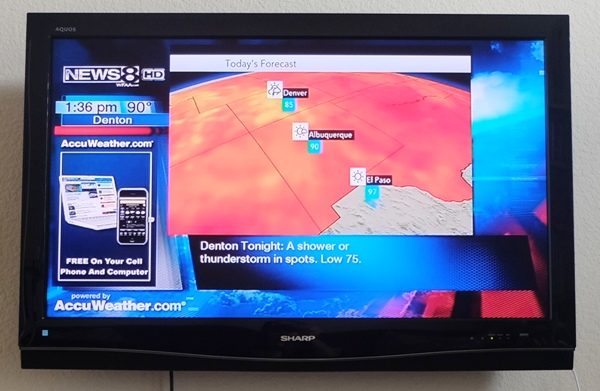
The antenna struggled to tune in all of the channels detected by the channel scan using this antenna position (this was the best position). Whenever I was able to tune in ABC (channel 8.1 in Fort Worth), I had difficulty tuning in NBC (channel 5.1) and visa versa. However, this seems to be a consistent problem with other indoor antennas I’ve tried in this area of the house.
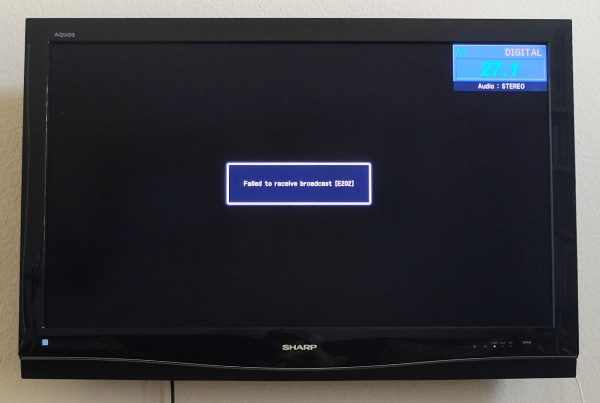
I also had some difficulty with tuning in FOX (channel 4.1), PBS (channel 13.1), and My27 (channel 27.1) although not all at once. Nighttime hours affected the reception, such that stations received during the day did not come in at night and visa versa. These are obviously important channels to me and thus this antenna did not work very well in the guest room.

Living Room Reception: When I placed this antenna in the living room where I was using my Clearstream Eclipse HDTV Amplified Indoor Antenna, the ANTOP antenna performed much better than it did in the guest room. I received 55 channels after performing the channel scan in this room which included all the channels I enjoy watching; however, I think the Clearstream antenna performed a little better – the Clearstream was better at tuning in ABC (I also prefer the Clearstream because it is smaller, has longer coax cable, and has a wonderful removable adhesive which makes positioning it easier). While in the living room, ABC (channel 8.1), channel 21 (KTXA) and ION (channel 68.1) had some pixelation show up during rainy weather using the ANTOP indoor antenna. These are important channels to me and so this was a little disappointing but not unexpected.

Conclusion about ANTOP AT-125B antenna: The ANTOP Paper Thin Smartpass Amplified AT-125B Indoor HDTV took patience to find the ideal placement in the guest room especially with such a limited length of coax cable (9’11”) that came with the antenna, but after doing so, I was able to tune in many of the TV stations, but had trouble tuning in stations like ABC, NBC, FOX, PBS and My27 using just one antenna position. When the antenna was placed in the living room it performed much better (there were some pixelation issues on important stations like ABC and ION during rainy weather) but not quite as well as the Clearstream Eclipse HDTV Amplified Indoor Antenna (the Clearstream is also smaller, has longer coax cable, and has removable adhesive which gives it an edge over other indoor antennas in my opinion).

There are factors that can make tuning in stations difficult. We live in a single family home in a crowded subdivision where the houses are very close together. And although it seems that our terrain here is rather flat, otadtv.com shows that there are some contours between me and the towers. So buildings, the surrounding terrain, weather, cars passing by the house, and even different rooms in our house may affect our reception using this antenna. I’m still on a quest to find an antenna that has no problems with these stations even when cars drive by, or during nighttime hours, or during inclement weather. I’ve been using HDTV indoor antennas for years, but how much better are whole-house attic antennas? Are they worth the extra cost?

FLAT PANEL SMARTPASS AMPLIFIED AT-400BV OUTDOOR/INDOOR HDTV ANTENNA
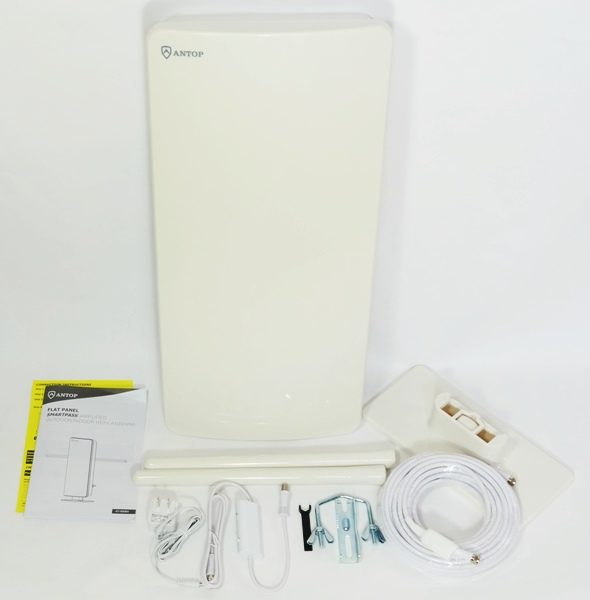
Package Contents

  • Flat Panel Smartpass Amplified Outdoor/Indoor HDTV antenna (AT-400BV)
  • Two plastic coated VHF enhancing rods
  • Indoor Table Stand
  • AC/DC Power Adapter
  • Power Inserter with Smart Switch
  • Wall/Pole Mounting Bracket
  • 39 ft Coaxial Cable
  • Instruction/User Manual

Technical Specifications

  • Application: Indoor/Outdoor
  • Amplification: Smartpass Amplified
  • Reception Pattern: Multi-directional
  • Distance to transmitter: 60/70 mile
  • Frequency Range: 87.5-230MHz, 470-700MHz
  • Gain: Switch-OFF: 10dB; Switch-ON: 33dB
  • Output Level: 100dBuV Max
  • Noise Figure: <3.5dB
  • Impedance: 75Ω
  • Power Supply: DC 12V via power adapter
  • Cable Length: 39ft
  • Color: White
  • Size: 22″ x 10″ x 4.7″
  • Operating Temperature: -40° F to 140° F
  • Whole house solution: Can feed multiple TVs
  • Enhancer Rods to strengthen VHF reception
  • 4G LTE filter: Blocks unwanted 3G and 4G signals
  • UV coating, weather resistant finish
  • Easy home exterior installation: wall, roof, balcony (can be installed in attic and used on table too)
  • Online customer support, installation assistance
  • 12-month warranty

Design & Build Quality
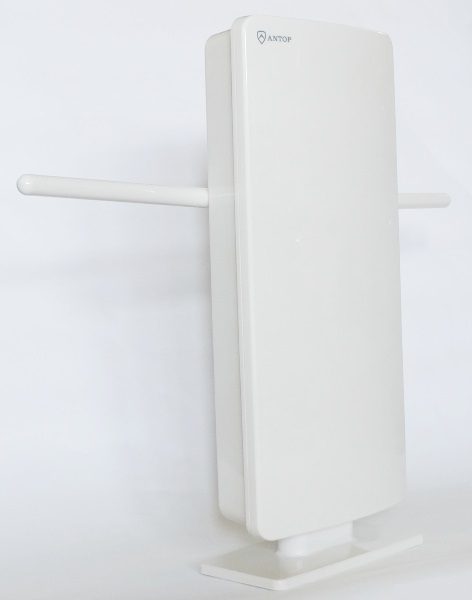
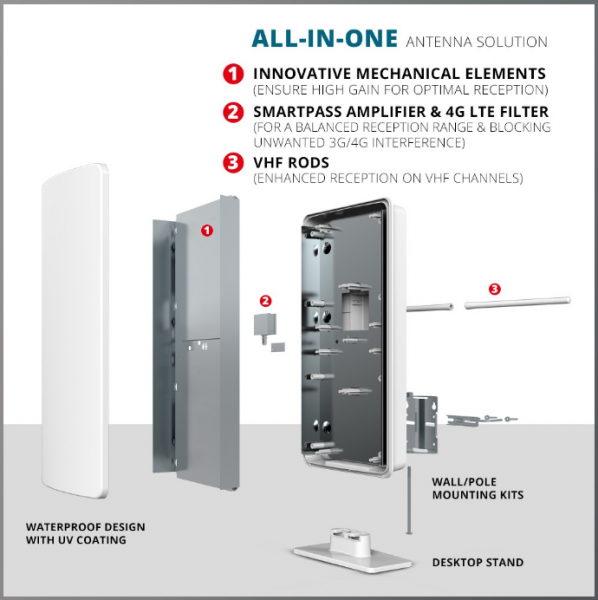
The ANTOP Flat Panel Smartpass Amplified Outdoor/Indoor HDTV antenna (AT-400BV) is encased in rigid white plastic that has been UV coated and has a weather resistant finish. It is a large antenna measuring 22″ x 10″ x 4.7″. It comes with a Smartpass Amplifier and 4G filter for “balanced reception range and blocking unwanted 3G/4G interference”. It also has a white plastic indoor stand for occasions when you may want to set this antenna on a flat surface.
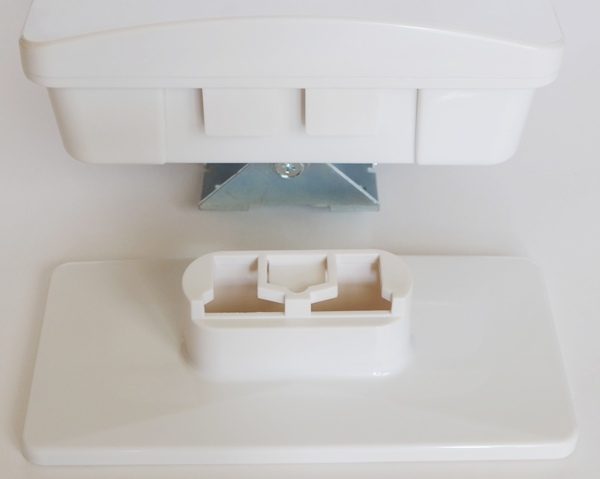
The stand slides onto the bottom of the antenna and clicks in place.
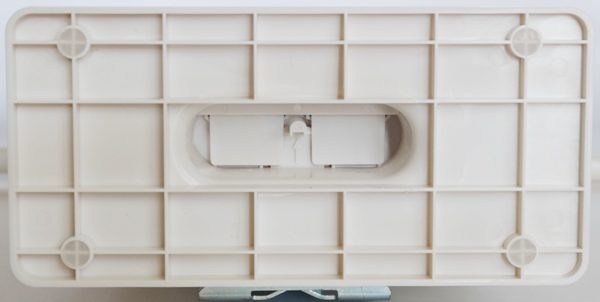
If you should need to remove the stand, you need to depress a small plastic peg located in the center of a hollow area under the stand (in the photo above, you would press the plastic peg up) to release the stand from the antenna.
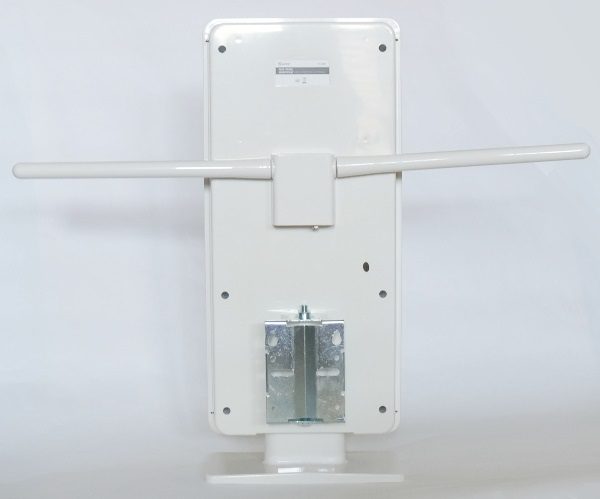
The back of the antenna displays the metal mounting bracket. The mounting bracket projects out from the antenna and pivots side-to-side on a long screw. We used this bracket to attach the antenna to a column in our attic.

The side of the antenna is rather thick measuring almost five inches.

ANTOP provides VHF enhancing rods with the AT-400BV model to strengthen VHF signals. The rods screw onto the back of the antenna to a white plastic “box” area.
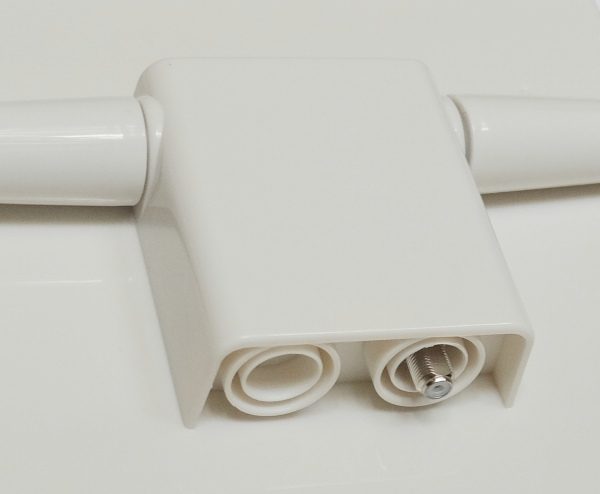
On the bottom of the white “box” area, is a place to attach the coaxial cable.

Installation

We chose to install the Flat Panel Smartpass Amplified AT-400BV Outdoor/Indoor HDTV antenna in the attic for several reasons. First, our roof line is very high and the attic is pretty open (they don’t use trusses in Texas). Also, all our coaxial lines are already in the attic, so it made connecting the antenna very easy. Thus it was a simpler installation compared to installing it outside attached to the roof where we would have had to pull new cable into the house. However, when considering installing the antenna in the attic, we became concerned about its operating temperature. Our attic can get up to 130° F (or hotter) in summer on a hot day (the day we installed this it was 125 degrees in the attic and 97 degrees outside). We contacted ANTOP and confirmed that the antenna is rated for an ambient temperature of up to 140° F, which is good even for Texas.

The first thing we needed to do before installing the ANTOP outdoor antenna was to take the metal mounting bracket off by unscrewing the bolt located on the underside of the antenna.
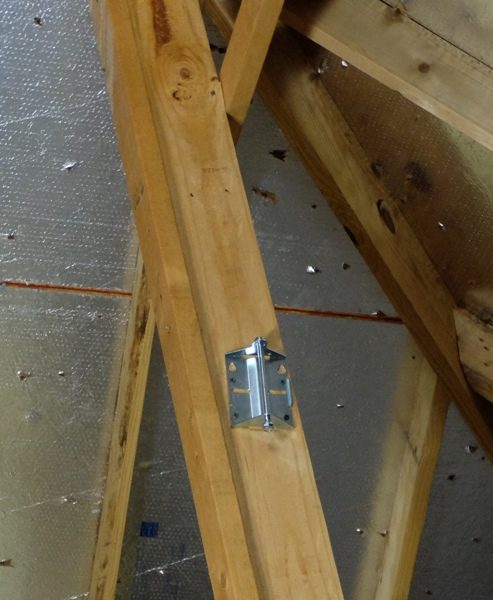
To install the antenna we used wood screws and attached the bracket onto one of the vertical attic columns (the highest location within the attic) on the side that would allow the antenna to be swiveled and pointed in the southeast direction toward the TV towers.

After attaching the bracket, we threaded the bolt back through the bracket and antenna, swiveled the antenna toward the cluster of TV towers located southeast of us, and then tightened the bolt holding the antenna in place.
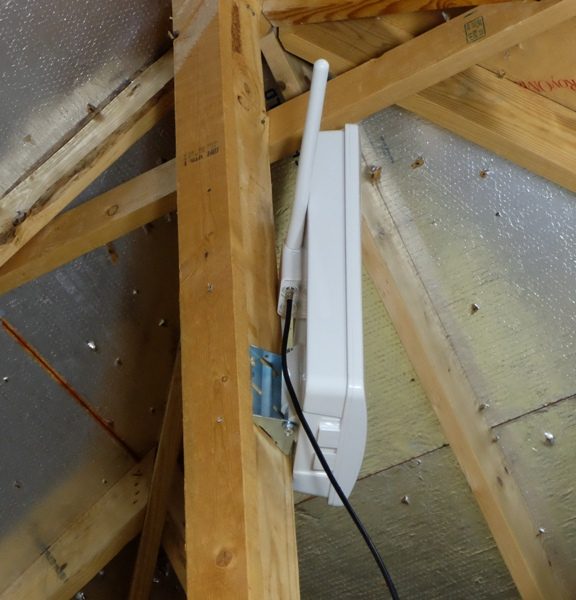
We then screwed one end of the coaxial cable to the back of the antenna (we need a much greater length of cable than that provided by ANTOP, so what is shown here is our own coax).
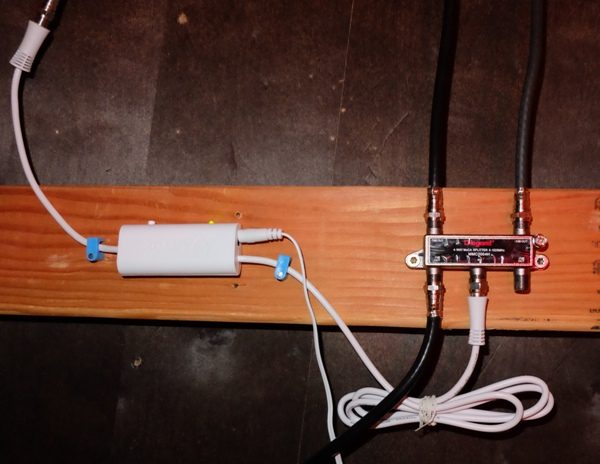
We then screwed the other end to the female end of the cable attached to the power inserter (this looks like the indoor antenna amplifier; this setup is located in our attic as well). The other end of the power inserter was then screwed into the four-way splitter. The power inserter was then plugged into a nearby outlet (which needed to be installed).

It is important to note that we purchased the splitter at Lowe’s, but we were concerned about that fact that the ANTOP instructions stated that the splitter must be capable of “All-Port DC Power Passing”. The splitters we found at the local stores do not have this capability, however, we purchased and installed it anyway and it worked just fine. All-Port DC Power Passing is a feature that allows power to be transmitted back to the antenna. We confirmed with ANTOP that although the instructions stated that All-Port DC Power Passing was required, that was not actually the case for our application.

The black coax cables connected to the splitter as shown in the photo above lead to the coax ports in each room where we have TVs. The final step was to connect each of our three TVs to the antenna. This was accomplished using a short six-foot length of our own coax cables connecting the TVs to the coax ports in each room and voila! Let there be TV channels!!

AT-400BV Outdoor Antenna Use
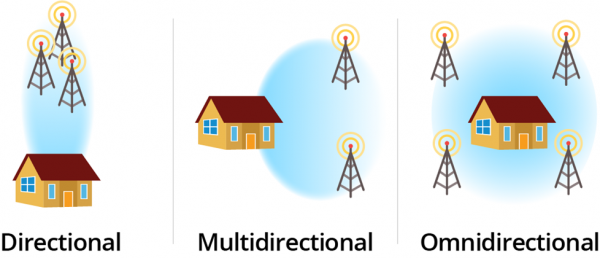
The ANTOP Flat Panel Smartpass Amplified AT-400BV Outdoor/Indoor HDTV antenna is a multi-directional antenna. This type of antenna receives signals from multiple directions. The above graphic comes from Crutchfield and they suggest that “If the transmitters are positioned more than 20° apart, try a multi-directional antenna”. If they are less than 20° apart, then you can use a directional antenna. Because all of our TV towers are southeast of us, the multi-directional antenna was suitable for our purposes.

After performing channel scans for each of our three TVs, 80 channels were detected and each of them tuned in perfectly using this antenna unlike the 55 channels (or less) that we received when using an indoor antenna. Wow, wow, wow, wow, WOW!! Every channel came in crystal clear. ABC is often difficult for us to tune in using an indoor HDTV antenna but comes in beautifully using the ANTOP AT-400BV outdoor antenna. There were no pixelation issues that I have observed even in the middle of sometimes heavy rain (we have been experiencing the rain brought on by the outskirts of Hurricane Harvey). Cars driving by no longer affect the image clarity and because we have the antenna installed at a height of about 22 feet above ground level, we’ve decreased the number of structures between us and the towers. We even receive stations that I have never received with our indoor HDTV antennas.

Conclusion about ANTOP AT-400BV antenna: This is by far the best of all of the antennas that I have tried thus far and if I had realized that it would work so well, I would have skipped the hassles of indoor antennas (finding the optimal position, problems with cars driving by and interfering with reception, or problems with storms interfering with channel reception) and gone with the outdoor/attic antenna a long time ago. We had an attic antenna years ago when we lived in a rural area of Wisconsin and it didn’t work very well. Fast forward to our Texas years and my fears were that after plunking down $200 for the antenna and going to the trouble to install it, would it even work? Holy cow, it works spectacularly and for all three of our TVs!

Final Thoughts

After trying the ANTOP Paper Thin SmartPass Amplified HDTV antenna (AT-125B) and the Flat Panel Smartpass Amplified Outdoor/Indoor HDTV antenna (AT-400BV), there is just no question that I would pass over the indoor antenna for the outdoor one. The indoor antenna had a very short length of coax cable integrated into the antenna (9’11”) and I struggled to find a good position where it would receive the most channels available to it using a single antenna position in our guest room (which happens to be the room farthest away from the TV towers). While in this room, it struggled to tune in stations like ABC, NBC, FOX, PBS and My27 using just one antenna position. It worked best in our living room and received 55 channels after the channel scan but still had some pixelation issues on stations that I like to watch like ABC and ION while it was raining outside.

The outdoor antenna which was installed in our attic at a height of about 22 feet above ground level, received 80 channels on each of our TVs and each channel came in crystal clear even with cars passing by or when it rained. I was absolutely thrilled with the AT-400BV outdoor antenna. I had no issues with it and highly recommend it; however, it is important to mention that it is a multi-directional antenna (not omnidirectional) and that your experience with it may be drastically different based on your terrain, distance from the towers, interference from buildings, etc.

Source: The samples used in this review were provided by ANTOP. Please visit their website for more information on the ANTOP Paper Thin SmartPass Amplified HDTV antenna (AT-125B) or the Flat Panel Smartpass Amplified Outdoor/Indoor HDTV antenna (AT-400BV). Or visit Amazon to purchase the AT-125B for $51.80 or AT-400BV for $143.00.


Product Information

Price: $51.80 (AT-125B); $143.00 (AT-400BV)
Manufacturer: ANTOP
Retailer: Amazon
Pros:
  • -AT-125B ANTOP indoor antenna performed very well in our living room and received 55 channels
  • -AT-400BV ANTOP outdoor antenna (installed in attic) is the true hero and received 80 crystal clear channels without issues (even in rain)
Cons:
  • -AT-125B indoor antenna has very short coax cable length (9'11")
  • -AT-125B had trouble displaying available channels during the day and night using one position of the antenna in our guest room
  • -AT-125B performed best in our living room but had trouble maintaining channel clarity on ABC, ION, and channel 21 (which are favorite channels) during the rain
  • -You may need to purchase longer coax cable to install the AT-400BV outdoor antenna in your attic or your roof

Filed in categories: Reviews

Tagged:

ANTOP AT-125B Indoor Antenna and AT-400BV Indoor/Outdoor Antenna review originally appeared on The Gadgeteer on September 4, 2017 at 9:27 am.

Note: If you are subscribed to this feed through FeedBurner, please switch to our native feed URL http://the-gadgeteer.com/feed/ in order to ensure continuous delivery.