WyzeCam security camera review

Would you believe me if I told you that you can have a home security camera that is priced at only $19.99 per camera AND there are no monthly subscription or cloud storage fees required? Yes, I’m serious. Let’s check out WyzeCam.

What is it?

WyzeCam is a small 1080p home security camera that’s crazy inexpensive but still has all the features of the big guys like Nest and even some features they don’t have, all for only $20 per camera.

What’s in the box?
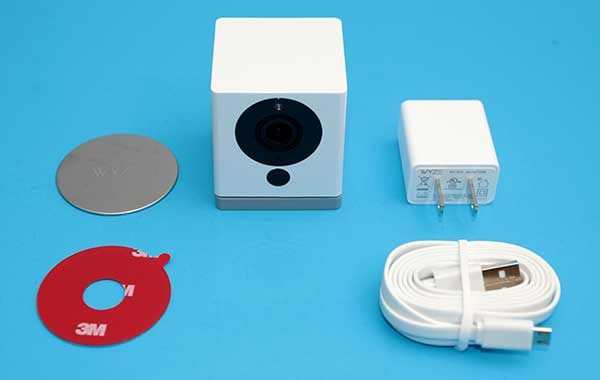
WyzeCam
Steel disk w/3M adhesive
USB cable (5.5-foot in length)
AC adapter

Hardware specs

2.8mm focal length
110 degrees wide angle lens
1920 x 1080 resolution
8x digital zoom
10fps recording
Night vision
2-way audio

Design and features
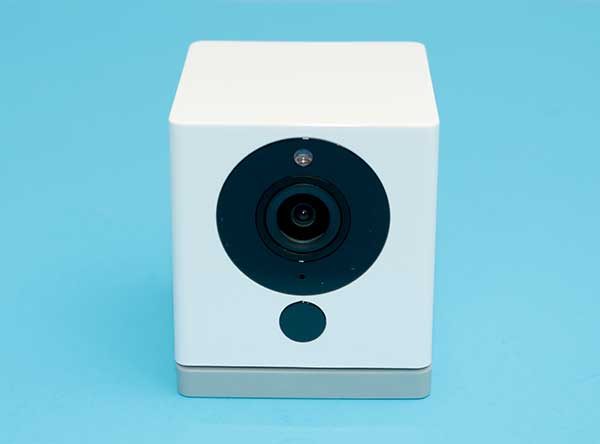
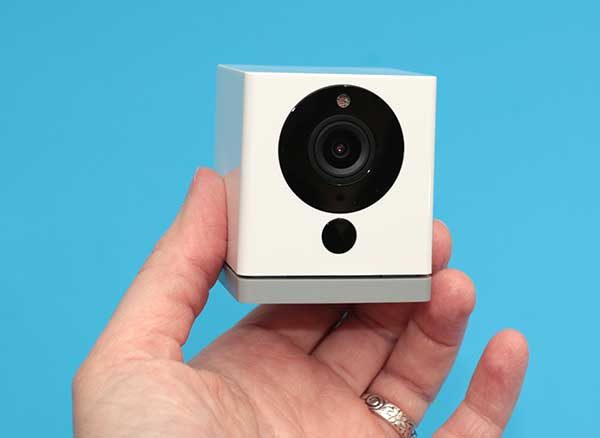
The WyzeCam is a small 2-inch white plastic cube with a grey base and a camera lens and IR sensor on the front.
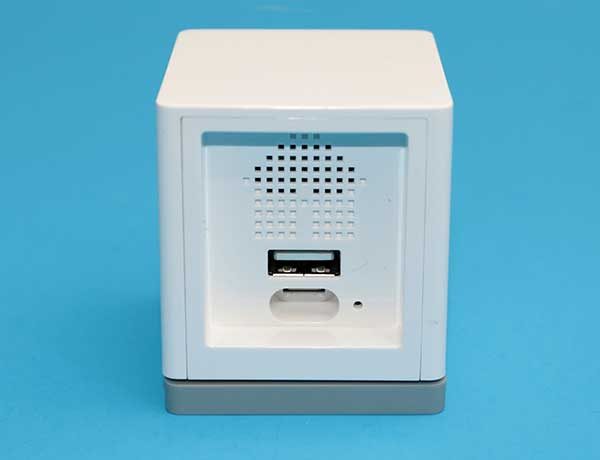
On the back of the camera is a speaker, a Type A USB connector, and a micro USB connector.

In a standard setup, you would connect the included micro USB cable into the micro USB port on the camera and then connect the other end into the included AC adapter.  The Type A USB connector allows you to daisy chain the cameras so that they can share one power connection. To do this, you would connect one WyzeCam the standard way and then connect the included USB cable with a 2nd WyzeCam into the back of the first WyzeCam.
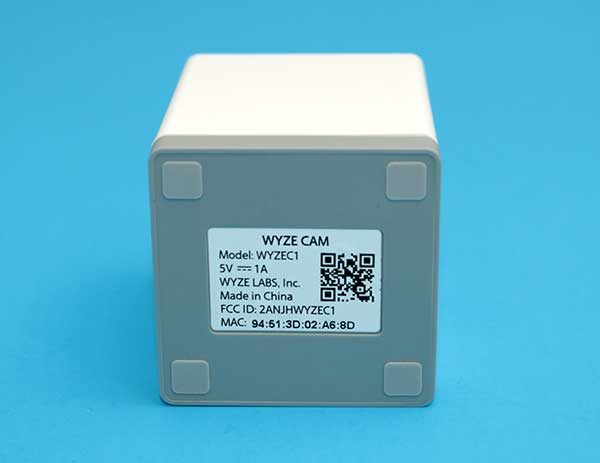
The base of the WyzeCam has a QR code that is used during setup.
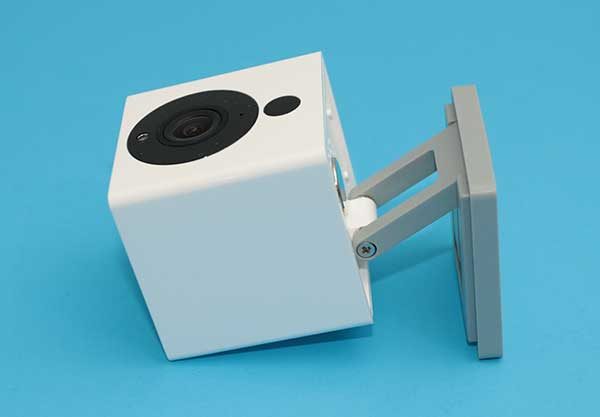
The base unfolds so that you can customize the viewing angle of the camera.
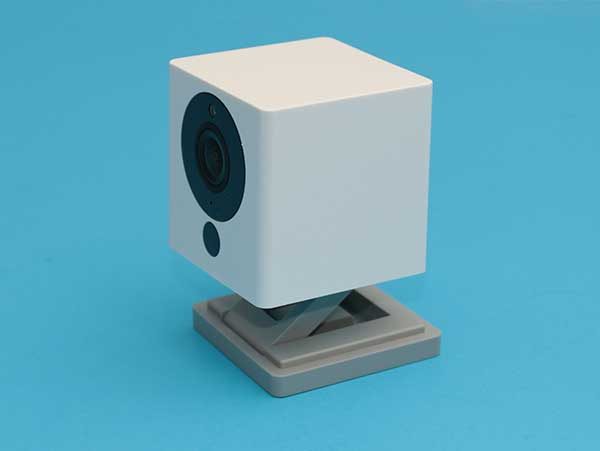
The base of the WyzeCam is magnetic, so you can attach the camera to any steel surface or you can use the included disk to mount the WyzeCam on a wall.
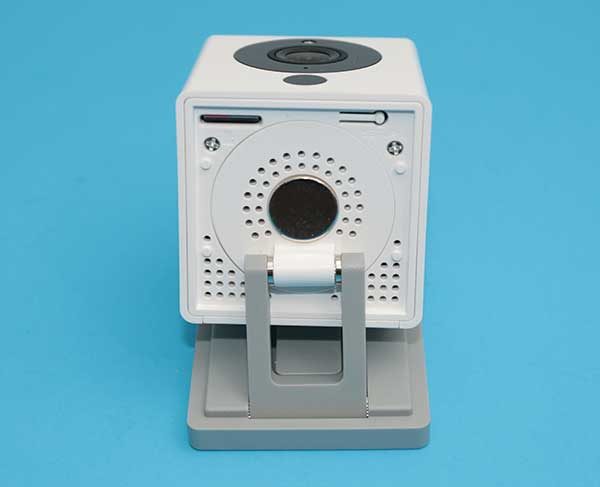
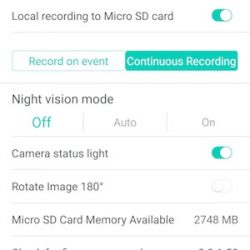
When you unfold the base, it also reveals the micro SD card slot that you’ll use if you want the camera to capture video 24/7. Note that you have to supply your own micro SD card. There’s also a button on the bottom of the camera that is used during the setup procedure.

Setup

The Wyze camera is one of the easiest security cameras that I’ve ever installed. All you do is install the mobile app, add a camera, power up the camera, and follow the screen and voice prompts. I had the first camera up and running within 2 minutes which I think is a record. Adding additional cameras is just as easy.


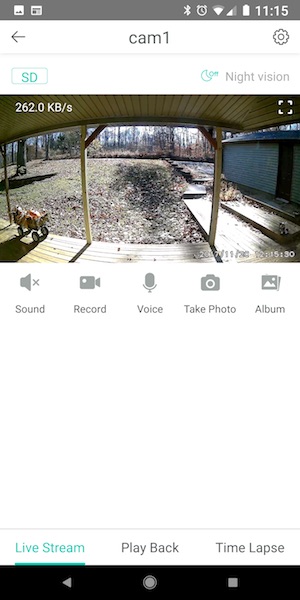
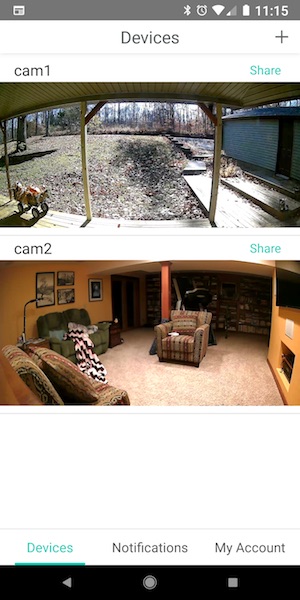
The WyzeCam app is similar to most other security camera apps. It gives you the ability to see a live view of the camera and customize settings.

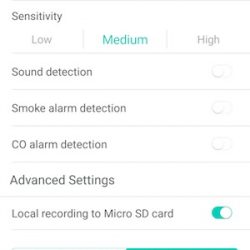
The WyzeCam can notify you via your phone when it detects motion, sound, and even a smoke or carbon monoxide alarm in your home.

This camera can also record motion detection clips locally on a micro SD card (not included), or you can set it to continuously record to the card.

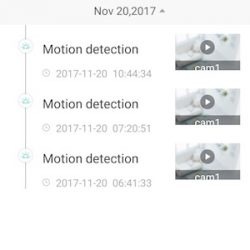
When motion is detected, the camera will save a short clip to the cloud which you can view through the app from anywhere in the world. These clips are saved for 14 days on the WzyCam servers and you’re not charged anything for that service.


The camera’s image quality is very good, as is the viewing angle.
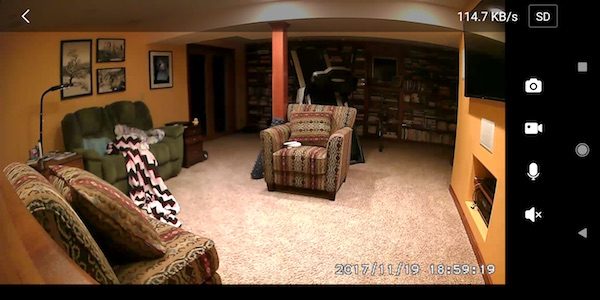
You can record action manually or snap an image by clicking the onscreen buttons in the live view window. You can also listen in on what is happening and have a two-way conversation using the built-in microphone and speaker.
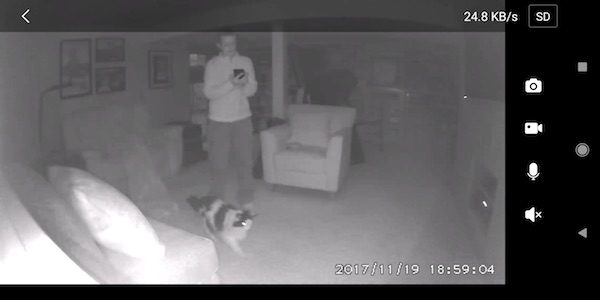
However, night vision is a little fuzzy compared to other security cameras that I’ve tested. but it’s not bad enough to be a deal breaker.


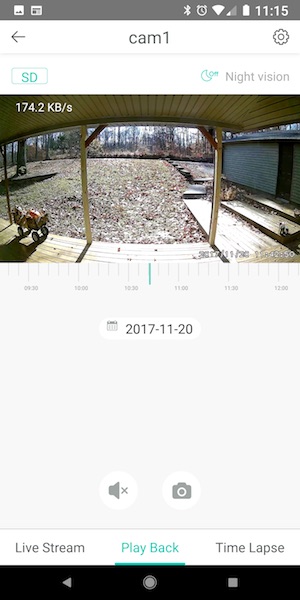
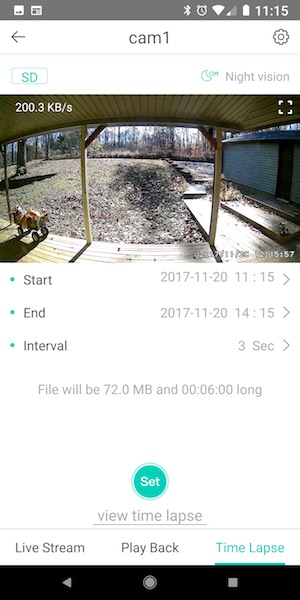
In addition to watching a live stream from the cameras from a remote location, you can also watch past events if you insert a micro SD card into the camera. The WyzeCam even has a time-lapse feature that you can use to condense an entire day down to a few minutes. This is a feature that you have to schedule and you can only view the time lapse when you’re on the same network as the camera.

Time-lapse video example


What I like

There’s not much that I don’t like about this camera. It’s small, the price is affordable for anyone, it has good image quality, alerts you when it detects motion, sound, smoke alarms, CO alarms, provides two-way conversation feature, and is simple to set up.

What needs improvement

There are only two main things that stand out for me that Wyze needs to improve. One is that the application is a little flakey. When I launch the app, 7 times out of 10, it will freeze or not connect to the camera until I kill the app and restart it.

The other improvement that I’d like to see is with motion detection. Sensitivity even when set to the lowest setting is pretty high resulting in motion alerts for things like tree limbs moving or shadows from the sun. I would also like to see a motion trigger zone feature.

And one more that really isn’t an improvement as much as it’s a wish… It would be great if they come out with a water and weather-resistant camera for outdoor use.

Final thoughts

WyzeCam security cameras are an inexpensive way to outfit your home with live streaming cameras that will alert you to motion, sound, smoke, and CO alarms. For only $20 a camera, it’s an obvious choice to go with WyzeCam over other security camera brands that cost 10x as much and lock you into a monthly fee to use their cloud services.

Source: The sample for this review was provided by Wyze. Please visit their site for more info. Amazon also sells them, but for some reason, they are more expensive than buying them right through Wyze.


Product Information

Price: $19.99
Manufacturer: Wyze
Retailer: Amazon
Pros:
  • Very easy to setup
  • $20 per camera and no monthly fees
  • Good image
  • 24/7 image capture option with microSD card
Cons:
  • Can't customize motion trigger areas
  • App is a little flakey

Filed in categories: Reviews

Tagged:

WyzeCam security camera review originally appeared on The Gadgeteer on November 20, 2017 at 2:43 pm.

Note: If you are subscribed to this feed through FeedBurner, please switch to our native feed URL http://the-gadgeteer.com/feed/ in order to ensure continuous delivery.

DBPOWER T21 LED projector review

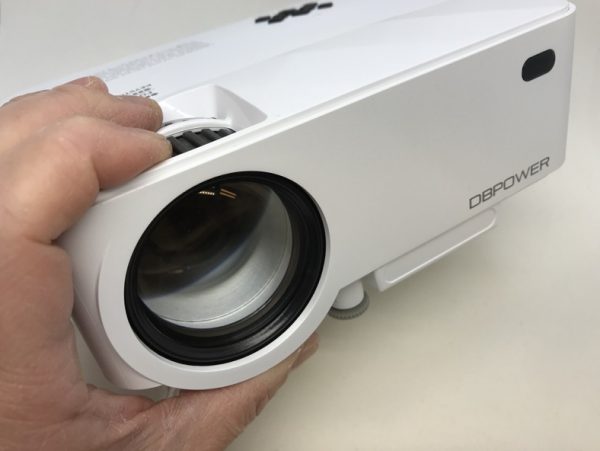
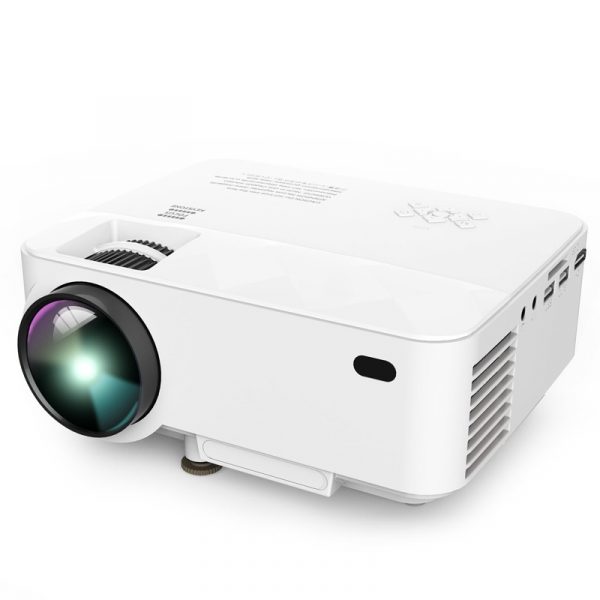
It seems that inexpensive projectors are everywhere. Today we’re going to look at an LED-based projector in the $100 range, the DBPOWER T21 1800 lumen LED projector.

  • Imaging technology: TFT LCD, Brightness: 1800 lumens
  • Contrast: 1000:1
  • Aspect ratio: 16:10
  • Projection ratio: 1.4:1
  • Native resolution: 800×480 pixels
  • Supported resolution: 1920×1080 pixels
  • Keystone: Manual correction 15°
  • Throw distance: 1.5-5M
  • Screen size: 32-176 inches

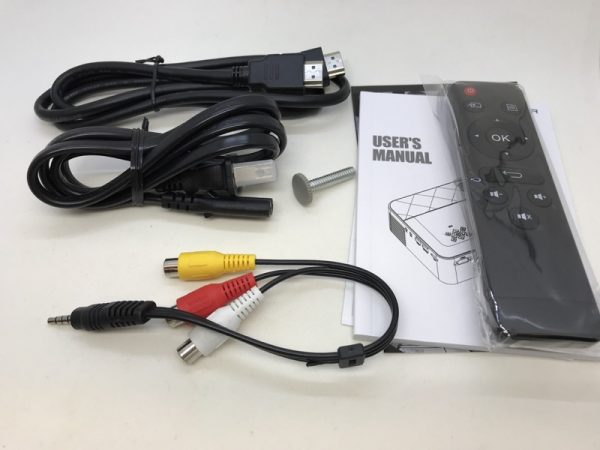
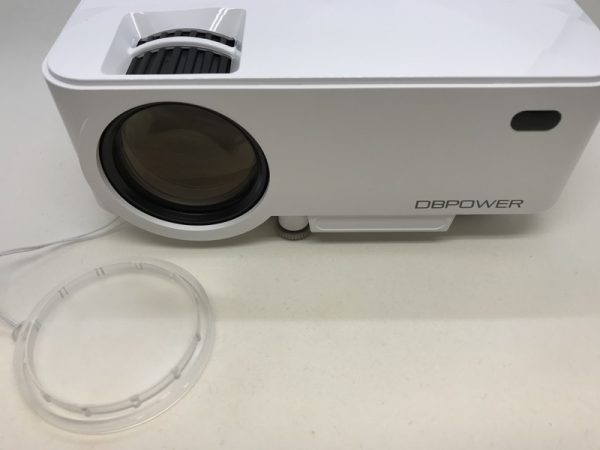
The kit came with an HDMI cable, composite video cable, power cord, height screw, remote and manual. A lens cap was already attached to the projector.


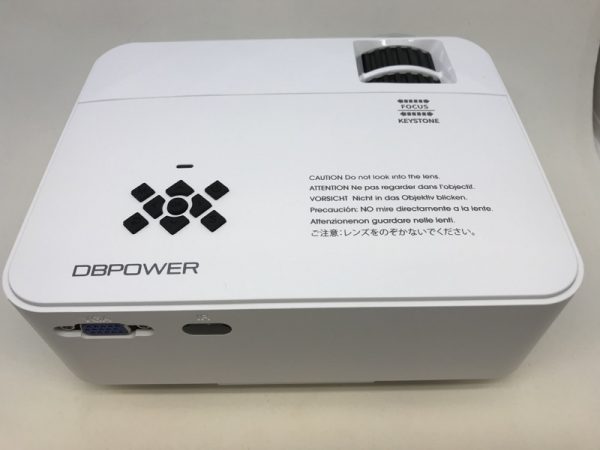
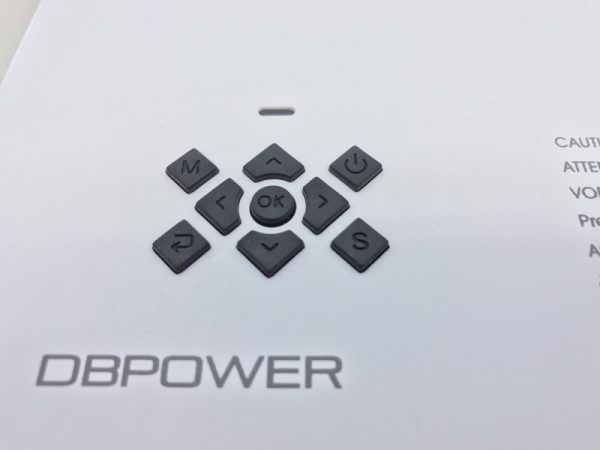
The top side has the focus and keystone correction dials, as well as 9 push buttons if you can’t find the remote.

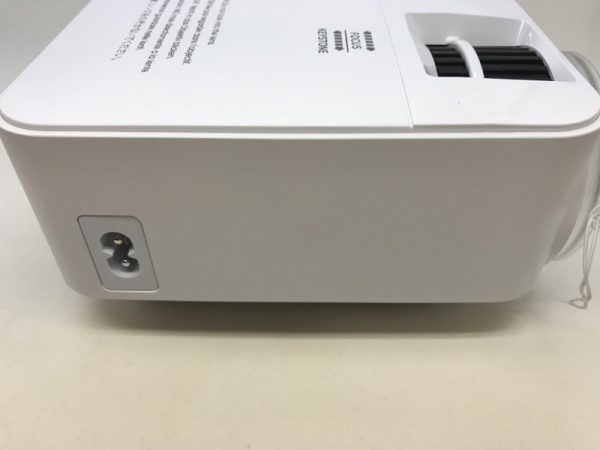
Note the power plug on the side.  The AC cord goes directly here. No external power “brick”.

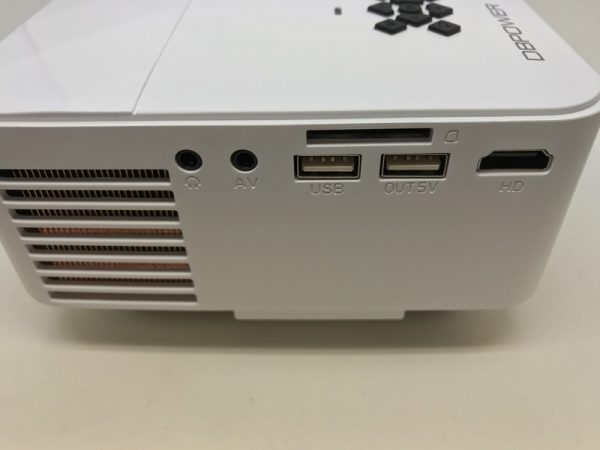
From left to right: Headphone output, composite video input, SD card slot, USB port, USB charging port, and HDMI port.

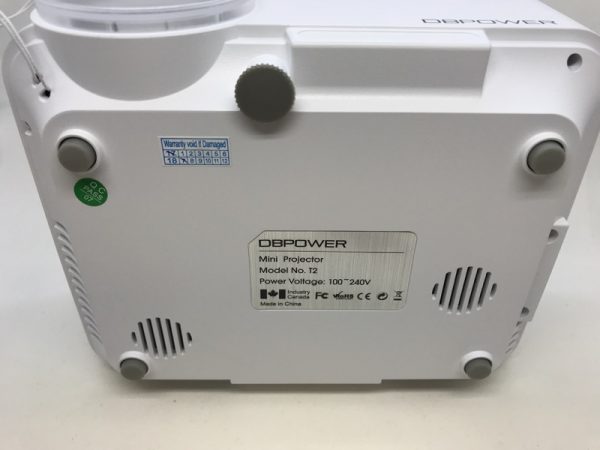
The bottom, with the height-adjustment screw in place.

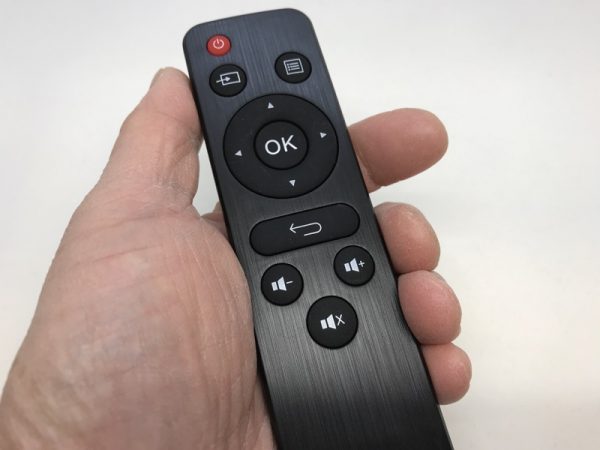
The handheld remote duplicates the functions of the control panel.  Batteries not included.

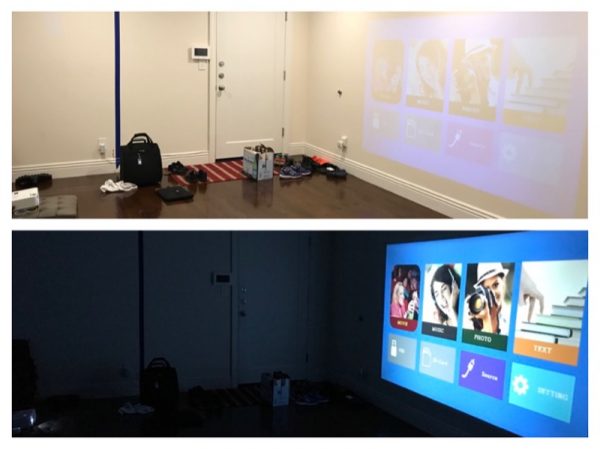
We just finished repairing our floors in our downstairs room (note the tape on the walls), so I had a clear space to set up the projector.  As you can see, the image is easily washed out from the ceiling lights.  Turn the lights off, and the image becomes much clearer.

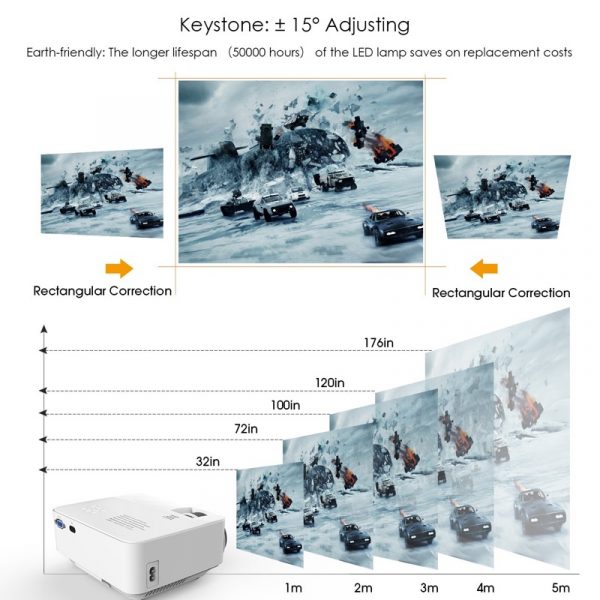
This table should give you a pretty good idea on the scaling.  I found the keystone correction dial to be quick and easy to use since it’s a physical adjustment, not pixel tweaking.

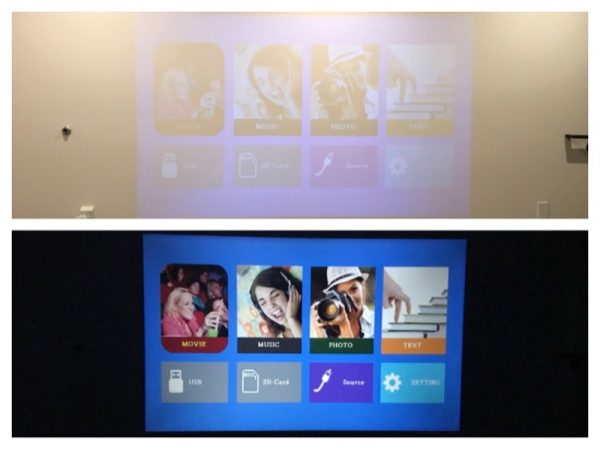
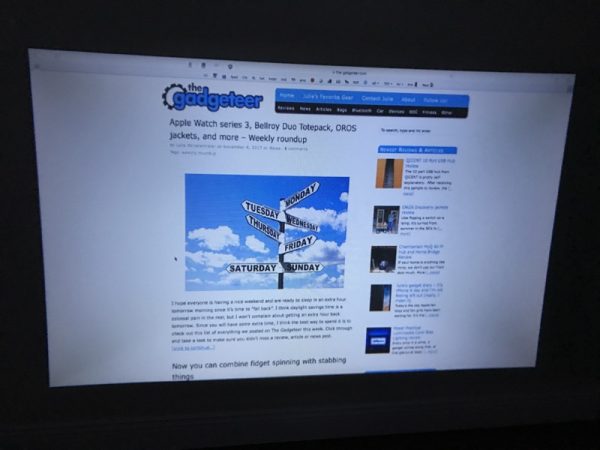
Since the native resolution of the projector is only 800×480, expect some strange scaling artifacts to happen. Here I’ve connected my laptop to the projector via HDMI, and you can see the “jagged” effects of scaling.

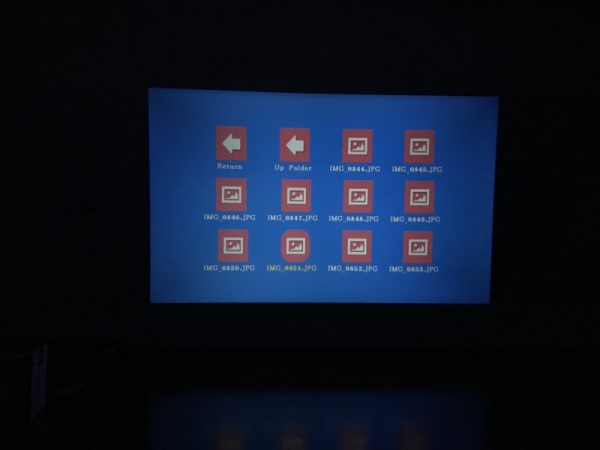
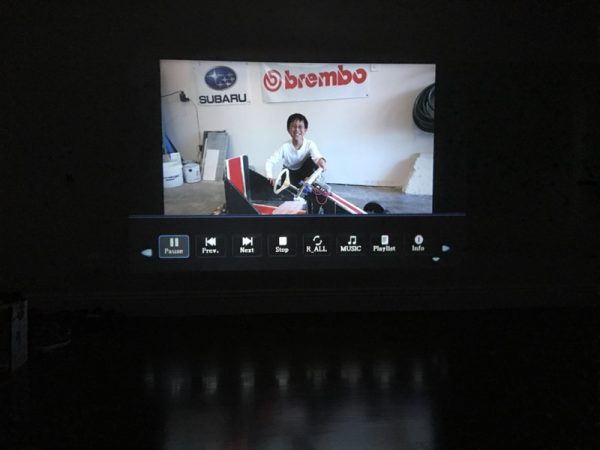
The projector also accepts SD card and USB to playback images and video.  Since you’re not reading text, the results are much more pleasant.

I would probably not use the DBPOWER T21 projector for projecting web page text or Powerpoint presentations from a laptop since the native resolution of the projector is only 800×480. In fact, the Amazon page “reminders” even indicates “Not recommended for PPT, word, excel or business presentations.”  I have no way to verify if the projector puts out 1800 lumens, so you need to be able to dim the room completely for best results.  If you can control your ambient lighting and you just need simple video, the DBPOWER T21 is an inexpensive, simple to use projector.

Source: The sample for this review was provided by DBPOWER. Please visit their site for more info and Amazon to order one and read other reviews.


Product Information

Price: $101.99
Manufacturer: DBPOWER
Retailer: Amazon
Pros:
  • Lightweight, no external power brick, simple manual focus and keystone controls
Cons:
  • Native resolution is only 800×480 pixels (supports up to 1920×1080 with scaling). Ambient light washes the image out pretty fast.

Filed in categories: Reviews

Tagged:

DBPOWER T21 LED projector review originally appeared on The Gadgeteer on November 20, 2017 at 11:30 am.

Note: If you are subscribed to this feed through FeedBurner, please switch to our native feed URL http://the-gadgeteer.com/feed/ in order to ensure continuous delivery.
Stand Corrected perfect posture stretching device review

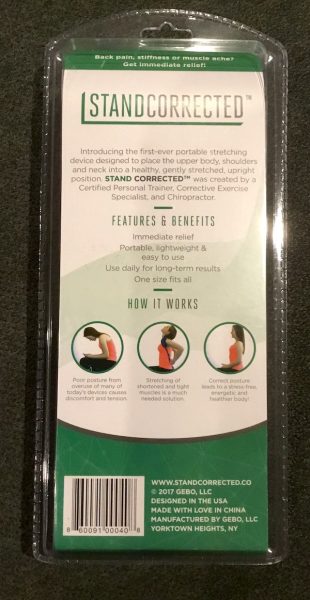
Do you have soreness and discomfort from being hunched over your electronic devices all day? The Stand Corrected is a stretching tool designed specifically to relieve that tension in your upper body, neck and shoulders. The designers also claim that it can help to straighten your spine and undo years of bad posture problems with regular use. Let’s go check it out and see how it works!

What is it?

The StandCorrected was designed Dr. Tom Carpenter, a certified trainer, chiropractor, and corrective exercise specialist. By elongating shortened and tight muscles in the upper body, the claim is that the device will correct posture issues and pain associated with hunching over our electronic devices all day. They even claim that the StandCorrected can reverse damage from years of poor posture is used regularly over time. 

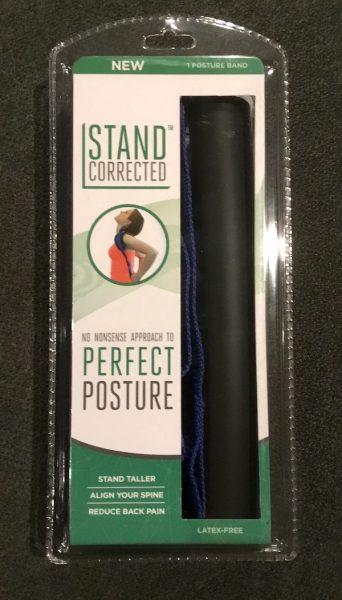
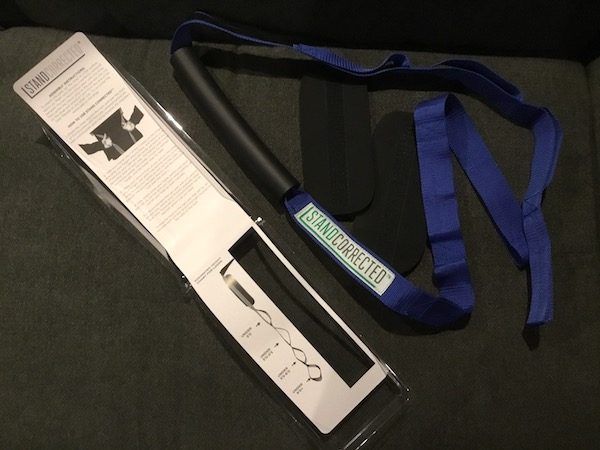
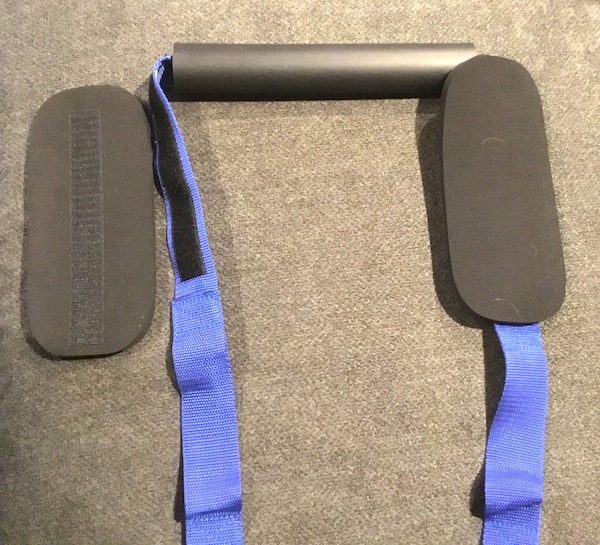
Out of the box, the Stand Corrected is a simple device. There’s a foam tube, through which is inserted a nylon webbing strap with a series of loop handles stitched into it. A pair of Velcro strips is set in the strap at either side of the tube, to which you attach a pair of foam pads. It’s all well constructed with thick foam padding and wide, durable nylon webbing. 

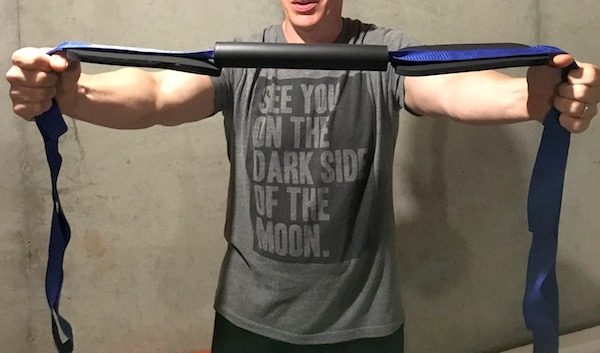
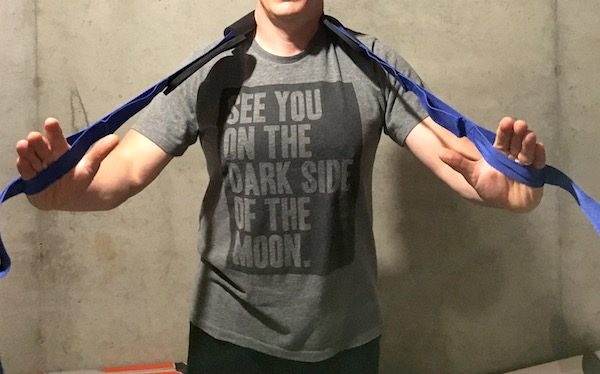
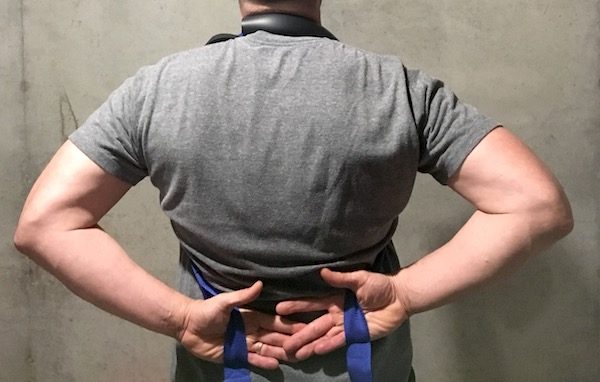
Using the Stand Corrected is just as simple. Start by standing or sitting up as straight as possible. You’ll place the tube behind your neck, with the pads resting on your chest at the shoulders. Grip the strap at the appropriate-length loops for your height, extend your arms to make sure it’s centered, then bring your hands around to the small of your back. Pull downward to create tension on the pads at your shoulders and the tube at the base of your neck, and look up. If you’re doing it right, you’ll feel the stretch at the base of your neck as you gently pull the straps down and continue to look up. Hold that stretch for up to 2 minutes (Stand Corrected recommends you start at 15 seconds, and work your way up), and release.

There are some very helpful instructions on the web site to help you get started, including a video to walk you through the motions. I was able to successfully execute the stretch within minutes of opening the box. It’s that simple.

Does it really work?

Getting older sucks. I’ve had issues associated with poor posture over the past few years, and have been working to correct them with stretches and exercise. Pulling the StandCorrected out of the box, it struck me as another one of those “as seen on TV” contraptions (Ab Roller, anyone?) that looks nice on an infomercial but doesn’t actually do anything. Honestly, I didn’t believe that this thing was going to work.

You know what? I was wrong.

At first use, I could feel a difference in my neck and shoulders. You know that lovely “pop-pop” sound you get from a good stretch, followed by that sense of tension relief? Yeah. I actually got that. I made my wife test it (despite numerous eye-rolls) and she was equally surprised. 

I’ve been using it regularly for several weeks now. After working at home all day, pecking away on the laptop, I often get stiffness & soreness in my back, neck, and shoulders (again, getting older sucks). I’ll use the Stand Corrected a couple of times throughout the day, and it really helps to straighten things out and relieve that tension.

There’s also something to be said for simple convenience promoting regular use. Stow it in a closet or drawer, grab it for a quick two-minute stretch, and you’re on your way again. It’s easy to enough to use that you don’t mind strategic games several times a day. You could throw it in the drawer at the office, too… it’s also discrete and easy to pack if you want to take it with you on an extended trip.

Will it reverse alignment and posture issues over time? I don’t see any studies done with the device to support these claims. And you should consult your physician before engaging in any exercise or stretching routine, especially if you have chronic issues. I will tell you that, after several weeks of regular use, I do feel a difference. I think it’s a great addition to your regular stretching routine.

The Stand Corrected stretching device retails for between $20 and $25 depending on where you shop. It’s available at Amazon, Walmart, Sears, and Kmart. Visit the Stand Corrected site and click on the “Shop Now” link for purchasing options.

Source: The sample for this review was provided by Stand Corrected. Please visit their site for more info and Amazon to order.


Product Information

Price: $20-$25
Manufacturer: Stand Corrected
Retailer: Amazon
Pros:
  • Works as designed for relieving muscle tension in your upper body, neck and shoulders.
  • Well designed and constructed.
  • Simple operation.
Cons:
  • May not work as intended if you have a chronic condition — always check with your doctor first!

Filed in categories: Reviews

Tagged:

Stand Corrected perfect posture stretching device review originally appeared on The Gadgeteer on November 19, 2017 at 9:45 am.

Note: If you are subscribed to this feed through FeedBurner, please switch to our native feed URL http://the-gadgeteer.com/feed/ in order to ensure continuous delivery.
SHOTBOX portable photography light box review

As a product reviewer, the pictures that I take of the products that I’m reviewing are almost as important as the words I write about those products. The old adage “a picture is worth a thousand words” is still true and I want my pictures to be as good as they can be. I’ve been using a Canon 70D DSLR and a Canon Speedlite flash for years but now I’m actually switching over to using my Pixel 2 XL as my main camera and the SHOTBOX is going to make that transition much easier. Let’s take a look.

What is it?

SHOTBOX is a portable and collapsible photography light box that has been designed to be used with your smartphone.

What’s in the box?

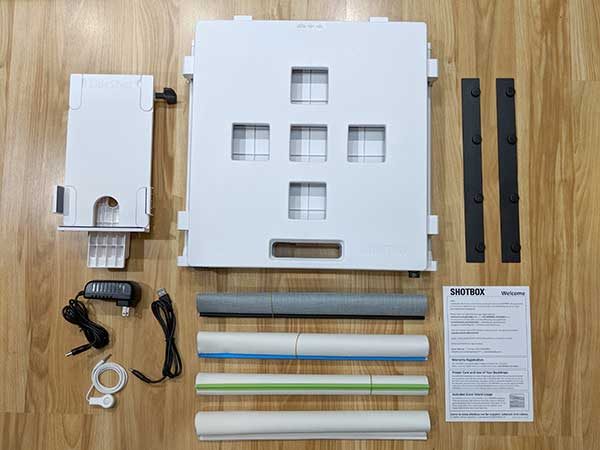
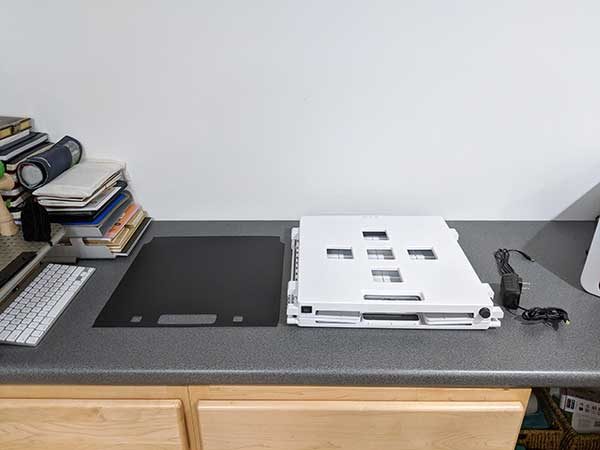
I was sent the SHOTBOX Deluxe Bundle with the SideShot, Backdrops and Deluxe Tote, a PANELS Complete set,

SHOTBOX light box
SideShot smartphone holder
4 backdrops
2 glare strips
Smartphone shutter release cable
USB to power cable
AC power adapter
Instructions

Also included is black/white reversible floor panel.

The PANELS Complete set includes:
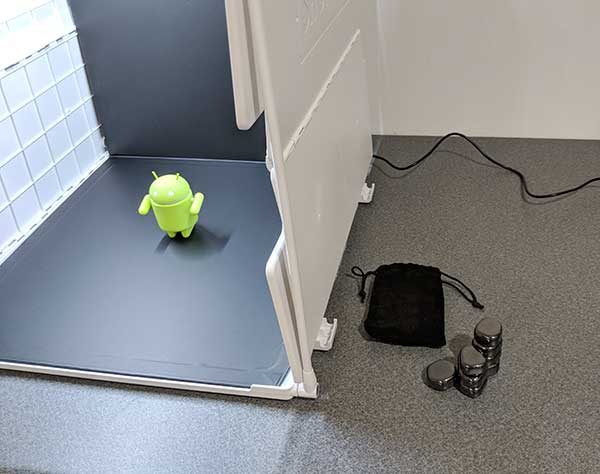
Magnetic base unit
12 Hematite magnets
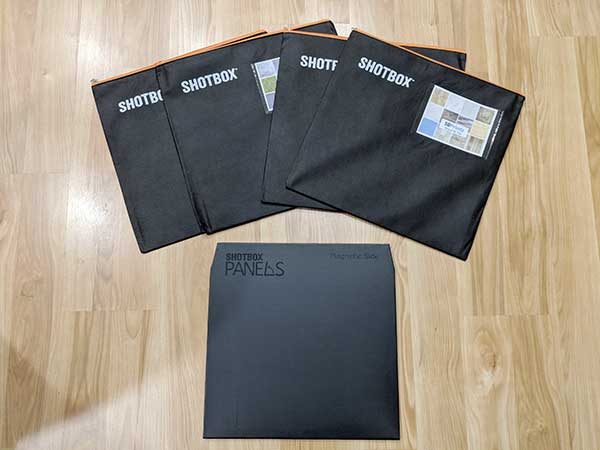
4 panel sets that are separated into zippered storage sleeves

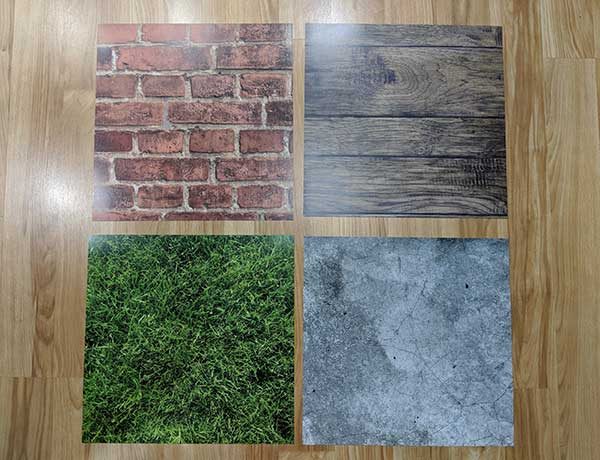
The panels include a variety of different textures and colors like you see above. They really help you get different looks for your product shots.

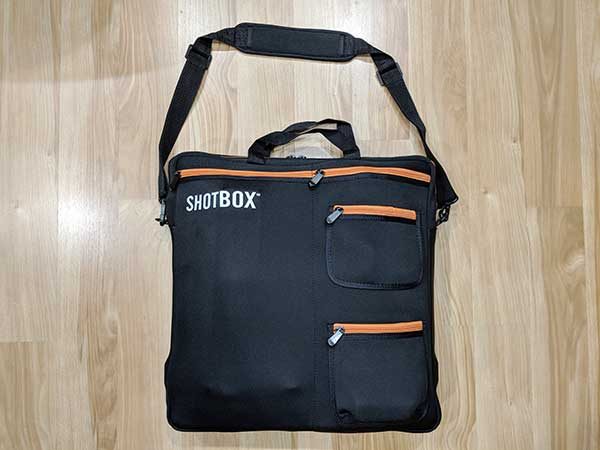
The deluxe carry tote is an awesome neoprene bag that has zippered pockets for everything that you see above except for the PANELS sets.

Setting up the SHOTBOX

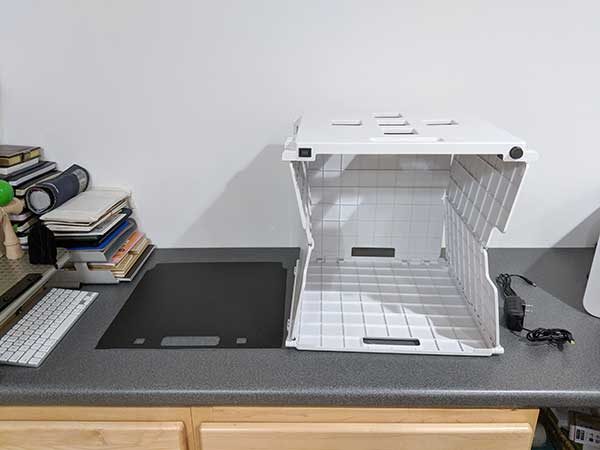
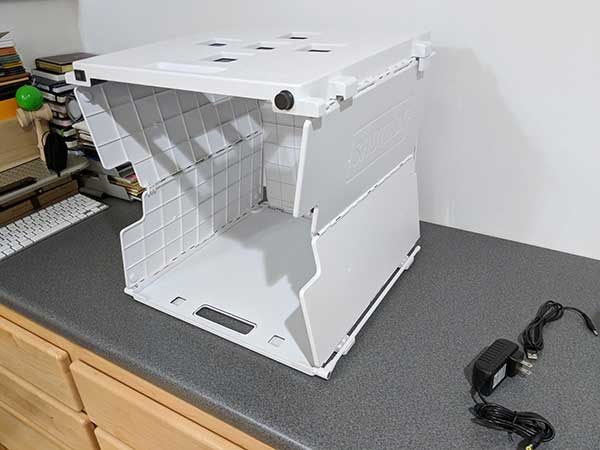
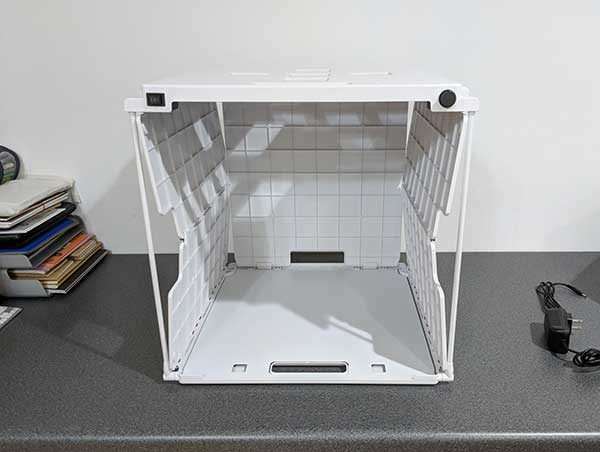
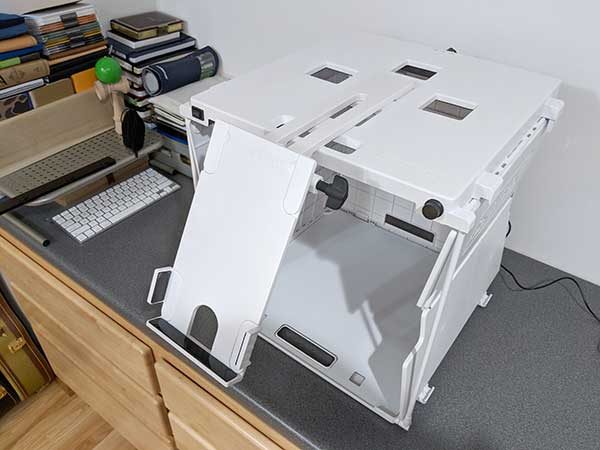
The heavy duty plastic SHOTBOX is easy to setup because all you really have to do is lift up on the top and reach inside to position the back panel into the slots on the bottom.

The next step is to lift the support legs on each side to secure the box.

You can then slide in the reversible floor panel that has a white and a black side. In the image above, I have the white side up.

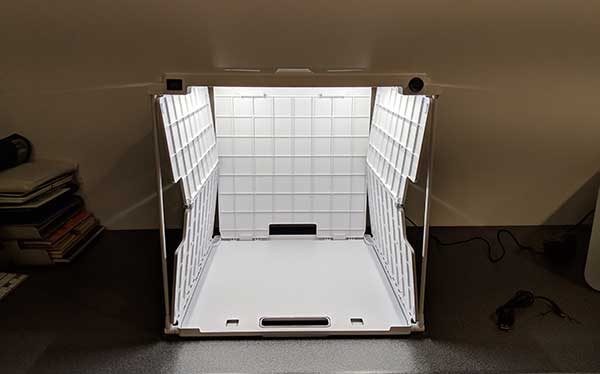
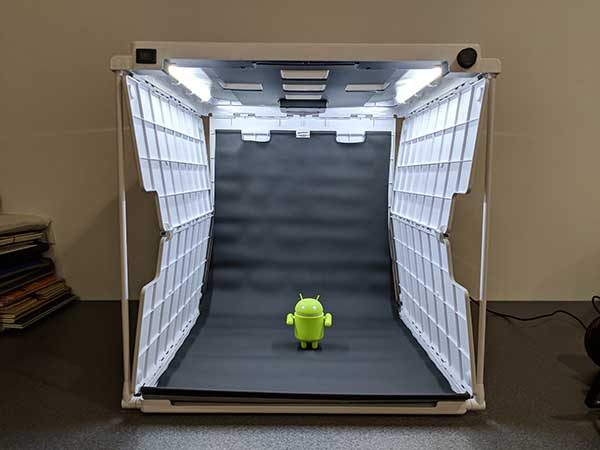
All that’s left to use the basic functionality is to attach the included AC adapter and flip the switch on the right to either have the left LED light strip on, the right LED light strip on, or both on.

Then the knob on the right will let you control the brightness. This knob also doubles as the power switch.

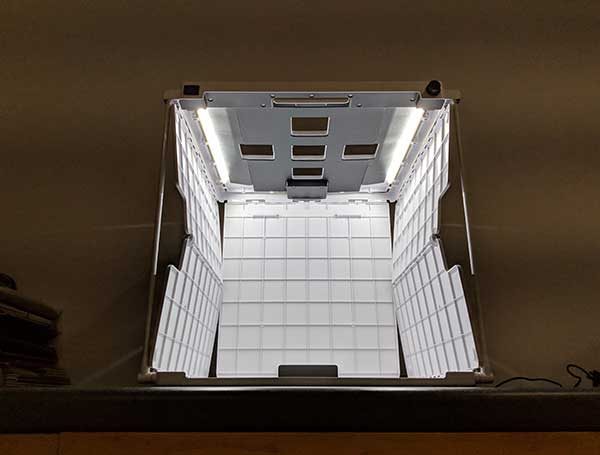
The LED lights strips are very bright and have a 50,000 hour lifespan which equals about 22+ years of use using the box for 6 hours a day.

At this point, you can start using the SHOTBOX to take product shots by placing the product inside the 14.25 wide x 15 tall x 15 inch deep box and shoot pictures either straight into the box from the front or from the top through one of the openings.

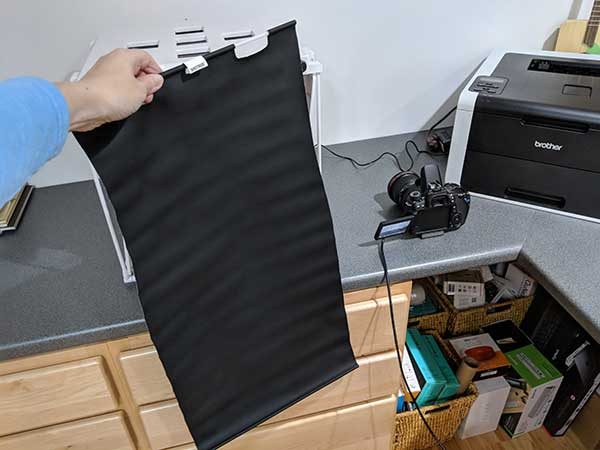
But to make the background look seamless, you will want to use one of the included backdrops.

The backdrop hooks to the back wall of the SHOTBOX to cover the back and the bottom like you see above.

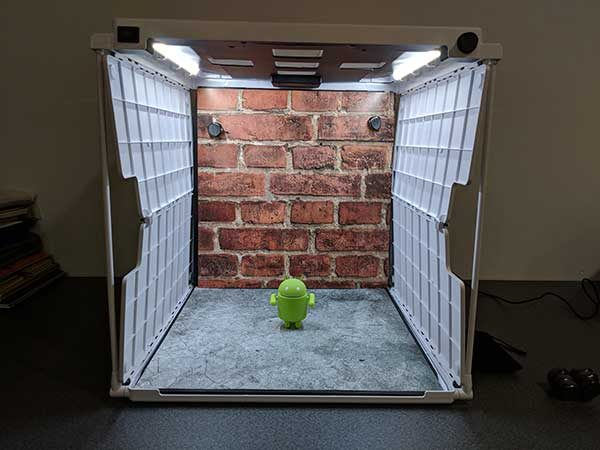
If you want to create an even nicer background, you can buy the optional PANELS set which comes with a folding magnetic panel that slides into the SHOTBOX. Then using the included magnets, you can use a panel on the back and a panel on the bottom to create the look you want.

In the example above, I used a concrete panel for the floor and a brick panel for the back wall.

Here’s the resulting image. Very cool right?

Your options are almost limitless using all the different panels.

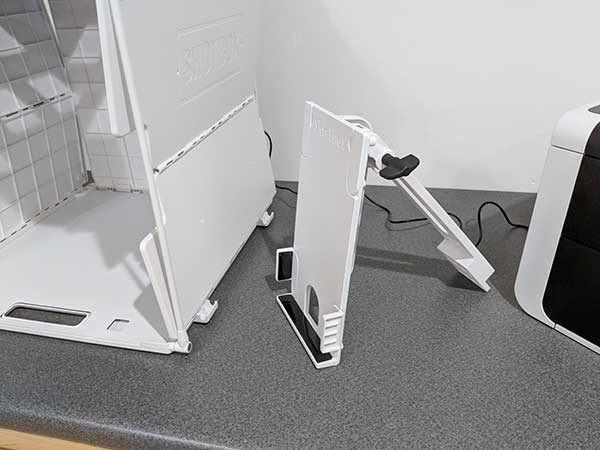
But wait, there’s more! You can also use the SideShot which is designed to hold your smartphone.

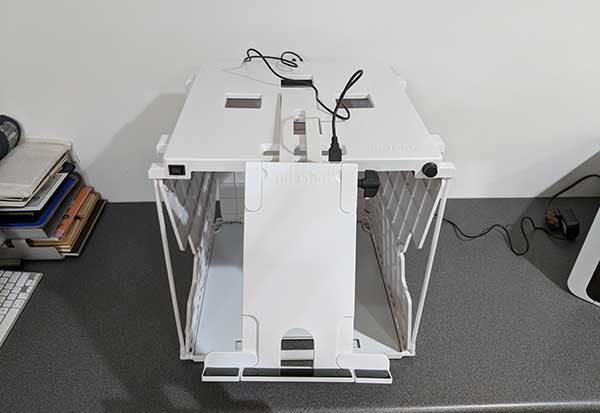
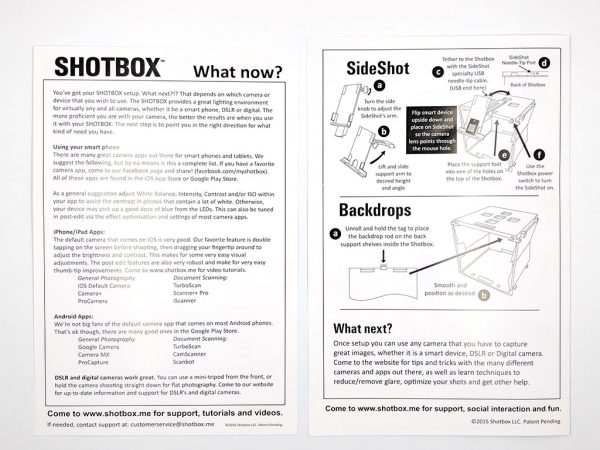
The SideShot has a support arm that fits into one of the openings on top of the SHOTBOX and then you can use the side knob on the SideShot to adjust the angle.

The included USB cable connects from the SideShot to the back of the SHOTBOX to provide power to the SideShot. Why does the holder need power you ask?

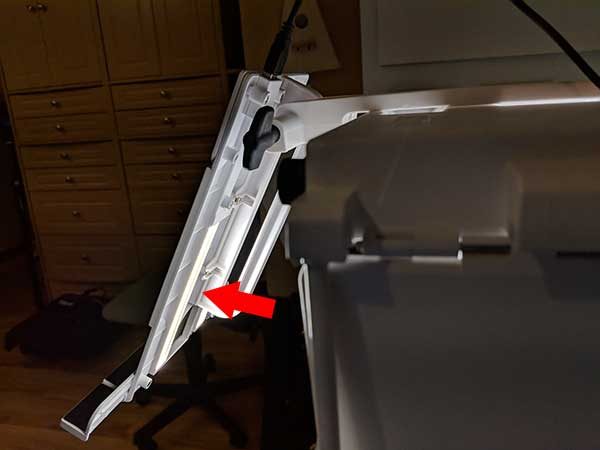
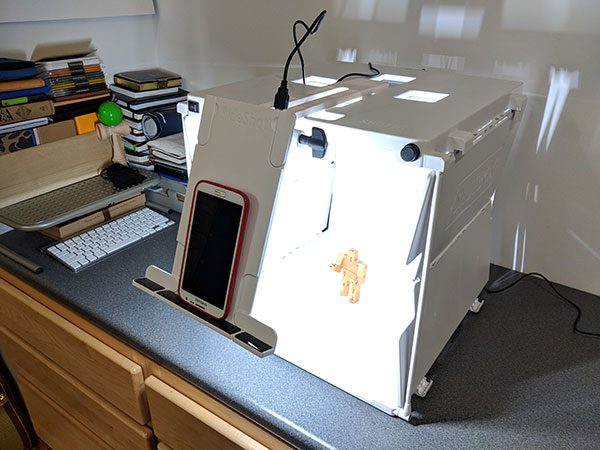
Because it lights up too! The SideShot has two LED strips of its own that shine into the SHOTBOX to provide more light on the product that you’re photographing.

When the SideShot is in position you can then place your smartphone upside down or sideways on the SideShot ledge so that the main camera points through the opening that looks into the SHOTBOX.

Here are some product shots that I’ve taken with the SHOTBOX and my Pixel 2 XL.

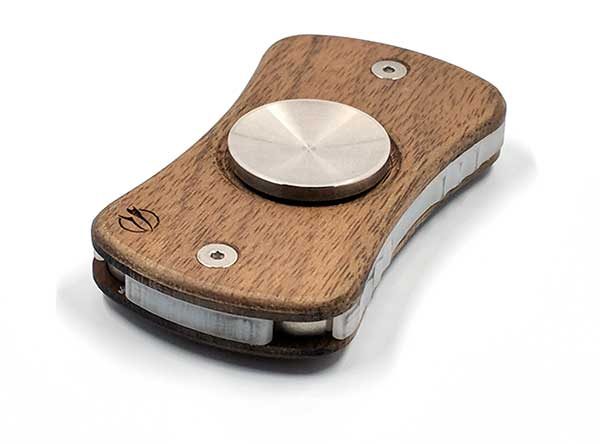
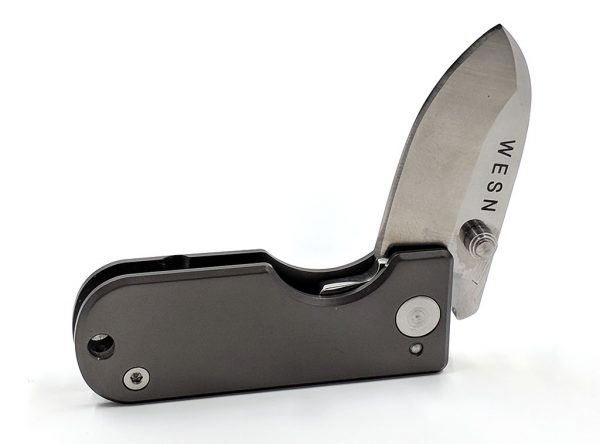
The first shot above of the fidget spinner was touched up in Photoshop to adjust the white balance and crop. The other two shots were straight out of the camera, so you can see that there can be some shadows that may or may not need to be cleaned up. But there is a way to minimise or even prevent shadows and glare, which is important if you use the SHOTBOX to take pictures of documents.

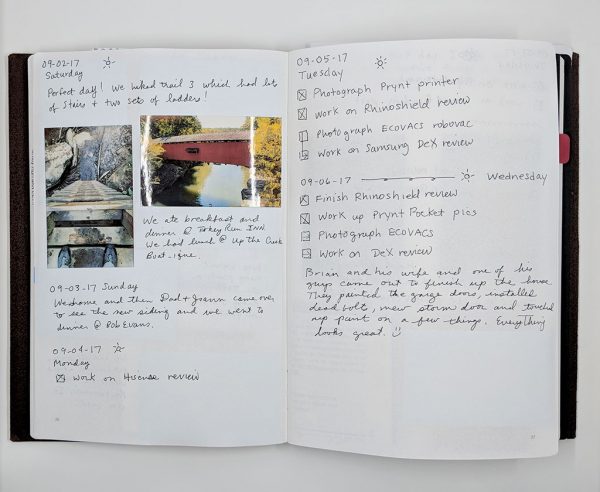
The SHOTBOX does a great job if you need to take pictures of documents. To do this, you just place the document on the bottom of the box and then use your smartphone or camera to shoot straight down from one of the openings on the top of the box.

You may run into glare issues from the side LED strips like you see in the image above.

To fix that, you can use the included glare strips which are magnet strips that you place over the LED light strips inside the SHOTBOX. These strips will cause the resulting image to be darker, but you can fix that with some post processing in Photoshop or even in your camera app.

Final thoughts

I won’t beat around the bush, I love the SHOTBOX. It’s allowed me to simplify my photography setup so that I no longer need a DSLR. The SHOTBOX is easy to use, folds down and can be stored when I don’t want to leave it set up on a desk, and just plain works great. I have tried another small light box, but the SHOTBOX is the one to get if you’re serious about document scanning and small object photography.

Source: The sample for this review was provided by SHOTBOX. Please visit their site for more info and Amazon to order.


Product Information

Price: $109.00 for just the SHOTBOX, $290.50 for everything reviewed here
Manufacturer: SHOTBOX
Retailer: Amazon
Pros:
  • Well made
  • Lots of features and add-ons
  • Easy to adjust LED light strips
Cons:
  • None

Filed in categories: Reviews

Tagged:

SHOTBOX portable photography light box review originally appeared on The Gadgeteer on November 18, 2017 at 11:38 am.

Note: If you are subscribed to this feed through FeedBurner, please switch to our native feed URL http://the-gadgeteer.com/feed/ in order to ensure continuous delivery.
North St Bags Pioneer 8 Hip Pack review

Several months ago, while reviewing North St Bags Pioneer 12 hip pack, carrying and using what was essentially a big fanny pack for a few weeks challenged the stigmas tied to it. That is, the long-held belief that a pouch you strap to your waist is nothing more than a dorky bag for dorks. It turns out that I loved that pack.
So when I was approached with the idea of trying out the new baby brother version of that hip pack, I was happy to oblige. And you know what? I’m officially calling it. Fanny packs are cool.

Who’s it for?

Initially, I felt spoiled from using a larger hip pack for so long. Trying to pare down my EDC items to fit into this regular size fanny pack was a bit of a challenge, for me, at least. I think something of this size would be very well suited for essential items. Like a multitool, wallet, phone, a couple granola bars, maybe a Red Bull, keys, and a few other small items. I think it would work well for someone who feels they need to securely carry more than would fit in their pockets, but doesn’t want to tote a backpack.

Integrated belt. Check.

Personally, there are some pairs of jeans and khakis I have that don’t comfortably fit my iPhone 7+, so having something like this is a nice option. I used it while jogging as well when I didn’t want to strap my monster phone to my arm, and it worked well in this case.

I feel like any other suggestions would be similar to what you’d need any hip pack for, and not really specific to this one, so I think you get the idea.

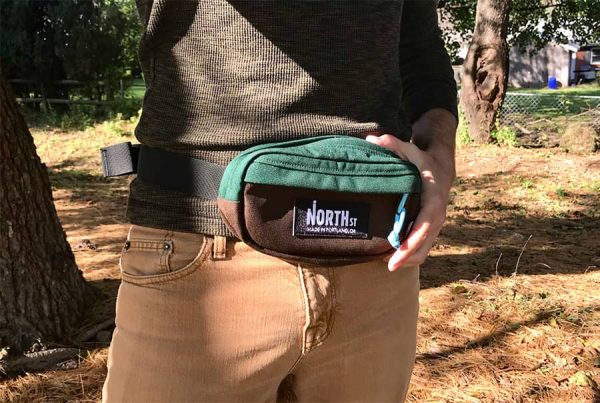
Look! I’m a marsupial!

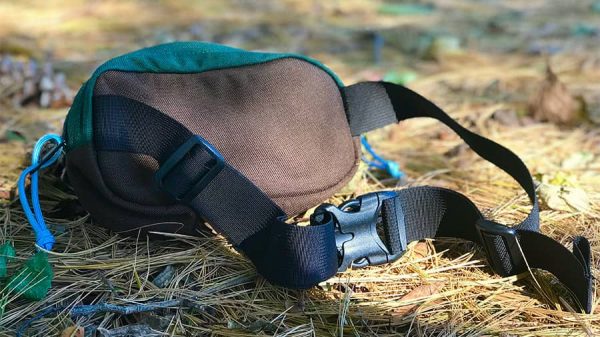
The belt is secure and comfortable, adjustable out to 46”. And the colors and design are pretty great. I love the options North St has on their website… think, Timbuktu style colors, with bright, interesting combinations. They’re meant to be seen.

Size and Build

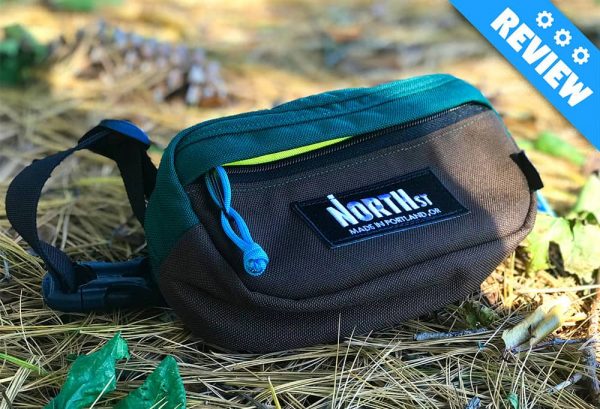
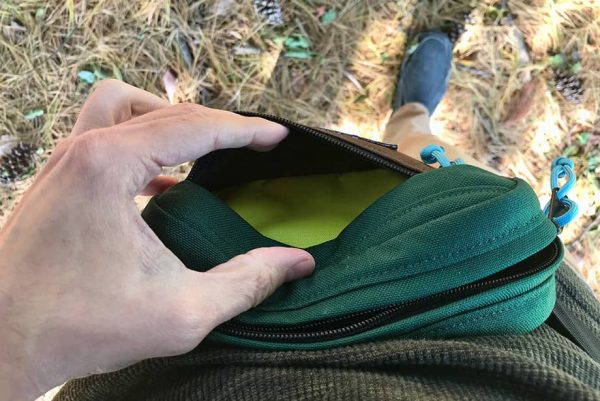
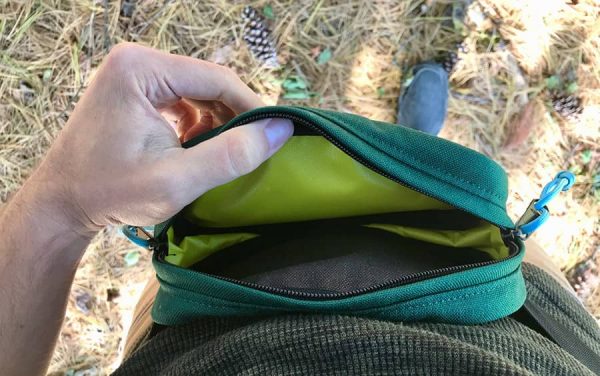
The Pioneer 8 looks very much like you’d imagine, even more so now because it’s about the right size and holds what you’d expect from a hip pack. There are only 2 pockets… one large main compartment and a smaller one in the front.

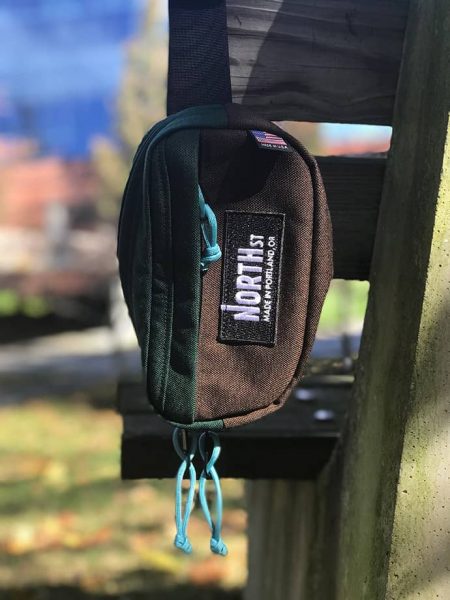
Small front pocket. Check.

The belt is directly integrated with the pouch. I mean, it’s a fanny pack, straight up, but it’s super rugged, looks great, and is extremely well made.

Large main pocket. Check.

Dimensions: 8″ wide x 2.5″ deep x 4″ tall
Capacity: 90 cubic inches (1.5 liters)
Weight: 7oz (199 grams)

  • Rugged 1000 denier CORDURA® Nylon
  • Fully adjustable belt fits sizes 30″ – 46″ waist
  • Water resistant DWR finish
  • Handmade with a lifetime warranty
  • Extra long zipper ties

Conclusion

The Pioneer 8 is about as basic as you can get. A small pouch with pockets and a belt. It’s the classic fanny pack, meaning it doesn’t do anything new with the medium, but it’s a really good one, and it looks great.

All in all, sweet looking pack.

It feels very well suited for carrying your essentials when you’re wearing something without pockets, or just needed some extra space for a camera, notebook, and pens, some extra tools or granola bars… and not a whole lot else.

That said, it’s small and light enough to put on and forget about, and, just like I mentioned in my review of this pack’s big brother, the usefulness far outweighs any lingering self-consciousness of wearing a fanny pack.

The Pioneer 8 is available now from North St Bags’ website for $39 and, like their other offerings is available in a large variety of colors.

Plus, if you purchase one of the Pioneer 8 size bags through Nov 22nd, North St. Bags will donate $5 to the National Parks Conservation Association.

Source: The sample for this review as provided by North St Bags. Please visit their site for more information and to order.


Product Information

Price: $39
Manufacturer: North St Bags
Pros:
  • – Very well made
  • – Love the look and color scheme
Cons:
  • – Might be a bit too small for some
  • – Doesn’t do anything new

Filed in categories: Reviews

Tagged:

North St Bags Pioneer 8 Hip Pack review originally appeared on The Gadgeteer on November 18, 2017 at 9:00 am.

Note: If you are subscribed to this feed through FeedBurner, please switch to our native feed URL http://the-gadgeteer.com/feed/ in order to ensure continuous delivery.