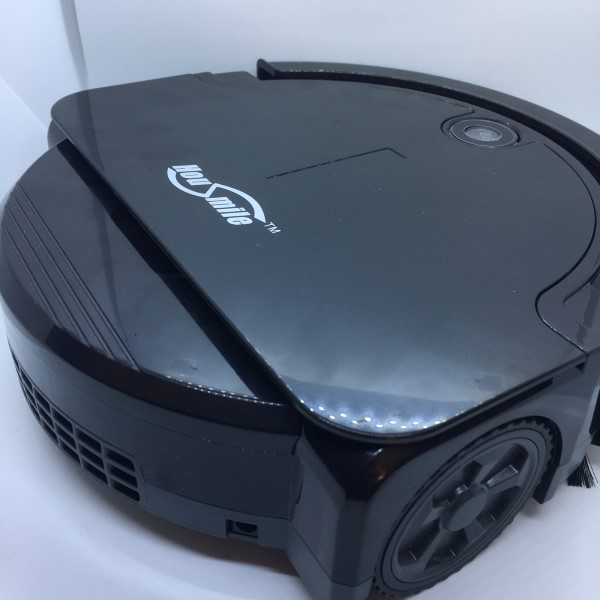
HouSmile Ecan Vacuum Robotic Cleaner review

I’ve been the happy owner of a Dyson 360 Eye robotic vacuum for over a year. It’s been great knowing that all of the little crumbs I spill at breakfast would be magically gone by dinner time. I was eager to have a look at HouSmile’s Ecan Robotic Vacuum Cleaner to do a comparison. 
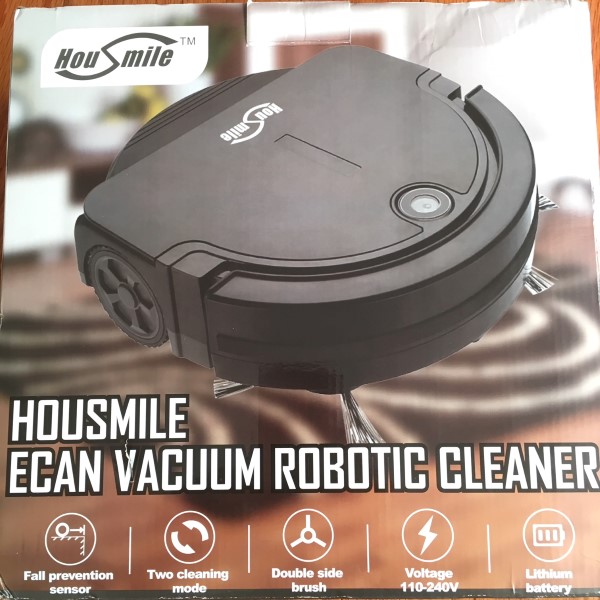
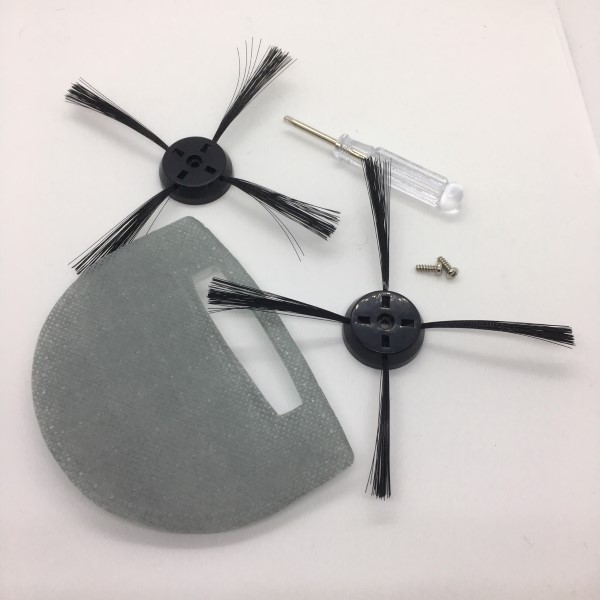
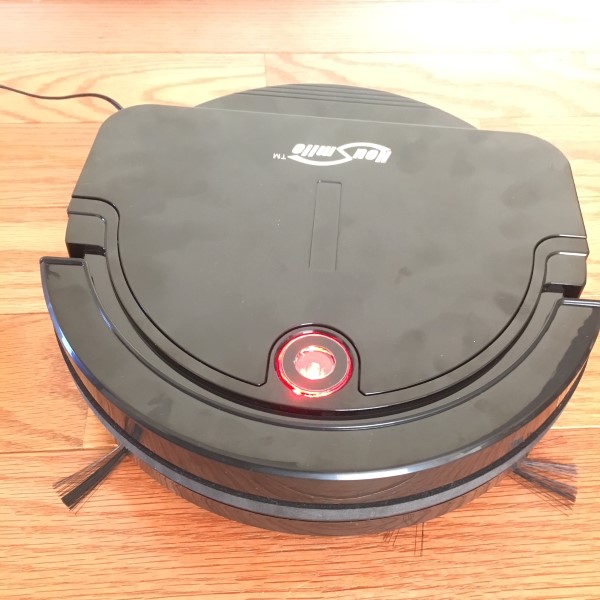
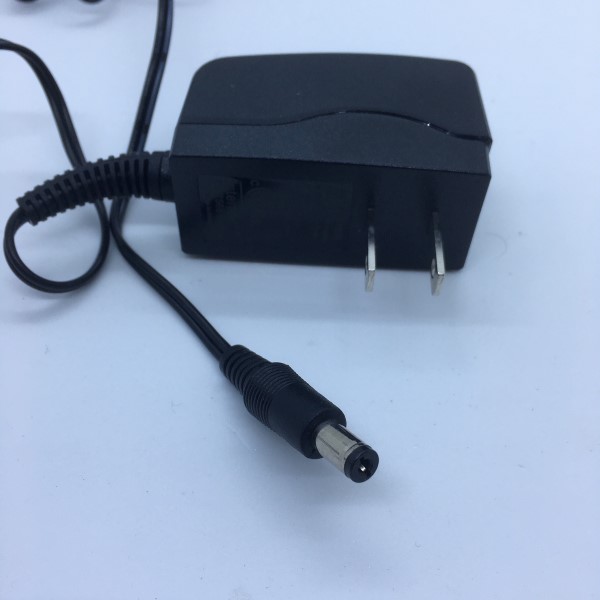
The vacuum arrived in recyclable packaging. After reading the instruction manual (yes, I actually take the time to read the instructions), I assembled the vacuum by installing the battery and attaching the brushes using a cute little screwdriver they were kind enough to include. They also include an extra brush and dustbin filter. Now plugged in, the vacuum’s red led blinked while it happily sipped electrons overnight to prepare for its maiden voyage.
The next morning, a blue LED told me that charging was complete. I unplugged the cable, put it in the middle of the room and tapped the solitary button to send the fledgling floor-sucker on its merry way. Press once for small rooms, twice for big rooms. Ok, but the manual isn’t specific about how small and big rooms are defined.  Small diagrams illustrate the different preprogrammed floor patterns, the smaller being a kind of corkscrew pattern, the larger kind of bumps around the room for a while, does a corkscrew pattern around the middle, then runs the perimeter.  I’m sure there are algorithms to guide its motion, but to me, it looks like it just goes where it wants, apparently without much rhyme or reason.
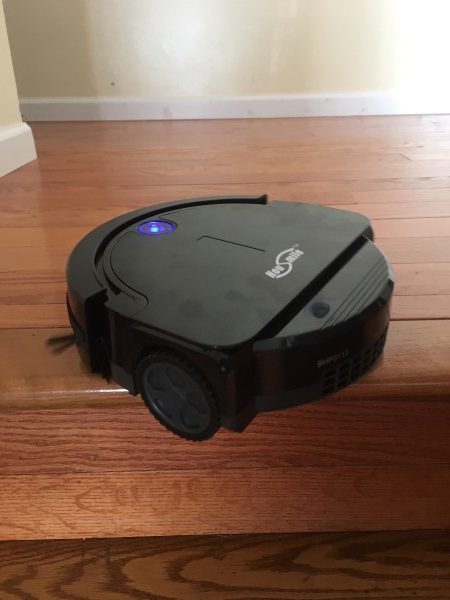
I set up a few obstacles and sprinkled a few targets around, then, not knowing how room size is defined, I tapped the button once, releasing the vacuum to devour as much floor-food as it could find. The vacuum is refreshingly quiet and happily meandered and ricocheted around the room in arcs, devouring all the debris in its path, first dancing around the middle of the room,  then scooting the perimeter. The vacuum continued down the hallway, occasionally changing its trajectory until, unfortunately, the little guy took a tumble down my stairs the second time around, but no damage done. On subsequent trips to the precipice, it got stuck three out of four times, wiggling back and forth, but not enough for it to regain the lost traction from the wheel pushed over the edge. Again, no harm was done and a quick nudge sent it lumbering along.  I sent it in motion again and it bounced and careened around for about two hours, an impressive run for such a small battery. Observations noted it seemed to go over the same places a number of times while missing others completely, but with its hit-and-miss approach to cleaning, I’m confident that it would eventually find every inch of the floor given sufficient time. It doesn’t have a lot of suction, but it’s plenty for most of the stuff that ends up on the floor. The vacuum opening isn’t very wide, only about 4 inches, but the rotating brushes do an adequate job directing debris into the vacuum’s maw.  The vacuum was quiet enough for me to watch television with a volume level that didn’t cause ear damage.
 Once exhausted, the vacuum simply stopped. No beeps, no flashing lights, nothing. It should be noted, this vacuum doesn’t know where it is. Consequently, when the battery dies, it does not return to the place it started, so you will need to send a posse out to find it. Limiting its roaming range to one room at a time might be a good way to keep it from becoming a wayward sheep.  Since it doesn’t come home on its own, plugging in the charger is a strictly manual operation – find it, pick it up and plug it in. There is also no timer, connectivity or programming functions so you’ll need to intentionally launch this beastie when you want a cleaning.
I took the opportunity to have a look in the dustbin. Mind you, my Dyson 360 Eye had made a run around the house yesterday, yet the HouSmile dustbin was packed with dust bunnies, remnants of Halloween candy wrappers and hair from my cat and the two long-haired beauties, my wife, and daughter, with whom I share my house. Emptying the dust bin was a simple process of opening the top cover, popping out the bin, opening the lid, inverting and tapping into the trash. In my case, a few hairs had stuck to the filter, but a quick wipe with a paper towel send them into the trash with the rest.

On a second cleaning, the vacuum abruptly stopped on a shag carpet. Flipping the vacuum over and taking a look at the rotating brushes, I found they were almost tied in knots with the number of hairs that had been wrapped up around them.  An easy cleaning and they were just as good as new, but I wonder how long they’ll hold up.
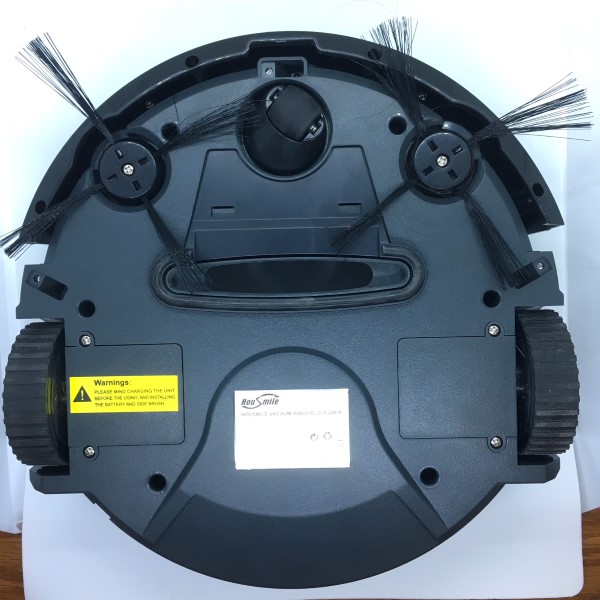
Overall, the vacuuming done by this machine is quite good. It’s no match for my Dyson for cleaning power and thoroughness, but it is inexpensive, but needs a bit of human interaction from time to time. I imagine this vacuum would be ideal for single-floor domiciles with open floor plans and lower pile carpets.  For smaller rooms, and under furniture, it does very well. The HouSmile Ecan robotic vacuum is well constructed and functional. Not many Bells and whistles, but it gets the job done.

Source: The sample for this review was provided by HouSmile. Please visit their site for more info and Amazon to order.


Product Information

Price: $99.00
Manufacturer: HouSmile
Retailer: Amazon
Pros:
  • Quiet
  • Inexpensive
Cons:
  • Occasionally gets stuck or falls down stairs
  • Not recommended for deep carpets

Filed in categories: Reviews

Tagged: ,

HouSmile Ecan Vacuum Robotic Cleaner review originally appeared on The Gadgeteer on November 25, 2017 at 9:00 am.

Note: If you are subscribed to this feed through FeedBurner, please switch to our native feed URL http://the-gadgeteer.com/feed/ in order to ensure continuous delivery.

Ekster Parliament + Tracker Wallet review

What makes a wallet a “smart wallet?” How about an RFID-protected card-slider mechanism for storing your credit cards? Perhaps a solar-powered tracking system so that you can find your wallet when it goes missing? These are some of the features you’ll find in the Ekster wallets, all wrapped in luxurious leather. I’ve got the Ekster Parliament Bi-Fold Wallet & tracking card for this review. Let’s go learn more!

Looking sharp and organized

Measuring in at 4.1” tall by 2.5” wide by .59” deep, the Ekster Parliament wallet is roughly the size of a pack of playing cards. It’s an all-leather wallet with a structured, formal look that pairs nicely with business or formal attire. The model I am testing is the black leather and has Ekster’s shield logo embossed on the front face for an extra touch of class.

The design of the wallet is built around a card slider system for storing and dispensing your cards. It’s a box that offers RFID/NFC blocking and is designed to hold 4-6 cards (depending on thickness). Push the thumb lever on the bottom of the wallet and your cards slide out, presented in a fan-like formation so that you can pick the card you need.

The rest of the wallet design is wrapped around the card-slider core. The front cover that will hold two additional cards, and there’s an additional card pocket on the back of the wallet. None of these slots is RFID protected so you have a place (or three) for your badge-swipe work ID, non-scannable cards, or tracking card (which we’ll discuss momentarily). Open the front flap and you’ll find a wide elastic band, finished with leather, to secure your cash or additional cards. All in all, you’ve got a total capacity in the wallet for 9 cards plus cash (or some additional cards) under the elastic band.

Overall construction of the wallet is excellent. The leather is quite good, with a substantial and luxurious hand feel. The dye work on the leather is excellent with consistent color, no color change with scratches, and no dye bleed into your clothes. Stitching and assembly is rock-solid throughout with even stitching and nicely finished seams. It’s a nice build, well in alignment with the high-end style of the wallet.

Where’s my wallet?

Ekster also offers a customized tracking card as an option for their wallets that utilizes the TrackR technology. It’s the size of a thick business card and is designed to fit in the rear card pocket on your wallet.

The card is a is designed to work with the TrackR app you’ll download to your smartphone. Choose add a new device and choose the “Works with TrackR” option to select Ekster products. Add a name for your card, and you’re paired in moments.


Once you’re paired up, the TrackR has some nice features for close range location. Lost your wallet? Tap a button on the app to cause your card to ring so you can find it. Lost your phone? Double press the button on your tracking card to set off an alarm on your wallet. Both of these features work as long as the app is open and Bluetooth is enabled (and in range). Leave your wallet somewhere? The app will report the last known location while within Bluetooth range. 

For long-range tracking, you’ll need to register with the TrackR Crowd GPS Network. If your wallet is within range of another device that has the TrackR app open and is part of the network, you’ll be notified of the last detected location. The app will also notify you if you helped someone else locate their TrackR enabled device. 

It’s also important to note that the TrackR card made for Ekster is solar powered. Charge it in direct sunlight for a couple of hours, and you’re good to go for a month or so before a recharge. That’s a nice bonus feature, given that a lot of tracking devices of this type are battery operated.

Stepping out with the Ekster Parliament Wallet

As a great looking wallet, the Ekster Parliament is a winner. It’s structured form and sophisticated style looks great with business wear or for formal occasions. It’s a classy accessory.

If you like your wallets super-slim, you should know that the boxy form doesn’t really favor front-pocket or back-pocket wear. It’s over 1/2” thick empty. It works great stashed in the inside pocket of a suit coat or blazer but shows a lot of bulk in your pants pocket (especially jeans or slim-fit dress pants). If you won’t mind a thicker wallet or keep your wallet in your bag (or your jacket), this won’t be an issue for you.

The card-slider system works exactly as intended, keeping 4-6 cards nestled snugly in it’s RFID-blocking chamber. Given that there’s not much of a gap between the cards when deployed, however, it’s not easy to quickly grab the card you’re looking for. You could keep your frequent-use card at the back of the stack, but I often found myself pulling all the cards out of the wallet to find the one I want. This means extra fumbling if you’re at the cashier paying for that double espresso you just ordered. I could just keep that card in the flap, but that kind of defeats the purpose of the RFID protection.If you’re only carrying those cards for occasional use (like at a formal occasion) this won’t be a big deal, but it’s irritating if you’re going for a credit card several times throughout the day. 

The elastic band for cash is also a bit of a design issue for me. On the Ekster web site, they show a couple of bills folded in half inserted behind the band. In reality, the wallet width is actually narrower than a standard U.S. bill. This means you’re either fighting to stuff your cash into the band or folding it twice to make it fit (which adds even more bulk to the wallet). If you’re used to going cash free and just keep a couple of bucks handy for emergencies, this may not be an issue for you. If you just got a bunch of bills in change for that espresso, however, you’ll find yourself fighting to get it all wrangled under the band.

Like all wallets, your satisfaction with the Ekster Parliament will really come down to personal preference. I see this wallet as ideal for formal occasions riding in my jacket pocket, where cash and frequent use of cards are not required. If you’re constantly going in and out of your wallet all day long, or carry a lot of cash on a regular basis, you may find some of these design features to be less than ideal. If you don’t mind a thicker wallet and prioritize the RFID protection, this may be the choice for you.

I do like the tracking system for close-range location, as I have a tendency to lose my wallet in the house. Or my phone. Sometimes both. The ability to ping one or the other to find where they have gotten to is really handy. This does require that the app is always running on your phone, however, to maintain the connection to the TrackR. The long distance tracking depends on other TrackR users being close to your device, which could to hit or miss… but the app does also log the last detected location of your device within Bluetooth range. This means that you can find out if you left your wallet at home or at the office before you go into a full-blown panic.

Conclusions and Pricing

If you’re looking for a classy wallet and don’t mind the thickness, you can’t go wrong with the Ekster Parliament Wallet. It looks great, has a clever RFID-protected card sliding system, and additional storage for cash and scannable cards like work IDs. The TrackR card is great for short-range location and remembering the last place you left your wallet if you wander off. Build quality and finishing are also excellent, with multiple leather finishes available. The Parliament wallet retails for $69.95 on its own or can be bundled with the custom solar-powered TrackR card for $99.95. Check them both out at Ekster’s web site! 

Source: The sample for this review was provided by Ekster. Please visit their site for more information.


Product Information

Price: $69.95
Manufacturer: Ekster
Pros:
  • Classy, elegant style
  • Great leather & excellent construction
  • Tracking card works well for short-range location
  • Solar powered tracker — no batteries to buy!
Cons:
  • It's a thicker wallet style, which may not be to everyone's tastes
  • Elastic band isn't quite wide enough for US bills, which means extra folding
  • Can be tricky to get to the card you want with the card slider system

Filed in categories: Reviews

Tagged:

Ekster Parliament + Tracker Wallet review originally appeared on The Gadgeteer on November 24, 2017 at 11:00 am.

Note: If you are subscribed to this feed through FeedBurner, please switch to our native feed URL http://the-gadgeteer.com/feed/ in order to ensure continuous delivery.
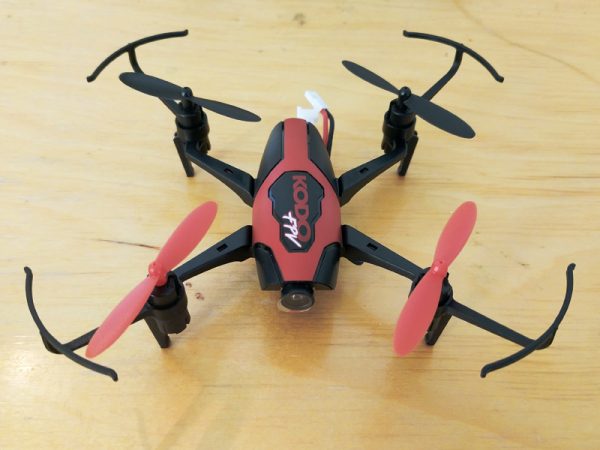
Dromida Kodo FPV Camera Drone review

The Dromida Kodo FPV Camera Drone is a fun, easy-to-set-up, beginner drone with some great extra features. Unfortunately, because of a poorly designed app and subpar hardware, it is not a true First Person View (FPV) drone. At $89.99, it’s still a good deal though for a drone that can (barely) stream Wi-Fi video and take pictures on command.

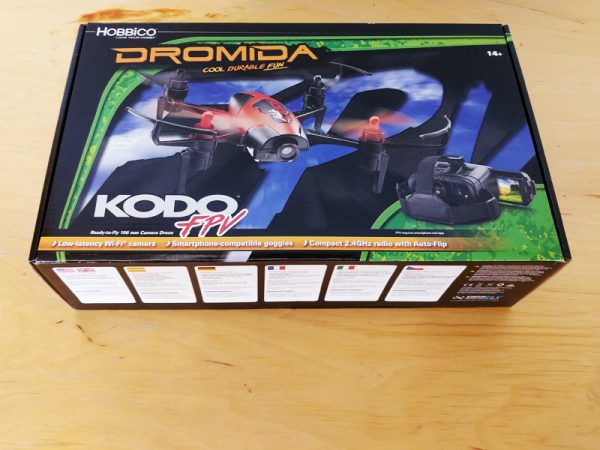
The Kodo FPV Drone comes in a standard flip top box adorned with pictures making promises the little drone definitely cannot keep.

In the box

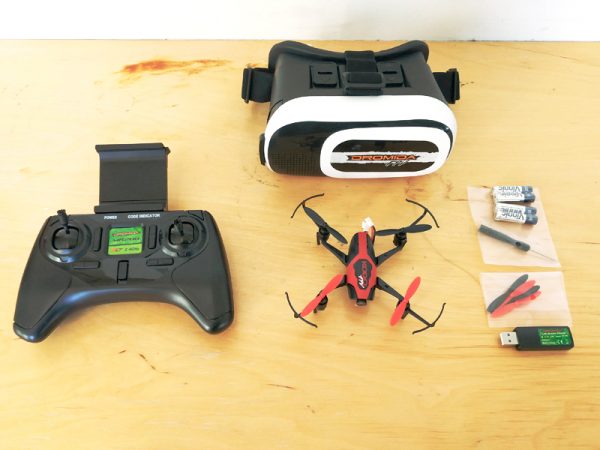
  • Dromida Kodo FPV Camera Drone
  • FPV Goggles/Smartphone holder
  • LiPo Battery
  • USB LiPo Charger
  • Replacement Props
  • AAA Batteries (4)
  • Screwdriver

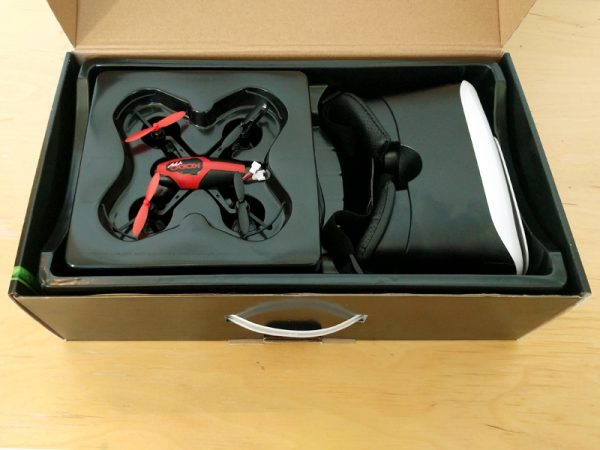
The box the Kodo ships in has compartments for the drone and a built-in handle which makes it pretty useful for storing and transporting the drone and its accessories.

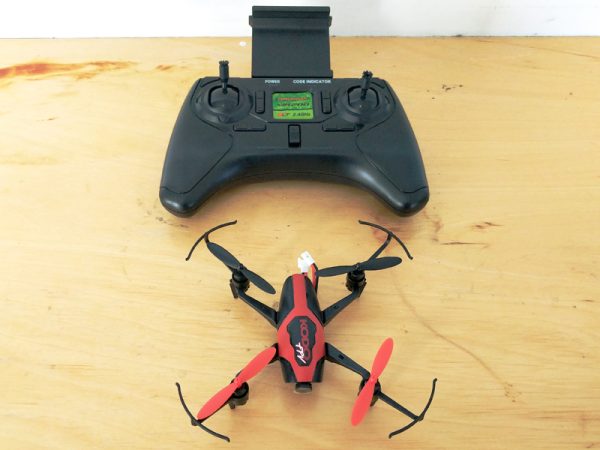
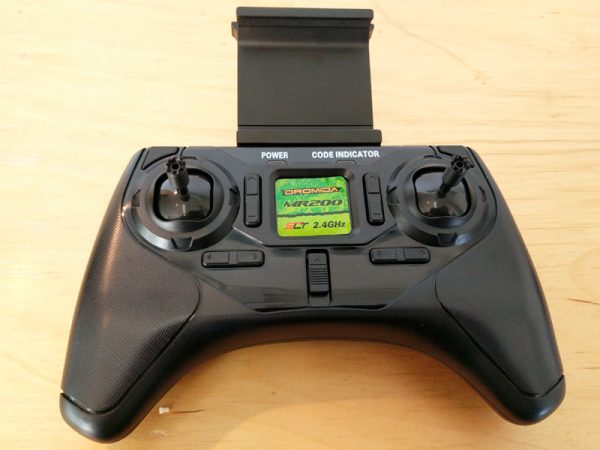
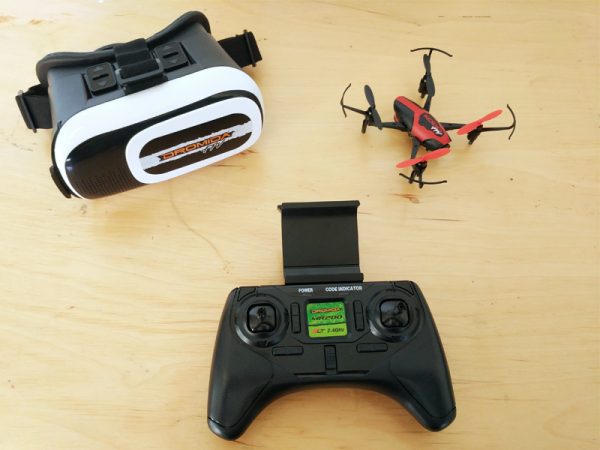
The Kodo FPV Drone comes with a 2.4GHz radio controller with AA batteries, FPV Goggles, a LiPo battery with USB charger, replacement props and a tiny screwdriver for accessing the battery compartment on the controller.

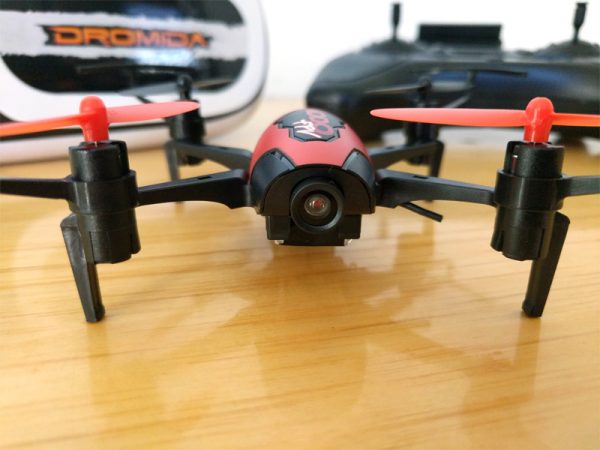
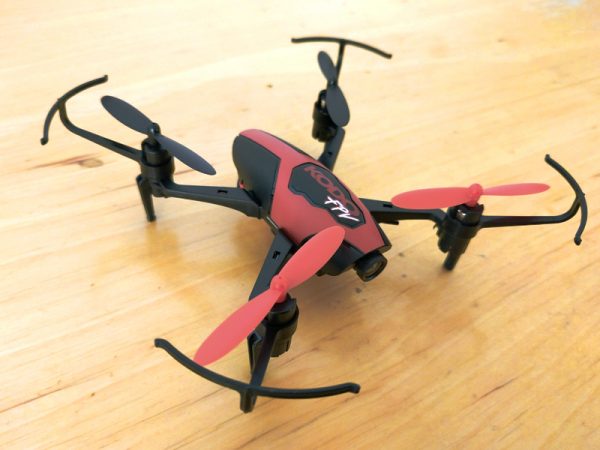
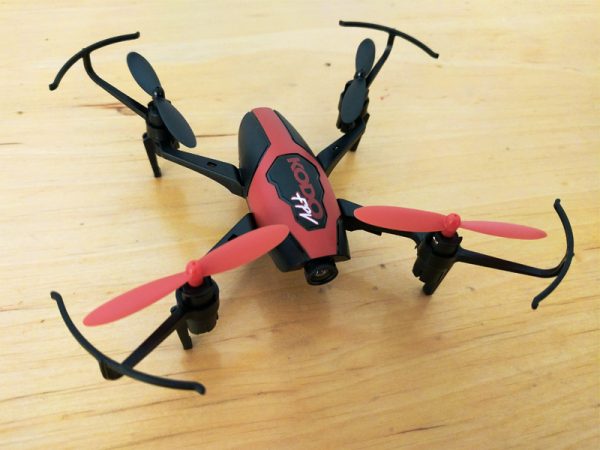
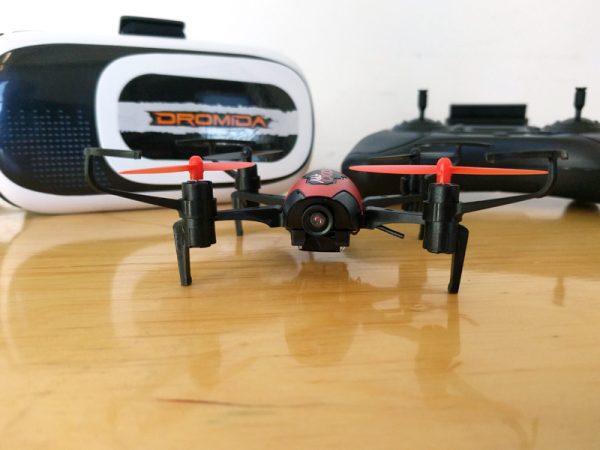
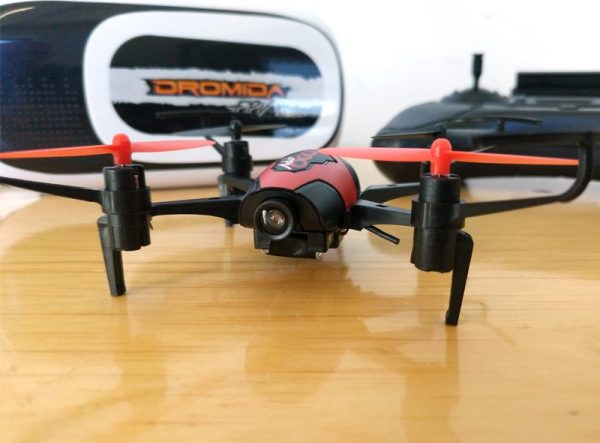
The design of the Kodo FPV is very similar to other entry-level drones. One thing I like in particular are the built-in prop protectors.

Like most drones, the props are color-coded for front and back. The Kodo has a small Wi-Fi camera on its nose and the angle of the camera can be manually adjusted before flight.

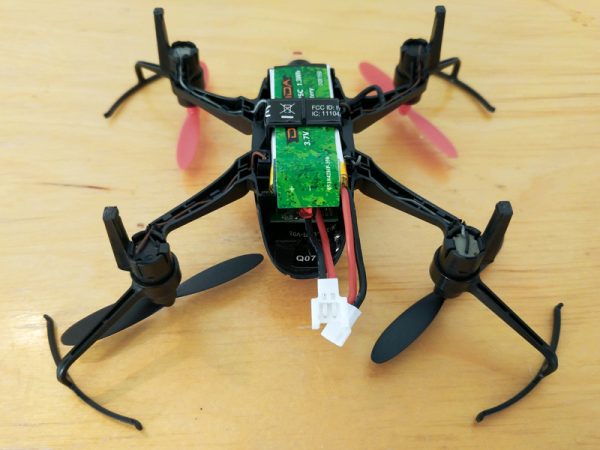
The included Lithium polymer battery hangs under the body of the drone and connects via power cables to the rear.

In my tests, I was able to fly indoors for just under five minutes per full charge. During that time I streamed video via Wi-Fi and captured both stills and video files with the drone’s camera.

Because of its light weight and small battery, the Kodo FPV is primarily an indoor drone. It can be flown outside, but fighting even the slightest breeze will quickly have you losing control and the battery will drain that much faster.

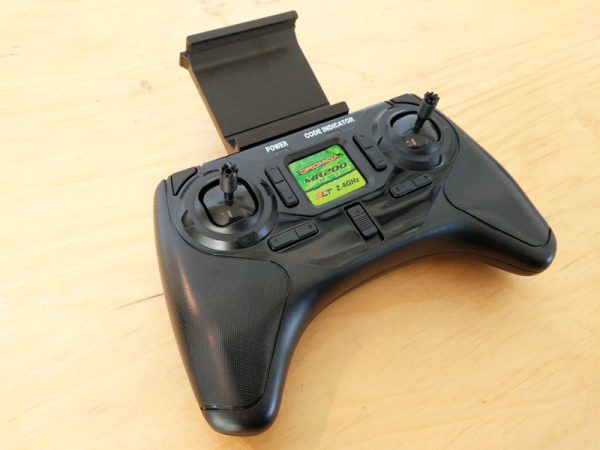
The controller for the Kodo is larger than what usually comes with a drone this size, which is great because larger controllers and control sticks make any drone much easier to fly, especially for novices.

The controller has a spring-loaded smartphone holder which can fit just about any standard phone. Once connected to the drone via Wi-Fi, you can monitor the view from the drone’s camera via your phone.

The controller has dedicated buttons for taking pictures and recording video, as well as a “stunt” button which initiates a flip when the drone is in flight. Like most drones, the Kodo and its controller have a “Power-On Fail-Safe”. This prevents the drone propellers from starting up until the flight stick is moved to the up and down position.

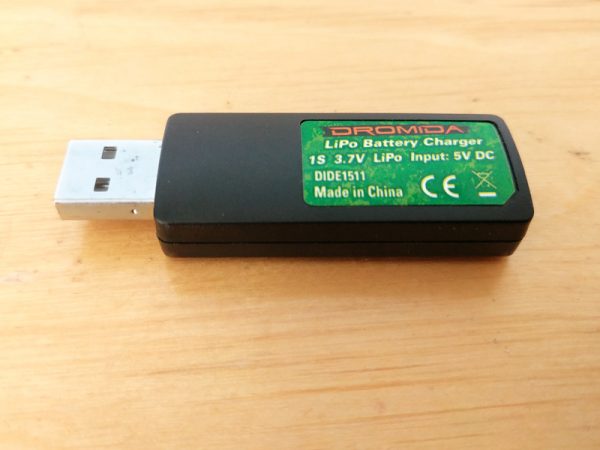
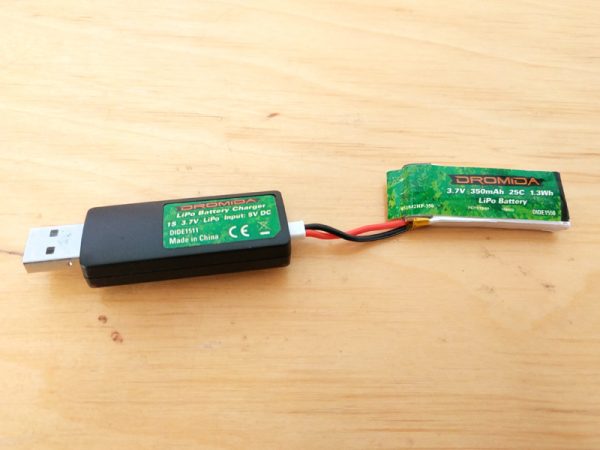
The included USB charger allows you to charge the drone’s LiPo battery via any powered USB port or by connecting it to a USB power plug. In my tests it took about 35-40 minutes for the battery to fully charge.

The same cable that connects the battery to the drone fits into a port on the charger. A great feature of this particular charger is that it has a red LED which flashes during the charging cycle and then glows steady red when charging is complete.

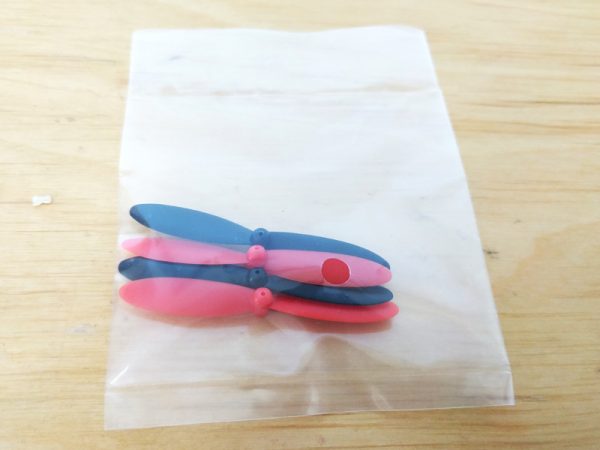
Also included with the Dromida Kodo is a complete set of replacement props. For novices and pros alike, it only takes a few crash landings to see how valuable these replacements will prove to be.

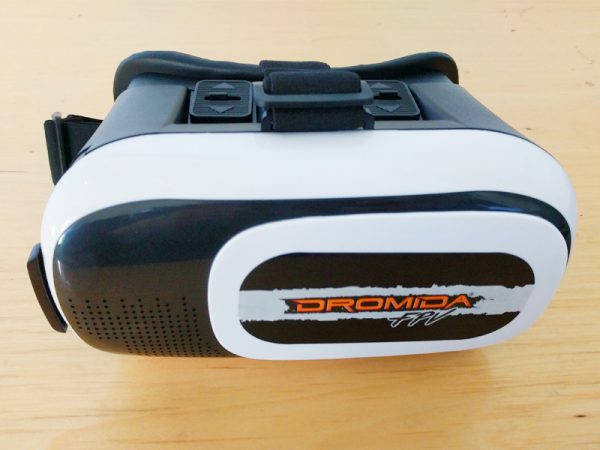
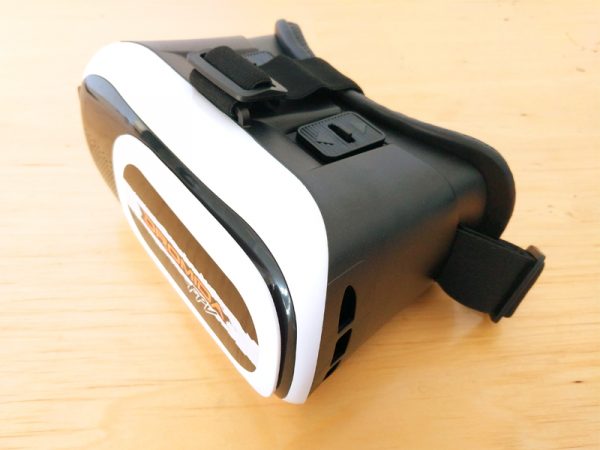
The main sell of the Dromida Kodo FPV Drone is the “FPV” aspect of it. The goggles that are included with the Kodo are meant to hold your smartphone and allow you to fly the drone in First Person View.

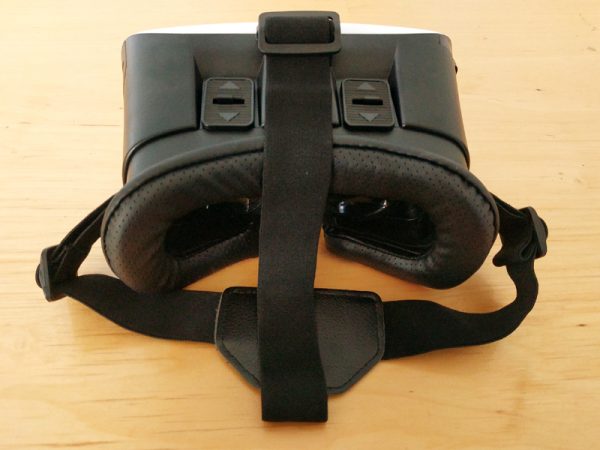
The goggles are very similar to any number of “Virtual Reality” googles that are sold on the web which allow you to access Google Cardboard or similar Virtual Reality apps and games.

The goggles themselves are comfortable and will fit most smartphones. They’re not too heavy when worn for long periods of time and are adjustable for kids and adults.

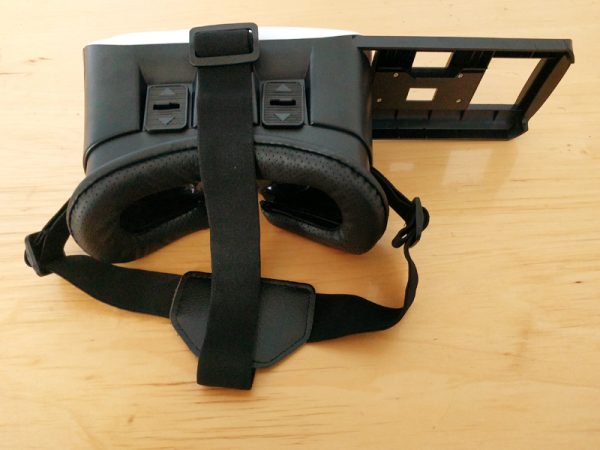
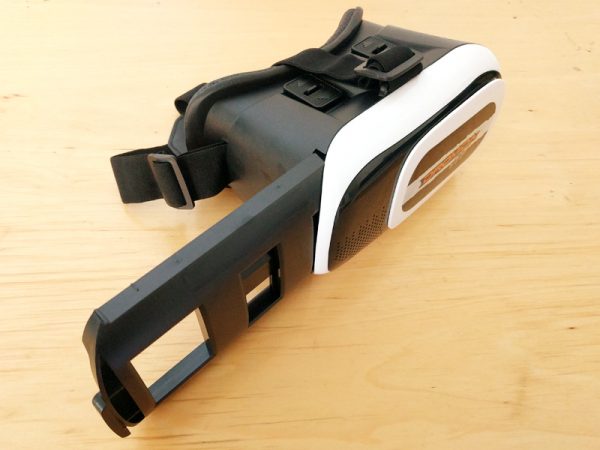
A sliding bracket on the right of the goggles allows a user to place their compatible smartphone in the unit and once closed, view the app content through the googles.

The app and its functionality, as usual, are the biggest disappointments of the Dromida Kodo Drone. The Kodoview app can be downloaded and installed on your device, via the QR code in the manual or by searching the Google Play Store or Apple App Store.

Once installed and running, you’ll need to power on the drone and controller and then find the drone’s Wi-Fi signal. After choosing the correct Wi-Fi signal you SHOULD be able to access the camera view from the drone by clicking on FLY in the app.

Unfortunately, that doesn’t always happen at first. It took me several tries and a good fifteen frustrating minutes when, for some unknown reason, the camera finally started streaming to my device, a Google Pixel. The quality of the camera is very low, both for the videos and stills. What’s interesting about the Kodo, that I haven’t seen on other camera drones is that the media files are not stored on the drone at all. Usually, a camera drone will have an internal SD card and the camera will write to it when accessed.

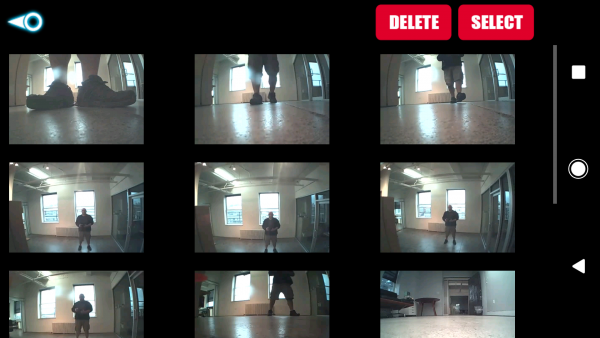
Instead, the Kodo transmits and stores all content on to the attached smartphone. I like this better than an SD card mainly because it makes it a lot easier to access your media. The Kodoview app creates a folder on your device where it stores all the media captured by the Kodo Drone and through the app you can view, select, and delete any of the pictures or videos.

There’s an option in the Kodoview app which allows you to view the First Person View of the camera and utilize the included FPV goggles.

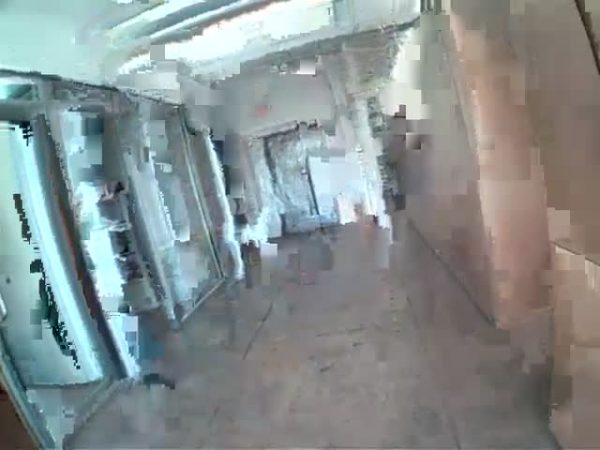
In my tests though, as you can see in the video and pictures captured from the Kodo, the quality of the video is very low and the lag of the transmission is much too high to be able to fly via the FPV goggles alone.

There is a lot of artifacting and it’s incredibly difficult to navigate with such poor laggy feedback.

The good news is that the googles and FPV are good for something. It’s great fun for someone else to view the First Person View while you’re flying.

Even though the Dromida Kodo FPV Camera Drone doesn’t quite deliver on the promise of a true First Person View experience, it is a good value at the price of $89.99 and great fun for drone novices.

It’s easy to get from box-opening to flight time and the battery life and performance are on par with other drones in this price range. The added features like FPV don’t work like they should, but do allow for some alternative enjoyment.

Source: The sample for this review was provided by Dromida. Please visit their site for more info and Amazon to order.


Product Information

Price: $89.99
Manufacturer: Dromida
Retailer: Amazon
Requirements:
  • Android or Apple smart device compatible with KODOVIEW mobile app
  • USB Power Source (such as PC with USB port) or a USB AC Adapter
Pros:
  • Good price for a Wifi enabled live-view drone
  • Durable construction
  • Easy setup for drone flight without app or FPV mode
Cons:
  • Cannot be flown in First Person View
  • Poorly designed App doesn't always connect with Drone
  • Poor video and picture quality

Filed in categories: Reviews

Tagged:

Dromida Kodo FPV Camera Drone review originally appeared on The Gadgeteer on November 24, 2017 at 9:00 am.

Note: If you are subscribed to this feed through FeedBurner, please switch to our native feed URL http://the-gadgeteer.com/feed/ in order to ensure continuous delivery.
ConnectSense Smart Outlet review

I grew up watching Star Trek and always thought that talking to a computer was the coolest thing! With Siri, Google and Alexa were getting darn close to Captain Kirk’s Enterprise. Ahhh, the joys of home automation! I love it when something cumbersome becomes effortless. Adding ConnectSense’s new Smart Outlet to my home automation system has made that dream one step closer. 

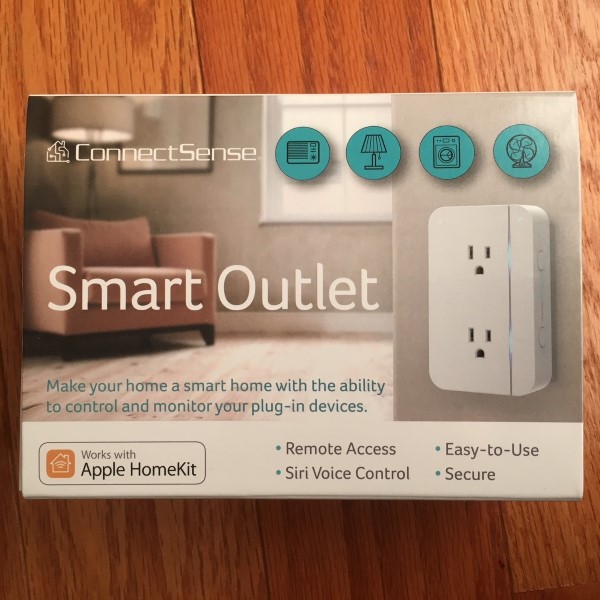
The Smart Outlet arrived in small packaging with only a brief “Getting Started” manual. Turns out, that’s all that was needed to get it working. Plug in the outlet, open Wi-Fi settings on my iPhone, follow the directions to connect to the home network, download the app, create an account, then open Home Kit, enter the device number and, voila, it works. I have to say it was among the fastest and simplest setups I’ve done for a device of this type. Literally, just minutes and everything was up and running.

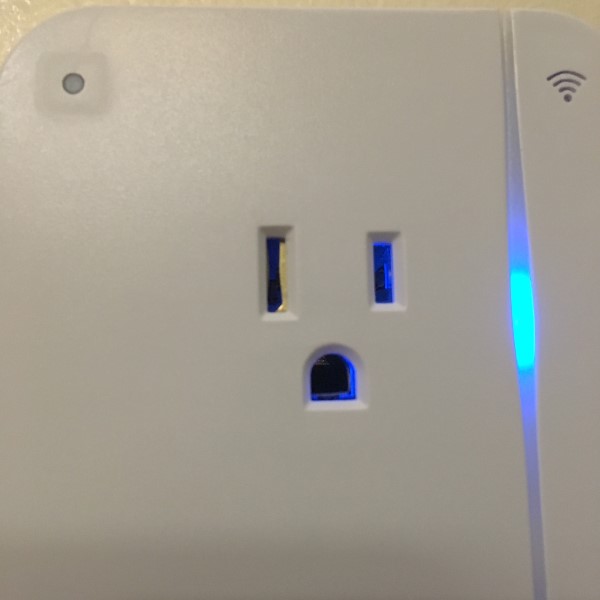
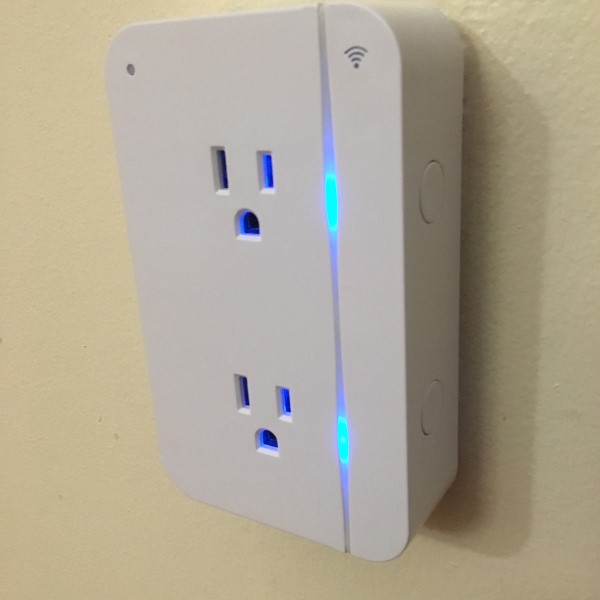
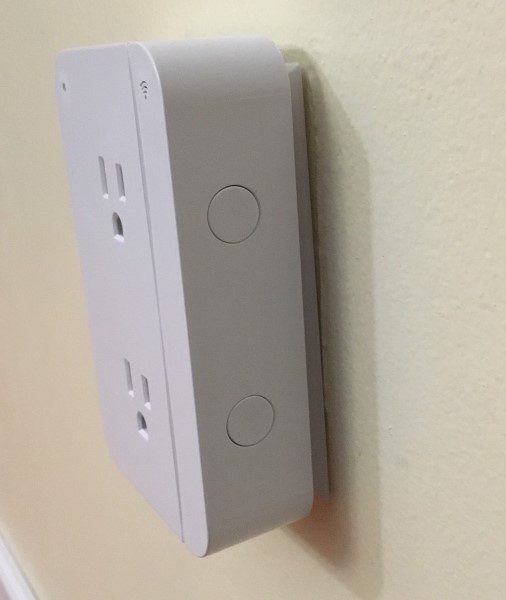
As soon as the outlet was added to Home Kit, I was able to ask Siri to turn on or off outlet one, two or both using simple phrasing like, “Hey, Siri, turn on outlet 1,” or “Hey, Siri, turn off the living room fan.” Each outlet has a pleasant blue LED to let me know it was on. As an Easter egg, there is even a USB port on the side. The other side has pushbuttons to control the outlets locally, although if plugged behind a couch, they might not be easily accessible.

The device plugs into a wall socket, but it should be noted that while it has only one grounded plug on the back, it blocks both outlets in a standard duplex outlet. It’s about 5 X 3-1/4 and the case protrudes about 1-1/4 inches from the wall, so if you have a tight space, say, behind a dresser, some creativity might be needed to preserve room aesthetics.

Like many Home Kit compatible devices, an Apple TV console is needed to enable control away from the home network. I don’t have one, so I’m hoping Santa thinks I’ve been good this year.

The ConnectSense Smart outlet was very easy to setup get working. It enables voice control of almost any 110volt device up to 15 Amps. I tested it with several lamps and a fan. But have not decided which outlet it will ultimately occupy, but it will be fun figuring it out. Now, if I could just get Siri to speak in Majel Barrett’s voice…

Source: The sample for this review was provided by ConnectSense. Please visit their site for more info and Amazon to order.


Product Information

Price: $59.95
Manufacturer: ConnectSense
Retailer: Amazon
Pros:
  • Easy setup
  • Home Kit compatible
Cons:
  • Expensive

Filed in categories: Reviews

Tagged:

ConnectSense Smart Outlet review originally appeared on The Gadgeteer on November 23, 2017 at 1:00 pm.

Note: If you are subscribed to this feed through FeedBurner, please switch to our native feed URL http://the-gadgeteer.com/feed/ in order to ensure continuous delivery.
iAsus Stealth Bluetooth mic review

I don’t use Bluetooth headsets anymore since I seem to text and email more than voice. But a Bluetooth headset that is completely immune to ambient noise?  Say hello the iAsus Stealth Bluetooth Mic.

If there’s one thing I can’t stand about Bluetooth headsets for phones is poor outbound quality due to environmental noise, or garbled digital artifacts.  But how does the iAsus Stealth Bluetooth Mic do it?

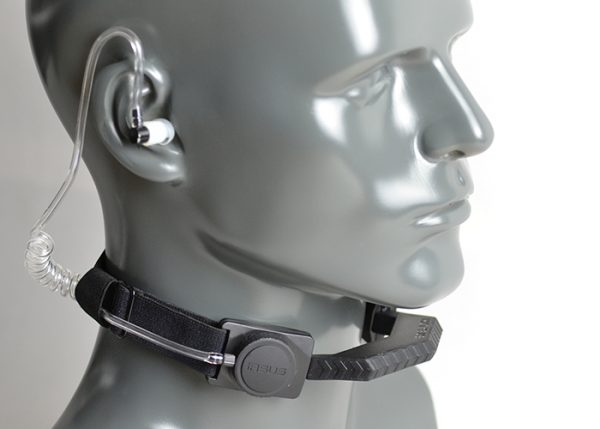
The answer?  This headset uses conduction points on the throat to pick up your voice.

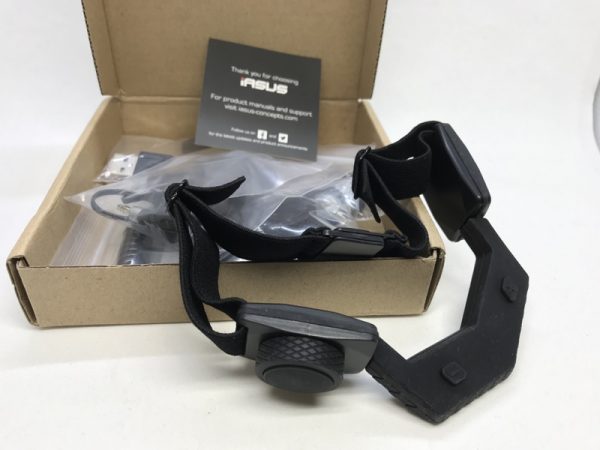
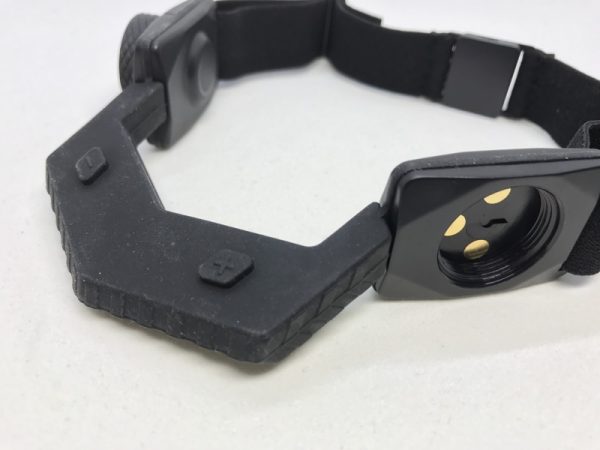
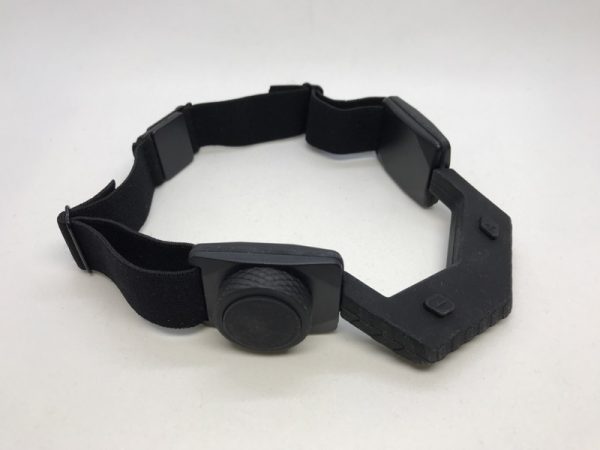
Here’s the headset without the earpiece.

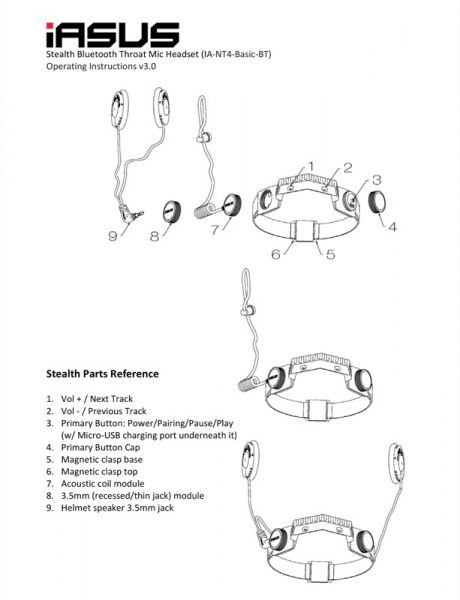
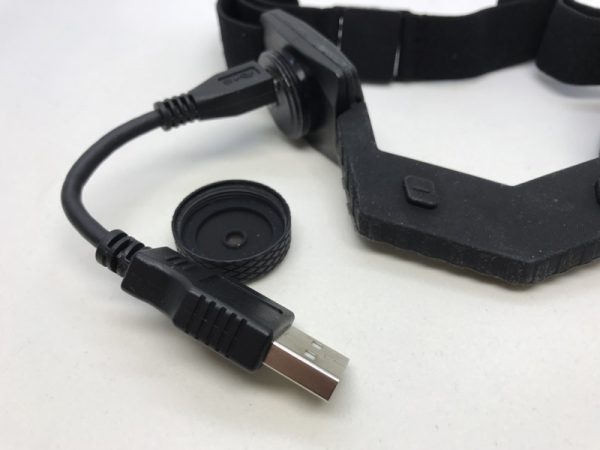
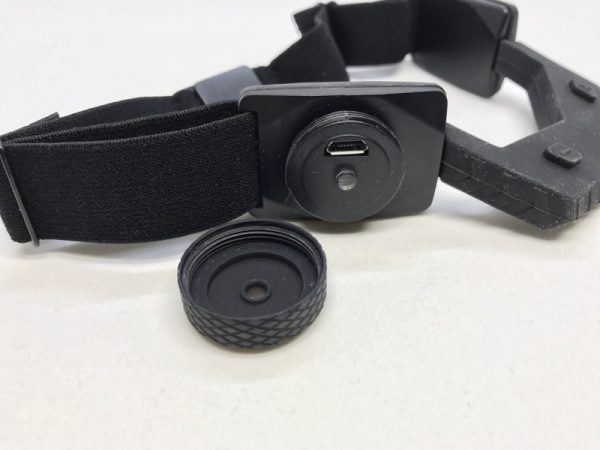
A screw-off cap reveals a charging port and a blue/red LED for status.  It also functions as the power on button.  Strangely enough, you don’t use this to power the headset off (press and hold the volume + button for that).

Speaking of volume buttons here are the two diamond-shaped volume up and down buttons.  These normally face down when worn.

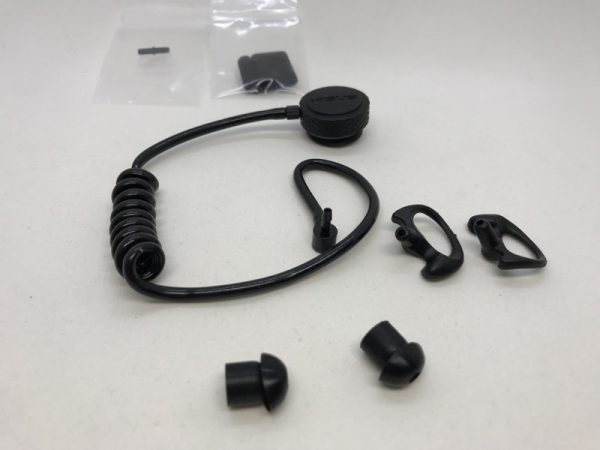
The kit comes with an audio “tube” earpiece, which is essentially a hollow plastic tube.  It differs from the clear one shown on the website photo.

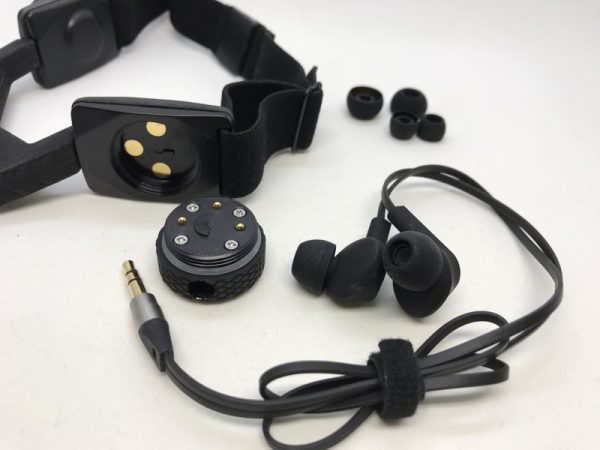
Alternatively, you can use the electrical minijack option, familiar to most  The three gold-colored contacts on the neck band interface with the round puck that the headphones attach to.

Here’s the short USB cable plugged in…

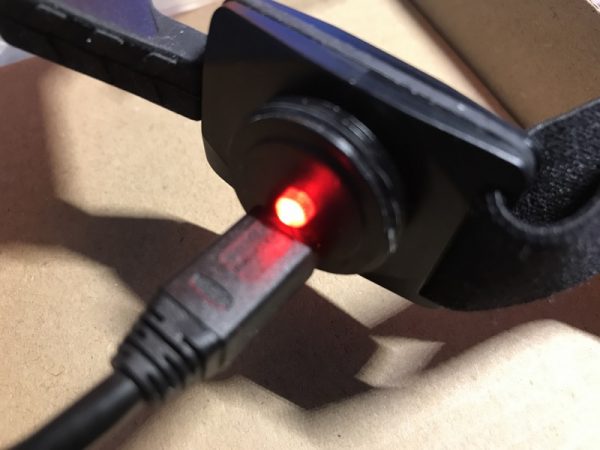
…and the LED lights up red when charging.

There’s no way around it.  I felt silly wearing it.  It instantly reminded me of the Collars of Obedience Captain Kirk wore.  (I’m the one on the left).

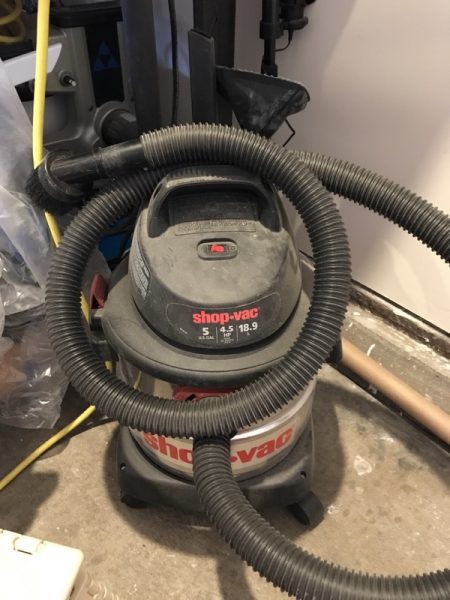
The million dollar question is:  How does it sound?  To test this, I performed a test in my garage with this dusty shop vac.  Take a listen:

First up:  iPhone recording only

Now here’s the same with the Stealth Mic.

I’m happy to say that you can barely tell the Shop Vac is turned on but at the expense of voice intelligibility.  Hard consonants seem to be a little hard to pick out.
If you’re looking for a Bluetooth mic for your phone that absolutely ignores outside noise, this is the one to get.  However, this comes at the cost of clarity.  If you think the test clip is “good enough”, and you want minimum visibility, the iAsus Stealth Bluetooth Headset might be for you.

Source: The sample for this review was provided by iAsus. Please visit their site for more info and check Amazon for ordering.


Product Information

Price: $199 (base configuration), $30 for coiled earpiece, $50 for 3.5mm earpiece module
Manufacturer: iAsus
Retailer: Amazon
Requirements:
  • Bluetooth, USB for charging
Pros:
  • No visible microphones, immune to environmental noise
Cons:
  • Reduction in voice clarity

Filed in categories: Reviews

Tagged:

iAsus Stealth Bluetooth mic review originally appeared on The Gadgeteer on November 23, 2017 at 11:00 am.

Note: If you are subscribed to this feed through FeedBurner, please switch to our native feed URL http://the-gadgeteer.com/feed/ in order to ensure continuous delivery.