Toffee slim leather MacBook or iPad sleeve review

As a gadgeteer, I love computers and gear, but I also love carrying those gadgets in nice cases to protect them. Toffee is no stranger as a brand to the site, so I was finally able to get my hands on a nice looking leather sleeve for my MacBook Pro.  The Toffee slim leather sleeve is sleek, sophisticated, and can be purchased for the MacBook Air, 13/15 in MacBook Pro, or 12.9″ iPad Pro. Let’s take a look!Note: Images can be clicked on to view a larger size.
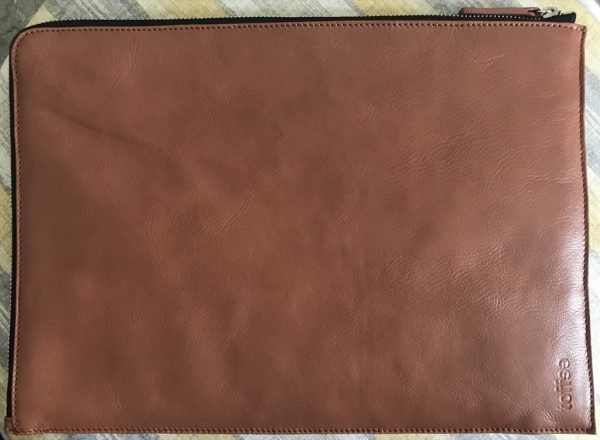
The Slim Leather sleeve is a beautiful and sleek laptop case.  The sleeve I was sent is made with supple genuine leather in a tan color. The dimensions from the website for the 13″ Slim Leather Sleeve & iPad Pro is 13.8 in x 9.8 in x 0.4 in, and for the 15″ Slim Leather Sleeve is 15.2 in x 10.6 in x 0.4 in.

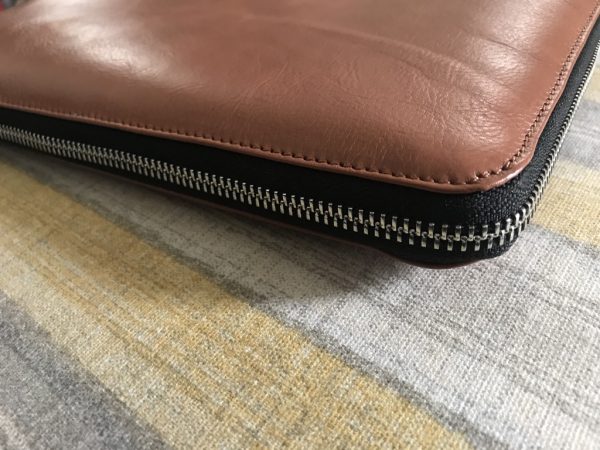
The hardware for the zipper and pull has a lovely leather tab so it’s easy to unzip the sleeve. I find it’s important to have a good zipper, especially one that doesn’t touch the notebook and leave scratches.

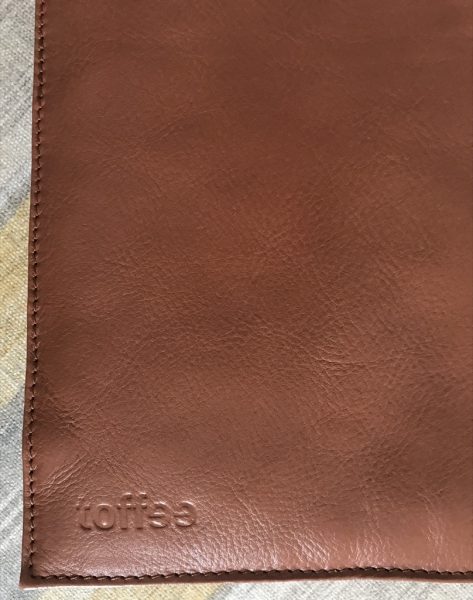
The corner of the sleeve is rounded so it doesn’t poke out at an odd angle when slipping into another bag or backpack. You can see the detailed stitching is really nicely done and well made. I also enjoy that it has a little bit of padding for protection, but not so much to make it bulky.


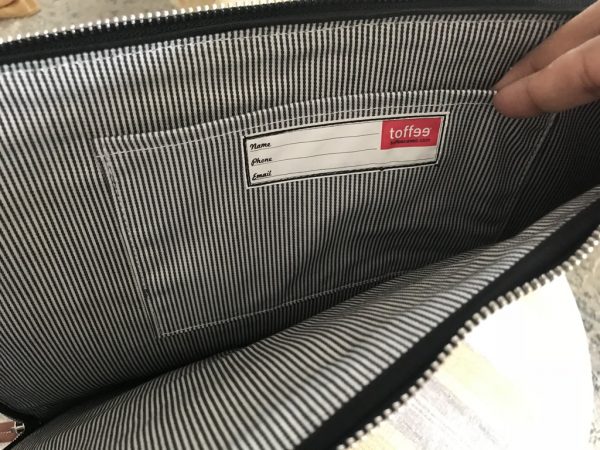
The inside of the sleeve is a really nice cotton striped pattern, that has an inside pocket that’s good for holding a phone or cards with space for some personal information in case the sleeve is lost.

The sleeve I was sent was supposed to be for my 13″ Retina MacBook Pro (2014 model) but sadly didn’t fit. I think this particular sleeve was made for the MacBook Air, but it ended up not being a problem. My mother’s 13″ Samsung Chromebook fit perfectly into it!

The Toffee slim leather sleeve is an absolute joy to hold in the hands. It’s a handsome addition to anyone with a notebook for work or if you’d like to add a bit of swankiness to your EDC (every day carry). With it’s naturally milled leather and smooth finish, I think it’ll last a very long time and will only look better with handling and age. It’s great as a gift for the upcoming holiday season; or let’s face it, a gift for yourself!

Source: The sample used in this review was provided by Toffee. Please visit their website for more information and you can order through Amazon.


Product Information

Price: $99.95 – $112.42
Manufacturer: Toffee Cases
Retailer: Amazon
Requirements:
  • 13" notebook or iPad Pro
Pros:
  • Beautiful leather
  • classic colors
  • well made zipper
  • well made interior padding
Cons:
  • A bit pricey but worth it

Filed in categories: Reviews

Tagged: , , ,

Toffee slim leather MacBook or iPad sleeve review originally appeared on The Gadgeteer on November 30, 2017 at 4:33 pm.

Note: If you are subscribed to this feed through FeedBurner, please switch to our native feed URL http://the-gadgeteer.com/feed/ in order to ensure continuous delivery.

Eagle Creek Pack-It Structured Cube review

When it comes to travel, whoever said “half the fun is getting there” quite obviously did not have to pack his own bag.  If you are anything like me – and I sense you are – you have a tendency to pack more than you need just in case you…well, need it.  To compensate, you have to learn how to pack efficiently or accept the fact you will need a small army to carry your bags.  Eagle Creek’s Pack-It cube system intends to help you with the first one, but the question is – can it?  Read on to find out…

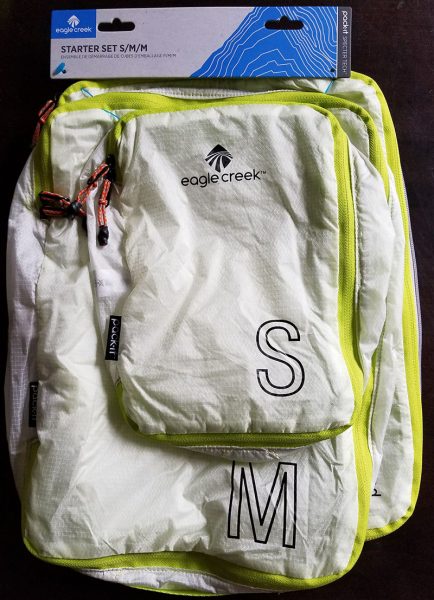
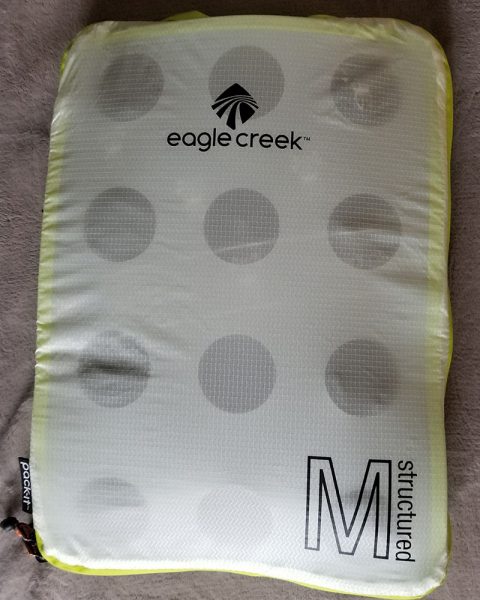
The Eagle Creek Pack-It Structured Cube starter set (lucky I don’t get paid by the word) is a set of nylon compression cubes designed to make whatever you put inside them, within reason, smaller.  The set comes with one small cube, one medium cube and a second medium cube with a structured panel.  More on the function of the panel in a moment.  The medium-sized cubes are perfect for shirts but the structured cube is too small for most man-sized pants.  For example, I wear a 38×32 pant – not a small size, to be sure, but not overly large either.  With some creative folding, I was able to get 1 pair of pants into the medium structured cube, so clearly you would need a larger size structured or an unstructured to handle your pants.  Not a fault by any means, just something to keep in mind.

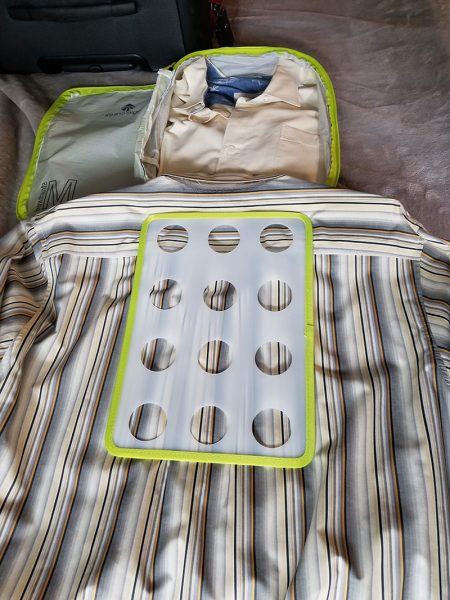
The structured panel, I assume, is intended to help you properly fold clothing like shirts to fit in the medium structured cube.  After folding, you can pack the panel at the bottom of the cube to help retain its shape.  Personally, I would have preferred both medium cubes in this set to have that panel – it would have made this a very valuable travel companion starter set.  Instead, only one of the cubes comes with this panel, an odd oversight.

Because I travel a lot for my day job and because I spend a lot of time in front of clients, I pack long-sleeve, button-down dress shirts.  The medium structured cube will hold 3 of my XL-sized shirts along with the panel.  The small cube will hold either a week’s worth of underwear or socks (not both).

As you can see, the medium structured cube is something of a tight fit with the 3 dress shirts packed along with the panel.  Question is, does the compression actually yield any space savings in your bag?

And the answer: yes, it does.  That is certainly less room than the 3 XL shirts on their own would take.  I would guess that 2 of the medium structured cubes, 2 of the unstructured medium cubes to hold rolled up pants and two small cubes would handle a week’s travel and would allow me to downsize to a smaller suitcase.

The solution comes at a potential cost, though.  I mentioned repeatedly that I pack dress shirts, and any system like this that relies on compression will wrinkly your clothing.  On the 3 trips I have taken using the cubes I have had to iron my shirts every morning.  Sure, that happens on occasion when free-packed in my bag, but there are times when I can get around that by hanging my shirt in the bathroom and letting the steam from the shower take care of minor wrinkling.  Not so with this system.  If I could wear t-shirts or a more casual shirt, this would not be an issue.  Nor should it be something that deters you unless you are actually allergic to irons.

All in all, the system does what it says.  My recommendation, however, would be to assess the kinds of packing cubes you might need and purchase accordingly rather than buying a one size fits some solution.  For example, the medium unstructured cube holds 2 pairs of rolled-up pants.  Two medium unstructured, two medium structured and two small unstructured would take me from a 25-inch checked bag to a 21-inch carry-on.  One trip and I’ve made back the investment in the system.  And that’s a good value in my book.

Source: The sample for this review was provided by Eagle Creek.  Please visit their site for more information or visit Amazon to order.

Filed in categories: Reviews

Tagged:

Eagle Creek Pack-It Structured Cube review originally appeared on The Gadgeteer on November 30, 2017 at 11:00 am.

Note: If you are subscribed to this feed through FeedBurner, please switch to our native feed URL http://the-gadgeteer.com/feed/ in order to ensure continuous delivery.

Solgaard LifePack backpack review

Backpacks come in a variety of sizes, styles, and designs. Some are meant to serve students, some are more for photographers or commuting information workers, and some are designed more for travel. As much as I like satchel bags or messenger-style bags, there’s sometimes nothing like a backpack when traveling. On my last vacation, I didn’t take one, and my shoulders regretted it every day. I was happy, then, when SolGaard offered us their LifePack for testing, and I was given the opportunity to use it. There are a couple of superpowers in this traditional looking bag that are great for travelers.

Note: Photos may be tapped or clicked for a larger image.

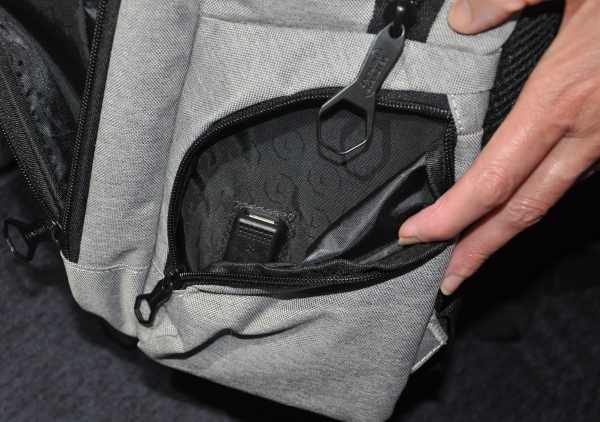
First things first: The bag is a traditional one, with permanently attached shoulder straps in a cushioned yoke at the top, and adjustable webbing at the base. At the ends of the padded area, just before the webbing, there are hidden zippered pockets that will hold travel documents, cash, passports, or treasure maps.

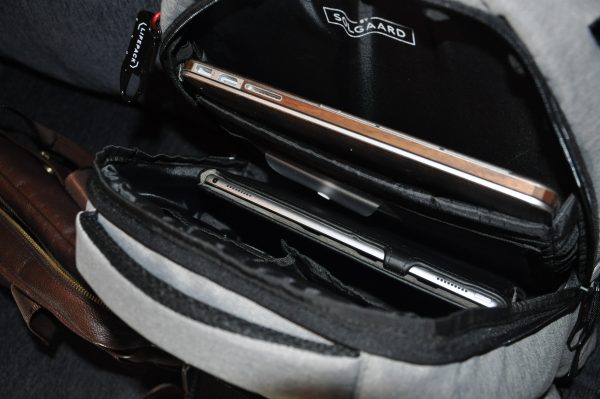
At the top of the bag is a wide, cushioned haul loop. This is not just seatbelt webbing with some foam over it – this is a purpose-built, multi-piece handle with the same breathable fabric that covered the underside of the straps and the pack of the pack. On either side of this haul loop, there is a cavernous pocket accessed through a dual-pull metal zipper. The zipper pulls are 2” long and have a .75” hexagonal loop at the tip. You can thread any lock or cable you want through these things! And, being dual pull, you can put the opening just where you want it. The front-most section is gusseted at the bottom, so it won’t easily open and spill out all the little stuff that settles down to the bottom. In the pocket against your back, there is a padded laptop sleeve that dwarfs my iPad Pro (12.9”) or my 15” MacBookPro. Your gaming rig is gonna love this bag! On the inner side of this is a letter-paper-sized pocket that is translucent, perfect for tossing in receipts, maps, brochures, etc. There’s also a snap-closed business card pocket of the same material on the front of that pocket. Since I rarely deal with paper, I use this sheath for my iPad Pro 10.5”. It’s totally covered in there.


On the opposite side are two mesh zippered pockets roughly passport-sized, a credit-card sized gusseted pocket about .5” thick, and 3 pen silos. The space at the bottom is wide enough that I can lay my iPhone 8 Plus flat on the bottom, with an inch or two top and bottom, and it doesn’t quite hit the sides. While it’s not protected, you could fit a drone or headphones or even a DSLR in here with no problem. Sneaks or textbooks as well, but I don’t think a rigid cycling helmet would go.


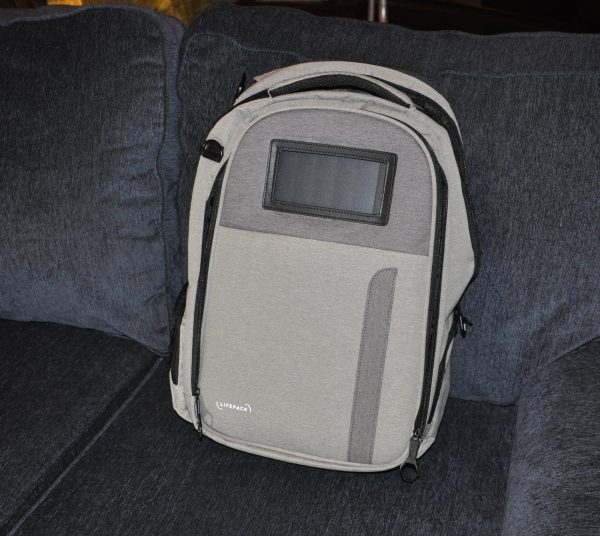
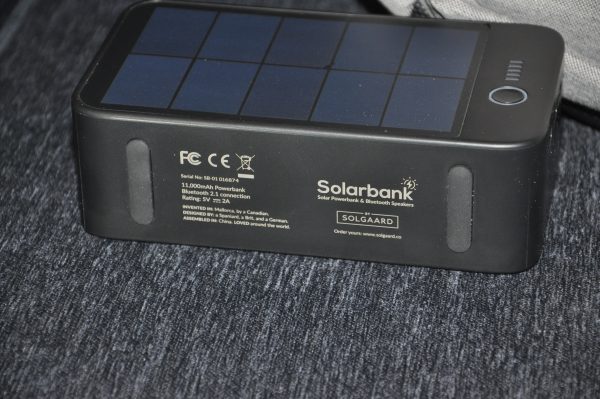
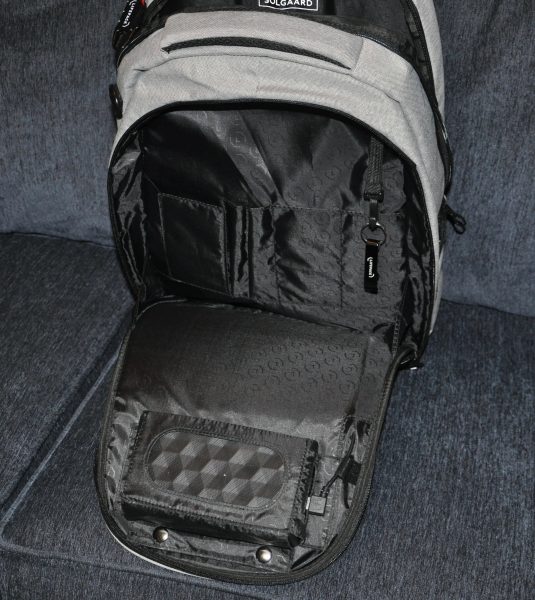
The outside pocket has a notable feature showing through on the outside: a 5” x 2.25” window allows the sun to reveal a solar charger for an 11,000 mAh battery pack! It is housed in its own Velcro-and-snap secured holder, perfectly centered over this window.

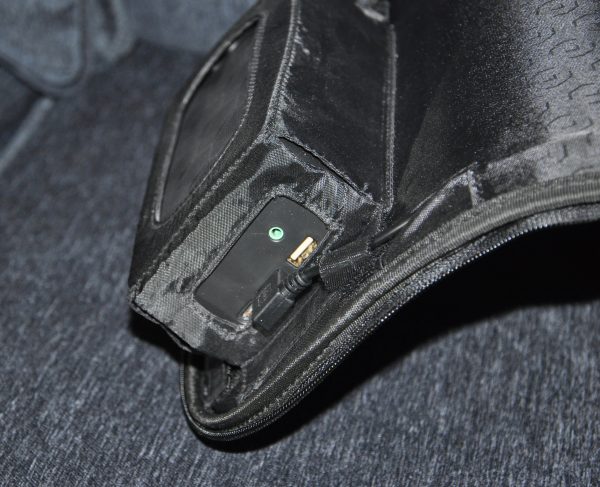
Inside, you’ll find access to the two USB charging ports. There’s even a cable built into the bag, which routes the power from one of those ports down to a small pocket on the corner, down where the straps connect!

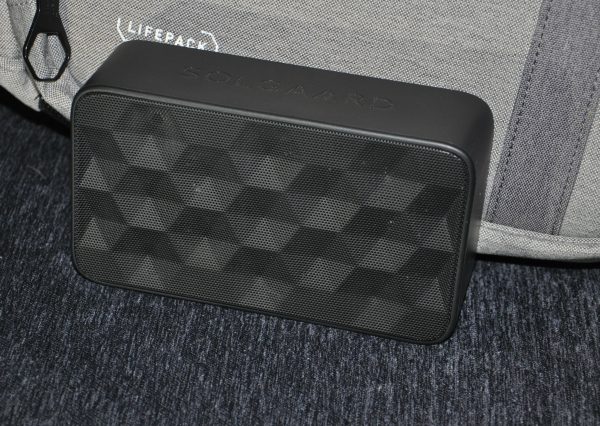
You can keep a cable in there, pull it out and top up your phone or iPad between flights, without ever opening your bag. When you remove this battery pack, you also find that the reverse side is a very powerful Bluetooth speaker!

While it’s in your bag, the sound is a bit muffled, but pull it out, and you’ve got an instant party! There’s also AUX input and a micro USB charging port for the battery pack. Five “gas-gauge” LEDs tell you the amount of charge left with a quick push of the adjacent button.


The power bank is rated to have 96 hours of non-stop listening or 6 smartphone charges. When it’s flat out of juice, 4 hours in the sun will bring in enough power to charge a smartphone completely, or play music for 8 hours. You can also charge two devices at once, while still playing music. Below this specialized holder in that front-most pocket, there’s open space to the bottom of the bag. The pocket is about an inch thick, so an iPad, pico projector, or novel for in-flight reading would be right at home. There are a few more card pockets and pen silos in that back panel as well. Sewn into this seam is a key holder with a cap lifter attached.

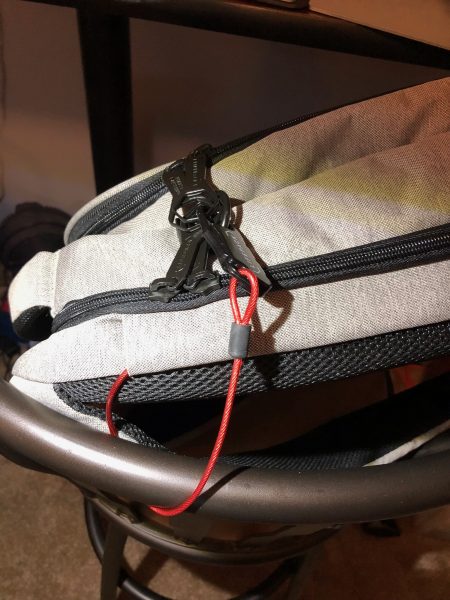
Coming back to the outside of the bag, remember that small pocket by the right strap that has the USB cord socket? There’s one on the opposite side that has a shock-corded holder for a water bottle. And, up above that left corner pocket, what’s that black clip peeking out? It’s a 3-digit combo locking carabiner with a 9” length of red-insulated steel aircraft cable attached!

This cable is bolted to the bag and allows you to tether the bag to a post, chair, or another object to avoid snatch & dash thieves. Or you could lock the four dual pull tabs together with the cord around a chair arm, and no one can get into the bag or remove it from where you place it, as in the photo above. Wish I’d have had this when I was doing trade shows!

There is still one last trick in the LifePack – to make up for a dark day when you can’t charge your battery, in the bottom, there is a zippered pocket that contains a full-sized waterproof cover.

All in all, this full-sized backpack can handle quite a lot of travel needs, from full-sized laptops to a variety of smaller gadgets. The safety and security features don’t really have the usual cost of added weight: I can tell no difference between this and 2-3 other full-sized packs in my collection. It was actually lighter than most. The handles and yoke where the straps attach are very comfortable, great for a full day of museums, travel, or classes.

Source: The sample for this review was provided by SolGaard. Please visit for more info and Amazon to order.


Product Information

Price: $269.00 MSRP
Manufacturer: Solgaard
Retailer: Amazon
Requirements:
  • none
Pros:
  • Solar charging battery pack
  • built-in wiring
  • good organizational pockets
Cons:
  • window through front pocket for solar panel – can't be used without power bank inserted
  • only one "outlet" for power routed outside of main compartment
  • speaker plays into pack

Filed in categories: Reviews

Tagged: ,

Solgaard LifePack backpack review originally appeared on The Gadgeteer on November 29, 2017 at 11:00 am.

Note: If you are subscribed to this feed through FeedBurner, please switch to our native feed URL http://the-gadgeteer.com/feed/ in order to ensure continuous delivery.

Electrolux ProSwivel Vacuum review

Think about all the regular housekeeping chores that you have to do on a regular basis. Now think about the ones that appear close to the bottom of that list. Maybe it’s taking out the garbage or cleaning the toilet. But if you would have asked me what I least enjoy, it would probably vacuuming.

Just the thought of dragging out that heavy, cumbersome machine and lug it around the living room for 10-15 minutes is enough to make me think “ehh… the carpet’s not thaaat dirty” and push that idea right out of my head for another day or two. But I learned sometimes, you just need the right tool to make the job enjoyable, and Electrolux’s ProSwivel vacuum really hit that sweet spot for me.

Specs and Build

The ProSwivel has a lot of features for such a small, unassuming vacuum. Hidden in the body is a long, 2-foot aluminum cleaning wand that is attached to the hose, giving you 12 feet of reach, making those ceiling fans and door frames a breeze to suction-dust.

I was pleasantly surprised by the cleaning attachment. Initially, I was looking around for 2-3 individual brushes and funnels to pop into the body but realized that they were all the same piece. Depending on which end you place on the hose, it can serve as a dust brush, crevice tool or furniture nozzle. Pretty clever space-saving trick.

The ProSwivel features…

  • Onboard (and quite innovative) 3-in-1 tool
  • 10-foot hose and 12-foot attachment reach
  • Easy floor height adjustment
  • Floor-height front LED lights
  • Easy-empty 1.2 quart cyclonic dust container
  • 13 inch cleaning width
  • Washable filter
  • 11 amp motor, 30 foot cord
  • 16 pound total weight

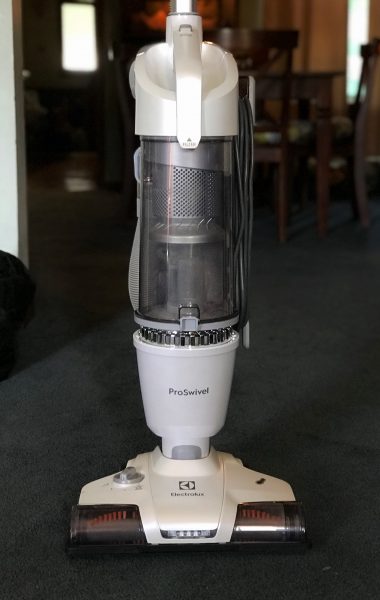
The vacuum is solidly built. I didn’t hear any rattling or strange noises while it was running. And as you can see in the photos, it has a clean, modern design. After several weeks of normal use, it still looks brand new. Of course, this is a product that you would use for years, hopefully, so it’s hard to ascertain how rugged the ProSwivel is.

The hidden handle extension pulls out of the body, allowing extra reach for brush attachments.

I did find one area that could be a cause for concern, over time. Where the hose is attached to the handle hangs at a sharp angle, and with the weight of the rest of the hose pulling on it, it seems like a stress point that could stretch or maybe even tear over time.

Here’s the hose stress point I mentioned, which could pose a problem after months and years of stretching.

In Action

I think the initial joy from using this vacuum was in just how lightweight and maneuverable it was. My other cleaner was an old basic Eureka upright… fairly no frills, and an absolute beast. I have fairly thick carpet and the ProSwivel glides over it while still effectively brushing and suctioning up plenty of dirt and dust.

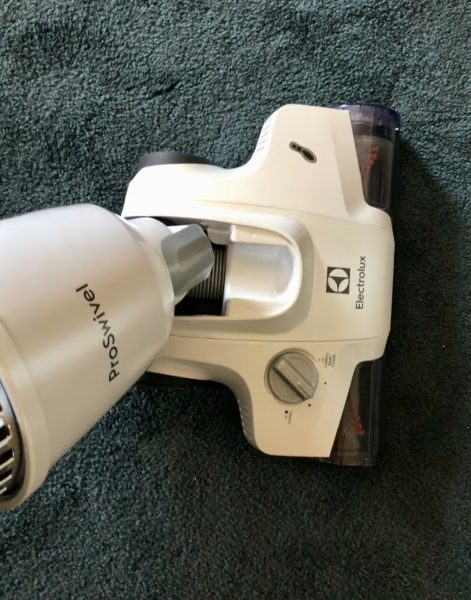
That 360º swivel point allows the ProSwivel to turn on a dime.

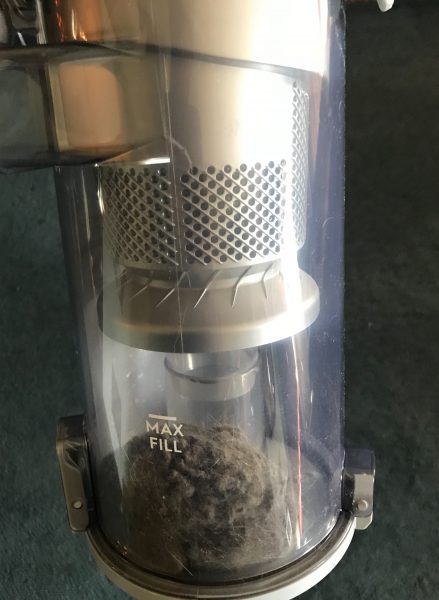
I also like the very visible cyclone dust canister. It gives a good idea of when it’s getting a little too full and needs emptied. It also demonstrates just how much dust, crumbs, and hair are being picked up, which, you know, can be both impressive that the vacuum is working so well and embarrassing that the carpet (mine, anyway) was that filthy.

All that dirt and dust surprises me every time.

Going back to the swivel feature, the head is easy to snake around corners and furniture legs. It takes some getting used to, sort of like driving with a trailer attached, but once you get the hang of it, something as pedestrian as vacuuming becomes, well, sort of fun. The width of the suction head is only a little over a foot wide, which gives it the advantage of being able to fit in a lot of narrow areas. Of course, that means more passes on large open areas of carpet. And since rounding corners and skirting against walls and furniture is so darn fun, it makes the wide expanses of carpet with that tiny head seem tedious by comparison, like painting the side of a barn with a paint roller.

That’s a fair trade.

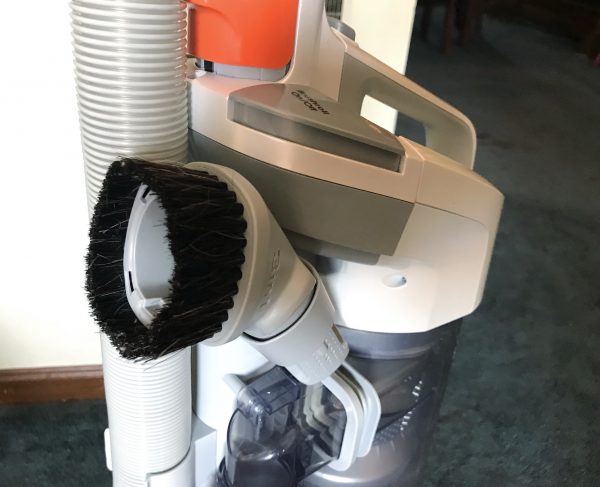
The brush attachment and hose stay out of the way until you need them.

The actual suction seems very good. I tested it on several surfaces with the brush roller on and off (there’s a handy brush switch near the power button) and it handled the floor height difference very well. I have a dark carpet and can plainly see crumbs and all the normal bits that land on the floor, so it’s very easy to tell when something doesn’t get picked up on the first pass. The only thing it missed was bits of food that had dried and stuck to the carpet fibers…. I have a five-year-old, so that’s a common sight. One good lap around the living room picked up all the visible mess and then some.

This clever brush attachment is actually three in one, depending on which end you place within the handle.

Conclusion

One of the largest hurdles in getting around to vacuuming the floors, at least for me, is the thought of getting up and lugging out a heavy, loud, clunky machine and pushing it around the room. The ProSwivel goes a long way toward removing that barrier with its light weight and fun design. I love anything that is designed to make me more productive.

Hunt down those dust bunnies with 4 bright LED headlights.

That transition from “Ugh, vacuuming” to “Ooh, vacuuming!” could be an accurate wrap-up of my experiences with the ProSwivel.

The Electrolux ProSwivel vacuum is currently available on Amazon for $219.99.

Source: The sample for this review as provided by North St Bags. Please visit their site for more information or Amazon to order.


Product Information

Price: $219.99
Manufacturer: Elextrolux
Retailer: Amazon
Pros:
  • – Lightweight and easy to maneuver
  • – Long, built in cleaning wand has good reach
  • – Very easy to empty and store
Cons:
  • – Not very wide, so it can be tedious for large areas
  • – Narrow base also makes upright unstable when using wand, falls over

Filed in categories: Reviews

Tagged: , ,

Electrolux ProSwivel Vacuum review originally appeared on The Gadgeteer on November 28, 2017 at 12:45 pm.

Note: If you are subscribed to this feed through FeedBurner, please switch to our native feed URL http://the-gadgeteer.com/feed/ in order to ensure continuous delivery.

PhotoBulk 2 image editing software for macOS review

So there you are, staring at that big batch of beautiful images on your desktop that needs to be prepped for publishing and/or distribution. Image editing can be a time-intensive task when done manually, especially if you’re dealing with a lot of content. You could be in for a long night. Enter PhotoBulk 2 for the macOS, an app that enables you to batch process common image editing tasks like resizing, converting formats, optimizing, and renaming. You can even create custom watermarks that include both text and graphics.

How does it work? Will it save you some precious sleep? Let’s go find out!

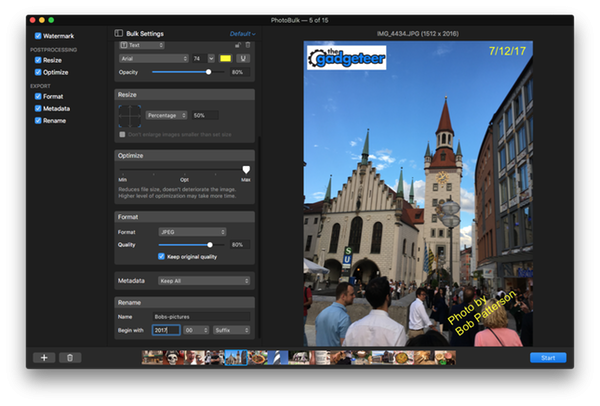
PhotoBulk 2 is the latest update to Eltima Software’s well-received bulk image editor, with a bunch of new enhancements and features. The interface is wonderfully simple. Select the batch of images you want to edit, which will then appear in a carousel at the bottom of the app window. Then you can select from a menu of 6 processing functions to apply to the batch, which can be toggled independently.

Watermarking

You have four watermark options to choose from, each of which is customizable to your specifications. Check the “Watermark” box to set your options, at which point you can any combination of watermarks you like.

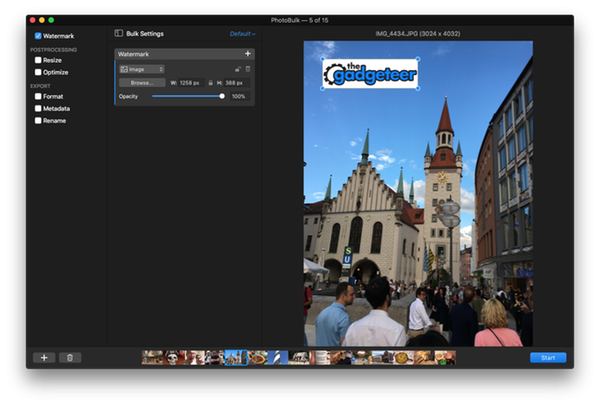
You can import an image (like your logo) which can be resized, rotated, and set to the opacity of your preference.
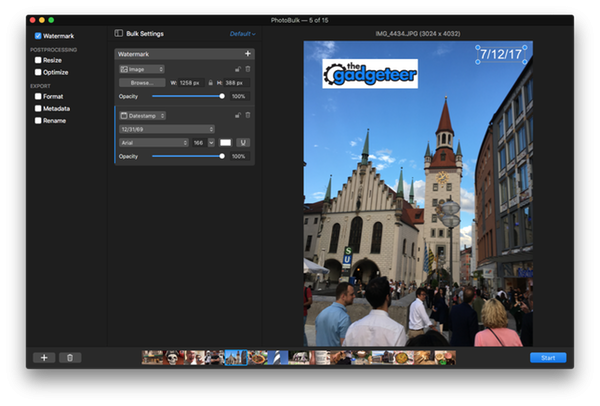
You can also add a date stamp for the image, with complete control over the font, size, color, positioning, and opacity. The date is automatically pulled from the photo metadata. You can also rotate the text placement if desired.
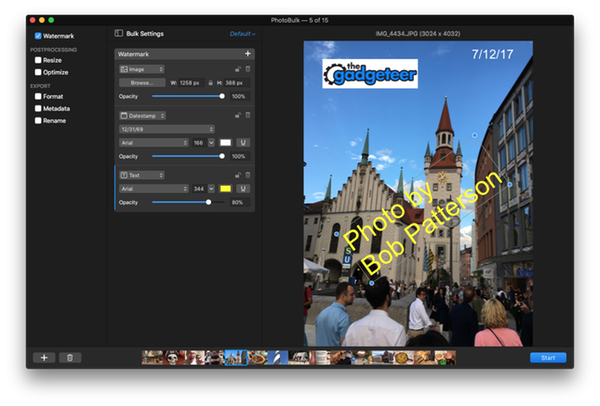
Additional text (like a byline or web site address) can also be added. As with the date stamp, you can customize all aspects of the text presentation (font, size, color, position, opacity, and rotation). Double-click on the text window to type your text, which can include multiple lines if desired.
Finally, there’s a “script” watermark (not shown here) that will automatically wash the formatted text across the entire image in a repeating pattern. This is especially useful if you want to embed a copyright tag, and can be formatted like the other text options (except for rotation).

The chosen options appear in the preview window, and you can toggle through images in the carousel to see the final results.

Post processing options

You have two post-processing options you can toggle: resizing and optimization.

The resizing process has 5 options that enable some pretty sophisticated flexibility. You can resize each image to a fixed height, a fixed width, a specific height & width for a “max size” to resize everything up to the largest possible size specified. Any of these choices also have a toggle that prevents the batch from enlarging images that are smaller than the set size. You can also set a generic “percentage” resizing that applies to every image in the batch.

Optimizing is an automated process that reduces the file size without deterioration. You can set your options on a sliding scale.

As with watermarks, you can use the preview window (and the carousel) to see how the selected options will impact your final images.

Export options

After you’ve set your desired watermark and post-processing options, you can set up the details for the final file exports. Note that PhotoBulk 2 enables you to choose your destination folder (or create a new one), retaining your original images if you want to process them again.

The “format” option allows you to export your final images to JPEG, PNG, GIF, BMP or TIFF format. You can also select the quality level for JPEGs if desired. You can also use the “metadata” option to keep or discard GPS data, camera info data, and copyright/contact info data embedded in the image. You can edit these options, but you can choose to keep or discard the data.

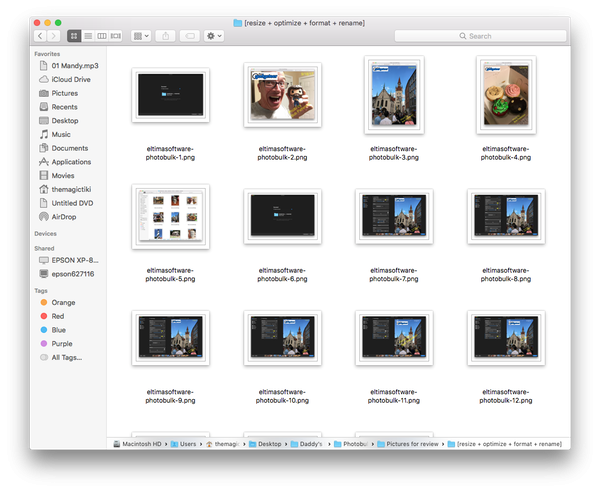
Finally, you can set your renaming options for the images if desired. You can pick a generic image name and append a common prefix or suffix to the file name, including sequential numbering with up to 4 digits (such as 1, 01, 001, or 0001). When I set up the processing for this review, this made it a snap to standardize my file naming. Here’s a screenshot of the output folder. No selecting and renaming for every picture!
Processing and saving your preferences

Once you have all of your options set, you press “start” to begin the processing. PhotoBulk 2 lets you choose your destination folder, and off you go!
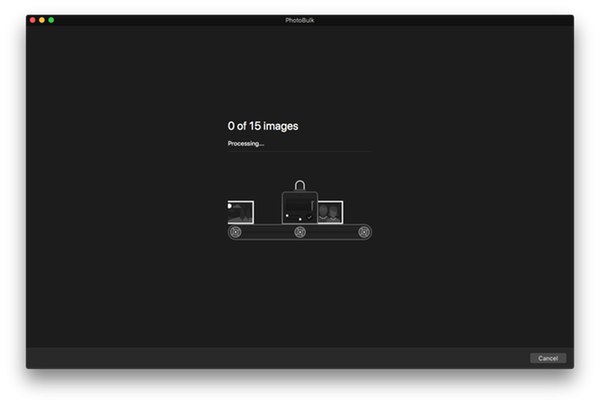
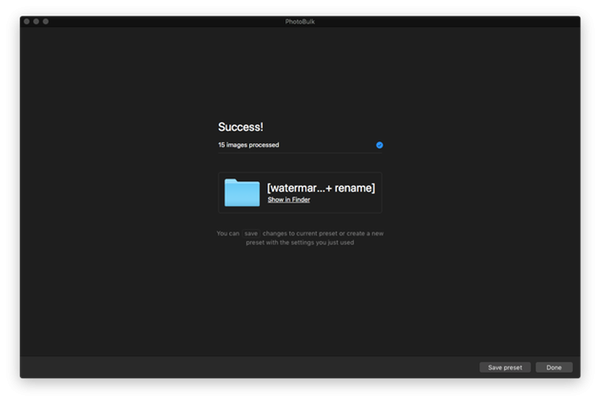
You have the ability to save your presets for future use, including the watermarking options. We use a standard image sizing and naming convention for our work here at The Gadgeteer, which I now have set for bulk processing of my review photos. I also do illustration work as a hobby, and I can save a different batch setting for managing the images I put up on my website or in social media. I can also change preset options and save them for future processing (like changing copyright dates with the new year). It’s a nice option that saves a bunch of time.

General notes on use

I really like the PhotoBulk 2 package. The user interface is intuitive and easy to use, enabling you to be up and running with a few minutes of orientation. Eltima also does a nice job with tutorials and support to help you along the way if needed. The app is also very fast, significantly faster than the previous edition based on my research.

You should note that the same watermark settings are applied the same way to all photos in the batch, regardless of the image size. It looks like PhotoBulk defaults to a standard xy measurement for positioning from the image edges, and uses the same size specifications for watermark options. I tested three photos here to show this. The first two are the same vertical orientation and size, while the third image is horizontal in orientation and 50% smaller. Check it out:
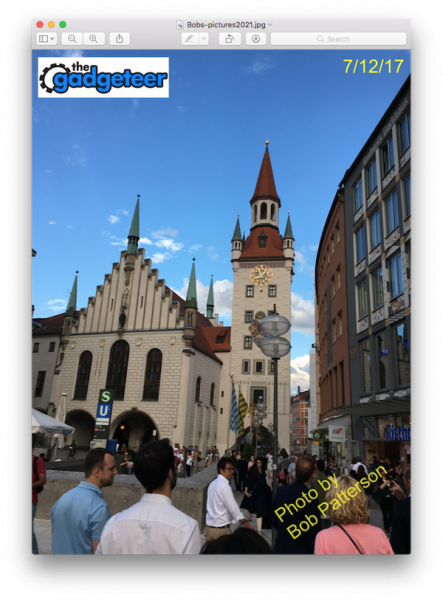

See the difference? If you’re processing a bunch of images that are the same (or close to the same) dimensions, this probably won’t be an issue for you. If you have dramatically different sized images in your collection, however, you may want to set up two different batches. Again, you can check all the images in the preview screen before you run them out.

Finally, please note that this app is designed specifically for use on the Mac desktop. If you’re on a windows device or an iPhone or iPad, you’ll need to look elsewhere for a batch processing solution.

Conclusions and Pricing

If you need a simple batch processing app with robust watermarking, formatting and export features, you can’t go wrong with PhotoBulk 2. With a clean, easy-to-use interface and intuitive functionality, I really like it as a massive time saver. It’s also bargain priced at $9.99. Check it out at the PhotoBulk web site or buy it at the macOS app store!

Source: the sample for this test was provided by Eltima Software. Please visit their site for more information.


Product Information

Price: $9.99
Manufacturer: Eltima Software
Retailer: macOS app store
Pros:
  • Intuitive, easy to use interface
  • Robust processing capabilities
  • Versatile watermarking options
  • Great value for under $10
Cons:
  • Only works on the macOS… no support for iPhone or iPad use

Filed in categories: Reviews

Tagged: ,

PhotoBulk 2 image editing software for macOS review originally appeared on The Gadgeteer on November 28, 2017 at 9:00 am.

Note: If you are subscribed to this feed through FeedBurner, please switch to our native feed URL http://the-gadgeteer.com/feed/ in order to ensure continuous delivery.