The MEATER wireless meat thermometer review

The Gadgeteer Kid & I are true carnivores without a doubt. We love all kinds of cooked meat from steaks to fish and everything in-between. IMHO, grilling is a science and an art form with cooking everyone’s meal to perfection a stressful experience more often than not. Managing all the variables and people’s preferences is challenging, add a little alcohol and the odds of missing the mark goes up exponentially. Well, the engineers who developed the MEATER (the G.K. and I still chuckle @the name), the first truly wireless meat thermometer, aim to help you “achieve perfect and consistent results every time.”

Design and features

I have used several “wireless” thermometer probes for measuring the core temperature of what you’re trying to cook. They all had a metal braided cable stretching from the basestation to the sensor inserted into the meat that is sitting inside your barbecue or oven. Then the basestation transmitted the temperature data to your smartphone or other device meant to let you know the status of your food.

The MEATER is a truly wireless, dual sensor probe created with the sole job of helping you cook your food to perfection with the unwritten goal of boosting your grilling street-cred to Master BBQ’er.

Technical specifications

  • Stainless steel construction
  • Water resistant design, dustproof, and easy to clean
  • Wireless up to 33 feet (10 meters): Bluetooth LE connection to your smart device
  • MEATER Sense™: 2 temperature sensors in 1 probe
  • Internal temperature sensor range: 212°F (100°C)
  • Ambient temperature sensor range: 527°F (275°C)
  • Rechargeable Battery: Lasts 24 hours of continuous cooking between charges
  • Dimensions 130mm x 7mm (6mm diameter)

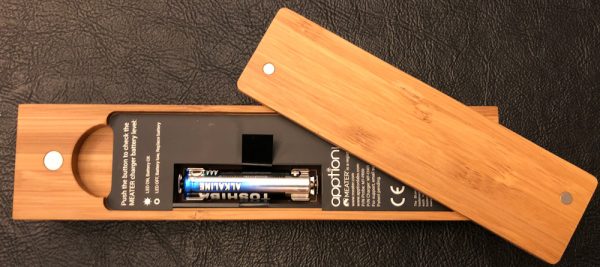
The MEATER comes with a bamboo holder that securely keeps and recharges the wireless (easily misplaced) probe. There is a battery power level LED & button located on the front of the wooden holder.

There are two embedded magnets on either side of the back that enable you to place the wooden charger on most metal surfaces (aka the side of a refrigerator, stove, BBQ, etc).

The MEATER is powered by a single AAA battery and can charge your MEATER probe up to 100 times before needing to be replaced. The back cover is also held in place by two small embedded magnets.

The MEATER probe has to be inserted into the meat beyond the line machined into the metal casing to protect the main sensor from damage due to high temperatures.

The ambient sensor is meant to monitor the cooking temperature of the oven or BBQ. It is located in the black plastic end of the probe.

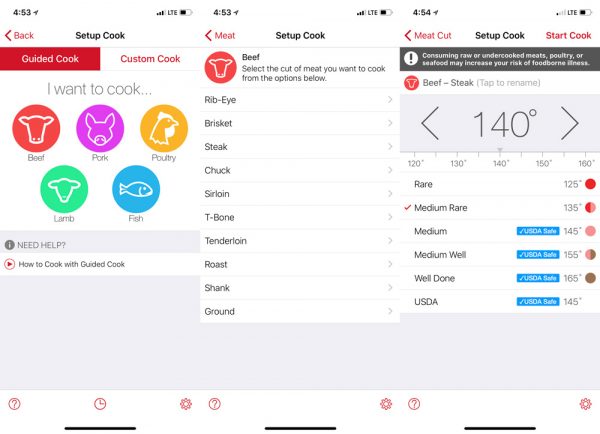
Along with creating a very easy to use, high quality device, the folks @MEATER have developed a very polished ecosystem/app to make cooking with the MEATER nearly foolproof. The MEATER’s Smart Guided Cook system walks you through every step of the cooking processThe app guides you thru the type, cut, and doneness of the meat.

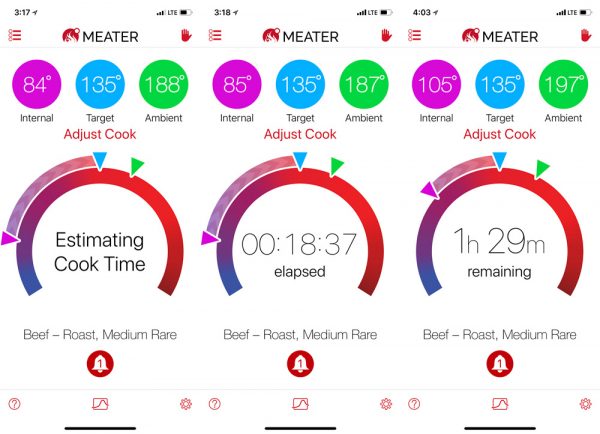
The MEATER’s dual sensors continuously monitor internal and ambient temperatures concurrently. The app also gives you elapsed cooking time and estimated time remaining until your meal is ready to serve.

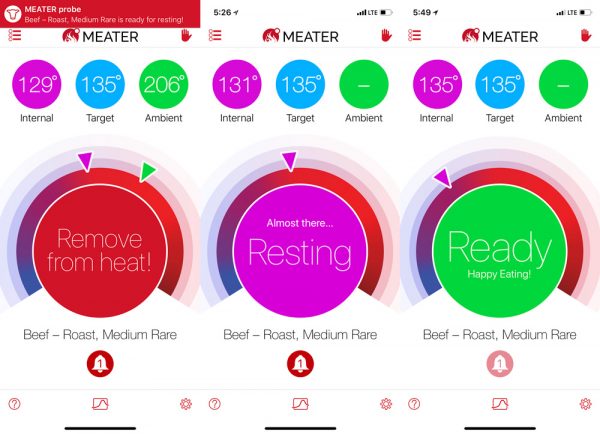
Then to walk you over the finish line, the app let’s you know when to pull the meat from the cooker, let it finalize it internal cooking (aka letting it rest), and when its ready to eat. The estimated cook time has been spot on…within 5 minutes or so. Not bad considering the roast took nearly two plus hours to cook.

Overall, the whole system is brilliant. I used the MEATER several times over the holiday season and every cook in the room loved it, we all geeked out. All of the were a bit jealous and seriously considering buying one ASAP. The agreed upon, most loved features of MEATER was it being truly wireless, with built-in internal and ambient sensors, and its ability to estimate cooking time so accurately.

The only real limitation of the MEATER is it’s range and lost connectivity. I wouldn’t even consider it a true negative just a known issue that needs to be worked around. You’re sticking a small under powered Bluetooth device into a metal box, it’s range is going to be pretty limited. I found both in the BBQ and oven, the range of the MEATER was approximately 10 feet but would quickly reconnect once back in range.

Positives

  • Well made, thought out design
  • Truly wireless
  • Water resistant, dust-proof, easy to clean
  • Built-in dual sensors
  • Excellent app/ecosystem

Negatives

  • Limited wireless range

Final thoughts

I would give the MEATER 5-stars if it weren’t for its limited range. The soon to be released MEATER BLOCK will hopefully take care of this limitation. That said, I love this device and in most, if not all circumstance would make an excellent tool for any and all grilling/barbecuing aficionados. The MEATER’s truly wireless, dual sensor design in concert with its Smart Guided Cook system makes cooking meat stress-free and nearly idiot-proof.

Price: $69.00
Where to buy: MEATER
Source: The sample for this review was provided by MEATER.

IOGEAR Compact USB-C Docking Station with PD Pass-Thru review

We recently bought a new Apple MacBook Pro for my wife.  It’s a fantastic device, but one of its limitations (I’m sure Apple would say advantages) is that basically the only ports on it are four USB-C ports.  I do like USB-C and I’m looking forward to the day when old-school USB is phased out of devices far and wide in favor of USB-C, but until then I thought it would be useful to have a way to connect non-USB-C-cable based peripherals to our new MacBook Pro.  The IOGEAR Compact USB-C Docking Station with PD Pass-Thru is one way to address this. Let’s check it out!  Gadget on!

What is it?

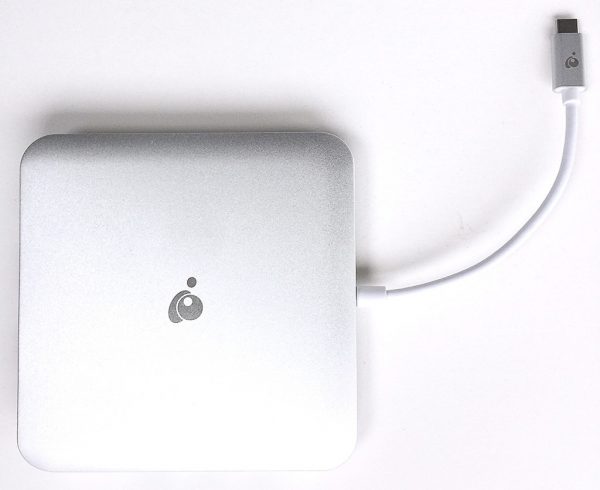
IOGEAR Compact USB-C Docking Station with PD Pass-Thru is a compact docking station that is intended to effectively turn your laptop into a full-functioning desktop workstation.  It includes a total of 10 ports and slots for various cable an memory card types and can also perform pass-through charging of your laptop.

Design and Features

As mentioned above, the IOGEAR Compact USB-C Docking Station with PD Pass-Thru includes the following ports:

  1. USB-C
  2. Memory Card Reader for SD or MicroSD cards
  3. USB 3.0 (Type A)
  4. USB 3.0 (Type A)
  5. USB 3.0 (Type A)
  6. Gigabit Ethernet LAN
  7. HDMI video
  8. Mini DisplayPort video
  9. VGA video
  10. Headset/Microphone jack


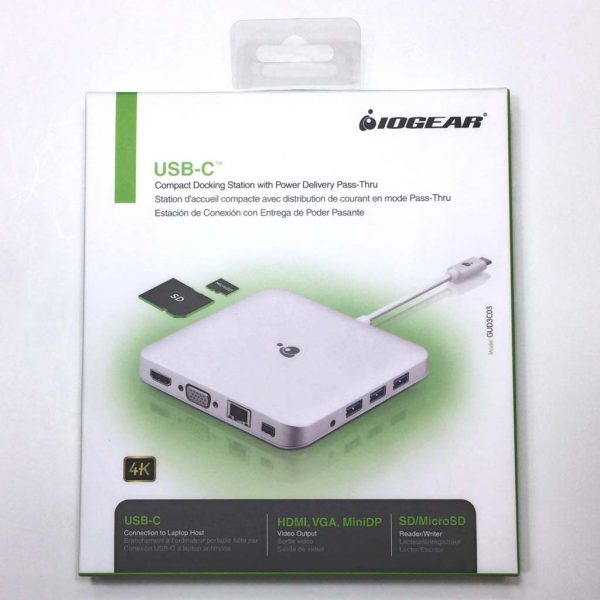
Above, the front of the IOGEAR Compact USB-C Docking Station’s packaging.  It includes an accurate photo of the product contained inside.

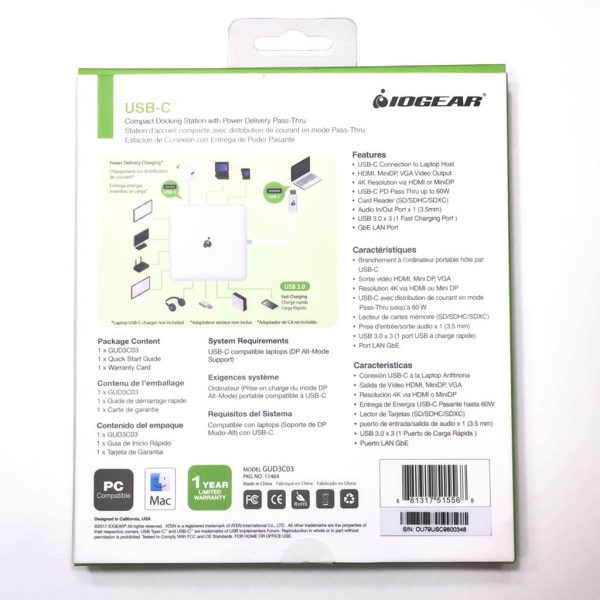
The rear of the IOGEAR Compact USB-C Docking Station’s package includes a detailed list of features include a list of all ports.

One thing I noticed when unboxing the Dock was that the tape seal had already been cut.  I wondered if this was evidence that I had not received a new device as a review sample.  I wondered this further when the Dock itself seemed to have some cosmetic scuffs on its exterior.  In any case, it seemed to function just fine.

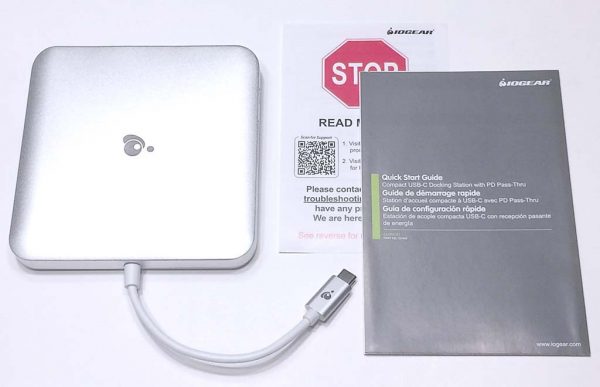
Above are the contents of the package, which are also listed below:

  • IOGEAR Compact USB-C Docking Station
  • Quick Start Guide booklet
  • Troubleshooting card

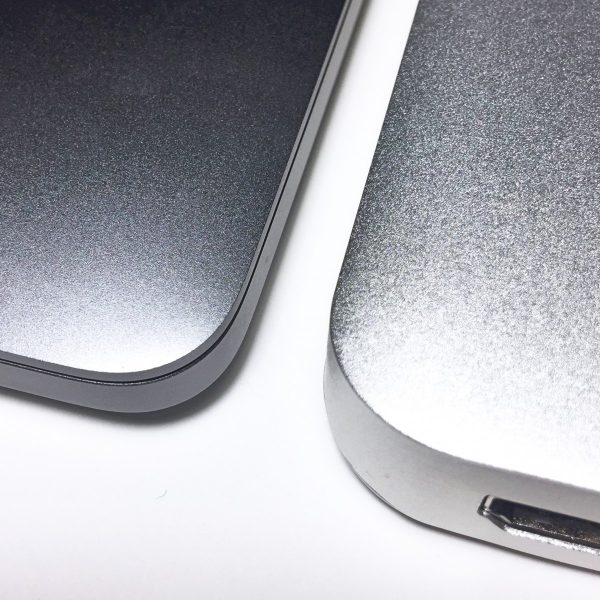
My initial impression of the Dock was that its aluminum case had a look and feel quite similar to an Apple MacBook laptop with its silver, matte-type texture.  More detailed on this below.

In the closeup photo above, my wife’s new Apple MacBook Pro is on the left, and the Dock is on the right.  As mentioned, both aluminum surfaces are very similar in appearance and texture, though I would note that the MacBook Pro is Space Gray in color; were it the Silver version, I think it would appear to match the Dock almost identically.

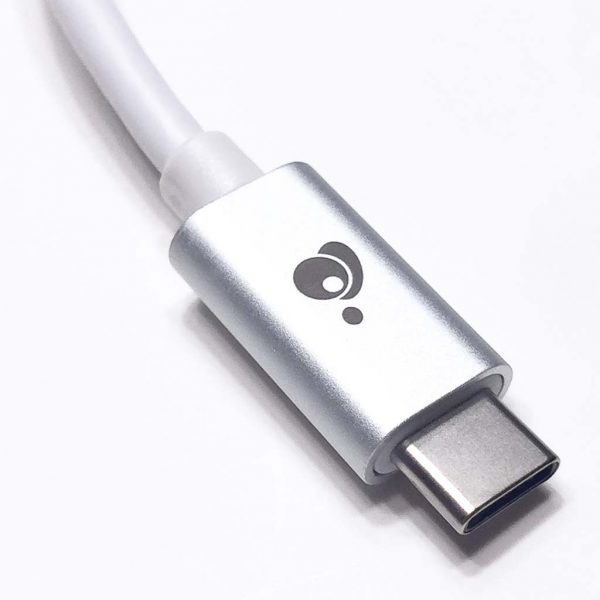
Above is a closeup of the USB-C docking interface cable that is intended to be plugged into your laptop.  This single cable provides all of the port replication of all peripherals plugged into the Dock.

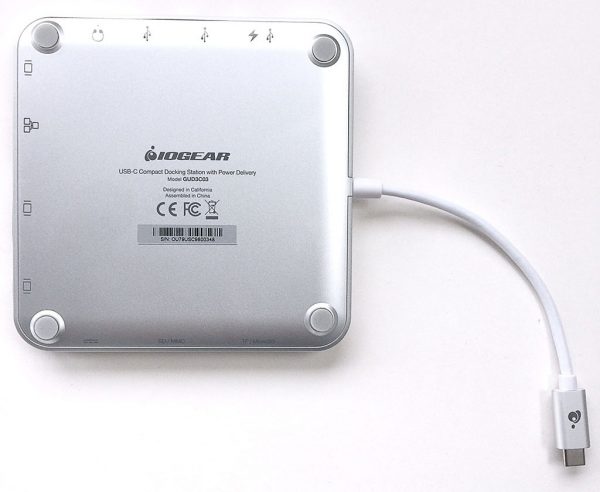
As seen above, the underside of the Dock includes symbols adjacent to each of the ports to indicate their compatibility.


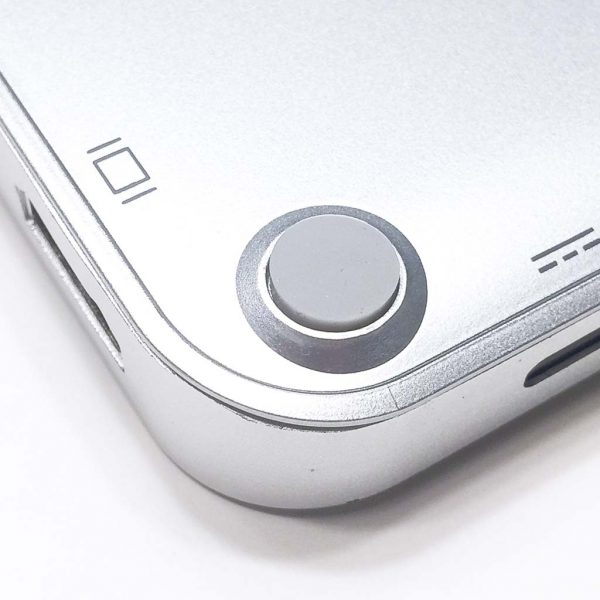
The underside of the Dock also has a silicone foot at each corner, as shown above, to keep it from sliding around while sitting on your desk or another surface.
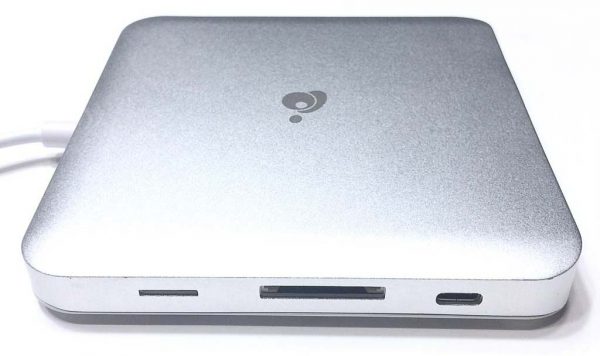
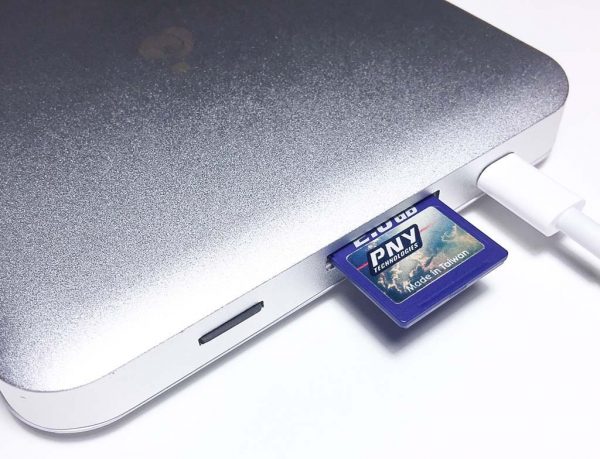
The Dock has ports on three sides (the USB-C docking interface cable that plugs into the laptop protrudes from the fourth side).  The side depicted above has, from left to right, MicroSD card slot, standard SD card slot, and USB-C port.  This single USB-C port is intended to plug your laptop’s power supply into, to enable Power Delivery Charging (PD Pass-Thru) while the Dock is connected to your laptop and in use, with up to 60W of charging power.  Also, when you are away from home, the bus-powered Dock does not need a power supply to connect your devices.
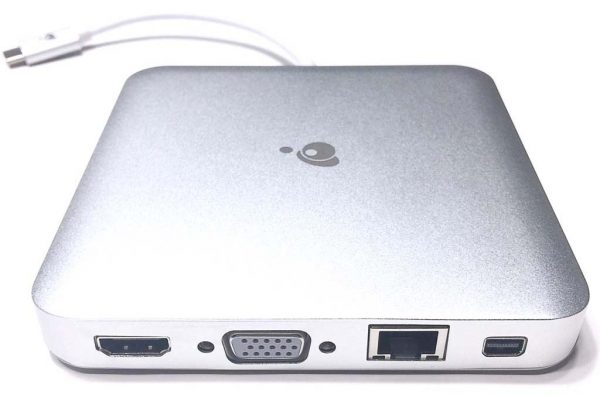
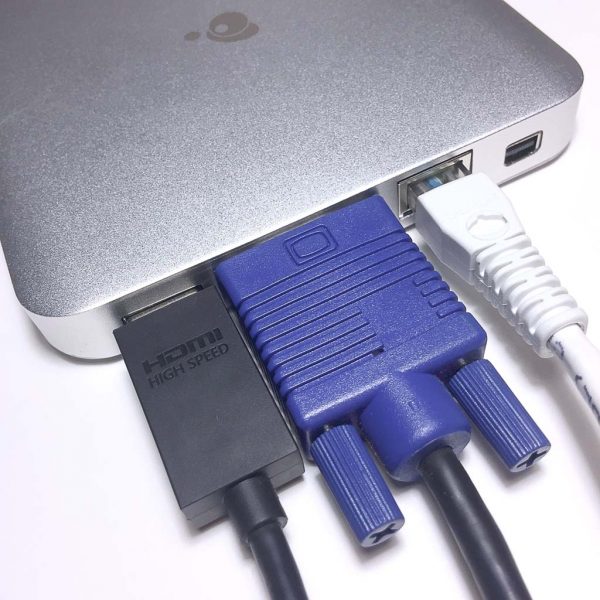
The next side of the Dock includes the ports shown above: HDMI video, VGA video, Ethernet LAN and Mini DisplayPort video.
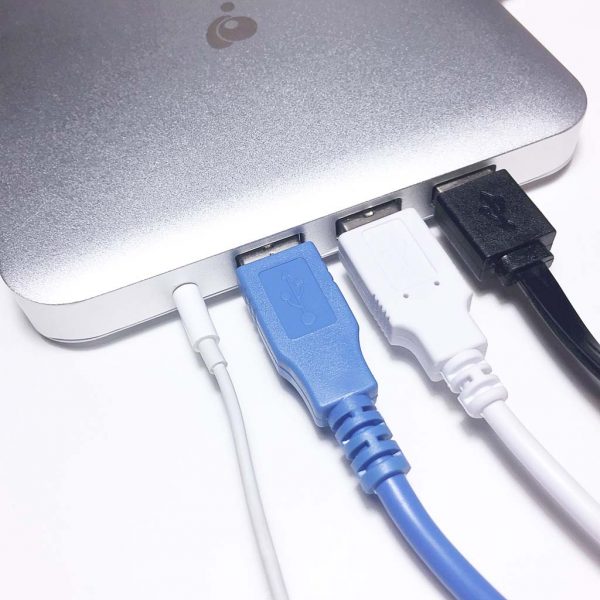
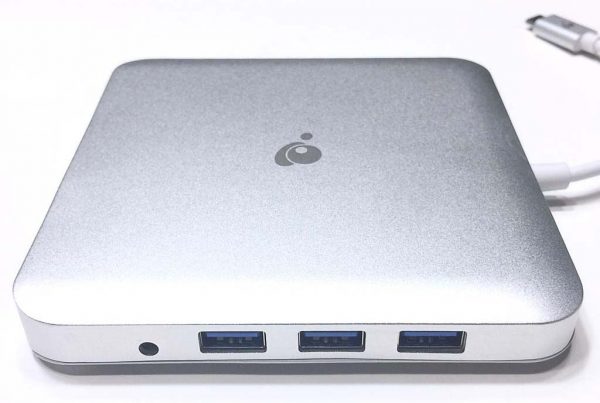
The final side of the Dock includes a headphone/microphone port and three USB 3.0 (Type A) ports.  Per the port symbols on the underside of the Dock, the USB 3.0 port to the far right also has a small lightning bolt near the USB port symbol, indicating that this USB port can be used for fast charging of phone, tablet or another device.Above, from left to right I’ve placed a MicroSD memory card, a standard SD memory card, and the laptop’s power supply USB-C cable into the Dock.
Next up, I’ve inserted, from left to right, an HDMI video, a VGA video cable, and an Ethernet LAB cable.  The fourth port is a Mini DisplayPort, but I don’t own such a cable to illustrate this, so you’ll have to use your imagination here.  The Dock gives the ability to connect two additional monitors (both at 1080p resolution) alongside your laptop’s monitor if using a Windows laptop, or a single additional monitor (at 4k Ultra HD resolution) alongside your laptop’s monitor if using an Apple laptop.
Finally, in the photo above, I’ve inserted an Apple Earpods cable and three old-style USB cables: one for an external hard drive running Apple’s Time Capsule backup software, one for a keyboard and one for an iPhone.

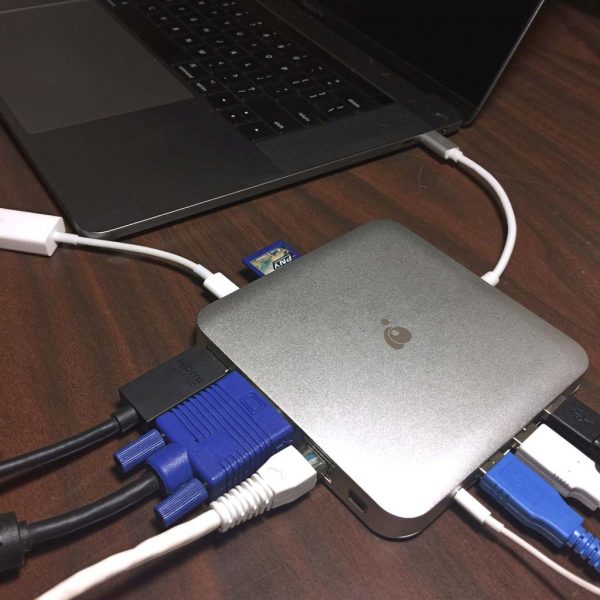
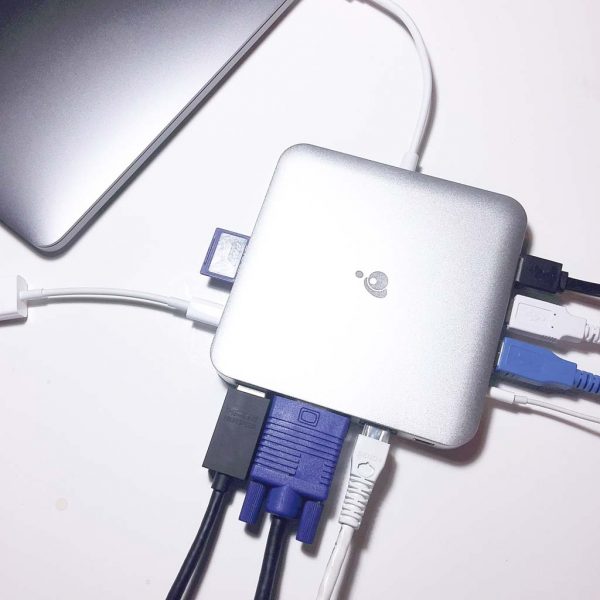
Above, a photo of the Dock connected to our MacBook Pro, and with multiple devices connected to the Dock.  The Dock is very compact and easy to use; once all of your peripherals are plugged into the Dock, the Dock’s single USB-C cable is all that is needed to quickly add a significant amount of desktop-like capability to your laptop.

Positives

  • 10 ports and slots allow a variety of peripherals to be connected to your laptop quickly and easily
  • Pass-through charging allows your laptop to be charged while still utilizing any of the connected peripherals
  • Slim, compact design that mimics the Apple MacBook in appearance and style

Negatives

  • None

Final Thoughts

We found the IOGEAR Compact USB-C Docking Station with PD Pass-Thru to be quite useful alongside my wife’s new Apple MacBook Pro.  It provides a quick and easy way to attach multiple peripherals with a single USB-C docking interface connection.  We were able to routinely connect an external backup hard drive as well as an HD TV as an external monitor and a keyboard on occasion, and all while continuing to charge the laptop’s battery.  At around $100, this dock isn’t necessarily cheap, but compared to other, similar docks, it seems to give a lot of features for the price.

Price: $99.99 MSRP
Where to Buy: Amazon
Source: The sample of this product was provided by IOGEAR.

EACHINE E56 quadcopter folding selfie drone review

In case you have been living under a rock, there is this phenomenon called drones going on. They are everywhere, and range from tiny insect-sized devices the size of a soda can top to large, load-bearing monsters that are being considered or actually used for everything from package delivery to first-aid supply drops in war zones. The speed, range, ease of control, and flight time all vary, and price ranges from under $50 to well over $2000. We have reviewed a few here, but none that I have seen so far that hit that sweet spot between affordability for a toe-dipper, fun of flying, and ease of getting started. EACHINE sent me their E56 model to test a few weeks ago, and I’ve found it may just be the beginner’s model you’ve been looking for.
Note: Photos may be tapped or clicked for a larger image.

What is it?

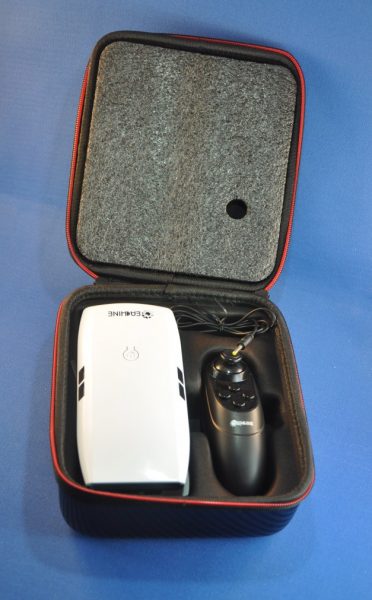
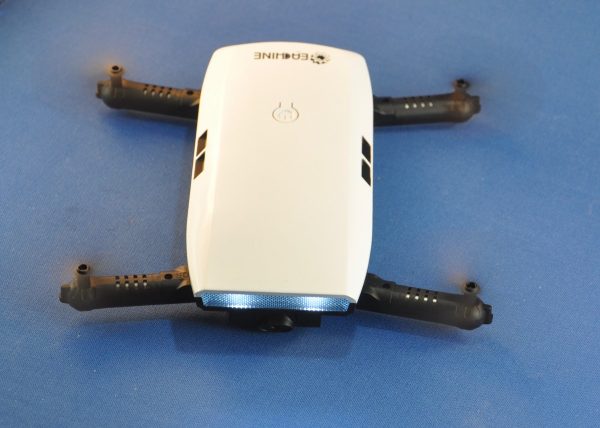
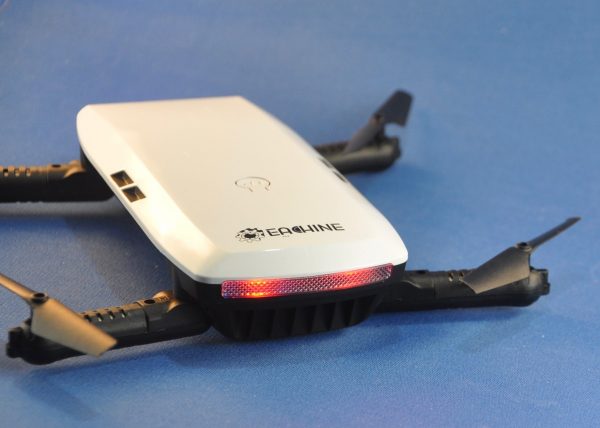
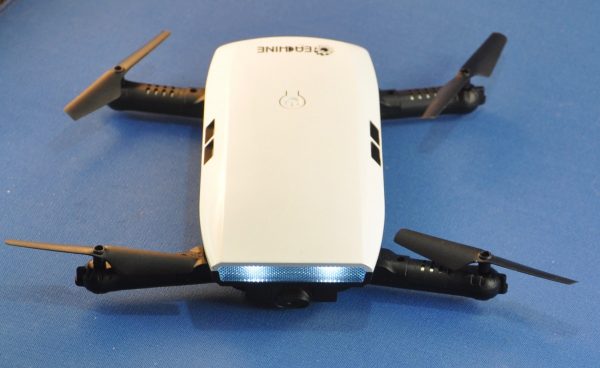
The E56 is a quad-copter, with arms that fold out and friction-lock into place with a nice, satisfying click. Folding up the legs is just as easy, and they nest perfectly against the body. Folded up, the body measures 5.75” x 2.75” x 1”, which fits into most of my shirt pockets easily. The unfolded wingspan is about 8”. The unit is very light, at only 3 ounces flight-ready. The battery weighs .7 oz. The only other thing you need to fly this little guy is a smartphone. Sure, there’s a thumb-guided controller included in the package, but the smartphone app is much more fun, plus you get to see what the drone’s camera is seeing as you fly, and it records directly to your smartphone’s camera roll!

Hardware specs

Product Specification:

Video Resolution: : 720P
R/C distance: : About 30m
Product battery: : 3.7V 500mAh Lipo Battery(Included)
Product size: : 17.8*18*3.2 cm (Before Folding)
Wheelbase: : 18.7cm
Package Size: : 19.5*8.5*16.5cm

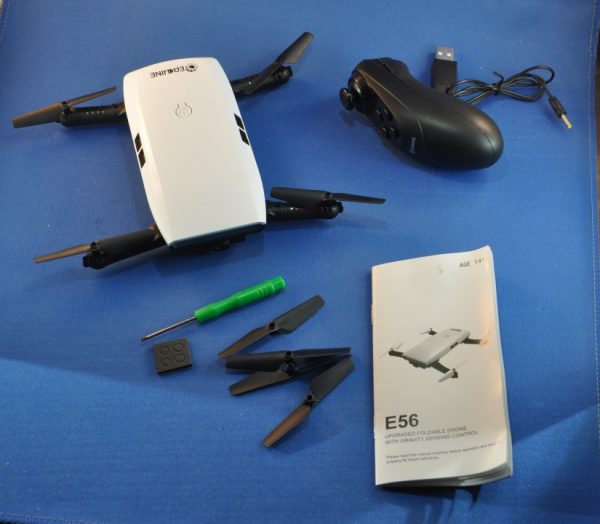
What’s in the box?

  • Drone
  • battery
  • charger
  • 3D thumb controller
  • Extra propellers and screwdriver for replacement
  • Instruction manual

Design and features

The unit is very compact and easy to deploy. With short battery life, having easy access to a USB recharger or a computer/car/power outlet that will allow recharging is important. With any drone, there is a huge gap between recharge time and flying time. Be prepared with multiple batteries, if possible

I took it out to a field near my house that is a former elementary school and now houses a teacher training facility. On the weekend, the place is deserted, and I sometimes take our dog here for frisbee and general running fits. Probably two acres of flat, tree-less grass with no power lines. Neighbors in the area use it to practice golf shots as well.
Here is the first in-flight movie I made with the E56.

I also made another that day, trying to turn and get more perspective on the area.

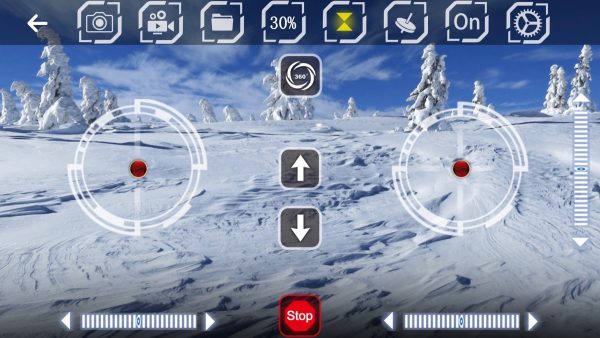
The drone has it’s own WiFi signal, which you lock into with the Wifi on your smartphone. Then, you get the generic UI to go up/down, or forward/back, sideways.

There are camera and other controls across the top. I found the E56 to be fairly responsive when connecting, but a little less so the further away it got from my iPhone. I tried some tests in my driveway, indoors, and in the previously mentioned field. The field, with no other competing wifi signals, was by far the best experience, but I never really felt totally in control. I would send a signal to turn and sometimes, it would. But it just as often would ignore the command. The “STOP” command was always obeyed, however, and brought the drone straight down where ever it was when you hit the button.

The software got an update the other day, but I’ve not been able to retest it yet. If I find it a huge difference, I will update this review.

Positives

  • Everything you need in one light, zippered carry case
  • Easy enough to set up and get started
  • works with the included remote or smartphone app

Negatives

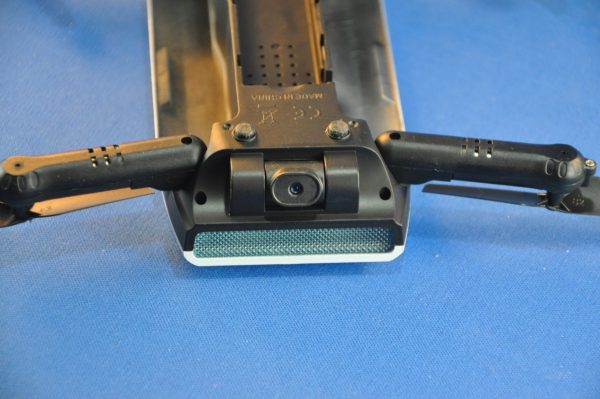
  • Camera cannot be adjusted via software
  • Wifi connection prone to interference

Final thoughts

While the fun and ease of use would seem to make it an easy pick for a younger UAV pilot-in-training, the fiddliness and lack of total control makes me not recommend it for someone who may not fully understand what it can do to someone, say, driving a car, to see a drone bearing down on them. One thing it did for me, however, it has kindled my interest in drone flying generally. I have already found a more beginner-friendly model that I will be testing early in the new year. For the price of this unit, however, it’s an easy decision to grab it and play with it enough to see if you want to take that curiosity further.

Price: $62.99
Where to buy: Amazon
Source: The sample of this product was provided by Eachine.

Hippus HandShoe Mouse review

I haven’t been to a doctor (yet), but from my own research, I think I may have the beginnings of carpal tunnel or De Quervain syndrome in my right hand. My mouse hand. The fleshy part of my thumb in the palm of my hand and the same area on top of my hand feels inflamed and a little swollen. I also have some pain in my hand when I  touch my thumb to the tips of my fingers or when I try to open jars with that hand. I’m sure this problem comes from years and 1000’s upon 1000’s of hours of using a mouse. So I decided to check out some alternative mice to see if I can halt the progress of carpal tunnel and even hopefully reverse it.

The first ergonomic mouse that I’m testing is the Hippus HandShoe Mouse. It has a weird name, but can it heal my issues? Let’s see.

What is it?

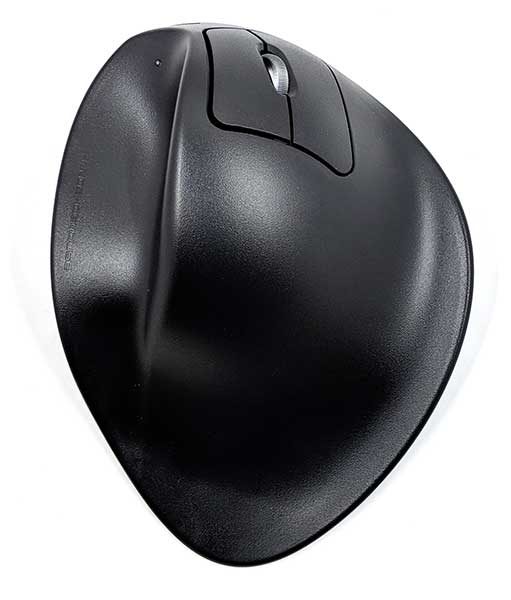
The HandShoe Mouse looks similar to a traditional two button mouse, but it’s much larger and provides a place for your whole hand to rest instead of just two fingers and your thumb.

Design and features

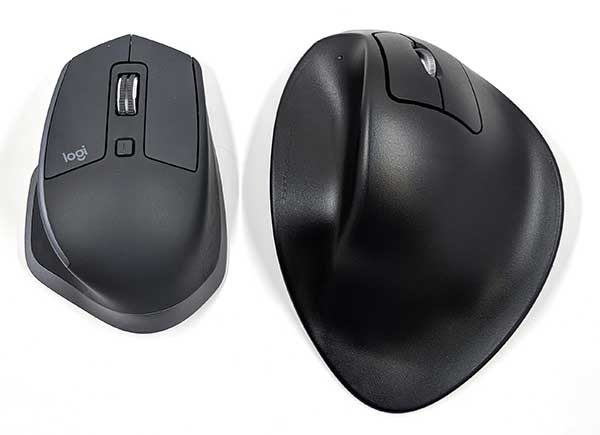
In the image above is a traditional mouse on the left and the HandShoe mouse on the right. As you can see, the HandShoe mouse is significantly larger and it sort of reminds me of a horseshoe crab, which makes me suddenly wonder if that’s where the name of this mouse comes from.

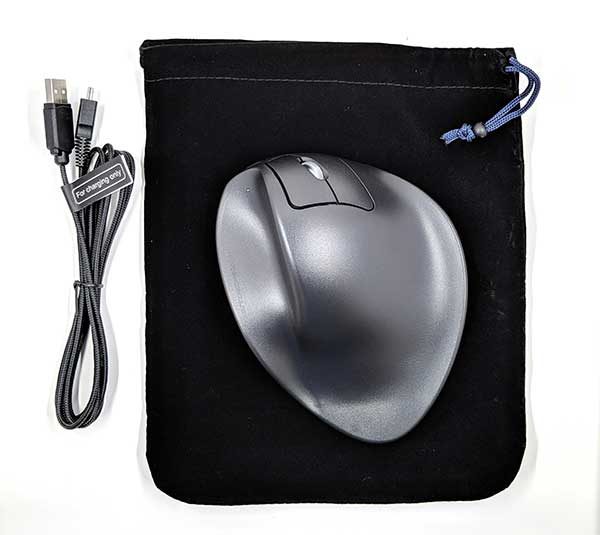
The HandShoe mouse is available in wired and wireless version. I was sent the wireless version which can also be used with a USB cable while it’s charging. This mouse is also available in four sizes from extra small to large. For my hand size, I was sent the medium-sized HandShoe mouse.

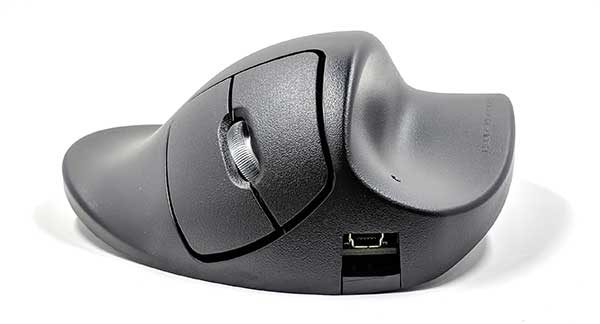
The mouse has 2 buttons and a scroll wheel. You can also see the mini USB charging port. According to the directions that come with the mouse, it should work for about 4-6 weeks per charge. There’s a small battery status LED above where your thumb tip would rest. This LED will turn red with the battery is running low. Luckily, you can use the mouse while it’s recharging and connected to a USB port using the included mini USB cable.

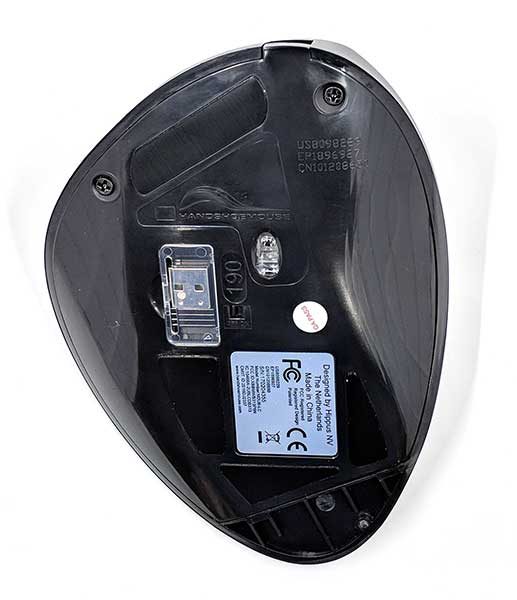
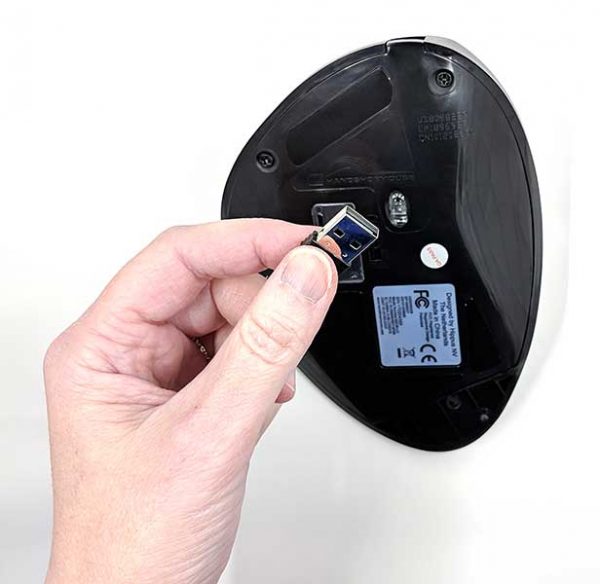
The HandShoe mouse does not use Bluetooth as a connection method. On the bottom of the mouse is a holder for the included USB receiver.

The USB receiver plugs into an open USB port on your computer. It goes without saying that this mouse won’t work with a laptop or computer that doesn’t have a USB Type-A port.

This is something to keep in mind for newer computers like my 12-inch MacBook which only has one USB Type-C port. However, I use my laptop with a LandingZone Docking Station which adds 2 Type-A USB ports to my MacBook.

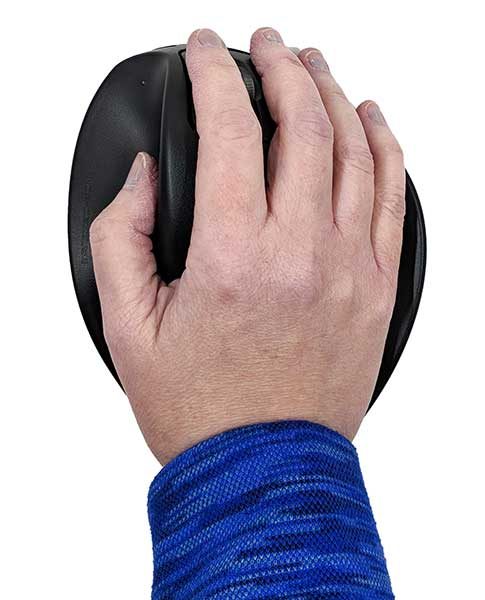
When I first placed my hand on the HandShoe mouse I was worried about how large it was. But the design allows you to place your whole hand on it and helps eliminate the need to squeeze the mouse with your thumb like I do with a traditional mouse. I’ll admit that I still find myself squeezing the HandShoe mouse, but I’m trying to learn to relax my thumb and move my whole arm when I need to move the cursor. Note that you need to support for your forearm on the desk or the arm of your chair.

What I like

  • Comfortable
  • Helps you relax your whole and not squeeze the mouse with your thumb

What needs to be improved

  • Expensive
  • Probably not a great mouse for gamers and people who need really fine cursor movement

Final thoughts

I’ve been using the HandShoe mouse for a few weeks now and have noticed some slight improvement in my hand. It isn’t the fault of the HandShoe mouse that I haven’t noticed more improvements because I have only been using the mouse at home. I have a traditional mouse at my day job. So I’ve only been using the HandShoe about 35% of the time. I plan to take the mouse to work and will update this review in a few weeks.

The biggest issue that I have so far with the HandShoe mouse is that it’s not optimal for making fine cursor movements. I do a lot of image editing and was finding that I would constantly move the cursor past the area where I needed it to be. I tweaked with the mouse sensitivity settings on my MacBook which improved things, and I hope I’ll get better as time goes on.

Other than the fine cursor movement issue, I do like this mouse. It’s comfortable to use and may be just what the doctor ordered for my hand problems. Time will tell though, so look for an update in a few weeks.

Price: $109.99
Where to buy: Amazon
Source: The sample for this review was provided by Hippus.

Douchebags Carryall 65L duffle bag review

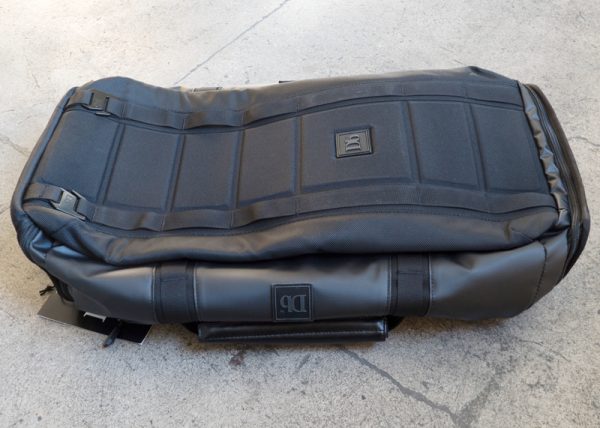
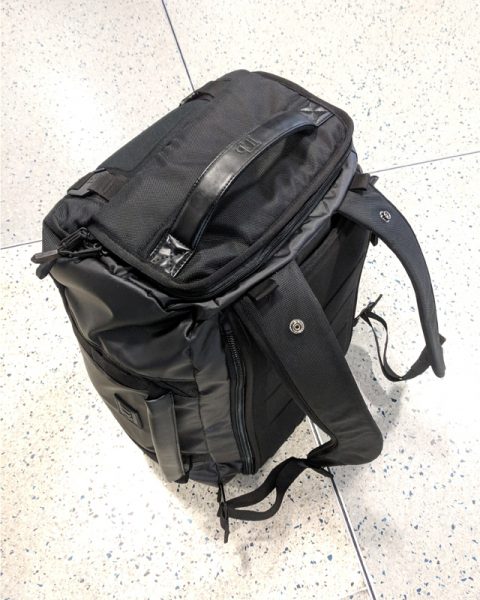
The Douchebags Carryall 65L duffle bag is an unfortunately named, versatile, cavernous bag that is solidly built. It is a little over-engineered and has some small design defects that make it difficult to justify the $199 price tag, but its durability and multitude of handles redeem it slightly.

What is it?

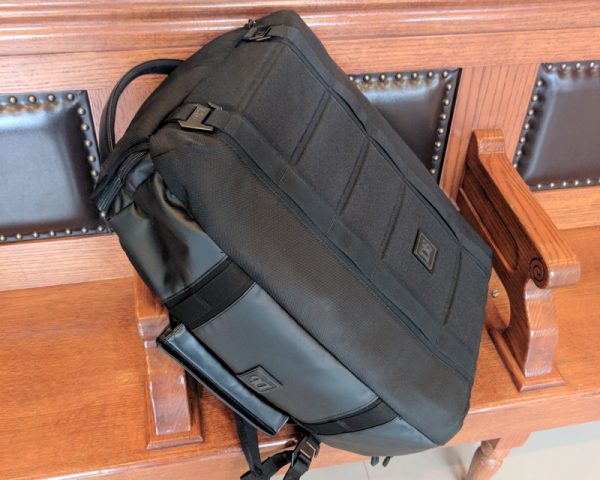
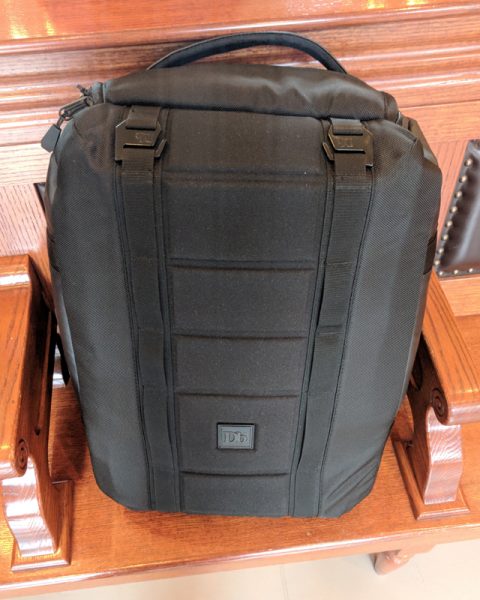
The Douchebags Carryall is a 65L duffle bag that fills the gap between a large suitcase and a standard airport wheeled carry-on. Packed conservatively, it will easily work as a carry-on. Jammed with clothing and accessories, and with the shoulder straps utilized, it works great as a long weekend getaway bag. It’s described as an “active duffle bag” that could be used for work or the gym, but it’s a bit too big for everyday carry in reality.

Technical specifications

  • Width: 36 cm / 14.7 in
  • Height: 60 cm / 23.6 in
  • Depth: 30 cm / 11.8 in
  • Weight: 1.6 kg / 3.5 lbs
  • Volume: 65 liters
  • Outer Shell: Polyester 600D / TPE 500D
  • Inner Lining: Polyester 200D-PU
  • EVA back panel
  • Thermal formed 1680D ballistic polyester underneath
  • Interior mesh pockets

Design and features

Before I get into the design and functionality of the Carryall, let’s first address the stunningly offensive and crass name of the company, Douchebags. Nowhere in the About section of the company’s website is the name ever addressed, which says to me that this choice was made without irony. It sounds like a name two fratboys would come up with after a night of binge drinking and objectifying women.

“Bro, we should totally start a company making backpacks and call it ‘Douchebags’!”

“Epic, Bro… epic!”

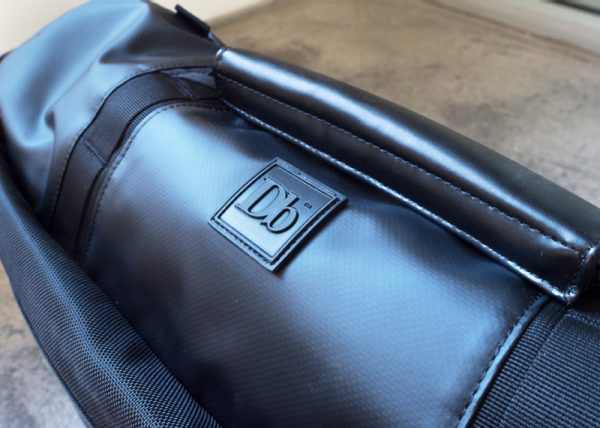
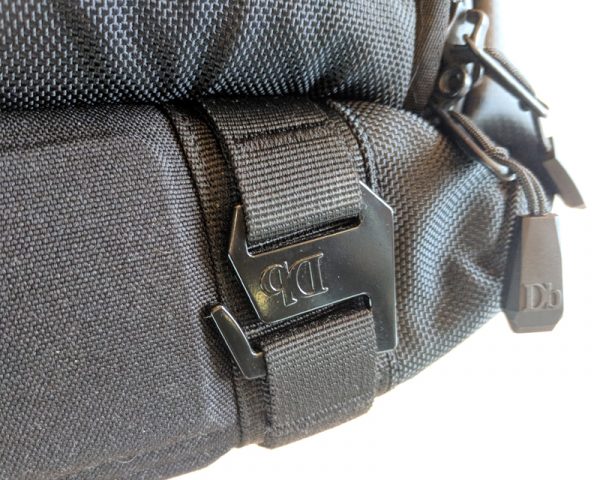
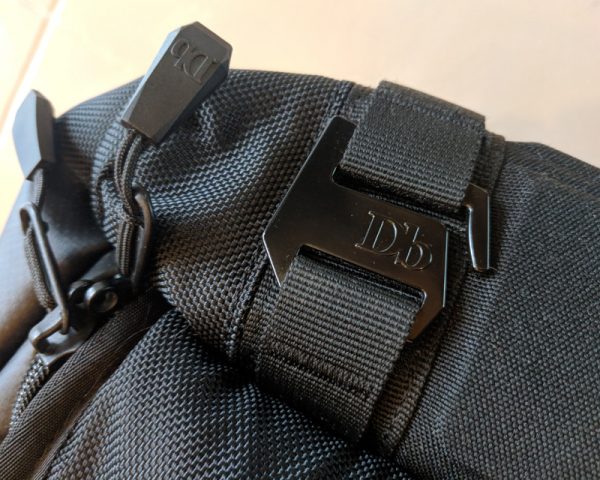
As a constant reminder of how proud they are of this sophomoric innovation, the initials of the company are emblazoned on seemingly every surface, zipper pull and panel of the Carryall like a childish inside joke. The name is so offensive and crude that it negatively affects my perception of the brand and, by extension, the product. I, personally, would never give money to this company for any product regardless of its functionality. I don’t want to use this bag after the review.

Phew, ok, got that out of my system, so now let’s talk about the design and features of the Douchebags Carryall.

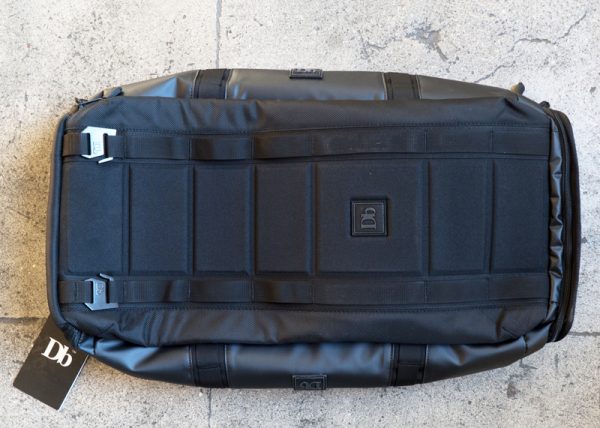
The Carryall is a really good duffle bag, with some great added features. It takes a bit of exploring to figure out the best way to open and load it to your liking. The feature I like the most though are the deep pouches on the top and bottom of the bag.

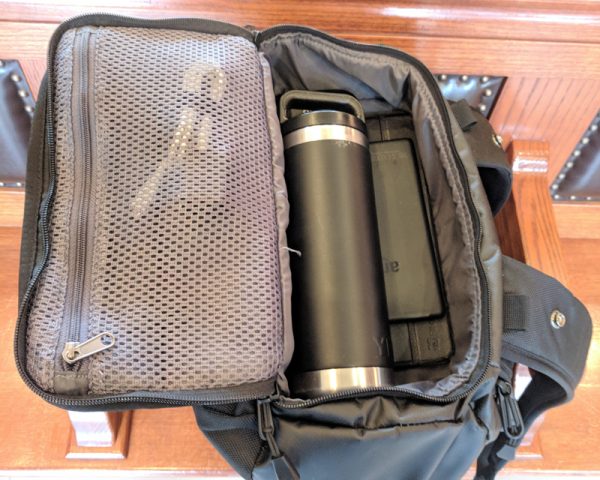
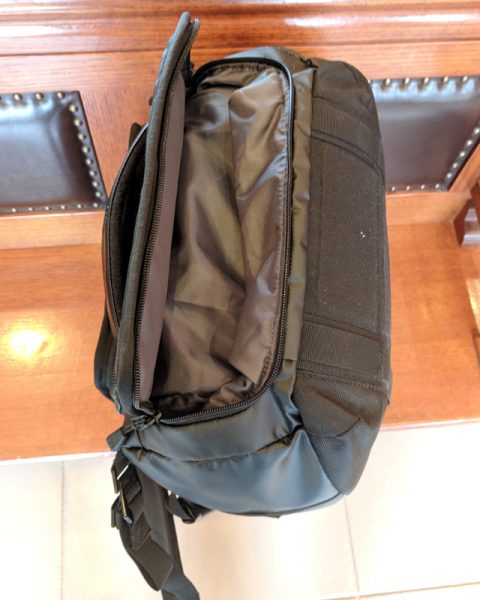
The pouches for these pockets extend deep into the bag. So if the bag is fully packed you can still find ways to cram more stuff into the pockets. Or, you can load these pockets first and then pack the interior. The top pocket also has a useful mesh pocket in the lid.

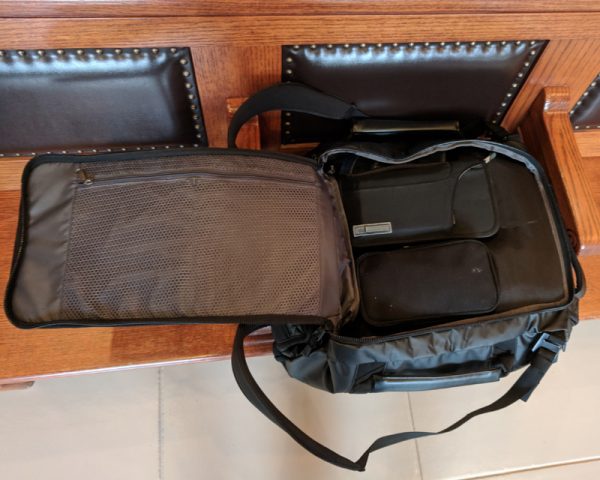
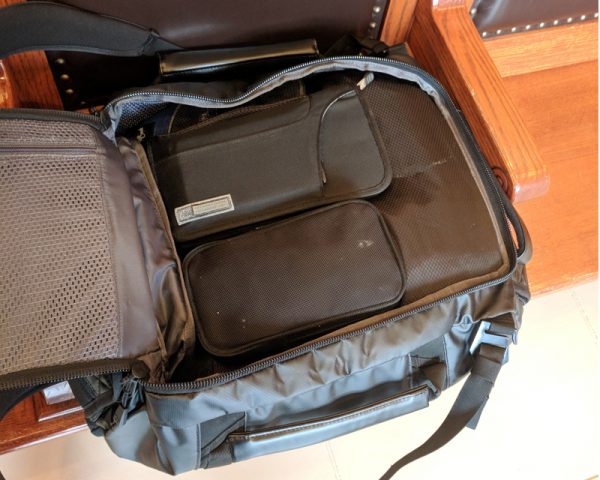
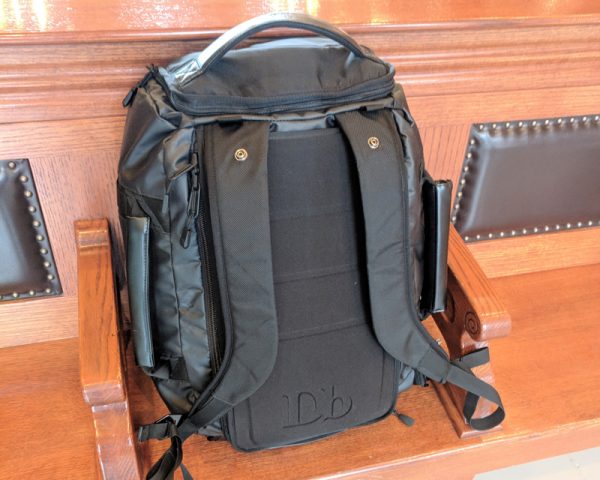
Access is key to a great bag and the Carryall has a really good setup.The access for the interior is at the top of the back panel when using the Carryall in the backpack configuration, with the deployed shoulder straps.

The back panel unzips fully to give you full access to the interior. This is a little backward compared to traditional backpacks which would have the zipper and access to the interior on the top front of the bag. The interior of the back panel has a sectioned zipper mesh pocket as well.

I loved having full access to the entire interior of the bag and it made packing a lot easier as compared to top-loading bags. Another great aspect of the Carryall is that there are handles on the top, bottom, and sides of the bag. Every time I went to reach for this bag, I was able to easily find a handle.

The shoulder straps are conveniently stored inside the back panel and easy enough to pull out, but it’s a bit difficult to lock them into place.

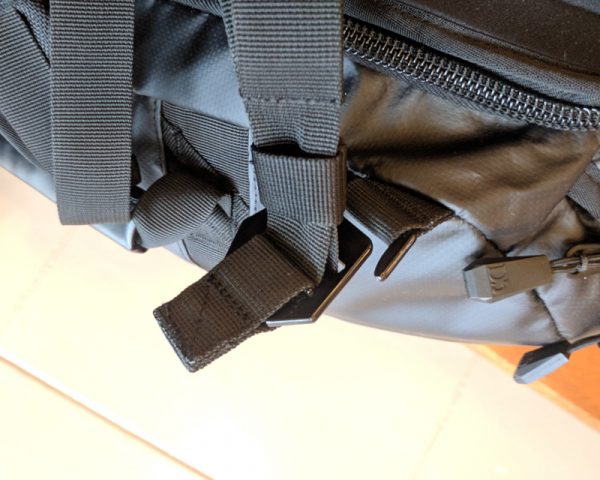
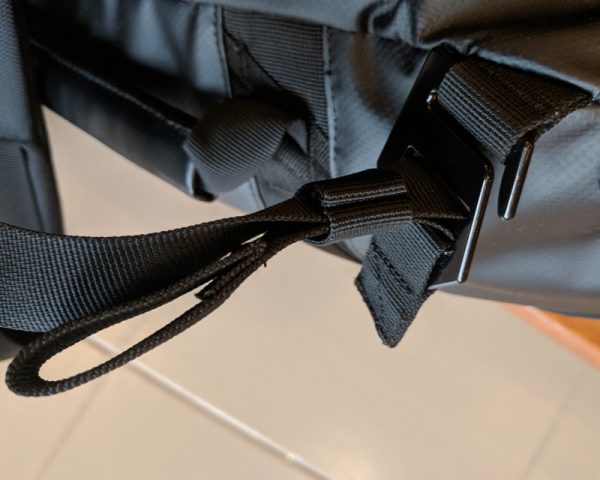
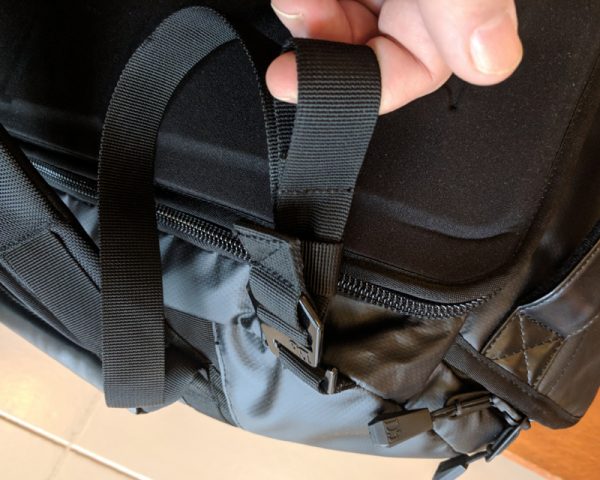
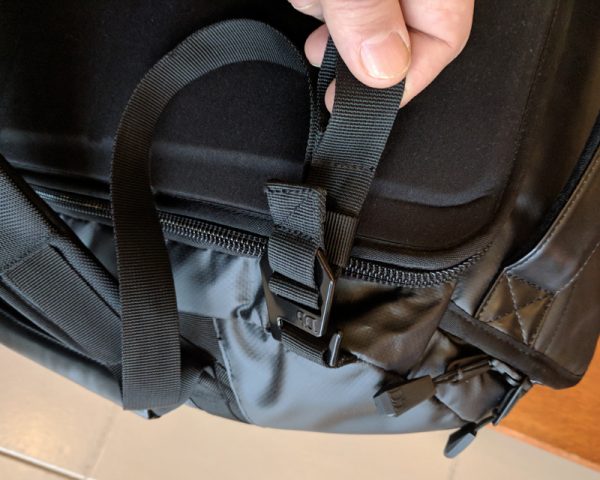
Two hooks on the ends of the straps need to be slid into corresponding loops on the bottom of the bag. It took a bit of wrangling to get the hooks in place, and once they were they felt really secure.

The problem is that to adjust the straps, you have to pull up on loops on the bottom of the straps. This was impossible to do while wearing the bag. Typically, the adjustment straps for backpacks sit about midway up the strap. You can adjust them easily by hiking your bag up on your back and pulling the straps tight.

This does not work with the Carryall straps. The only way I was able to get the correct adjustment was to take the bag off, adjust the straps and then put the bag back on to check the adjustment.

It’s not a deal-breaker, but while wearing the fully loaded pack, I found myself constantly trying to tighten or loosen the straps to no avail.

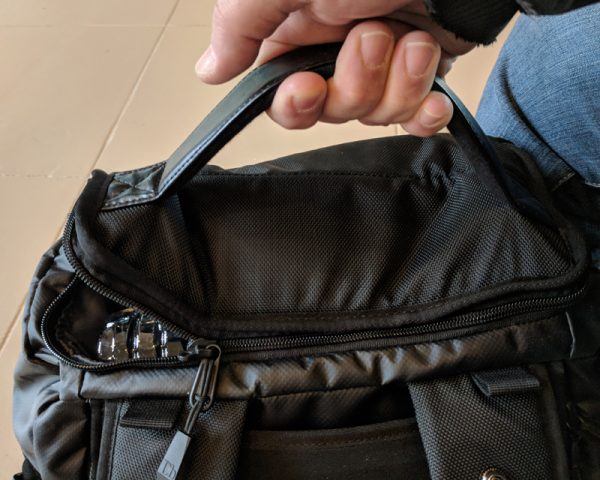
One other design flaw I found was that when the top pocket wasn’t zipped completely shut with the zippers pushed to the back of the bag, the top flap would unzip and open if the bag was picked up by the top handle.

This happened to me several times. The best way to secure the top pocket and handle would be to put a small travel lock through the zippers on the top pocket, but that negates the convenience of having the pocket in the first place.

The hooks used to fasten the shoulder straps show up elsewhere on the Carryall but have no real function other than aesthetics.

When filled to capacity, the Carryall is pretty unwieldy and difficult to carry without using the shoulder straps, but it’s manageable. The overall large size of the Carryall, even when empty, is the main reason it wouldn’t be useful as an everyday carry bag.

Positives

  • Handles everywhere
  • Fits very comfortably with shoulder straps once properly adjusted
  • Holds a huge amount
  • Top and bottom pouches very useful
  • Full access to interior

Negatives

  • The name
  • Expensive
  • Shoulder straps very difficult to adjust once deployed
  • Top and bottom pouches can unzip when using handles

The Douchebags Carryall 65L duffle bag is a decent bag with great capacity and some unique design elements. It functions well as a weekend travel bag, but some flaws like the difficult shoulder strap adjusters and the top flap opening if not secured properly, take away from its overall usefulness.

Plus, that name is just horrible.

The Carryall comes in black, white, and green.

Price: $199
Where to buy: Douchebags
Source: The sample of this product was provided by Douchebags