Oberon Design Sonoma Tote review

Oberon Design is a USA-based company that designs and creates beautiful, useful leather accessories and bags.  The Gadgeteer has reviewed many of their products over the years, and we’ve been selected to put another of their bags to the test.  I was happy to be selected to review the Sonoma Tote when Oberon Design sent us one; it’s just the right size to hold my normal EDC, laptop bag stuff, plus a 13″ MacBook Pro and/or a 12.9″ iPad Pro.

Specs

As specified on the Oberon website, the Sonoma Tote is:

  • High quality; American made
  • Size: 12″ tall x 14″ wide x 5″ deep
  • Weighs 1.8 lb
  • Adjustable length strap handles; maximum 12″ under-arm space
  • Interior 9″ x 7″ zippered security pocket
  • 2 additional interior slip-in pockets and a pen holder pocket
  • Interior keyring hook
  • All seams are triple stitched, taped, and bound
  • Solid brass, durable Sam Browne studs
  • Interior pockets are constructed from spill resistant, top grade ballistic nylon, which is strong and lightweight

Design and features

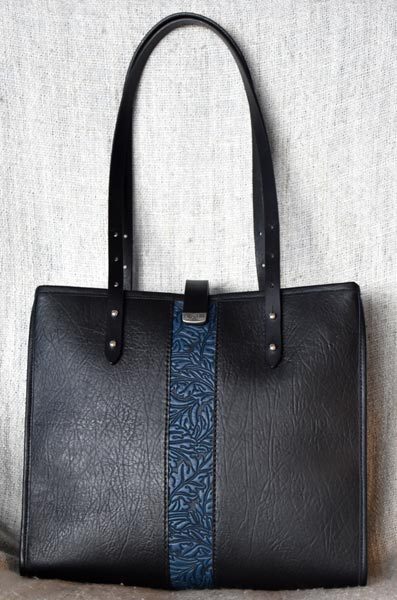
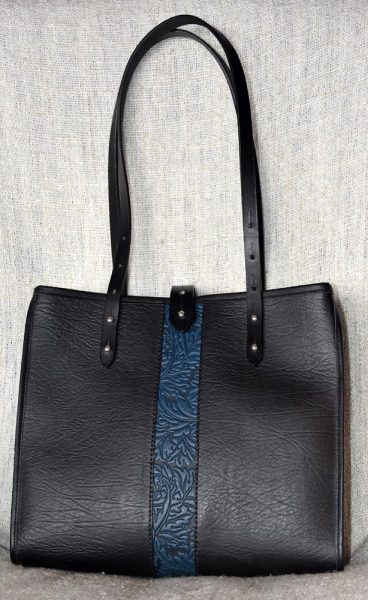
The Sonoma Tote is a new offering from Oberon.  They describe it as a classic tote shape with an Oberon twist.  The twist is apparently a strip of embossed, colored leather bisecting both the front and back of the bag.  The rest of the bag and the straps are black leather, which lets the colored strip shine.  There are five design/color combinations available.  I received the acanthus leaves design in navy.

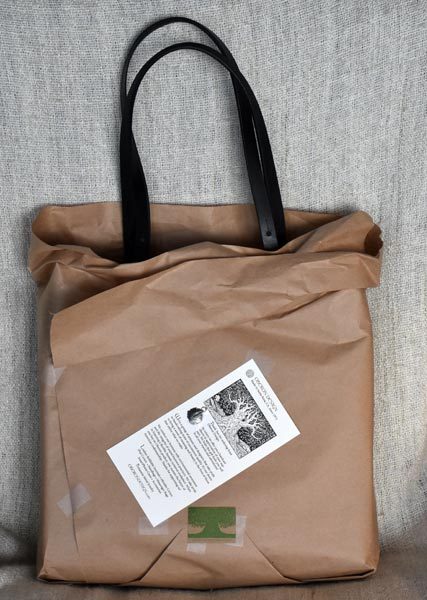
I opened the shipping box to find the Sonoma Tote wrapped in brown paper to protect the leather during shipment.  A thank-you card with a small, handcast charm is taped to the wrapping.
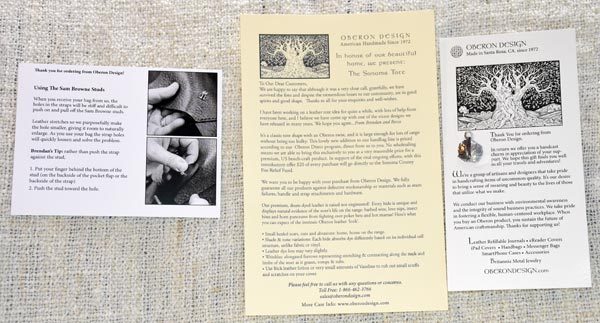


Two other cards shipped with the bag.  The left card explains how to use the Sam Browne studs for adjusting the strap length and closing the bag.  The middle card explains how the design for the Sonoma Tote came about, and it explains the pricing for this bag:  “This lovely new addition to our handbag line will be priced according to our new Oberon Direct program, direct from us to you. No wholesaling means we are able to bring this exclusively to you at a very reasonable price for a premium, US bench-craft product.”  Also, as the bag was designed in honor of Oberon’s home in Sonoma, which was recently devastated by wildfires, Oberon says:  “In support of the vital ongoing efforts, with this introductory offer $20 of every purchase will go directly to the Sonoma County Fire Relief Fund. ”  The card on the right is the previously-mentioned thank-you card with the charm.

Design and features

The front of the bag is seen in the top photo.  The back of the bag is also decorated with the embossed design strip of leather.

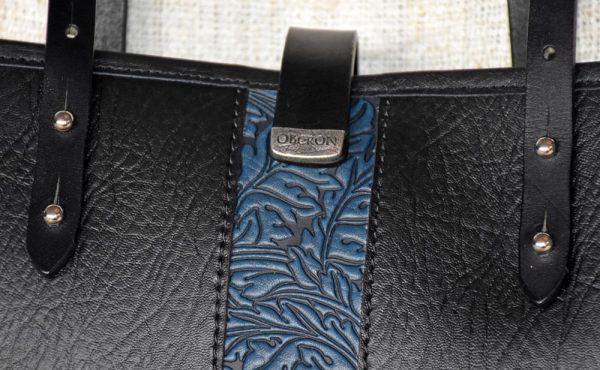
A close-up of the back of the tote shows the beautiful, embossed leather design strip.  You also see the back strap attached with the Sam Browne studs, and the metal piece, with the Oberon name, that attaches the closure strap to the back of the bag.  Note the even, straight stitching and the bound top edge.


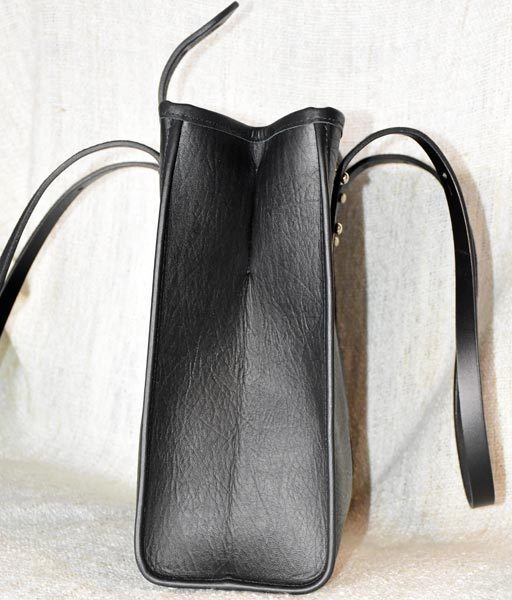
The Sonoma Tote has a rectangular profile when seen from the side.  The bottom is flat, but it has no metal feet to protect the bottom from the surface it sits on.  You can see the bag is sitting up on its own in this picture, and I’m happy to report that the bag sits stably even when fully loaded with all my gear and devices.

You’ll also note that the top of the side panel appears pinched together.  A small section of the top of each side is sewn together to give the tote shape and to slightly divide it into a front an back section.  This slight division works nicely to hold my iPad sleeve in place inside the bag.

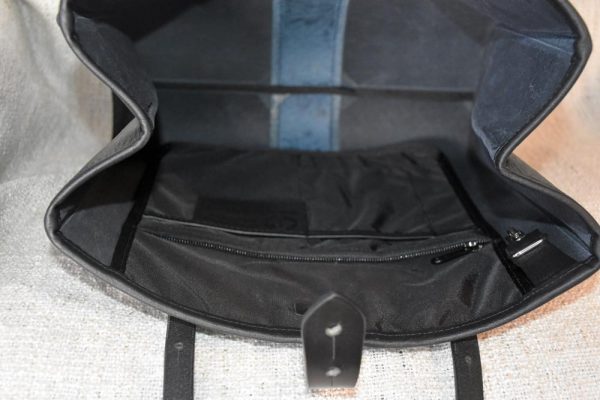
The interior of the bag is empty, except for the pockets on the tote’s back wall.

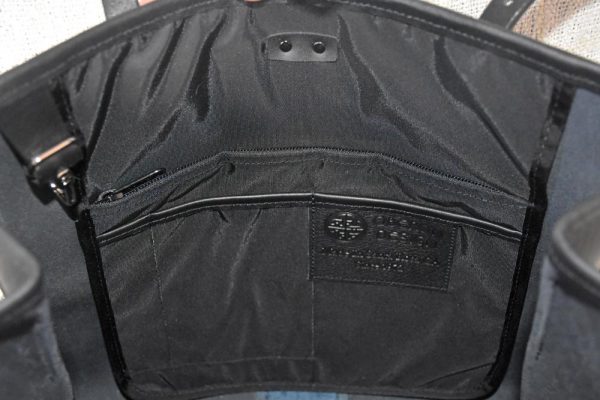
The back wall of the Sonoma Tote has the zippered security pouch, a pen pocket, and two slip-in pockets.  There’s a leather badge sewn on one of the slip-in pockets with the Oberon Design logo.  At the upper left, you will see the keyring keeper.  It’s made with a leather strip and a metal clip, so it should hold your keys securely.

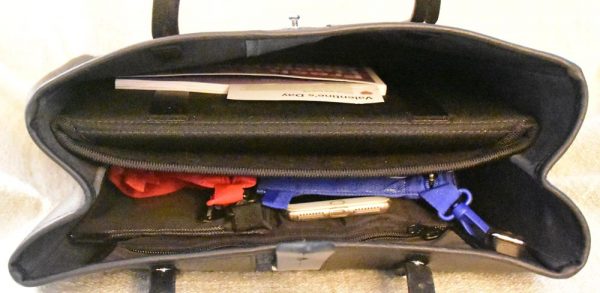
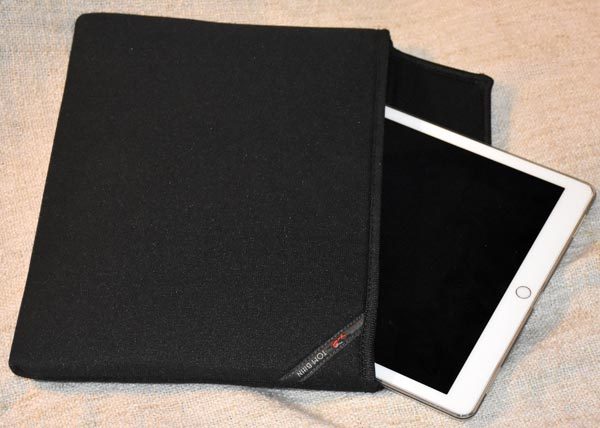
This image is taken with the front of the bag facing up.  That’s the iPad Pro Cache sleeve at the top, with a small catalog between the sleeve and the front wall of the bag.  The Cache fits in that front area like it was made for the Sonoma Tote.

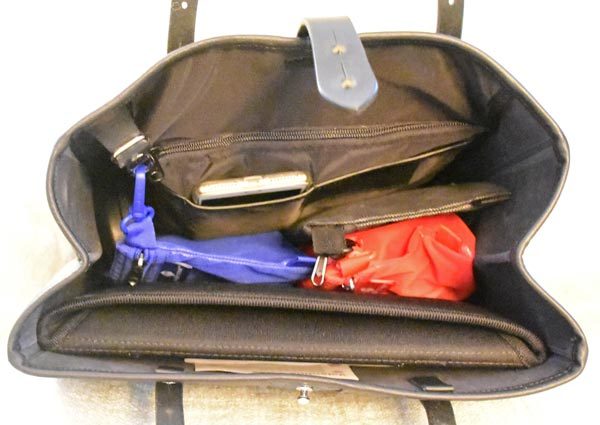
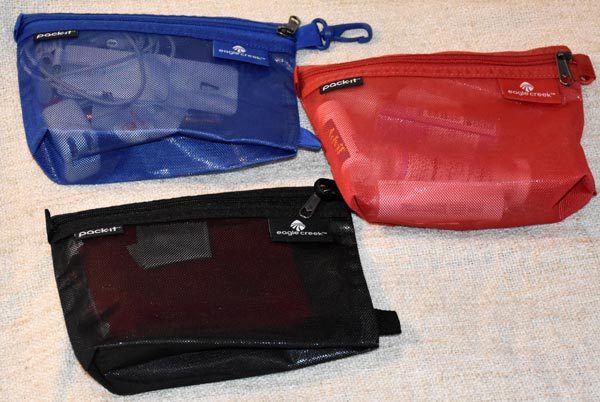
Here’s a view of the zippered security pouch on the back of the bag.  You can see my iPhone 7 Plus in one of the slip-in pockets.  You can also see black and red pouches on the right side of the bag, a blue pouch clipped to to keyring keeper at the top of the bag, and the Tom Bihn Cache at the bottom of this image.

I keep the Tom Bihn Cache sleeve for the 12.9″ iPad Pro into the front area of the Sonoma bag, just behind the Sam Brown stud that holds the bag closed.   This sleeve, with the iPad Pro inside, fits easily in the front section and still allows the bag to close with the stud.  This Cache can actually hold my 13″ MacBook Pro Retina, and the Cache will still fit in the front section and allow the bag to close.  If I needed, I could actually have my laptop in the Cache and slide my iPad between the front of the bag and the Cache – but that makes for a very heavy load.  I’d only take both if I were going on a long trip.  I’d make do with one device for a daily trip.

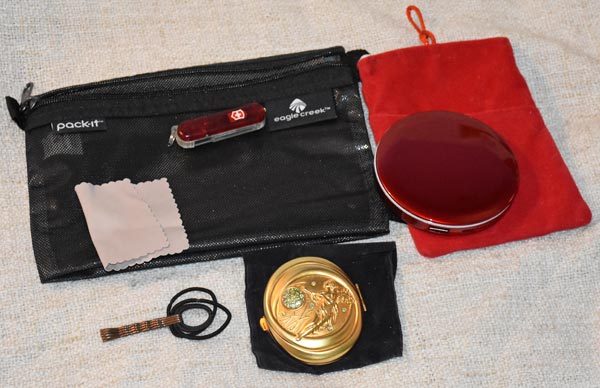
Loose in the bottom of the bag are three Eagle Creek Pack-It sacs, loaded with my small “I’ll take it, just in case” things.  These are the small size sacs, each measuring 6″ x 8″.

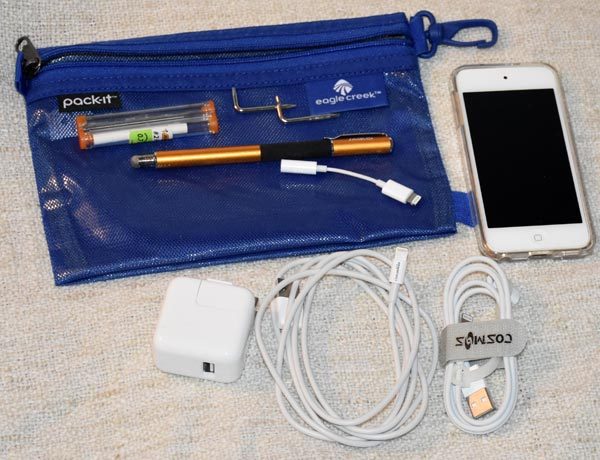
The blue bag holds an Apple USB wall charger, charging cables, stylus, and my iPod touch.

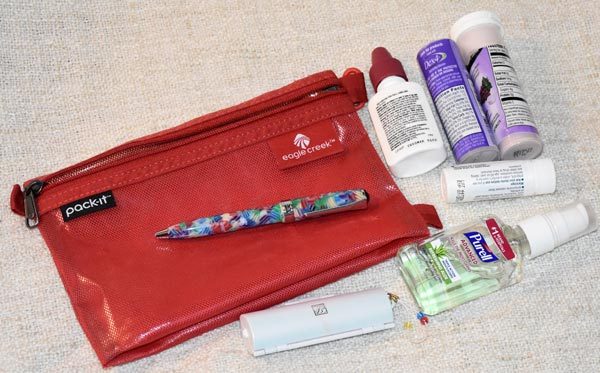
The red bag holds toiletries, and a pen (for some reason…)

The black bag holds a Pearl compact mirror/powerbank, plus a few other small items.

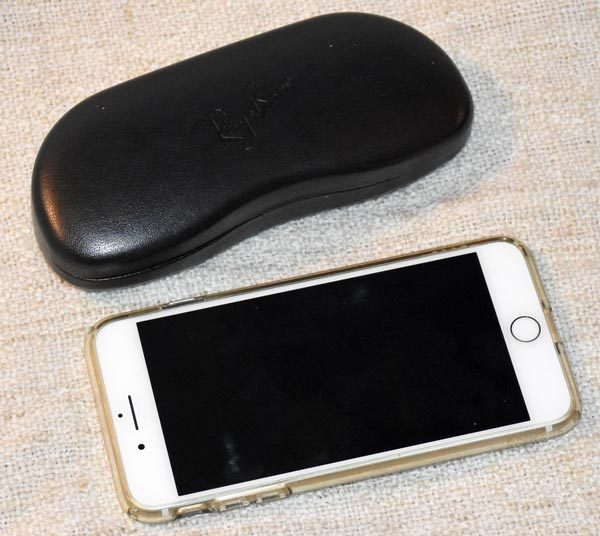
My sunglasses in their case fit into the bottom of the bag, and my iPhone 7 Plus slides into one of the slip-in pockets on the front of the secured zippered pocket.


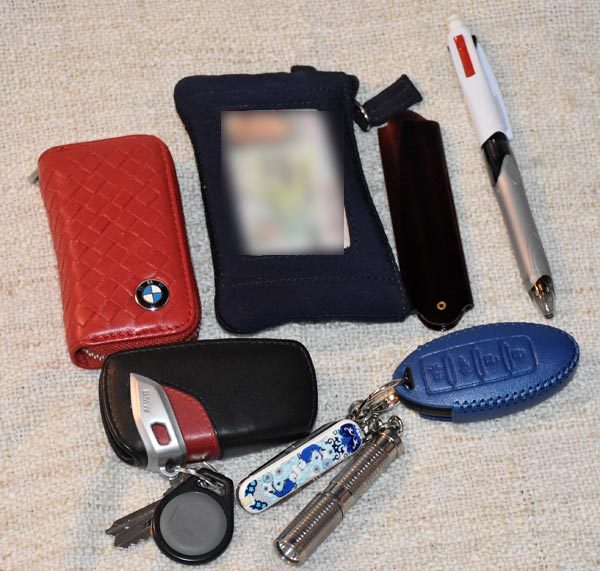
The interior zippered pocket holds my three car fobs, wallet, folding comb, Swiss Army knife, LED flashlight, and a BIC pen.

The Sonoma Tote holds everything I need when I’m having an “everything plus the kitchen sink” day.  I can take my smaller EDC kit and spread it out between my Eagle Creek bags and the secured zippered pocket, or I could even just stick a small purse with my normal carry items in the bottom of the Tote beside those Eagle Creek bags.

The Tote has plenty of room for my laptop and/or my iPad Pro when I need them, but I could easily remove the iPad sleeve and use the Sonoma Tote as a handbag.  It’s beautiful, stylish, and sophisticated enough to complement your nicest business outfit, and no one would think it was a gear bag until they see you pull out a laptop.  My daughter saw me carrying it when we went out to dinner, and she complimented my new handbag; she was doubly impressed when she saw everything I was carrying inside it.

What I like

  • Beautiful design
  • Well constructed
  • Stands on its bottom, even when fully loaded
  • Secure interior pocket to protect small items
  • Key holder at the top of the bag
  • Big enough to hold all my normal EDC things, plus all the cables and accouterments that I keep in my laptop bag, plus a 13″ MacBook Pro Retina or a 12.9″ iPad Pro in Tom Bihn Cache sleeve – or both the laptop and iPad, if needed.

What needs to be improved

  • It would be nice to have feet on the bottom of the bag to keep the leather off the floor

Final thoughts

The Sonoma Tote is just as beautifully designed and constructed as you would expect from Oberon Design.  The bag is big enough to hold everything your laptop bag plus your purse can hold and is beautiful enough to look like you’re carrying a designer handbag.  It fits comfortably on your shoulder, or you can carry it in your hand or on your elbow with ease.  And when you purchase this great gear bag for yourself, you’re helping out the folks who are trying to recover from the devastation of the recent wildfires.

I think this bag is perfect!  I think you’ll like it, too.

Price: $295.00
Where to buy: Oberon Design
Source: The sample of this product was provided by Oberon Design

ScanMyPhotos photo scanning service review

When we wanted to save a moment in time before the days of smartphones, we captured a picture with an actual camera. Inside the camera was a roll of film which had to be dropped off at a drug store or camera store to be developed. A few days later you’d stop at the store and pick up the processed pictures. If you’re old enough, you probably have a few boxes of photos from days gone by collecting dust on a shelf. How can you “backup” those images or share them on social media without manually scanning each individual photo? ScanMyPhotos is a service that will take care of the work of scanning your photos. Let’s take a look.

What is it?

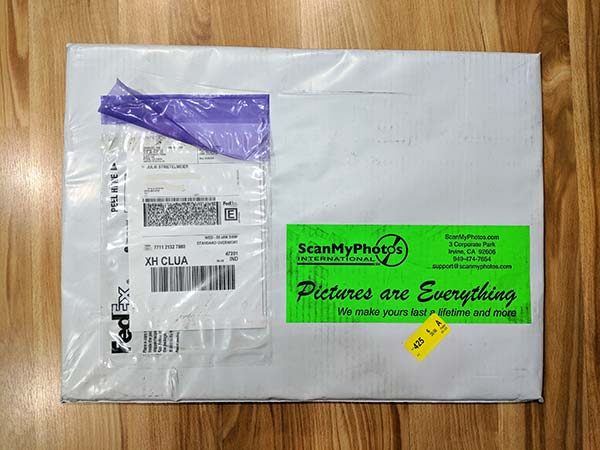
ScanMyPhotos is a service that will send you a postage paid box which you fill with your physical photos and send back to them. They will then scan and send them back to you along with a DVD of the scanned pictures.

What’s in the box?

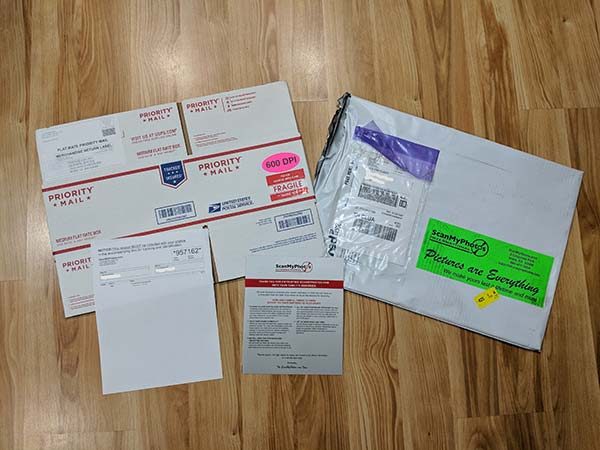
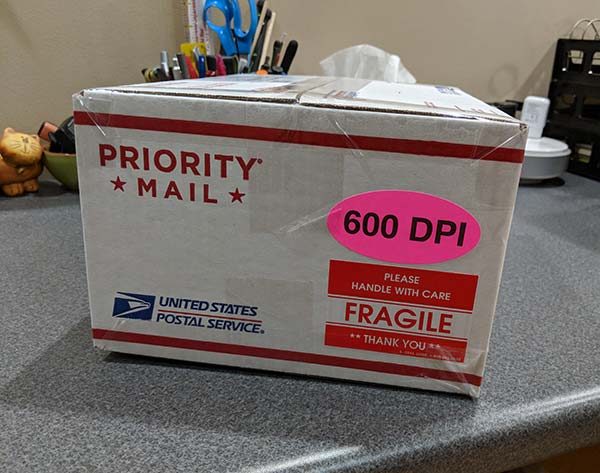
USPS Priority mail box with pre-paid label
Photo prep and packing instructions

Getting your photos ready to ship

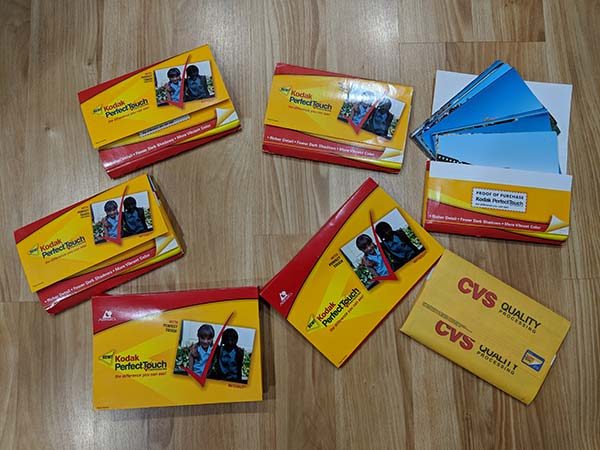
The way the ScanMyPhotos photo scanning service works is that you have 6 months to send them your photos.  When you’re ready, you can cram as many of your photos as possible in the box (around 1800 photos) and they will scan and save them .jpg format for one price. The price will depend on the DPI (150 – 600 DPI) you choose and if you want a USB flash drive, the ability to download the files, and other optional add-ons.

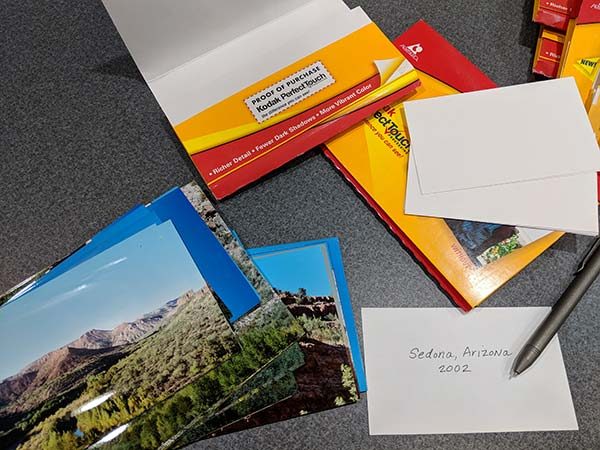
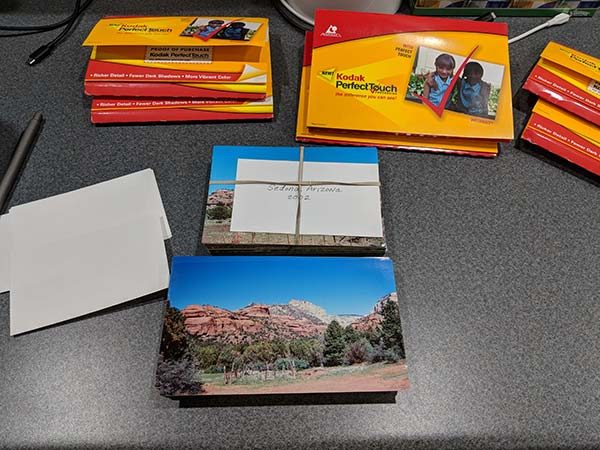
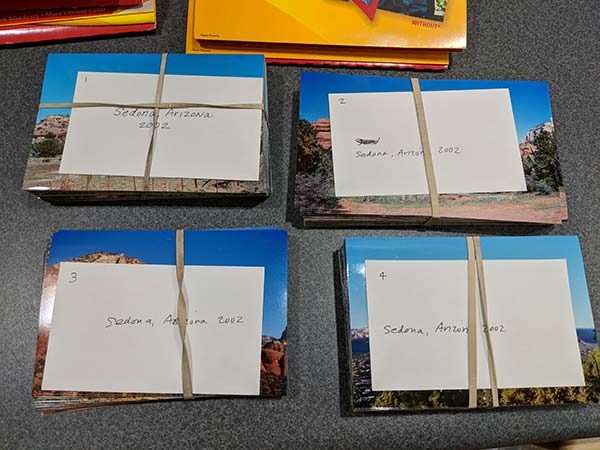
To prepare your photos for shipping and scanning, they should be removed from albums, sleeves, etc. If you want the photos arranged by year, event, trip, or whatever criteria you would like them to be grouped instead of in random order, you will have to pay extra for the scan in order add-on which is an extra $68 per box. You then write the group name on a piece of paper that is about the same size as the photos and rubber band the stacks.

Each bundle should have 100 – 150 pictures.

ScanMyPhotos will scan rectangular photos that are as small as 3 x 3 inches and as large as 8 x 10 inches. The photos can be no thicker than an old-style Polaroid pictures.

The bundles can also be numbered if you have several bundles of images for one event and would like to have them scanned in a specific order.

After you’ve grouped all your pictures into labeled bundles, you can put them in the included box with your own packing material around them for cushion.

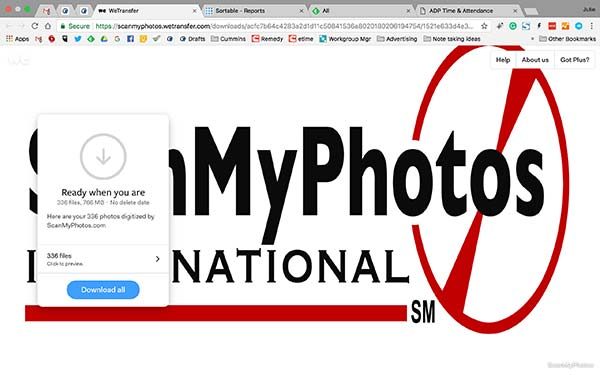
All that is left to do is to seal the box and take it to the post office. The box should arrive within 3 days and once it is received, ScanMyPhotos will send an email when the scanning process has started. I shipped my box on 1/31/18 and received a confirmation email that it was being scanned on 2/6/18 which was 6 days later (there was a weekend in there). The very next day on 2/7/18, I received a link to download the scanned photos on ScanMyPhotos download site and a tracking number for the return shipment of my original photos.

The results

I like the image download add-on feature because it’s convenient to be able to get access to your photos as soon as they’ve been scanned. That way you don’t have to wait for the DVD or USB flash drive to arrive in the mail.

Here are a few examples of the scanned images. Click to see the full size image.


The quality of the scanned photos will only be as good as the original photos. If the photos have are a little faded, so will the scanned images unless you want to pay extra ($84 per box) for the Photo Soap add-on option which will enhance the images to help restore color and contrast.

What I like

  • They send you everything you need including a postage paid box
  • Fast turn around time
  • Ability to download the images for fast access

What needs to be improved

  • Need to include tape to seal the box
  • You shouldn’t have to pay extra for some of the add-ons

Final thoughts

I’m kind of lazy, so I like the idea of shoving a bunch of my old pictures in a box and being rewarded a few days later with digital copies that I can share with friends, to social media, etc. I felt that the pricing was pretty high and asked a photography buddy of mine and he said that he didn’t think it was high as long as the scans were good ones. I’m not a digital scanning expert but from what I can tell, the scans look fine to me. But I do think it’s silly to charge the customer $20 for the ability to download the images when you know that they are already in their system. $68 to scan in order of the bundles with the title cards seems steep to me as well. But when it’s all said and done, if you have the cash and don’t want to spend the time scanning each photo yourself, you ScanMyPhotos is a fast and easy way to bring your physical photo collection into the digital world.

Price: Starts at $145 for 150DPI. As reviewed the price would be $299 for 600DPI + $68 for the scan in order add-on + $19.95 download add-on = $386.95.
Where to buy: ScanMyPhotos
Source: The sample for this review was provided by ScanMyPhotos.

Uten Model UCA001 auto DVR Review

I’ve never thought I needed a dash camera. I have a 20-minute commute each way, which is mostly limited access or multi-lane highways, and folks generally drive OK. But the team at Uten needed a reviewer, so I volunteered to test their Model UCA001.

Note: Photos may be tapped or clicked for a larger image.

You can’t have surfed the internet very long and not have come across one of those dash-cam videos from Eastern Europe. You know the ones: cars and trucks of mostly Soviet designs that fall apart, swerve in front, flip over and catch fire while the driver tries to dodge. They are the reason I never thought I needed a dash camera. My commute is somewhat staid by comparison. But then I started to notice folks weaving into lanes, pulling in and stopping, slamming on brakes in front of me, and generally not driving well. There are a lot of distracted drivers out there these days. If I were to hit one of these crazies, how could I prove their actions in court? Or how could I explain to unbelieving friends?

What is it?

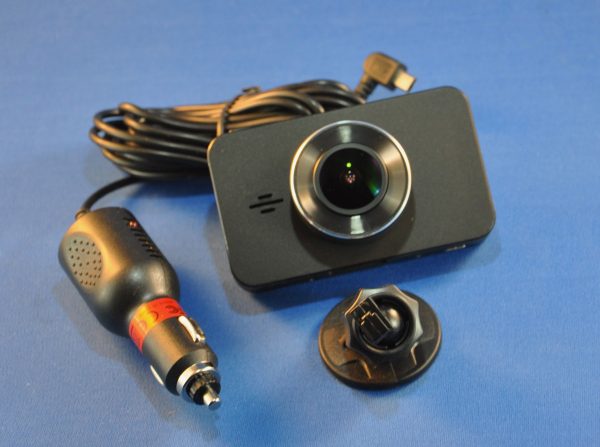
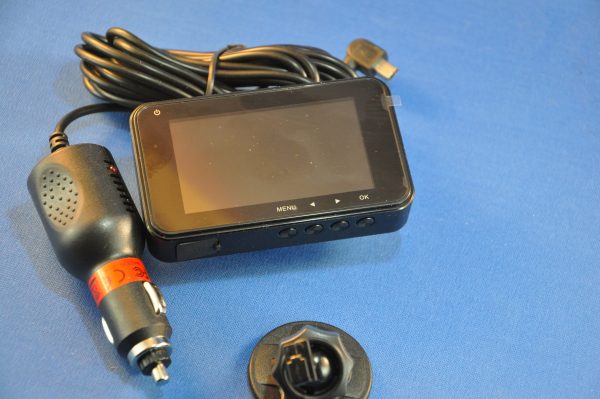
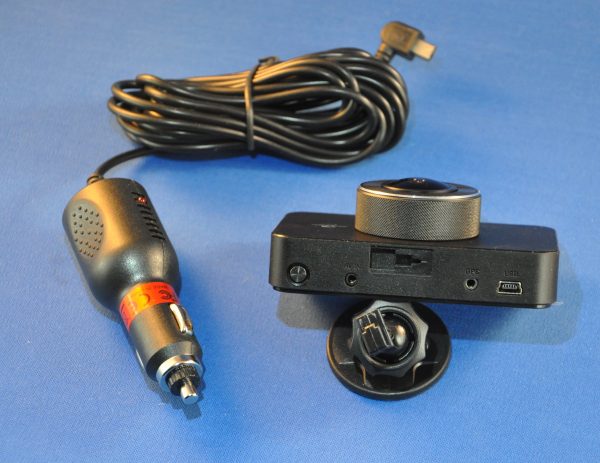
The camera is a 3.75” x 2.25” x .75” smooth black box with a lens and small speaker on one face, and a full-face screen on the opposite side. Across the top is an on/off switch, AUX input, a mounting hole for the included holder, a GPS input, and a mini USB power input. Across the bottom is a TFT slot (covered by a rubber gasket) and four menu controls: menu, left, right, OK. There’s nothing on the right side (with the lens facing you) and there are only a reset button and a mic hole on the left side.

Hardware specs

  •  1296P+30FPS HD RESOLUTION: Providing great sharp video quality and super great vision.The camera can be mounted on your car’s dashboard or windshield to record what happens in front of the vehicle. Whatever treasured memories you want to keep, our in-car camera will deliver a high-definition record of events that you can watch time and time again.
  • SUPPORT 128G LARGE SD CAPACITY: Super large capacity, storing all your videos and pics of your beautiful life right in this camera, enable you to capture videos of more enjoyable activities such as scenic road trip holidays and exciting track-day races!
  • MSTAR TECH SOLUTION: Great clear night vision, clearly captures the license plates cars as well as road signs during the day and night, making our roads a safer and better place for everybody.
  • 170°WIDE ANGLE+ F1.8 APERTURE LENS: Though most are F2.0 aperture in the market, our F1.8 is better than F2.0. The actual aperture much less, the vision is much brighter with better effect.
  • 1-YEAR MONEY-BACK GUARANTEE: We commits ourselves to creating high quality and great design products. Also being confident in our premium upgrade dash cam and offering a full 1-year guarantee. We will do the best for you!

What’s in the box?

The unit comes packaged in a well-designed black cardboard box with a black heavy paper sleeve. Inside, a lighter-weight black cardboard box contains the 12-volt plug with a 9+foot captured cable, which ends in a molded right-angle mini USB plug. The camera itself is wrapped in a Tyvek-type envelope, with clear stickers over the rear screen and front lens. It is held steady by a black foam insert, centered over a black cardboard riser, under which is the mounting stand. Top marks for recyclable packaging. I think the foam around the camera is the only not-clearly-recyclable piece. You get everything except a storage card. Camera, charger/cord, instruction sheet, and mounting stand: that’s it.

Design and features
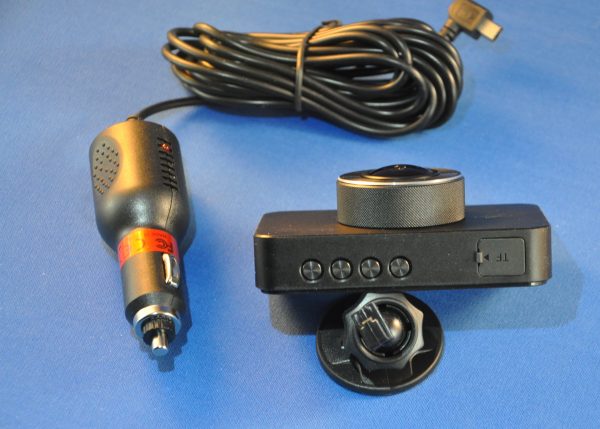
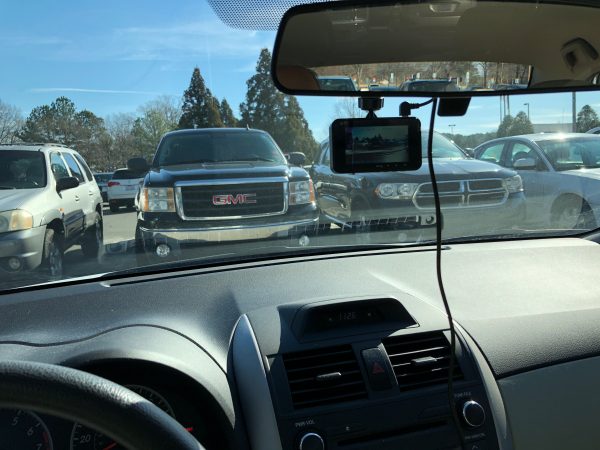
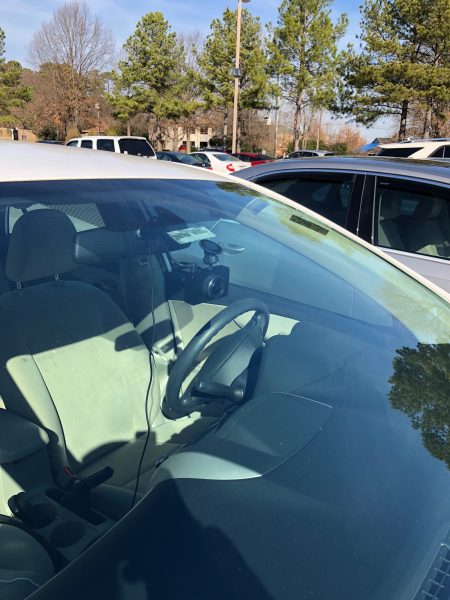
The camera is dead simple. You don’t even have to turn it on – just apply power and it is ready. By default, incoming video is cut into 3-minute segments and is set to fill the memory card, then the camera starts erasing the oldest unlocked clips. You literally just point it out the front window and you’re done. I used it for a week or so lashed to the rearview mirror with extra charging cable. (9 feet gives you a good bit of play!)
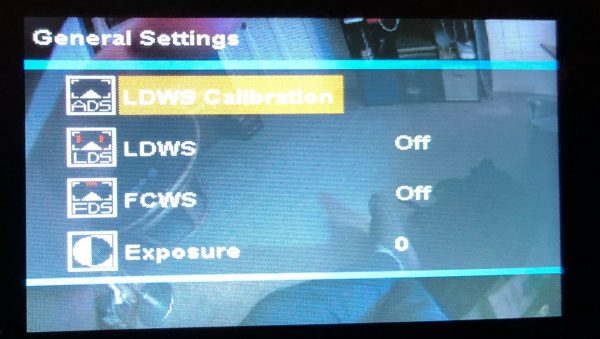
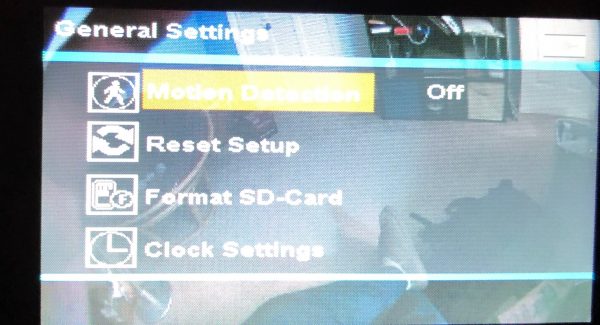
Settings available are lane departure warning, GPS connectivity, and distance warning. You can also alter the length of video clips, aperture, and time/date setup. The menu screens are pretty bare-bones but offer the settings needed.


Performance

The camera is rock solid. It turns on with the power, records until the power is cut, and locks video clips where significant vibration occurred. (I have seen this several times driving a bit quickly through road construction sites.) There is a sensitivity setting for this.

Here’s a sample video using the default settings during the day:

Here’s a sample video using the default settings at night:

What I Like

Simple on/off activation.
Flexible – can be used as front or rear camera.
Automatically cuts video into segments.
Automatically locks segments around velocity events.

What needs to be improved

The Permanent mounting – This would be better as flexible so that you could mount in rentals while traveling, or reposition if you don’t like where you first mount it.
No battery means routing power cord – never pretty.
The captive power cable is also irritating. I have at least one other item charging all the time and only one power outlet. 🙂

Final thoughts

Dash cameras are a natural outgrowth of two modern trends – highly litigious societies, and technical progress. Ten years ago, a similar system would have cost many hundreds of dollars, and a lot of custom programming and installation. However, ten years ago, the road-rage and “I’ll sue you” factors were much lower. With the cheap ability to document things, you may forestall any legal action early on, enough to cover the investment in this little gem. For now, I’m keeping it installed and running, at least when I don’t need to charge anything in the car. Were I to change to a more driving-oriented occupation, I might look into getting a multi-outlet adapter, or finding a camera that doesn’t have a captive cable. Since it’s a standard mini USB connector, however, that may be the route I take anyway.

If you have a larger car/van/SUV that may benefit should you be rear-ended, using this mounted and aimed out the rear glass may help you in the event of an accident. Seeing the driver checking their email just before they hit you and their airbag deploys may be great party footage as well, after your car gets out of the shop.

Price: $49.99
Where to buy: Amazon
Source: The sample of this product was provided by Uten.

Adobe Photoshop Elements 2018 review

I’m not entirely sure how it happened, but over the years I have become the curator of the family media archive.  I routinely receive old movie reels, slide and photos to digitize and archive.  Many of these items arrive in somewhat less than pristine shape, and it just doesn’t make sense to store damaged images.  This is the space where a tool like Adobe’s Photoshop Elements 2018 plays best.  The question is will this application make things easier for me and improve the quality of our digital memories, or will I spend a lot of time with little to show for it?  Read on to find out.

In order to decide whether Photoshop Elements would help or hinder, I wanted to take a real-life example.  When my father passed away I helped to clean out storage at the house I grew up in, and along the way, I found a treasure trove of old photos from when my Dad was far younger than I ever was.  Most were in pretty good shape, but some were scratched and dusty from years of storage.  The following photo is my Dad when he was 4 years old and growing up in New Jersey.

What you can see immediately are the scratches and discoloration that happens when a picture sits in a shoe box for 65+ years.

Photoshop Elements offers a “guided mode” which allows you to choose a path to enhancing your images.  After loading the photo in the application, I switched to the guided mode.  There are dozens of options, but since this is a black and white image, I limited the choices to that type of guide only.  From the 10 or so guides that came up, I selected the scratch and dust removal guide.

Once the path was chosen, a step-by-step guide came up on the right side of the screen.  I selected each step that seemed appropriate to the picture I was working on.  First I cropped the image to highlight my Dad and not necessarily the table.  Tools like spot healing to remove lines, blur to smooth out imperfections and dust removal to get rid of spots, each tool making the image just that much better than it was.  At the end, I removed the extraneous colors that scanning a less than perfect photo introduces, adjusted the brightness and contrast, and finally sharpened the image.

And here is the result.

Arguably better than the original in my opinion.  The whole process for this picture took me less than 5 minutes – I could have spent more time on this and improved it even more if I wanted.  And the original image is untouched as the guide allows you to either overwrite or save to a new image.  If this were something I had taken with my phone, I could also have used the guide to share the picture on Facebook or Instagram.

Not just for the record anymore!

So I know that Photoshop Elements can handle the hard work of preserving my family’s precious memories.  But how will it stack up against tasks like inserting myself into places I have never been?  You know, the important stuff.  I started this part of the journey with a picture of a close friend.

That, of course, is Groot from Marvel’s Guardians of the Galaxy.  If you haven’t seen the movie(s) go watch them now.  I’ll wait.

There.  Now you see why I love Groot.  Problem is, there is very little opportunity to spend time with him outside of those movies.  My head may be in space, but the rest of me is firmly rooted here.

How can I get us together?  Photoshop Elements to the rescue!  Using Expert mode and a tutorial I found online (and there are a ton of these kinds of tutorials out there to help you with anything you want to do), I was able to get my favorite tree person to photobomb me.  Start to finish, even with my fumbling around and reading the tutorial over and over, the whole thing took less than 10 minutes.  Oh, and after the fact I learned there is a guide to do this as well, but…experience.  Here is the result.

Maybe not up to the standard of some Photoshop work, but more than enough to show my friends I know trees in high places.

What else do you get?

Photoshop Elements also provides an excellent way to organize your images through the Organizer tool.  The tool allows you to view, rename and manage your library.  In the 2018 edition, Adobe has added an AI tool called Auto Curate which will examine the images in your library to point out possible flaws like composition, exposure and focus problems.  It can also help identify faces plus tag images with any kind of data – including EXIF data coming from your camera, and all delivered via smart tools.

There is even a smart tool which will take a photo where the subject’s eyes are closed and will open them.  Here’s the before (from our wedding 8 years ago).

And after running the Open Closed Eyes tool.

So now that Auto Curate has pointed out some image flaws, do you have to edit each image individually to fix those problems?  Good question!  And the answer is “of course not” – Photoshop Elements also offers a batch processing mode that will allow you to select a group of photos, apply transformations (resizing, corrections and other adjustments) and output the results to another location to let you choose whether they keep the old or new.  It will even change image formats, like taking all of your PNG files and converting them to JPG.

Now that you have a nice, clean library of photos, the Slide Show tool will allow you to arrange the images into a presentation.  You can apply artistic effects like watercolor rendering, transition effects like dissolves, and add your own soundtrack to the results.  When you are done, you can share your creation in the usual places.

So what are the quirks?

As great as Photoshop Elements is, the application is not without any shortcomings.  First, there is a weird problem if you use multiple monitors.  Elements always opens on the primary monitor, but you can drag the window to your secondary monitor (or any other you might have connected).  What’s weird is that once the window is on the non-primary monitor, any attempt to resize the window causes the application to snap the window back to the primary monitor and the window is maximized.  This happens on both the Mac and Windows versions of the application.

And if you own an iPhone or iPad that you use to take pictures, you might not be able to edit the images in Elements on either platform.  iOS 11 introduced the HEIF format (High Efficiency Image Format), a container that gives greater compression to your images so you don’t run out of space on your device.  At the moment Elements does not support the HEIF format although a patch has been promised.  If you use an Apple device, you will have to go into Settings for the Camera app and choose Most Compatible rather than High Efficiency.

Final thoughts

If you take pictures, Adobe’s Photoshop Elements is one of the friendliest and least expensive way to manipulate, catalog and preserve your media.  When paired with the sister application (Adobe Premiere Elements 2018, review coming soon), these two applications will make your digital life the envy of your friends.  And at $99.99 list price (cheaper on sale at Amazon for digital downloads), the application won’t break the bank.

Available in versions for both macOS and Windows and a generous license which will allow you non-simultaneous use on 2 machines – and cross-platform licensing so you can use the application on either OS – makes this a must-have tool if you want to curate your digital life.

Price: $99.99 (bundled with Premiere Elements 2018 for $149 – but often on sale for much less)
Where to buy:  Amazon
Source: The sample for this review was provided by Adobe.

Anker Zolo Liberty totally wireless earphone review

I’ve reviewed three pairs of what is called “totally wireless earbuds,” so I’m now fairly comfortable with them and know what to expect for the money. The affordable  E’NOD Mini Ring buds are okay, but not great—lacking in bass and lackluster call quality. The much more expensive Nuheara iQbuds also do much more. They have an amazing call quality,  and a jaw-dropping ability to isolate individual voices in a noisy environment. But they had long-term comfort issues. Now, we have the Anker’s Zolo Liberty totally wireless earphones. Has Anker managed to make Liberty earphones unique in an increasingly crowded market? Let’s find out.

What is it?

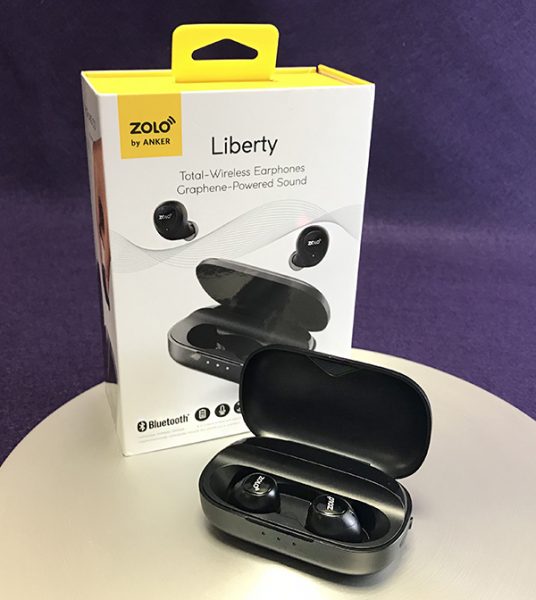
Anker makes some really good computer and smarphone accessories. Zolo is their new spinoff company that specializes in audio. Liberty is Zolo’s first product(s). There are actually two models—Liberty and Liberty+. Liberty+ is identical to Liberty, but has better battery life, built-in toggle sound isolation and (of course) costs more. I’m reviewing the standard Liberty.

Liberty is a totally wireless earphone. This simply means there are no wires connecting the two earphones to each other. This has advantages and disadvantages. The advantage is no constraints when moving around. However, this also makes them easy to lose. Have fun replacing just one bud if lost.

Liberty is great for exercising and are IPX5 rated—water and sweat proof. So no worries if you’re caught jogging in the rain.

Hardware specs

Liberty is a dynamic-styled earphone. Dynamic speakers look just like tiny versions of regular speakers. The big difference with Liberty is that the speakers are graphene-coated. This makes the speakers more rigid without adding any weight. Speaker rigidity makes the speaker “snap back” after handling a sound vibration. The result is less muddiness to the audio and more detailed and impactful music. Note that this improvement is more subtle as opposed to an OMG moment.


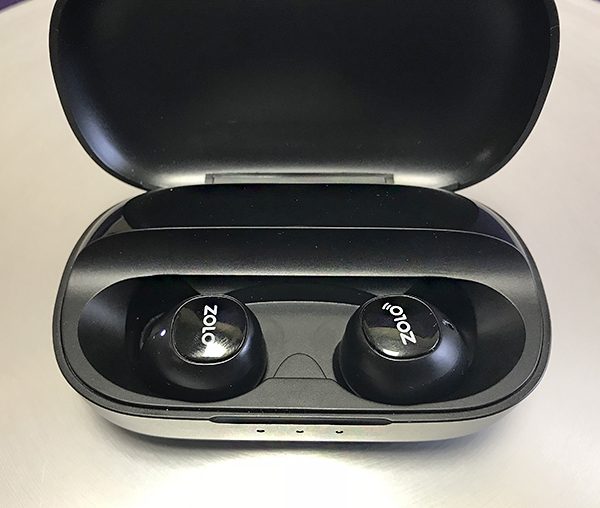
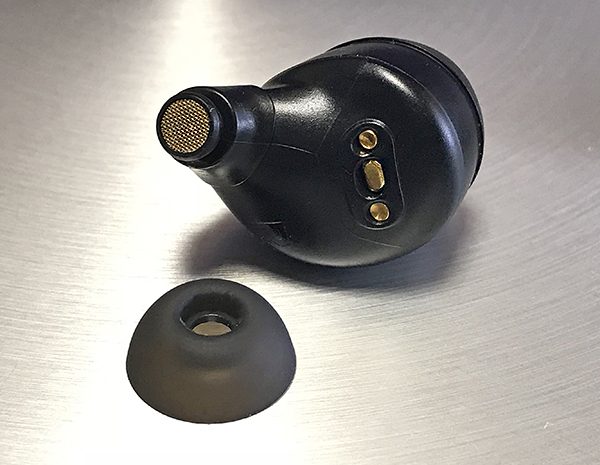
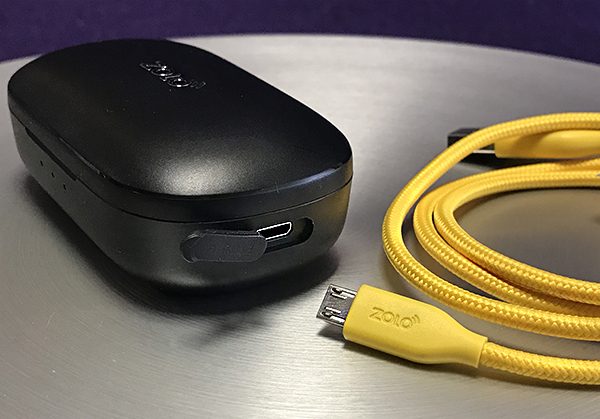
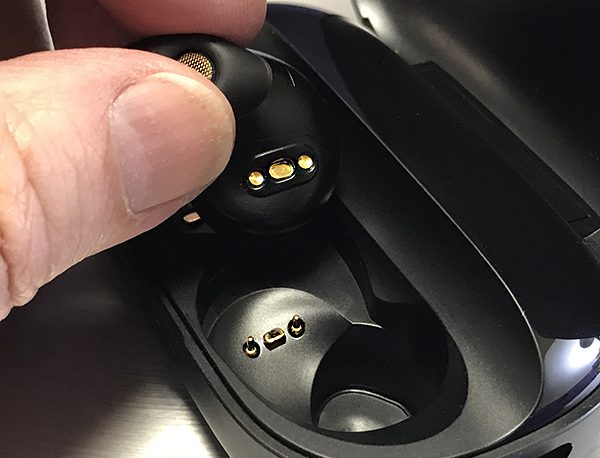
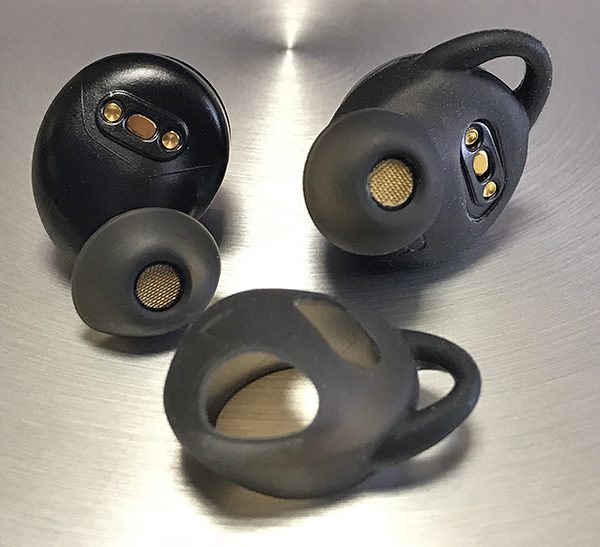
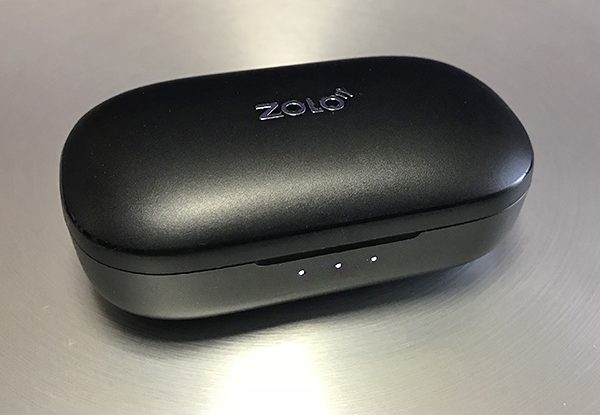
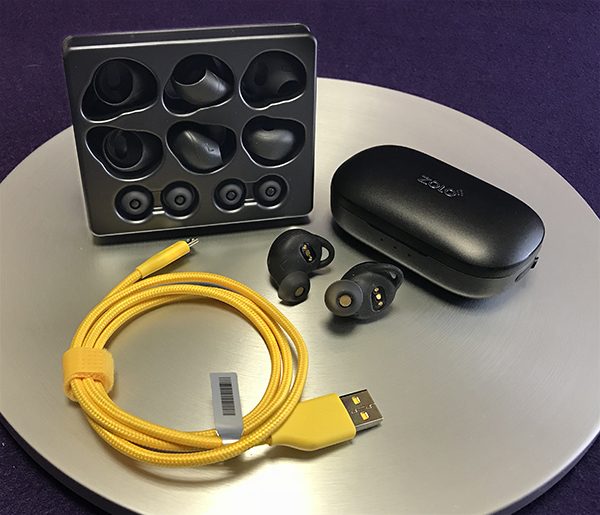
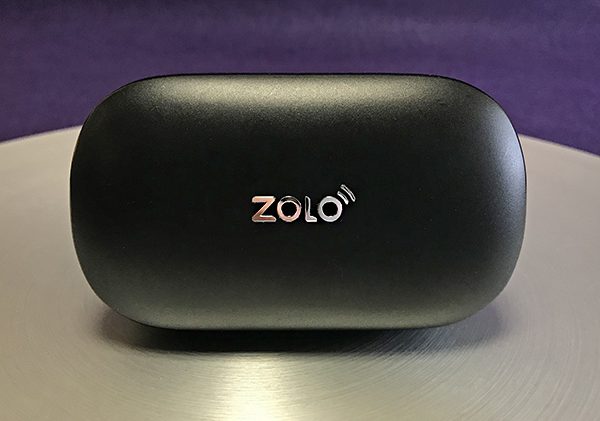
Battery life is 3.5 hours of playtime at reasonable volume. The included case adds 24 hours playtime. The earphones are automatically recharged while seated into the hard, protective case. Lights on the earphones and case indicate how much battery life is left. Seating the earphones into the case is easy and secure. The case is hinged for a tight and secure closure. The Liberty earphones come with silicone jackets that have an included molded gripper locking them securely into the ear. It works great—but the jackets make it more difficult to properly seat the earphones into the case. It can be done—it’s just a hassle.

When battery life is low, Liberty will beep every few minutes as a warning until they give out completely with a “turning off” sound and need to be recharged.

Liberty comes with what Zolo calls Smart Control. Tapping the earphones performs various functions. Tap once and music pauses music or a phone call is answered. Tap and hold will either replay (left bud) or forward (right bud) a song. Double tapping will activate your smartphone’s AI—in my case, Siri. I didn’t even have to say “Hey, Siri.” It just connected. Nice.

Bluetooth is 4.2 (Liberty+ has the newer Bluetooth 5.0). I had no issues initially pairing and connections have been solid with (so far) no drop outs. Later however, sometimes if only one earbud was paired, I had issues getting the other bud to pair and match its twin. In extreme cases, I’ve had to take them out, place them in the case and start over. It can be a pain, especially if the case is not nearby. I’ve had this issue with other brands, so it’s not unique to Zolo. It happens rarely, but it is something to consider if you’re looking for wireless ear buds. Once the tech matures, this issue should hopefully disappear.

Call quality is good. It amazes me how a mic in the ear can pick up a voice as well as it does. People I’ve talked to say they can hear me just fine, with a hint of echo. Callers are only heard by me in the right ear bud—the opposite of most wired earphones with the mic attached to the left wire. I’m left handed and prefer my left ear for calls, so this takes getting used to. I wish Liberty could be set up for either the left or right ear.

Specs

  • Drivers
  • 2 * 5.5mm Graphene Dynamic
  • Frequency Response
  • 20Hz~20kHz
  • Audio Codec
  • AAC, SBC
  • Bluetooth
  • 4.2
  • Microphone (right earphone only)
  • MEMS with CVC noise reduction
  • Battery
  • Earphones: up to 3.5hrs audio playback
  • Charge case: 24+hrs additional audio playback
  • Water Resistant / Sweat Proof
  • Sweat Proof: IPX5
  • Power Source
  • Micro USB 5V/1.5A

What’s in the box?

  • Liberty Total-Wireless earphones
  • Charging case
  • 4  silicone jackets
  • 3  silicone ear tips
  • Micro-USB charging cable
  • 12-month warranty

Design and features
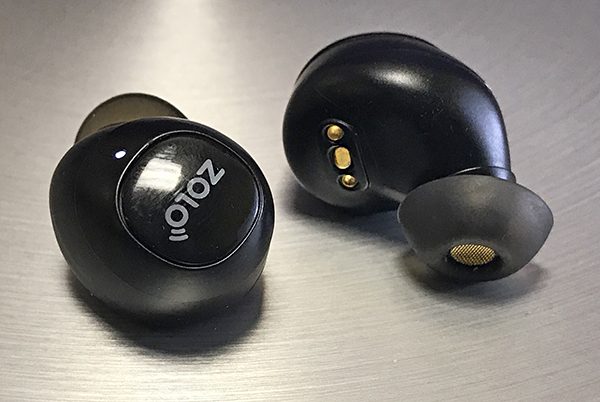
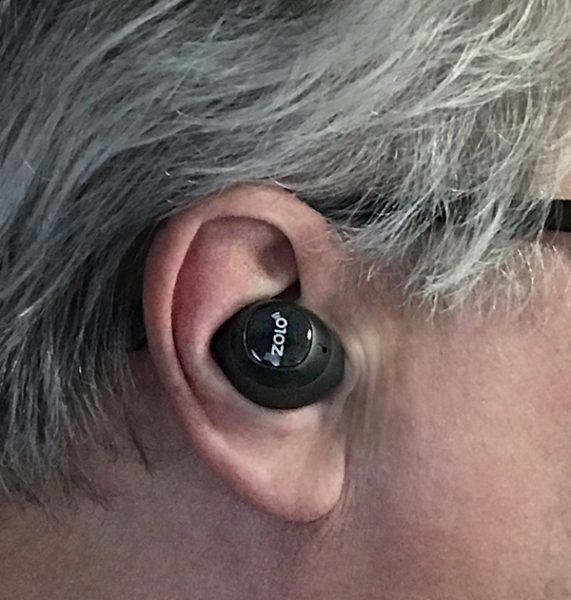
Liberty earphones are solidly built. When in the ear, they look like most other wireless buds. The Zolo logo is printed on the exterior in white letters. The teardrop shape fits well and the supplied ear tips provide a good seal. They are comfortable for a couple of hours, but then my ears begin to hurt a bit. In fairness to Zolo, I haven’t yet found a long-term comfortable pair of totally wireless ear buds yet.

I also haven’t yet found a pair of wireless ear buds that sound as good as comparably priced wired earphones. No surprises there. As good as Bluetooth has become over the years, wired connections are still better sounding. Having said that, many times the convenience factor outweighs minor audio improvements.

Listening to music with Liberty reminds me of earphones tuned more towards modern music than classic rock or jazz. Bass is prominent, but not overpowering. Middle frequencies (where most vocals lie) are recessed a bit, but vocal performances are not hindered. On certain songs, treble can be a too bright, but that’s rare with music I prefer.

What I like

  • Solid build
  • Wireless freedom
  • East pairing
  • Music sounds good

What needs to be improved

  • Overall comfort

Final Thoughts

All in all, I like the Zolo Liberty totally wireless earphones. Music sounds good and they work great while watching movies on my iPhone—as long as the movie isn’t longer than 3.5 hours! They have their quirks, but it seems all wireless ear buds do. Liberty is appropriately named—it allows you to cut all the wires and gain the freedom of going truly wireless.

Price: $99.99
Where to buy: Amazon
Source: The sample of this product was provided by Zolo.