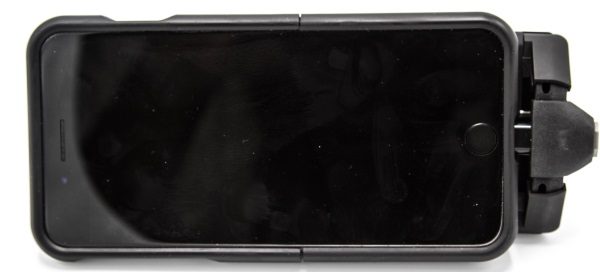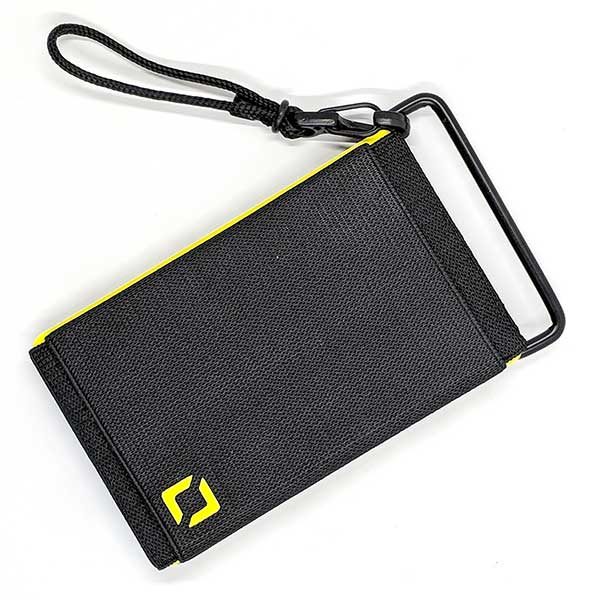
Anti-Wallet minimalist wallet review

I am a big fan of minimalists wallets because I don’t carry a purse and don’t want to carry a traditional wallet in my pocket because they are too big and bulky. I already have a favorite minimalist wallet (check my favorite gear page) but it only holds credit cards and has no way to carry cash. So, I’ve been looking for a minimalist wallet that can carry both cards and cash and the newest wallet that I’ve had the opportunity to test, is the Anti-Wallet from Anti-Gear Co.

What is it?

The Anti-Wallet is a minimalist wallet that is constructed of wide strips of black elastic that have been formed in such a way that the wallet can hold 1-10 credit cards, 1-20 folded dollar bills, keys, other paper items like receipts, and more.

Design and features
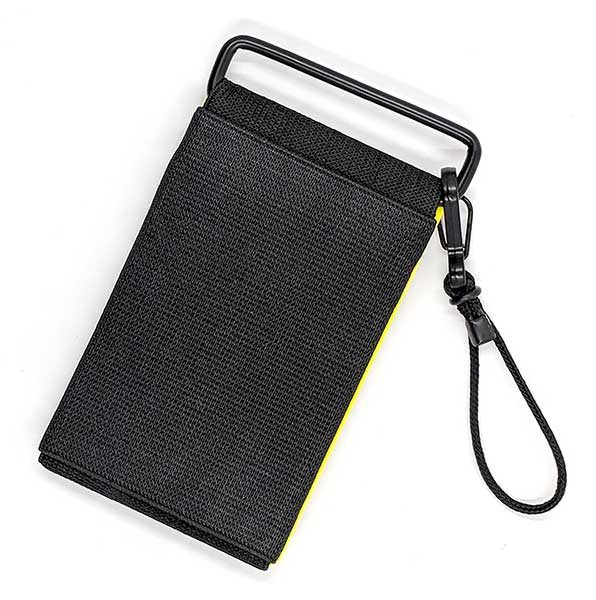
As mentioned, the Anti-Wallet is made of heavy duty black elastic and features three separate storage areas. It’s really up to you how you want to arrange your cash, cards, and other items in the storage slots.
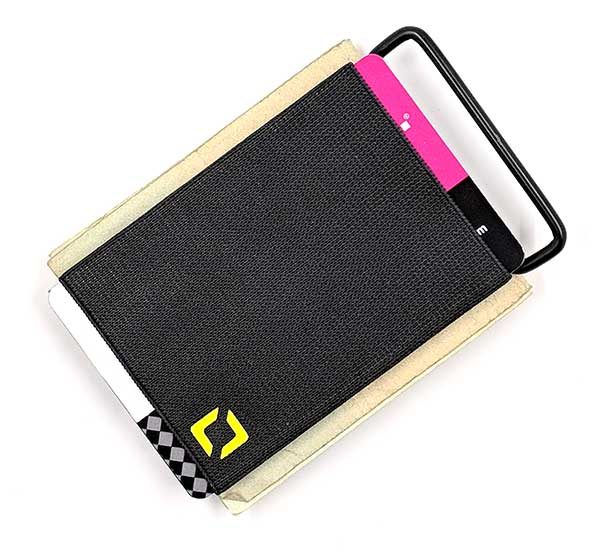
On the Anti-Gear Co. site, they have pictures showing the Anti-Wallet with cash folded in half and stored in the center slot and credit cards in the top and bottom slots.
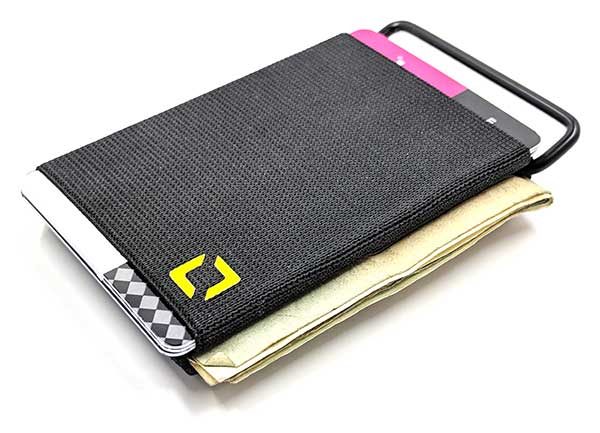
This works fine, but as you can see, the cash and the credit cards stick out the ends of the elastic storage “tubes”.

While I was testing the wallet, I carried five credit cards in the center slot. Although both ends of the wallet are open, the cards won’t fall out because the elastic holds the stack tightly.
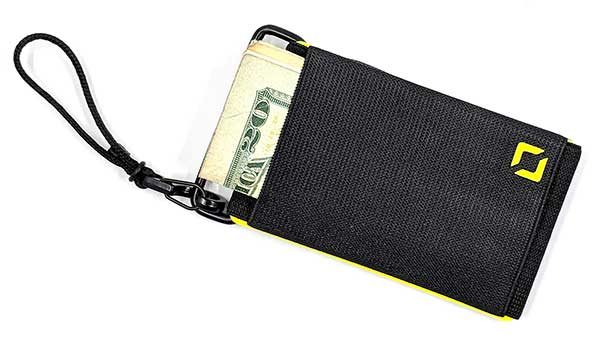
I then used the storage slots on the top and bottom of the wallet to hold folded cash and folded papers like restaurant receipts. And since both ends of the tubes are open, it makes it quick and easy to insert or remove the cash just by pushing up from the bottom.
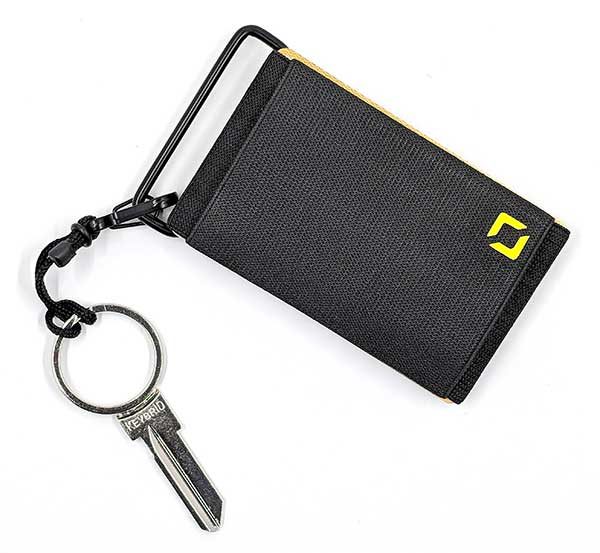
The Anti-Wallet also comes with a detachable key hitch which is a small metal clip with a cord attached to it. The key hitch clips to the rectangular metal “ring” and then the keys can be stowed away in the top or the bottom storage slots.


Anti-Gear Co. also offers a ClingR Card which is a credit card sized
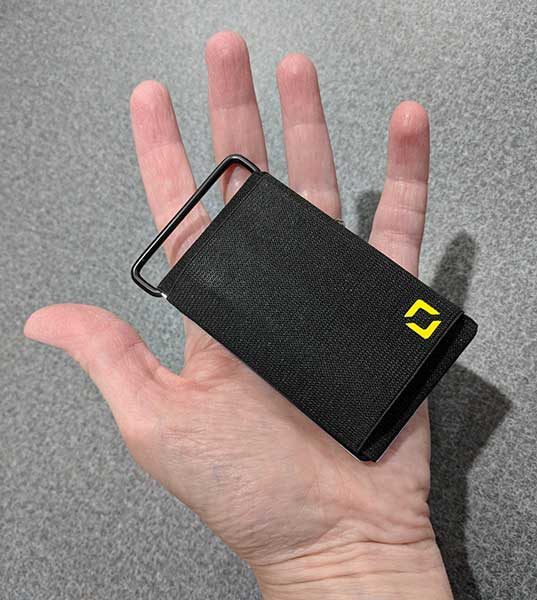


With the way I like to arrange the cards and cash, the Anti-Wallet is compact and comfortable to carry in my pocket. The metal ring gets in the way since I don’t want to use it to attach the key hitch, but otherwise, the wallet is slim and small just the way I like my wallets to be.

Accessing cards and cash no matter which storage slots that you use is easy enough and the fact that the elastic can stretch means that this wallet can expand or contract to adapt to the number of credit cards and currency that you happen to be carrying.

What I like

The Anti-Wallet is well made and doesn’t look homebrew like some minimalist wallets that I’ve tried in the past. I like the simple minimal design and the fact that this wallet has three storage slots so that it can carry credit cards AND other items like cash and receipts. The design really does make this wallet convenient and handy.

What needs to be improved

I would like the option of buying the Anti-Wallet without the rectangular metal “ring” for the key hitch since it isn’t useful for someone like myself who doesn’t plan to attach keys to the wallet.

I’d also like to see other colors offered in addition to black.

Final thoughts

If you’ve been looking for a wallet that is slim and small but can still hold cash in addition to credit cards, the Anti-Wallet from Anti-Gear Co. is a really nice choice. It’s well made, easy to use, and it’s inexpensive so you’ll still have some money left over to store in one of the slots!

Price: $19.95
Where to buy: Amazon
Source: The sample for this review was provided by Anti-Gear Co.

The post Anti-Wallet minimalist wallet review appeared first on The Gadgeteer.

Filed in categories: Reviews

Tagged:

Anti-Wallet minimalist wallet review originally appeared on The Gadgeteer on April 9, 2018 at 4:45 pm.

Note: If you are subscribed to this feed through FeedBurner, please switch to our native feed URL http://the-gadgeteer.com/feed/ in order to ensure continuous delivery.

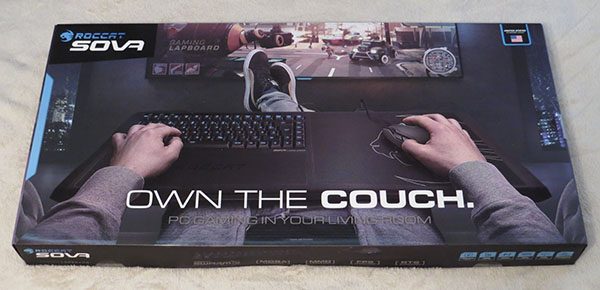
ROCCAT Sova gaming lapboard review

One difficult thing about gaming is that it nearly always requires a dedicated desk with a monitor, keyboard, and mouse. It’s quite difficult to sit on a couch and play without moving your entire system and taking over the coffee table, which is annoying and time consuming. ROCCAT has been my go-to keyboard for a while now, and with their new Sova gaming lapboard, I was excited to try out playing games lazily from my bed.

What is it?

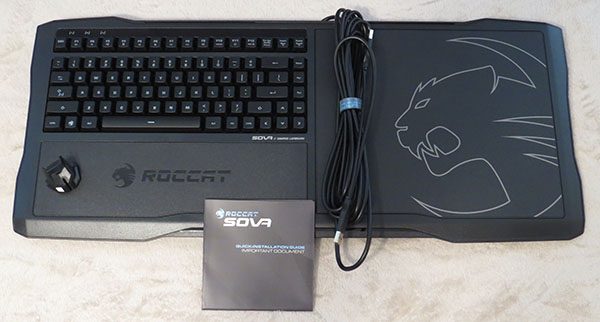
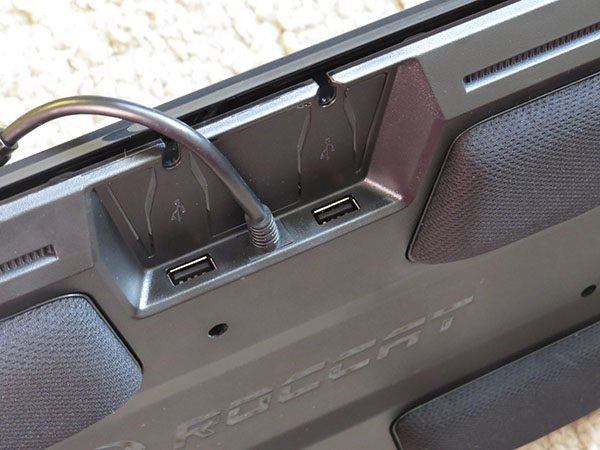
The ROCCAT Sova is a lap keyboard (lapboard) with a mouse pad built in. It has two USB ports to allow you to plug in your headset and mouse as well, with an extra long USB cord to plug it in to your computer.

Hardware specs

  • 275mm × 240mm replaceable mouse pad
  • Replaceable wrist rest and lap cushions
  • Easy-Shift[+]™ with 28-key EasyZone
  • 2 × USB 2.0 ports
  • ROCCAT® Talk™
  • Multimedia functions
  • 4m break-away cable
  • 512kB memory + 32-bit Arm IC
  • 1000Hz polling rate
  • Advanced anti-ghosting with N-key rollover
  • Membrane keys

What’s in the box?

In the box, you’ll find the Sova lapboard, mouse bungee clip, and instruction manual.

Design and features

So, I glanced through the instruction manual, ordered a longer HDMI cable, and plugged the Sova into the computer and TV. It worked flawlessly. Next, I plugged a mouse into the Sova and once again, it worked flawlessly. The only thing that I had a problem testing was a headset since I do not own a USB headset. The sound went to the TV just fine without me having to change any settings on the computer. I tried to get their Swarm app up and going, but whether it was user error or a bug in the software, I could not get it going. Google is telling me it is a software issue, so I hope an update comes out soon to fix this.


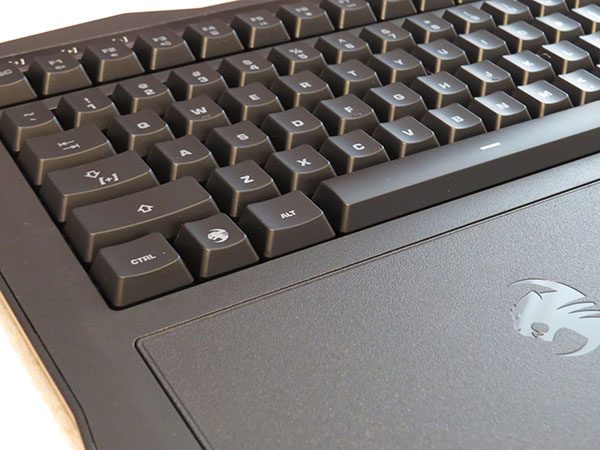
There are two versions of the ROCCAT Sova keyboard; membrane keys and mechanical keys. I was sent the membrane version, which is nice and quiet compared to my mechanical keyboard. The membrane keys were smooth, quiet, and I had no problem with pressing down multiple keys during my gaming. It felt like a mix between a regular keyboard and a laptop keyboard, so it took me a bit to get used to where the arrow keys were on the right side. It didn’t bother me that much, however. The one thing that did was the lack of a number pad since I do use that for at least one game.

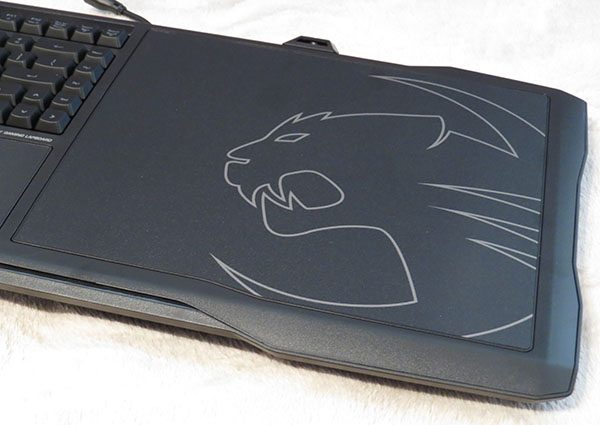
The mouse pad is a hard mat that worked well. I usually play with a cloth mat, but I did not notice much of a difference at all. The size was plenty big enough for my style of gameplay, and should be fine for most people.

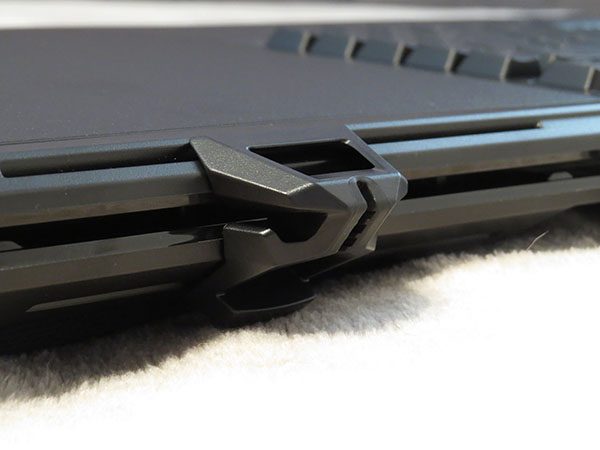
There is a mouse bungee clip for your mouse cable that can be attached to the Sova. It’s necessary, since you do not need much cord. There is also a channel in the back to feed your cord into to try to hide it away. I didn’t bother terribly much with the channel, but I definitely took advantage of the clip after the first time I tried it. It kept my mouse from sliding off, which it wanted to do if I let go of the mouse with the Sova on my lap.

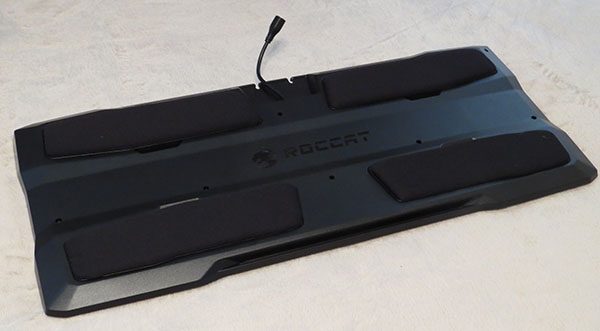
On the bottom of the lapboard, there is padding for comfort, which also hides the release for removing the mouse pad and palm rest. ROCCAT plans to have these be interchangeable in the future. This also allows for the pads on the bottom to be replaced if need be. The pads themselves made the lapboard rest comfortably on my lap, and it did well at staying in one place.

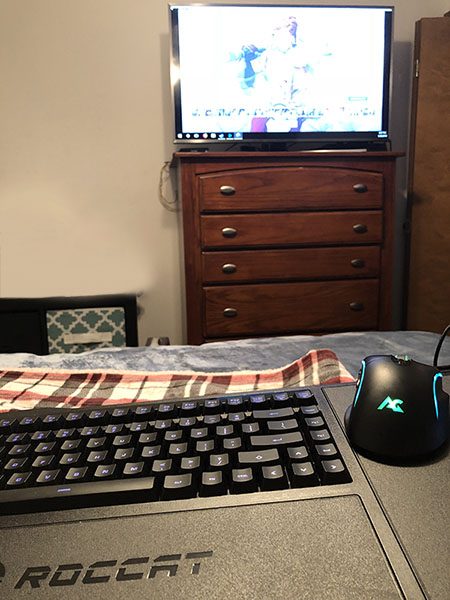
So how well did it work overall? I enjoyed sitting on my bed and relaxing while playing Overwatch on the TV. The overall size of the mouse pad was just right. I would not have wanted that to be any smaller. While the size of the lapboard in general is quite large, it was comfortable to use. The plug and play aspect was great. I just needed to plug in the USB to my computer and it was ready to go.

What I like

  • Very quiet keyboard
  • Comfortable to sit on my lap
  • Nice for lazy gaming

What I dislike/could be improved

  • No number pad
  • Needs a streaming box or TV in the room with the PC

Final thoughts

While I think the idea of a lapboard is great, my current setup makes it pretty difficult to really utilize it well. Without a streaming box, you have to make sure your PC is in the same room as the TV. What I will use it for, however, is not to play on my TV, but use my monitors when playing casual games from my bed, which is close to the PC. So while it won’t get a lot of use, it will find its way out now and then when I am extra lazy. If you are looking at getting the ROCCAT Sova, check your home layout and figure out if it would work out. It would be a fun and nifty addition to your gaming if you have the setup for it.

Price: $149.99
Where to buy: You can purchase the ROCCAT Sova on ROCCAT’s website.
Source: The sample of this product was provided ROCCAT.

The post ROCCAT Sova gaming lapboard review appeared first on The Gadgeteer.

Filed in categories: Reviews

Tagged: ,

ROCCAT Sova gaming lapboard review originally appeared on The Gadgeteer on April 9, 2018 at 11:00 am.

Note: If you are subscribed to this feed through FeedBurner, please switch to our native feed URL http://the-gadgeteer.com/feed/ in order to ensure continuous delivery.

Maximus Camera Floodlight review

Home security seems to be one of the hot topics at this years CES, with the expansion of the connected home it seems like new home security products are popping up every day. While interior security seems to be getting the most attention improvements and innovations in outdoor security have brought about new products and competitors. One such “new” innovation is the outdoor floodlight. I know the floodlight is not new, but the addition of a camera and speaker system is. These systems have the ability to record incidents as well as allow you to view them in real time. 

Note: Images can be clicked to view a larger size.

What is it?

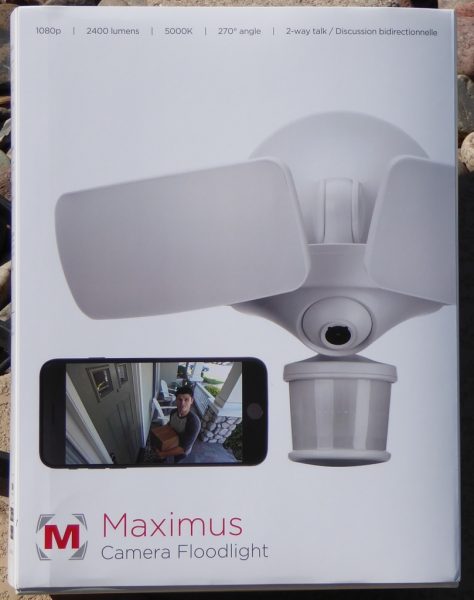
The Maximus Camera Floodlight is just what the name implies, a Floodlight with a camera built into it. But there is more to it than that, it is a security tool. Besides, the floodlight and camera the light has a built in microphone and speaker. Along with the Kuna software package the Maximus Camera Floodlight is a smart security device.

Hardware specs

Per the Maximus web page:

Camera & Sound

  • Resolution: HD full-color 1080p
  • Field of view: 155º diagonal
  • Viewing angle: Adjustable camera (up to 40º left-right, up-down)
  • Two-way talk: Communication through your smart device
  • Siren: 100 dB

WiFi & Detection

  • Wi-Fi frequency: 2.4/5 GHz
  • WiFi network 802.11b/g WEP, WPA and WPA2 supported (WPA2 recommended)
  • WiFi speed: best performance with 2 Mbps upload/download where installed
  • Sensor: passive infrared + motion detection algorithm 
  • Detection range: optimized to detect objects within 70’ (7’ mounting height)
  • Mobile device: iOS devices running iOS7 and above, Android devices supporting Bluetooth LE:4.4 (Kit Kat) an above
  • Internet: internet connection required for both mobile device and location where camera floodlight is installed

Hardware

  • Material: plastic
  • Power type: hardwired continuous power (no batteries)
  • Weatherproof: tested in -4ºF (-20ºC) and 122ºF (50ºC). Humidity < 95%
  • Light settings: dimmable; motion activated + dusk-to-dawn + turn on/off from your phone
  • Lightbulb: 2400 lumens brightness; 5000K color temperature 
  • Dimension/weight: 10.78 (W) x 8.02 (H)
  • Input voltage: rated 100-240V, 50/60 Hz max 90-277V, 50/60Hz

What’s in the box?

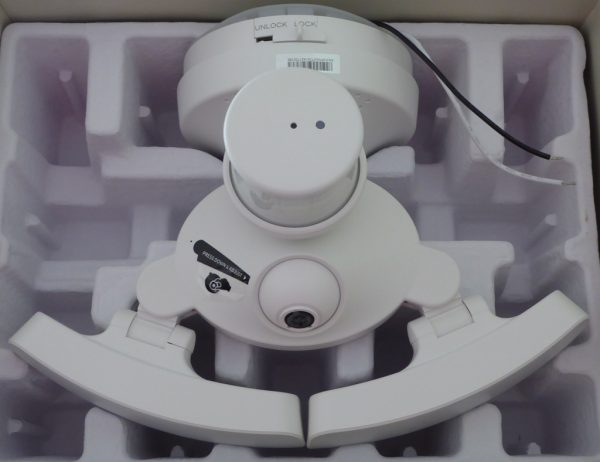
In the box you get the Maximus Camera Floodlight, instruction booklet, a welcome card and mounting hardware. 

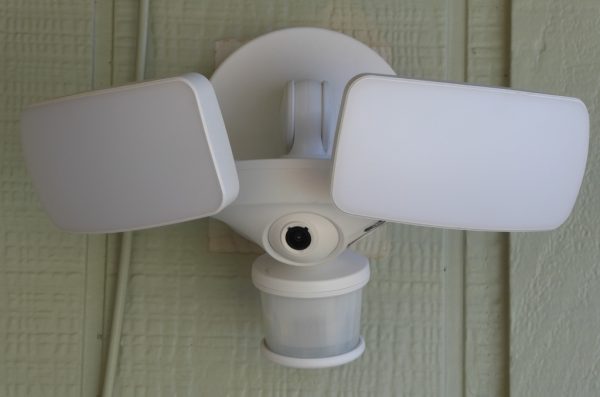
There are four main components to this floodlight system (not including the WiFi element), the lights, the sensor, the camera and the two way speaker. 

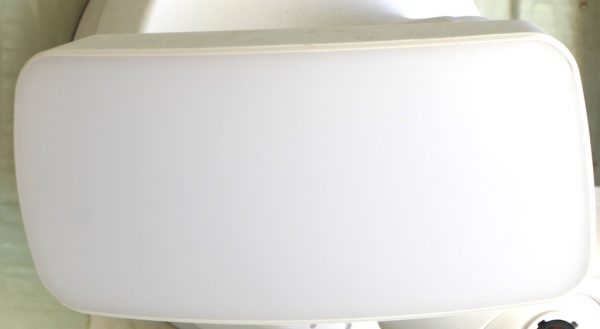
The lights for the floodlight are bright. They are so bright in fact that I dimmed them a little so I would not make the neighbors mad. Being adjustable allows me to set a wide area of illumination so I can see more with the camera. 

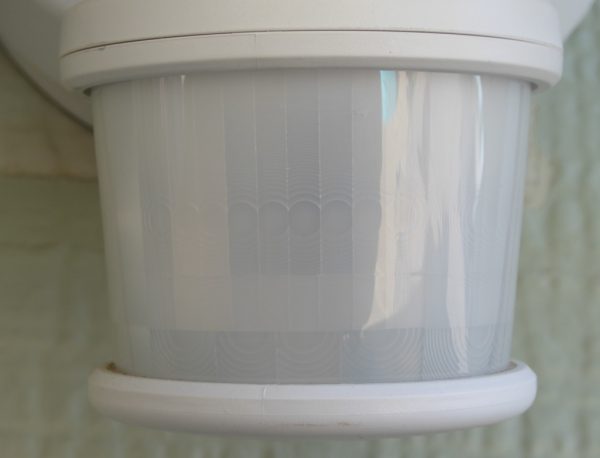
The sensor looks like most sensors on outdoor floodlights with the exception of the LED on the bottom of it. This LED is what lets you know when you are connected to WiFi. 

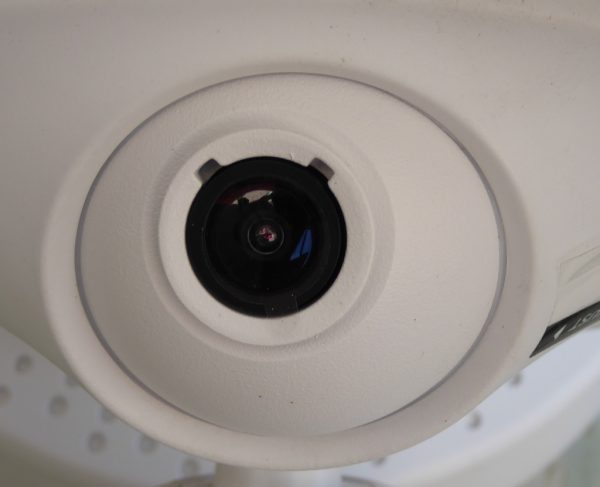
The camera on the Maximus Camera Floodlight is adjustable, it looks kind of like a ball joint with a hole in it. Daylight and nighttime (when the lights are on) pictures are good quality.

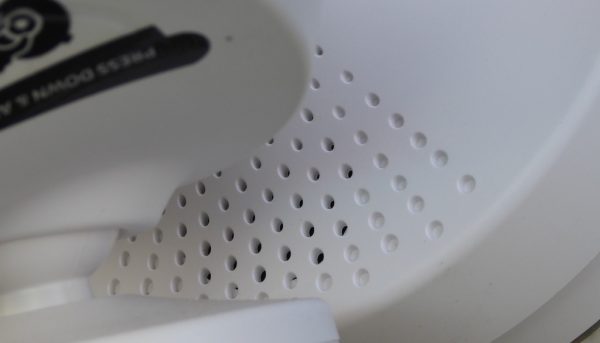
The speaker unit is mounted on the base of the floodlight unit, you can see the holes. Besides, being able you yell sayings like “hey you kids get off my lawn” the system comes with preprogrammed sayings that you can activate using the Kuna software on your smart device (I like the dog barking).

Instllation

The Maximus camera Floodlight comes with mounting hardware, and installation is rather simple if you already have wiring and a junction box at the location where you are mounting the camera.  The system is designed to use the junction box as a mounting point. In order for you to be able to take advantage of all of the features of the Maximus Camera Floodlight you will have to be connected to the internet. 

Software

Although not technically in the package there is a software component to this system its called Kuna. The Kuna app is used to set up and control the features of our Maximus Camera Floodlight.  Kuna also has a built in AI that can learn and can distinguish between a car and a person.

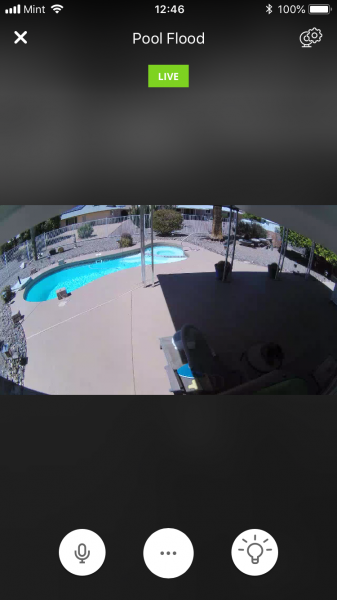
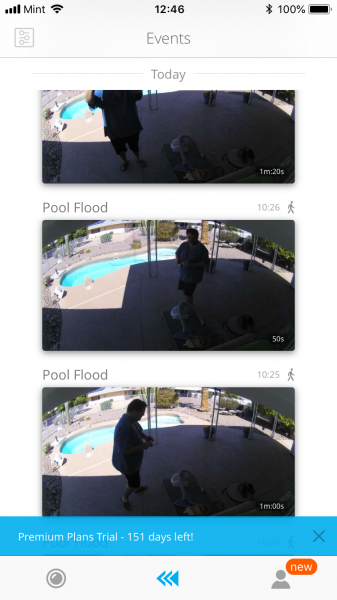
One nice feature of the Kuna software is the thumbnail view of recent events. This displays the recordings of events that have happened in the recent past (I believe within the last two hours). That being said, I must say I found the Kuna app hard to navigate at times. Getting to the settings page is not really evident and can be frustrating when trying to adjust the floodlight system. Another issue I observed is that the app does not work well on my iPad Pro. Even though the user interface was not to my liking setting up and connecting to my Maximus Camera Floodlight was easy and straightforward. The app automatically found my device and walked me through the setup.

Design and features

As you may have surmised by now the Maximus Camera Floodlight is designed to compete against other similar products on the market today, mainly Ring. With similar features floodlight, camera, two way speaker both systems work on the same principle. The folks at Maximus (the makers of the system I am reviewing) sent me a design and feature comparison so I could see the difference between them and who they perceive as their main competition. Both Ring and Maximus have a free service and paid service for their apps so I will highlight things what I think are important focusing mainly on the hardware features.

Mounting options: Both products can be mounted on a vertical wall, but the Maximus Camera Floodlight can be mounted on your eves as well. The Maximus Camera Floodlight also has a “Quick Connect” mounting base that made installation easier.

Lighting: Both systems have two lights, the Ring has LED spotlights and the Maximus has LED panels. In the comparison photos I would say the Maximus illuminates a wider area.

Camera: Both cameras seem to be close enough in similarities to call that a wash, but the Maximus camera does allow for some independent adjustment where the Ring’s is fixed.

Software/apps: Both companies offer a paid service and a free service and they have some of the same features, but what stands out to me on the Kuna app for Maximus is the free cloud storage of your recordings. The recordings will stay in the cloud for two hours so you can view and download them. Ring does not offer this in their free service.

What I like

  • Designed for easy installation.
  • Bright and adjustable lighting.
  • Easy setup.
  • Free service basic functionality works well.

What needs to be improved

  • Kuna software

Final thoughts

What’s my bottom line on the Maximus Camera Floodlight? I like it a lot. This system is almost plug and play (minus the hardwiring you do) out of the box. Once you wire it up and connect to the internet you are good to go. The Maximus Camera Floodlight works well with the basic free service, but the pay service has an AI that will learn and help make your system smarter. During my writing of this review this system gained the ability to integrate with Google Assistant which is a nice plus. With a cost of $249 on the Kuna website, the Maximus Camera Floodlight is on par with other similar systems of this type and quality.

Price: $249.00
Where to buy: Kuna
Source: The sample for this review was provided by Maximus

The post Maximus Camera Floodlight review appeared first on The Gadgeteer.

Filed in categories: Reviews

Tagged:

Maximus Camera Floodlight review originally appeared on The Gadgeteer on April 8, 2018 at 10:00 am.

Note: If you are subscribed to this feed through FeedBurner, please switch to our native feed URL http://the-gadgeteer.com/feed/ in order to ensure continuous delivery.

iClever BoostCube Fast Wireless Charger review

The iClever BoostCube Wireless Charger can charge a Qi enabled device simply by placing the device on top of it. The adapter supports 5W and 10W charging modes and the power supply is from a USB cable. Read on to see what I think!

What is it?

The iClever BoostCube Wireless Charging station is an adapter that charges Qi enabled devices using USB power. Qi devices are capable of being charged at a distance and the main benefit of this capability is the convenience of charging devices without connecting power cables. The technology relies on inductive coupling between two coils and it works because at least one coil is in the charging base, another is in the target device and there isn’t a large amount of metal between the coils. The speed at which the charging takes place depends upon the power available to the adapter, circuitry in the adapter, circuitry in the receiving device, and the condition of the battery in the receiving device.

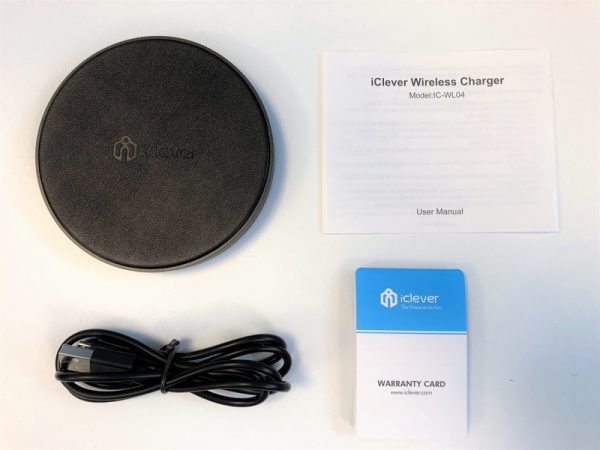
What’s in the box?

iClever Wireless Charger
USB Charging Cable
User Manual
Warranty Card

Design and features

Specifications

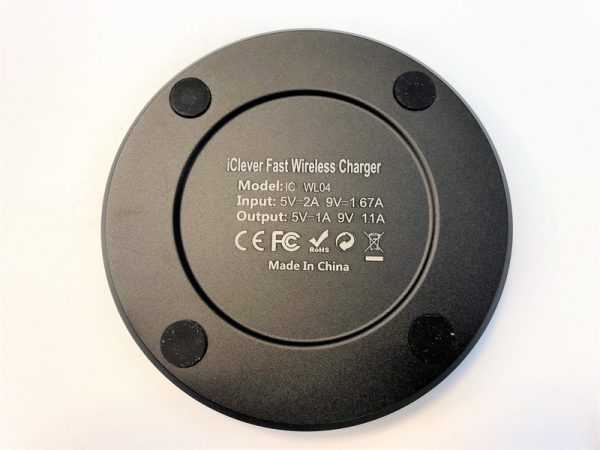
Input: 9V/1.67A or 5V/2A
Output: 9V/1A or 5V/1A
Power: 10W/5W
Charging distance: 2~8mm
Product Dimensions 2.9 x 0.5 x 2.9 inches
Item Weight 3.68 ounces

Unboxing

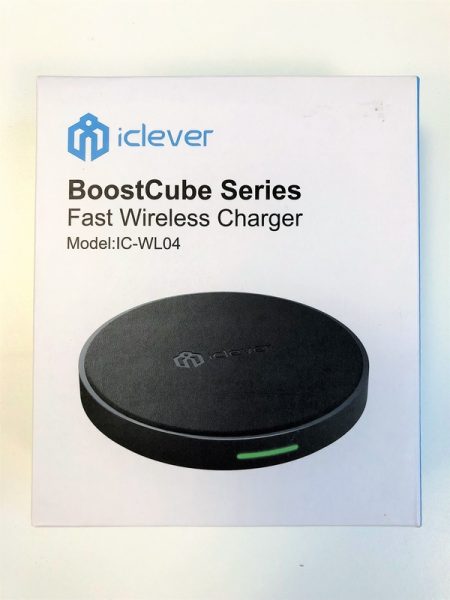
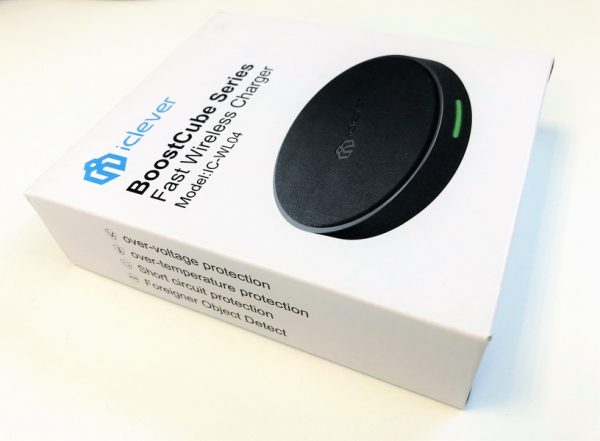
The iClever charger comes in a fairly standard printed cardboard box. The side of the box lists the main features of the device, which includes over-voltage protection, over-temperature protection, short circuit protection and foreign object protection.

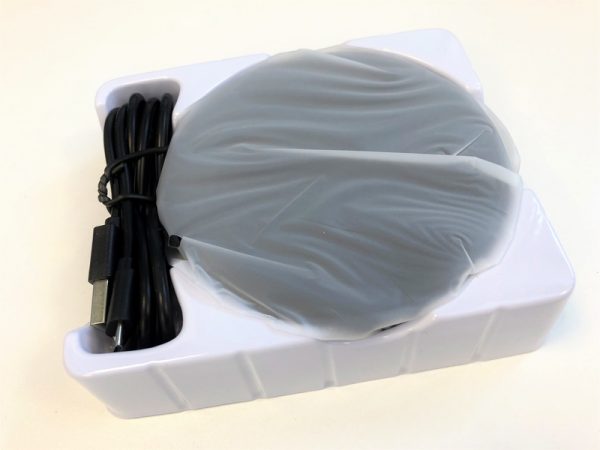
Plastic molded packaging protects the charging pad and the USB cable inside the box. The user manual and the warranty card come packaged below the plastic form. The instructions and the warranty card are in the English language only.

Design of the Wireless Charger

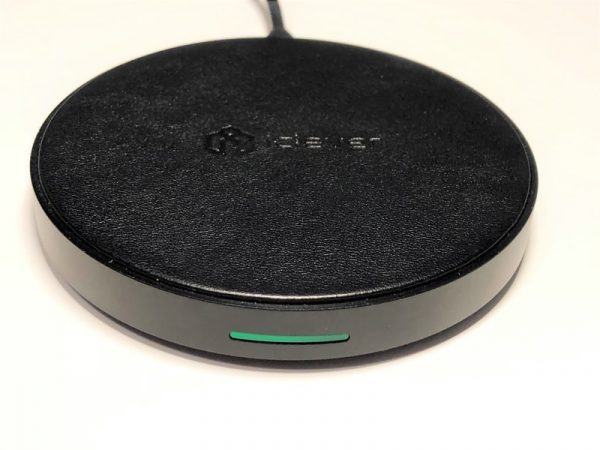
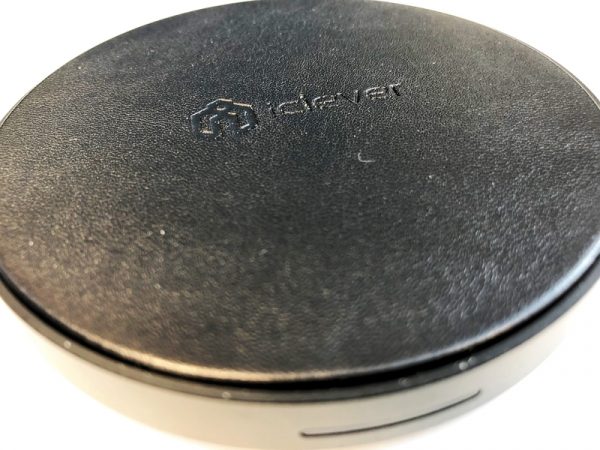
The top of the iClever charging pad has a leather coating. The leather has a black pigment and is embossed in the center with the iClever logo and name. The leather is a great feature because it makes each wireless charger unique, it provides a professional look and feels to the charger, it’s durable and easy to clean. Also, the natural grain of the leather provides a surface with the ideal texture to keep the device on top of it from moving. Other synthetic materials tend to be too slick or sticky.  The wireless charger is completely round and therefore can be set up with the cord leaving from any direction and not look askew on the surface it is resting on.

The material on the sides and base of the unit is black anodized aluminum. The material is perfect for good heat transfer and durability. The front of the base (the area in front of the iClever logo) has a LED indicator about 3/4″ wide. Four screws are hidden under silicone rubber feet to secure the top to the base. The bottom of the base indicates the model name and number, power information, compliance information and country of origin info.

Operation

The user must supply their own power supply for the included USB cable. It seems likely that most people have many more power supplies than they actually use, therefore this isn’t really an area that needs improvement. However, while the outside box does indicate many of the items features and benefits, it does not state that the unit comes without a power supply. Once the unit is plugged into the power supply the front LED illuminates for 3 seconds, indicating that device is ready to use.

Placing the phone on the wireless charger immediately starts the charging process. Once the battery reaches 100% on the phone the charging LED remains on and trickle charges the iPhone. Once the iPhone battery is full the LED turns off indicating that the wireless charging pad is no longer functioning.

The LED blinks on and off indicating that a foreign object is present between the wireless charger and phone. This function works when a quarter is between the charger and phone.

Performance

I plugged the USB into a 10W USB power adapter and monitored the charging operation with a USB safety tester that displays the voltage and amps and calculates the watts and accumulated amp hours. Even when a 10W power adapter supplies the power, the draw from the USB tester never exceeds 5.1W while charging an iPhone. This is in agreement with the operating instructions because the manufacturer indicates that QC compliant fast charging is not compatible with iPhone. In conclusion, the iPhone battery was charged from 10% to 43% in 70 minutes.

When the iPhone is not in a case, it will still charge with 5.56 mm of Post-it notes between the phone and the wireless charger.

What I like

  • Leather top
  • flexible power supply options

What needs to be improved

  • Box should indicate that the contents does not include a power supply.

Final thoughts

The iClever Wireless Charger is a good looking effective wireless charger.

Price: $21.99
Where to buyAmazon
Source: The sample for this review was provided by iClever.

The post iClever BoostCube Fast Wireless Charger review appeared first on The Gadgeteer.

Filed in categories: Reviews

Tagged: ,

iClever BoostCube Fast Wireless Charger review originally appeared on The Gadgeteer on April 7, 2018 at 12:00 pm.

Note: If you are subscribed to this feed through FeedBurner, please switch to our native feed URL http://the-gadgeteer.com/feed/ in order to ensure continuous delivery.

Thinium ReCharge+ 2.0 backup battery review

What is it?

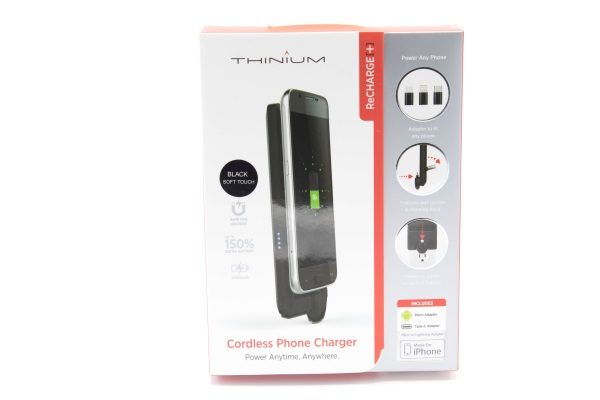
The Thinium ReCharge+ 2.0 is a slim Smartphone/Tablet charger that can be used to provide power and charge via several different types of connections, using its interchangeable adapters and built-in USB port. It can be re-charged directly via a wall outlet without the need for a cable or a wall wart.

What is in the box?


Package contents:
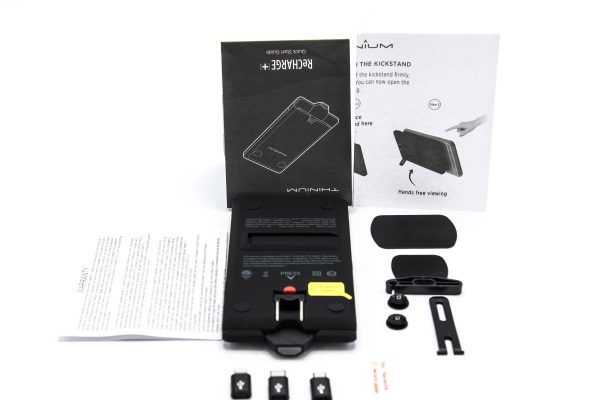
• 1 x Thinium ReCharge+ 2.0 Power pack
• 2 x Magnetic plates
• 1 x Kickstand
• 2 x Suction cups
• 1 x USB-C adapter
• 1 x Micro USB adapter
• 1 x Lightning adapter
• 1 x Booster

Design and features

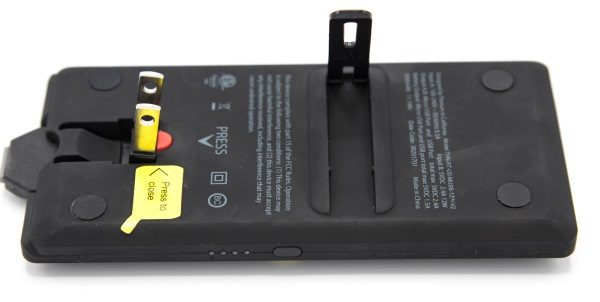
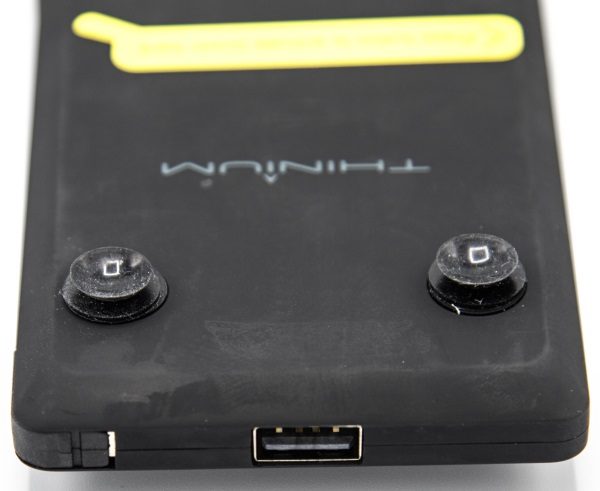
The Thinium ReCharge 2.0+ is a smooth to the touch, all black, lightweight, versatile charger that can be used to charge or power devices via its USB port or directly charge and power any phone that uses either a USB-C, USB micro or Lightning port. It can also charge 2 devices simultaneously. It has a popup section that uses the various adapters and allows you to connect your phone directly to it. It also has a pop out AC plug that allows a phone that is connected to it to be charged while the Thinium is also being charged from a wall outlet.

There are suctions cups that are provided that can be mounted to the surface of the Thinium to secure the phone, and there are 2 magnetic plates with a strong adhesive backing that can be attached to the phone or the phone case, and magnetically clamped to the Thinium.

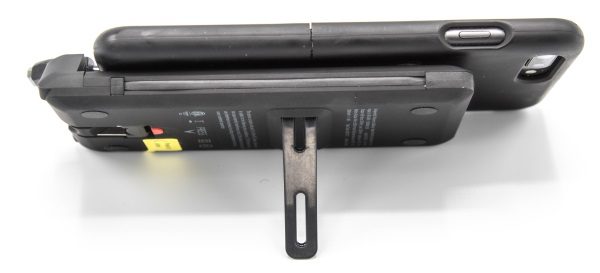
On the opposite side of the Thinium, there is a kickstand that can be used to support the phone horizontally, so that full screen viewing can be enjoyed while it is being charged. The Thinium can also be used in a similar manner to charge a tablet.

What I like

The Thinium is lightweight and the fit and finish are great. It offers multiple ways to charge devices, and multiple adapters to accommodate different types of ports. I like that the AC plug is built-in so that there is no need for a cable and a bulky wall wart.

What can be improved

While the Thinium offers versatility in several ways, when it was attached to my phone I found it to be very bulky and inconvenient to carry around as a daily charging device. Today’s technology offers QI wireless portable chargers that are thin and light, and also include the ability to charge multiple devices simultaneously. In addition, since wireless charging works with many cases that have built-in kickstands, that feature is readily available but in a more convenient package. When I attached the magnetic plate to the back of my case, it did not work for me because my phone case has a built-in kickstand that made the distance between the case and the Thinium too far. I decided to take it off and adhere it directly to the back of the phone to try it without my case. However, the adhesive was so strong that I needed to use a screwdriver to remove it. In my opinion, that would have damaged my phone if attached directly to it and if I later needed to remove it. Prior to removing the magnetic plate from my case, I placed my phone in its case on the QI wireless charger that I regularly use. About an hour later, I picked up my phone and I almost dropped it because the magnetic plate had become incredibly hot. To me, this means that if I decided to use the Thinium charger and the magnetic plate to keep it in place, I would only be able to use the Thinium to charge my phone from then on, because using any other wireless charger would result in this heating or overheating problem.

The other factor that needs improvement is the capacity of the battery and the time it takes to provide a charge. I plugged in my iPhone 8Plus at 58% of charge and it took 2 hours and 40 minutes to charge it to 100%. I then plugged in my iPad Pro 12.9″ which was at 64% to charge, and by the time it reached 71%, the Thinium’s battery was completely depleted. The next day I charged the Thinium to full charge and again I plugged it into my iPad Pro 12.9” via the lightning connector. It charged my iPad from 66% to 86% in 2 hours and 30 minutes, and the battery was once again completely drained. While I understand that it is primarily made to be used with phones, it does state that it has the ability to charge other devices via its USB port, and that it can charge multiple devices simultaneously. Based on the initial results of its charging capability, it seemed pointless to test it using my power hungry laptop. Manufacturers today offer slim, lightweight, high-powered wireless chargers with way more capacity. This lack of capacity just compounds the negatives of this device.

Final thoughts

While the Thinium offers some versatility and features in an innovative way, it lacks the portability, and the 3000mAH capacity is simply not enough for what people today demand and need from their devices. The added bulk negates the advantage that most of the other convenient features are intended to provide. While this device may work for some, it is likely to be passed over by most.

Price: $69.99
Where to buy: Thinium Website
Source: The sample for this review was provided by Thinium.

The post Thinium ReCharge+ 2.0 backup battery review appeared first on The Gadgeteer.

Filed in categories: Reviews

Tagged:

Thinium ReCharge+ 2.0 backup battery review originally appeared on The Gadgeteer on April 7, 2018 at 10:00 am.

Note: If you are subscribed to this feed through FeedBurner, please switch to our native feed URL http://the-gadgeteer.com/feed/ in order to ensure continuous delivery.